


Exterior
Lower price usually goes hand in hand with lower quality materials or overall poorer build quality. This also applies to the tested Evolveo M5. With this case, you will come across a few places where the manufacturer has clearly skimped, but as long as you define yourself as a lower-end user, you’ll most likely be fine. The main advantage here may be the attractive price that probably won’t break the bank for you.
Basic parameters
| Parameters | Evolveo |
| M5 | |
| Supported motherboard formats | Mini-ITX, mATX |
| Supported PSU format | ATX |
| CPU cooler | up to 160 mm |
| Graphics cards | up to 345 mm |
| Fan | 5× 120 mm (2× preinstalled) |
| Supported liquid radiators | 2× do 240 mm + 1× do 120 mm |
| 2,5" positions | 4 |
| 3,5" positions | 2 |
| 5,25" positions | 0 |
| Dimensions [H/D/W] (and volume) | 402 × 392 × 205 mm (32 l) |
| Materials | steel + plastic + tempered glass |
| Connectivity | 1× USB 3.2 gen. 1 + 2× USB 2.0 + 2× 3,5 mm jack |
| MSRP | 50 EUR |
Exterior
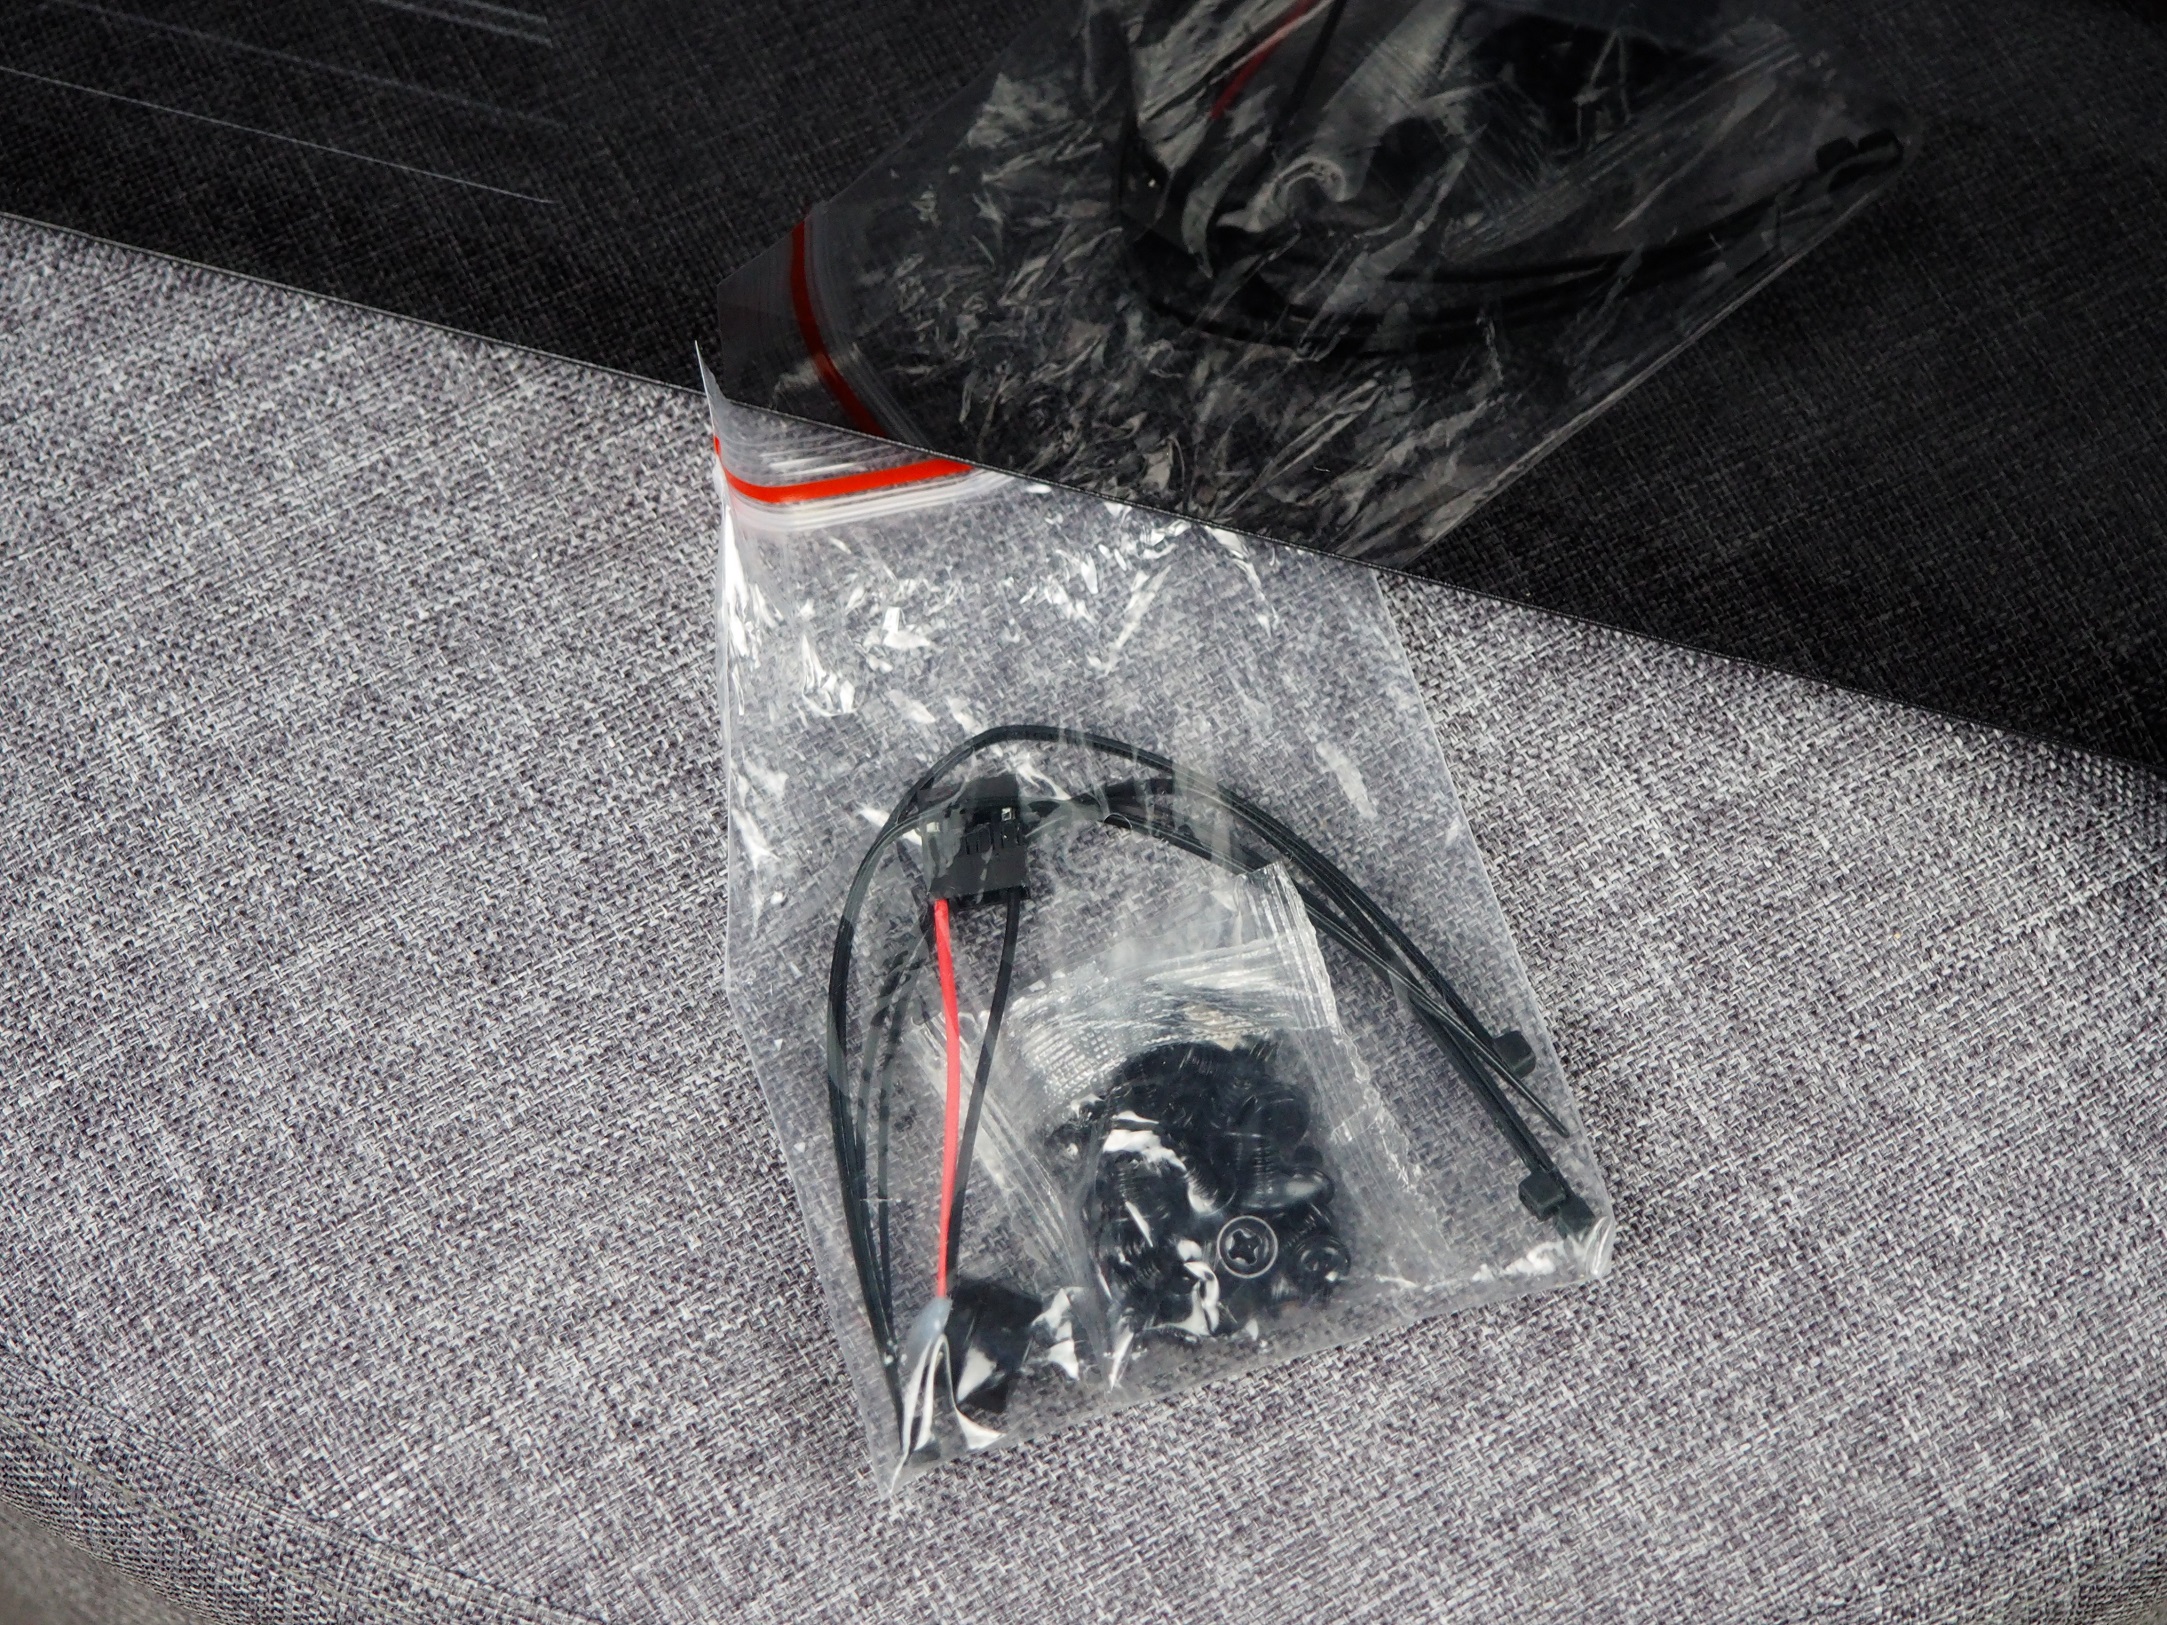
The box is packed in a standard cardboard box. The interior is protected during transport by a polystyrene filling in which the case is placed. The accessory box contains only the basic things needed to assemble it. These are screws, single-use zip ties and a motherboard buzzer for reporting errors. You don’t necessarily need to plug the latter in but keep the zip ties close, you will need them.
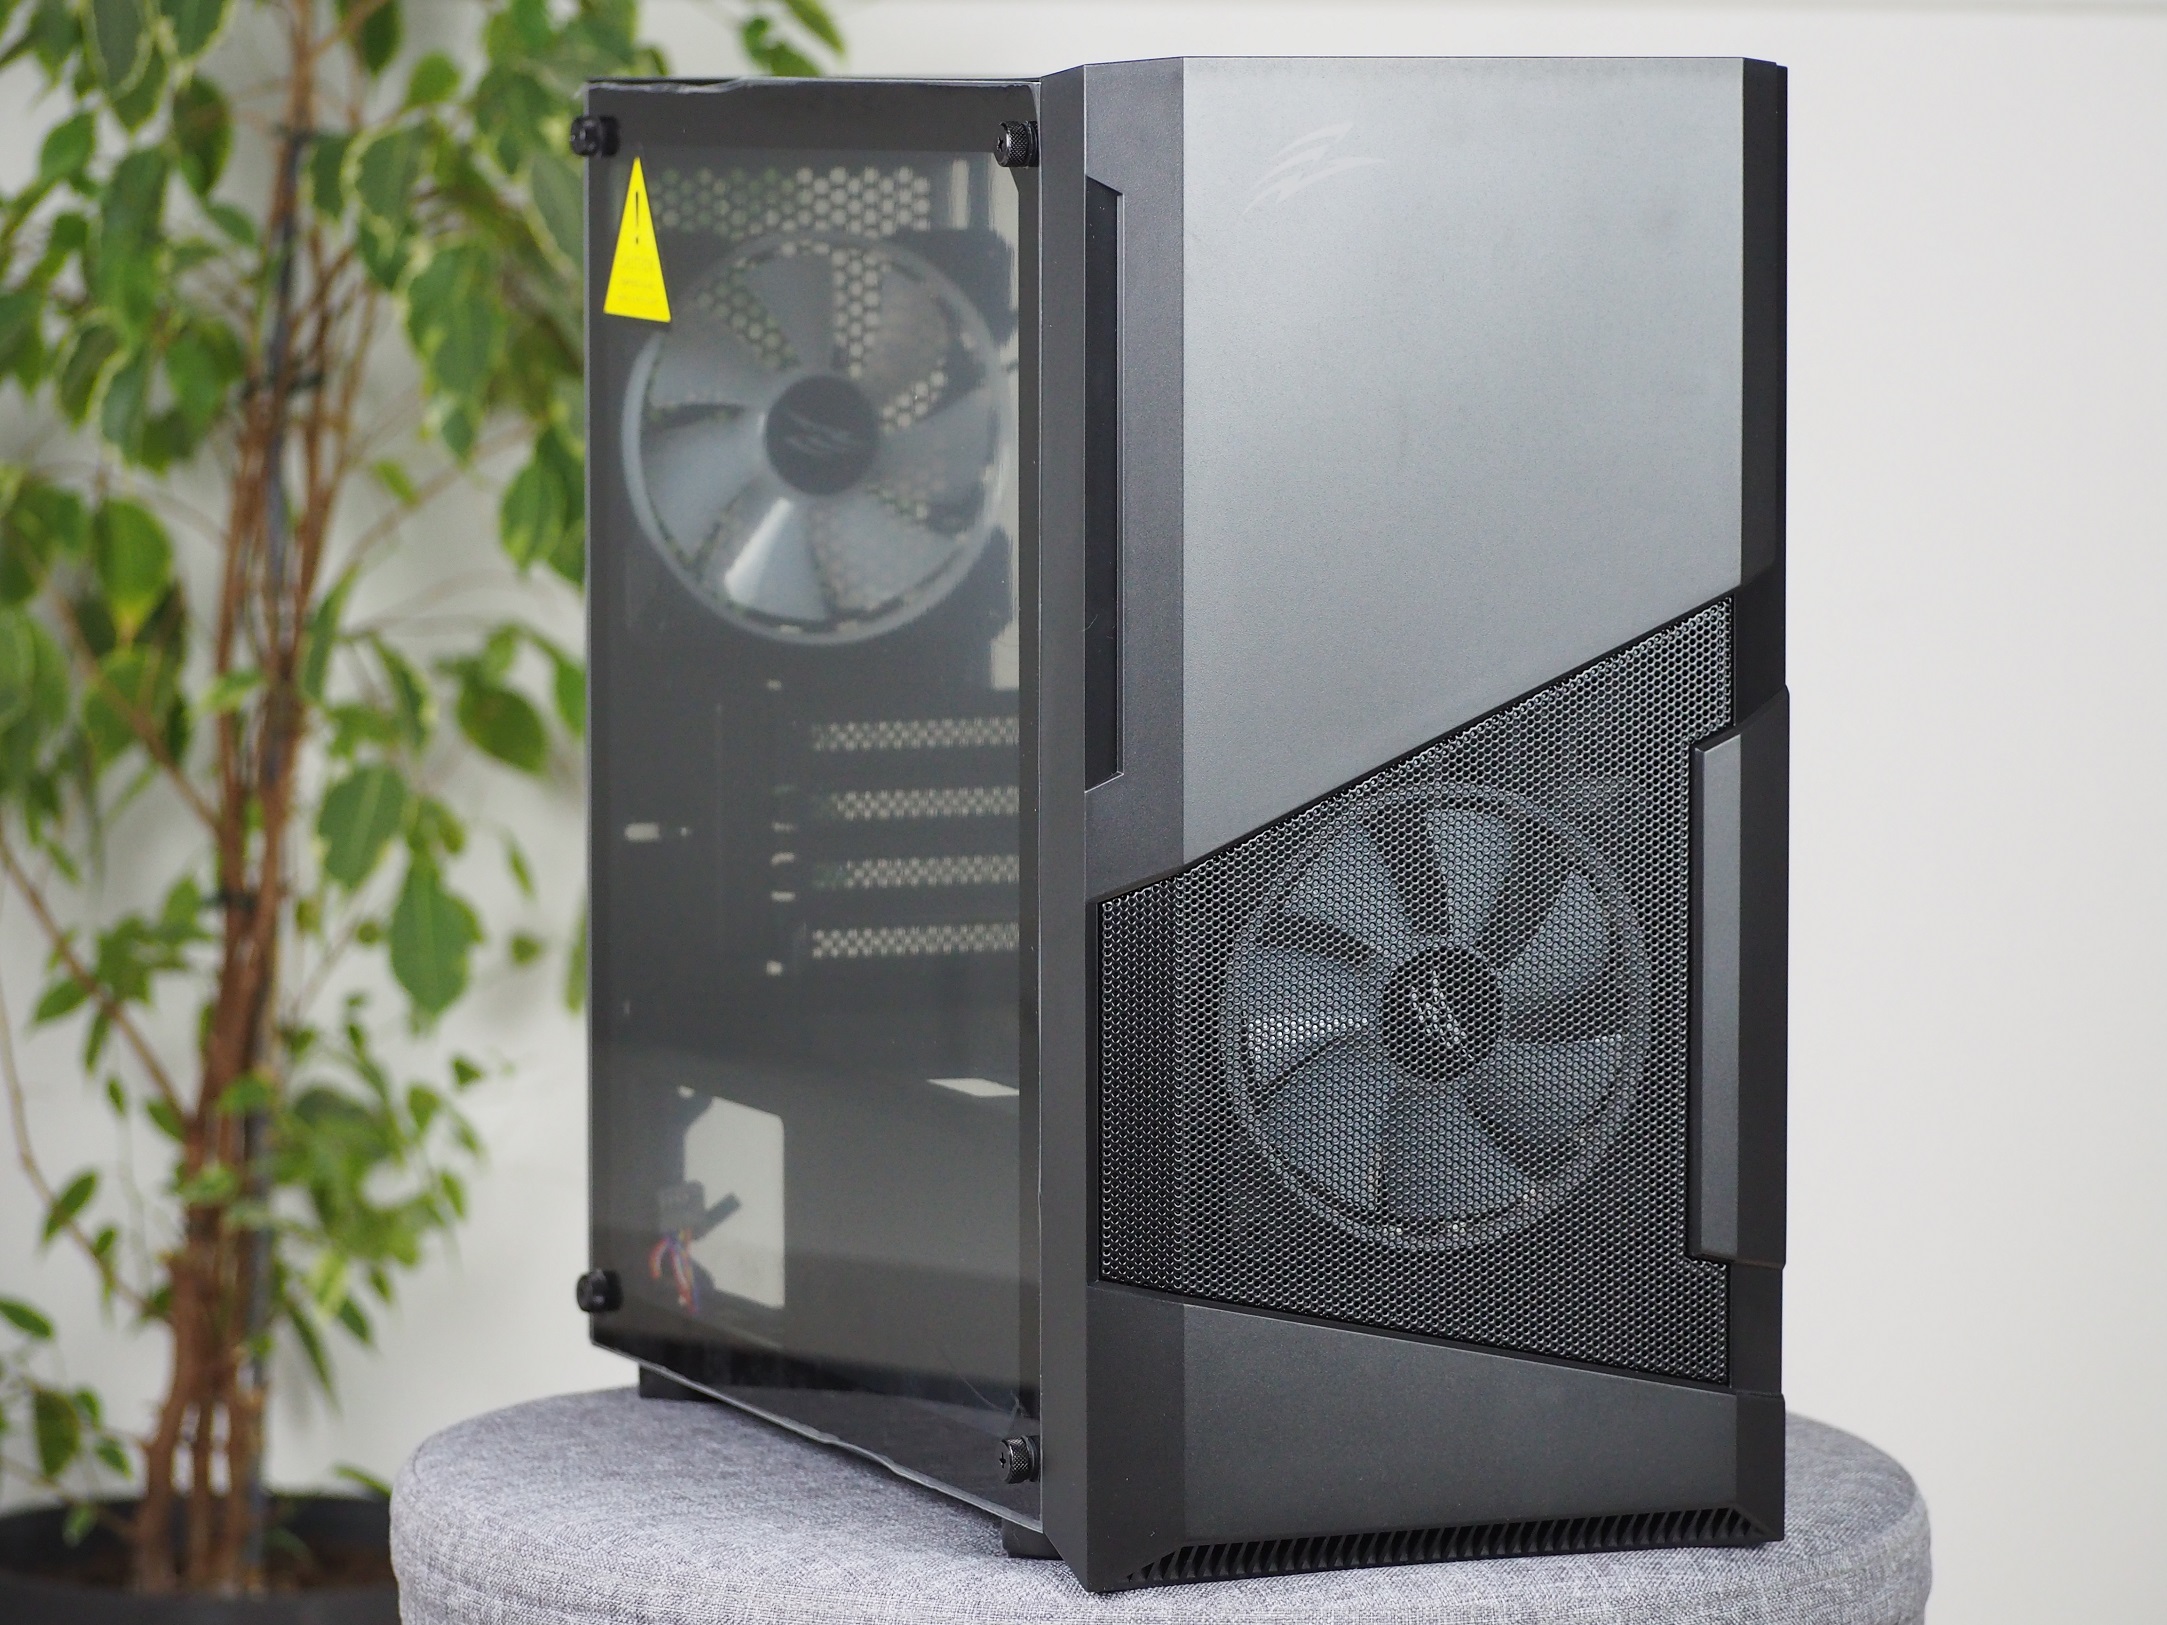
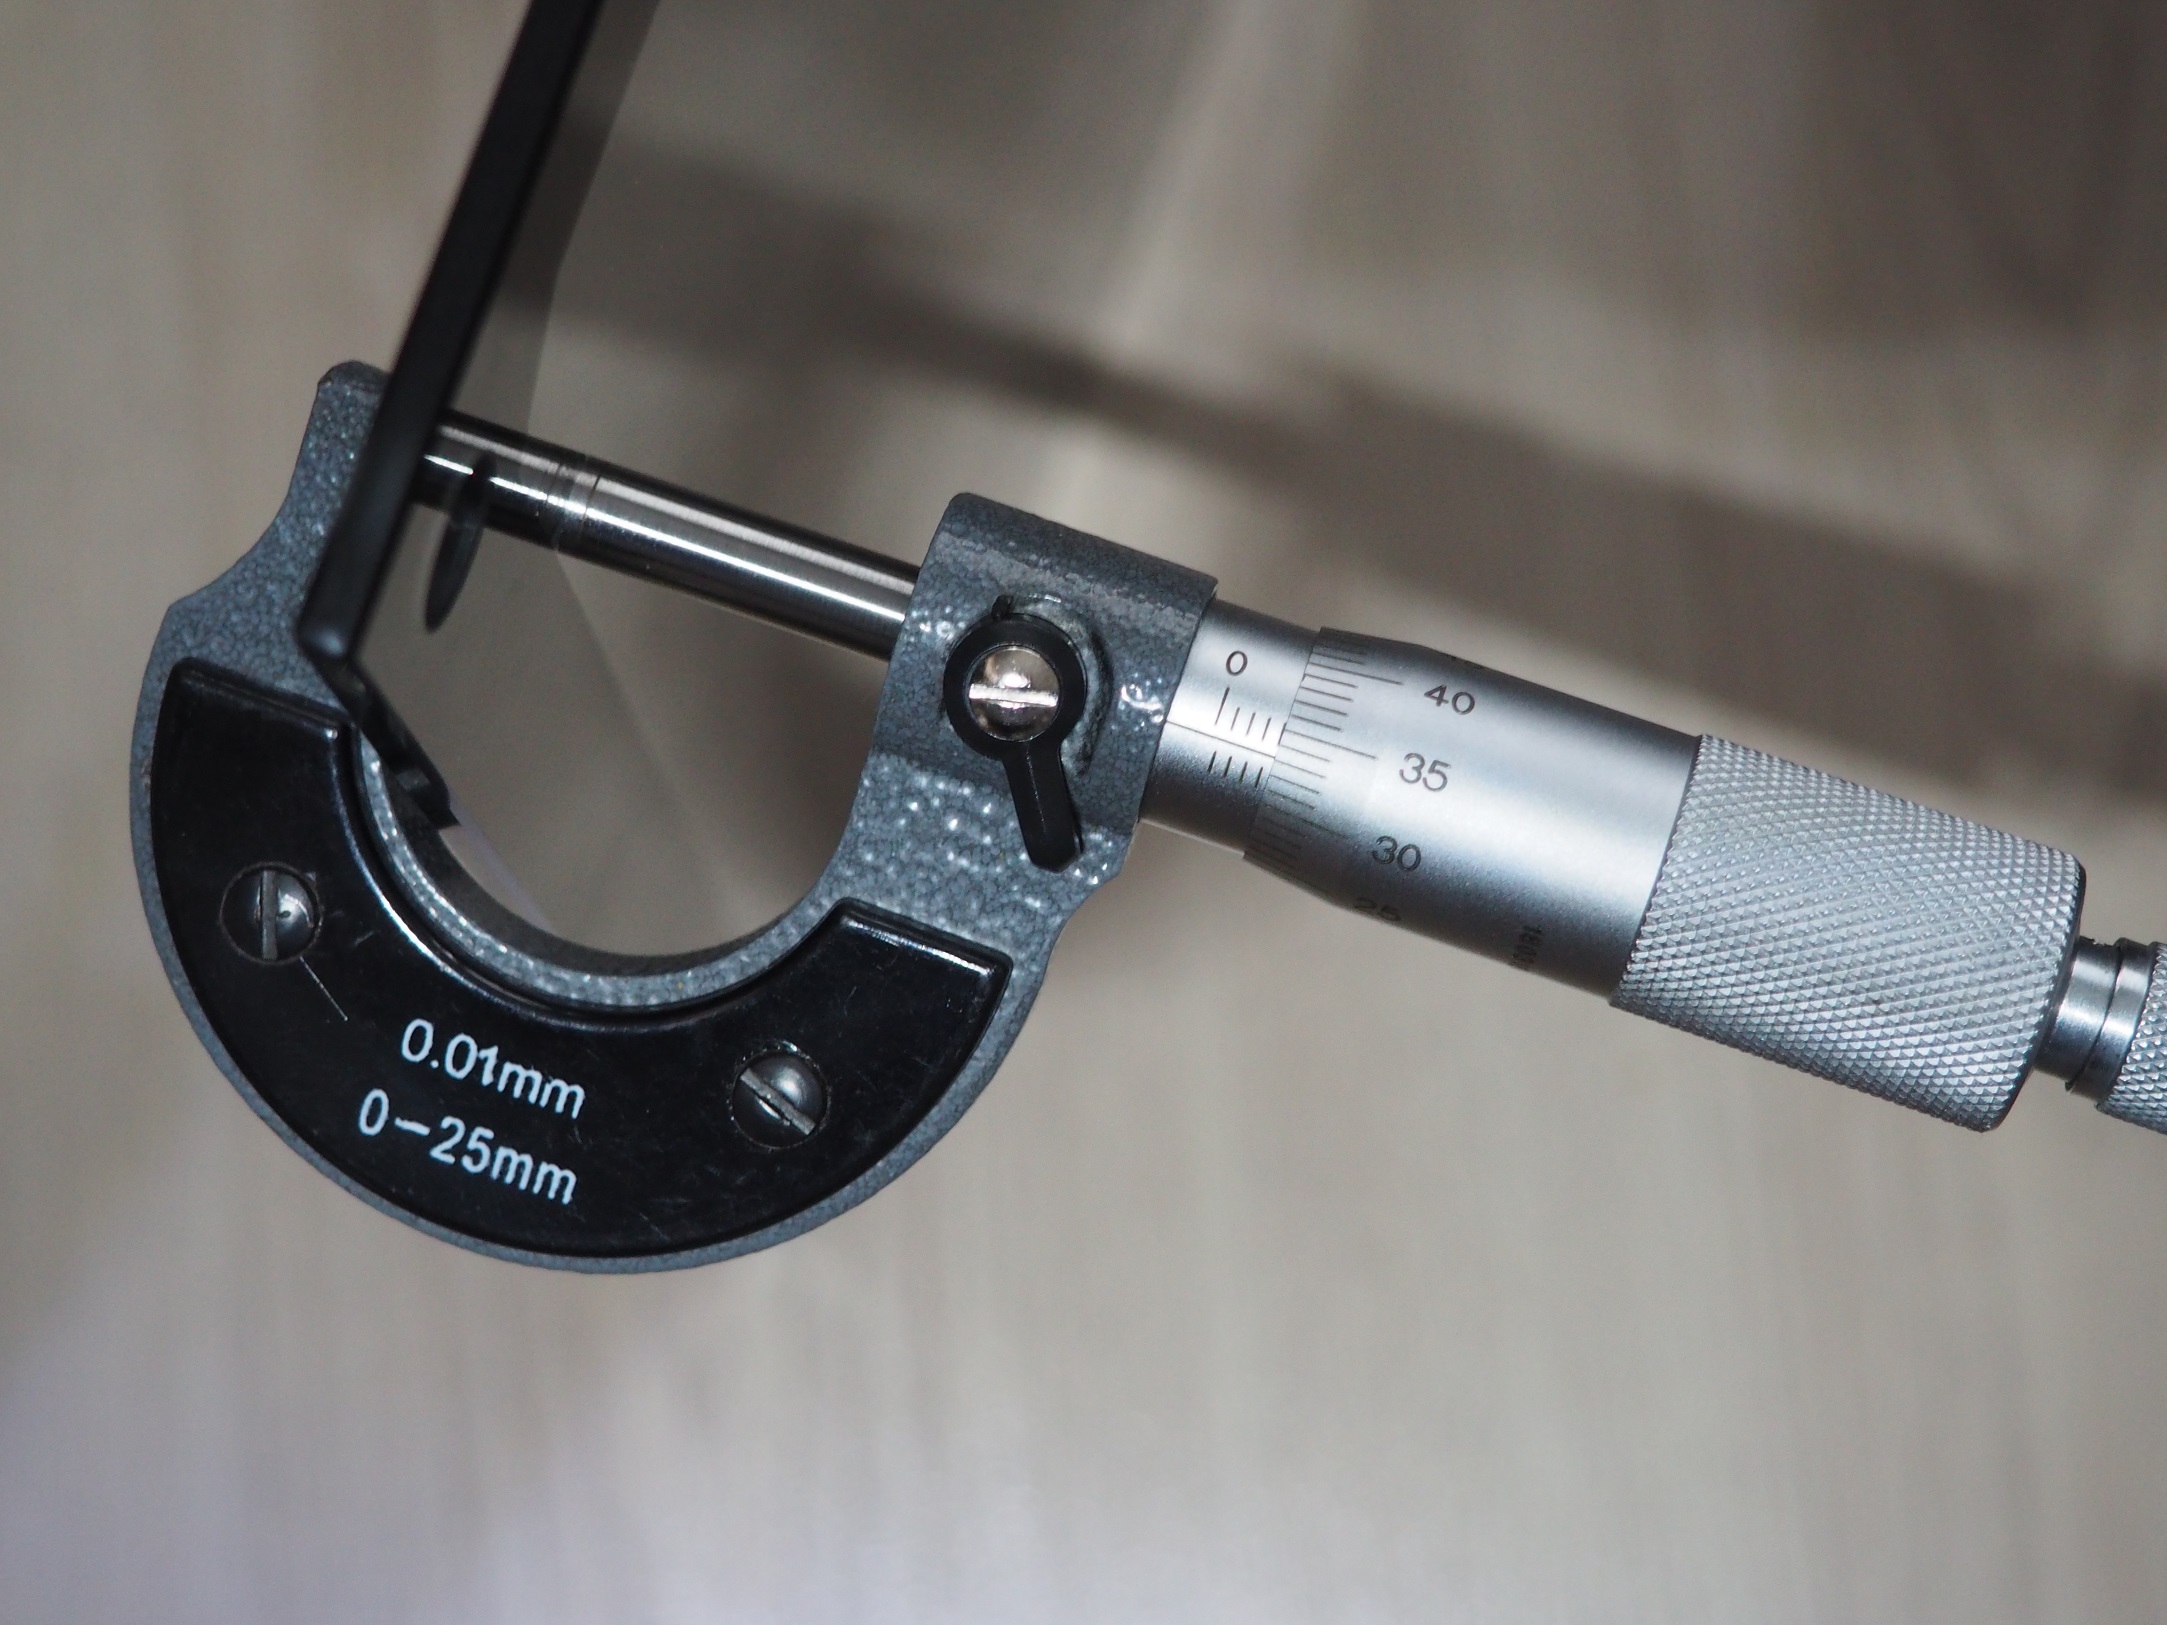
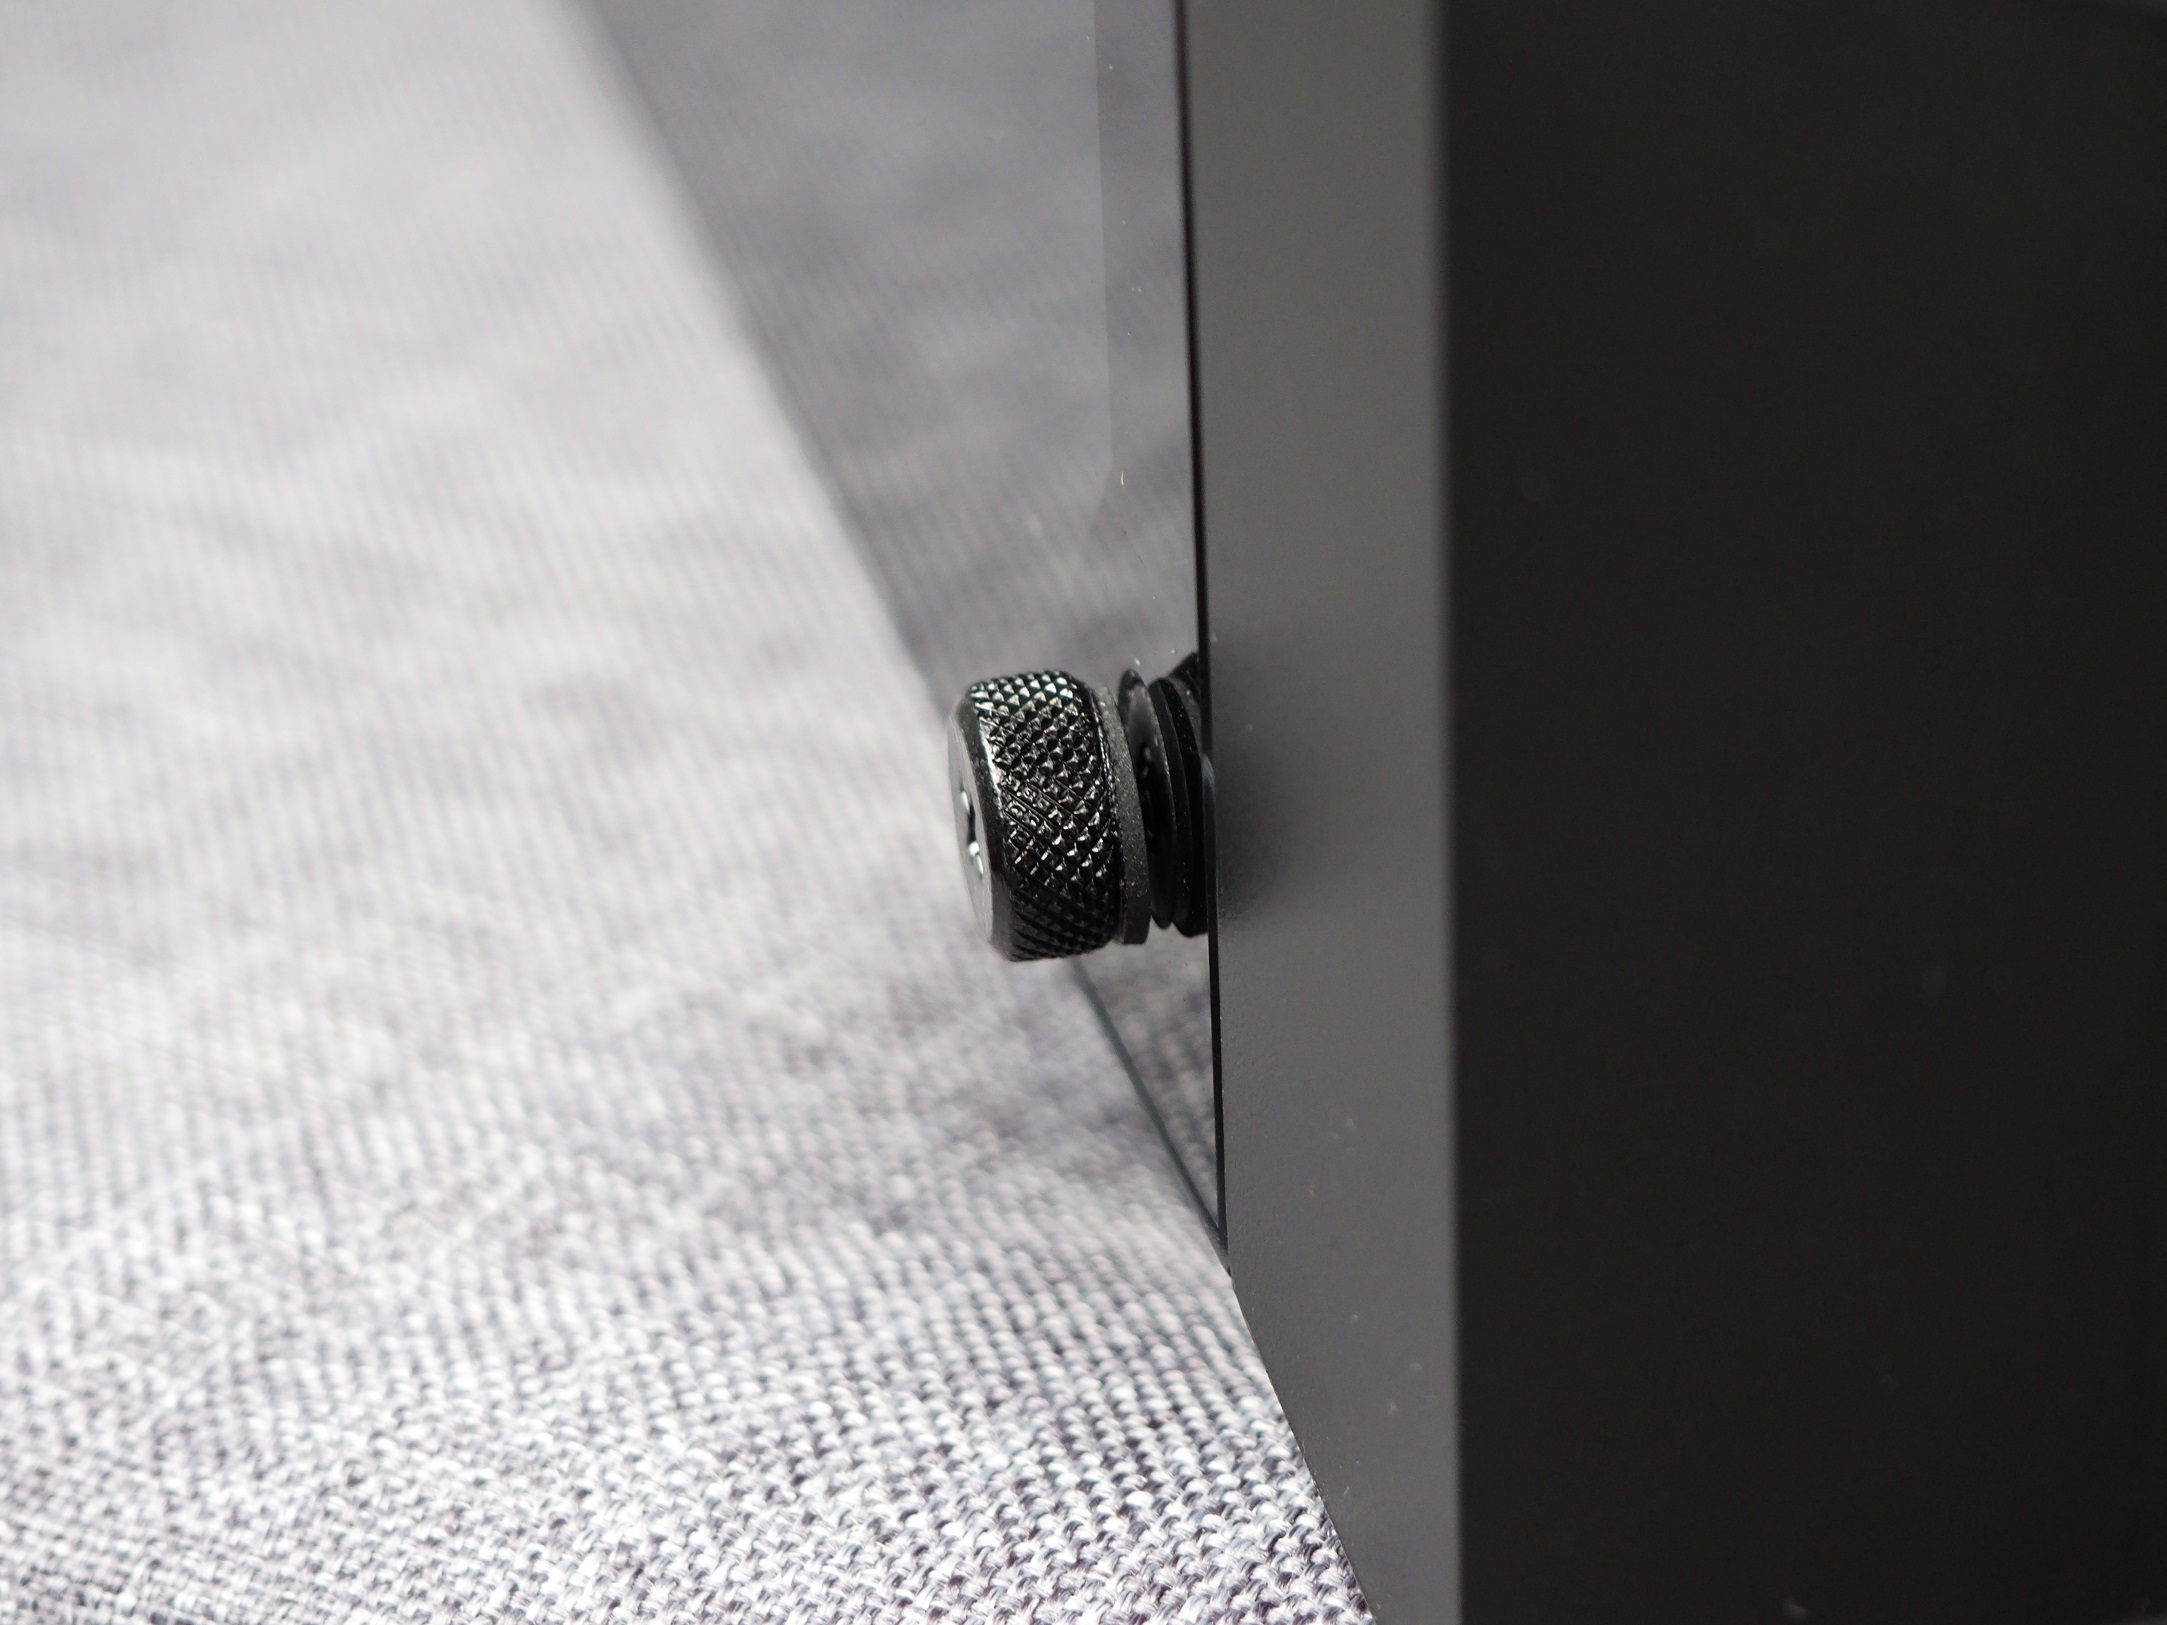
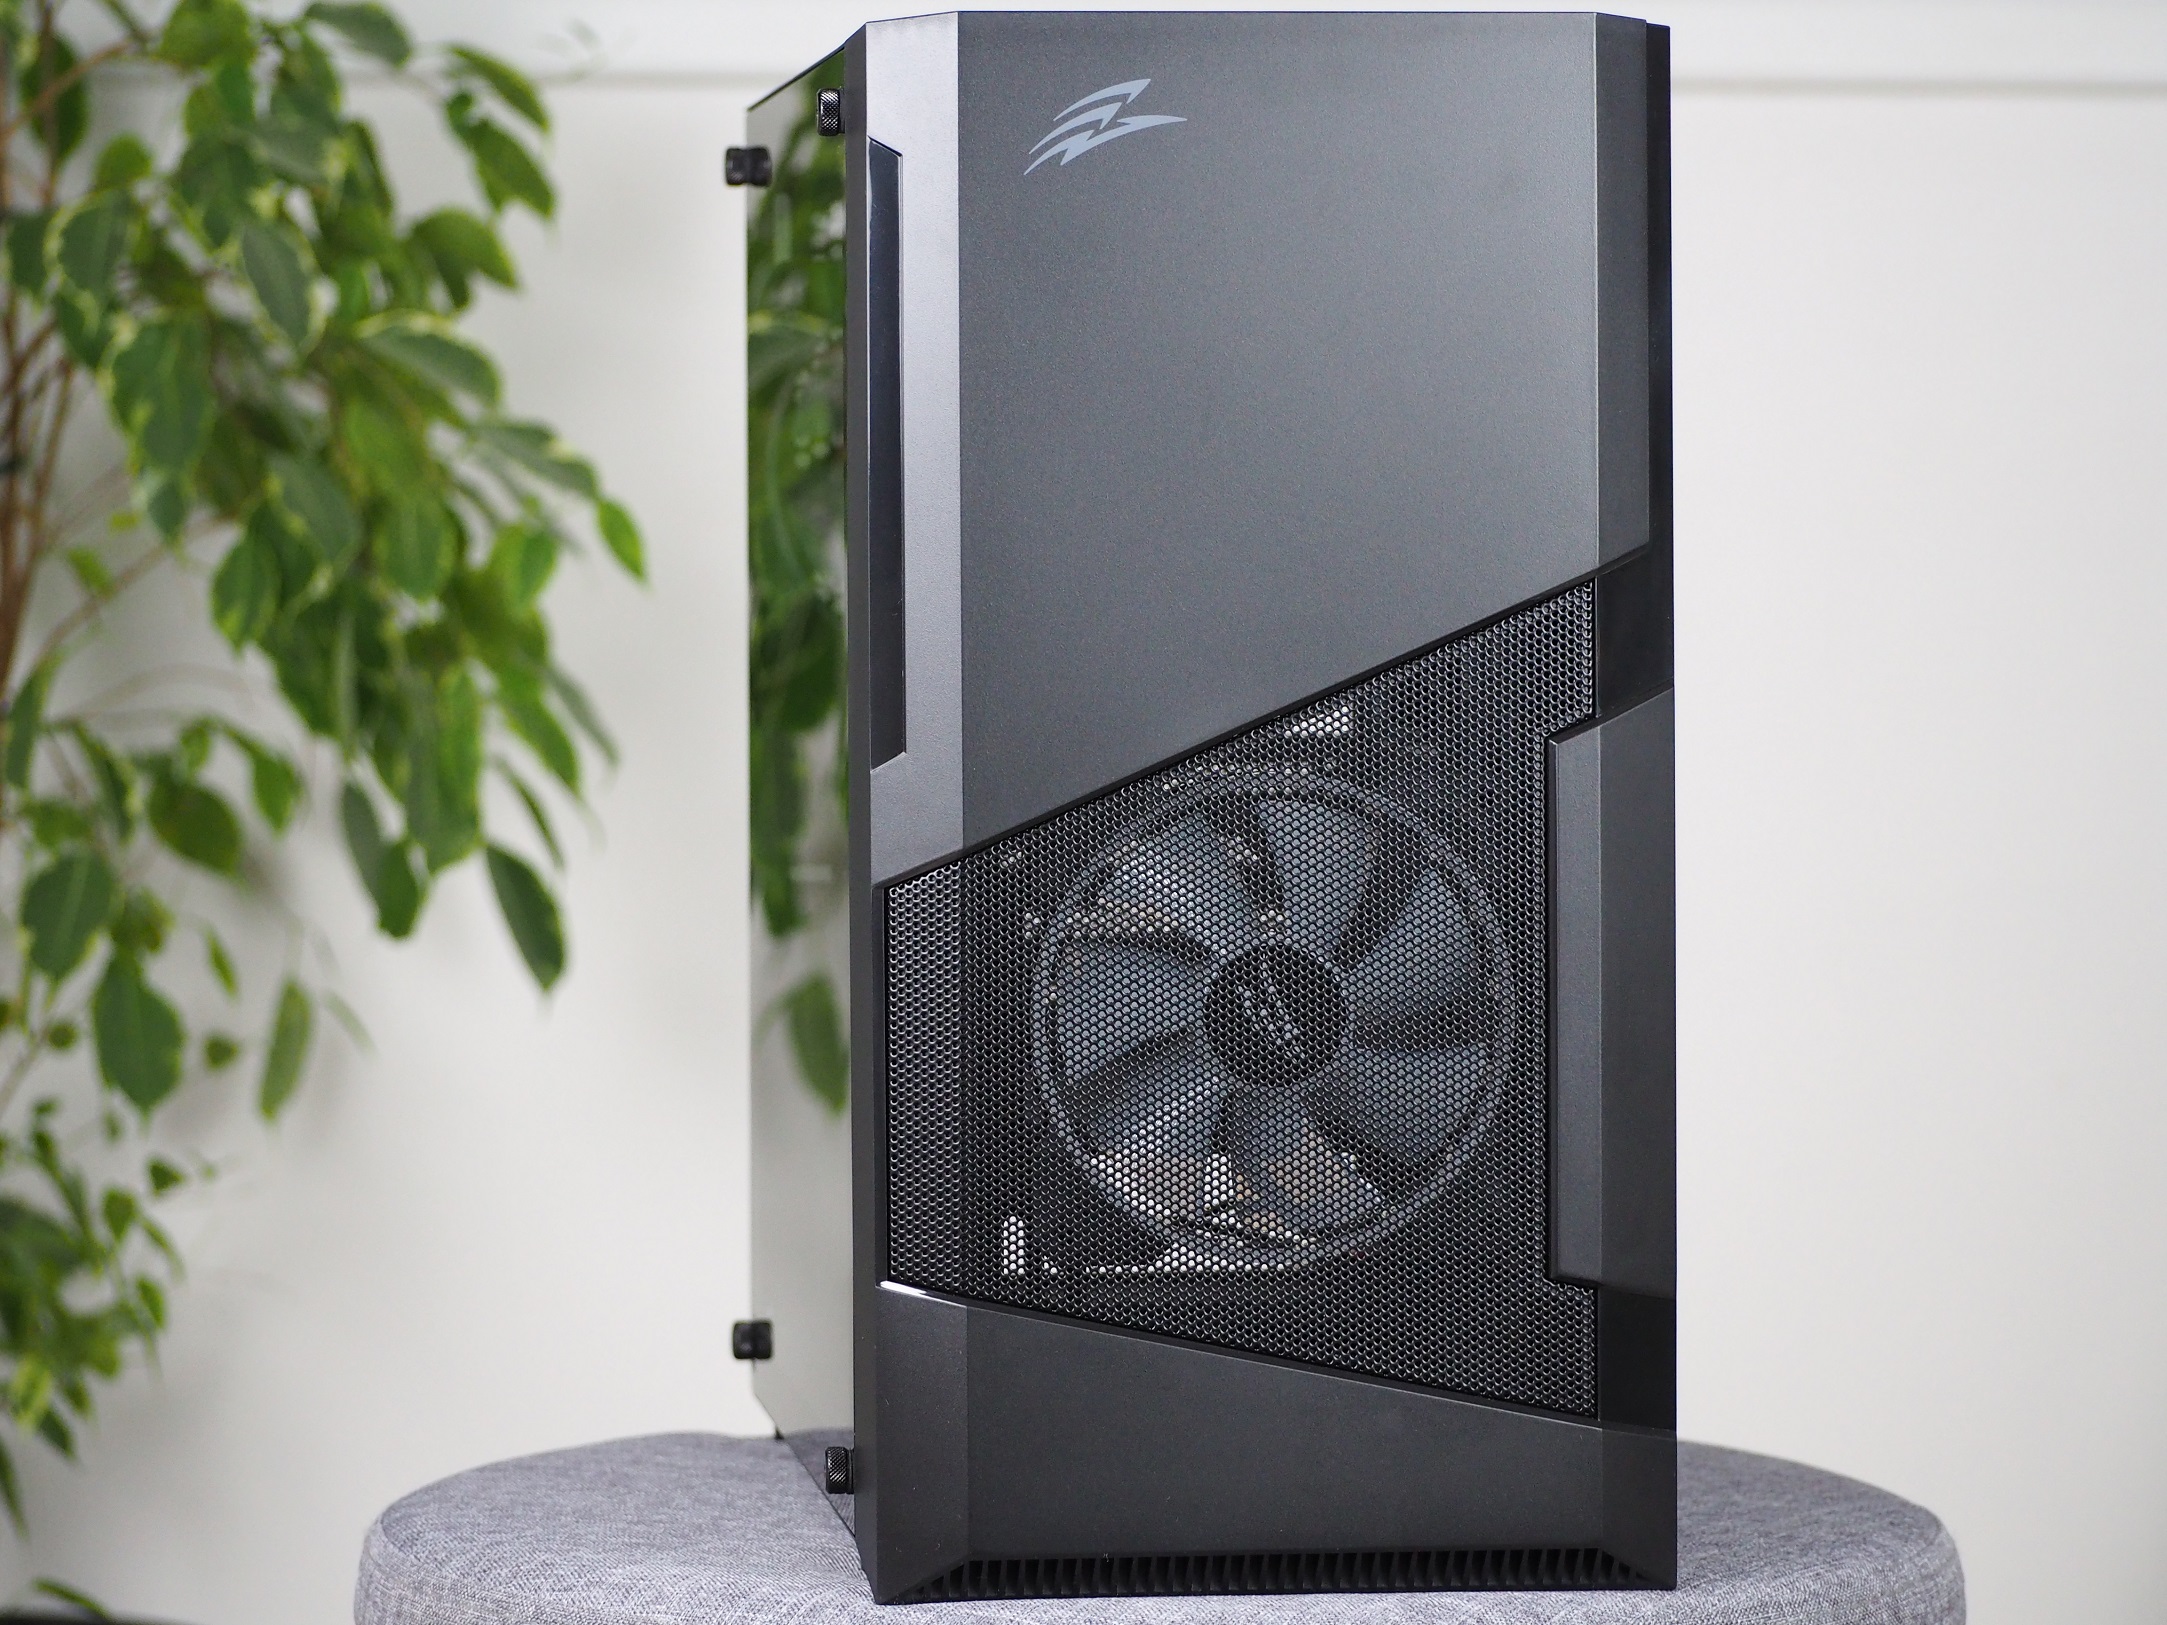
The left side panel came with the typical protective film glued on both sides on tempered glass. The glass thickness is slightly under four millimeters, 3.85 mm to be exact. It is held in place by four locking screws, which kind of detracts from the nice look of the case. However, it is a way of offsetting the glass from the metal structure via rubber spacers and thus also preventing possible vibration transmission. From a distance, the glass looks like it’s beautifully recessed into the holes, but that’s not entirely true. If you look closely at the top of the sheet, you can see the slightly curved end. This way, the sheet is curved both at the beginning of the case and at the end.

The entire front panel is made of plastic, except for the metal perforation. This is located on the bottom part, where the fan is also mounted from the factory. The panel can be snapped out from the structure for better access to the fan and easier cleaning. In practice, however, it’s not so easy. With the imitation vents, the chin of the front extends almost flush with the feet, so prying it out is only possible from the side where the front is beveled. It can be done, but it’s not the ideal position from where to pull the front panel.
Despite the smaller size of the case, you have the option to swap out the used 120mm fan for a 140mm fan. You can also fit the empty top position with a single 120/140 mm fan. If you would like to use a liquid cooler, you can fit its radiator here in the 280mm size. That’s a decent flexibility for fitting fans/radiators, considering the dimensions of the case along with the price tag of around 50 euros.
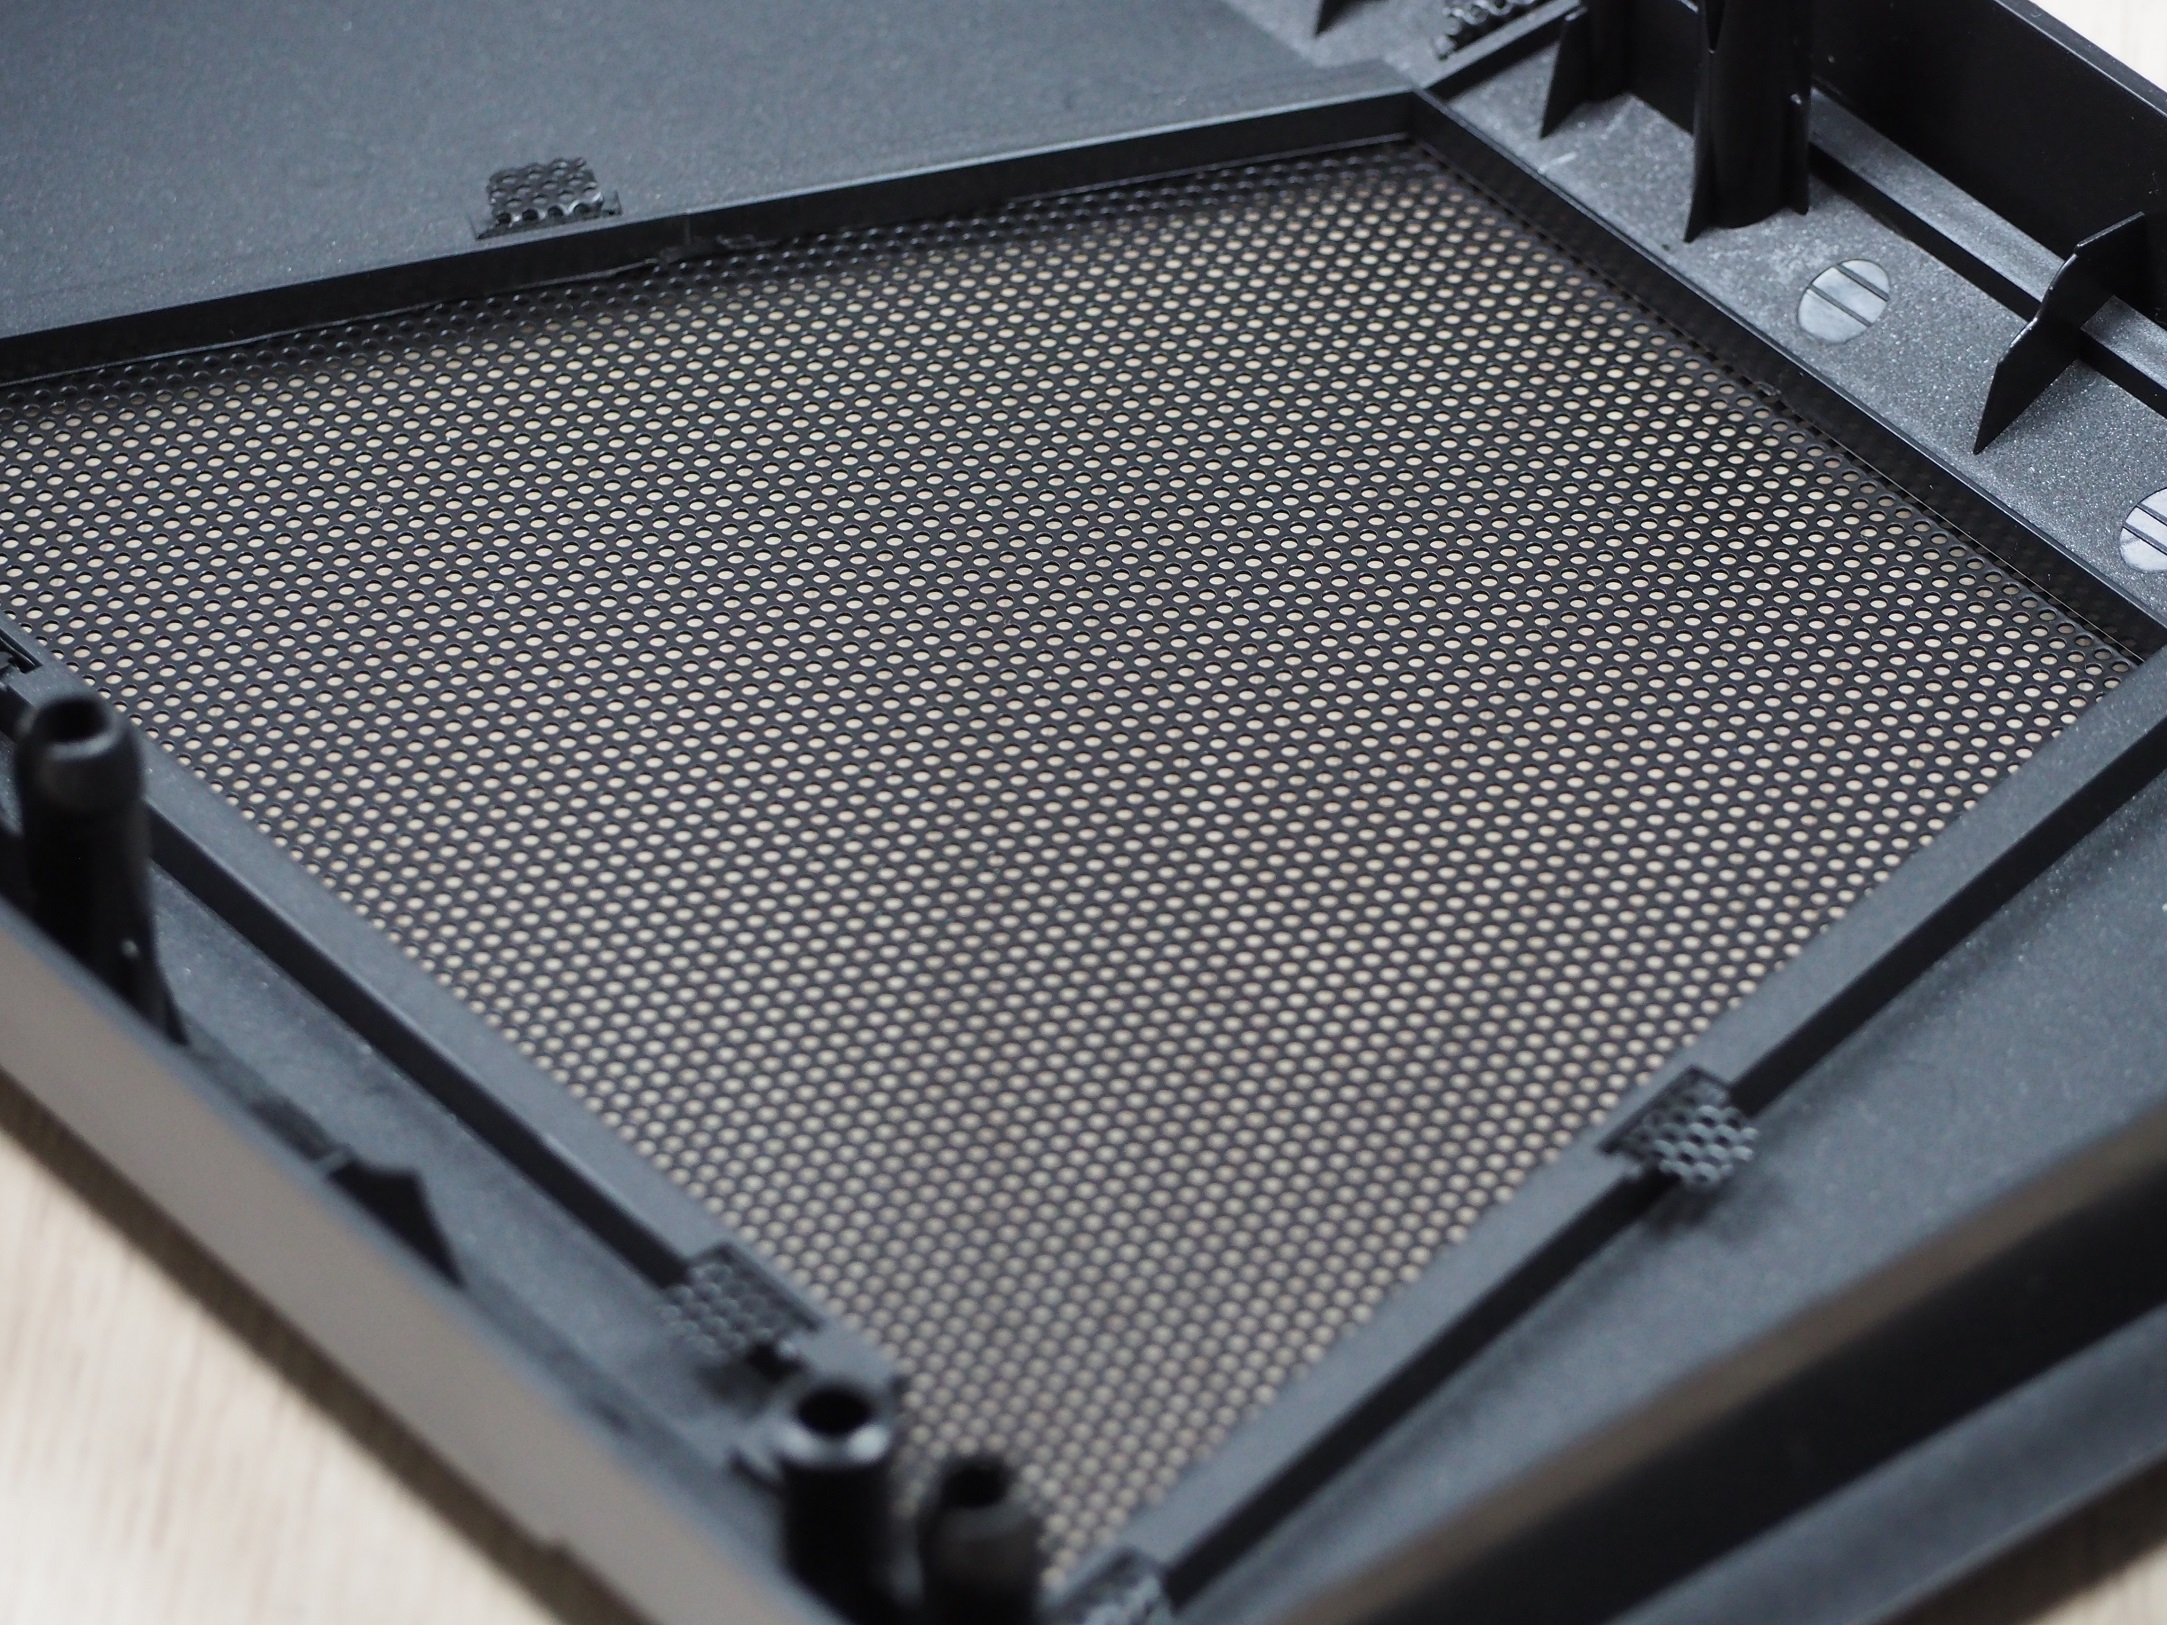
The perforated sheet with larger holes also serves as protection against larger dust particles. However, as the holes are around 1.5 millimetres in size, finer dust particles will still penetrate into the interior of the case.
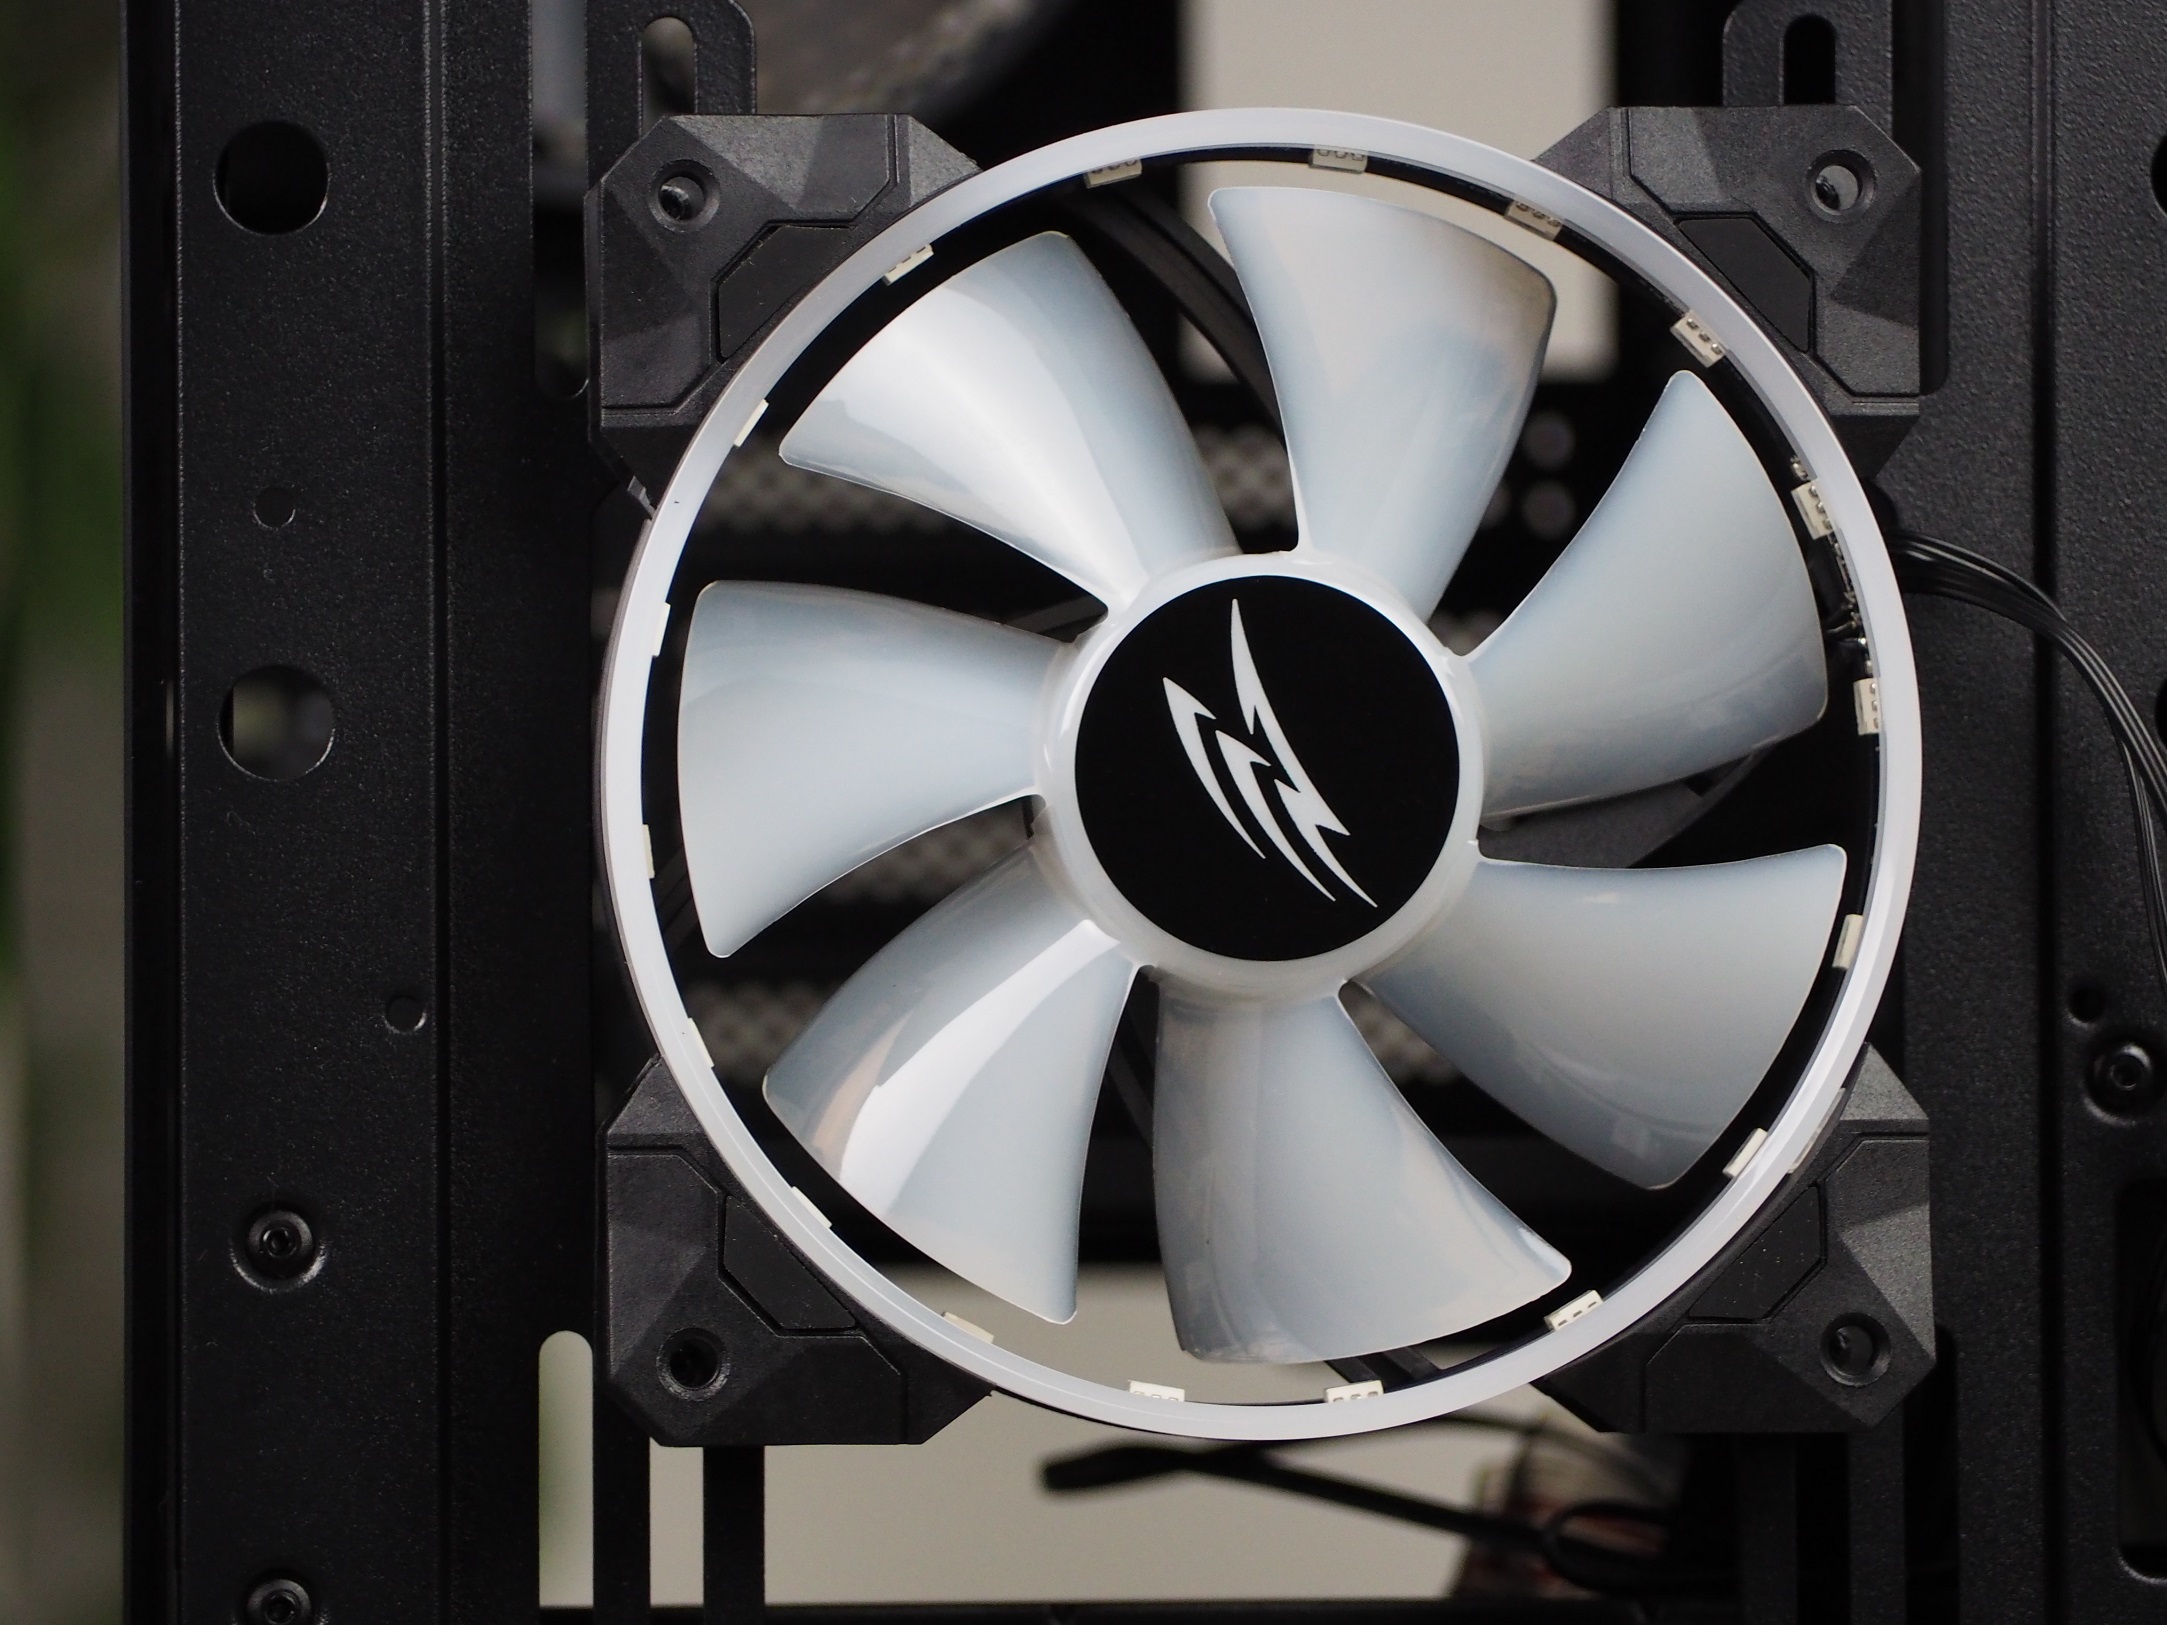
On the front panel, you’ll find a single fan labeled Evolveo 12R1R Rainbow. Surrounding the rotor are 18 ARGB LEDs that are ready to make quite a spectacle. Along with the case, they will give you up to 60 preset options for how they will glow. Not to mention that you can stop some of the moving effects in any position, so they become stationary. There’s not a lot of information from the manufacturer about this fan, but they did provide a few things, like the speed. The maximum speed should be 1200 rpm. The manufacturer also specifies a maximum air flow of 54.37 m³/h. The bearing used is of the “rifle” type.

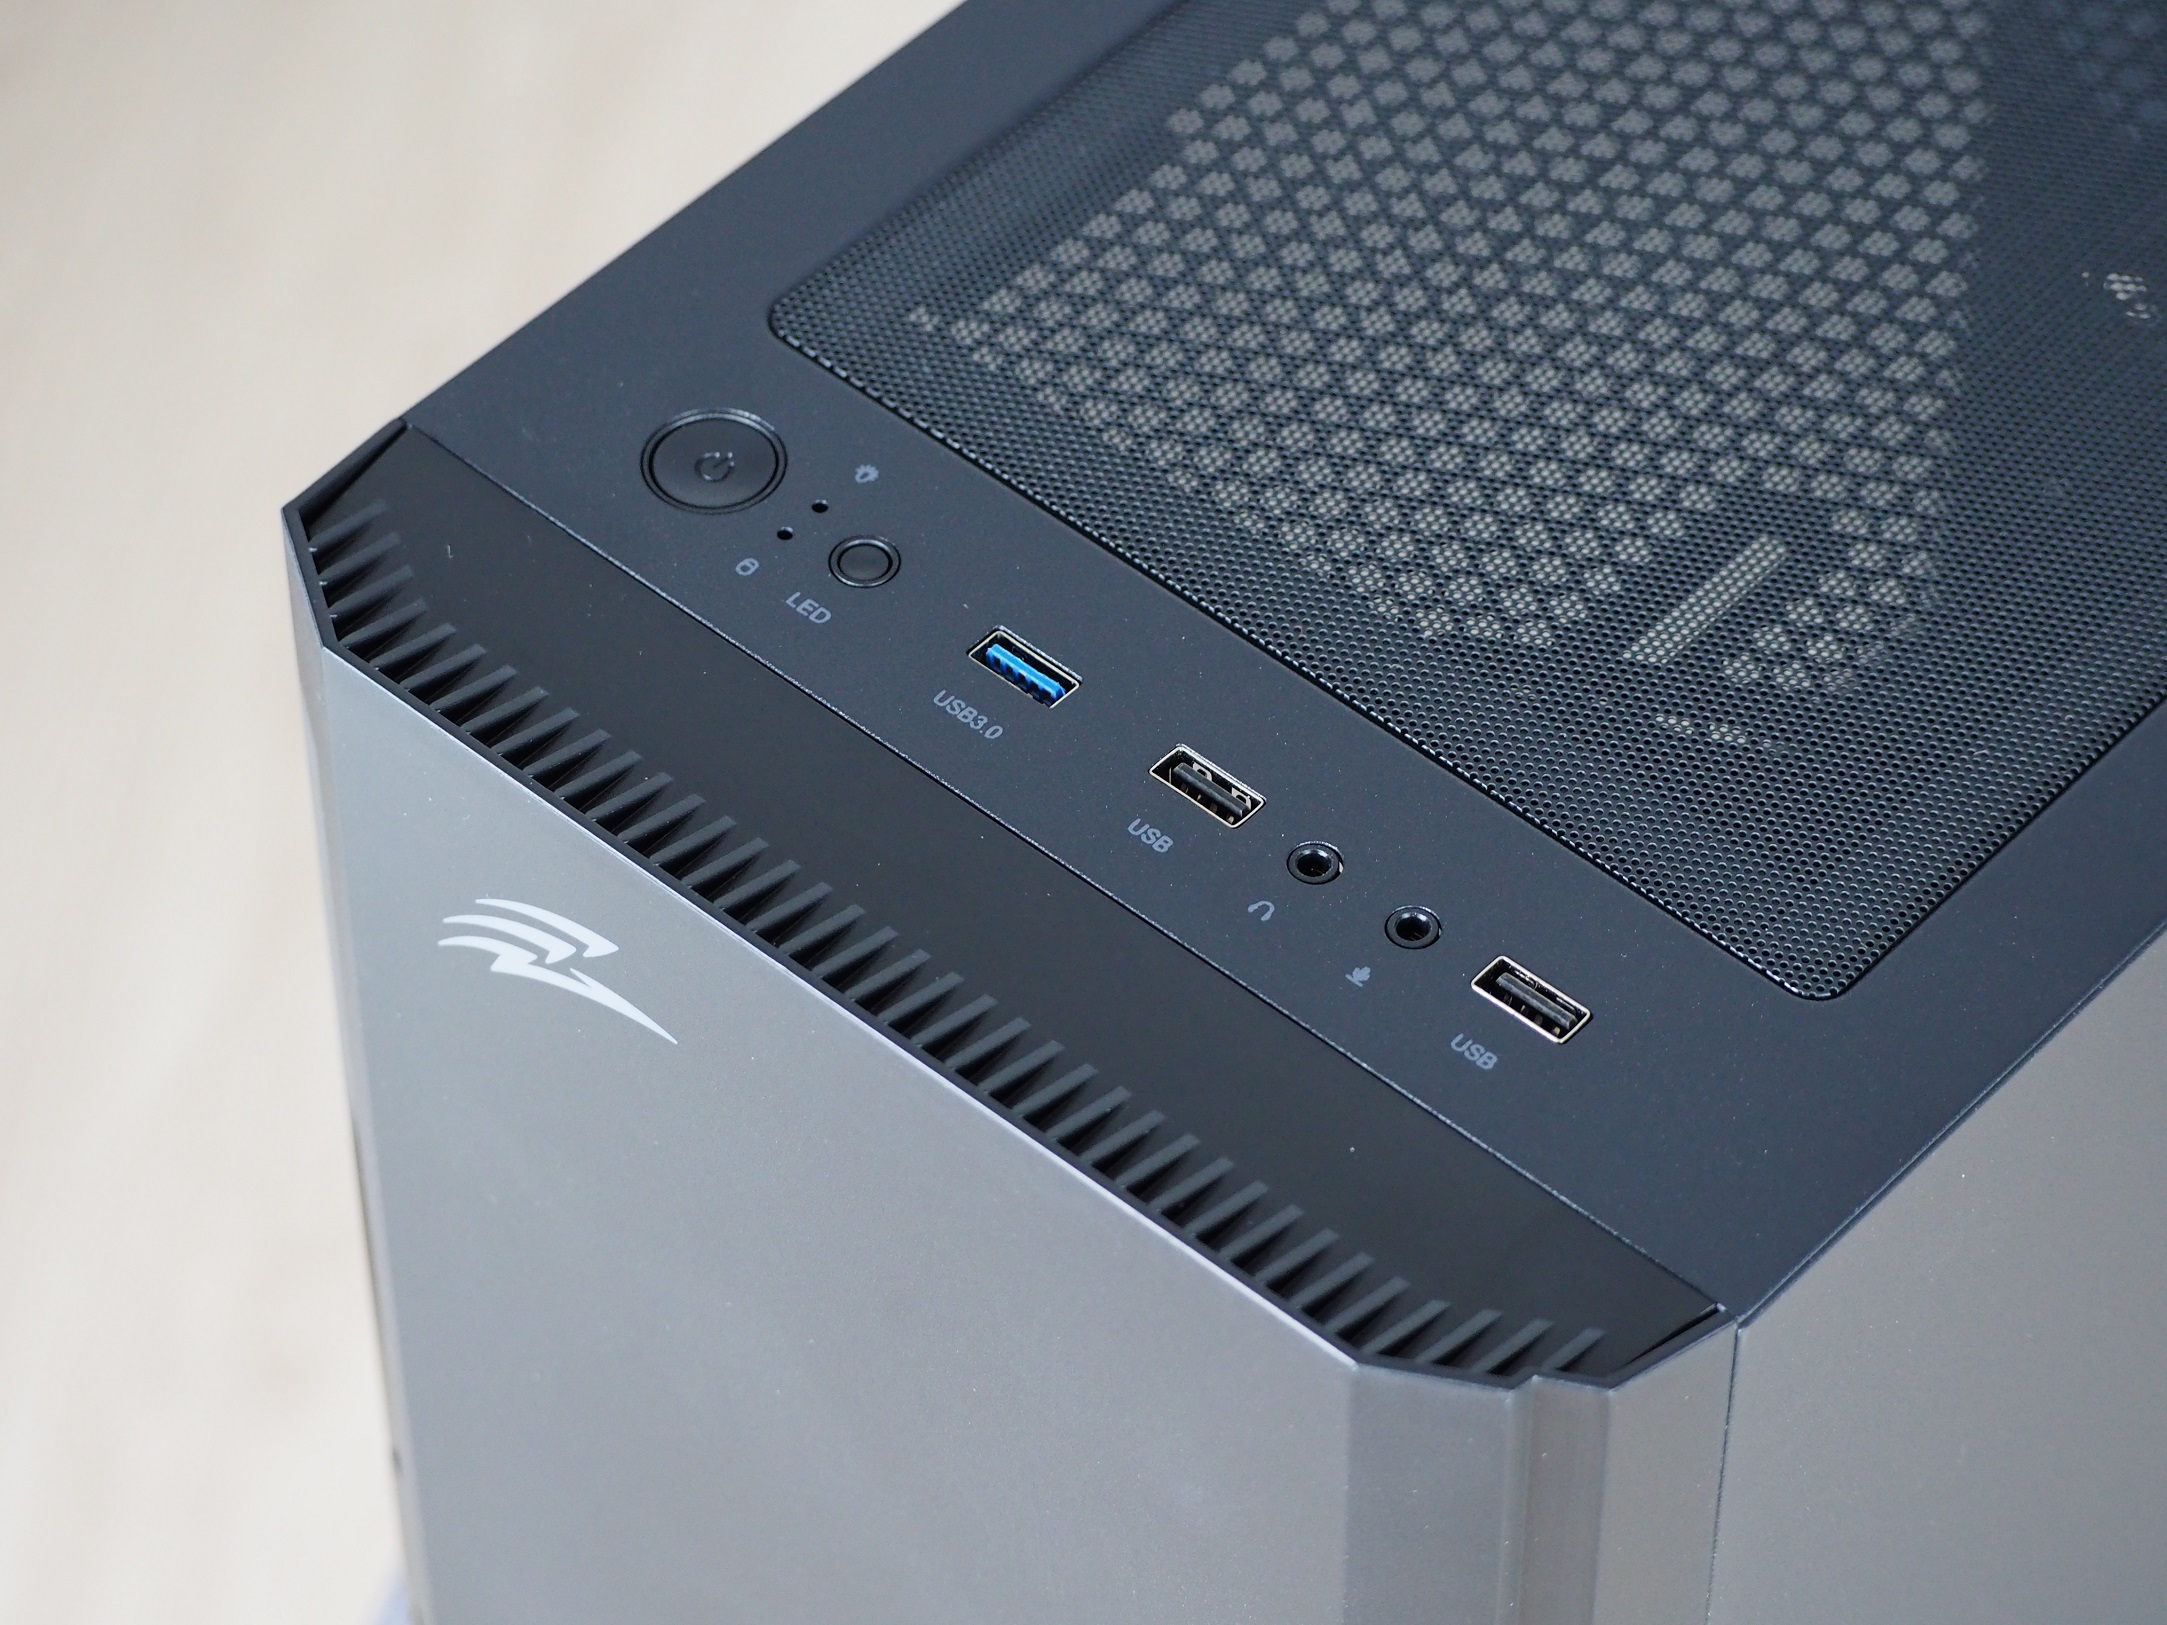
In the category of inexpensive cases, you will certainly be pleased with a larger than usual number of USB ports. There are three of them on the I/O panel, and even though two of them are slower USB 2.0 ports, their number will secure the M5 plus points. The rest of the functional parts include two 3.5mm jacks for microphone and headphones, a button to change the backlight of the fans, and also a button for power on or emergency power off. We must not forget to mention the two small but brightly lit LEDs between the buttons. One indicates the power on status (on all the time) and the other the disk activity (flashing when active).
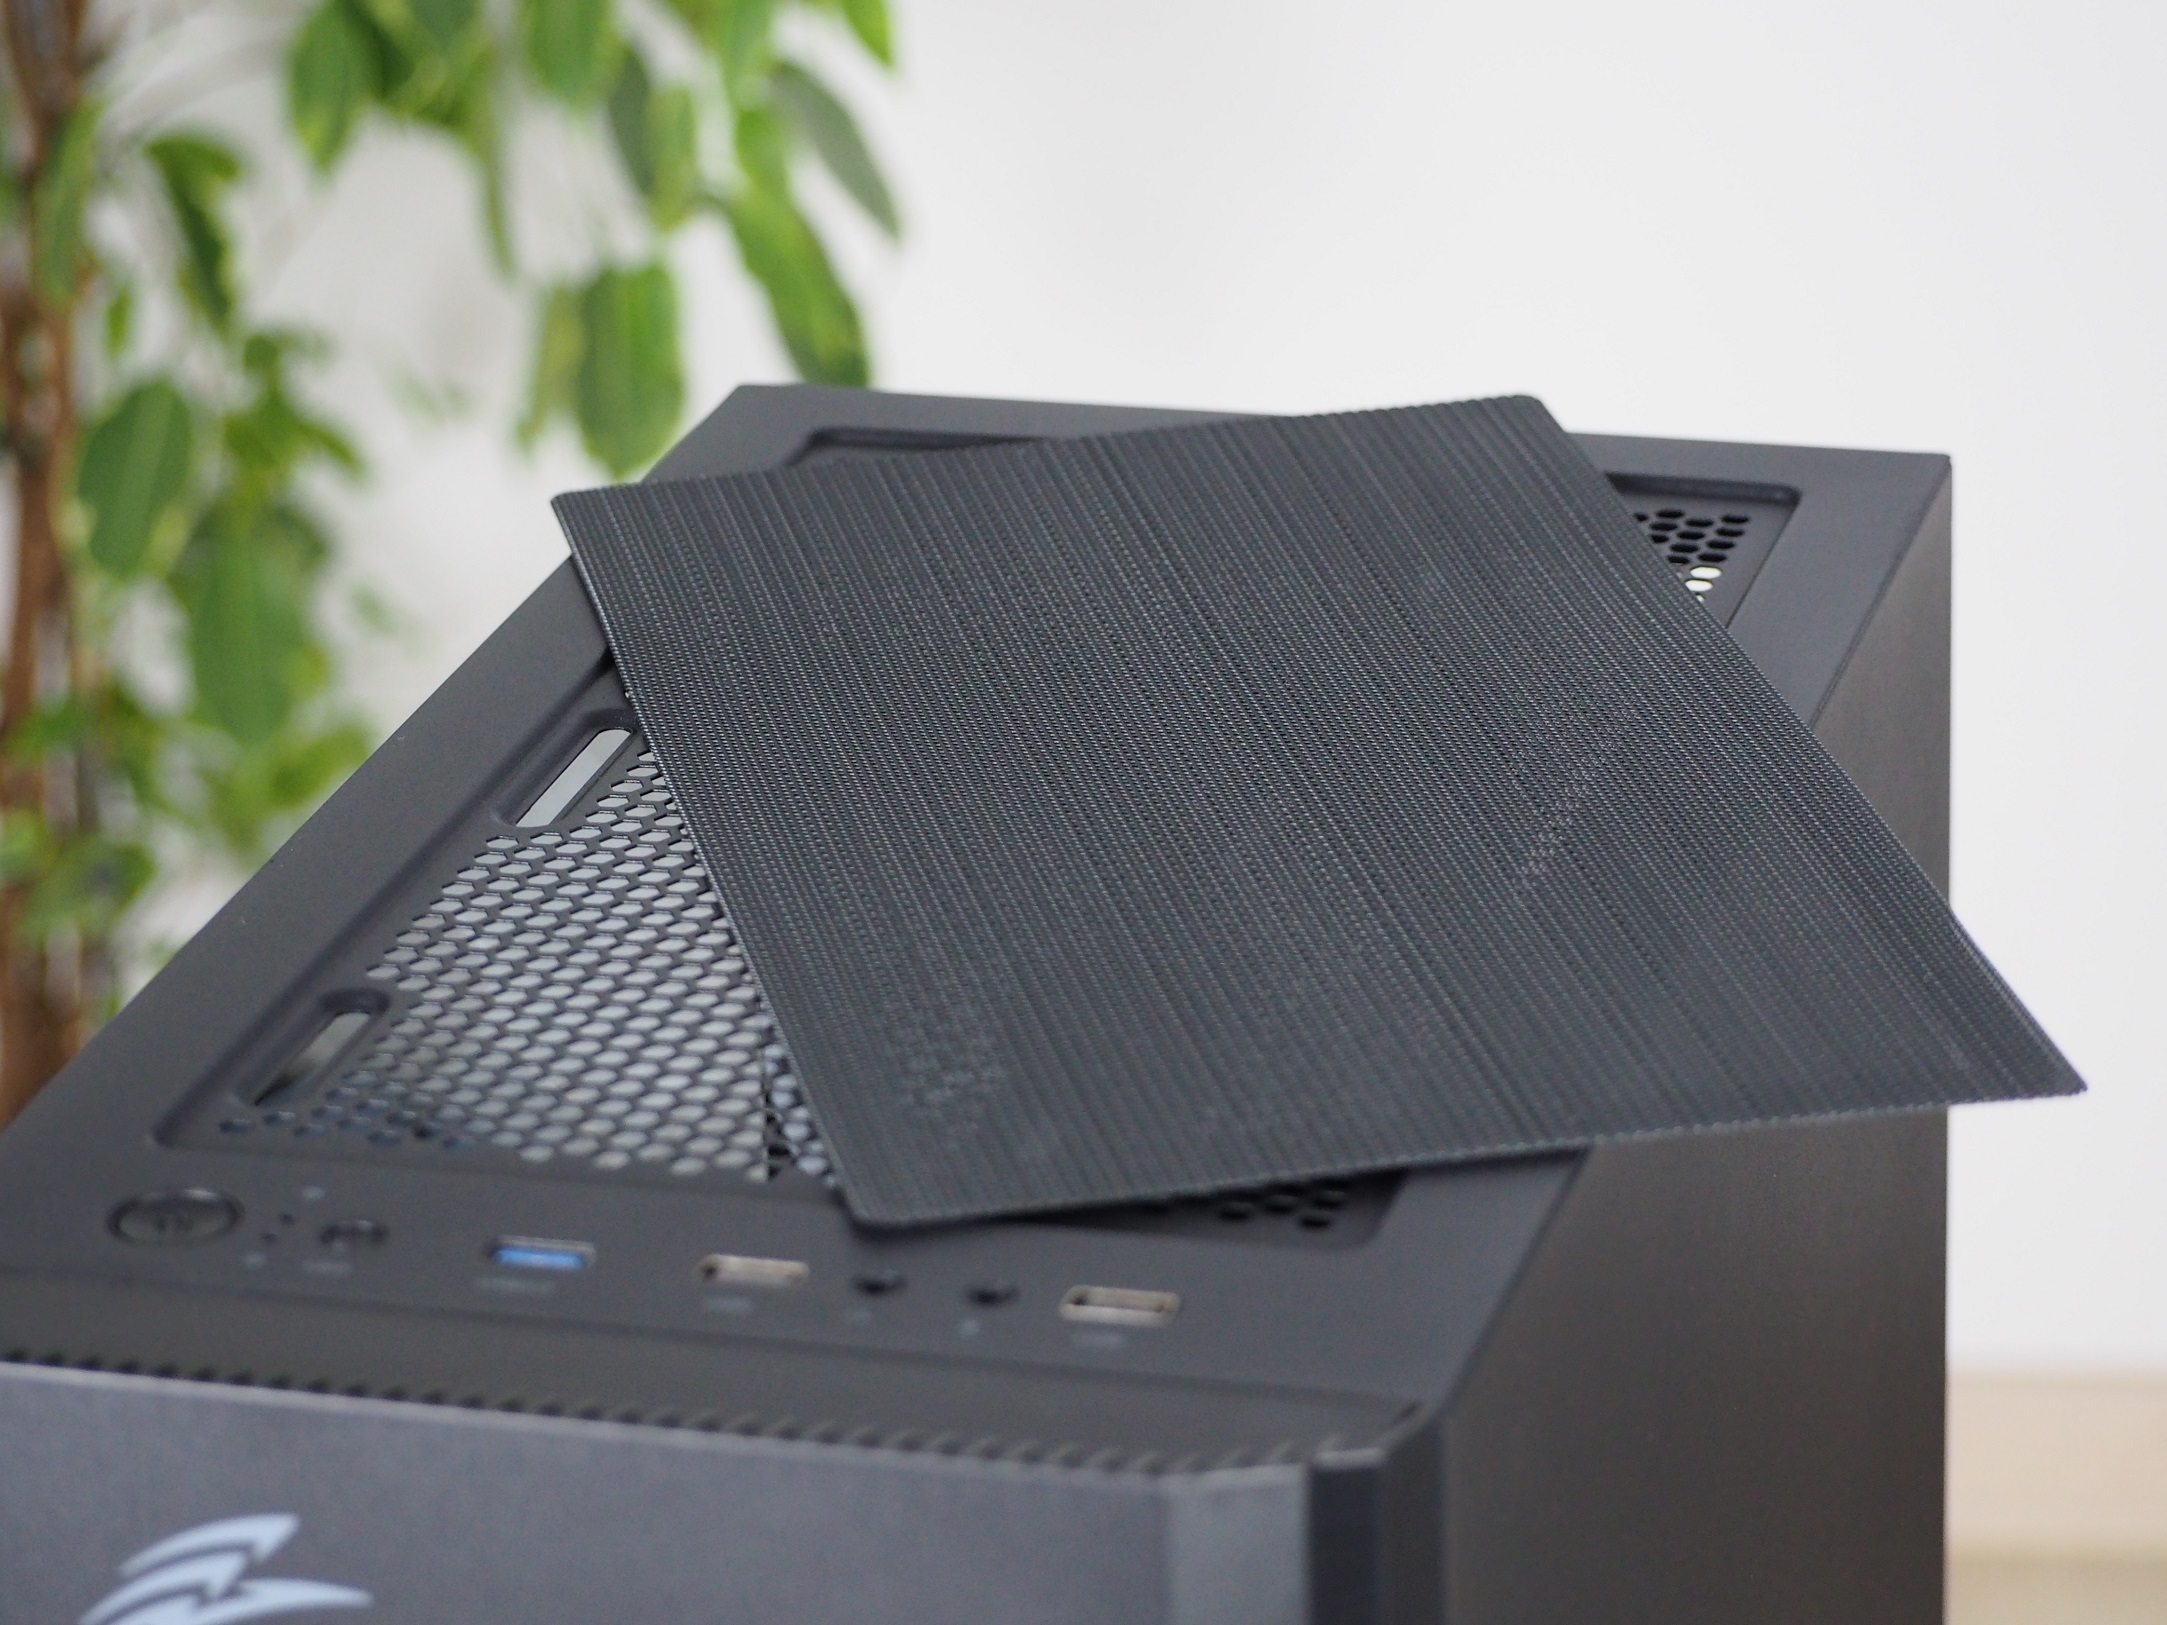
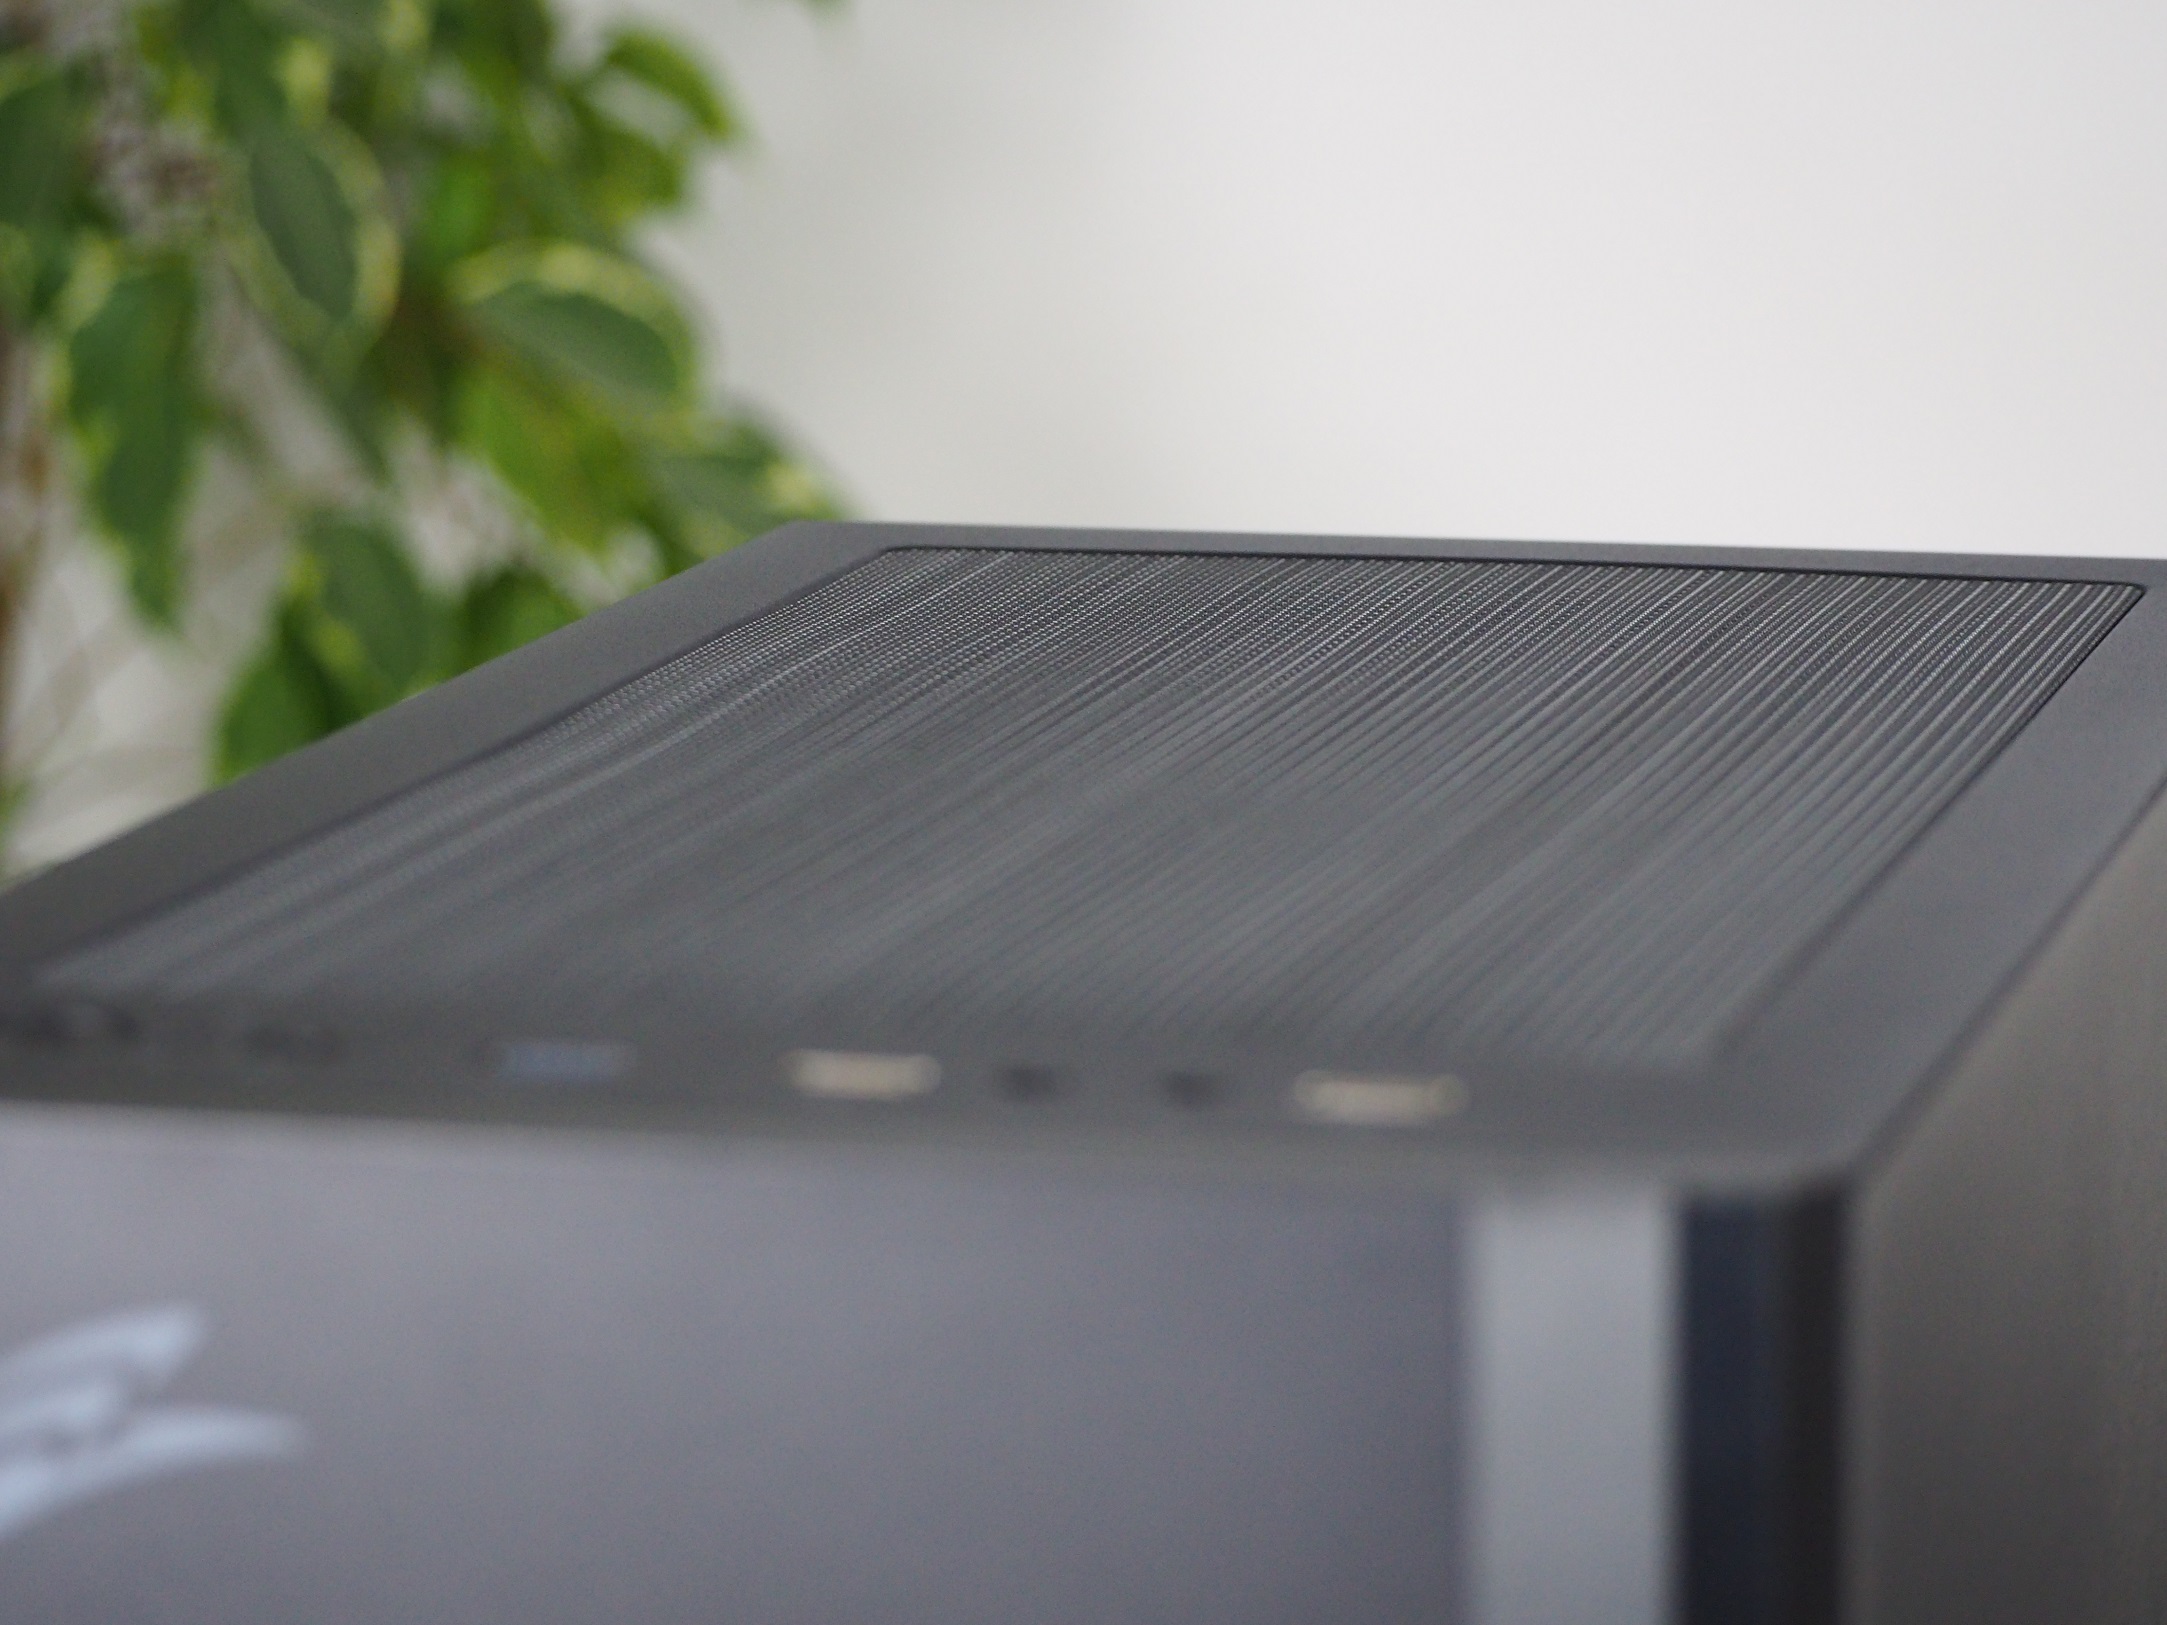
Another part of the top is the perforated grille. This is supposed to protect the ceiling from particles, but it is just as (in)effective as the one in front. Fortunately, it doesn’t matter so much on the top, as it is used as an exhaust rather than an intake position. The grille is positioned a little deeper in a gutter, it doesn’t protrude anywhere. It is attracted to the structure by magnets all around its perimeter. These hold the grille in place quite well. Two 120mm fans or a liquid cooling radiator up to 240mm can be mounted under the ceiling.
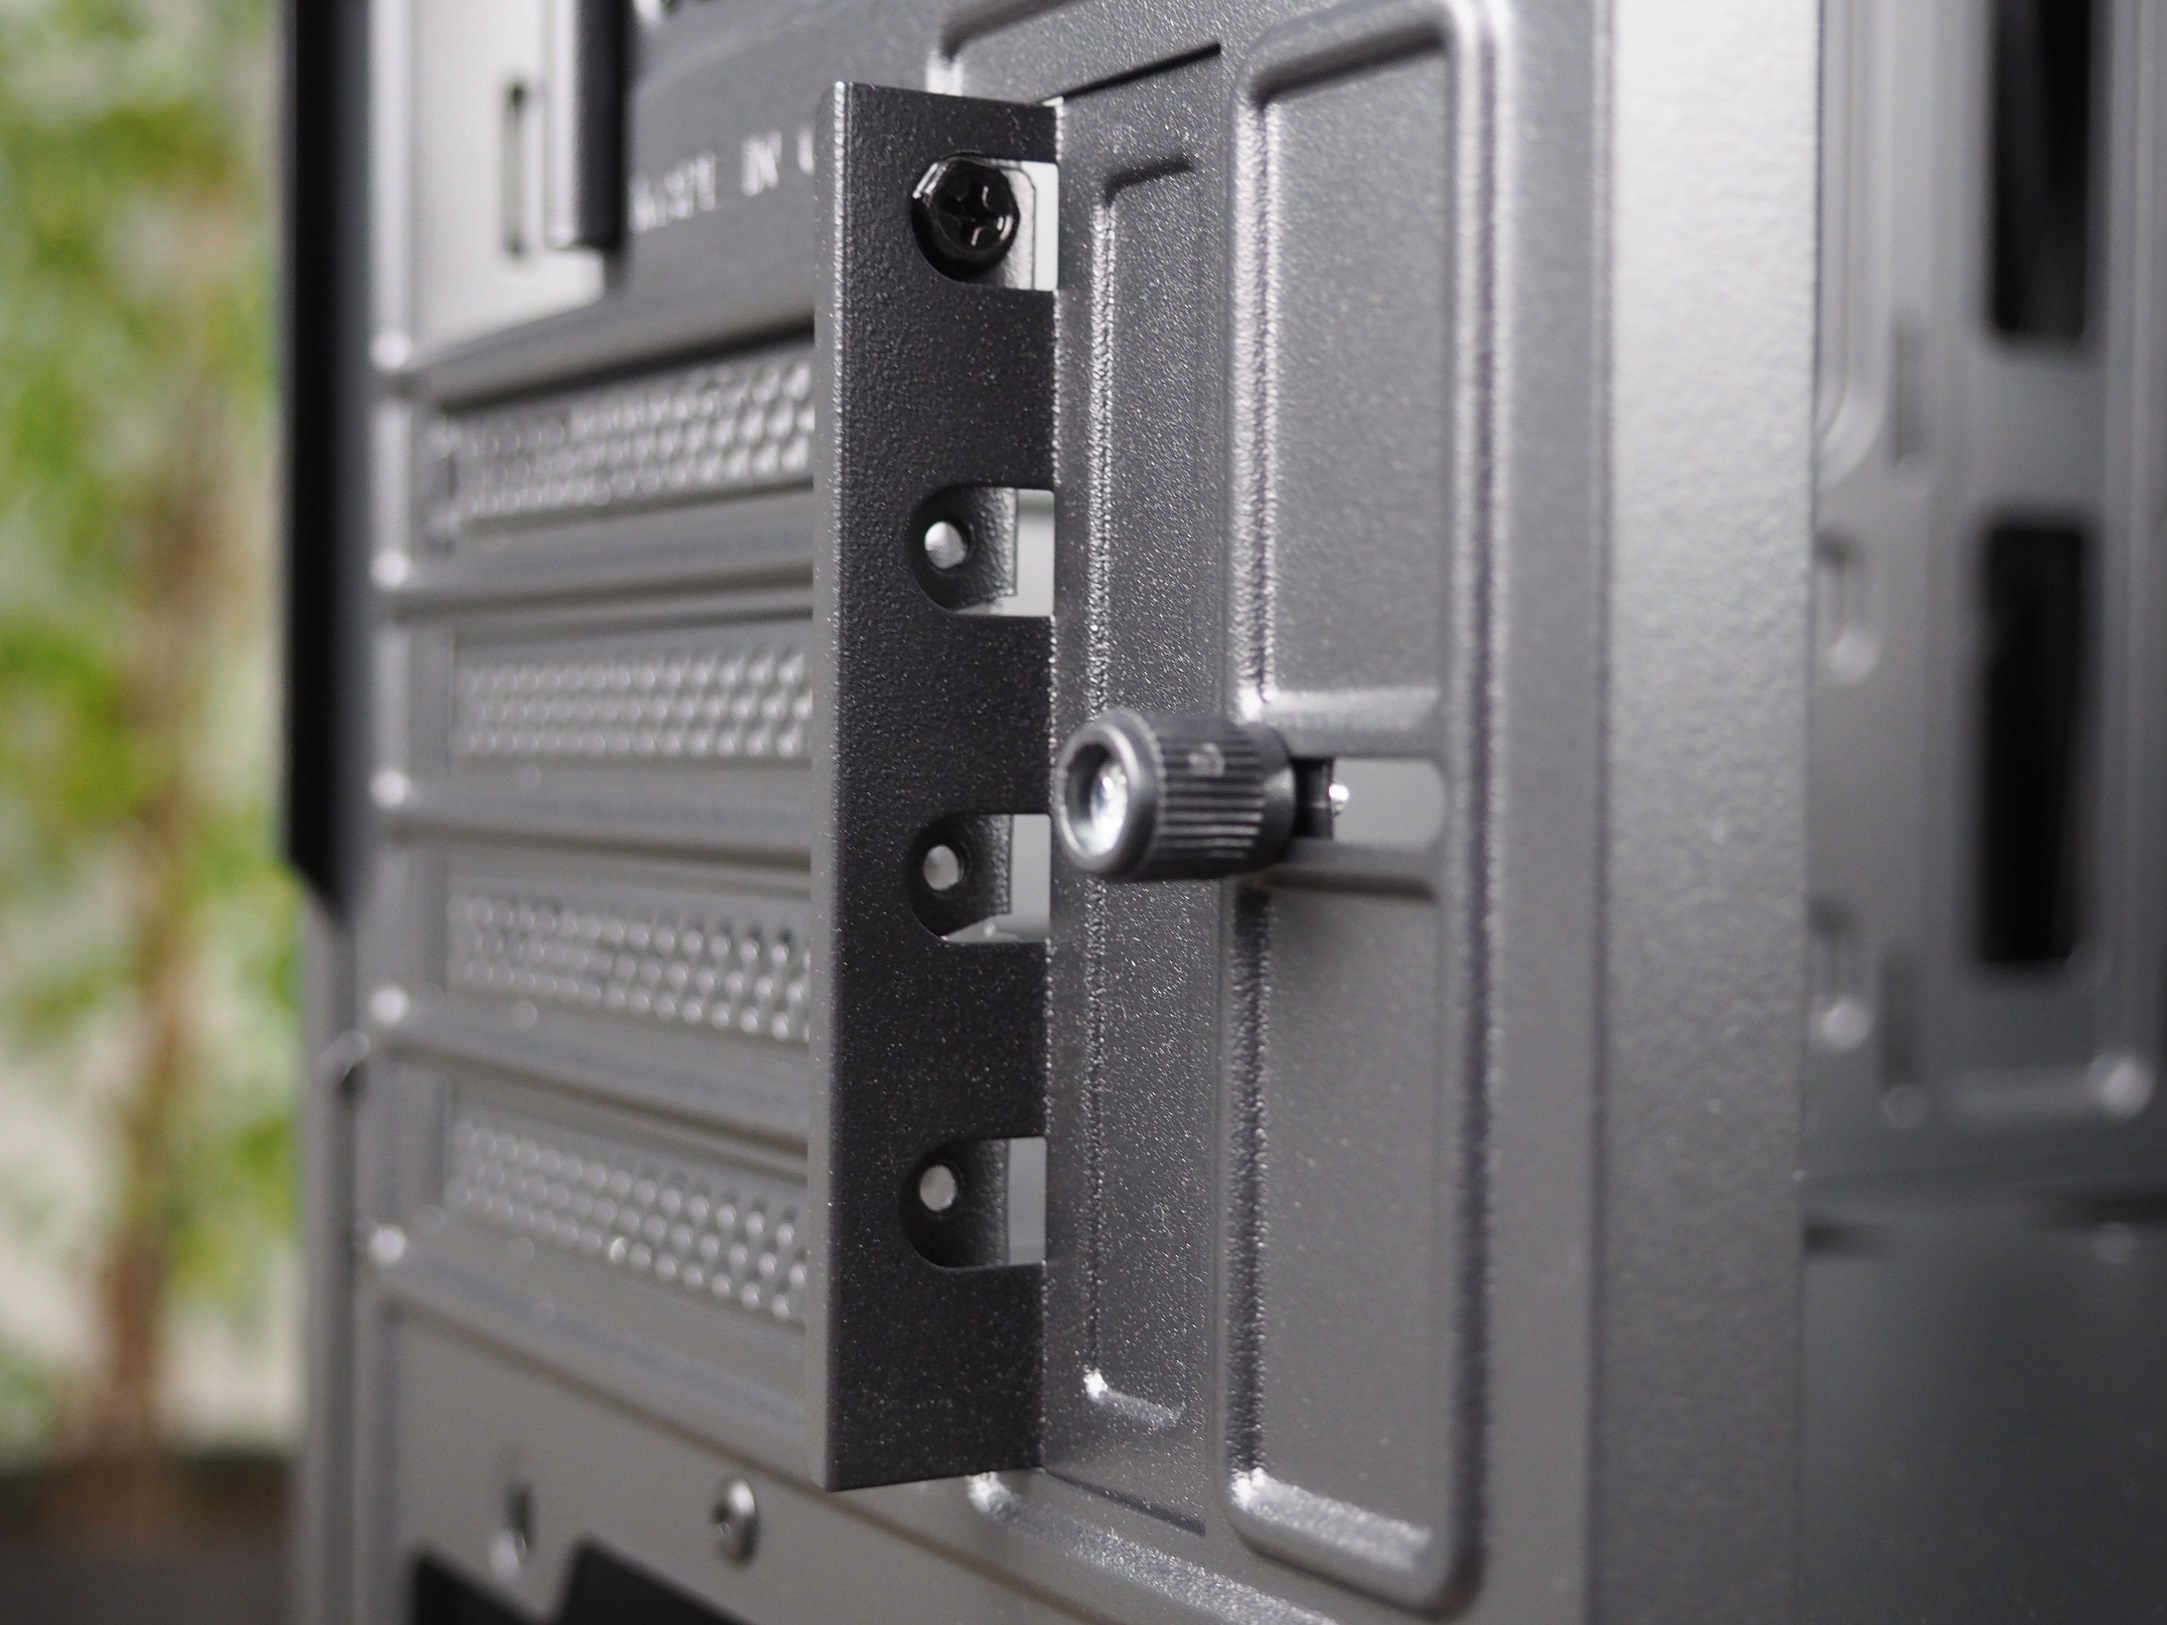
The four PCI Express expansion card slot caps immediately reveal that this is a case without support for ATX and larger motherboards. As a cost-saving measure, only one of the caps remains “recyclable”. The other three underneath are snap-off. For the expansion card retaining screw headers, a simple sliding cover was included for a more complete look from the back of the case as well. There are two more holes for the power supply and motherboard I/O panel. The dimensions of the exhaust are adapted only for a 120mm fan but offer more flexibility in the vertical direction, which is not the rule for small or larger cases.

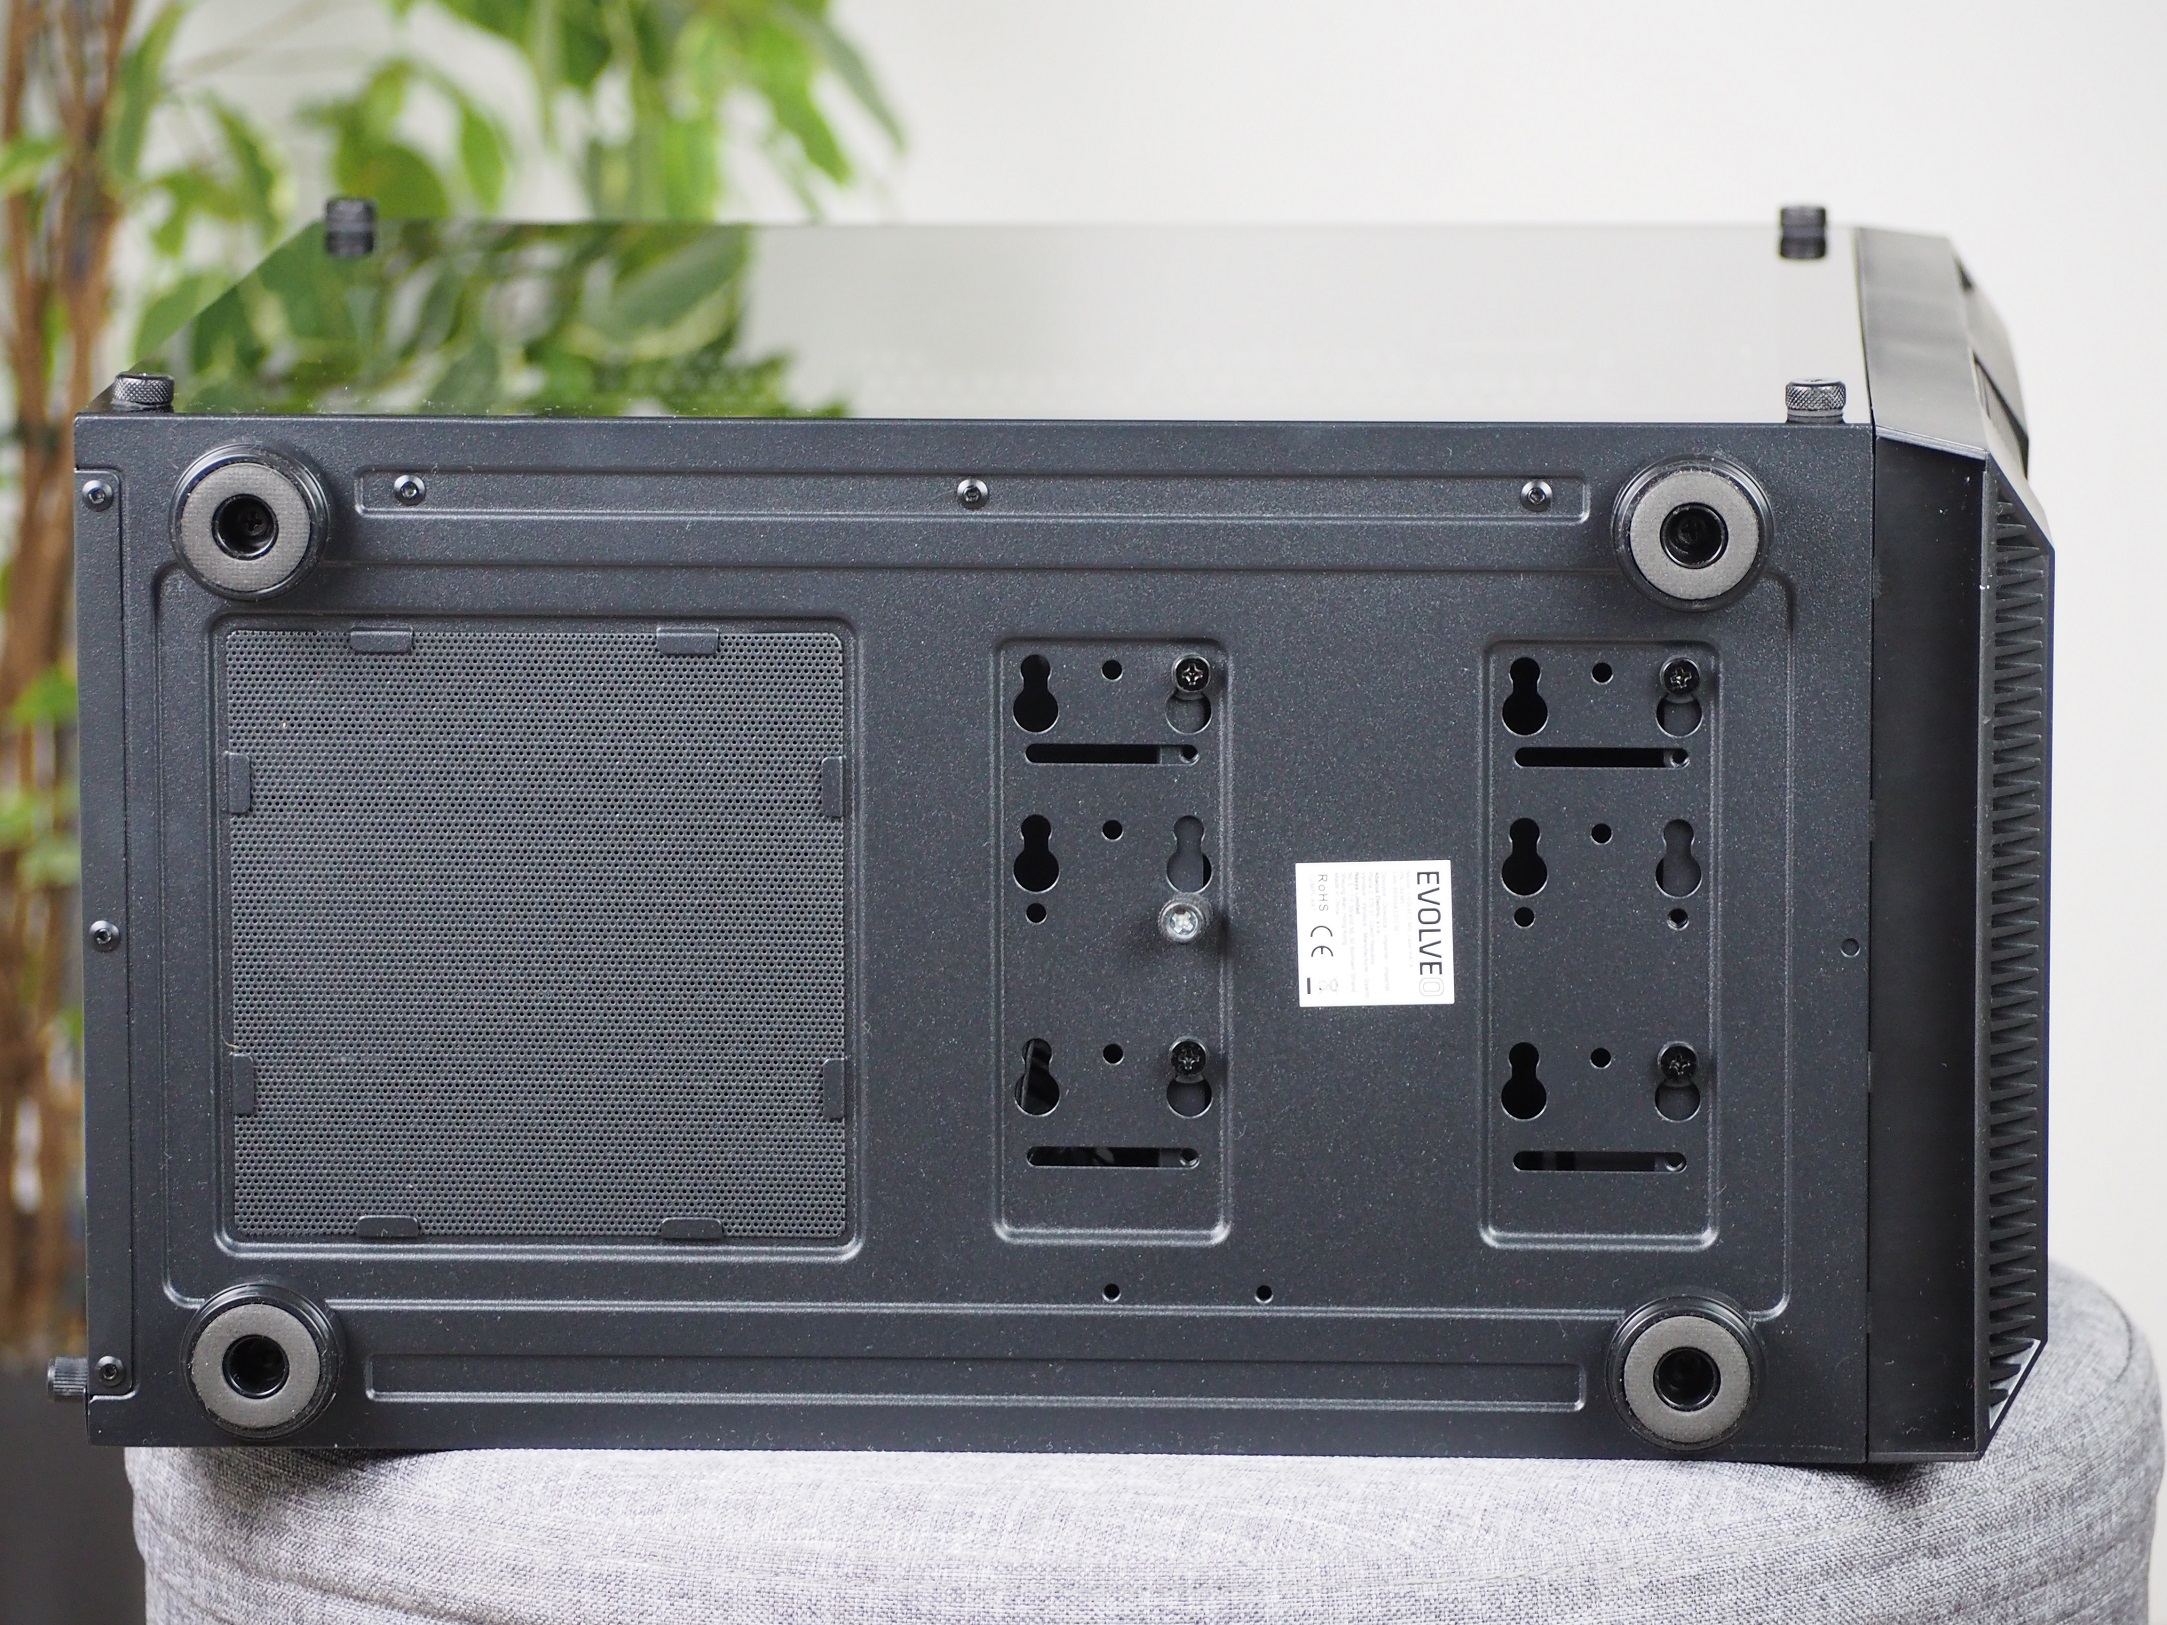
Four feet separate the structure from the ground at a height of 15 mm. Although they have a rubberized bottom, the resistance they create is not very high. A dust filter is placed underneath the position for the power supply. While this has smaller holes than the ones in the front and on top of the case, it is still not something that can keep dust out of your power supply like a nylon dust filter. Next to it are holes for various storage drawer locations.
Lower price usually goes hand in hand with lower quality materials or overall poorer build quality. This also applies to the tested Evolveo M5. With this case, you will come across a few places where the manufacturer has clearly skimped, but as long as you define yourself as a lower-end user, you’ll most likely be fine. The main advantage here may be the attractive price that probably won’t break the bank for you.
Interior
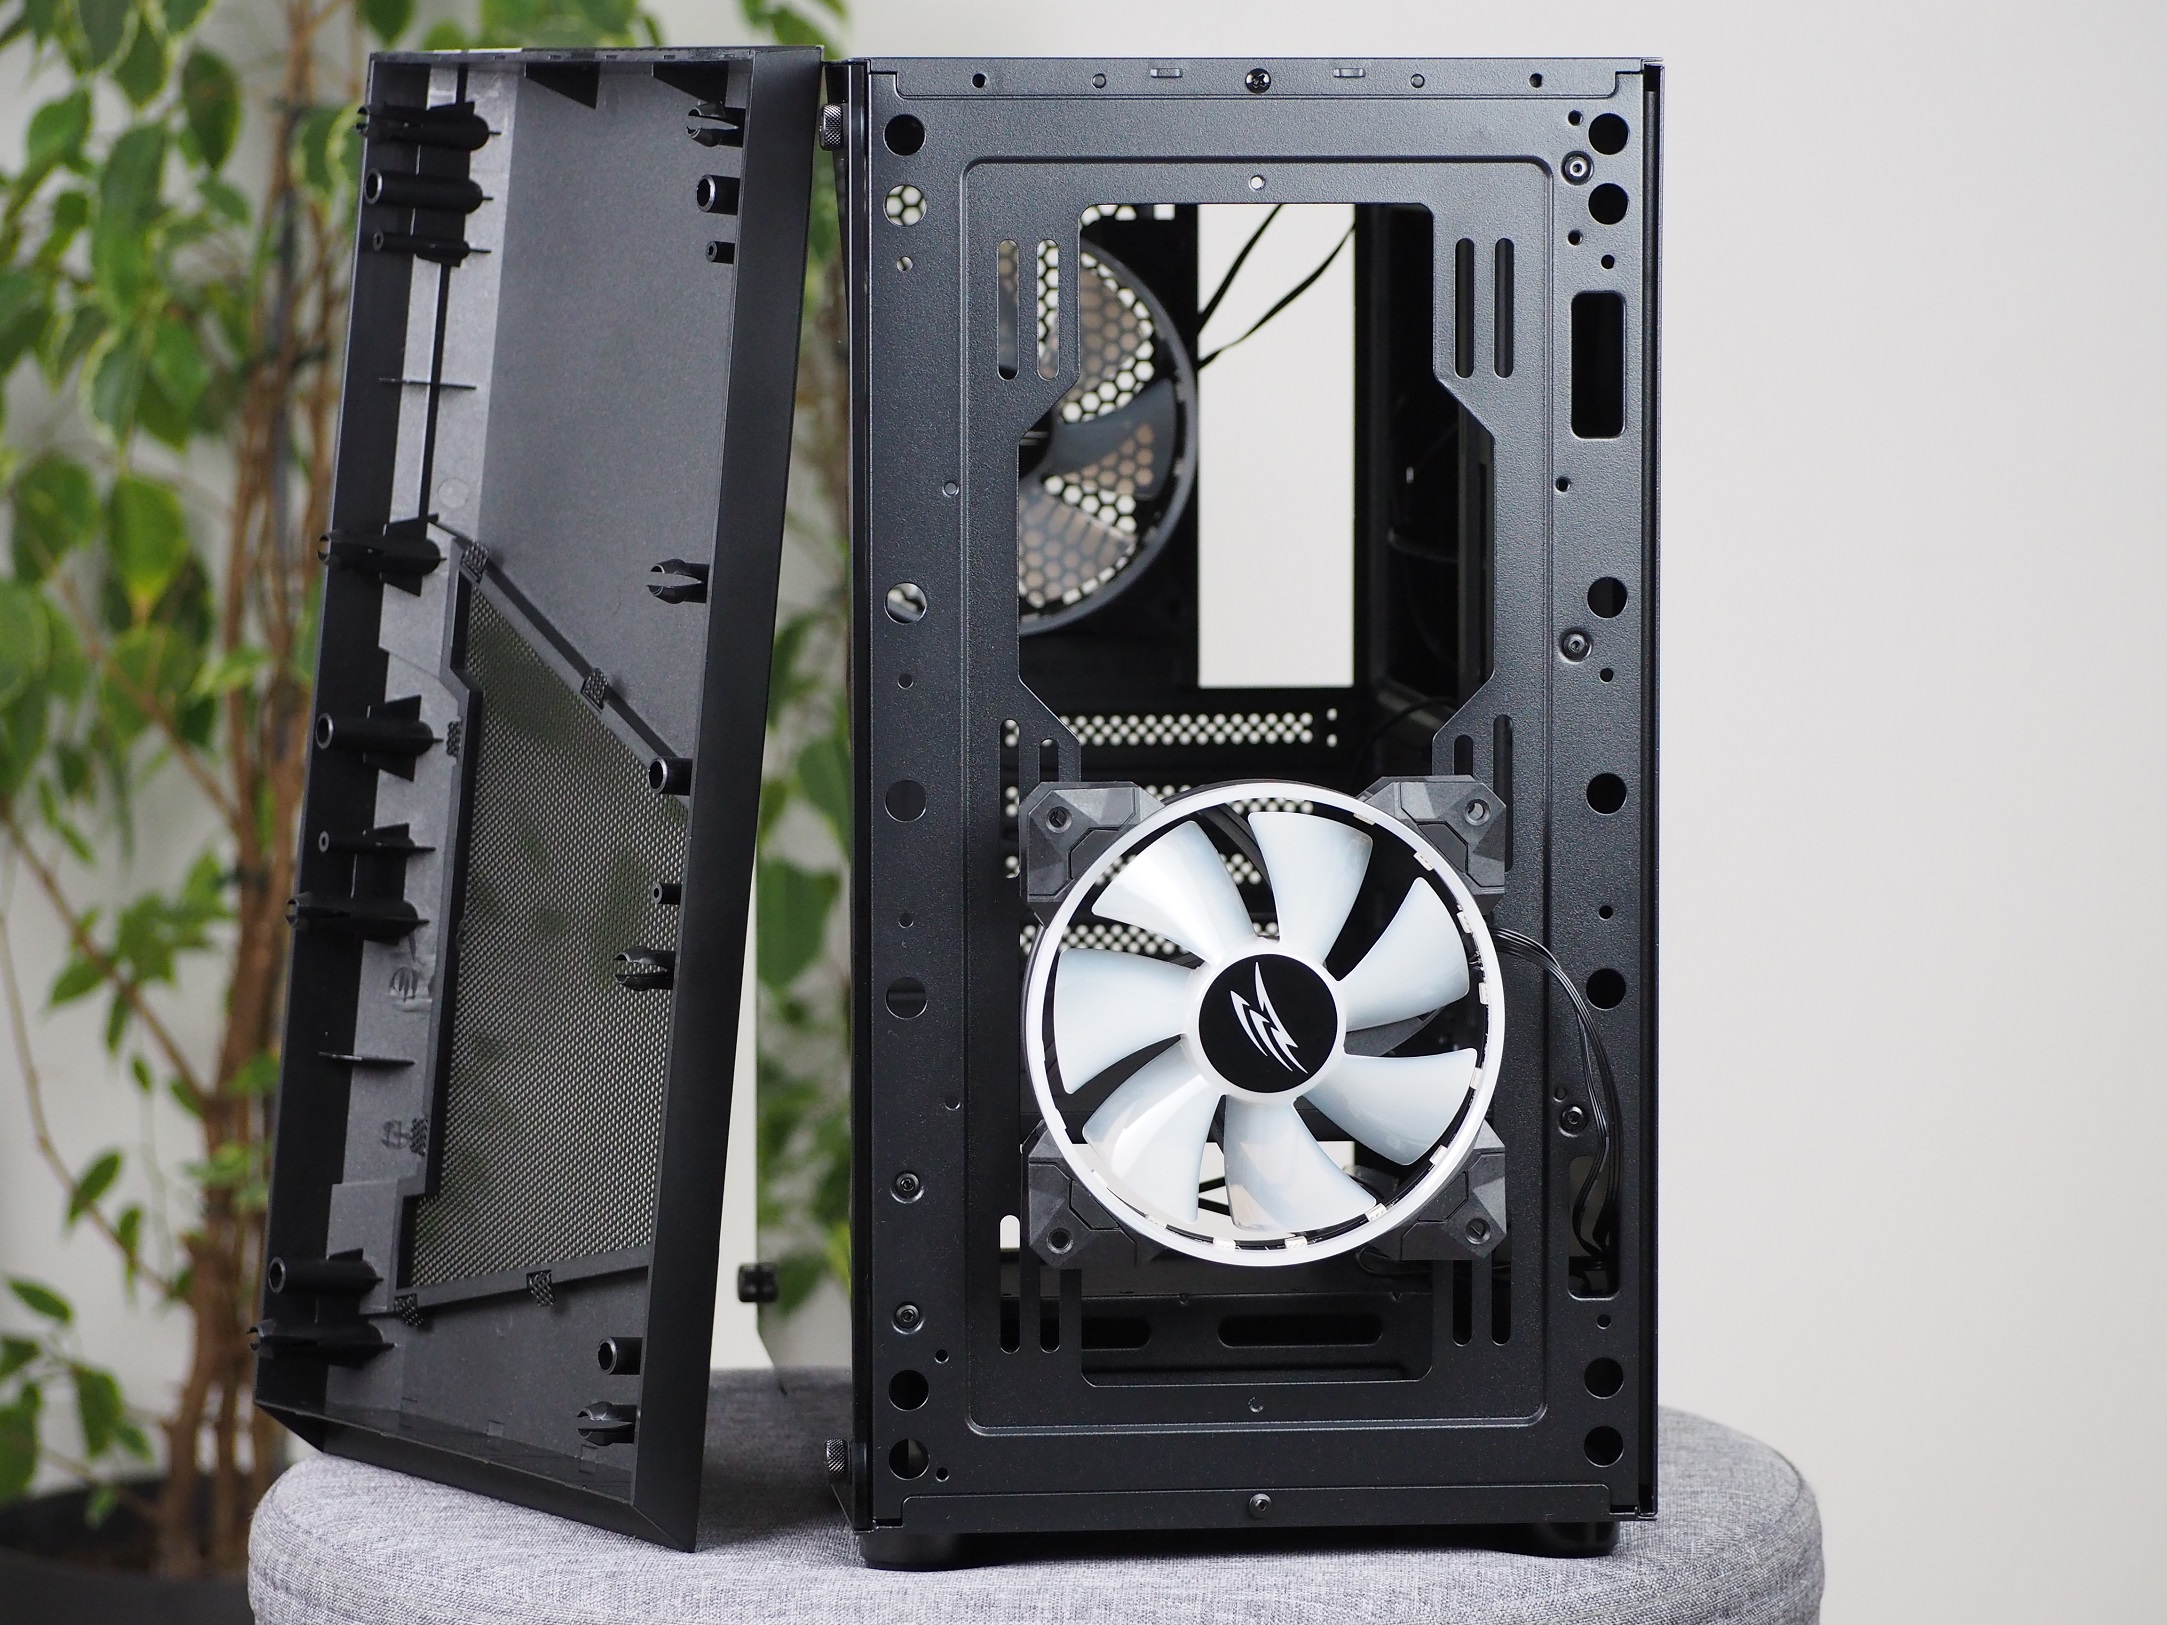
As the number of positions for PCI Express cards has already revealed, you can mount boards in ITX or M-ATX format inside, not larger ones. This is perhaps the only part where you are limited due to smaller dimensions. Of course, if you wanted to fit larger colossus tower CPU coolers like the NH-D15 or Dark Rock Pro 4, you’d run into the limits of the case. But you still have a free hand when choosing a cooler with a maximum size of up to 160 mm. For graphics cards, you also need to be careful not to exceed the 345mm limit. But this shouldn’t be difficult considering the case isn’t aimed for the most powerful and largest hardware of today.
Cost savings can be felt not only in dust filters but also in the absence of rubber caps for the cable grommets. But I’m not saying that this is a disadvantage. Sometimes when threading cables they are more of a detriment than a benefit when they don’t stay firmly in the holes. But the size of the grommets themselves is sufficient for all types of cables. On the tray they are 22 mm wide.
On the right there are two positions for two 2.5″ storage drives. These are placed less traditionally on this side of the case, not from the back of the tray.


The upper part of the tunnel is dotted with holes. Four are for cabling, even one by the side panel directly dedicated to additional power for the graphics card. This way, the cable doesn’t have to stretch across the entire inside of the case all the way to the card. Here the grommets are slightly narrower than the ones on the tray, their width is 17 mm. Between them there is one “bare” position for 2.5″ storage. More precisely, these are just its holes, through which you attach it. The storage itself is cleverly placed under the ceiling of the tunnel. The last of the holes near the front panel is 62mm wide and is for the potential placement of a liquid cooling radiator.


You may notice that the back of the tray doesn’t have a single Velcro pull-tab for cable management, which seems like a step in the wrong direction to me. Yes, we can argue that there are zip ties in the accessories. But then what about when the cables need to be re-organized again? Aside from that, the case offers 20mm of space in which to organize cables. Seven eyelet positions help you to do this, where you can definitely make use of those single-use zip ties.

To the left of the front panel, a power hub for up to four fans and also for the ARGB backlight is mounted on two screws. This entire unit is powered directly from the power supply via a SATA cable. However, it is very unfortunately designed, because when powering the fans it is not possible to control the speed of the fans through the motherboard. If you want to have them with regulation, you have to plug them directly into the connectors on the motherboard. But what you can regulate through it is the backlight. This, when plugged into the ARGB connector of the motherboard, can be synchronized and controlled using software directly from the motherboard manufacturer.

The metal tray and the right side panel are both 0,5 mm thick. These do bend as expected at this thickness, but they are not paper-like, so they should hold up.

The inside of the tunnel is partly customizable, thanks to a drawer for one 2.5″ and two 3.5″ storage drives. The drawer can be positioned (towards or away from the front panel) or even pulled out. With the drawer fitted, you get a maximum of 210 mm for the power supply and cables. Without it, the space increases to 340 mm. It’s creatively devised that even when the drawer is removed, you can still mount one 2.5″ storage on the ceiling of the tunnel. And in the end, it doesn’t interfere with anything either.


Cable management is not a strong point with this case. Without the use of single-use zip ties it was a misery. I used flexible wire to anchor the main branch of cables in the center, with which originally only the cables from the top I/O panel were held in place. The drive drawer was also slightly in the way, but I eventually managed to get it together and even closed the case with a side panel on the first try. The latter did bend a little to accommodate the cables, but you can’t see the bulge unless you focus on it. I would even say here that for longer cables, the flexibility of the side panel is a benefit.


Lower price usually goes hand in hand with lower quality materials or overall poorer build quality. This also applies to the tested Evolveo M5. With this case, you will come across a few places where the manufacturer has clearly skimped, but as long as you define yourself as a lower-end user, you’ll most likely be fine. The main advantage here may be the attractive price that probably won’t break the bank for you.
Test methodology
In the case we have two fans with the Evolveo 12R1R Rainbow designation, which can please certain audiences with a light show. But we are mainly interested in how the original fan placement will cope with cooling the used components. Would it be better to take the bottom fan on the intake and put it in the top position? Won’t the plastic covering the top position of the intake reduce effectiveness? In testing we will look at this option as well.
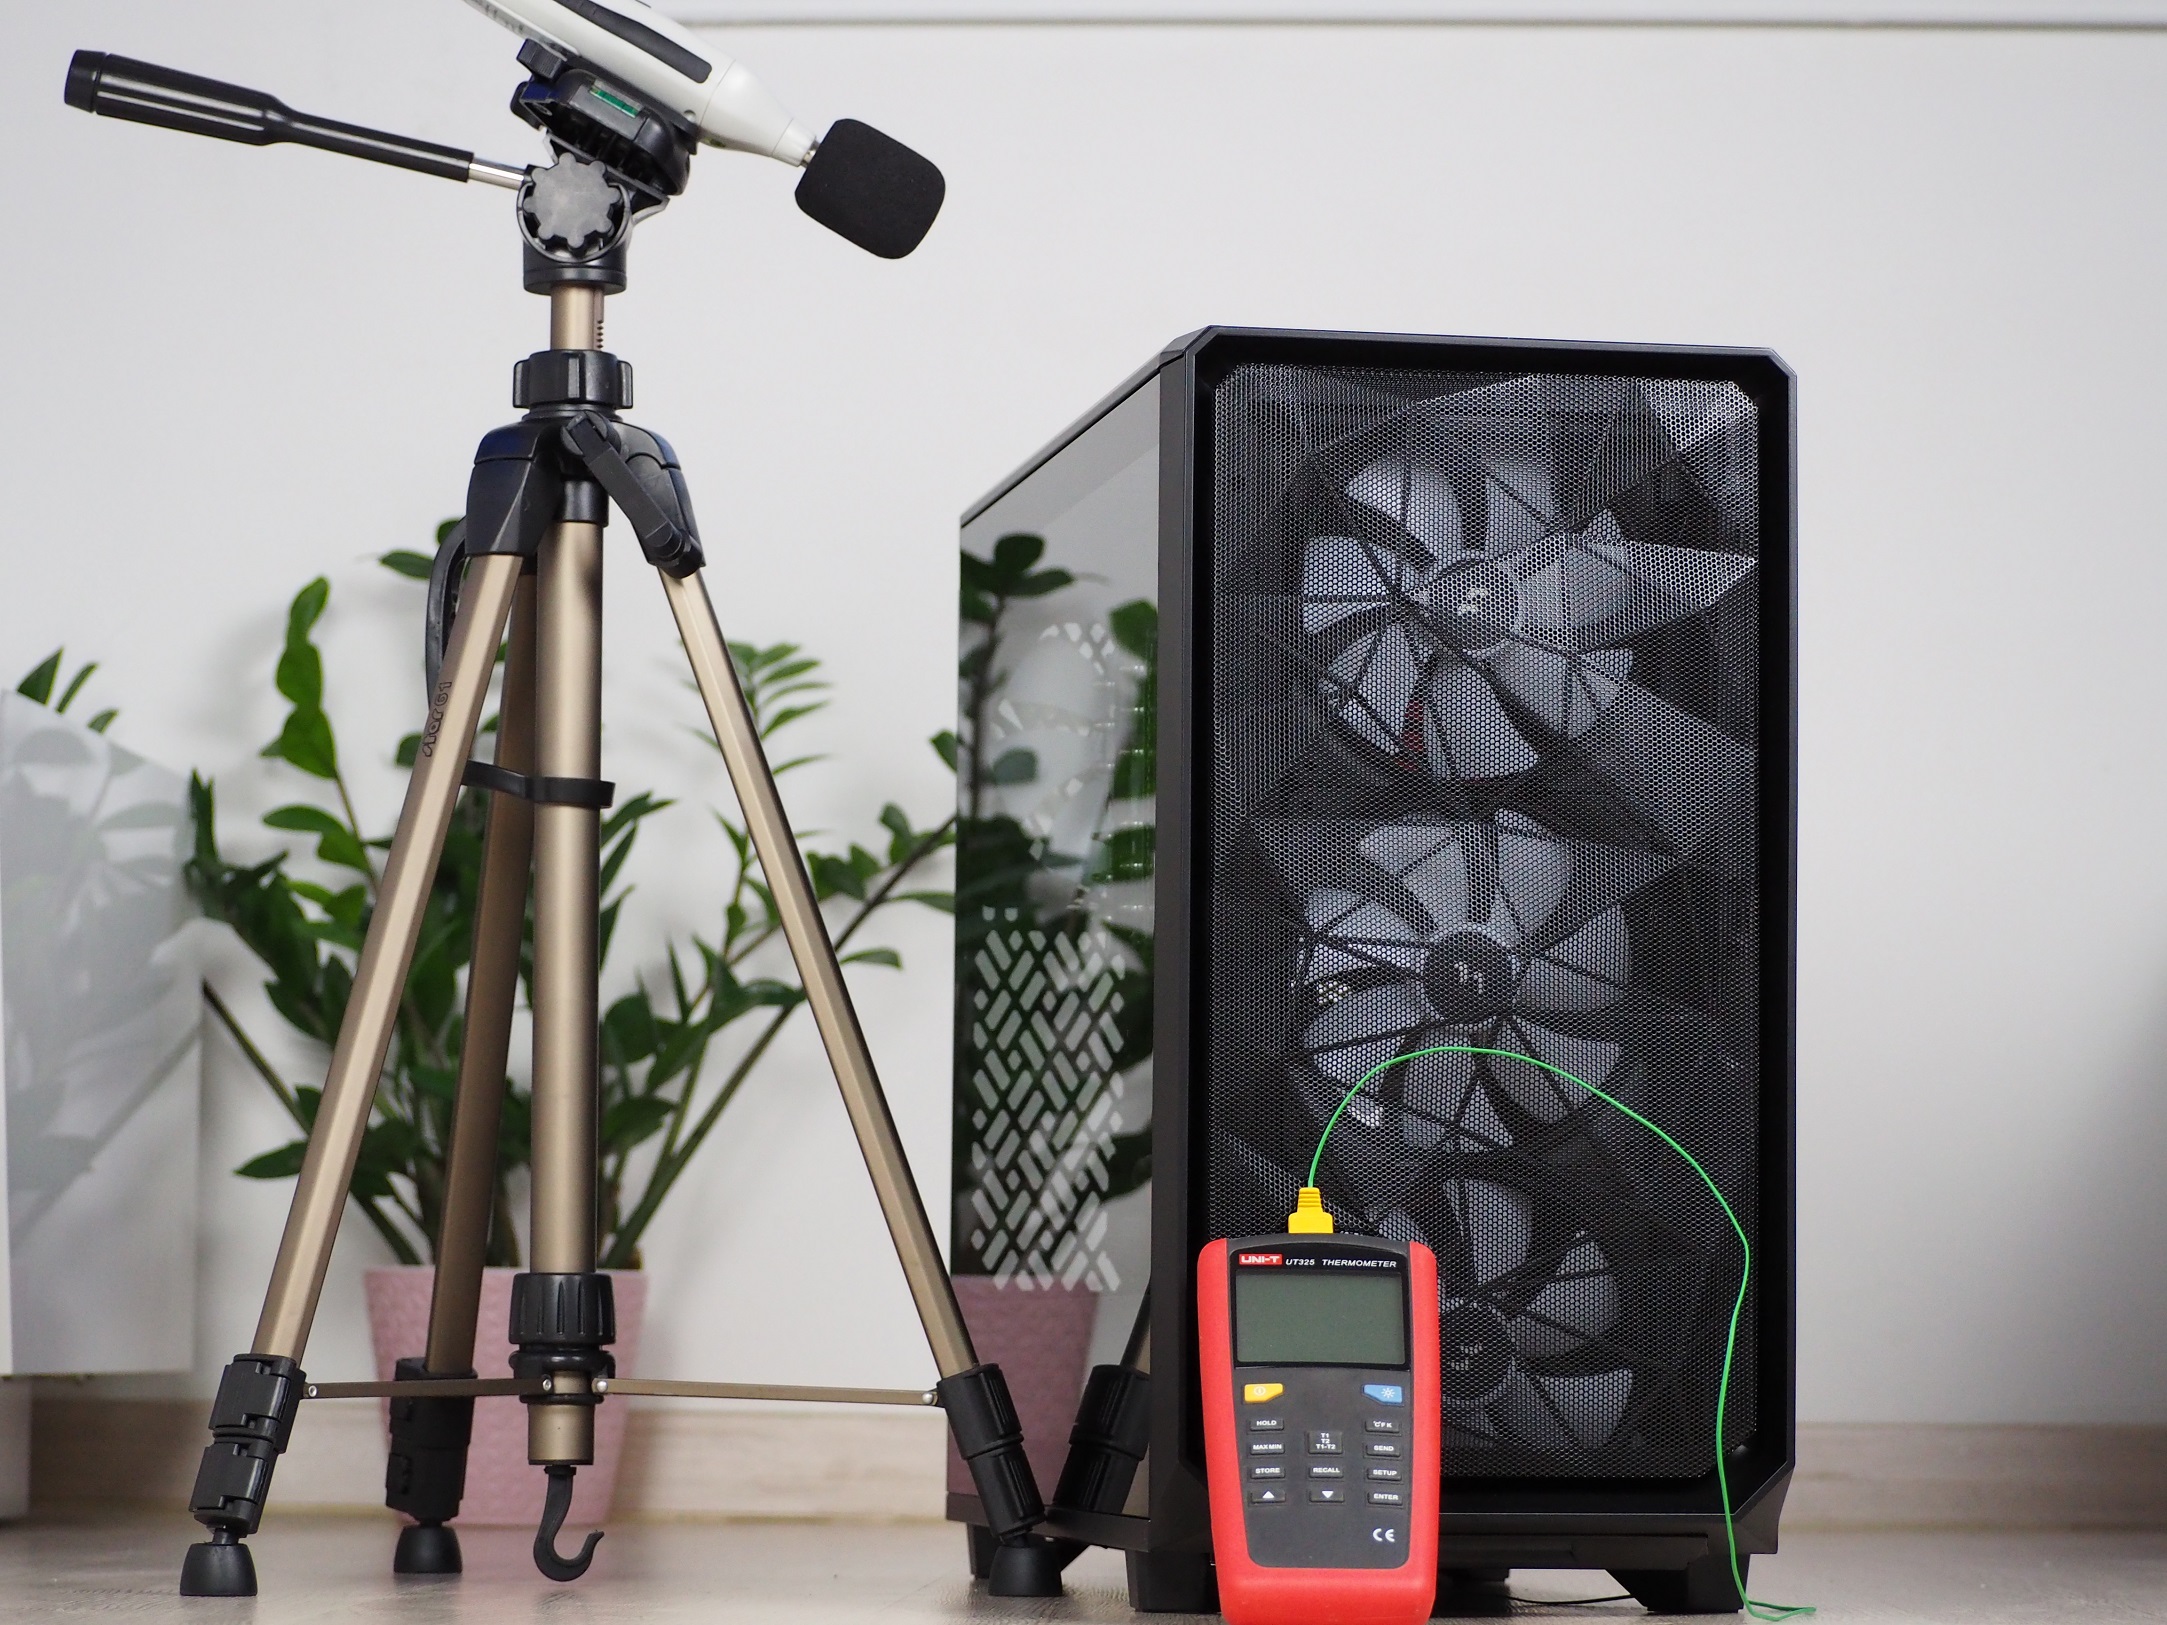
Testing is done in a home environment where I strive for the most accurate results possible. In the room during testing, the air temperature in front of the case is 23 degrees Celsius and the minimum noise level I can measure with the Voltcraft SL-100 noise meter is 32.4 dBA. The sensor of the noise meter is aligned to the center of the top of the case at a distance of 10 cm, for the best measurement of the speed difference of the fans, which I change using the motherboard. For easy comparison to other cases, they are always regulated to fixed noise levels.
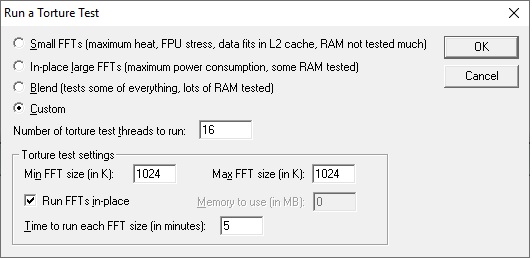
Individual components are heated for 10 minutes in FurMark synthetic stress tests and with Prime95 (custom settings) at the same time. This time is long enough to allow all components to warm up sufficiently. There are then 15-minute cooling breaks between tests, during which the component temperatures (and the case air temperature as well) are brought back to default.
Noise mode levels:
- 36 dBA
- 38 dBA
- 39 dBA
| Test setup | |
| Processor | AMD Ryzen 7 3700X |
| Motherboard | Asus ROG Strix X470-I Gaming |
| CPU cooler | Scythe Fuma rev. 2 (single fan) |
| Thermal compound | Noctua NT-H2 |
| Graphics card | Asus RTX 2060 Super Dual |
| RAM | Patriot, 2× 8GB, 3600 MHz/CL17 |
| SSD | Western Digital Blue 500GB (2280) |
| Power supply | Corsair RM750X |
Lower price usually goes hand in hand with lower quality materials or overall poorer build quality. This also applies to the tested Evolveo M5. With this case, you will come across a few places where the manufacturer has clearly skimped, but as long as you define yourself as a lower-end user, you’ll most likely be fine. The main advantage here may be the attractive price that probably won’t break the bank for you.
CPU and GPU cooling tests

Lower price usually goes hand in hand with lower quality materials or overall poorer build quality. This also applies to the tested Evolveo M5. With this case, you will come across a few places where the manufacturer has clearly skimped, but as long as you define yourself as a lower-end user, you’ll most likely be fine. The main advantage here may be the attractive price that probably won’t break the bank for you.
Motherboard cooling tests
Lower price usually goes hand in hand with lower quality materials or overall poorer build quality. This also applies to the tested Evolveo M5. With this case, you will come across a few places where the manufacturer has clearly skimped, but as long as you define yourself as a lower-end user, you’ll most likely be fine. The main advantage here may be the attractive price that probably won’t break the bank for you.
SSD cooling tests

Temperature of the air under the ceiling
Lower price usually goes hand in hand with lower quality materials or overall poorer build quality. This also applies to the tested Evolveo M5. With this case, you will come across a few places where the manufacturer has clearly skimped, but as long as you define yourself as a lower-end user, you’ll most likely be fine. The main advantage here may be the attractive price that probably won’t break the bank for you.
Conclusion
The case with the original fan placement lags far behind the others tested. The processor was the most affected, reaching a peak temperature of 71 °C at 39 dBA. With this value, the case took the last place, along with the Macube 310. However, when the fan is placed in the top position on the intake, the CPU temperatures are reduced by three degrees. On the other hand, the temperatures on the graphics card rise by two degrees. It’s up to you what you want to cool more effectively.
The design of the case is no great hit parade. The thinner sheets do bend, but they will hold what you load on them. The top plate is bent upwards along the edges at the front and back. I don’t know why or if this is just a defect on the test piece or a feature of the case. Also worth mentioning is the mounted power hub for the fans and their backlights. The one big drawback here is that you can only control the backlight and not even the speed of the fans themselves. You can only regulate these when you plug them directly into the motherboard.

I installed the test hardware into the case without difficulty. Cable management is subpar in the case, and you can only use the single-use zip ties you get in the accessories to modify it. You’ll have to leave the Velcro ones in your dreams.
For a price of around 50 EUR, you get a case that is both visually and dimensionally acceptable and that you can show off on your desk. What you probably won’t be boasting about is the cooling. It is weaker compared to most of the tested cases, but it can keep mid-range hardware running cool. Although with minor shortcomings, less demanding users will appreciate it, which is why it earns the “Approved” rating from us.
English translation and edit by Jozef Dudáš
| Evolveo M5 |
| + As much as three USB ports |
| + Pleasant appearance |
| + Fans with backlight |
| + Hub for both fans and ARGB backlight |
| + Up to 6 storage positions |
| - Thinner sheet metal |
| - Weaker cooling |
| - Hub does not regulate fan speed |