


Test procedures
We have added the third major manufacturer to our tests of X370 boards – MSI. The X370 Pro Carbon is about thirty euros cheaper than its opponents from Gigabyte and Asus, so it will be interesting to watch how these savings are reflected in overall quality and design. We don’t want to give away too much, but we can say that it is definitely worth checking.
Basic parameters
| Parameters | MSI X370 Gaming Pro | |
| Socket | AMD AM4 | |
| Chipset | AMD X370 | |
| Format | ATX (305 × 244 mm) | |
| Power supply cascade | 10 phases | |
| Maximum officially supported memory clock | 3200 MHz | |
| PCIe ×16 + PCIe ×1 Slots | 3× (×16 | ×8 | ×4) + 3× | |
| From the center of the socket to the first PCI × 16 | 94 mm | |
| From the center of the socket to the first DIMM slot | 52 mm | |
| Disk connectors | 6× SATA 6Gb, 1× M.2 (42 – 80 mm) | |
| 4-pin connectors | 6× | |
| Internal USB ports | 4× USB 3.1 gen 1, 4× USB 2.0 | |
| Other internal connectors | 1× TMP, 1× RGB LED, 1× jumper Clear CMOS | |
| POST display | no | |
| Buttons | none | |
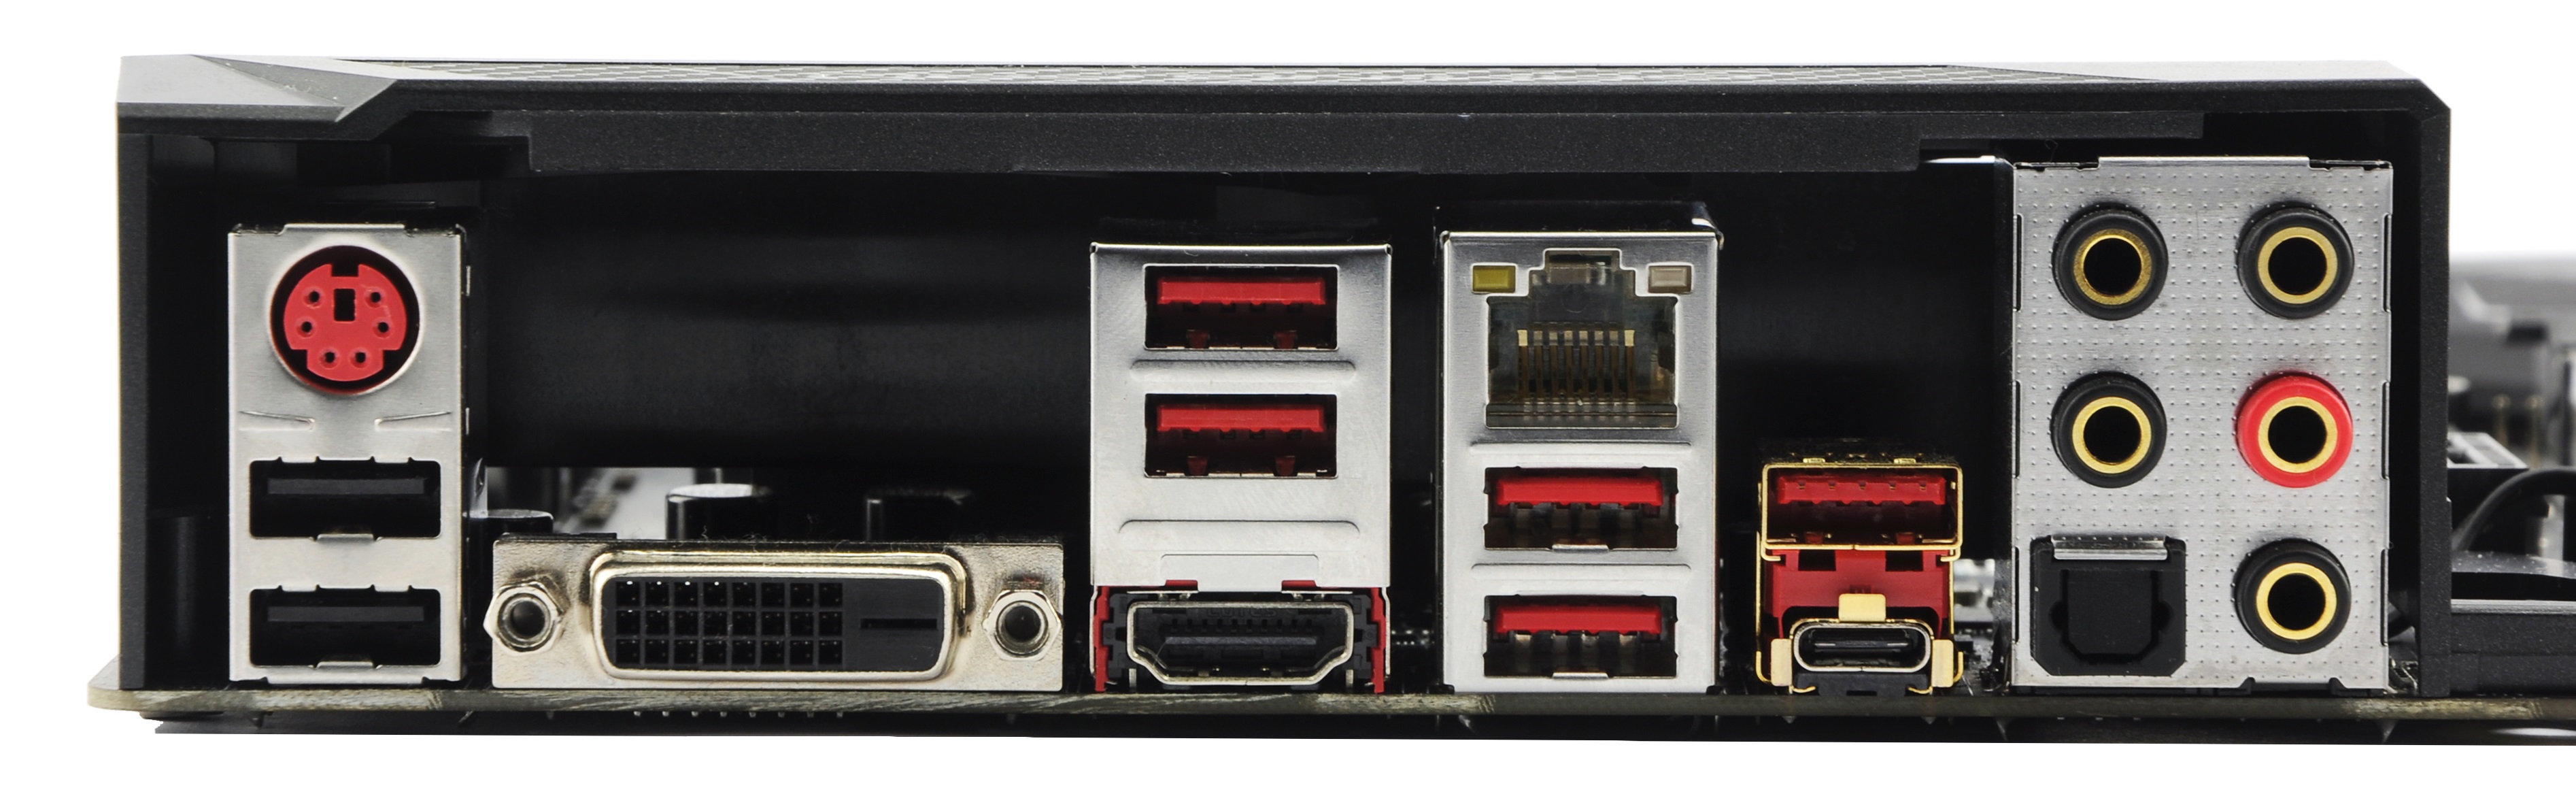
| External USB ports | 2× USB 2.0, 4× USB 3.1 gen 1 type A, 1× USB 3.1 gen 2 type A, 1× USB 3.1 gen 2 type C | |
| Video outputs | 1× HDMI, 1× DVI-D (Dual Link) | |
| Network | 1× RJ-45 (GbE) – Realtek 8111H | |
| Sound | Realtek ALC892 Codec (7.1) | |
| Other external connectors | – | |
| Approximate price | 150 eur |
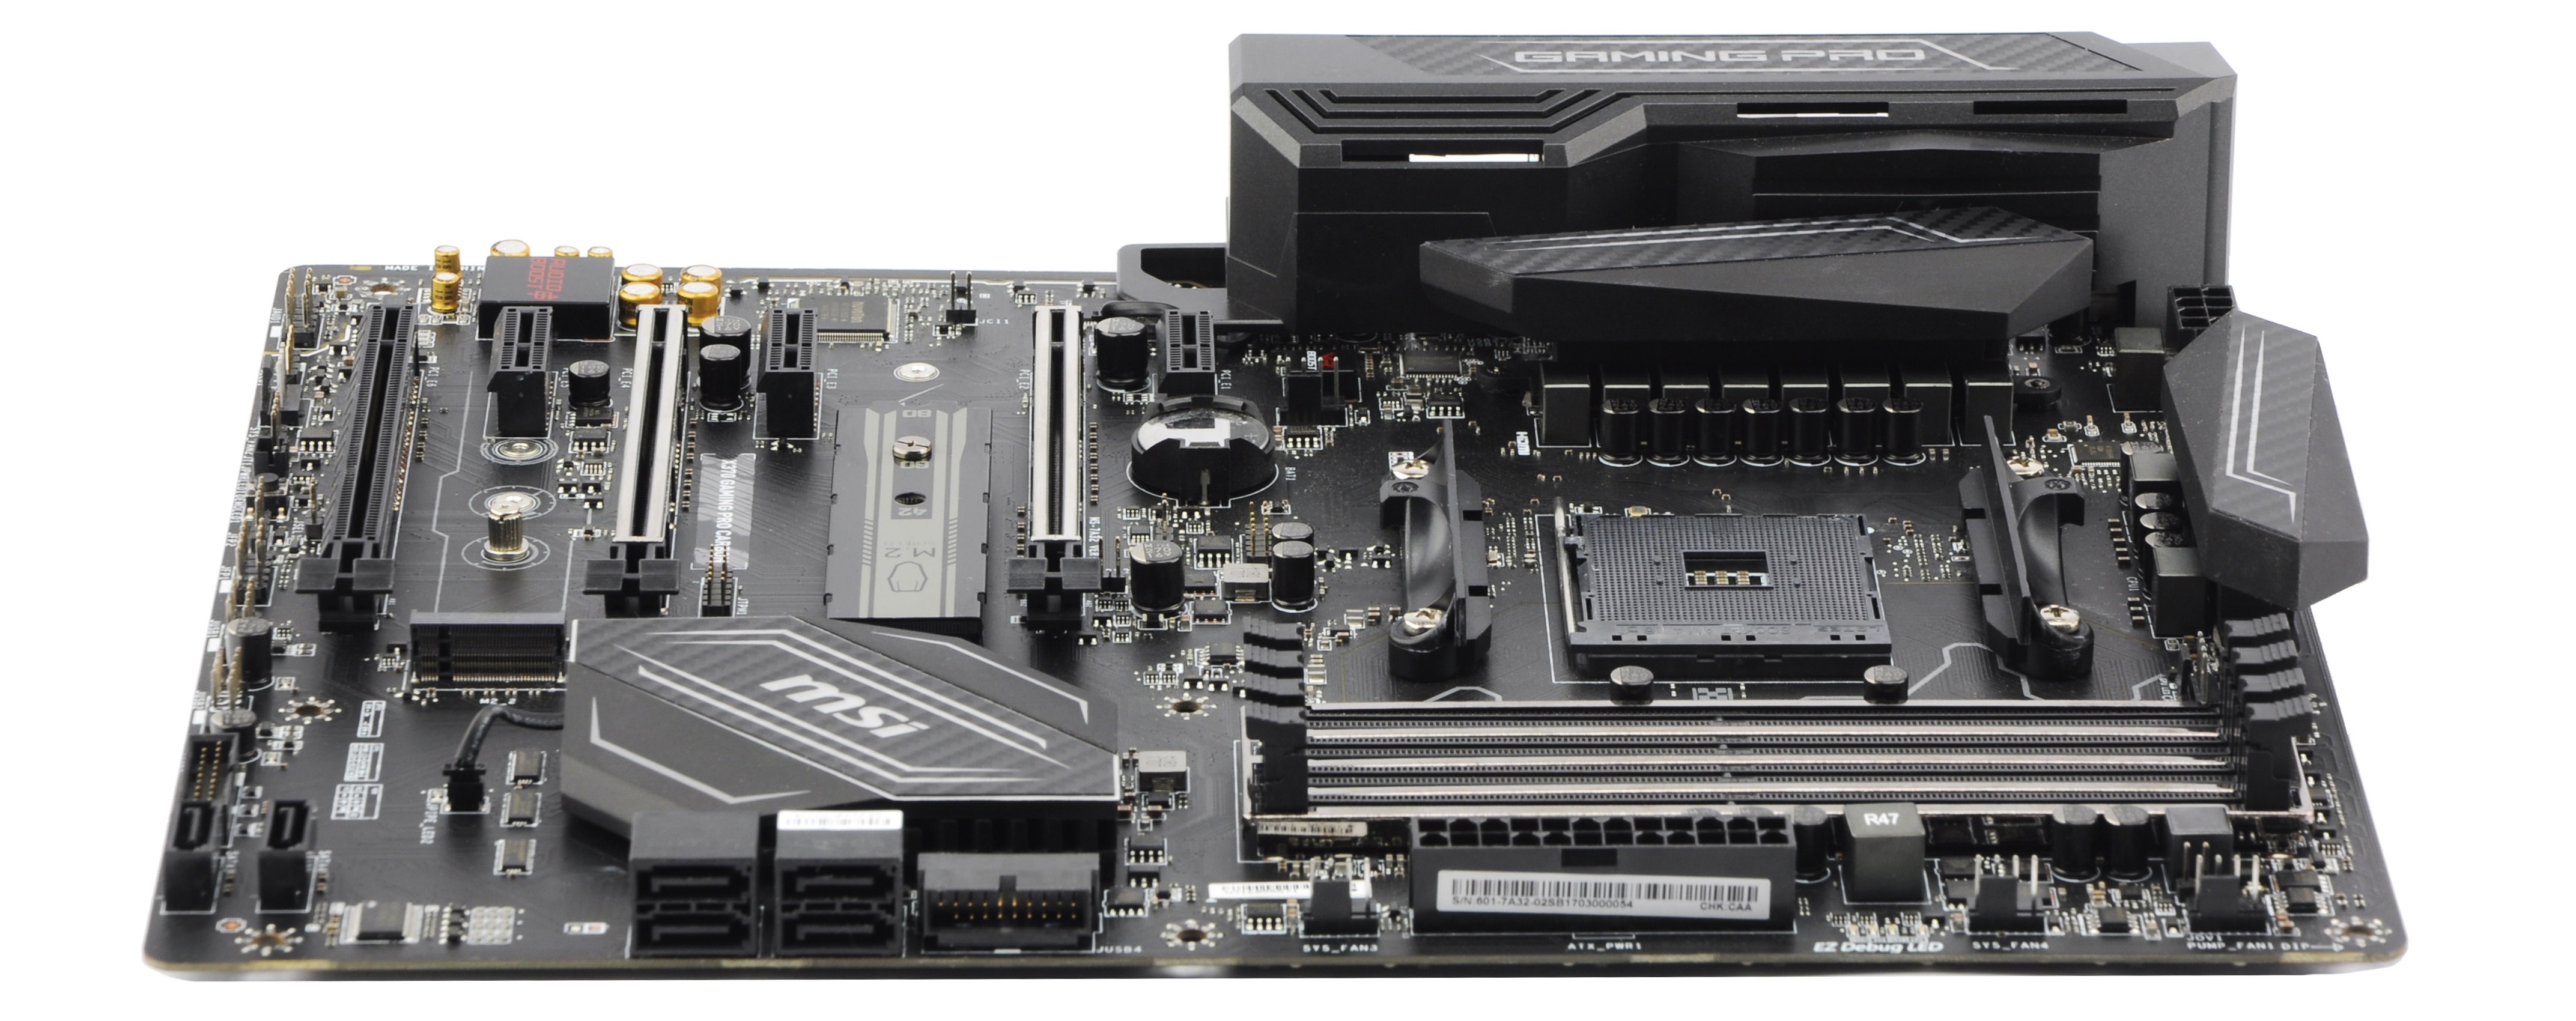
Details
Basic Pro Carbon (there is also a variation with Wi-Fi) is the golden mean among MSI AMD X370 boards. The price and equipment are therefore well balanced. A casual user of 1800X (for example) won‘t miss anything, and also won’t pay extra for any special features.
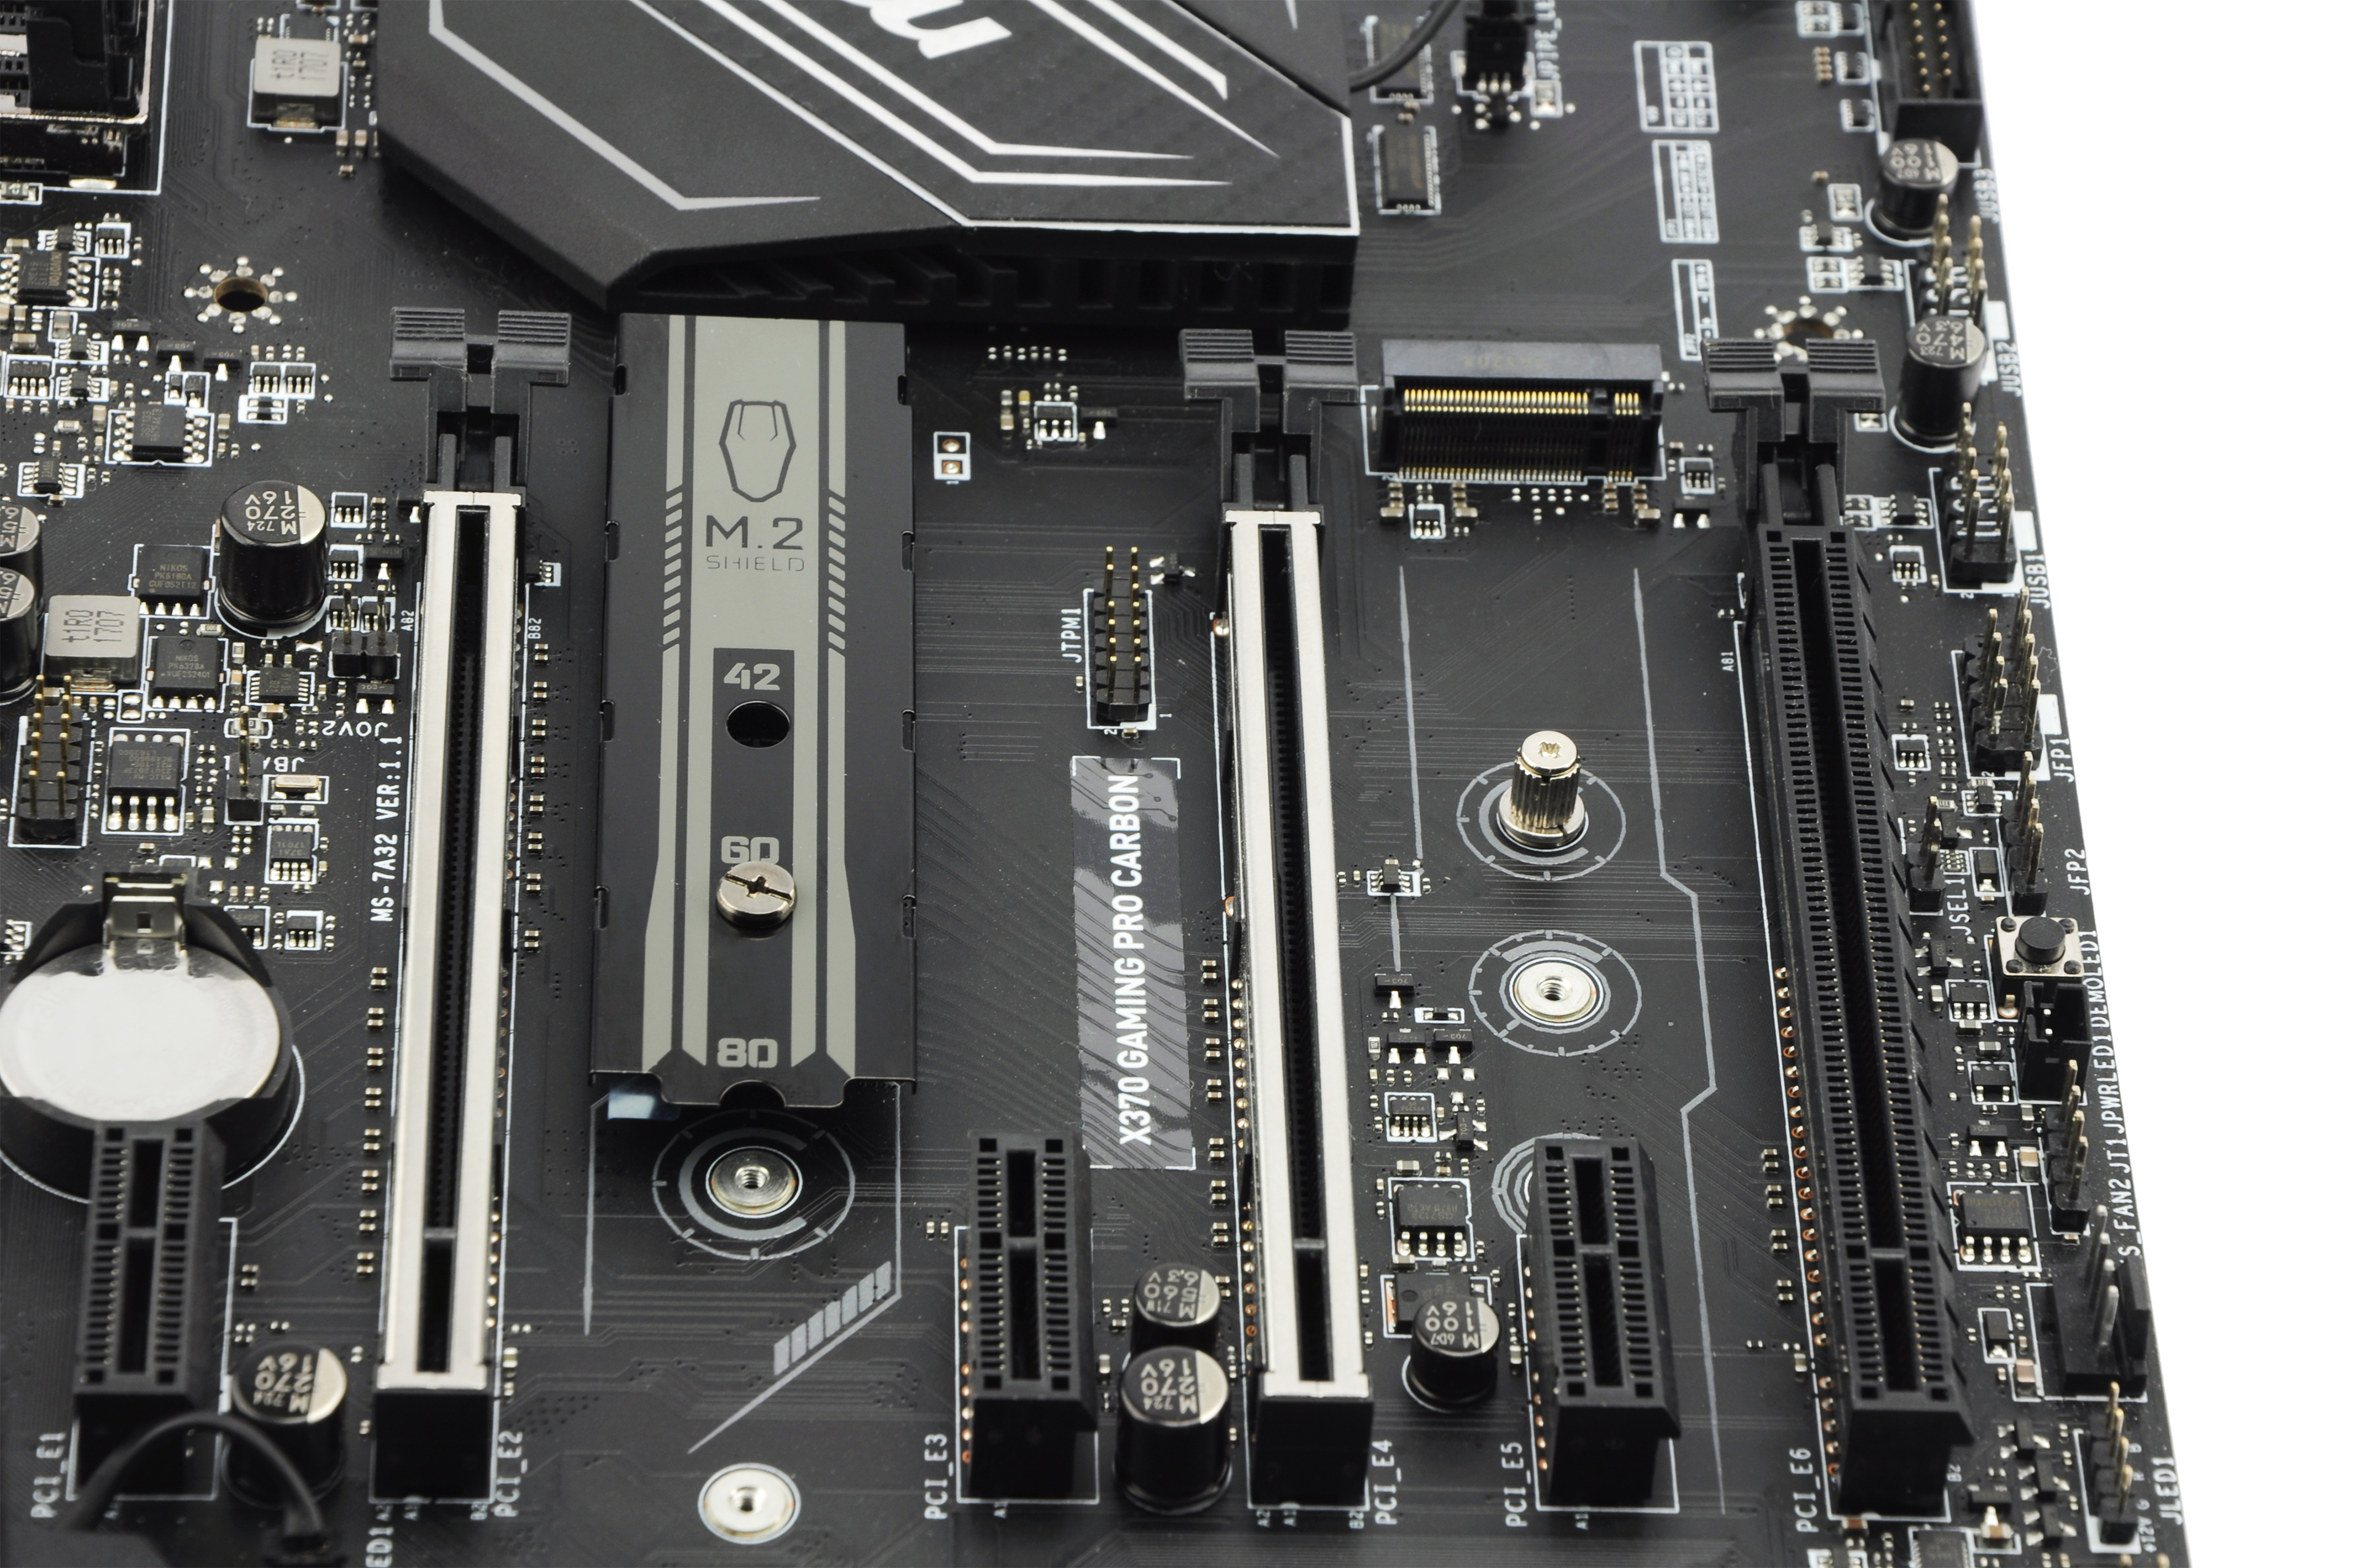
The selection and layout of the components is quite standard. There are three PCIe ×16 slots (and three more PCIe ×1 slots). The first two work in ×16/×0 and ×8/×8 configurations. The third (×4) is generation 2.0, so it is suitable for some SSD (NVM included). There is also a M.2 connector with shared bandwidth above it. That means that you don’t have to use an adapter for the second SSD. Most boards for AMD processor have only one M.2 slot.
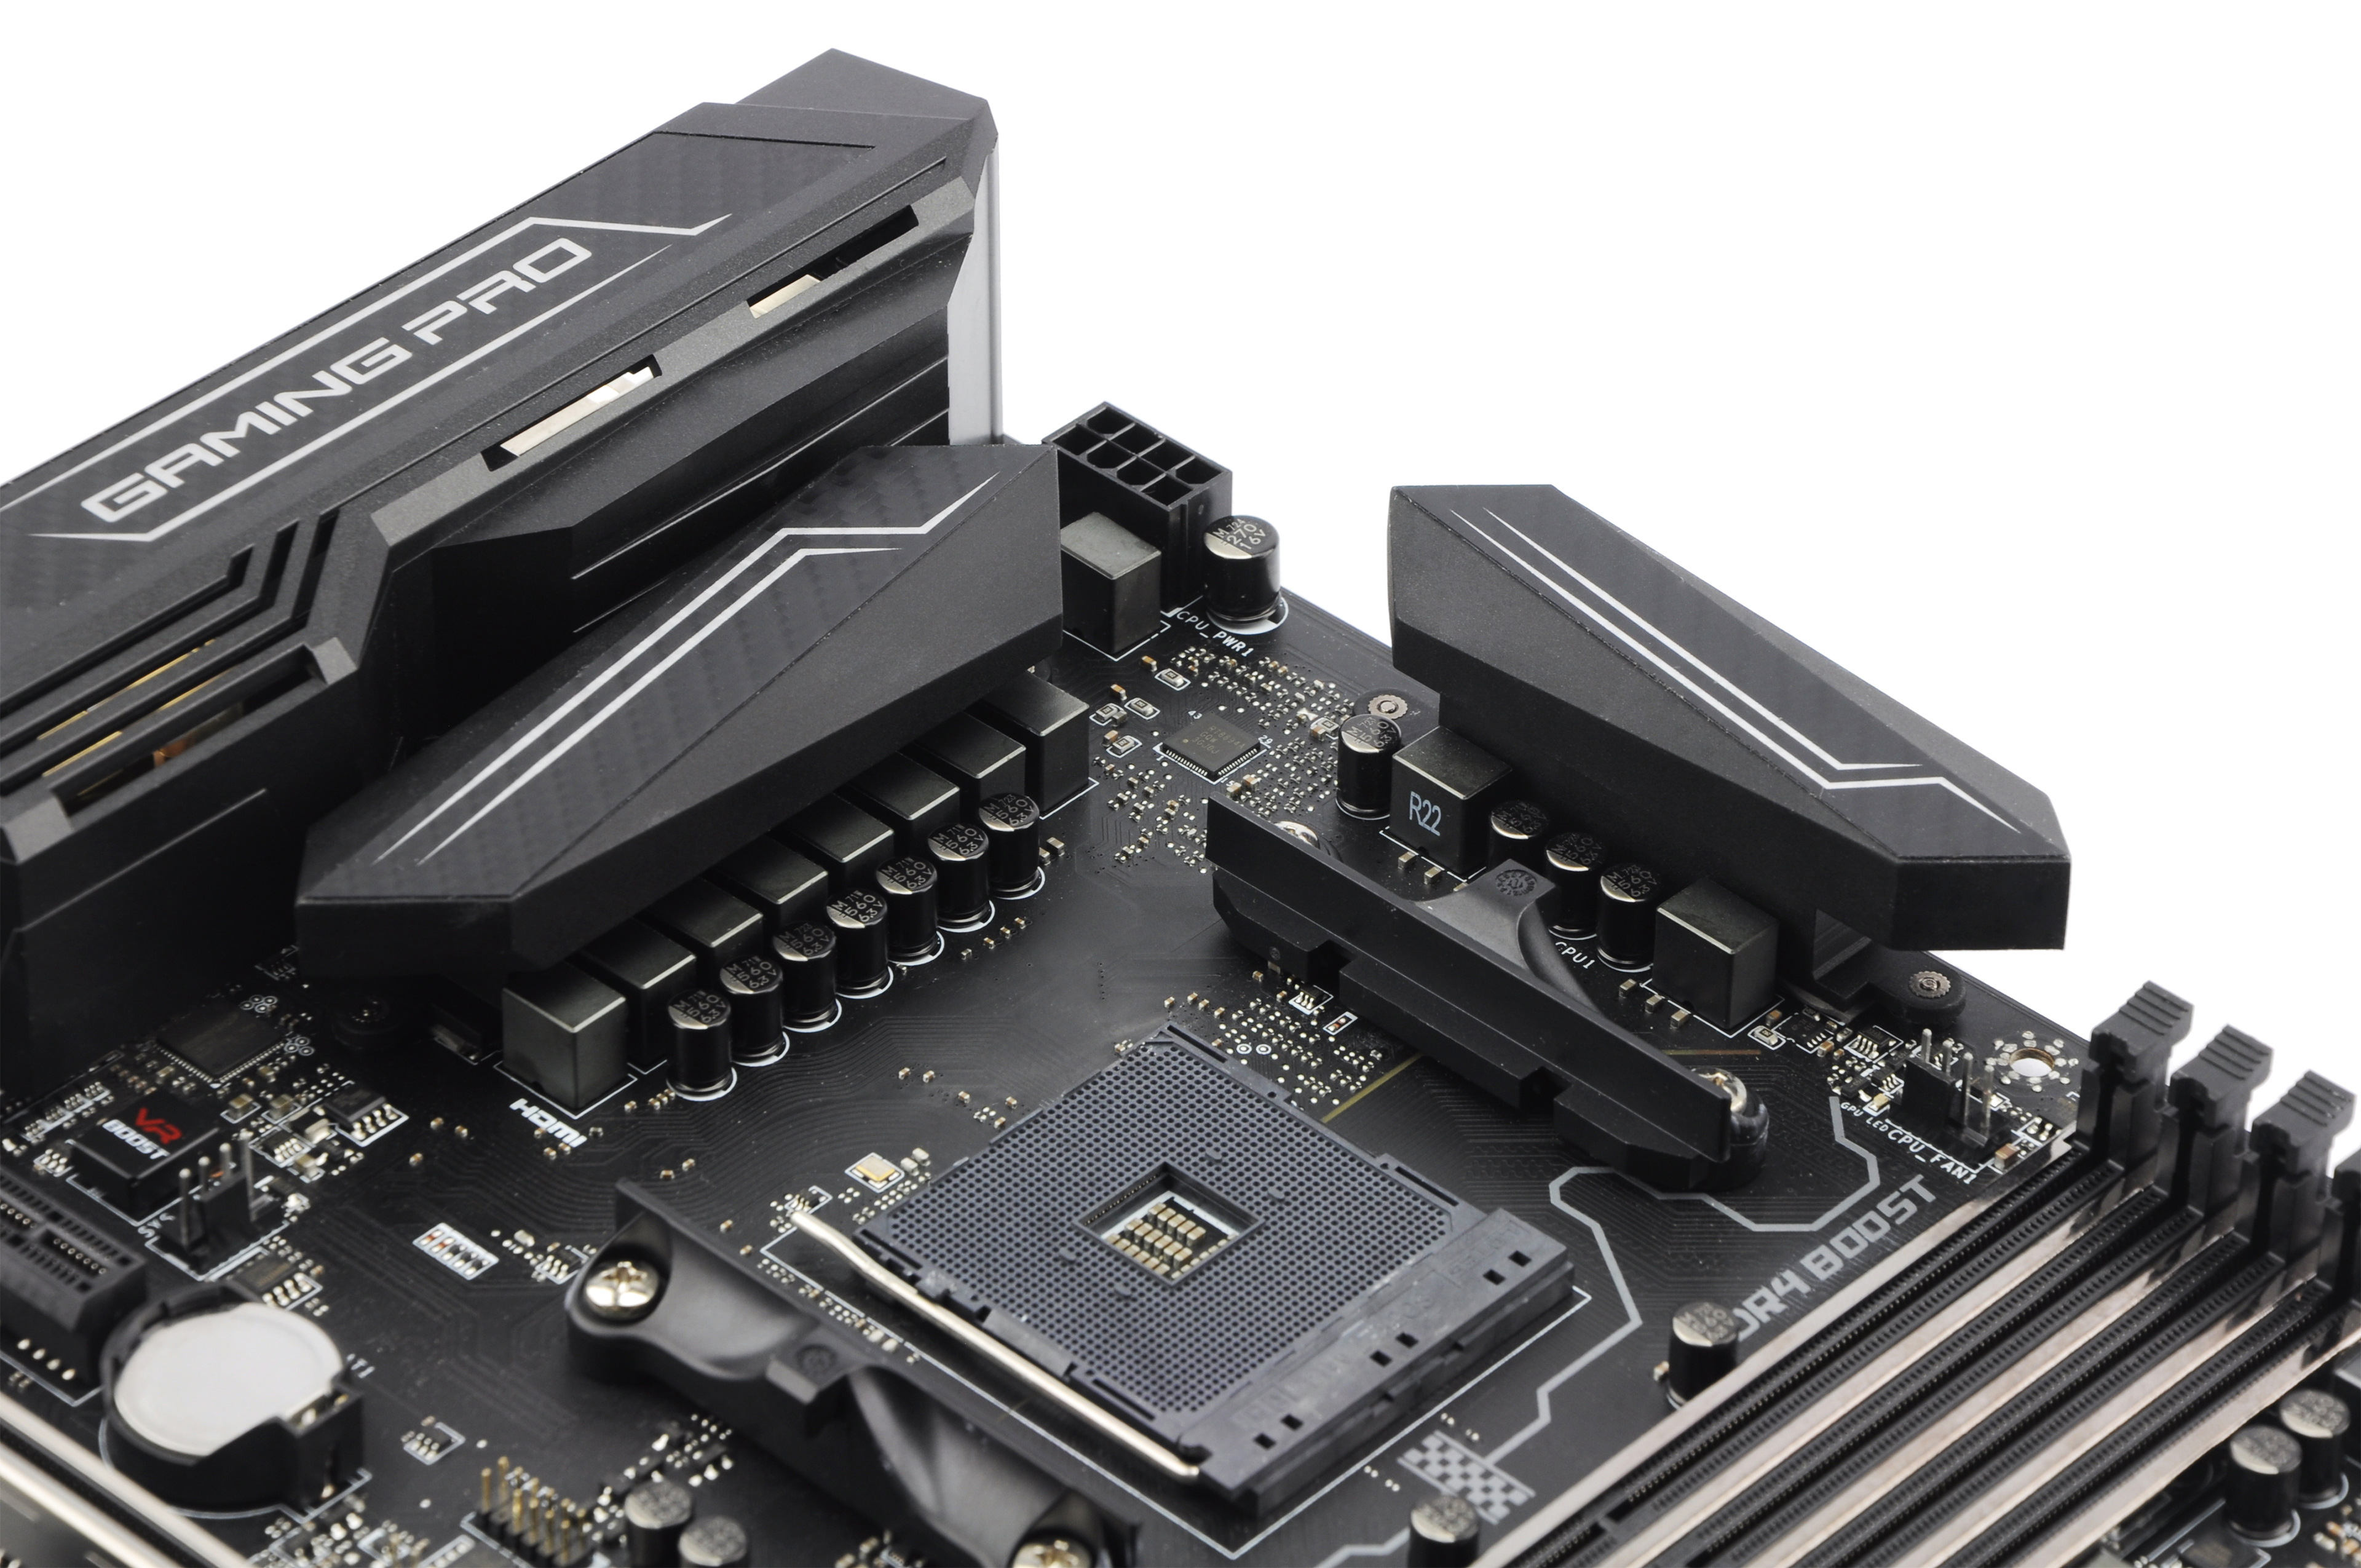
When it comes to some possible collisions of a CPU cooler with RAM and graphics cards, the design is pretty decent. The first DIMM slot is traditionally 52 mm away from the center of the socket, and the first PCI Express ×16 slot is 94 mm away. So, even the largest coolers can be used without problems.
There are six connectors for fans – four for system fans, one pump_fan (with an aggressive preset for PWM), and one CPU_fan. We would appreciate one extra for CPU. Coolers with high performance and one fan only (usually liquid coolers) already have a relatively high consumption for just one connector.

The external connectors are missing DisplayPort. Instead we got DVI-D (Dual Link). The manufacturer apparently considered compatibility with older monitors. However, HDMI is included as well as USB type C gen 2. There are eight external USB ports (and eight internal).
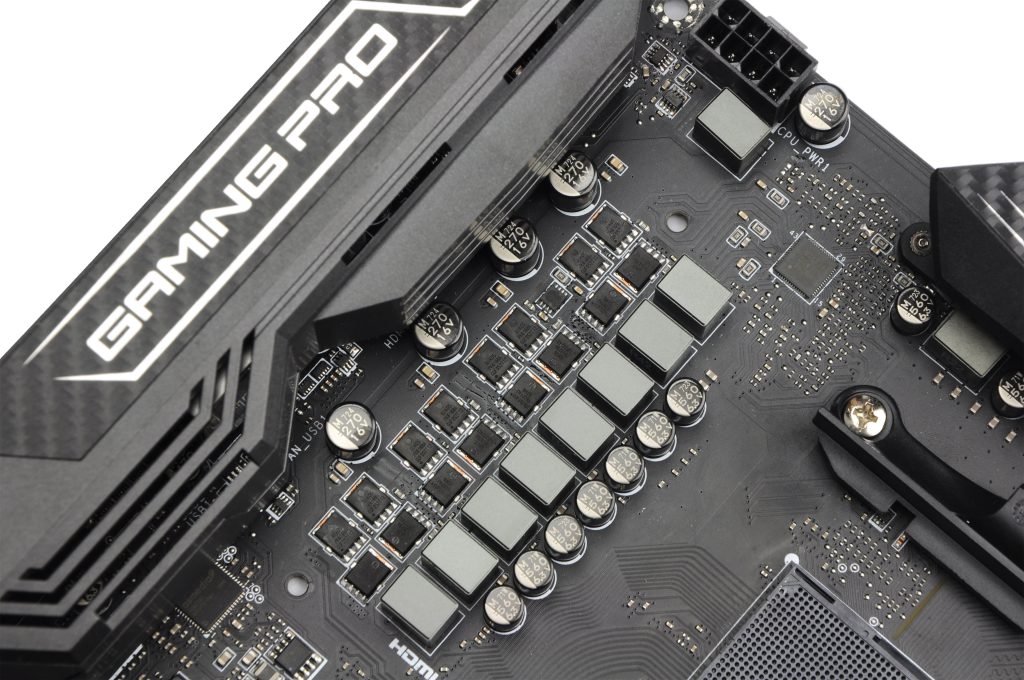
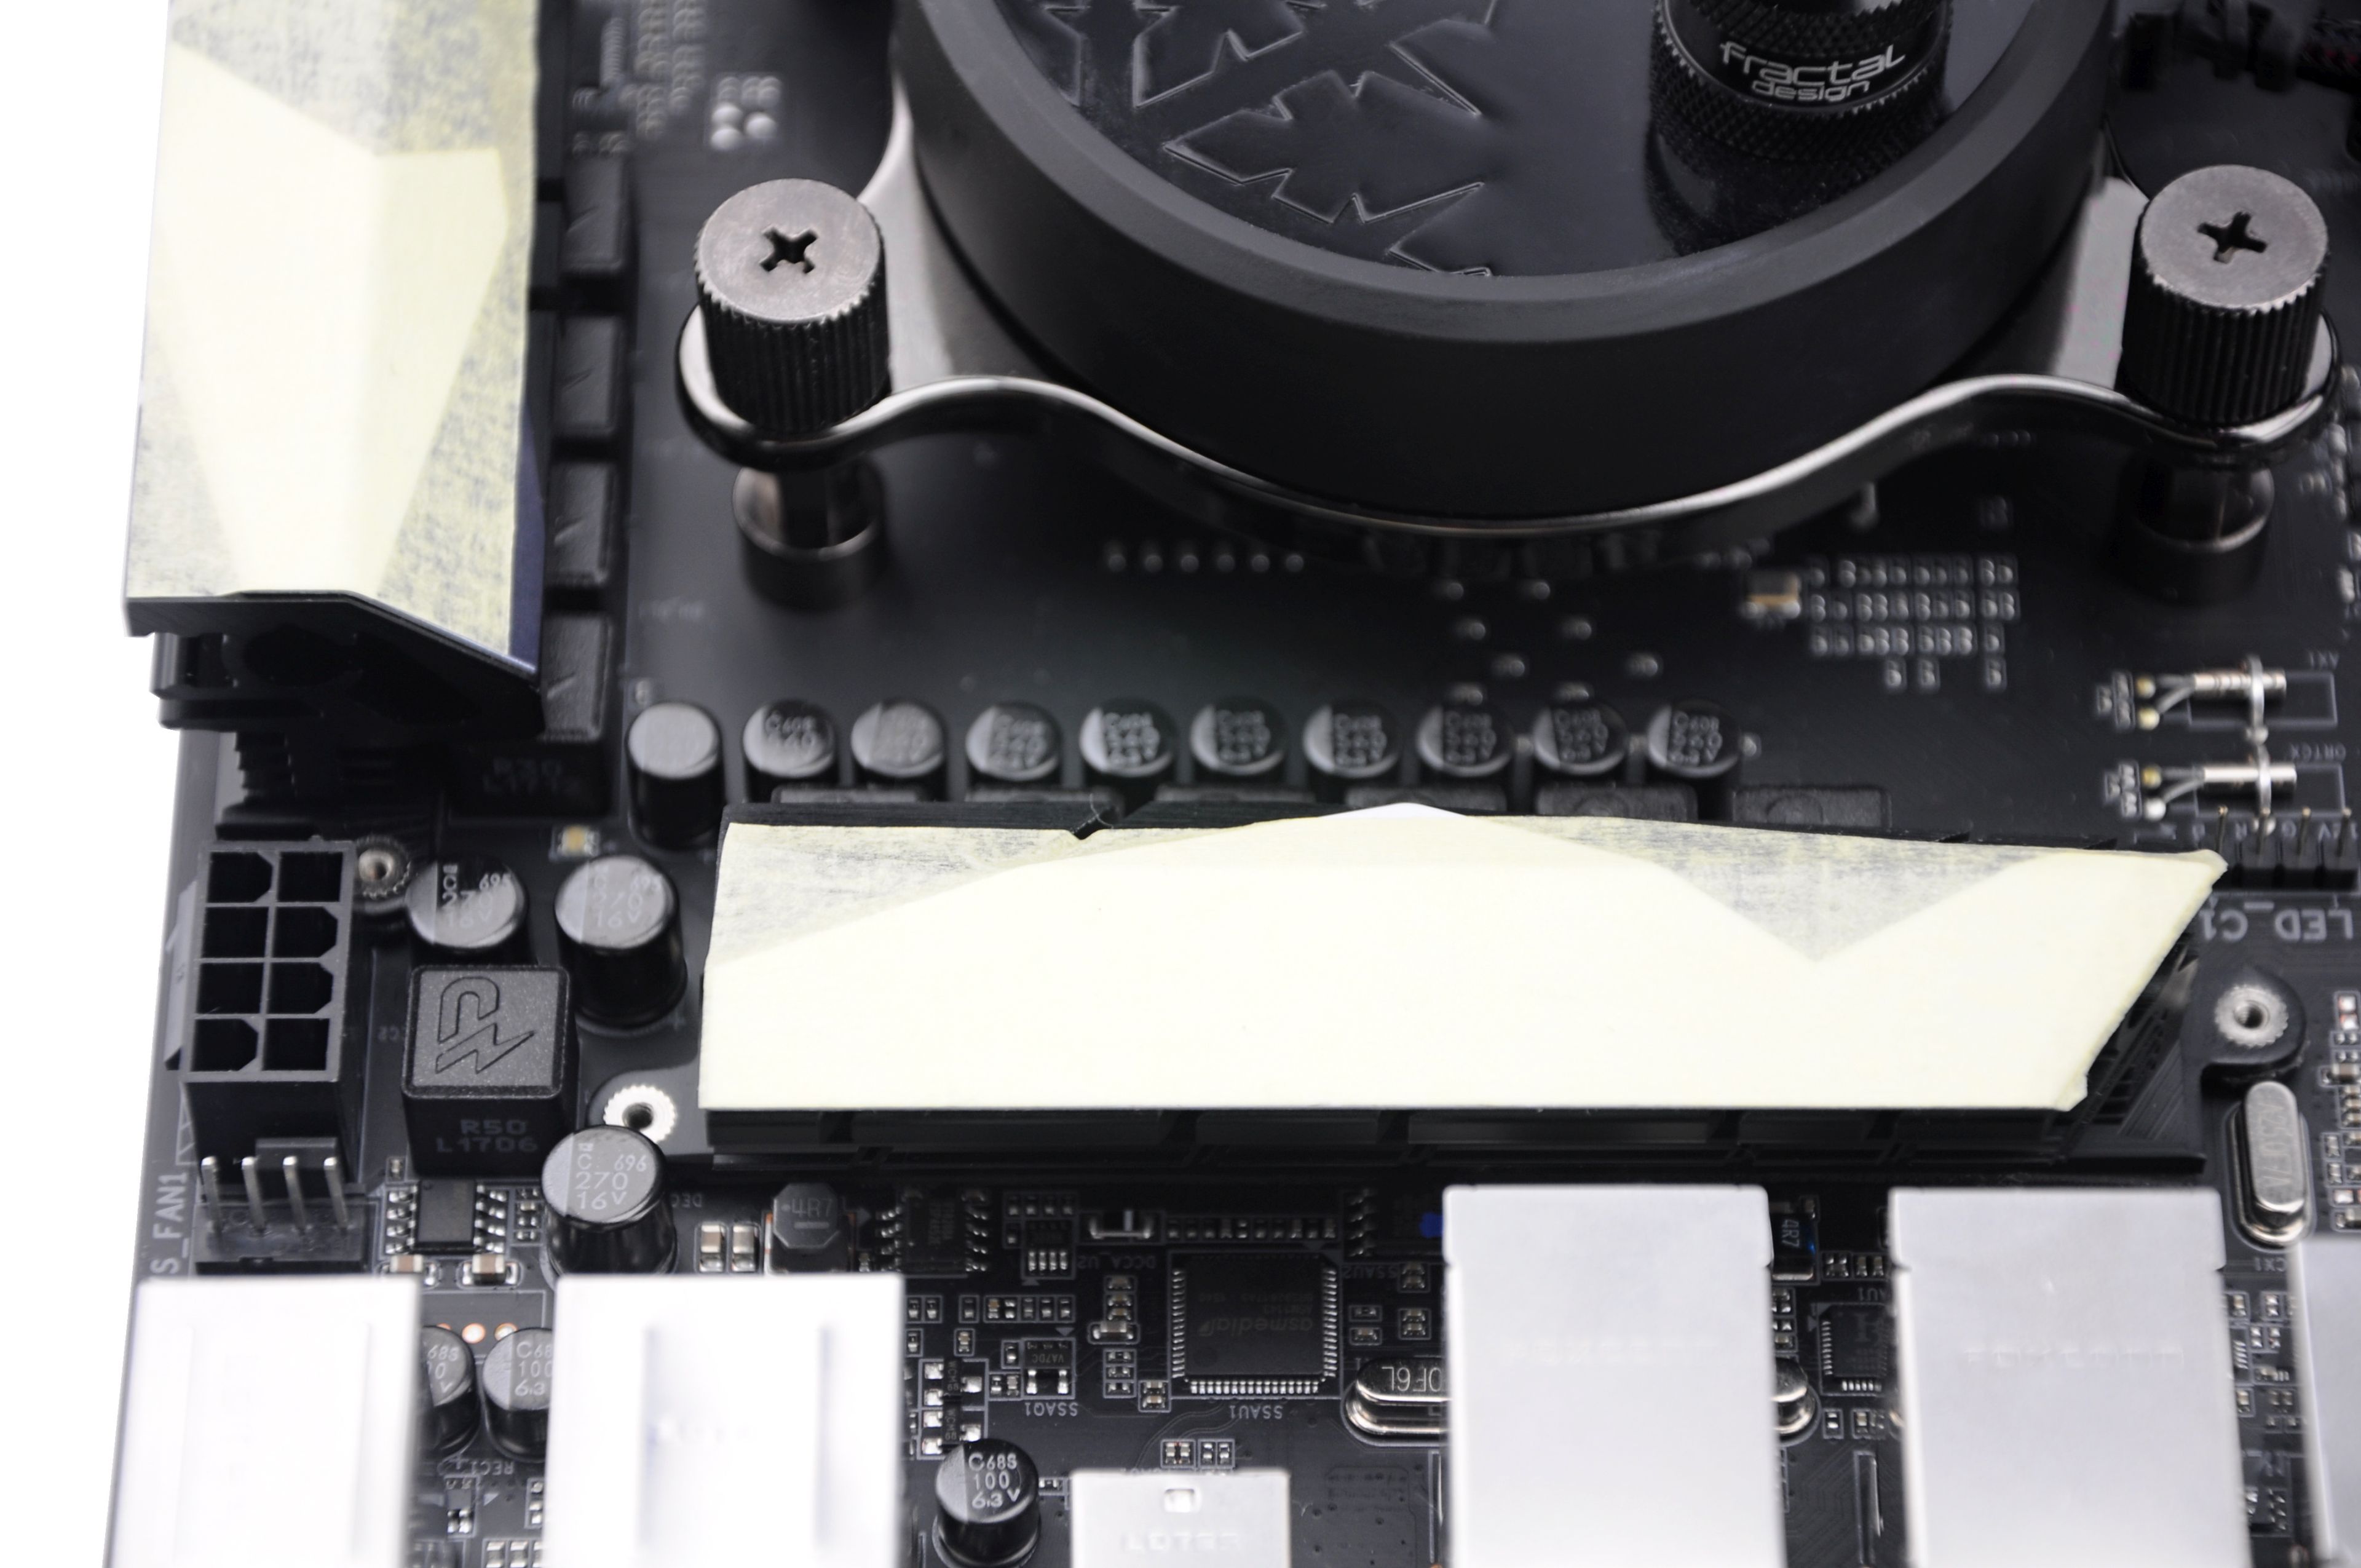
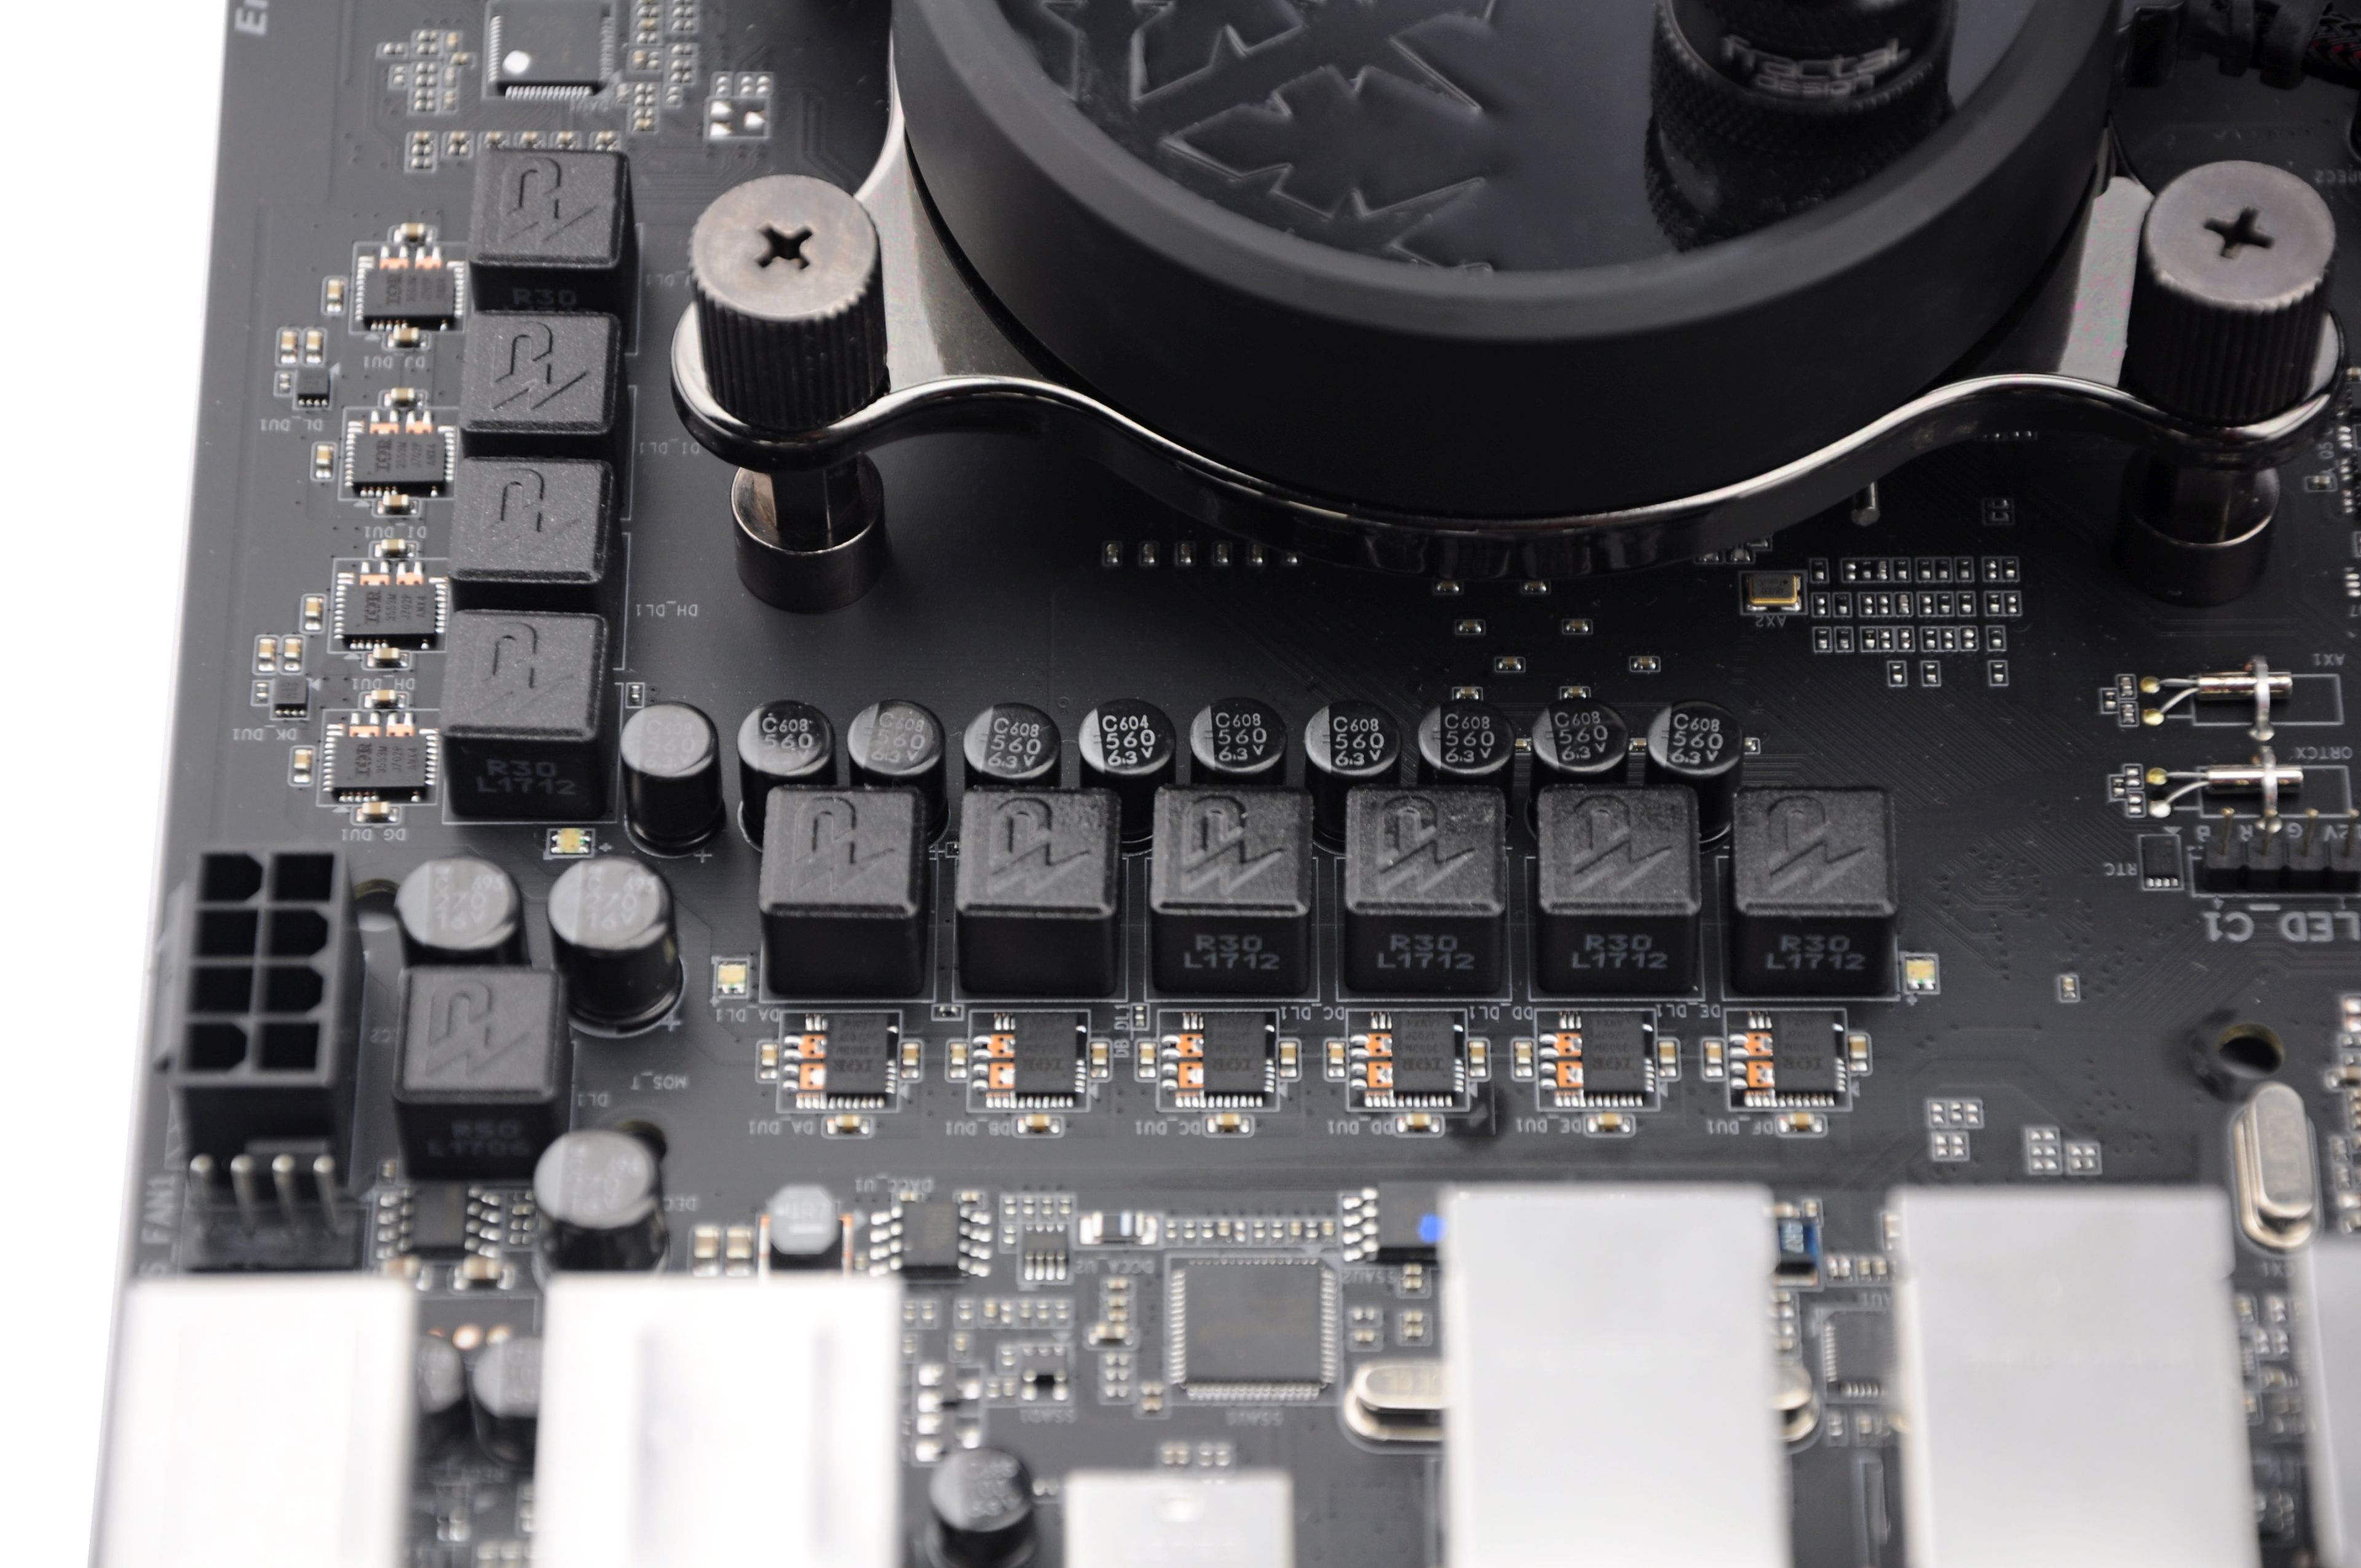
The processor power supply circuit has 10 phases. Its design is a little different than those of Asus ROG Strix X370-F Gaming and Gigabyte Aorus AX370 Gaming 5. It is not a 6 + 4 but 8 + 2 layout (only two phases are for SOC, eight for Vcore). Two MOSFETs for each coil, Niko-Sem PK616BA (24A) + PK632BA (40A). Capacitors are fitted with MIL, which should be durable enough.
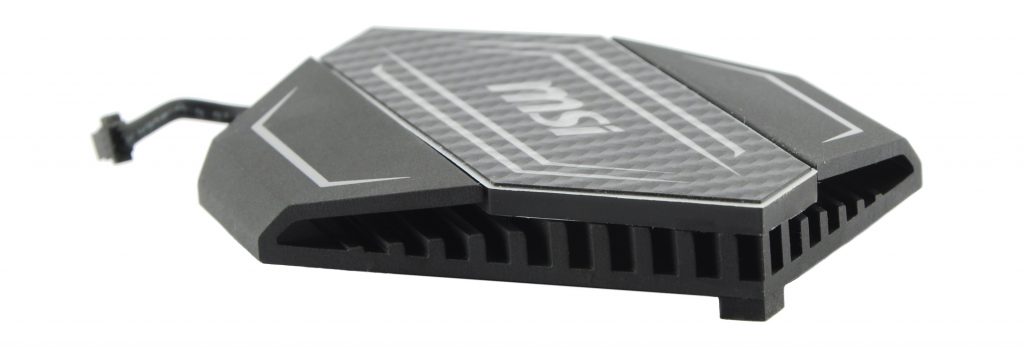
VRM heatsinks are really massive (174 g), but they don’t have ribbing, and basically it’s just a hollow aluminum. But at least the chipset (62 g) is nicely perforated, which is good. X370 chips have a higher heat output and without a cooler they can easily go above 100 degrees. You will find out more about components efficiency in next chapters.
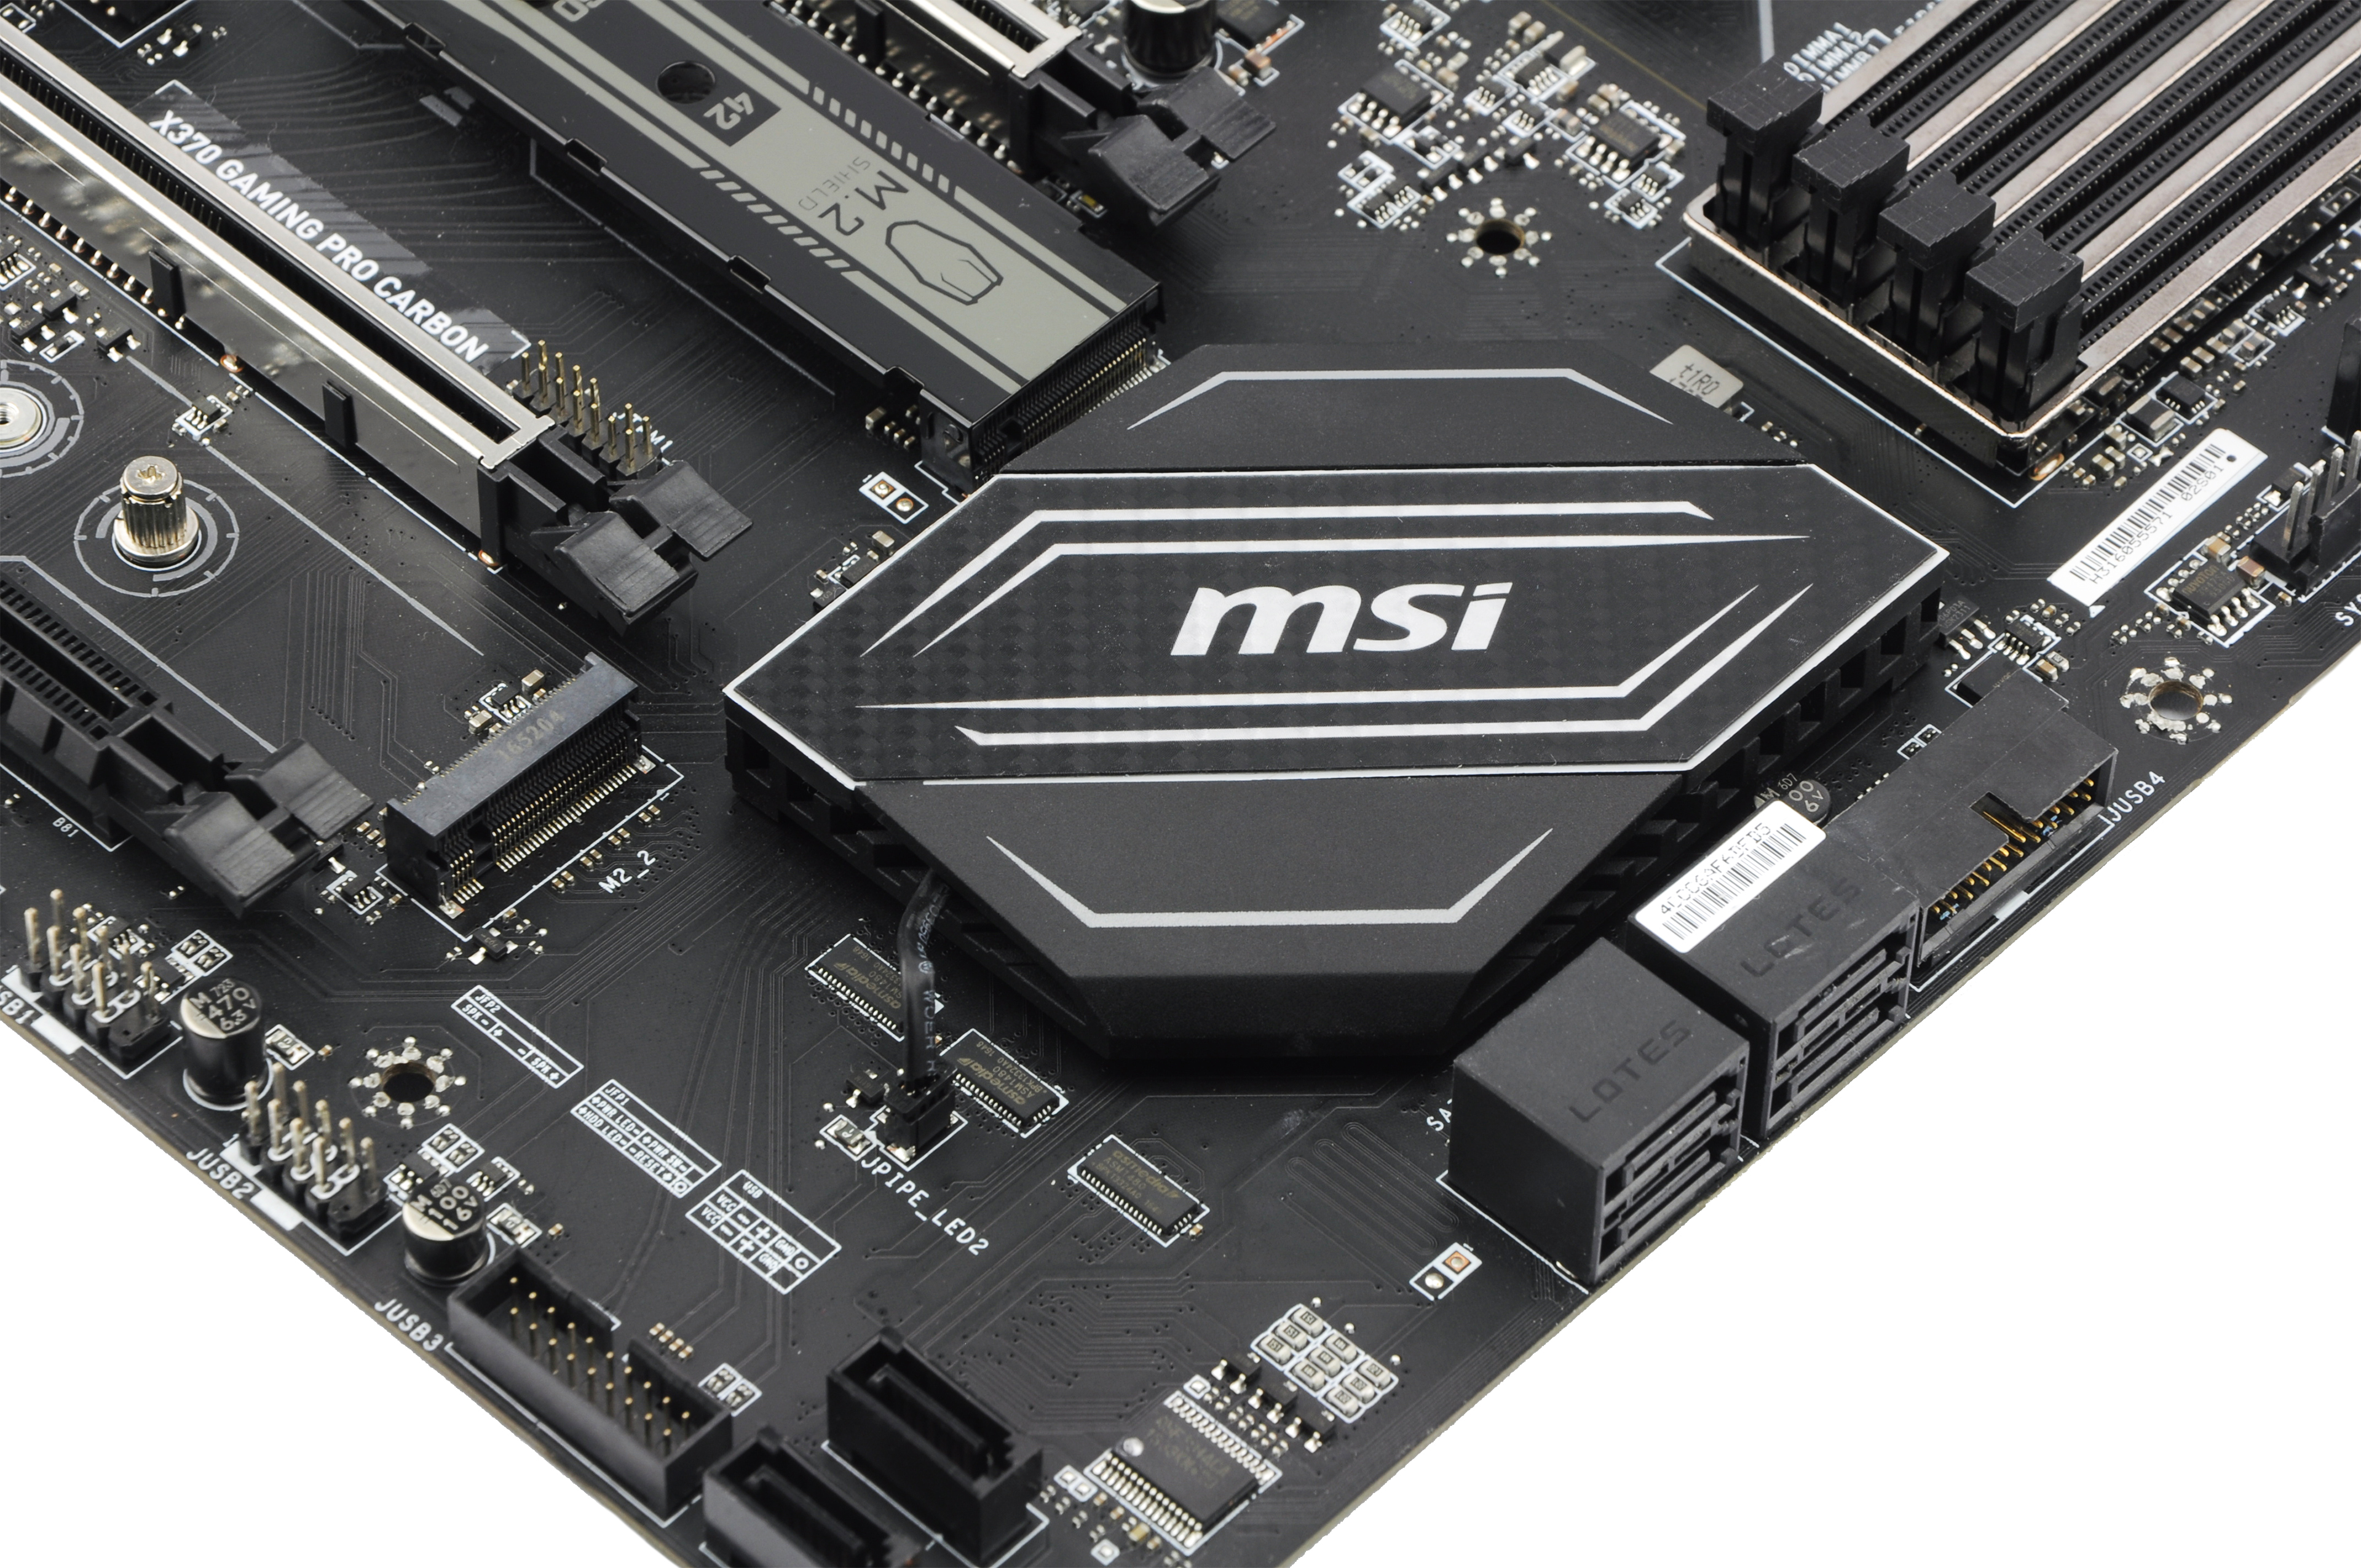
We will also try to test how effective is the cooling cover for SSD in some following review. Perhaps in the upcoming article about how a position of a SSD affects their heating. This board with two M.2 slots seems like a good basis for it.
We have added the third major manufacturer to our tests of X370 boards – MSI. The X370 Pro Carbon is about thirty euros cheaper than its opponents from Gigabyte and Asus, so it will be interesting to watch how these savings are reflected in overall quality and design. We don’t want to give away too much, but we can say that it is definitely worth checking.
Fan control options
Within UEFI, Hardware Monitor offers a user-friendly interface. All fan settings are in one box and completely under your control (not like with Asus, where you have to go to another file to set your regulation based on a reference point).
In addition to monitoring temperatures, speed, voltage, and so on, this interface makes it possible to customize the control of connected fans. You can choose from linear voltage, DC, and PWM (which is particularly interesting nowadays because it allows to start your fans at low speed) modes.
You can adjust the curve (temperature and PWM intensity) for each connector individually. You can even combine this with CPU temperature regulation and the regulation based on the sensor for the “system temperature”. However, who knows how this sensor really works. So, there are only these two reference points, which is not exactly grandiose. Gigabyte Gaming 5 has seven internal sensors (including those for VRM, PCIe, and chipset) + two external ones. From this perspective, the MSI board doesn’t offer much. Despite the fact that besides these two points it can monitor the temperature of MB and the chipset which is detected as AUXTIN2.
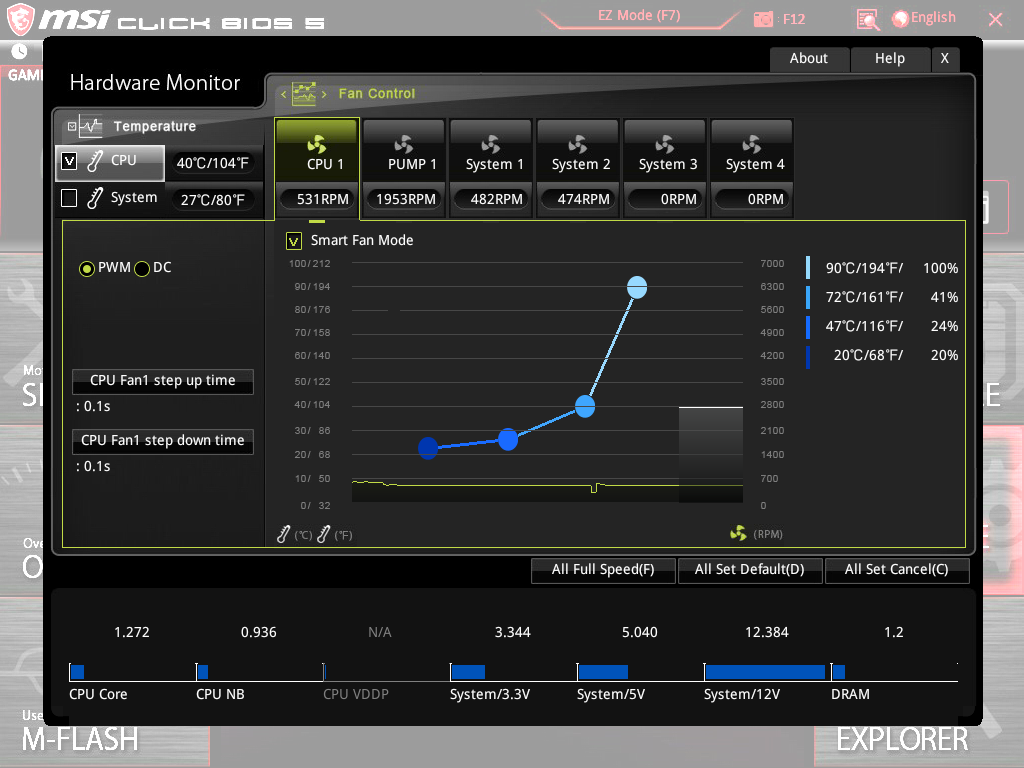
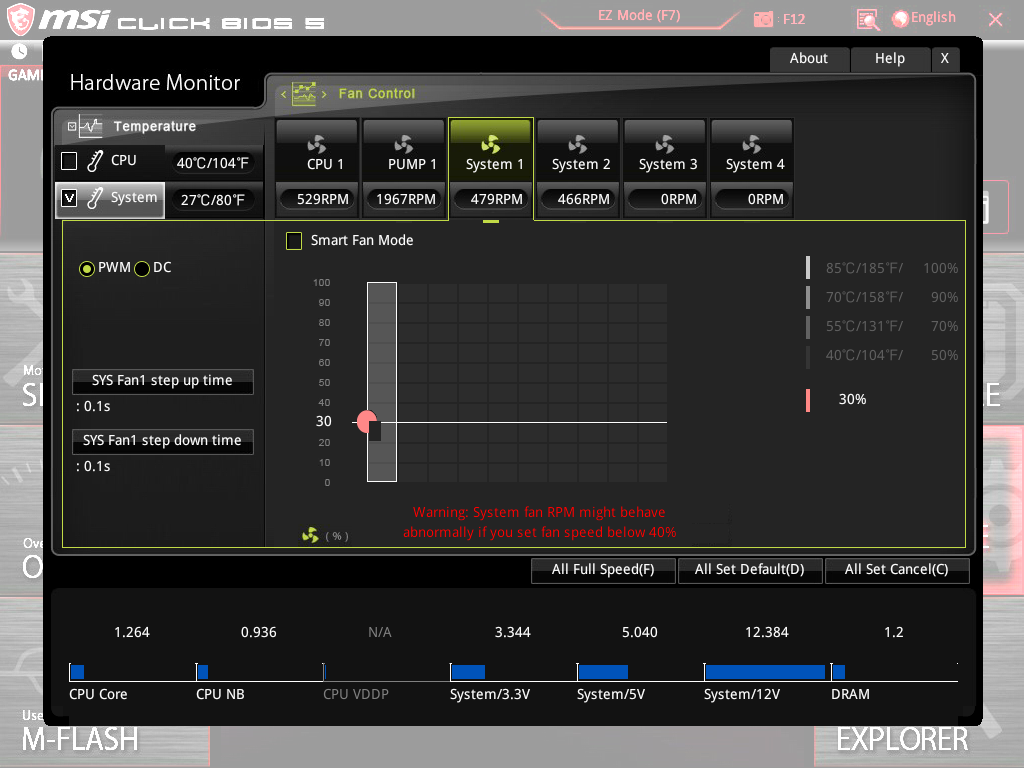
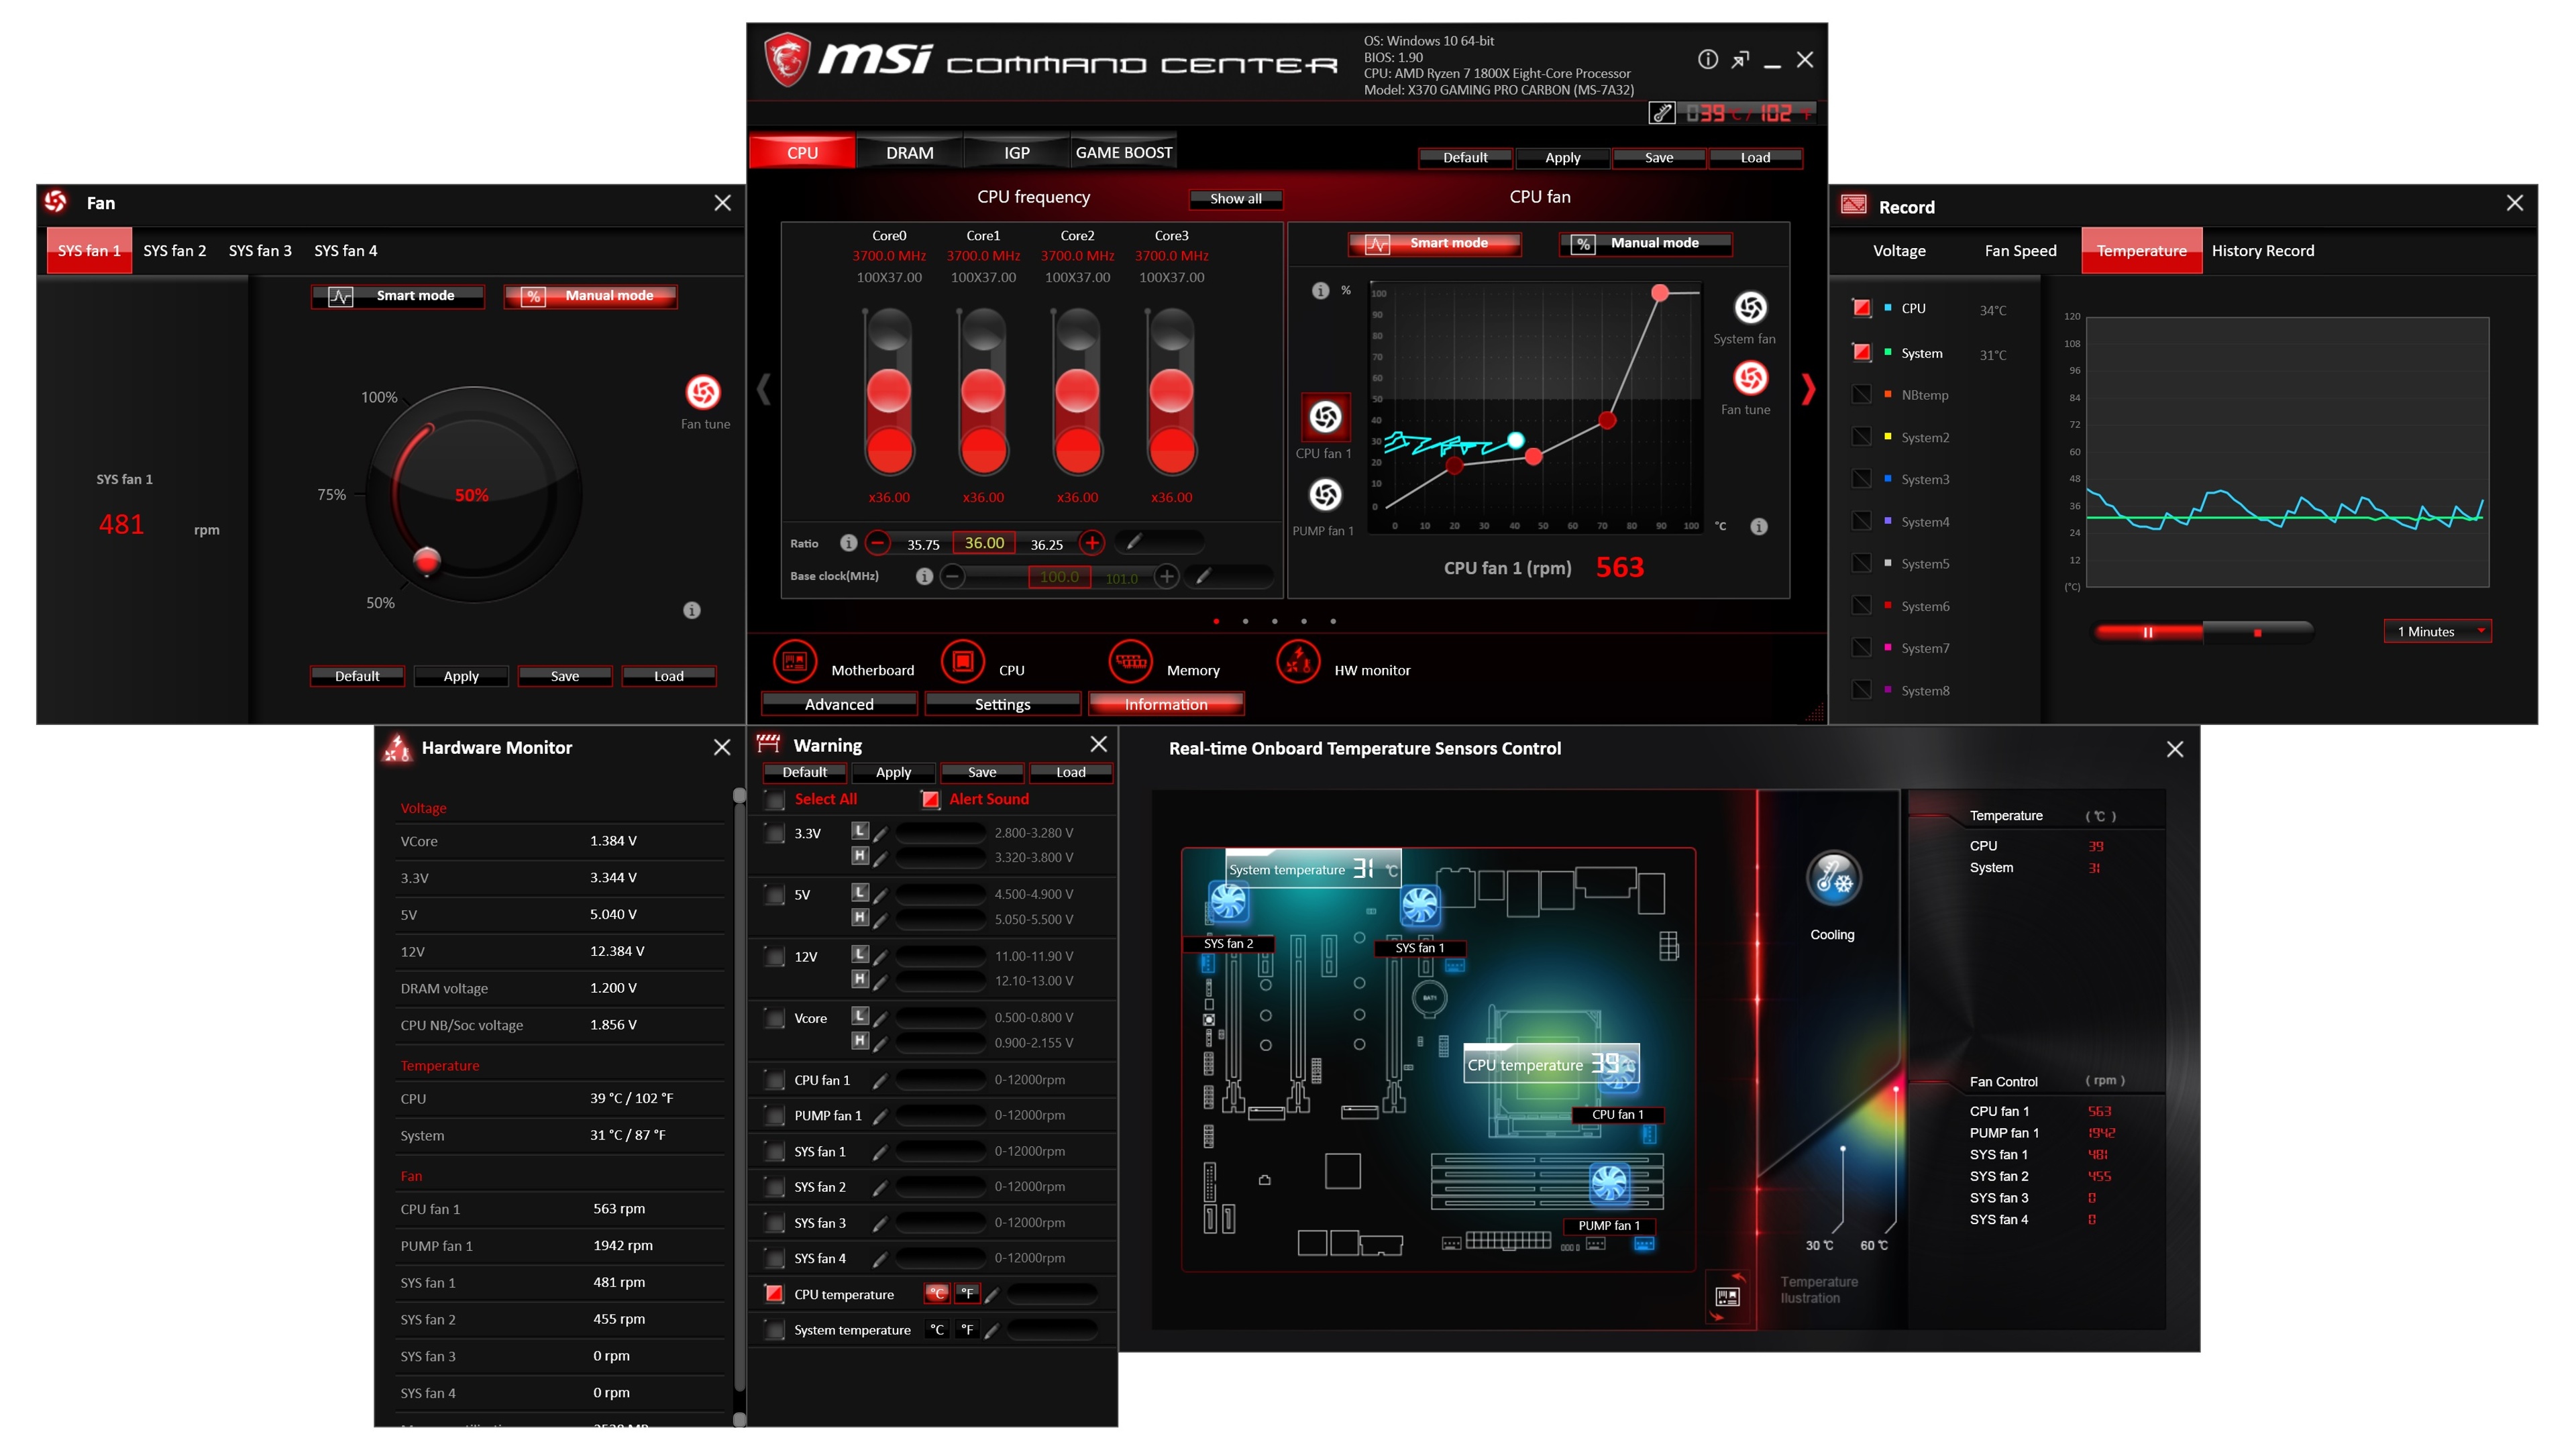
The speed can be set precisely by %/° C ratio. If you go below 40% for the system cooling, you are notified that the fan can behave abnormally. We can confirm that it really behaves abnormally. The speed is inaccurate regardless of the setting. The real speed never copies the curve, and is always slightly above it. You can see this in the last screenshot in this chapter (CPU_fan monitoring).
If you turn on “Smart Fan Auto” option in the BIOS, it reads (and then work with) the Command Center in the operating system. This app works really well. The user interface is intuitive and rich in setup options. The only thing that is a bit nasty is the precision of the manual CPU_fan regulation (just four levels, starting at 25%), and SYS_fan regulation (just three levels, starting at 50%). The graphical design of connectors and temperature levels is great. You can also record the values (temperature, speed, voltage).
It is possible to set an alarm when exceeding a certain temperature level, speed, or voltage on one of the branches.
Command Center is available for Android too. All features can be monitored via Wi-Fi, and you can change settings directly in your phone. This could be an interesting replacement of an external panel. It is more complicated to change the settings in full screen on PC. We’ll give this app a closer look later in some standalone article, and we’ll try to find out why its Google Play rating is 2.7 out of 5.
We have added the third major manufacturer to our tests of X370 boards – MSI. The X370 Pro Carbon is about thirty euros cheaper than its opponents from Gigabyte and Asus, so it will be interesting to watch how these savings are reflected in overall quality and design. We don’t want to give away too much, but we can say that it is definitely worth checking.
Test procedures
We analyzed heat and consumption in idle, with processor (AMD Ryzen 7 1800X) in burn with factory settings, and after overclocking.
Used G.Skill Flare X memory had XMP enabled all the time, which is the only change in UEFI for the first two modes compared to the original settings. In overclocking mode, constant 3.95 GHz was set for all cores, including the active SMT (with C’n’Q off). Although this frequency does not hit the limits of the processor, it will be possible to operate with it on cheaper boards too, which makes it easier to compare models from all categories. The Vcore CPU was tuned to the lowest possible value, which makes the process stable even at high load. Vcore SOC was manually regulated to fixed 1.1 V, other settings (including LLC) were left in “auto” mode.
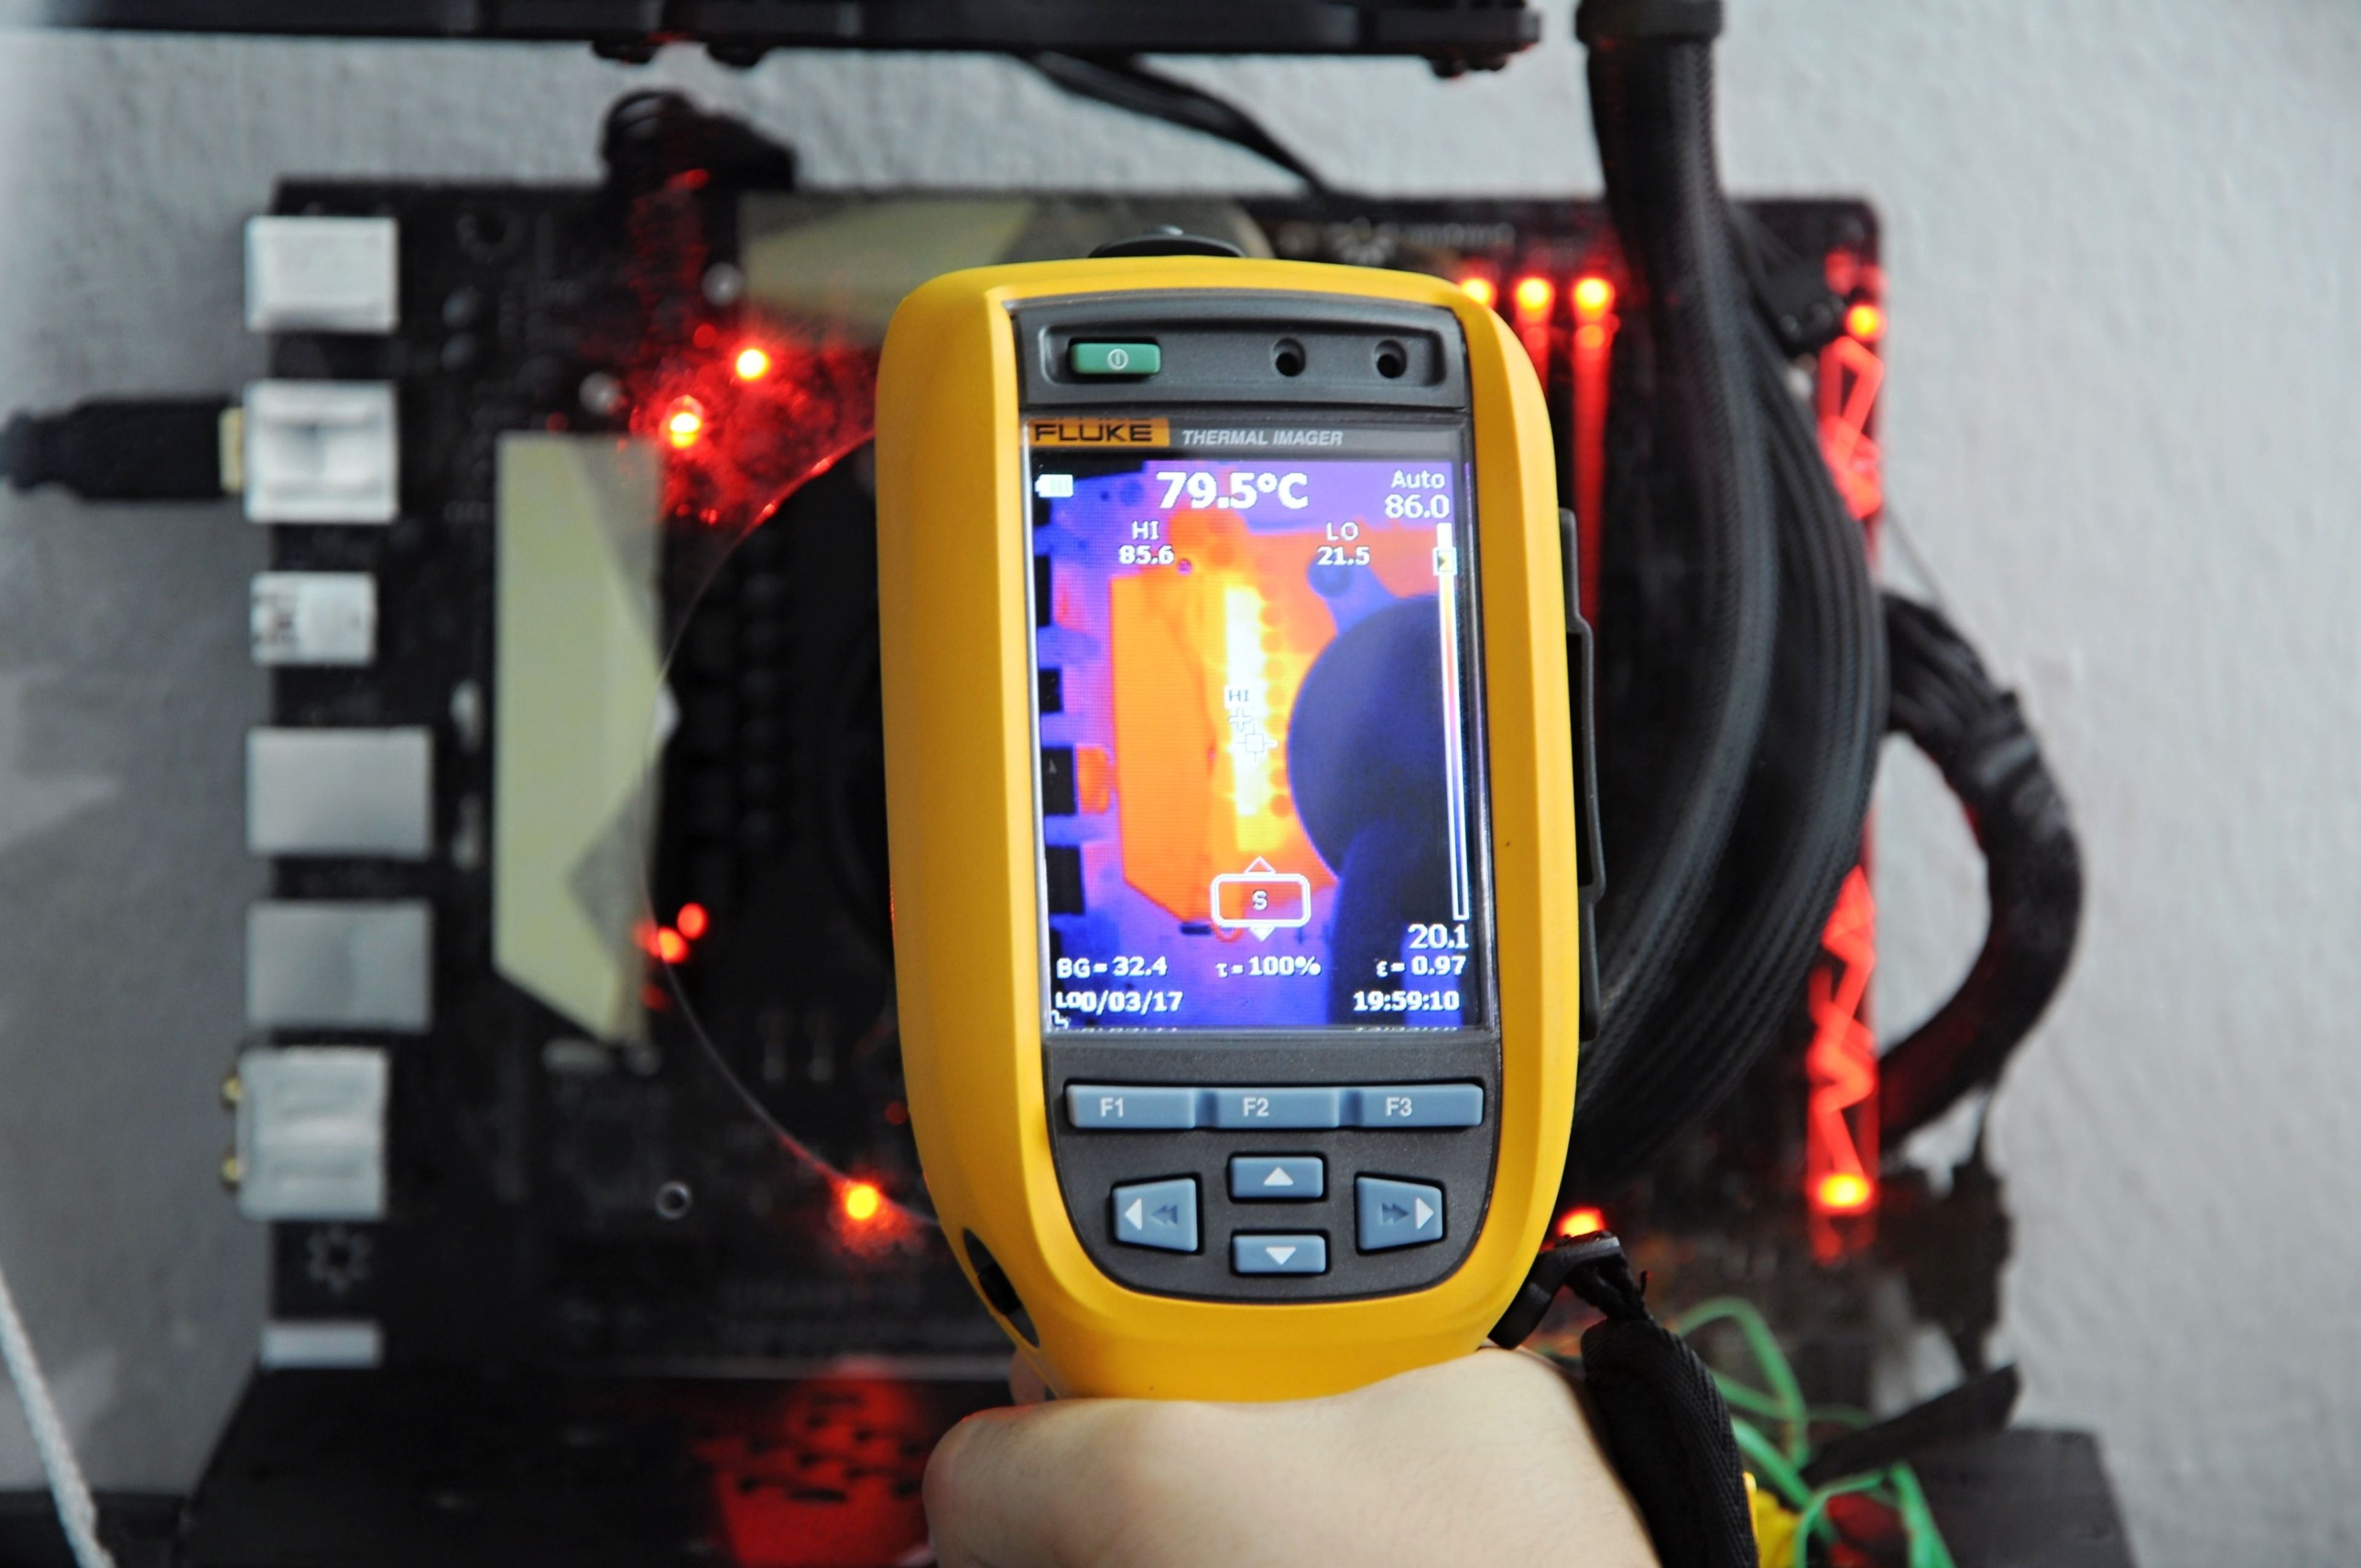
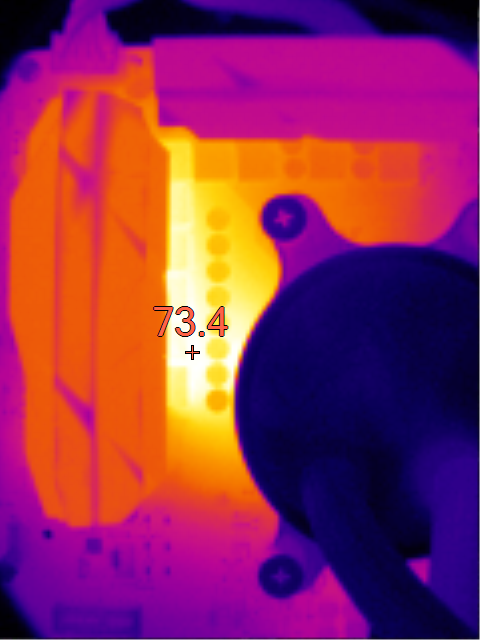
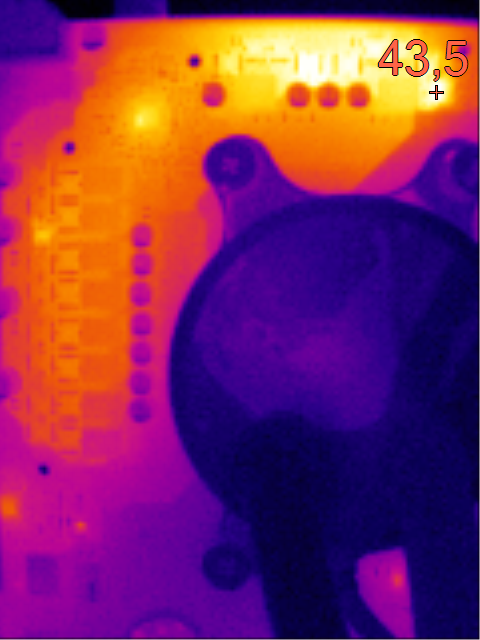
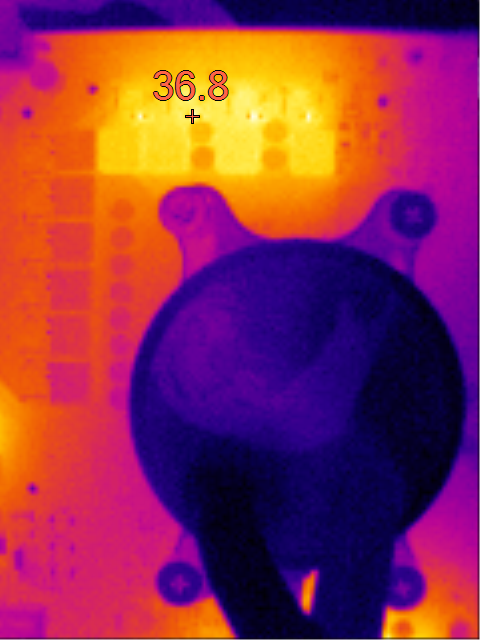
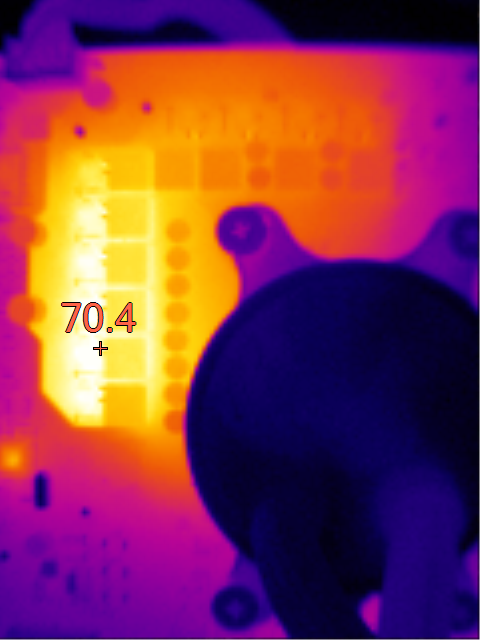
We simulated the burn in IntelBurnTest (12 GB) for 15 minutes. In the first chapter, you can find the results from the internal chipset sensor and VRM. The second sensor, however, is not included in all boards, so this value will often be missing in the results. We captured the image of the heat around the socket with the thermal imager Fluke Ti125. Specifically, the maximum surface temperature of the coil casing, the MOSFET heatsink, and also the MOSFET casing (with heatsink removed, but for safety reasons, we did not include these measurements in overclocking mode). Through thermalvision, it is easy to see the temperature of MOSFETs and how efficient their coolers are. We put a strip of a thin paper tape on them before taking the pictures to ensure that the thermal imager reads temperatures from the same surface – eliminating distortions caused by combinations of different materials.
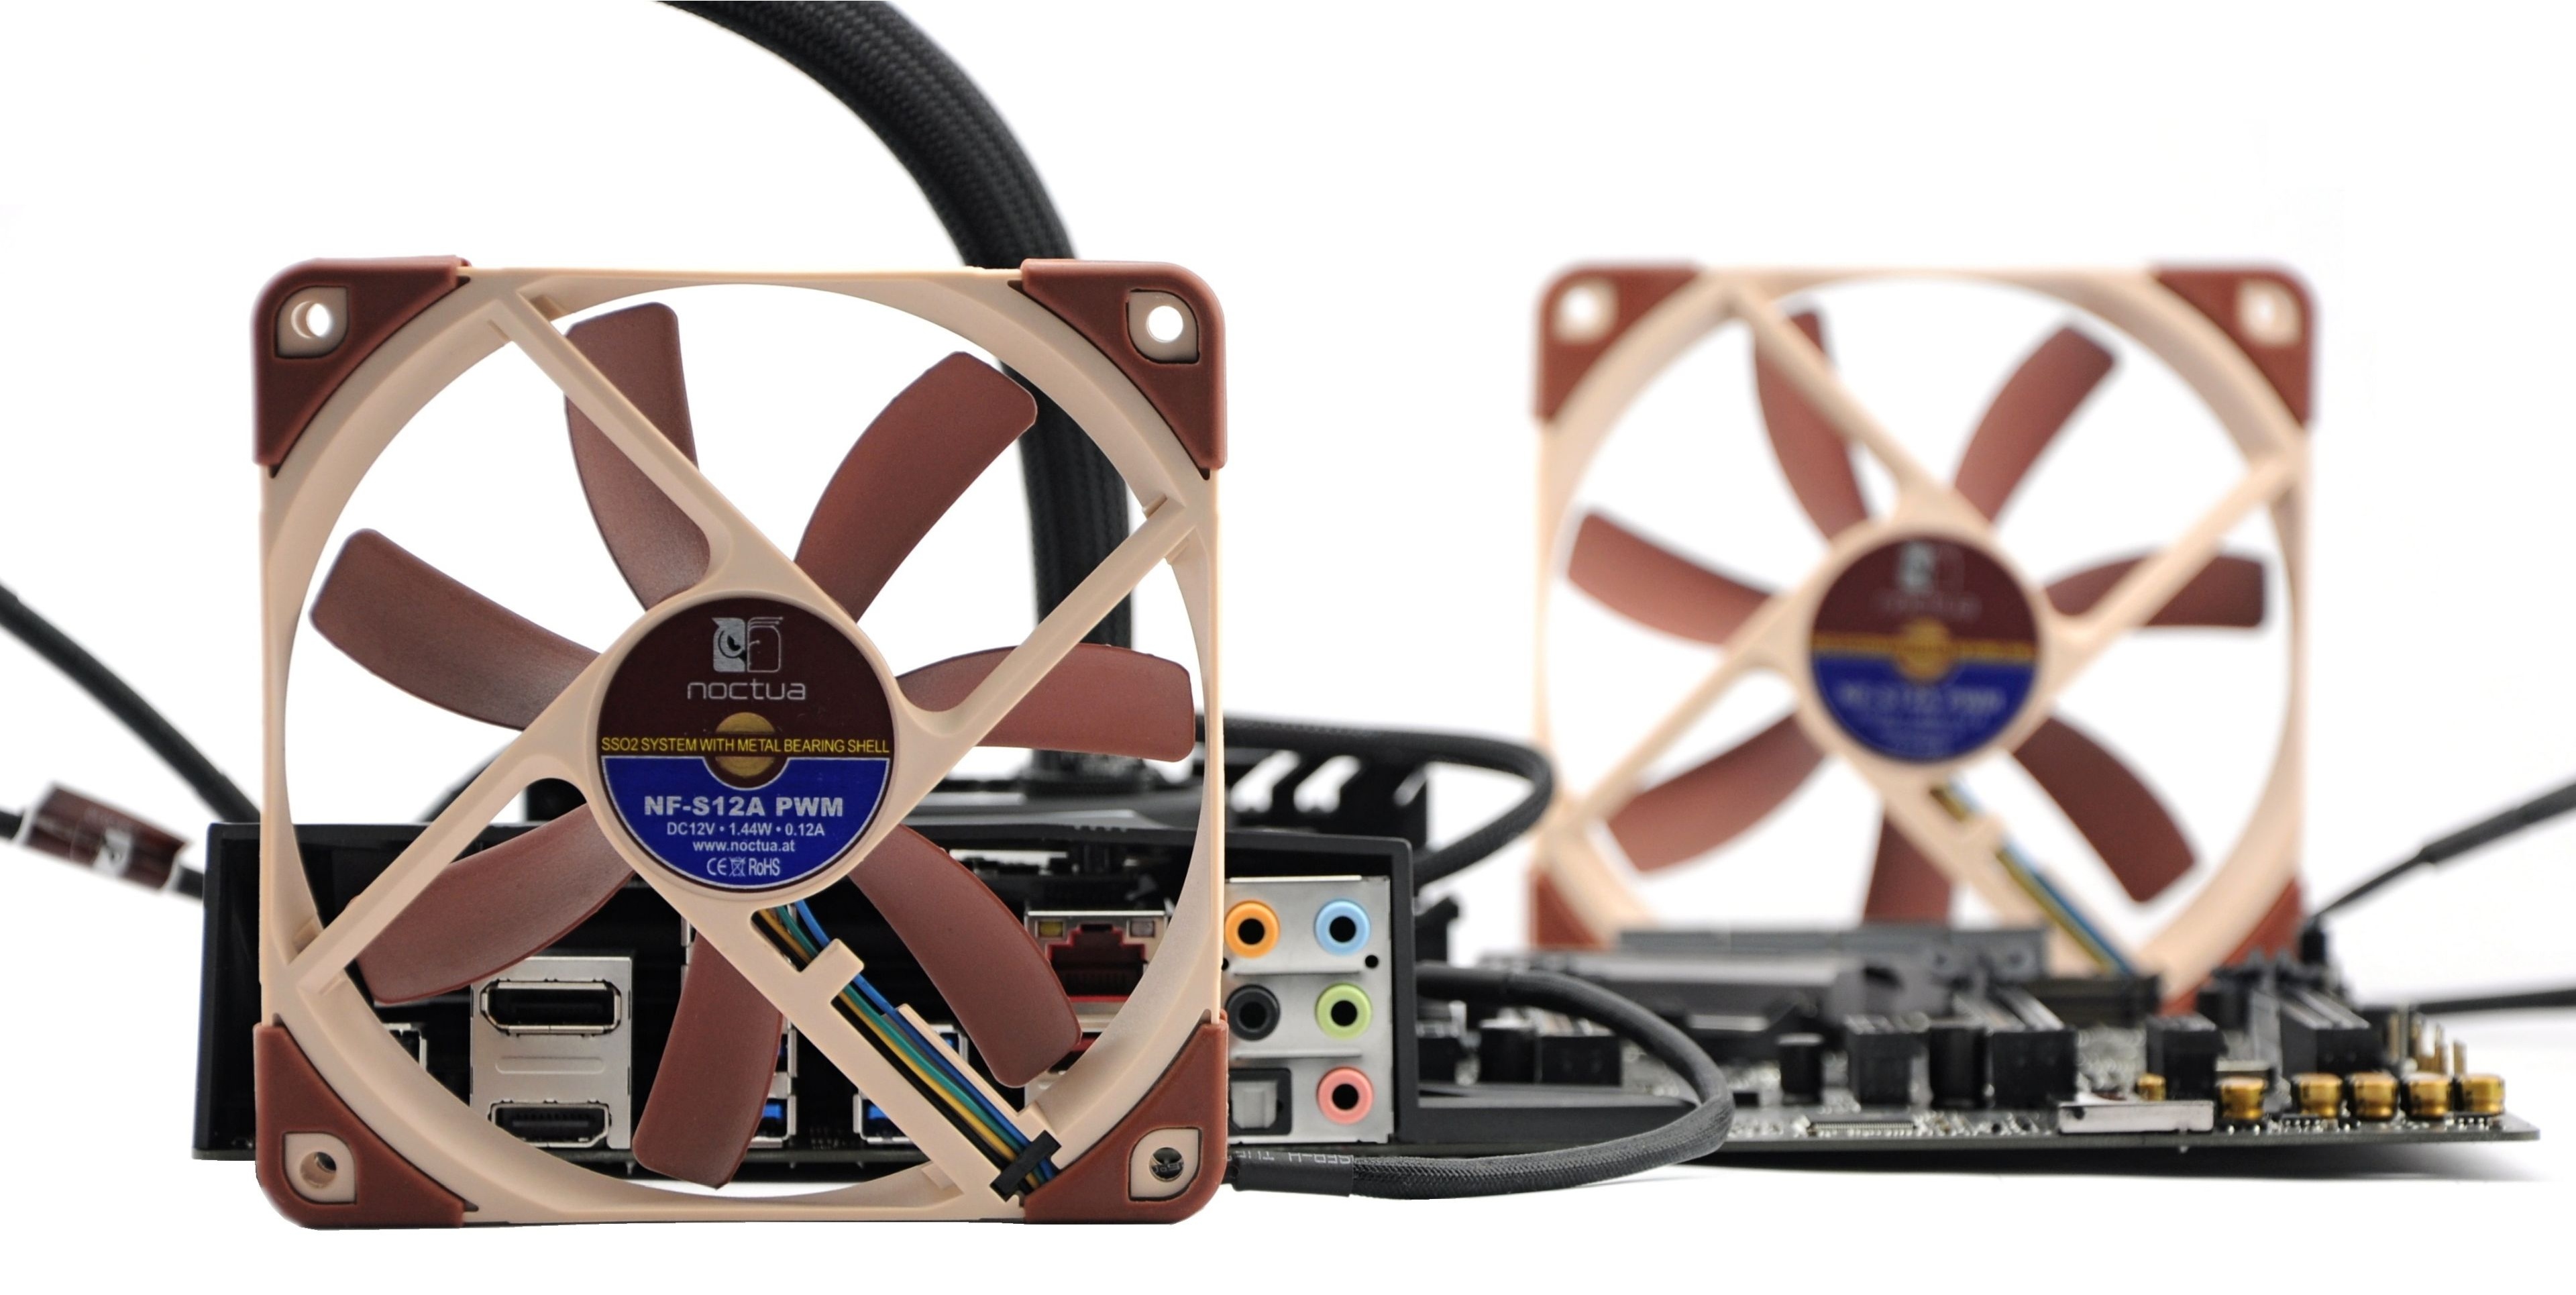
Tests were conducted in a well ventilated wind tunnel fitted with four Noctua NF-A12S fans decelerated to 550 rpm: two for the input and two for the output.
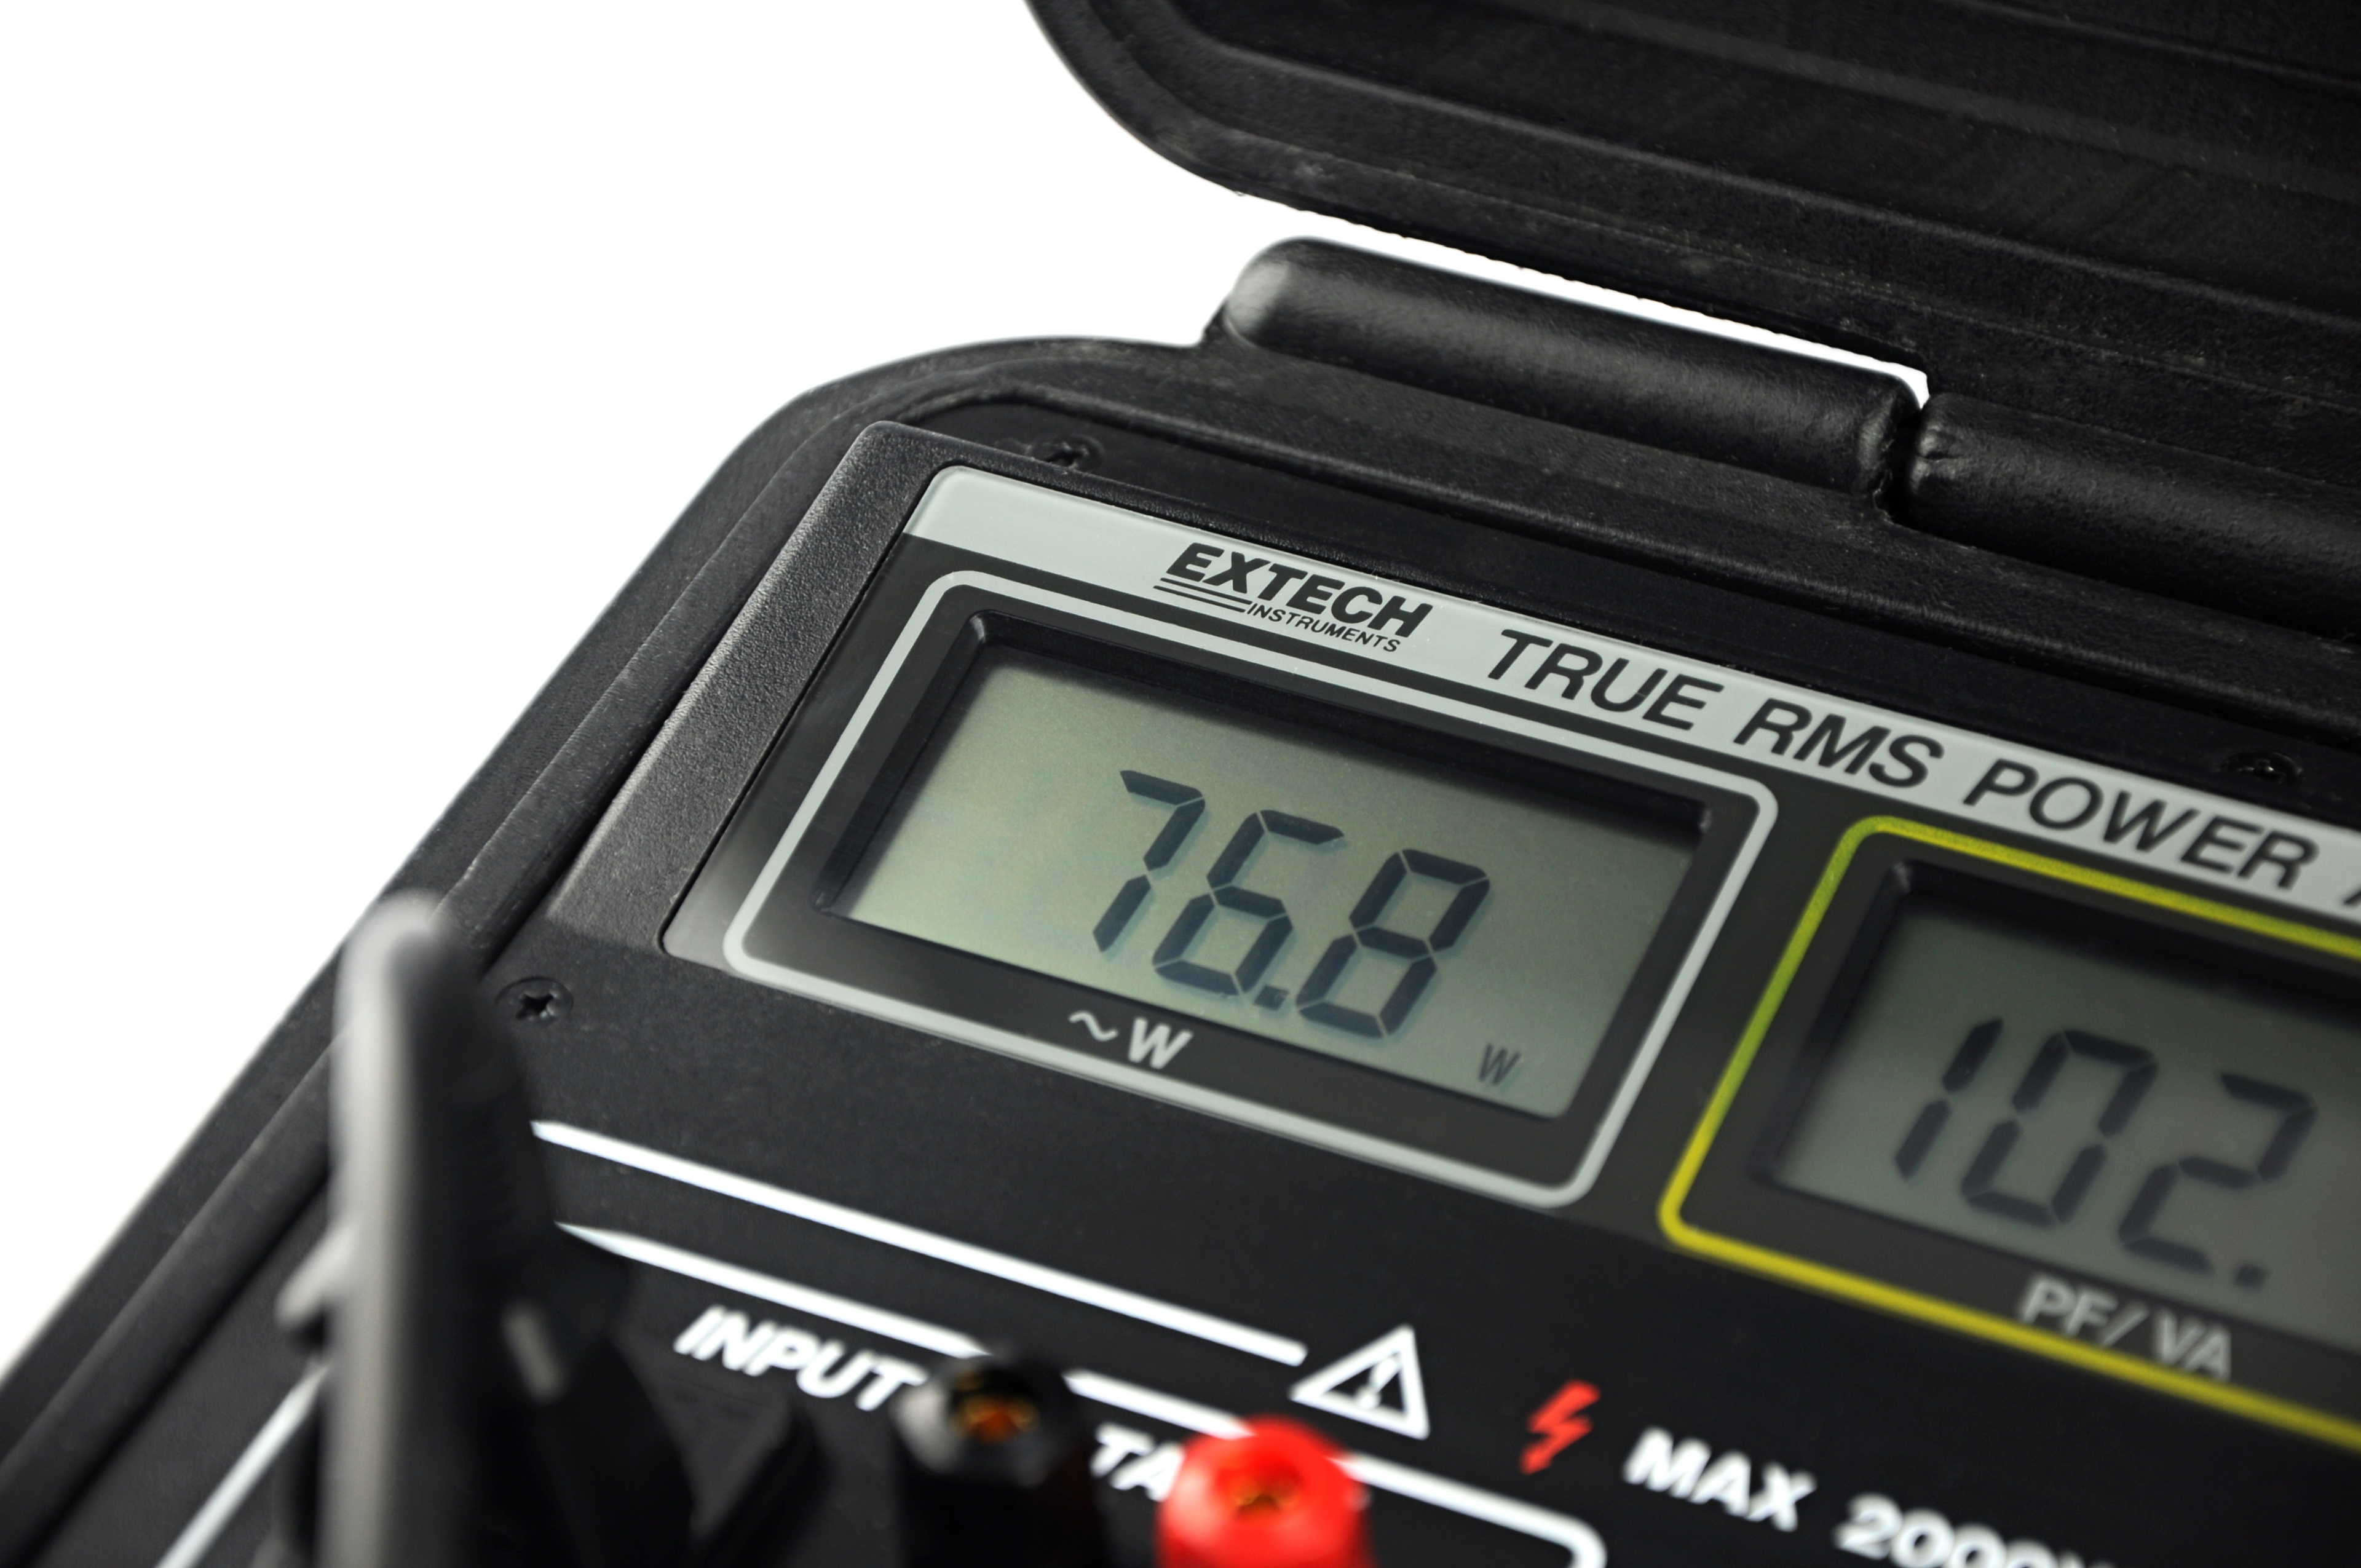
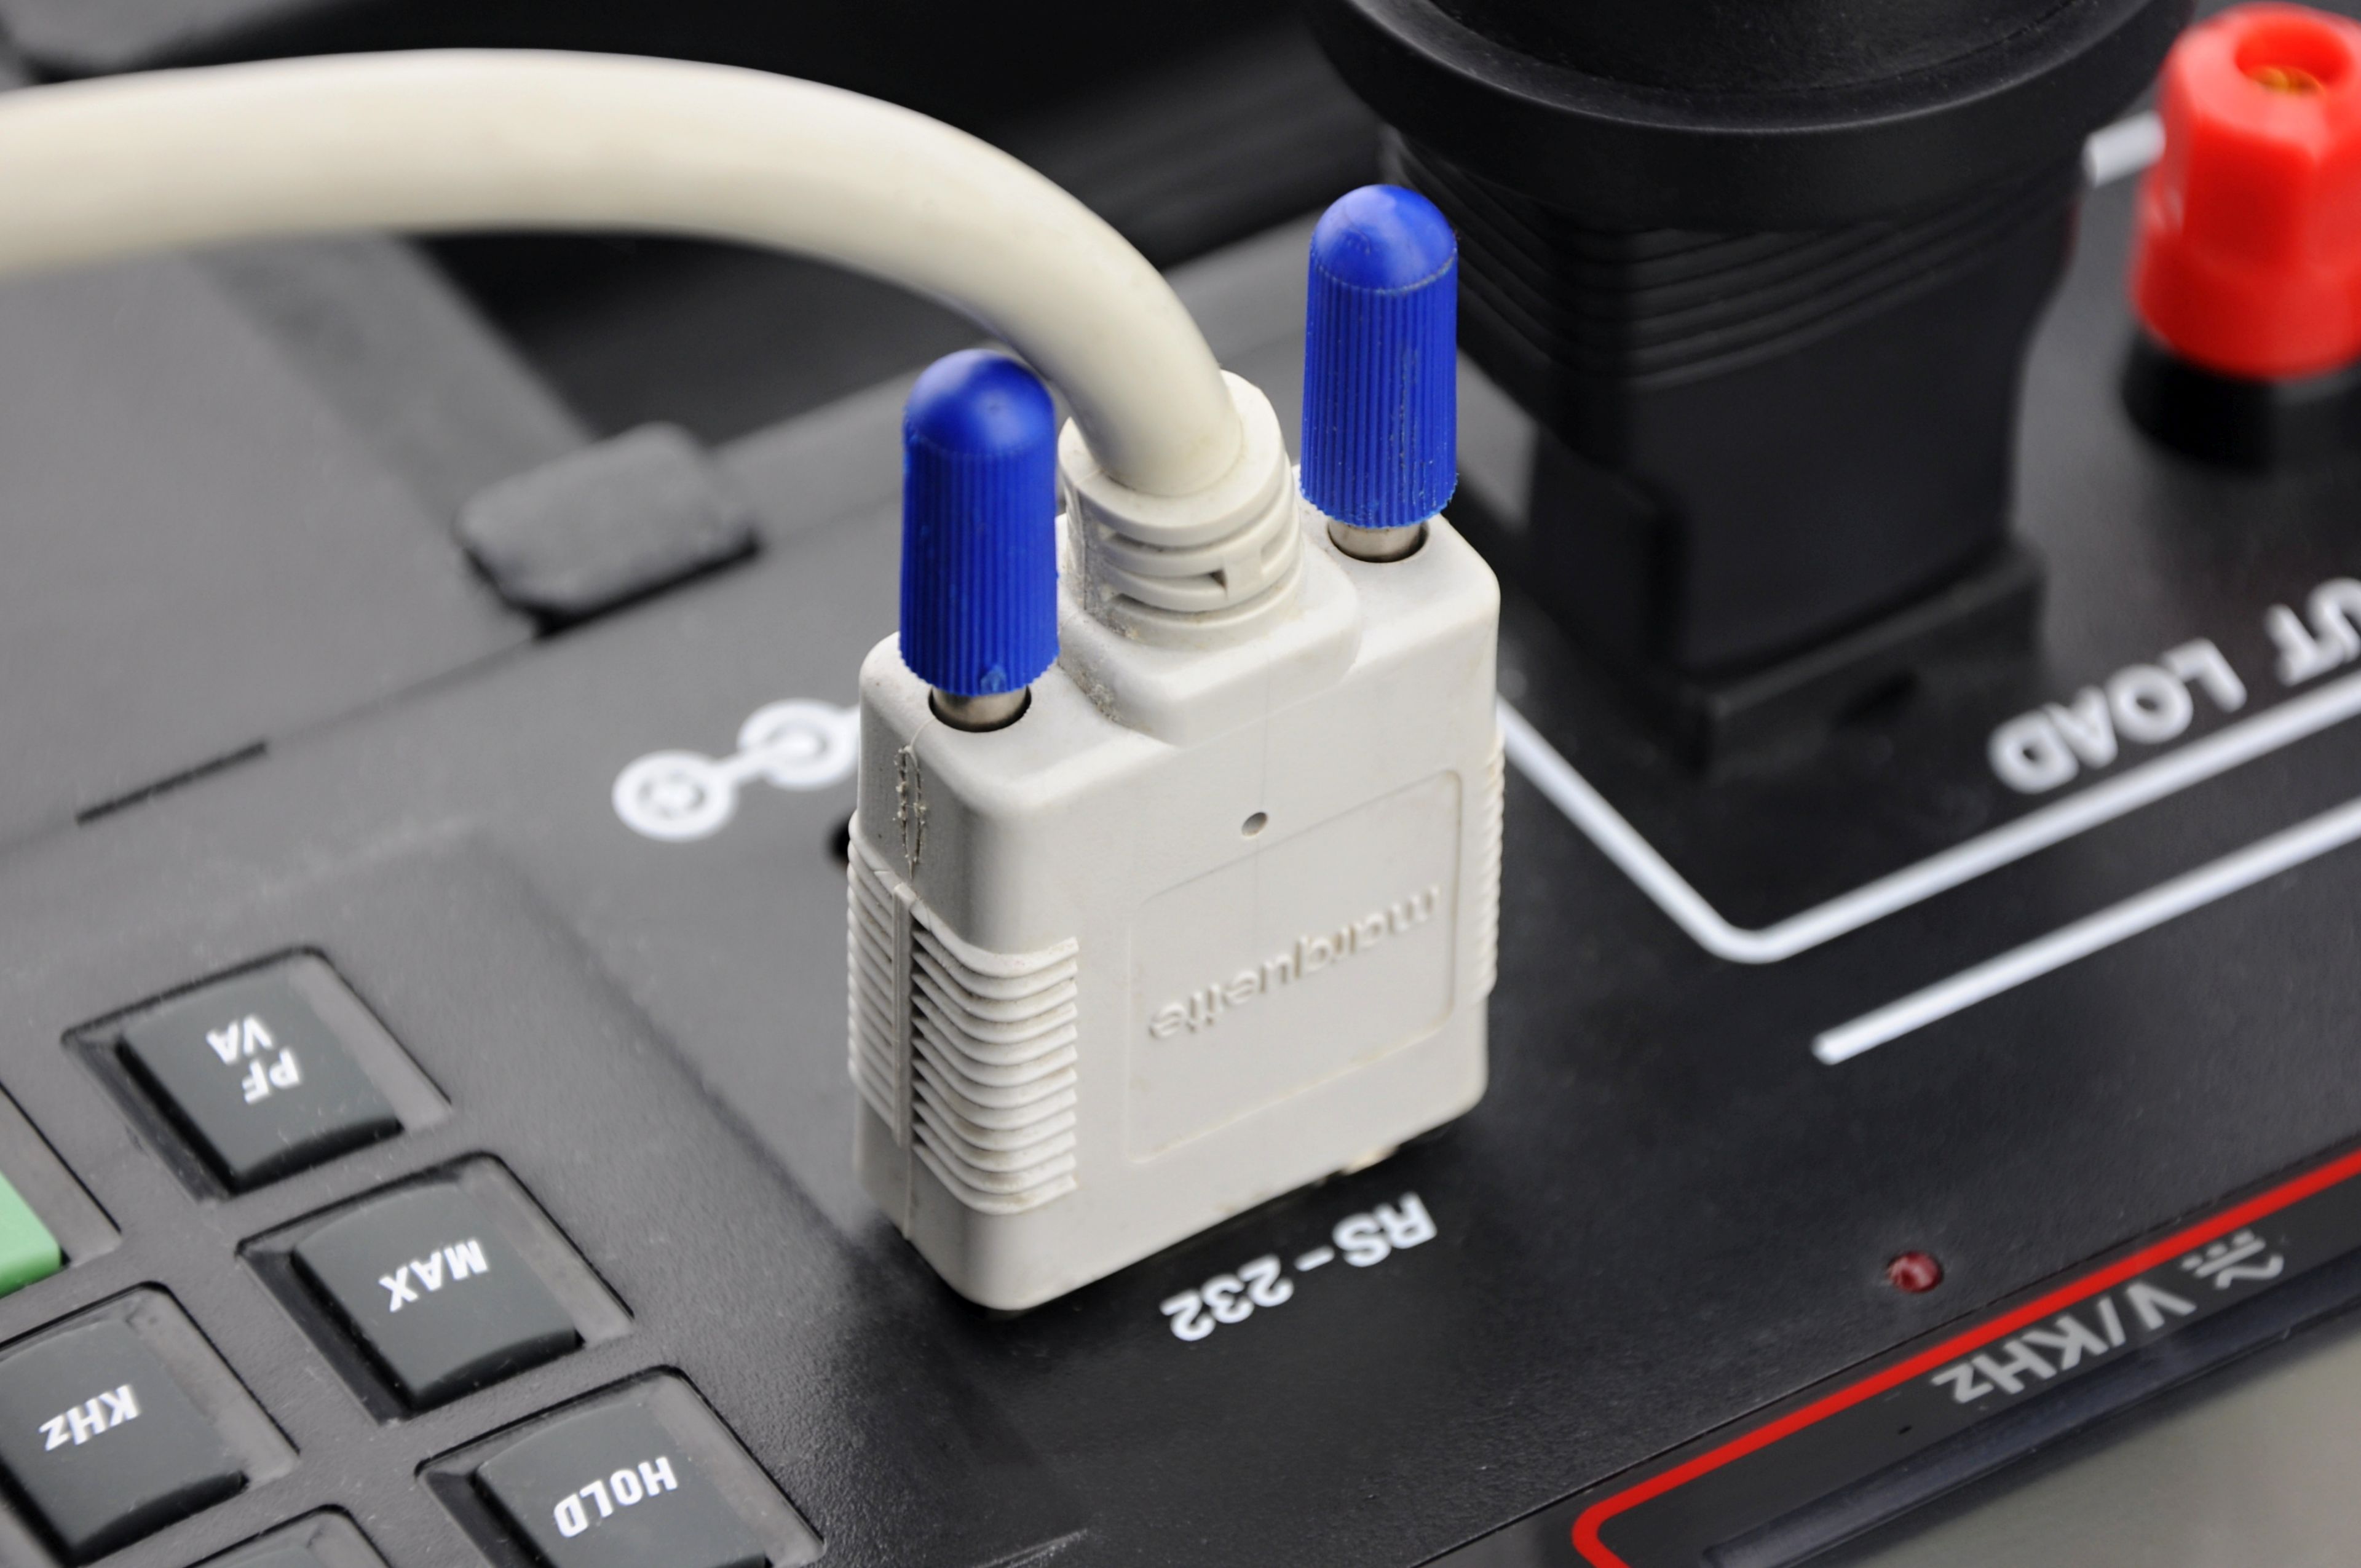
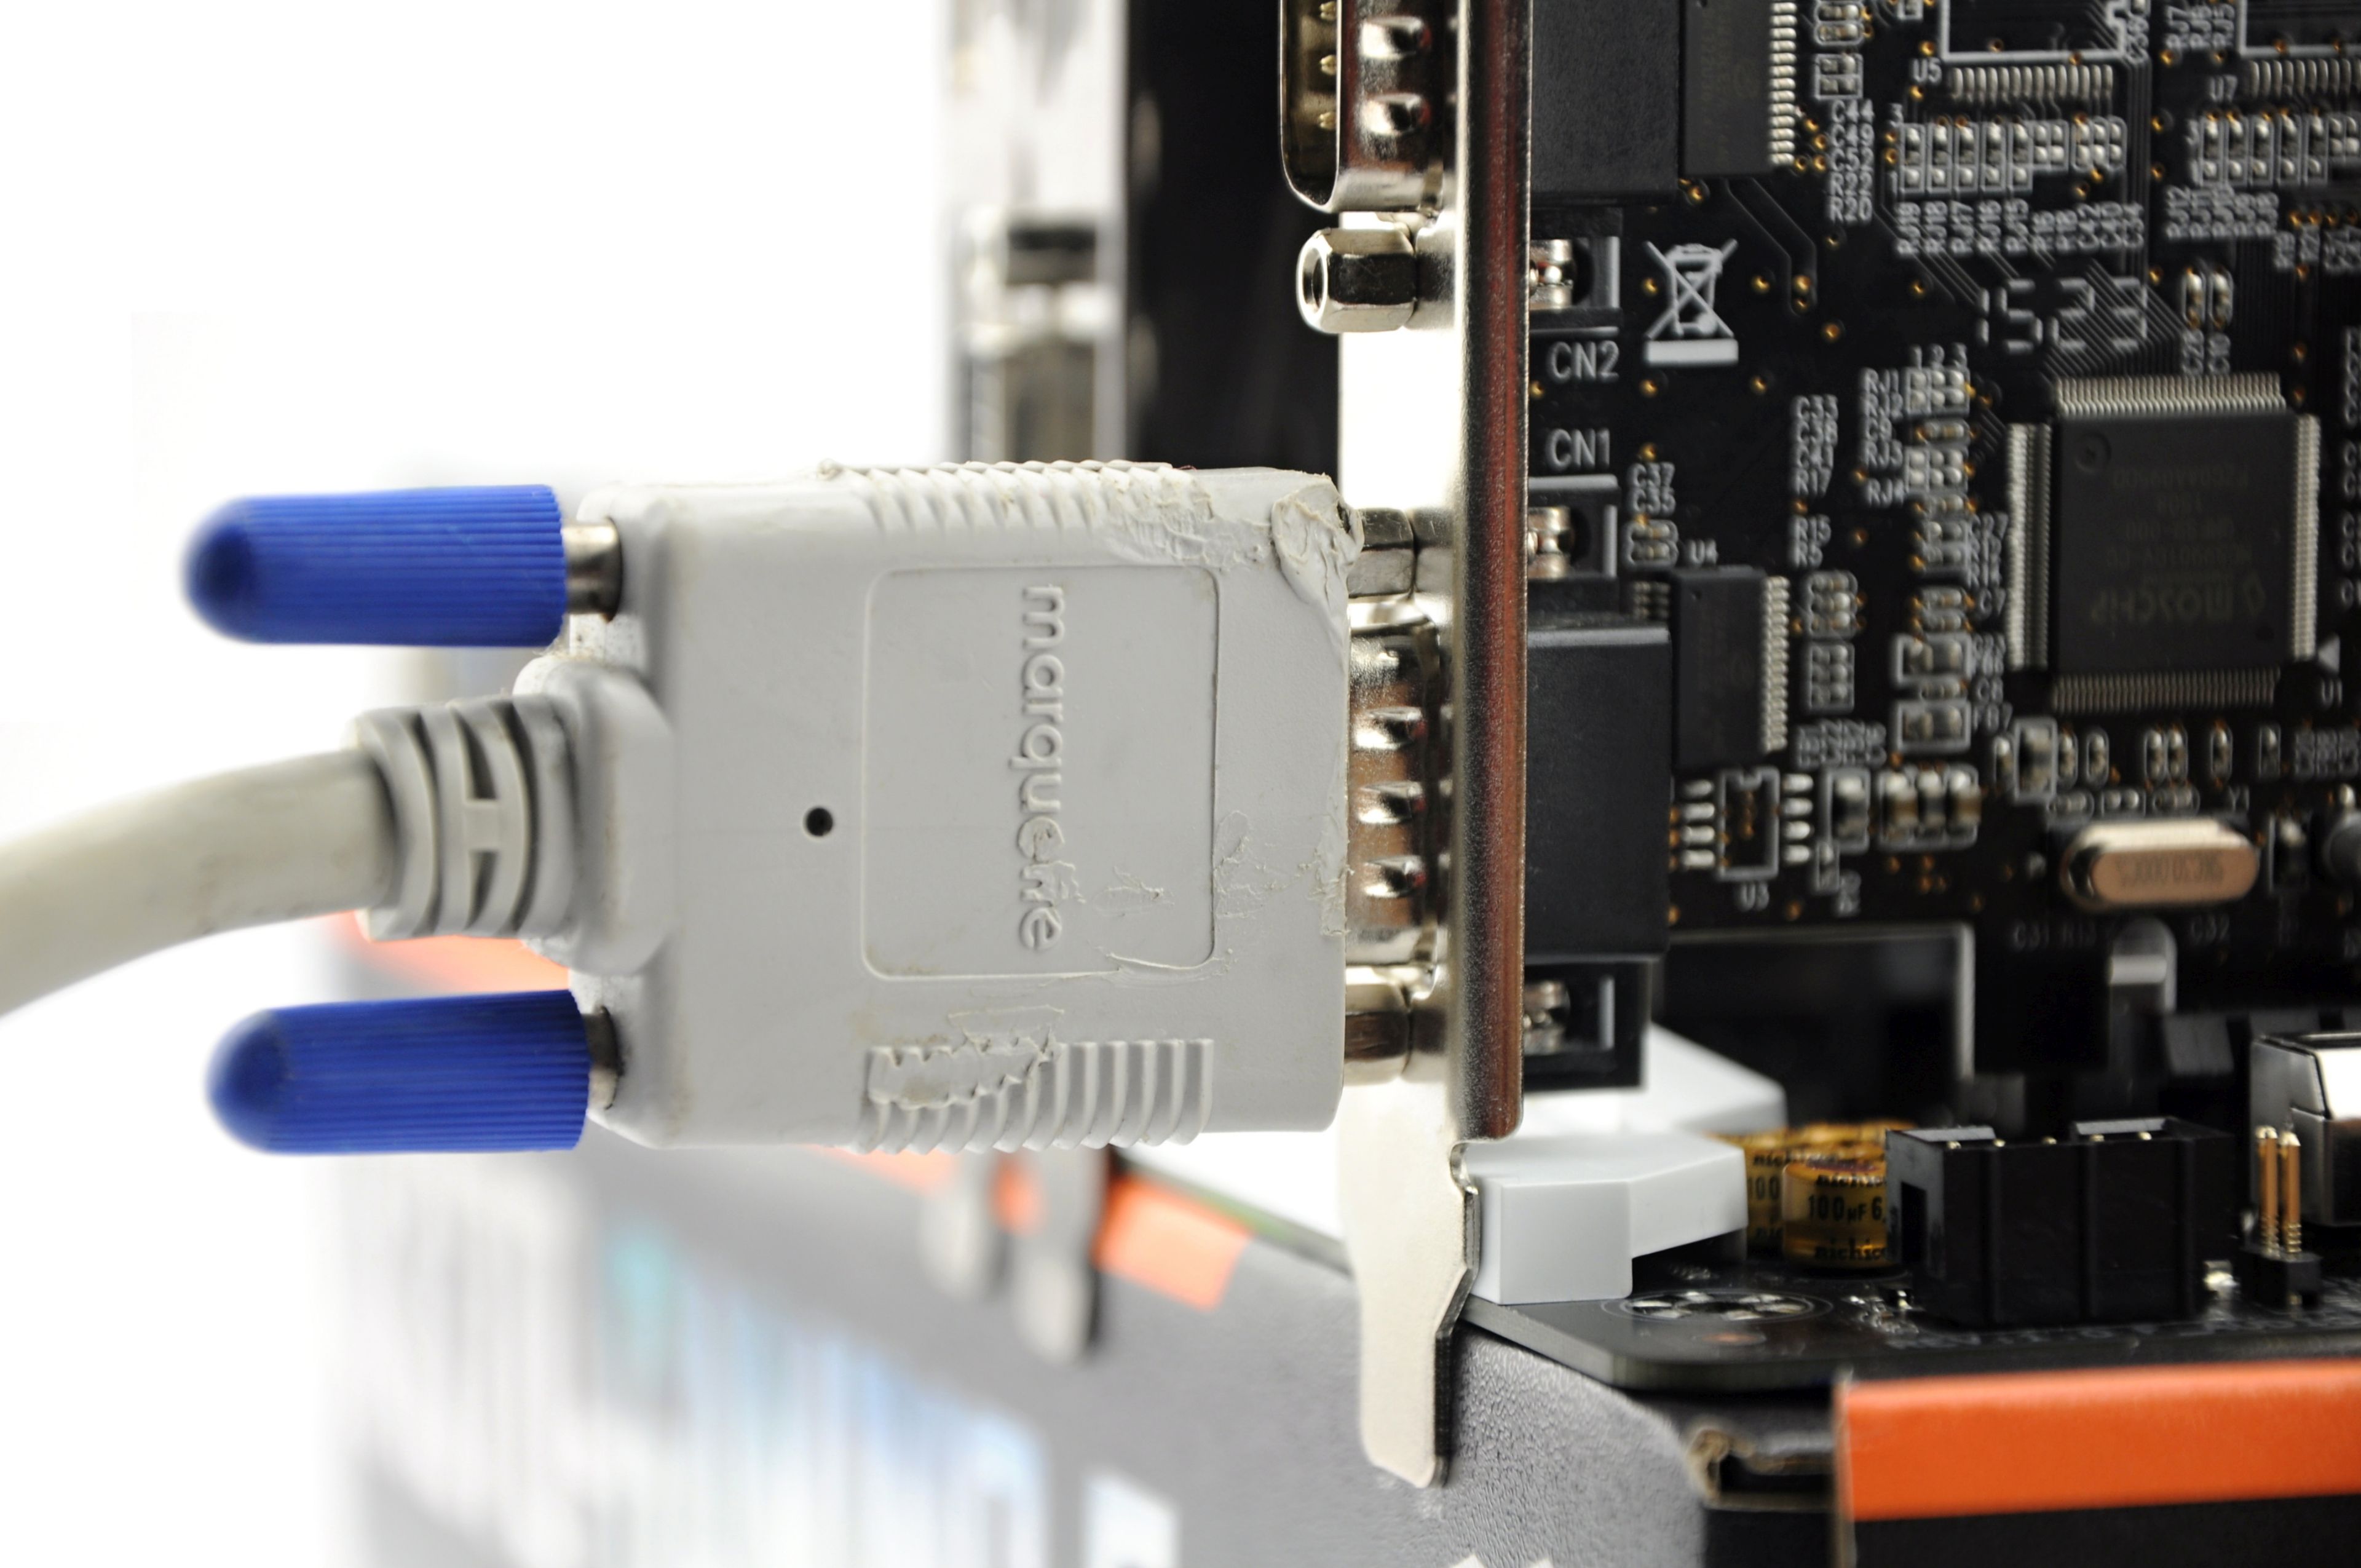
Consumption of the configuration was recorded for 600 – 900 seconds using the Extech 380801 powermeter which sent data via RS232. We put the average values from approximately 150 measured samples to the charts. Fluctuations that occurred from time to time by random system activity, or just by mouse movement, were removed during post-processing. Used peripherals (mouse and keyboard) were the same in all tests. To bring the results as close to real consumption as possible, we used power supply SeaSonic Prime 650 W with 80Plus Titanium (ie with high efficiency 90+ %).
| Test configuration | |
| BIOS version | 7A32v19 |
| Processor | AMD Ryzen 7 1800X |
| CPU cooler | Fractal Design Kelvin S24@max. |
| Thermal paste | Noctua NT-H1 |
| RAM | G.Skill Flare X, 2× 8 GB, 3200 MHz/CL14 |
| Graphics card | MSI GeForce GTX 1060 Gaming X (6 GB) |
| SSD | Patriot Flare (120 GB) |
| Power supply | SeaSonic Prime 650 W (80Plus Titanium) |
We have added the third major manufacturer to our tests of X370 boards – MSI. The X370 Pro Carbon is about thirty euros cheaper than its opponents from Gigabyte and Asus, so it will be interesting to watch how these savings are reflected in overall quality and design. We don’t want to give away too much, but we can say that it is definitely worth checking.
Reports from internal sensors (chipset, VRM, …)


We have added the third major manufacturer to our tests of X370 boards – MSI. The X370 Pro Carbon is about thirty euros cheaper than its opponents from Gigabyte and Asus, so it will be interesting to watch how these savings are reflected in overall quality and design. We don’t want to give away too much, but we can say that it is definitely worth checking.
Circuit heating – stock + same OC
| Motherboard | Vcore with the same OC (in BIOS) | |
| Asus ROG Strix X370-F Gaming | 1.3250 V | |
| Gigabyte Aorus AX370 Gaming 5 | 1.3185 V | 1,3185 V |
| MSI X370 Gaming Pro Carbon | 1.3500 V |
We have added the third major manufacturer to our tests of X370 boards – MSI. The X370 Pro Carbon is about thirty euros cheaper than its opponents from Gigabyte and Asus, so it will be interesting to watch how these savings are reflected in overall quality and design. We don’t want to give away too much, but we can say that it is definitely worth checking.
Gallery of thermal images
MSI X370 Gaming Pro Carbon is on the left. On the right is Asus ROG Strix X370-F Gaming with the top-notch MOSFETs IR3555M.
In idle

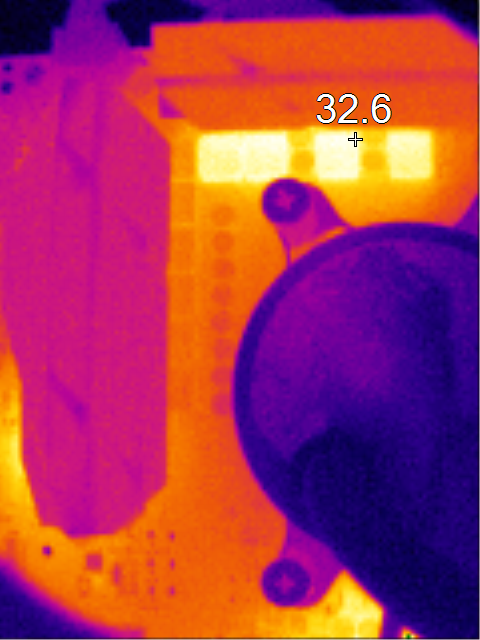
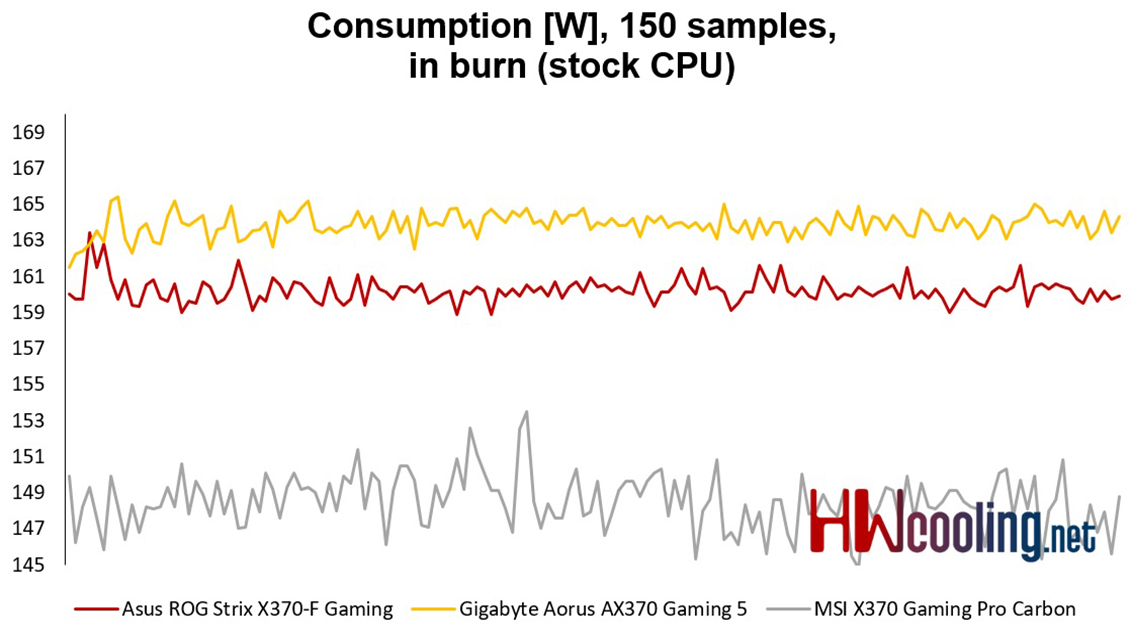
In burn (stock CPU)
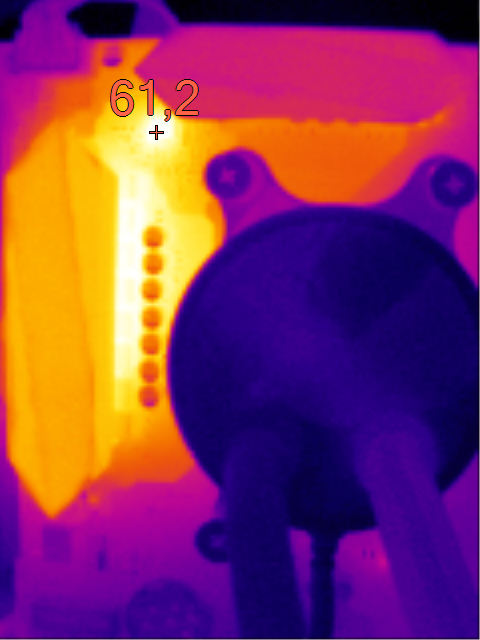
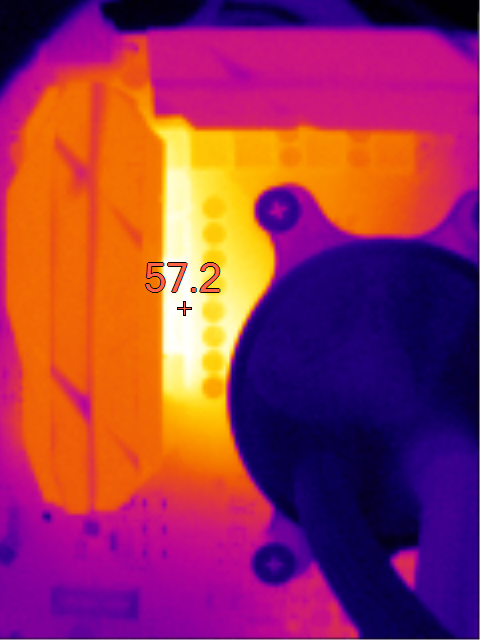
In burn (OC CPU)
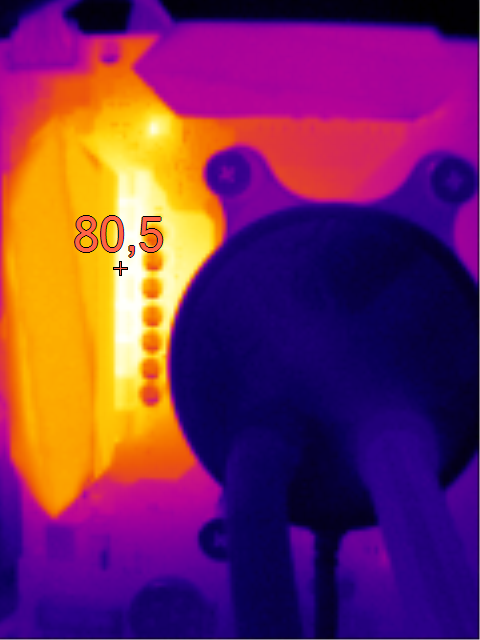
In idle without heatsinks
In burn without heatsinks (stock CPU)

We have added the third major manufacturer to our tests of X370 boards – MSI. The X370 Pro Carbon is about thirty euros cheaper than its opponents from Gigabyte and Asus, so it will be interesting to watch how these savings are reflected in overall quality and design. We don’t want to give away too much, but we can say that it is definitely worth checking.
Consumption – stock + same OC


| Motherboard | Vcore with the same OC (in BIOS) | |
| Asus ROG Strix X370-F Gaming | 1.3250 V | |
| Gigabyte Aorus AX370 Gaming 5 | 1.3185 V | 1,3185 V |
| MSI X370 Gaming Pro Carbon | 1.3500 V |
We have added the third major manufacturer to our tests of X370 boards – MSI. The X370 Pro Carbon is about thirty euros cheaper than its opponents from Gigabyte and Asus, so it will be interesting to watch how these savings are reflected in overall quality and design. We don’t want to give away too much, but we can say that it is definitely worth checking.
Conclusion
Things that made X370 Gaming Pro Carbon cost less than Asus ROG X370-F Gaming and Gigabyte Aorus AX370 Gaming 5 are nothing dramatic. Compared to Asus, it is lacking RAM overclocking over 3200 MHz, depth of UEFI settings, and luxury VRM. Gigabyte has better dual BIOS, the pair of RJ-45, better audio codecs, more external buttons, and other small things.
However, Pro Carbon differs by more efficient voltage regulation. It provides better consumption (by -12 – -15 W) with the same processor performance (with RGB turned off). If you choose to set the voltage manually, this difference is gone (obviously), and we have measured 210 W with both configurations after overclocking to 3.95 GHz. What’s interesting is that MSI board needs a significantly higher Vcore. Gigabyte board could handle R7 1800X with 1.3185 V, and Pro Carbon needed 1.3500 V. This is something that is MSI often criticized for, but we would like to say something more about it. Yes, the voltage is higher, but the current is lower. Sure, the lifespan is reduced by higher voltage, but the real TPD is basically the same (per the unit of power/performance).
The design and implementation of cooling is one of the more concerning drawbacks of this board. The heat loss of VRM is a bit better than with Aorus AX370 G5, but the heatsink surface is way hotter. That means that airflow cannot take the heat away efficiently. PCH heatsinks look better on the eye, they have some ribs, and they have better design than those of Asus X370-F, but the chipset reached the highest temperatures anyway. It doesn’t matter that much if you stay below 50 °C, but the potential of the used material was not fully exploited, again. Very dry and firm thermal compound is probably to blame.
MSI X370 Gaming Pro Carbon is a decent motherboard that will not be a limitation for any regular gaming computer or a workstation. It also allows to use two SSD (M.2). A good deal for 150€.
| MSI X370 Gaming Pro Carbon |
| + well balanced components |
| + quite good for casual overclocking |
| + a decent product for a decent price |
| + rich fan control options |
| + effective automatic Vcore regulation with processor in the default state |
| + a mobile app for monitoring and adjustments |
| + the first PCIe ×16 slot is further away from the socket |
| + intuitive interface (UEFI/Command Center) |
| + two M.2 slots |
| – VRM cooling |
| – the Asus board has more options for overclocking |
| – no BIOS backup |
If you like magazine HWCooling, please support us.
We cannot keep publishing this kind of detailed content on regular basis without your help because it is very time consuming. We will be grateful for every contribution. Thank you!