


SSD cooling tests
The latest hardware from the Swedish company is a case for Mini-ITX boards. However, thanks to the sensible interior layout, it is also possible to mount larger components. Their cooling is taken care of by the ubiquitous perforation of the outer plates and two 140 mm fans. With or without them? You’ll have to decide what you want to cool more effectively. We measured four different scenarios in our tests.
Basic parameters
| Parameters | Fractal Design |
| Ridge | |
| Supported motherboard formats | Mini-ITX |
| Supported PSU format | SFX, SFX-L |
| CPU cooler | up to 70 mm |
| Graphics cards | up to 335 mm |
| Fan | 2× up to 140 mm + 3× 80 mm |
| Supported liquid radiators | 1× up to 280 mm |
| 2,5" positions | 4 |
| 3,5" positions | no |
| 5,25" positions | no |
| Dimensions [H/D/W] (and volume) | 395,4 × 374 × 110 mm – with stand (12,5 L – without feet) |
| Weight | 4.3 kg |
| Materials | steel + plasic + tempered glass + synthetic leather |
| Connectivity | 2× USB 3.2 gen. 1 type A + 1× USB 3.2 gen. 2 type C+ 1× 3,5mm jack |
| MSRP | 155 EUR |
Exterior
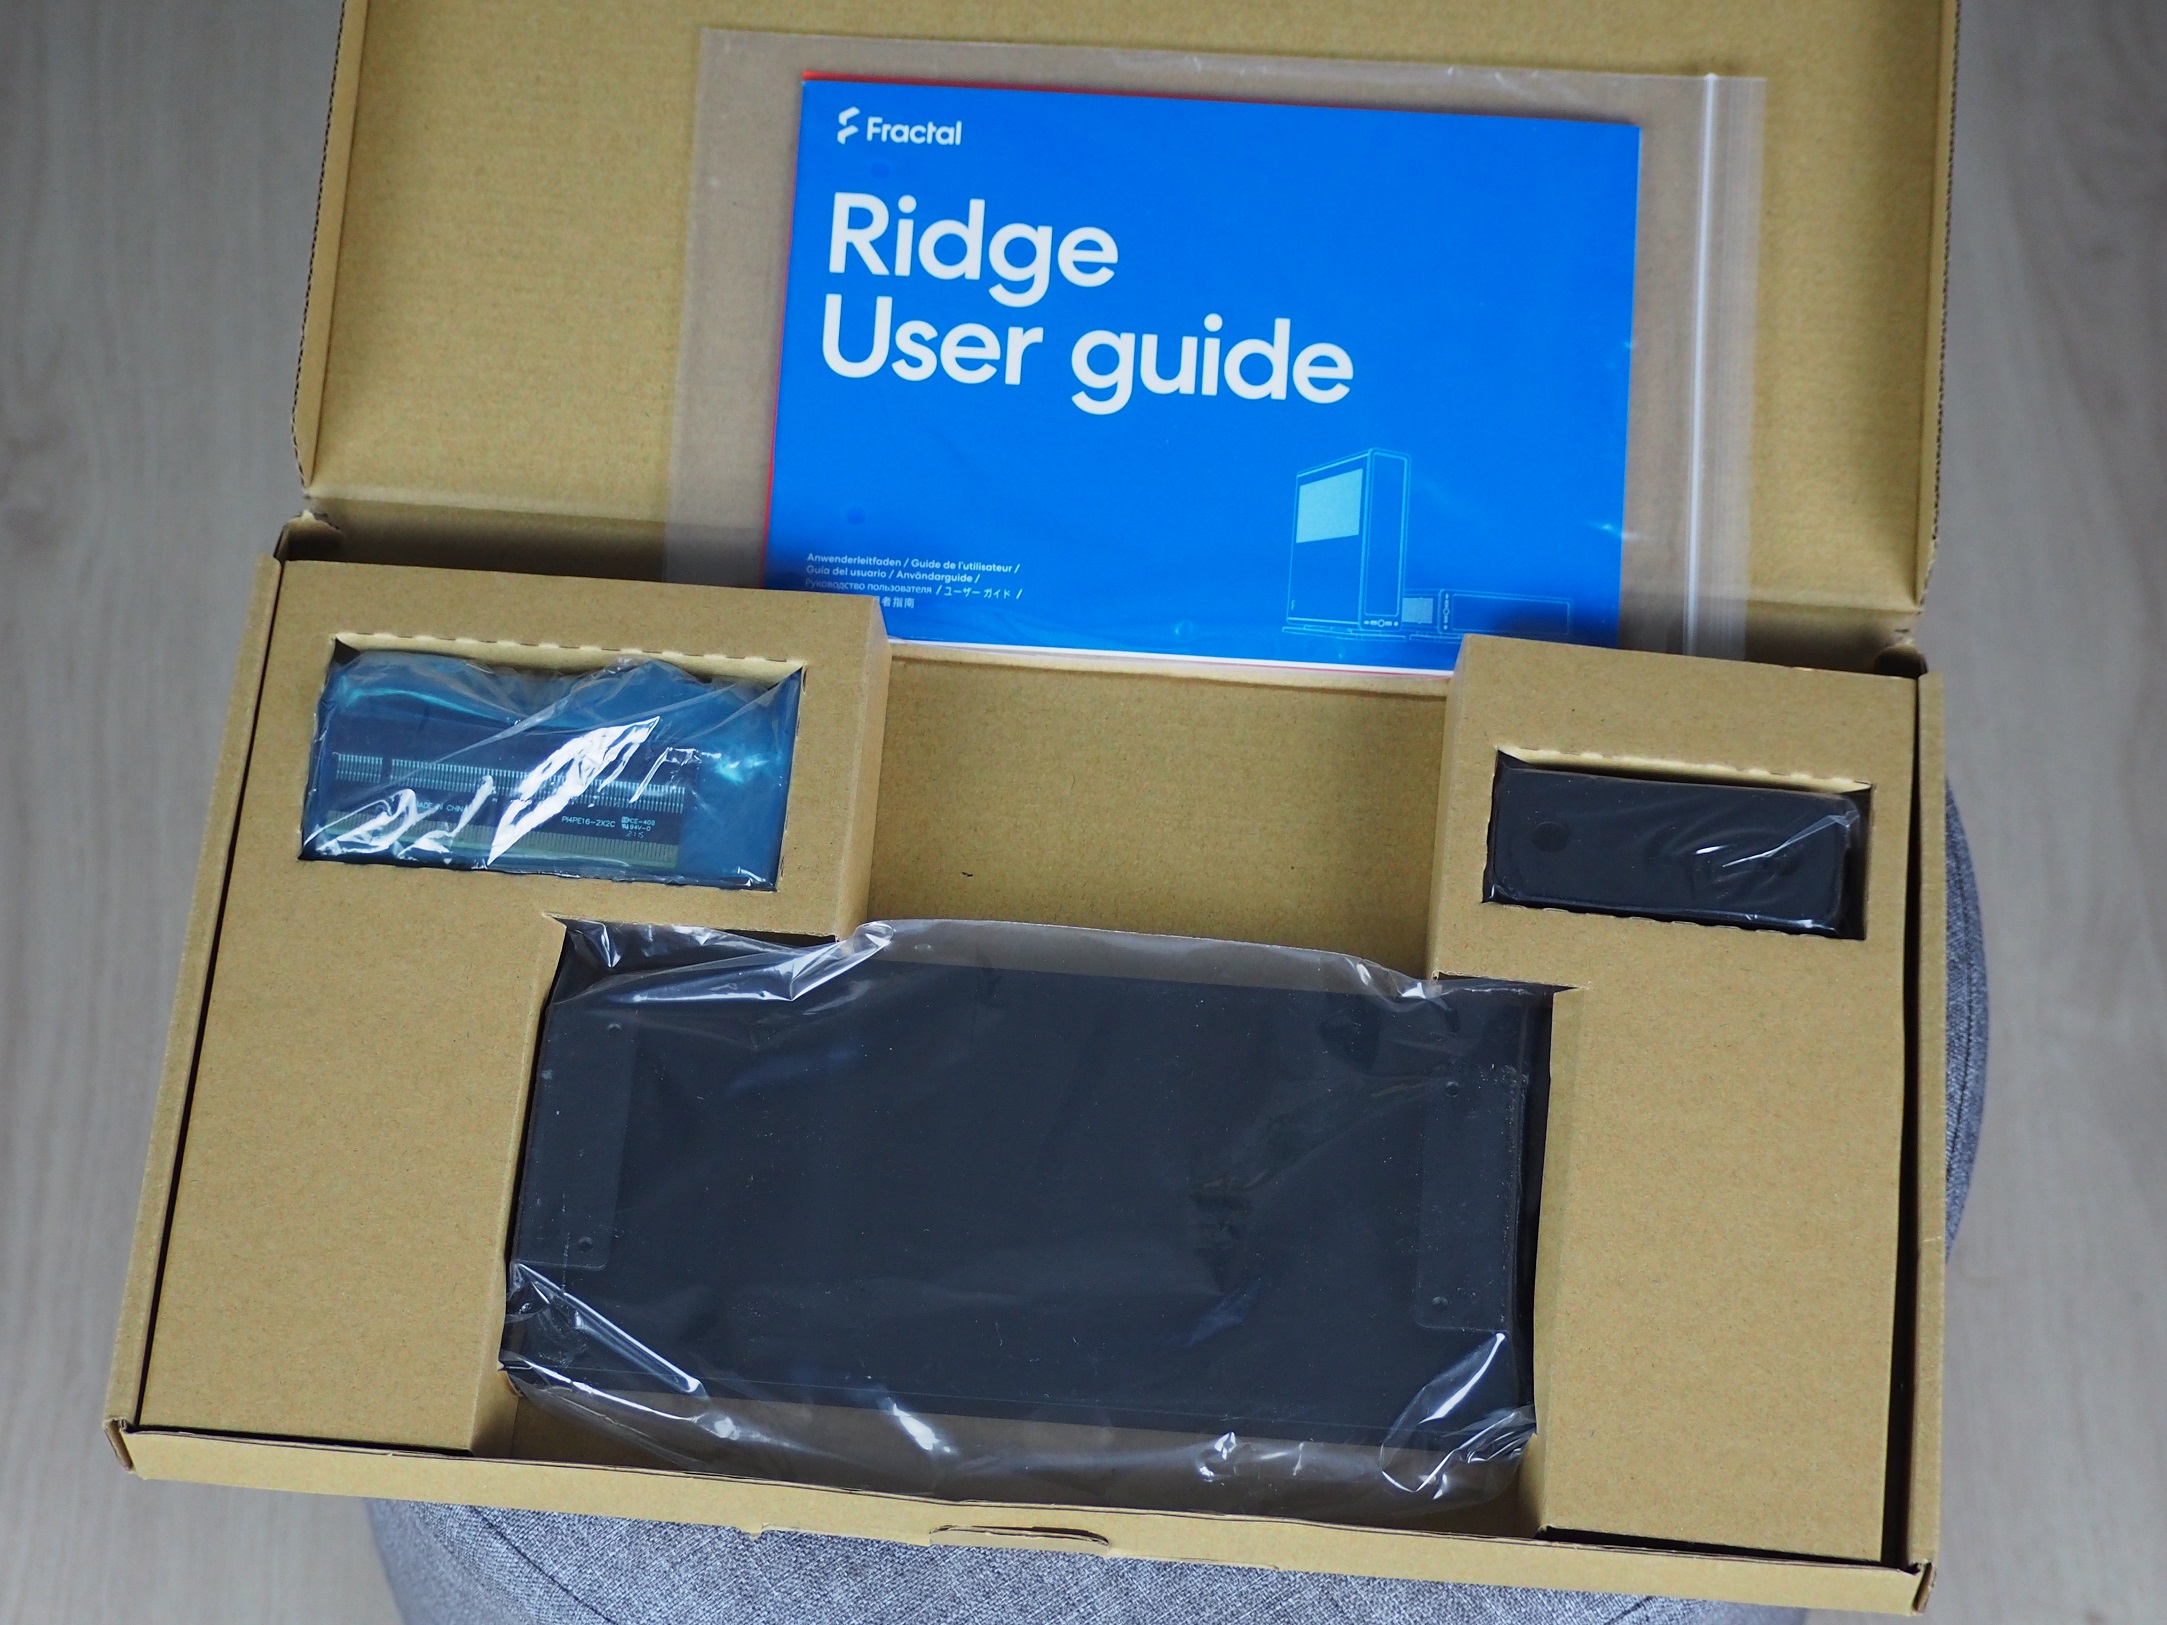
In a small box, the case is filled not with polystyrene, as is customary, but with cardboard stuffing. The first thing you’ll pull out from inside is the accessories. There is quite a lot of them considering the small size, but without most of them you would not be able to use the case to its full potential. You will find a large stand, a small stand, an extension for the PCI Express connector, screws and of course a detailed illustrated manual.
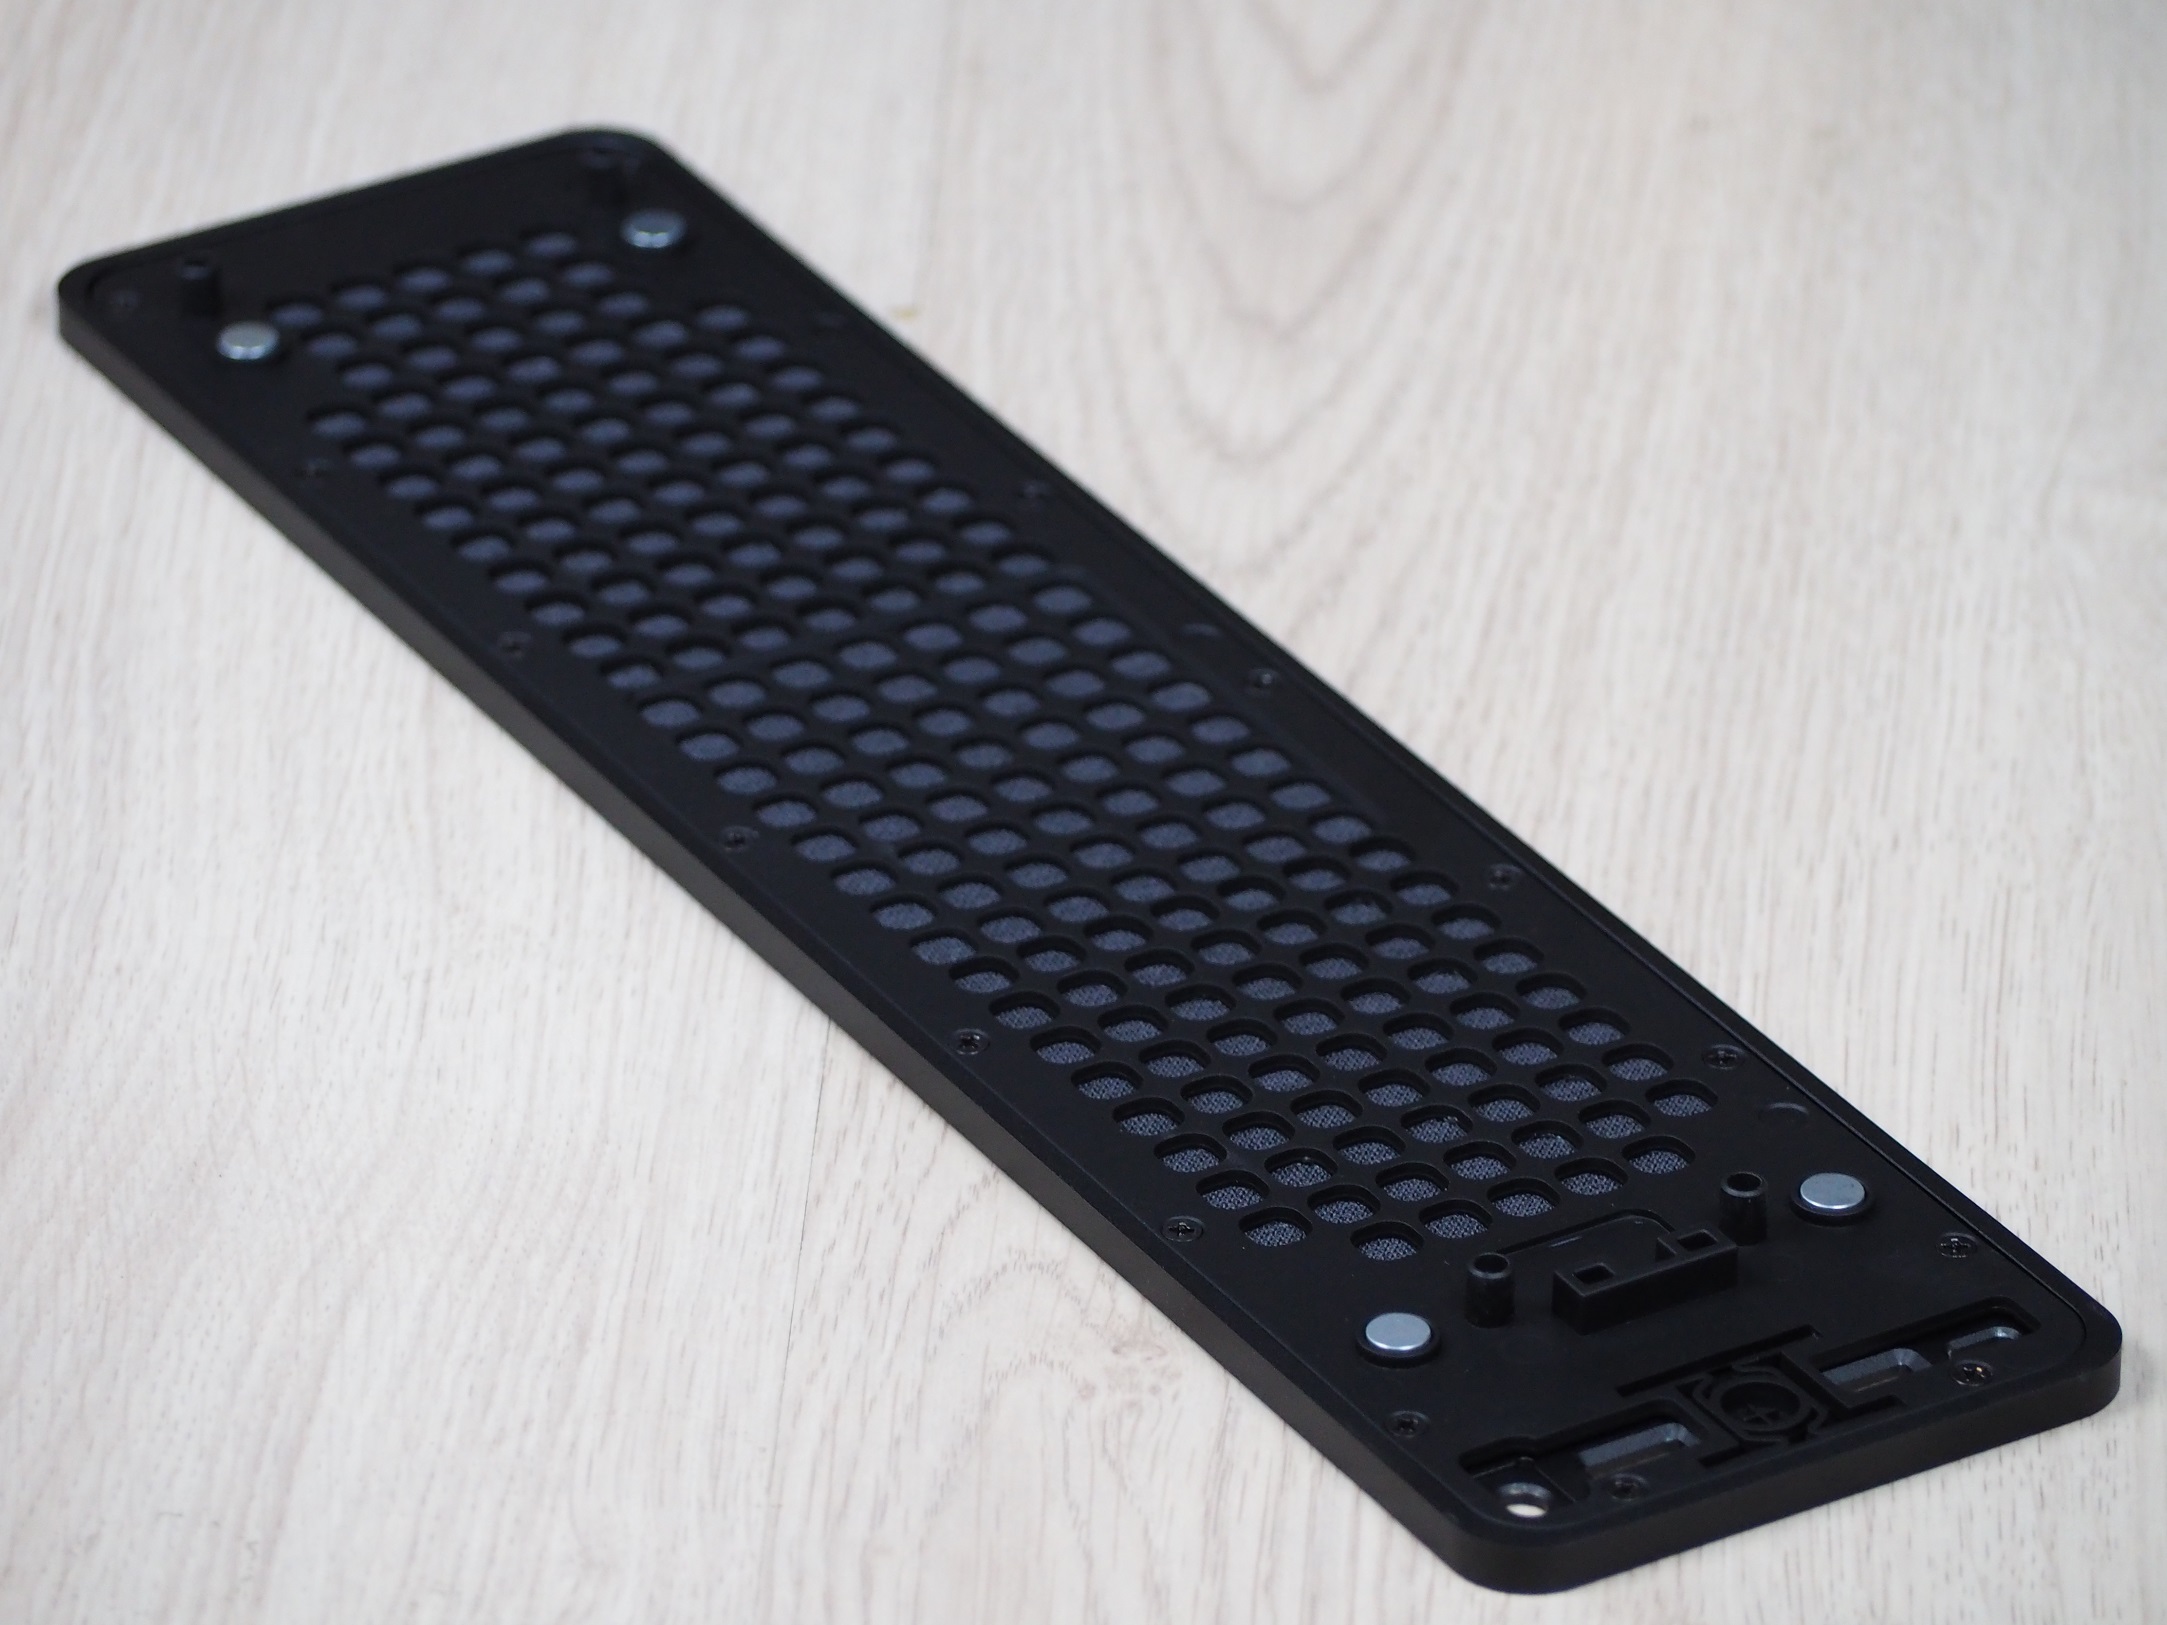
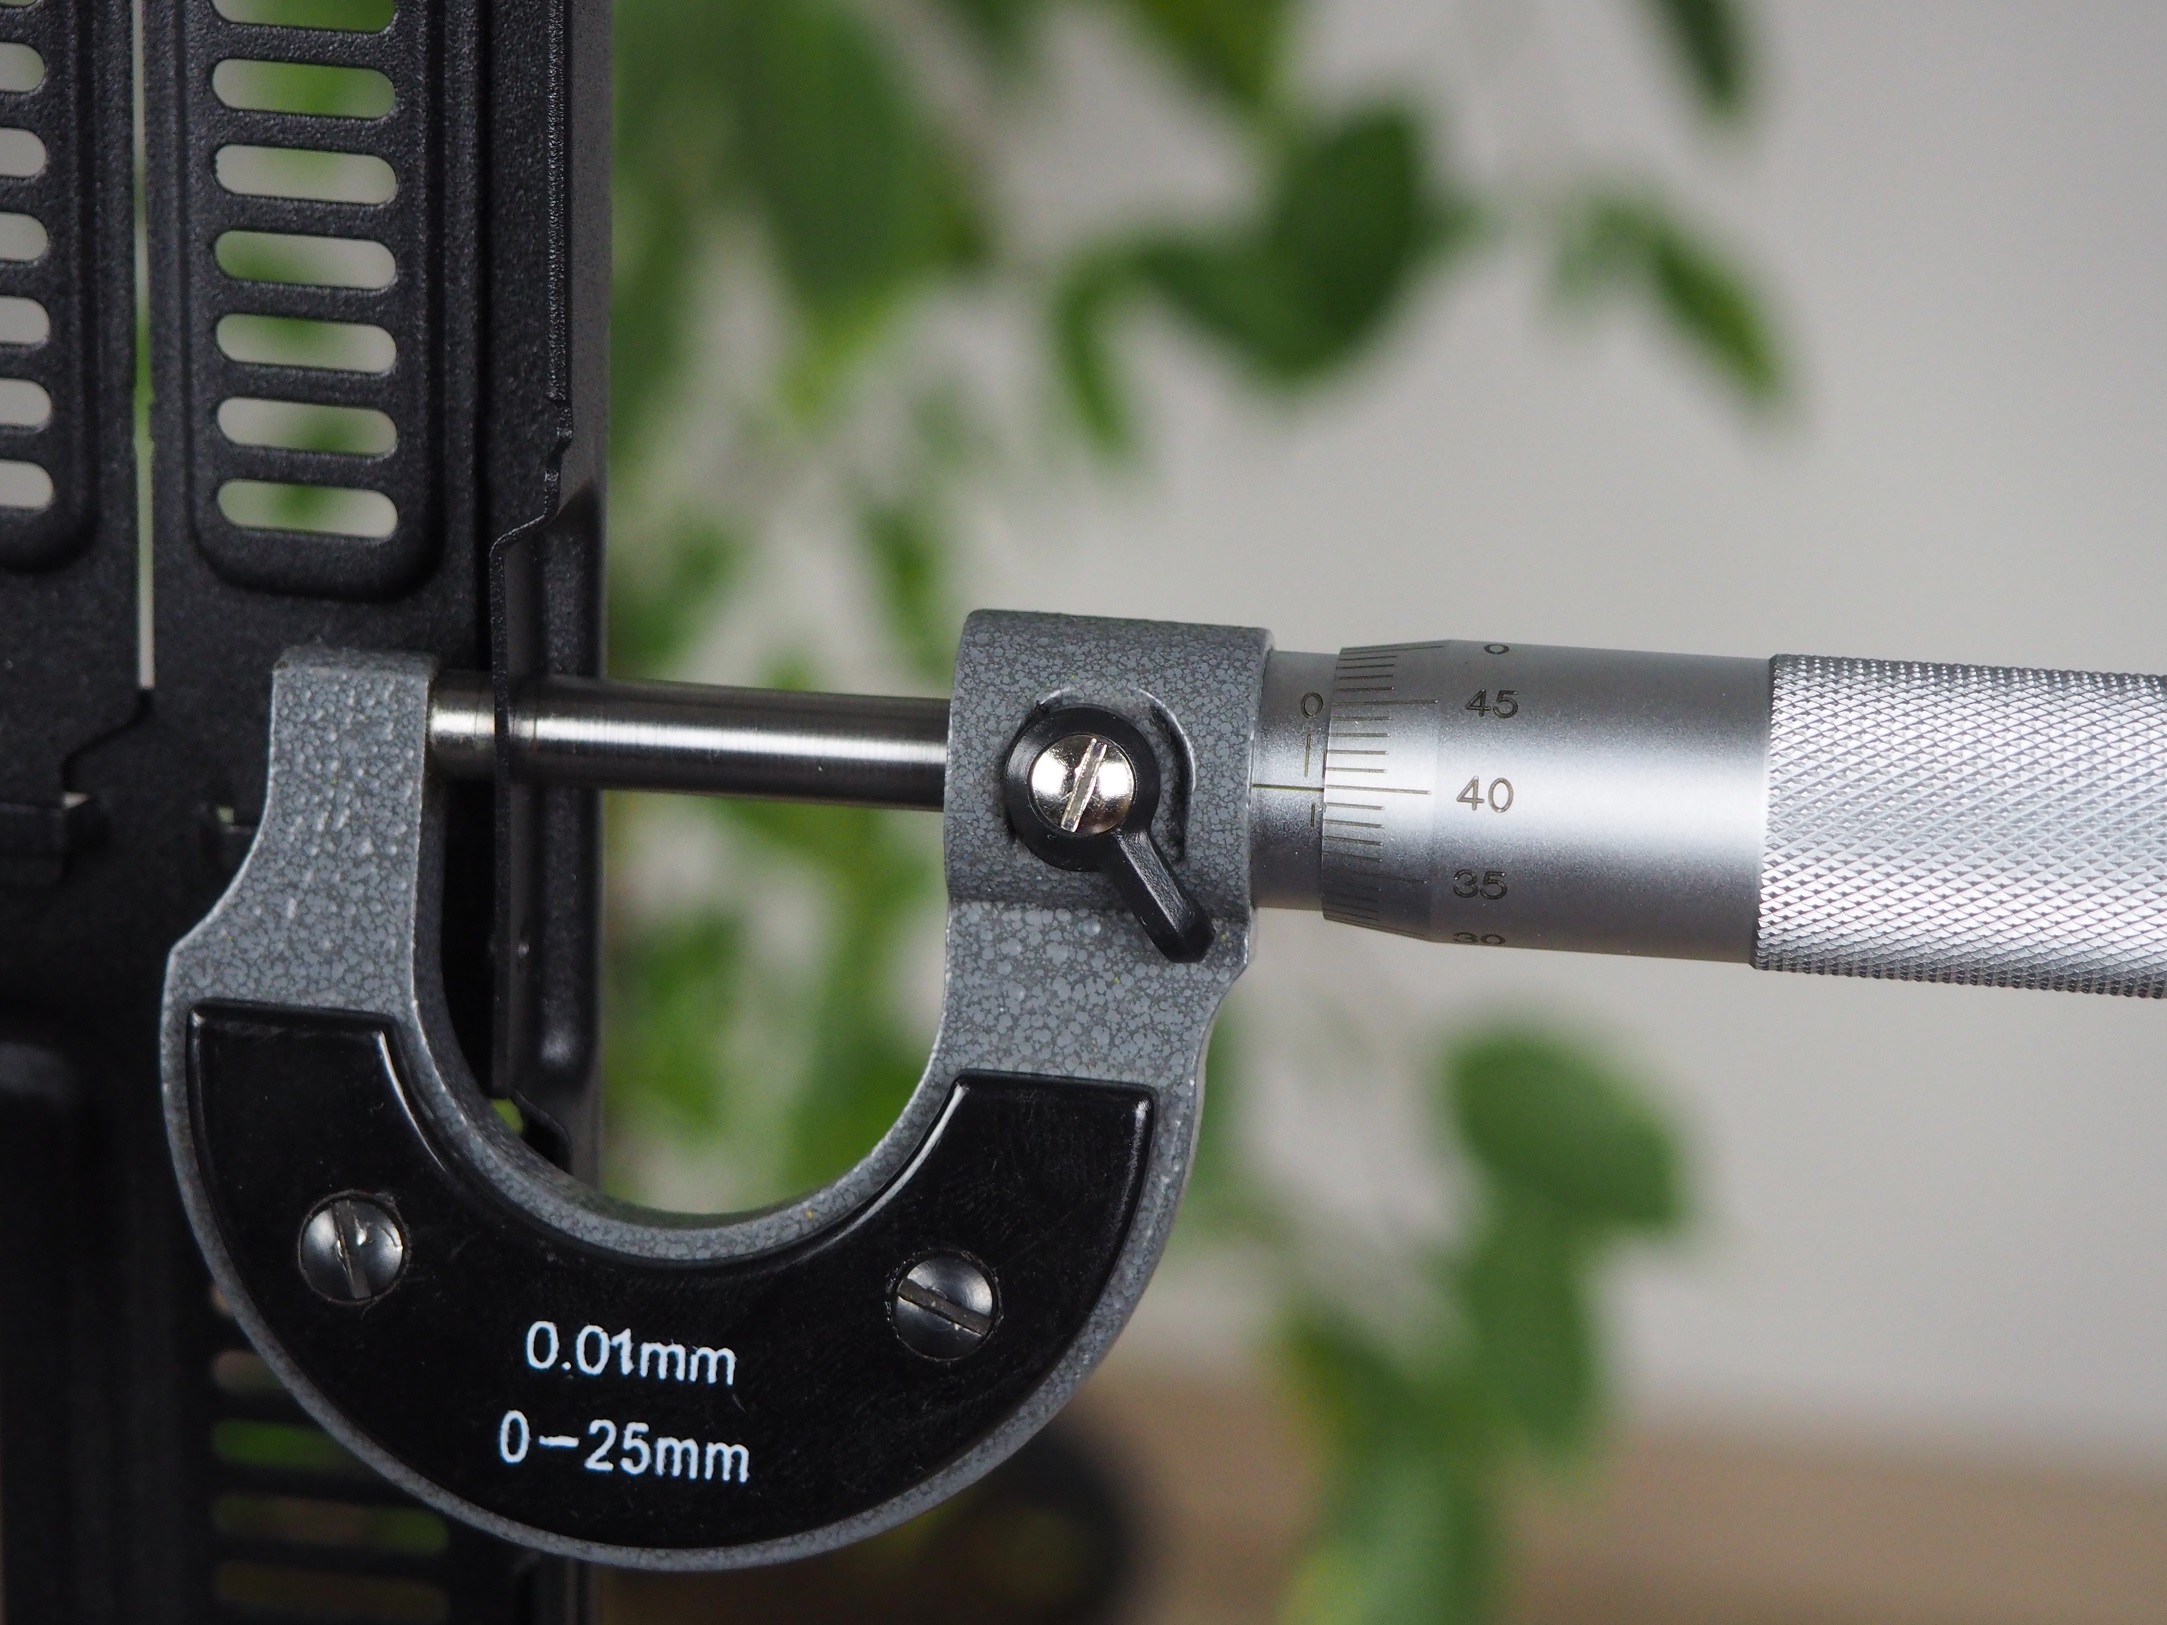
As everywhere, you have to start by demounting both side panels. These have a slightly modified latching mechanism as we know from other Fractal Design model lines. There is a screw at the back and a locking latch at the front. The side panels flex slightly even at their 0.85mm thickness.But this is probably due to the large area on them with holes.
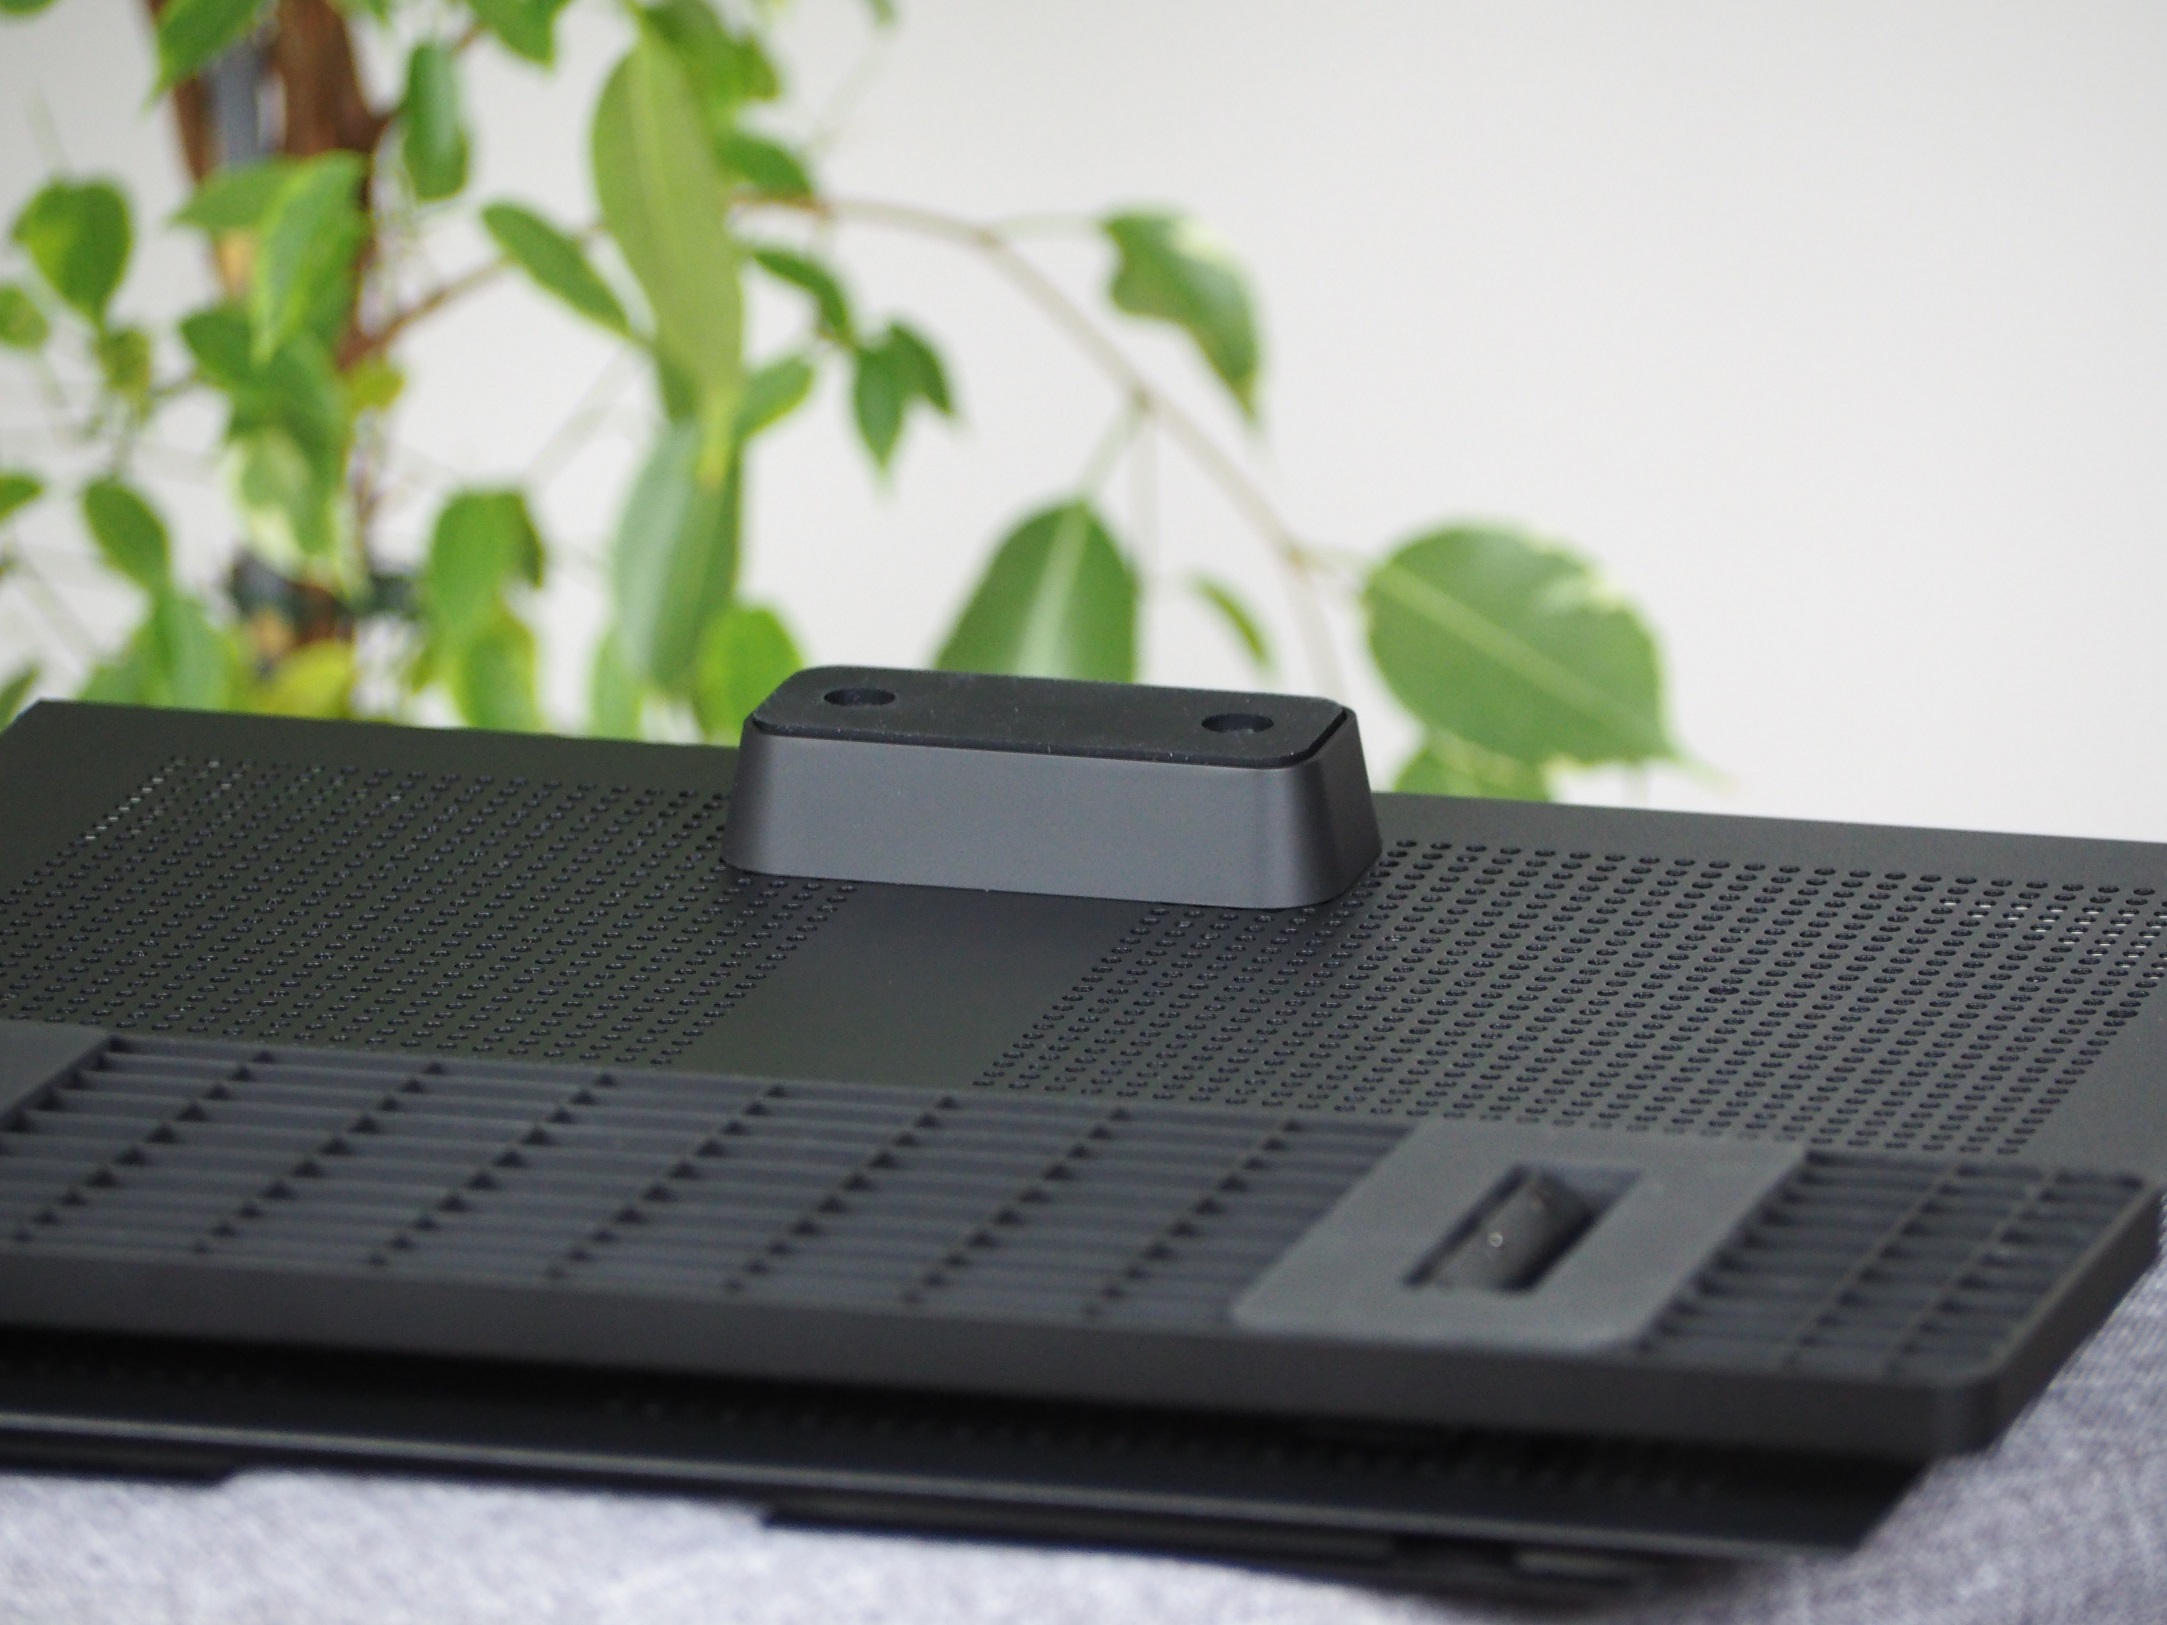
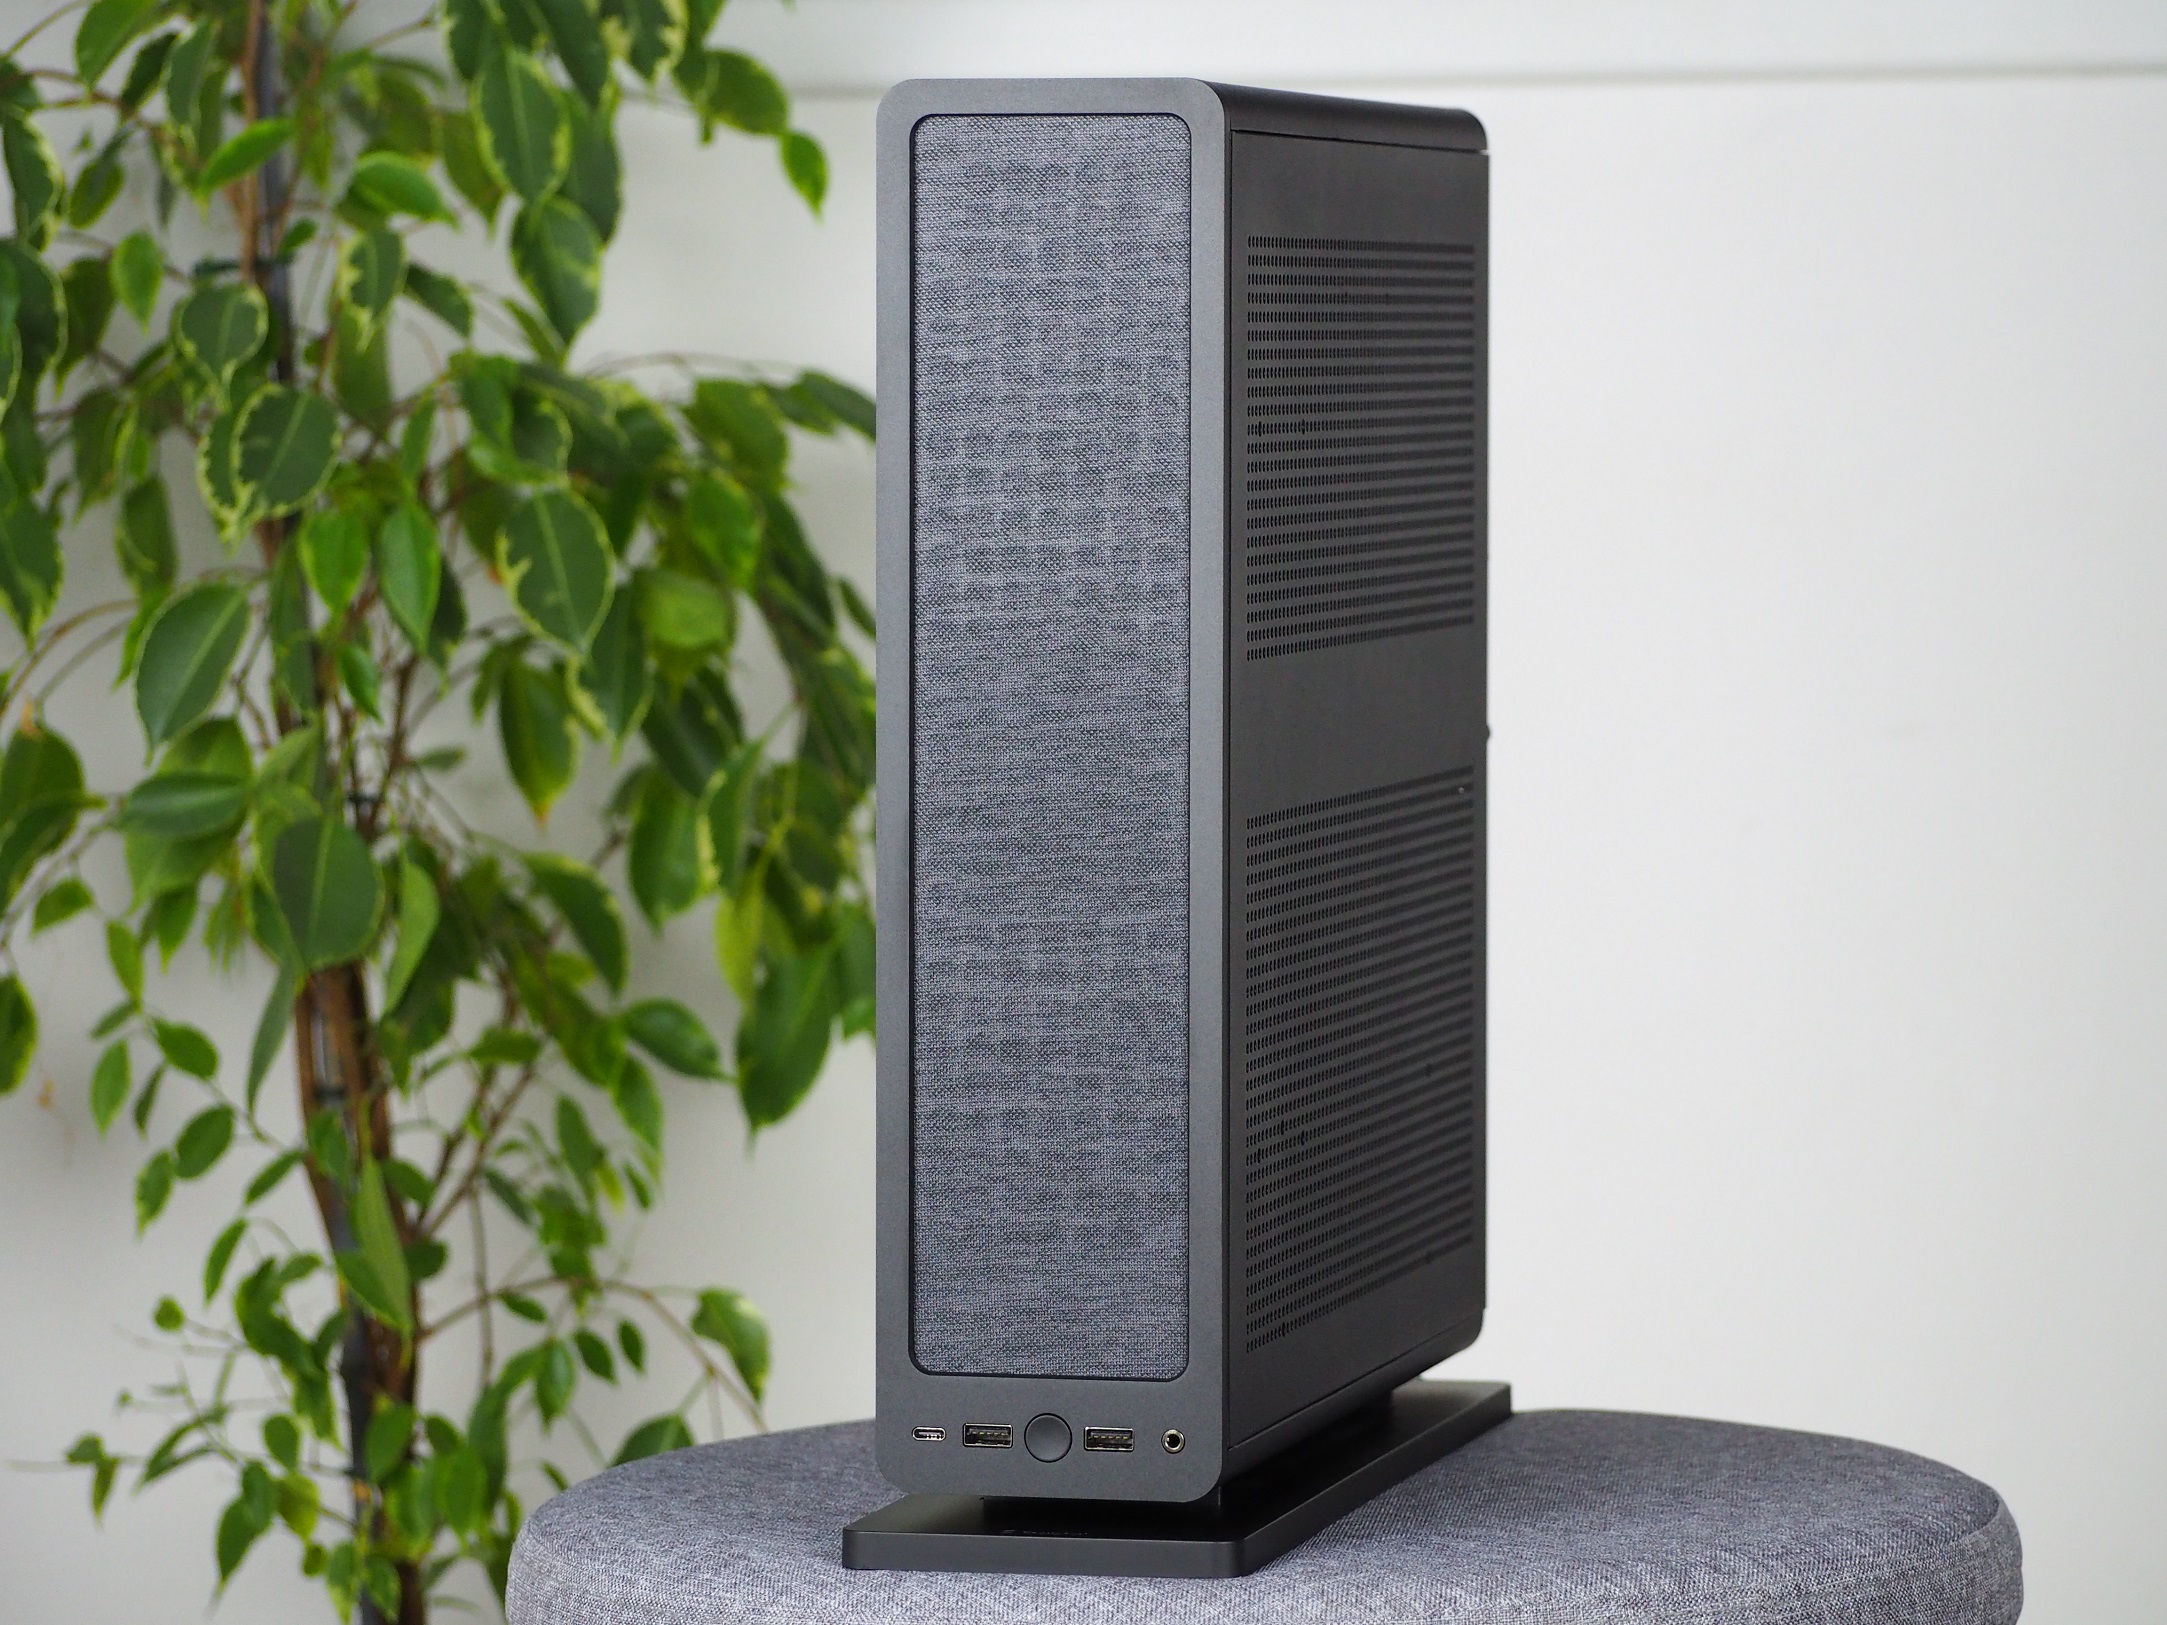
Even though the entire case will be disassembled prior to installation, you can start by mounting a stand on the bottom. A case that has good stability is better to work with. You need to first unscrew and unclick the bottom part as well as the side panels. You can then mount the stand on it, the larger of the two in the accessories.

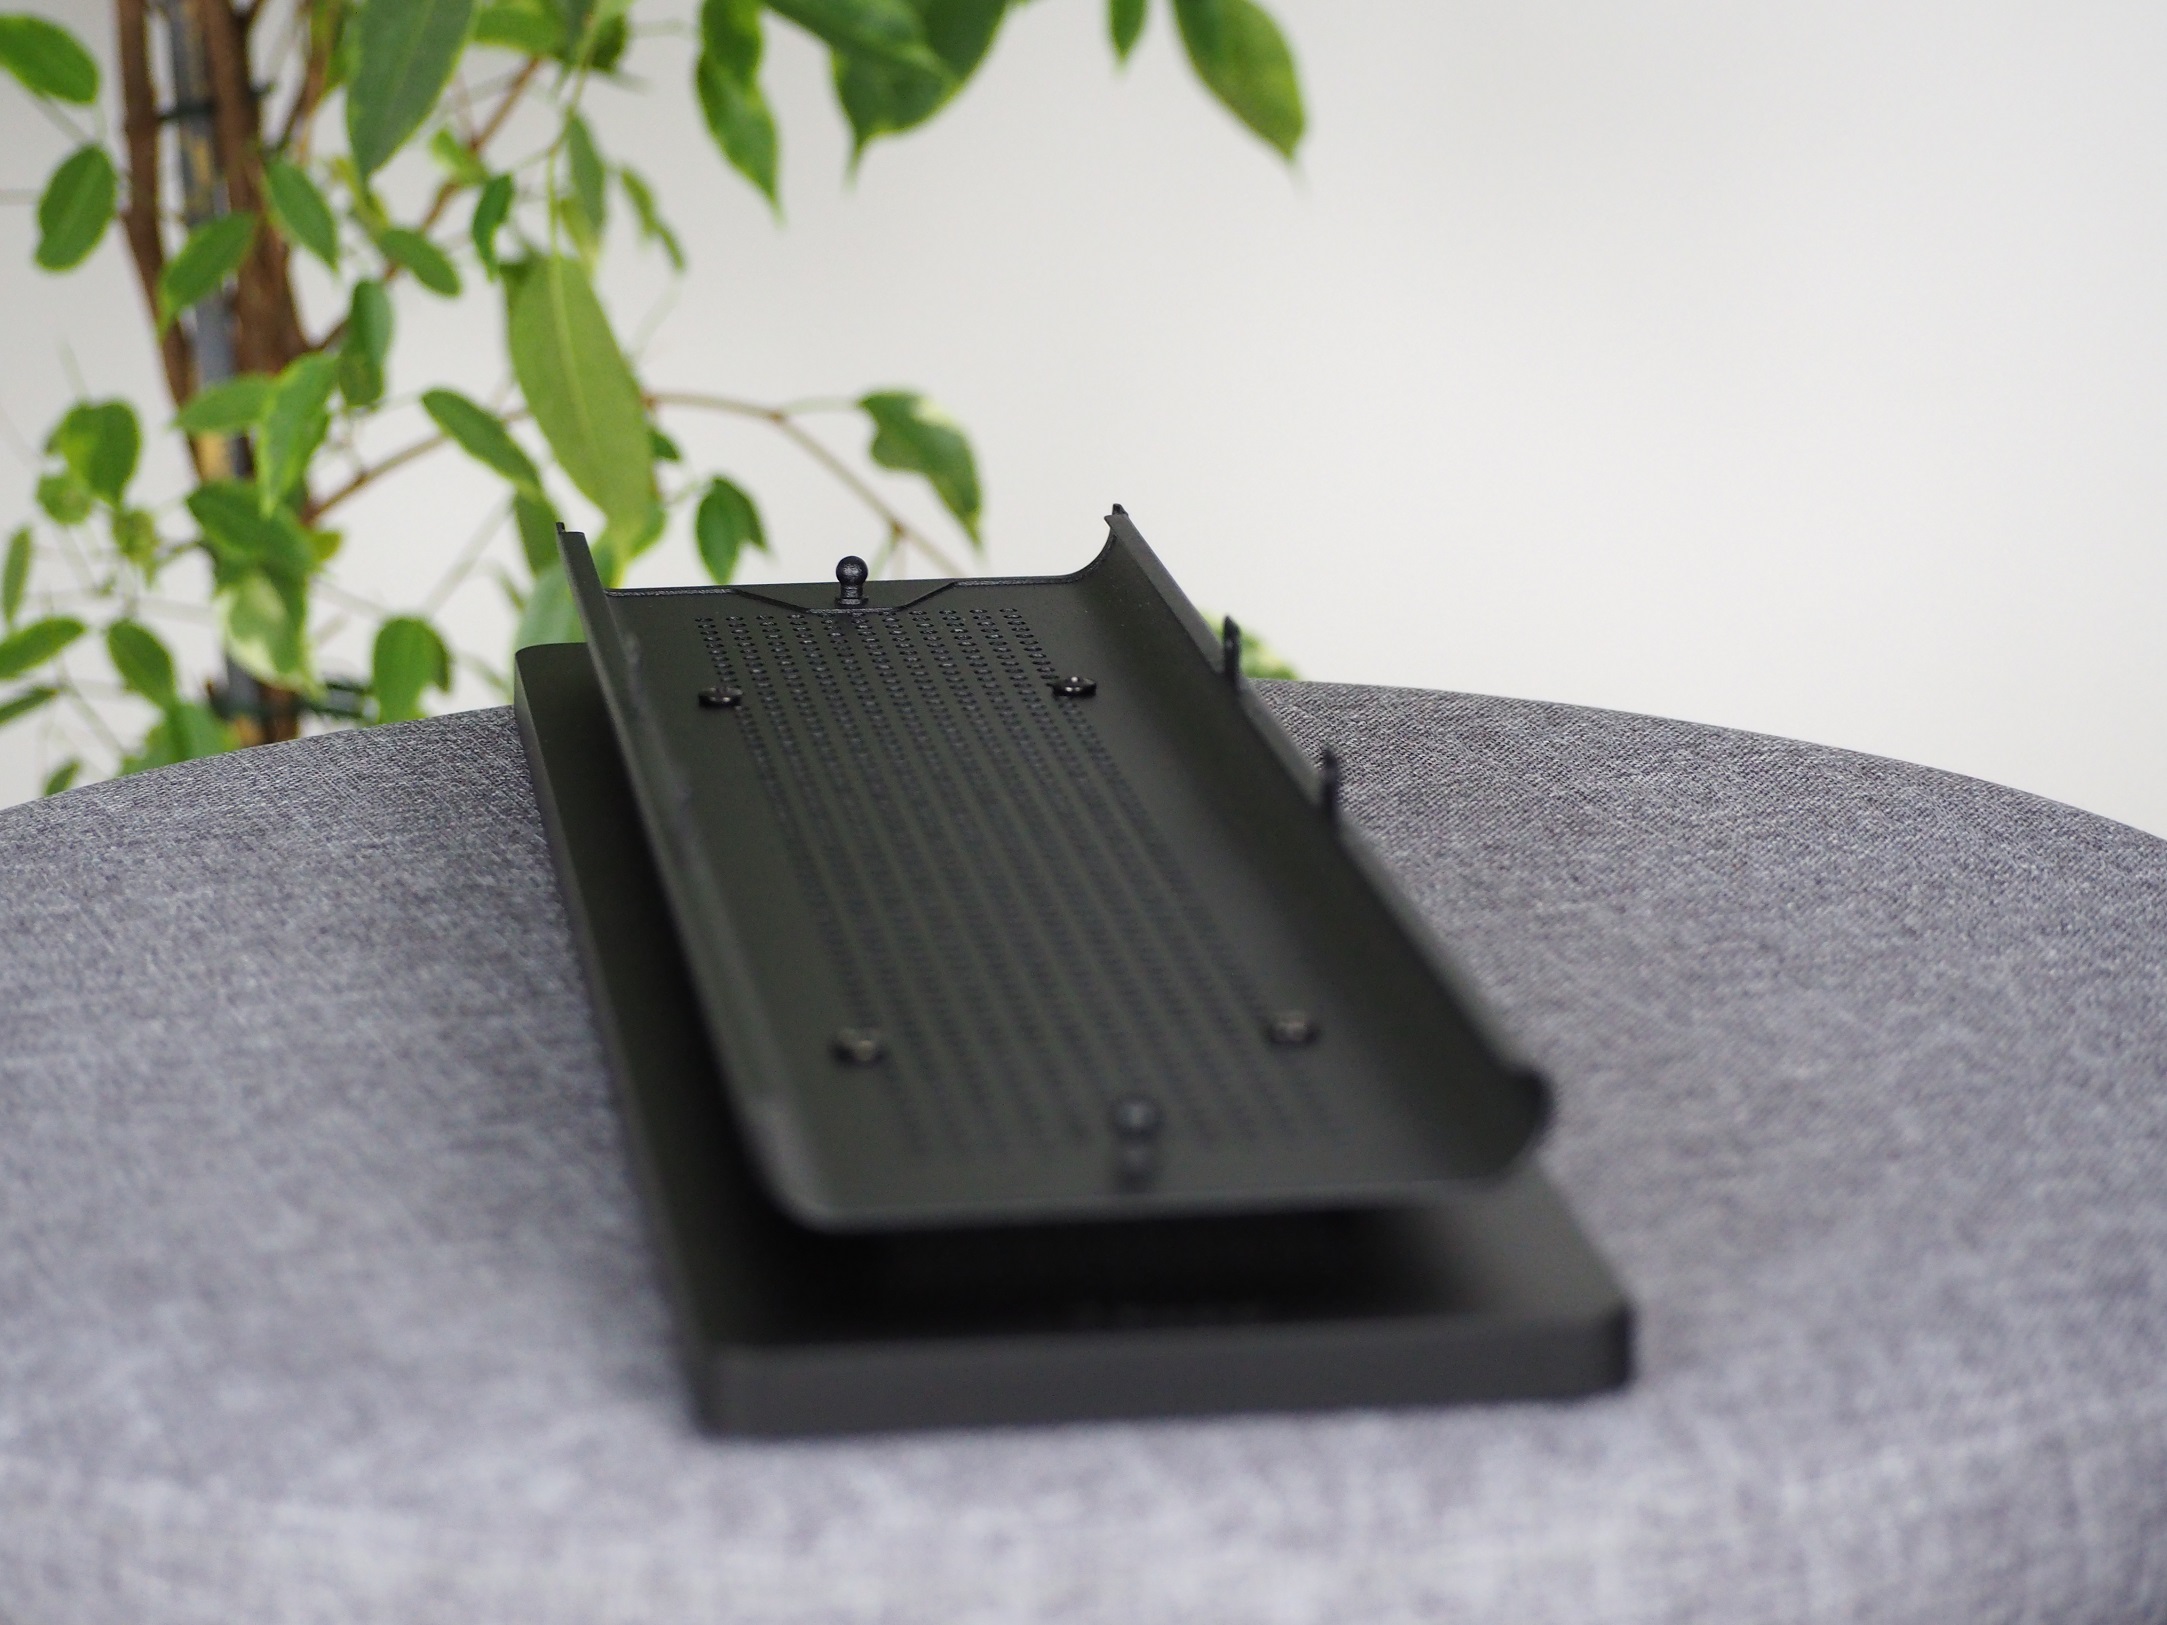

In addition to the vertical position of the case, you also have a second option, the horizontal position. This is created by screwing the two stands onto the right side panel. The large one at the front and the small one at the back or they can also be on the sides of the side panel (top and bottom). Now you can position the case according to your preference and available space.
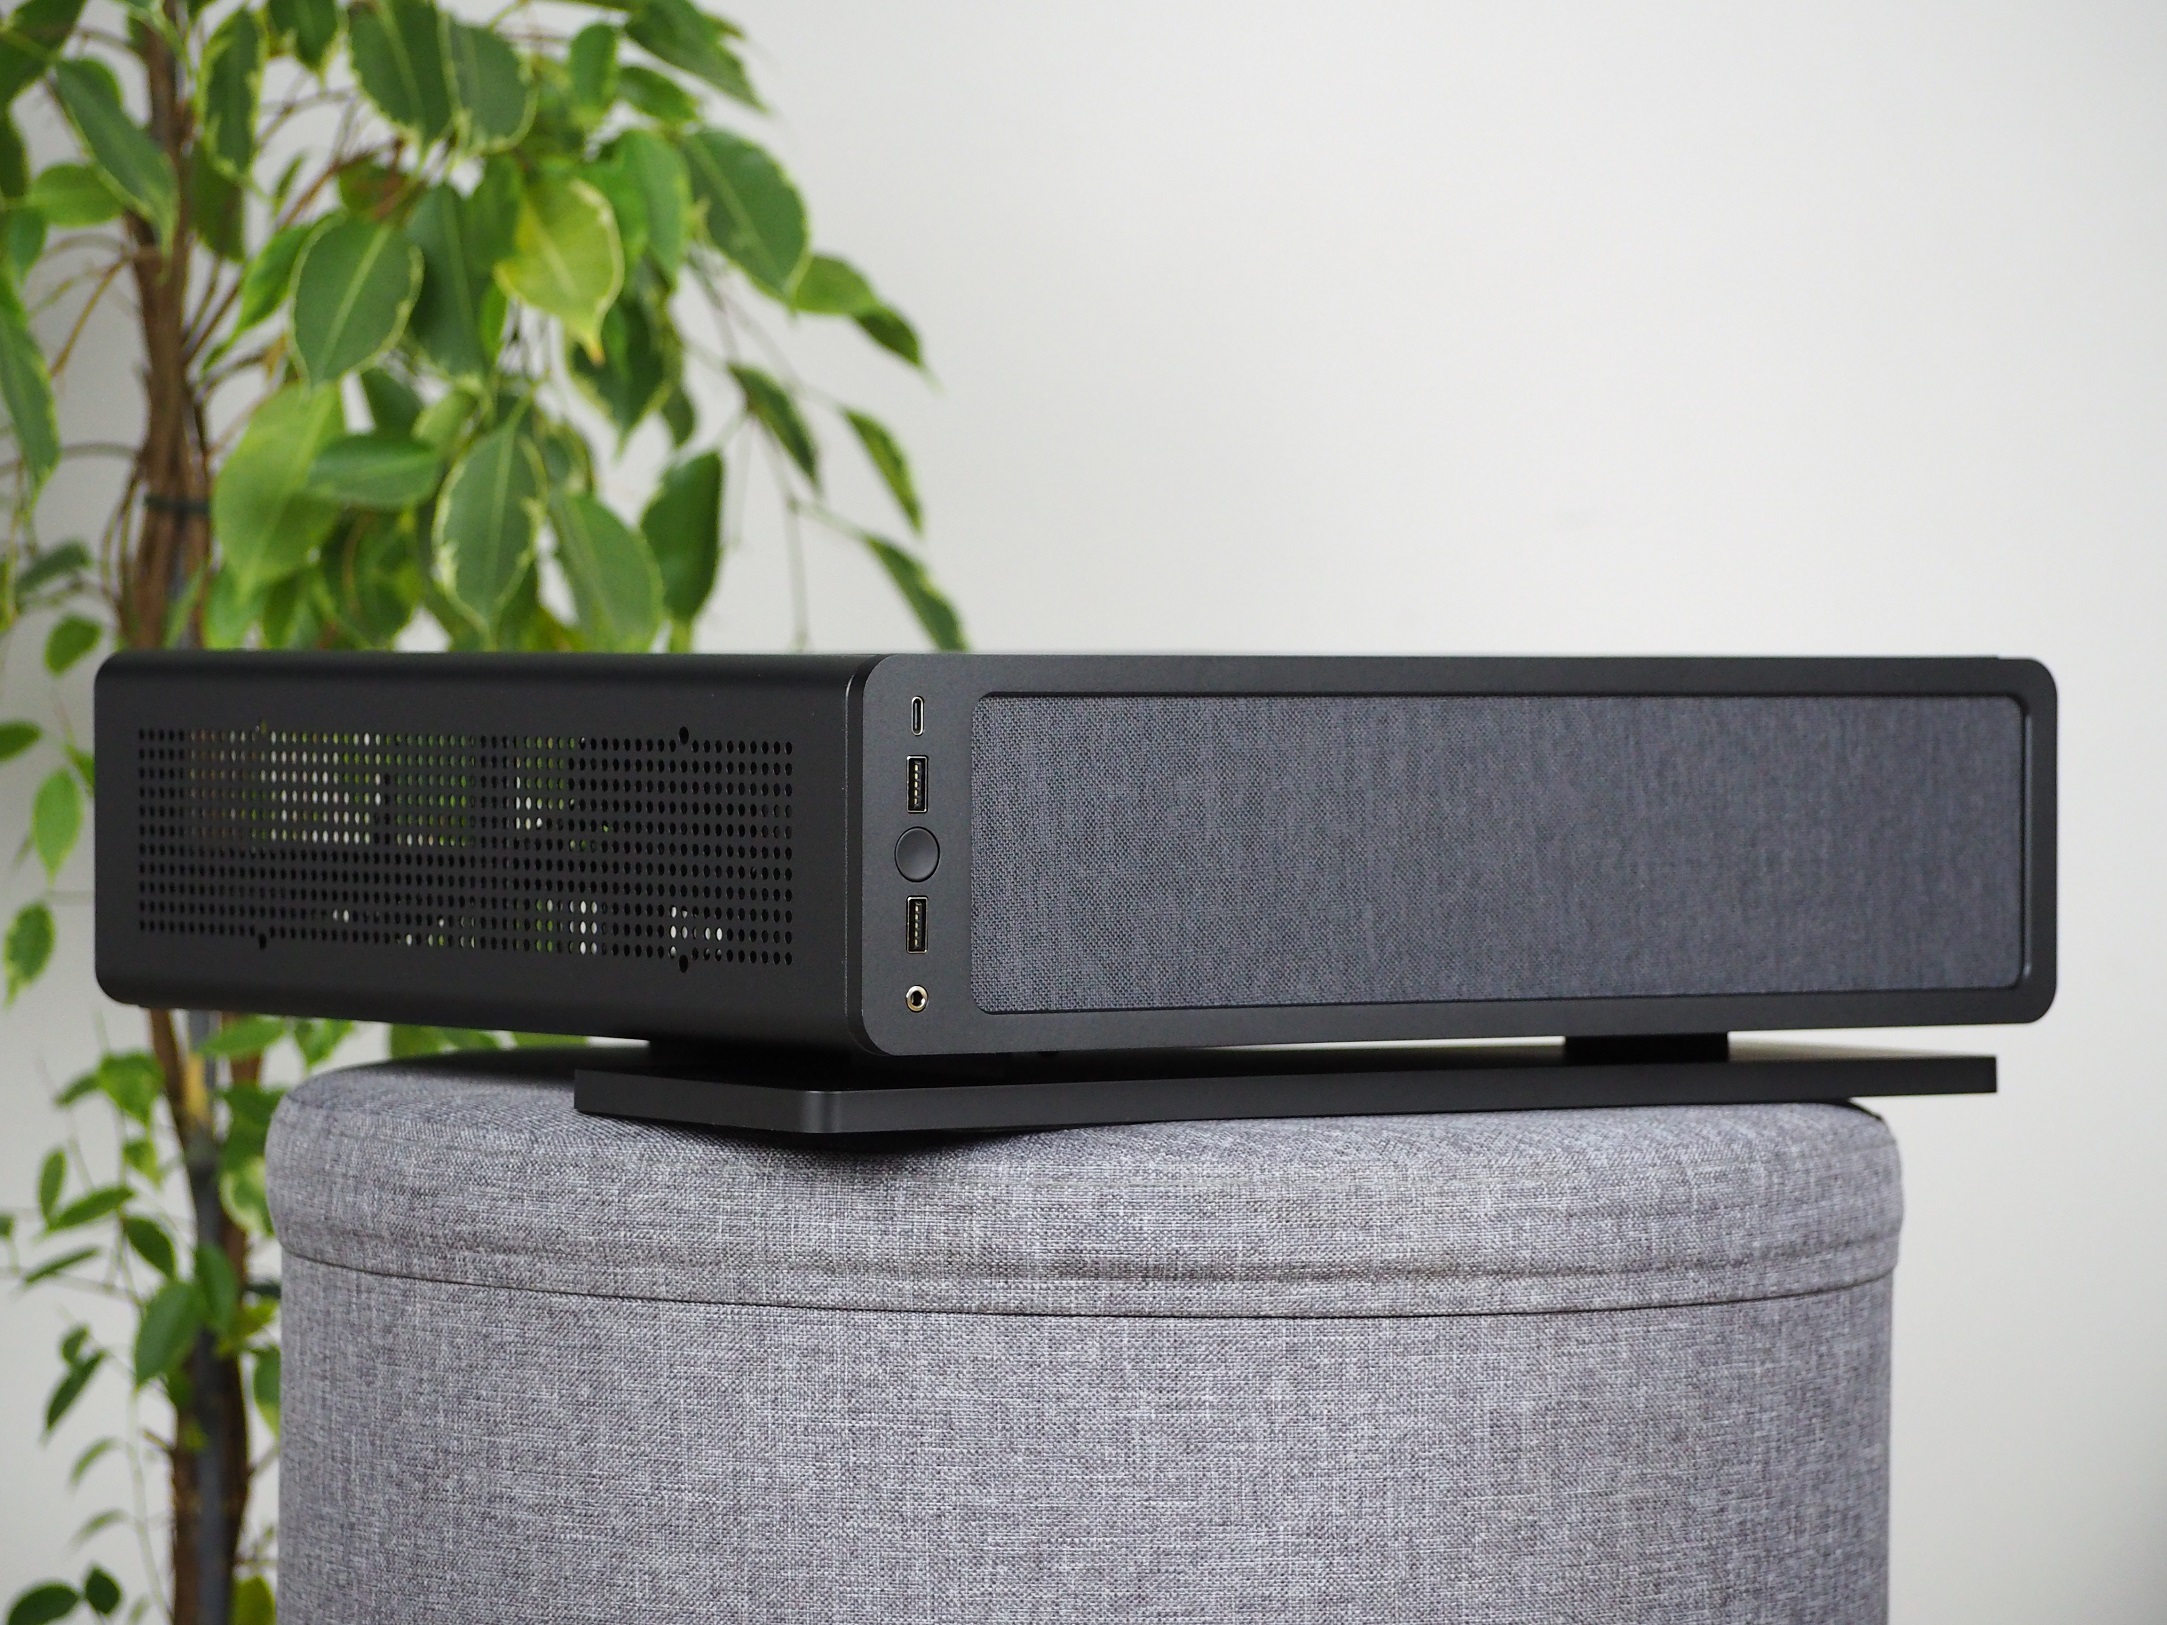
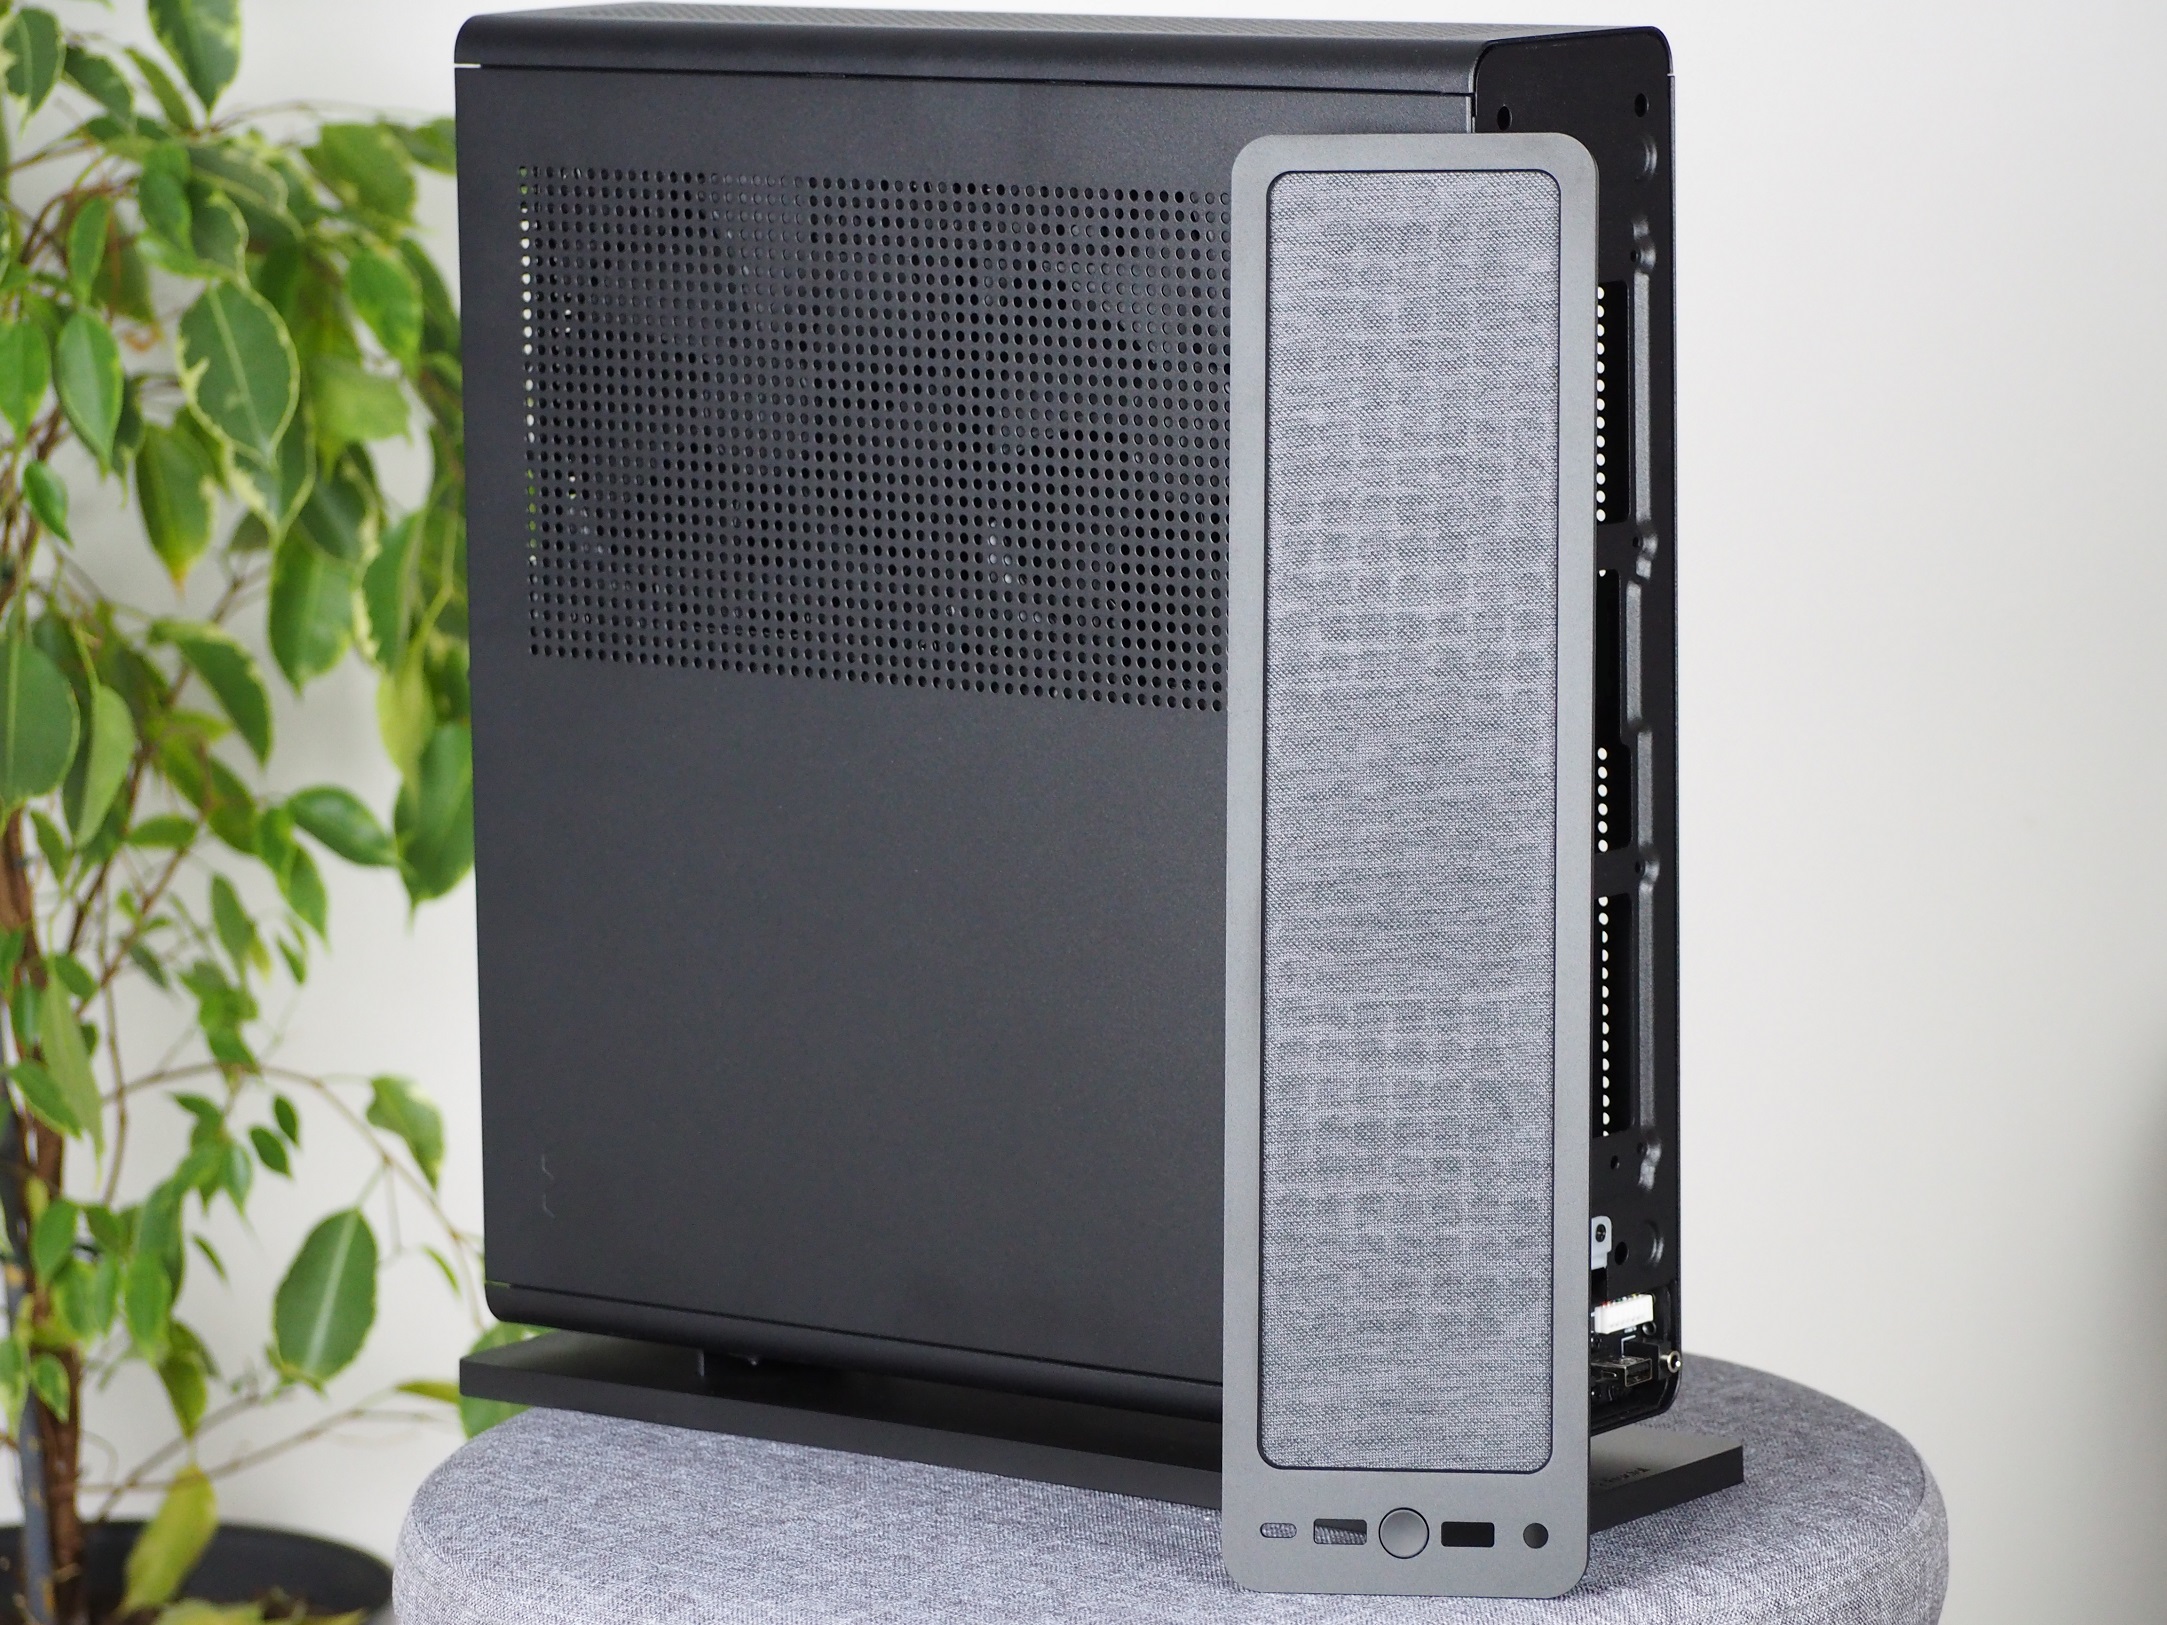
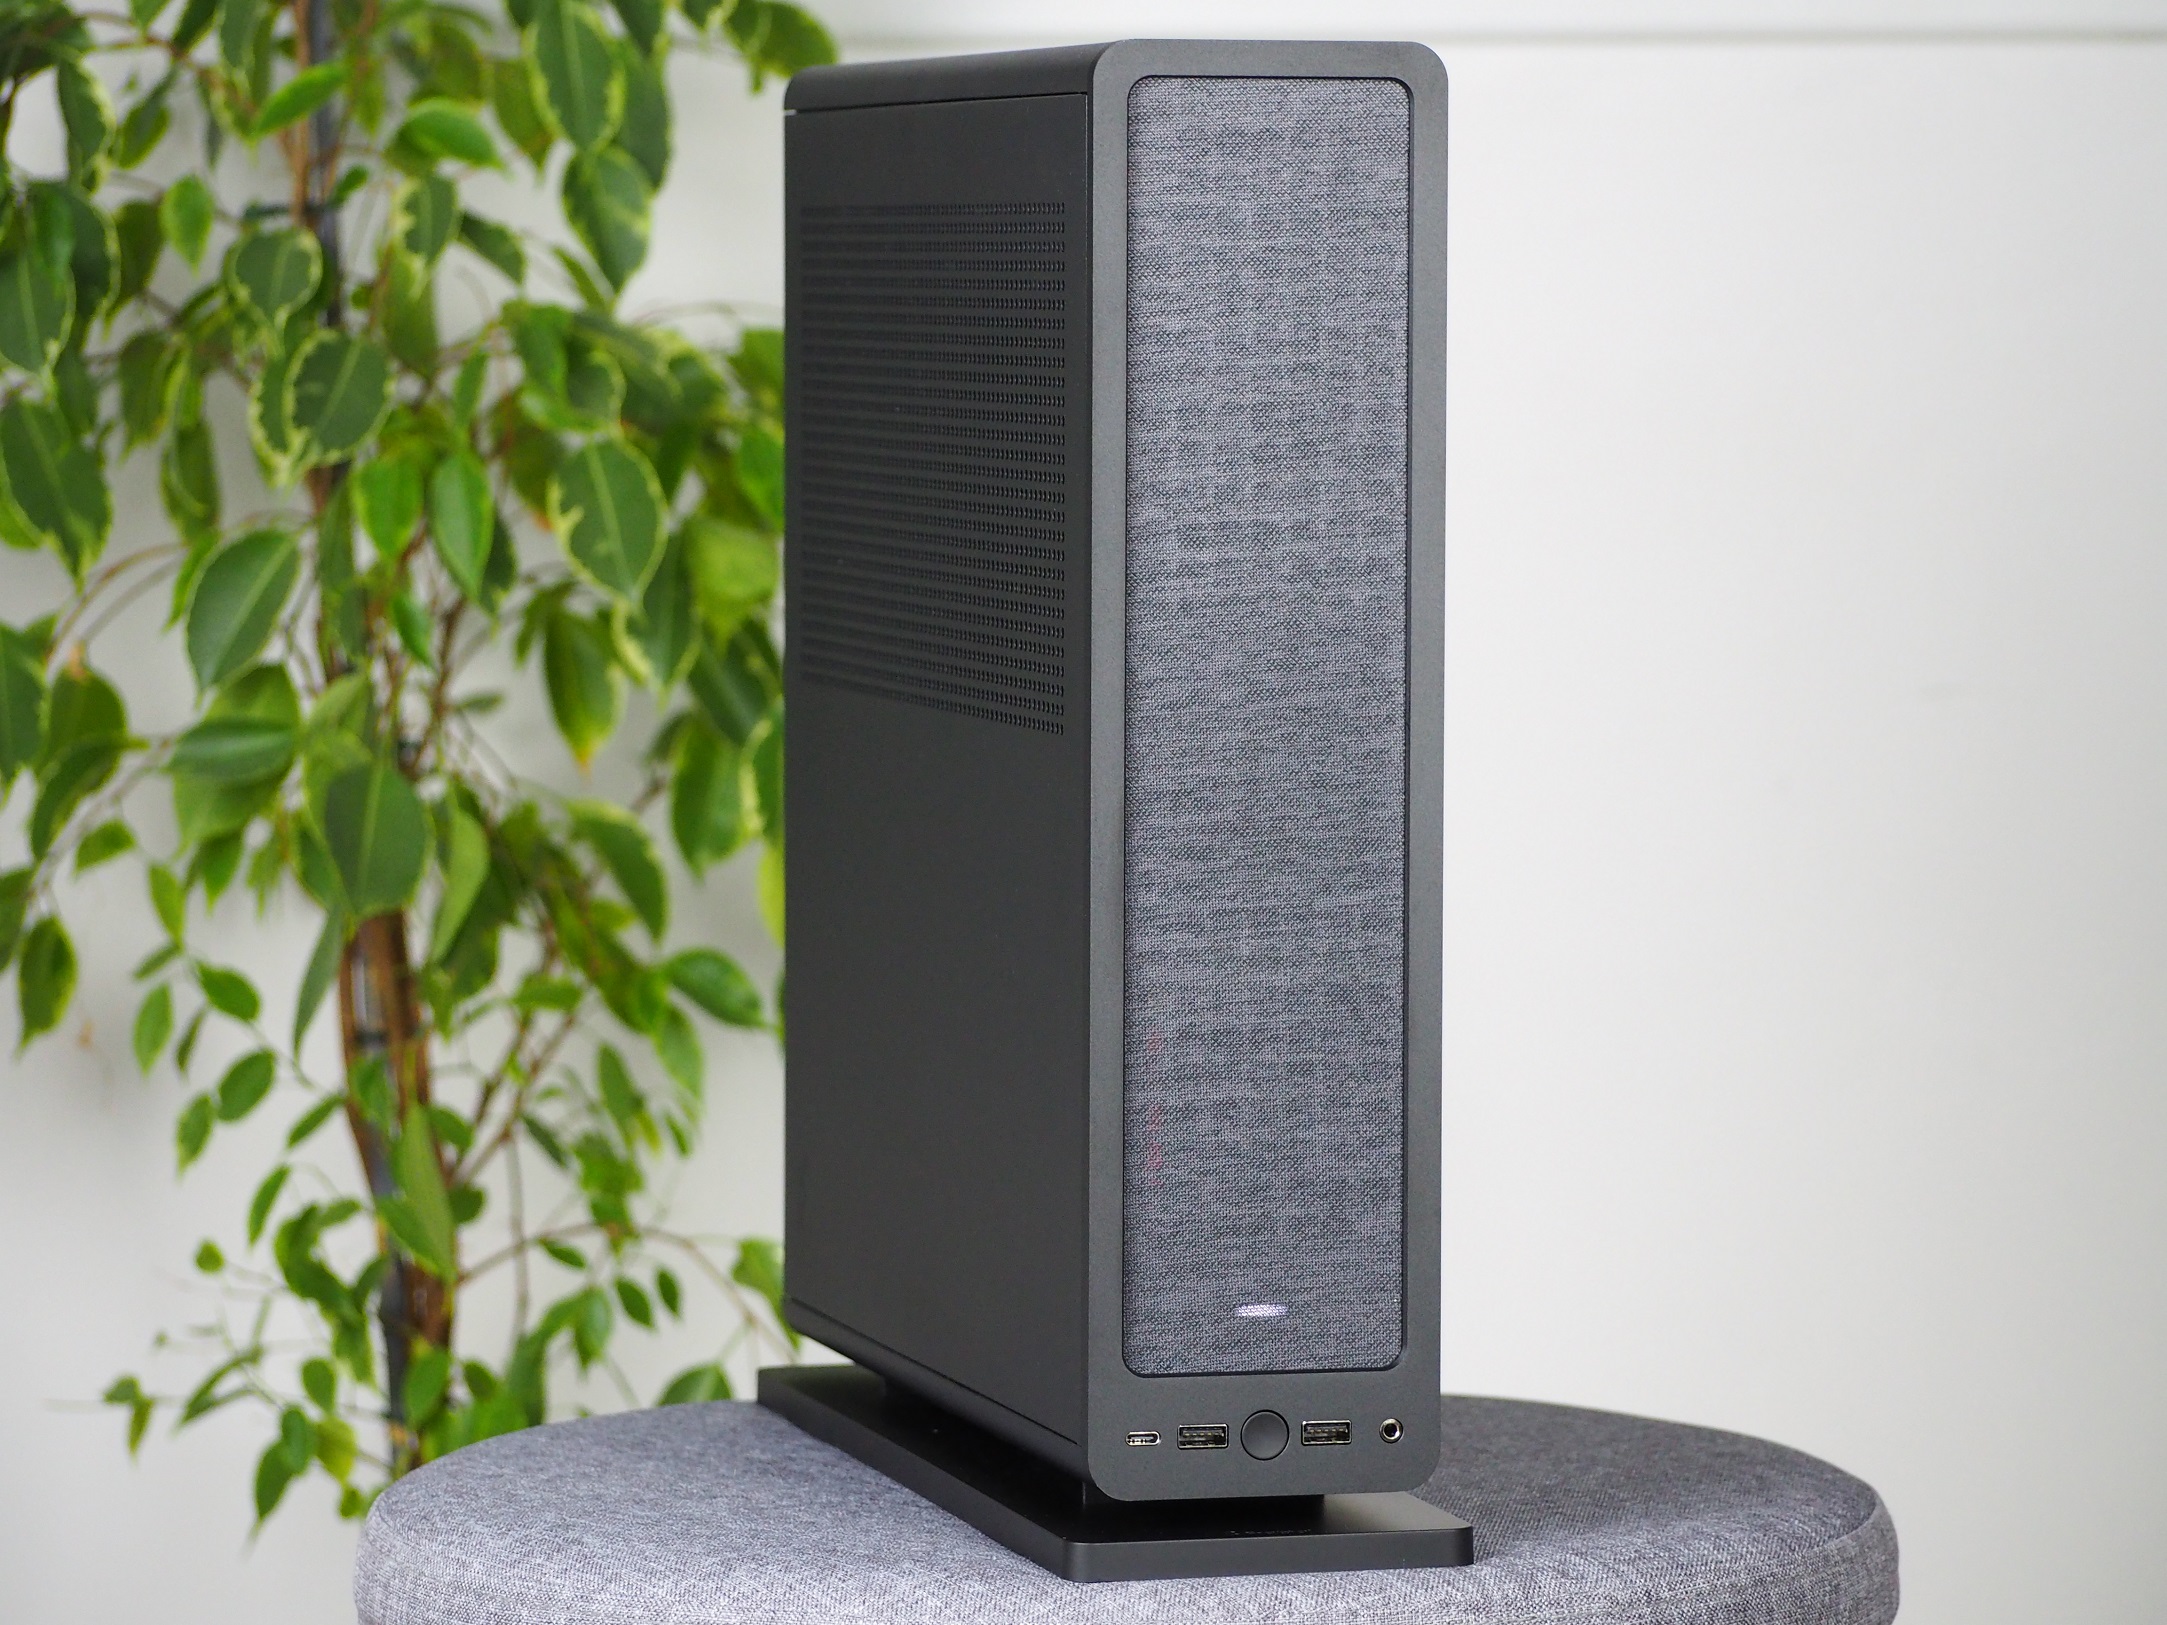
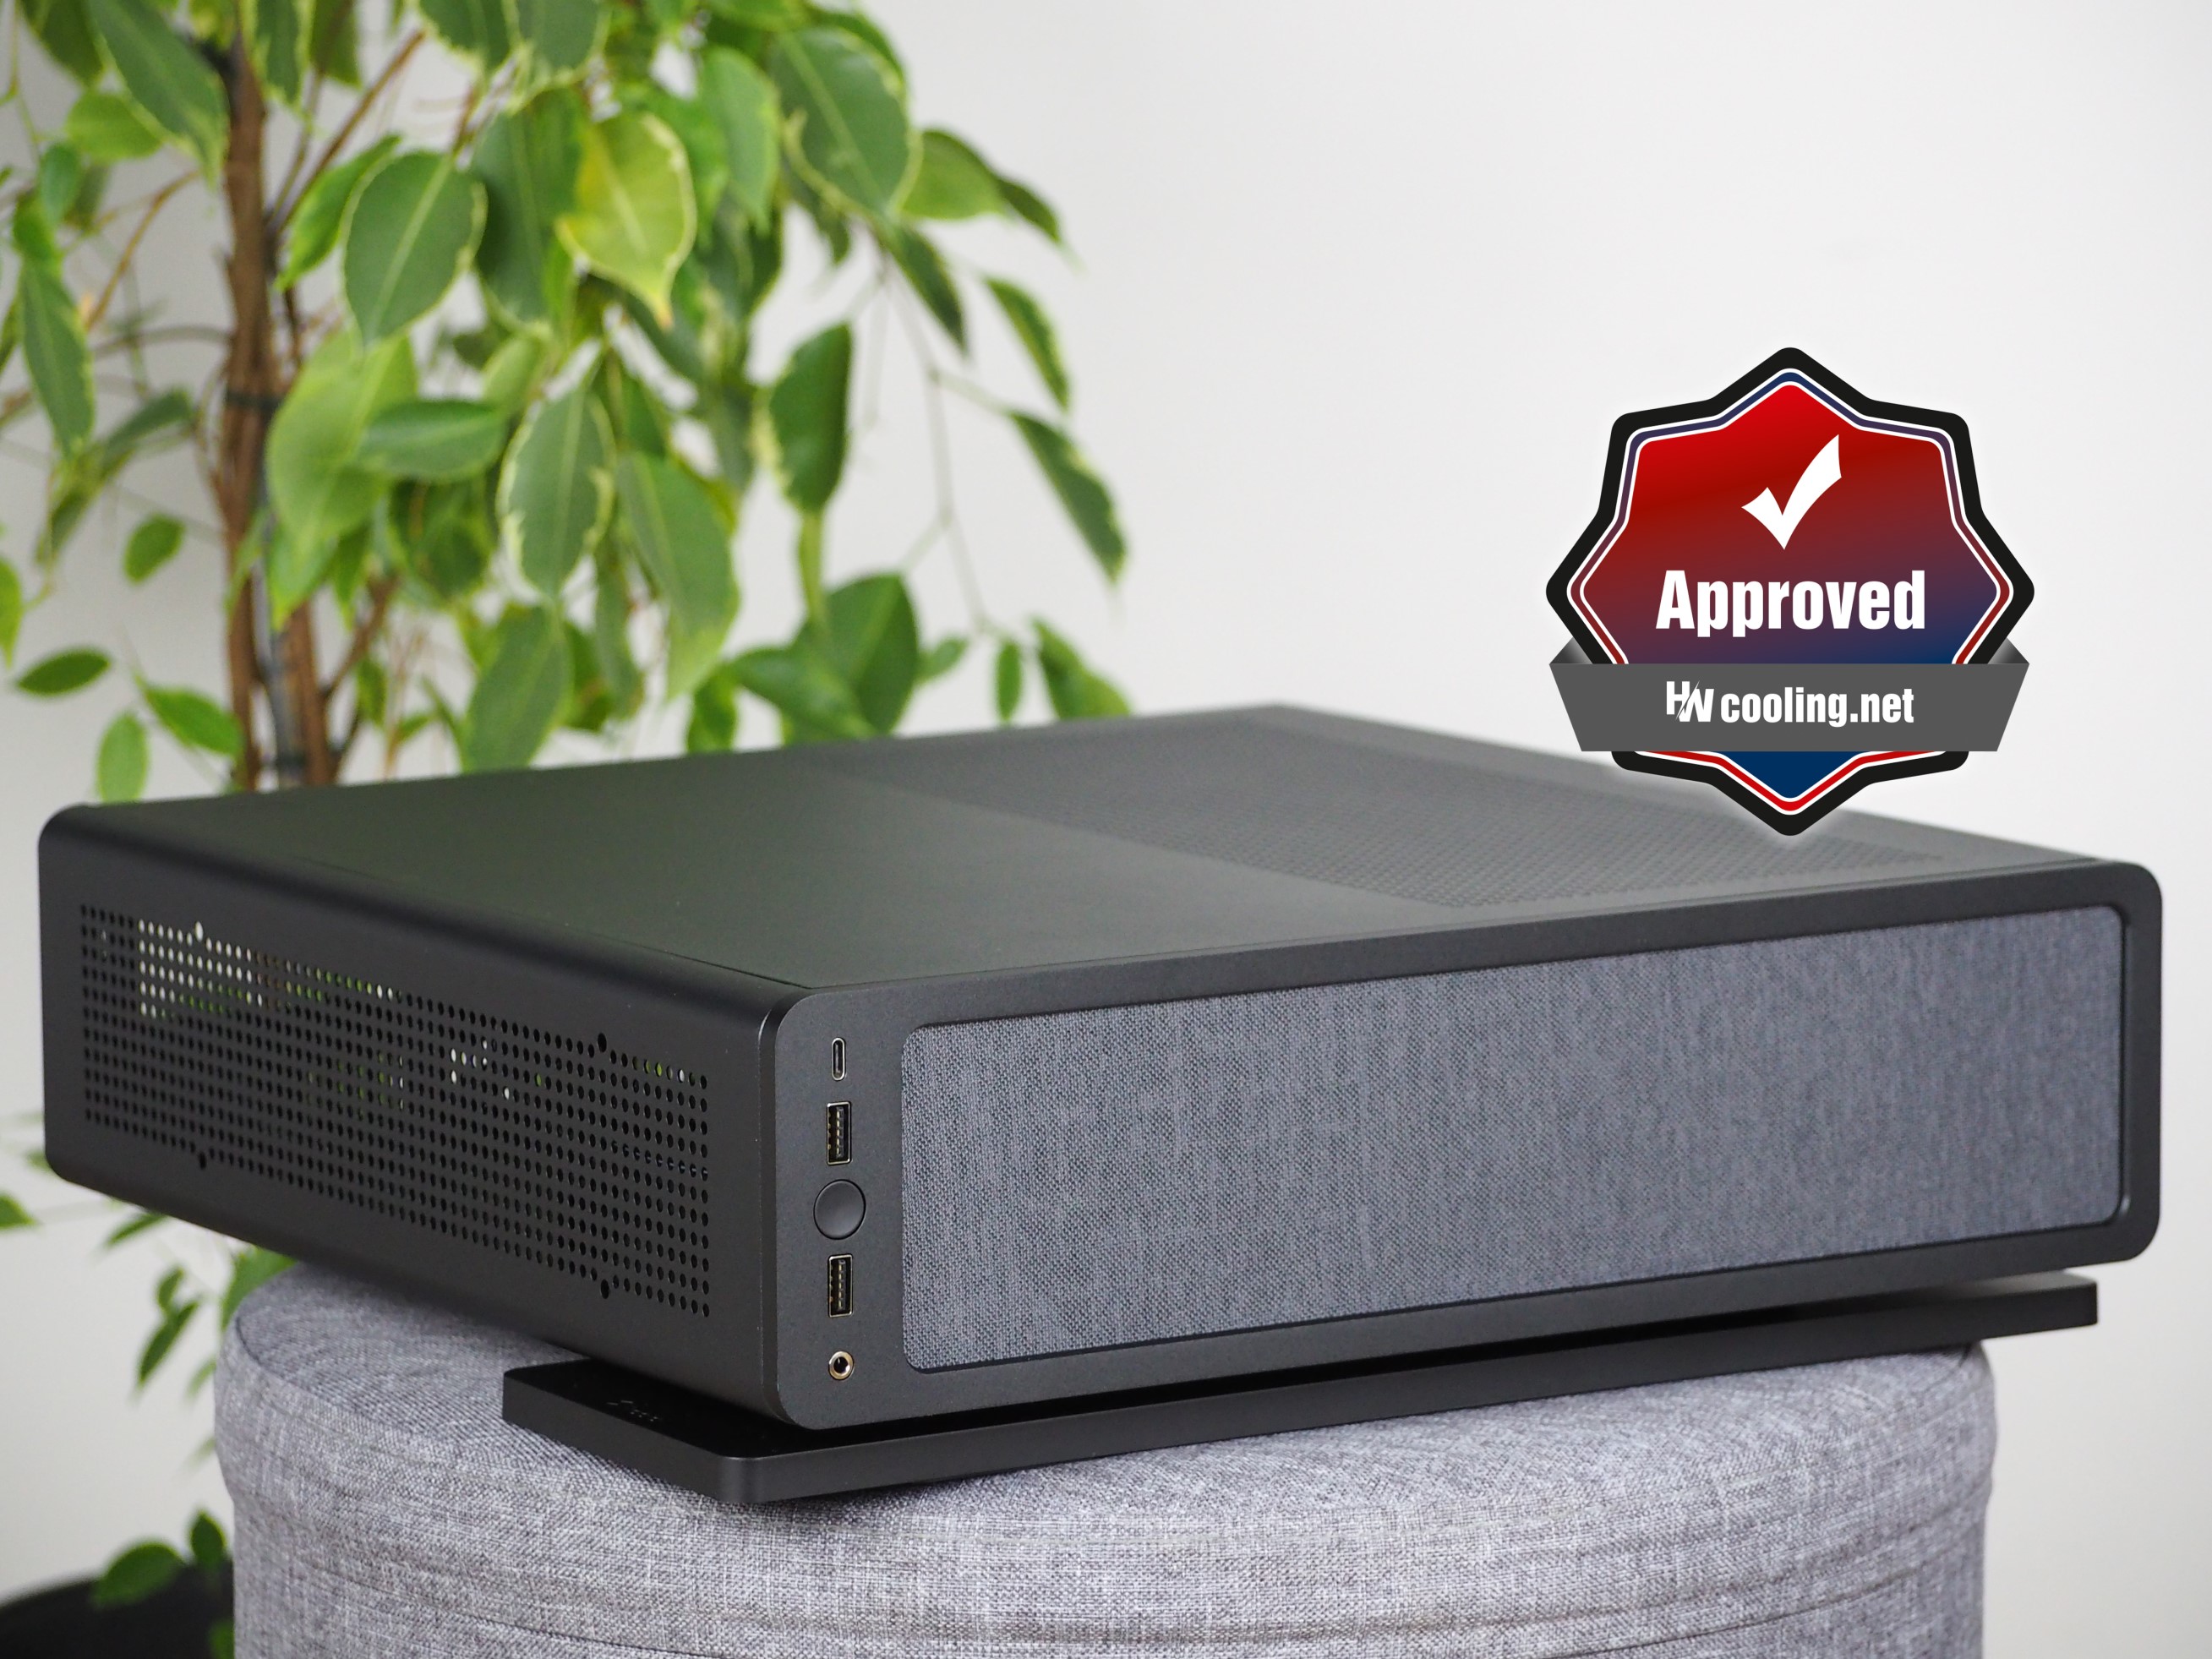
An elegant impression of completeness is created by the grey textile on the front panel. I have to admit that it is not so pronounced in the black version of the case. It stands out more in white. In addition to making the front panel more solid, it also serves as an exhaust where warm air can escape through the fabric.
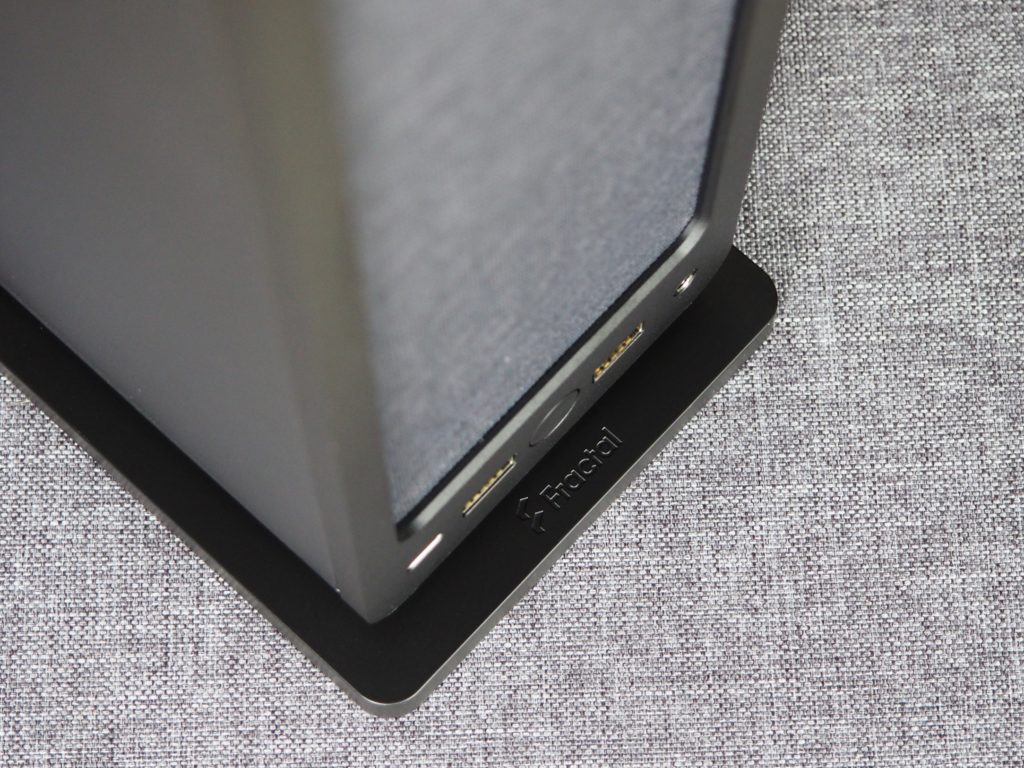
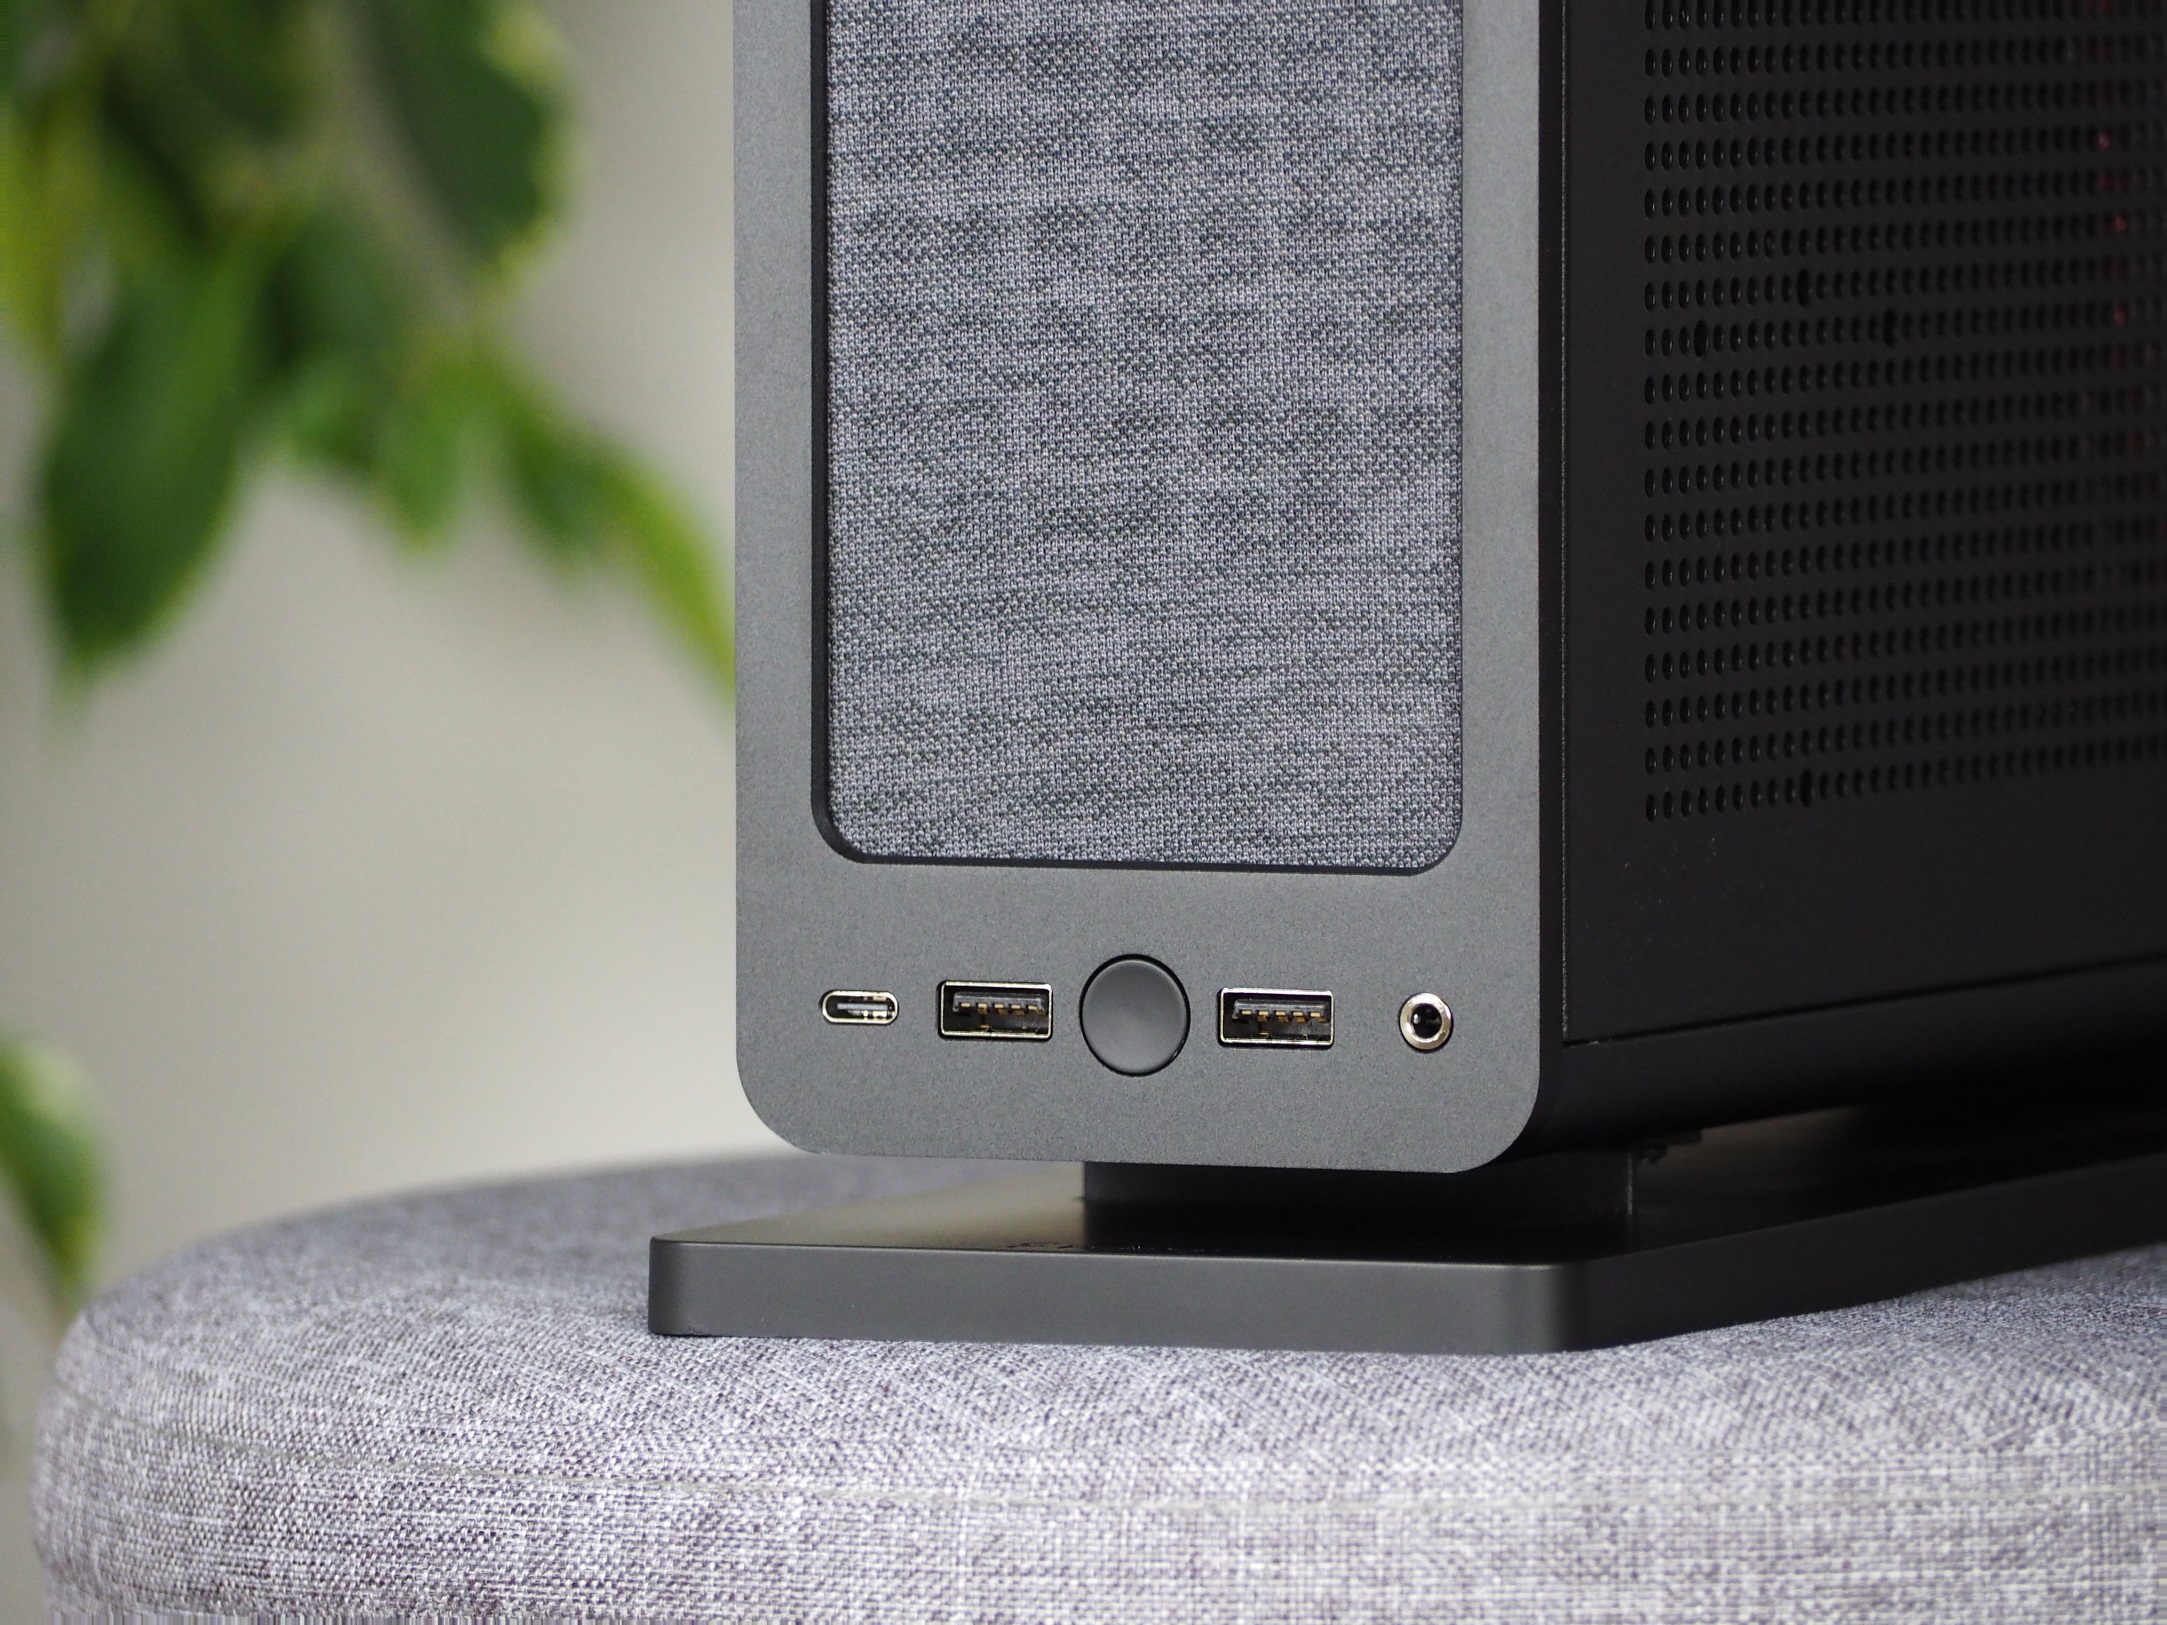
There are three USB connectors on the bottom (or the side, depending on how you position the case). One of them is also type C. Then there is also a combined 3.5 mm jack, for headphones or a microphone. Between the USB connectors is a smaller power button with a recess for better tactile orientation. This is quite sensitive and it doesn’t take much to activate the button.
The panel can be removed very easily for better access to the insides. It is attached to the structure by four strong magnets. In addition to the fact that the front is made up of metal, there’s a screwed-in plastic perforation on the back. Its main purpose is to protect the fabric from unwanted pressure and thus damage.
The latest hardware from the Swedish company is a case for Mini-ITX boards. However, thanks to the sensible interior layout, it is also possible to mount larger components. Their cooling is taken care of by the ubiquitous perforation of the outer plates and two 140 mm fans. With or without them? You’ll have to decide what you want to cool more effectively. We measured four different scenarios in our tests.
Interior layout
Looking at the inside of the case, it is clear that the case has to be disassembled first in order to mount components.
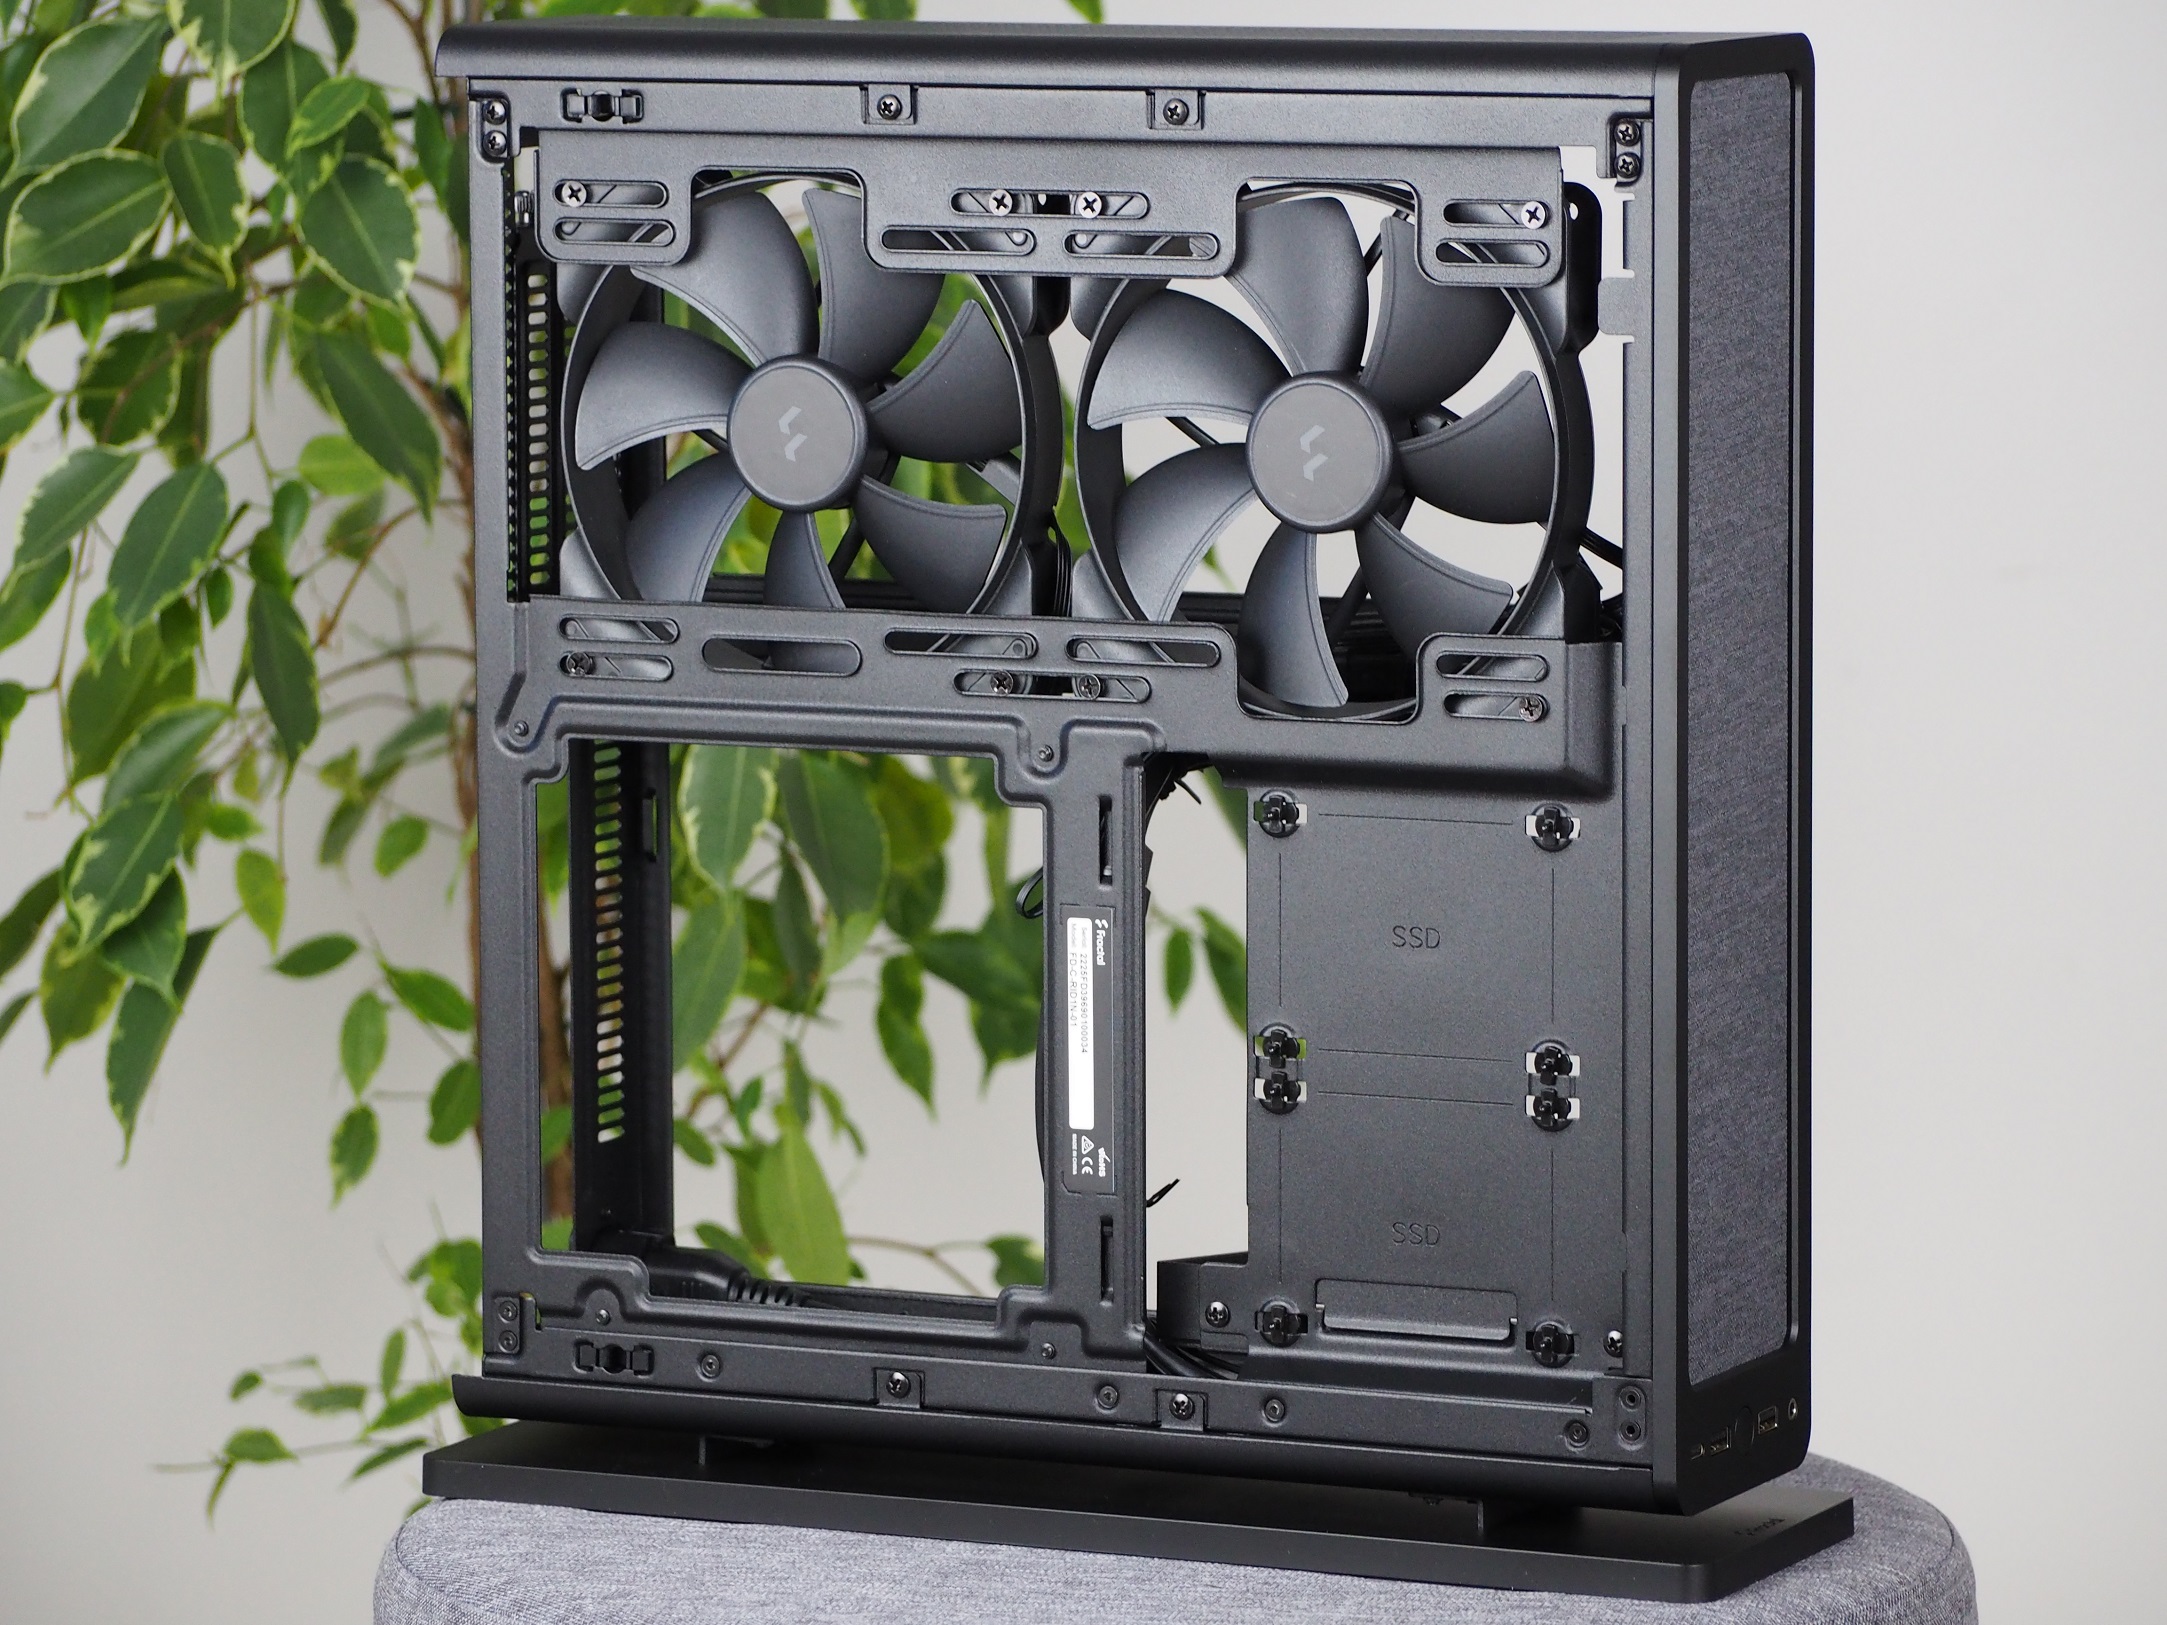
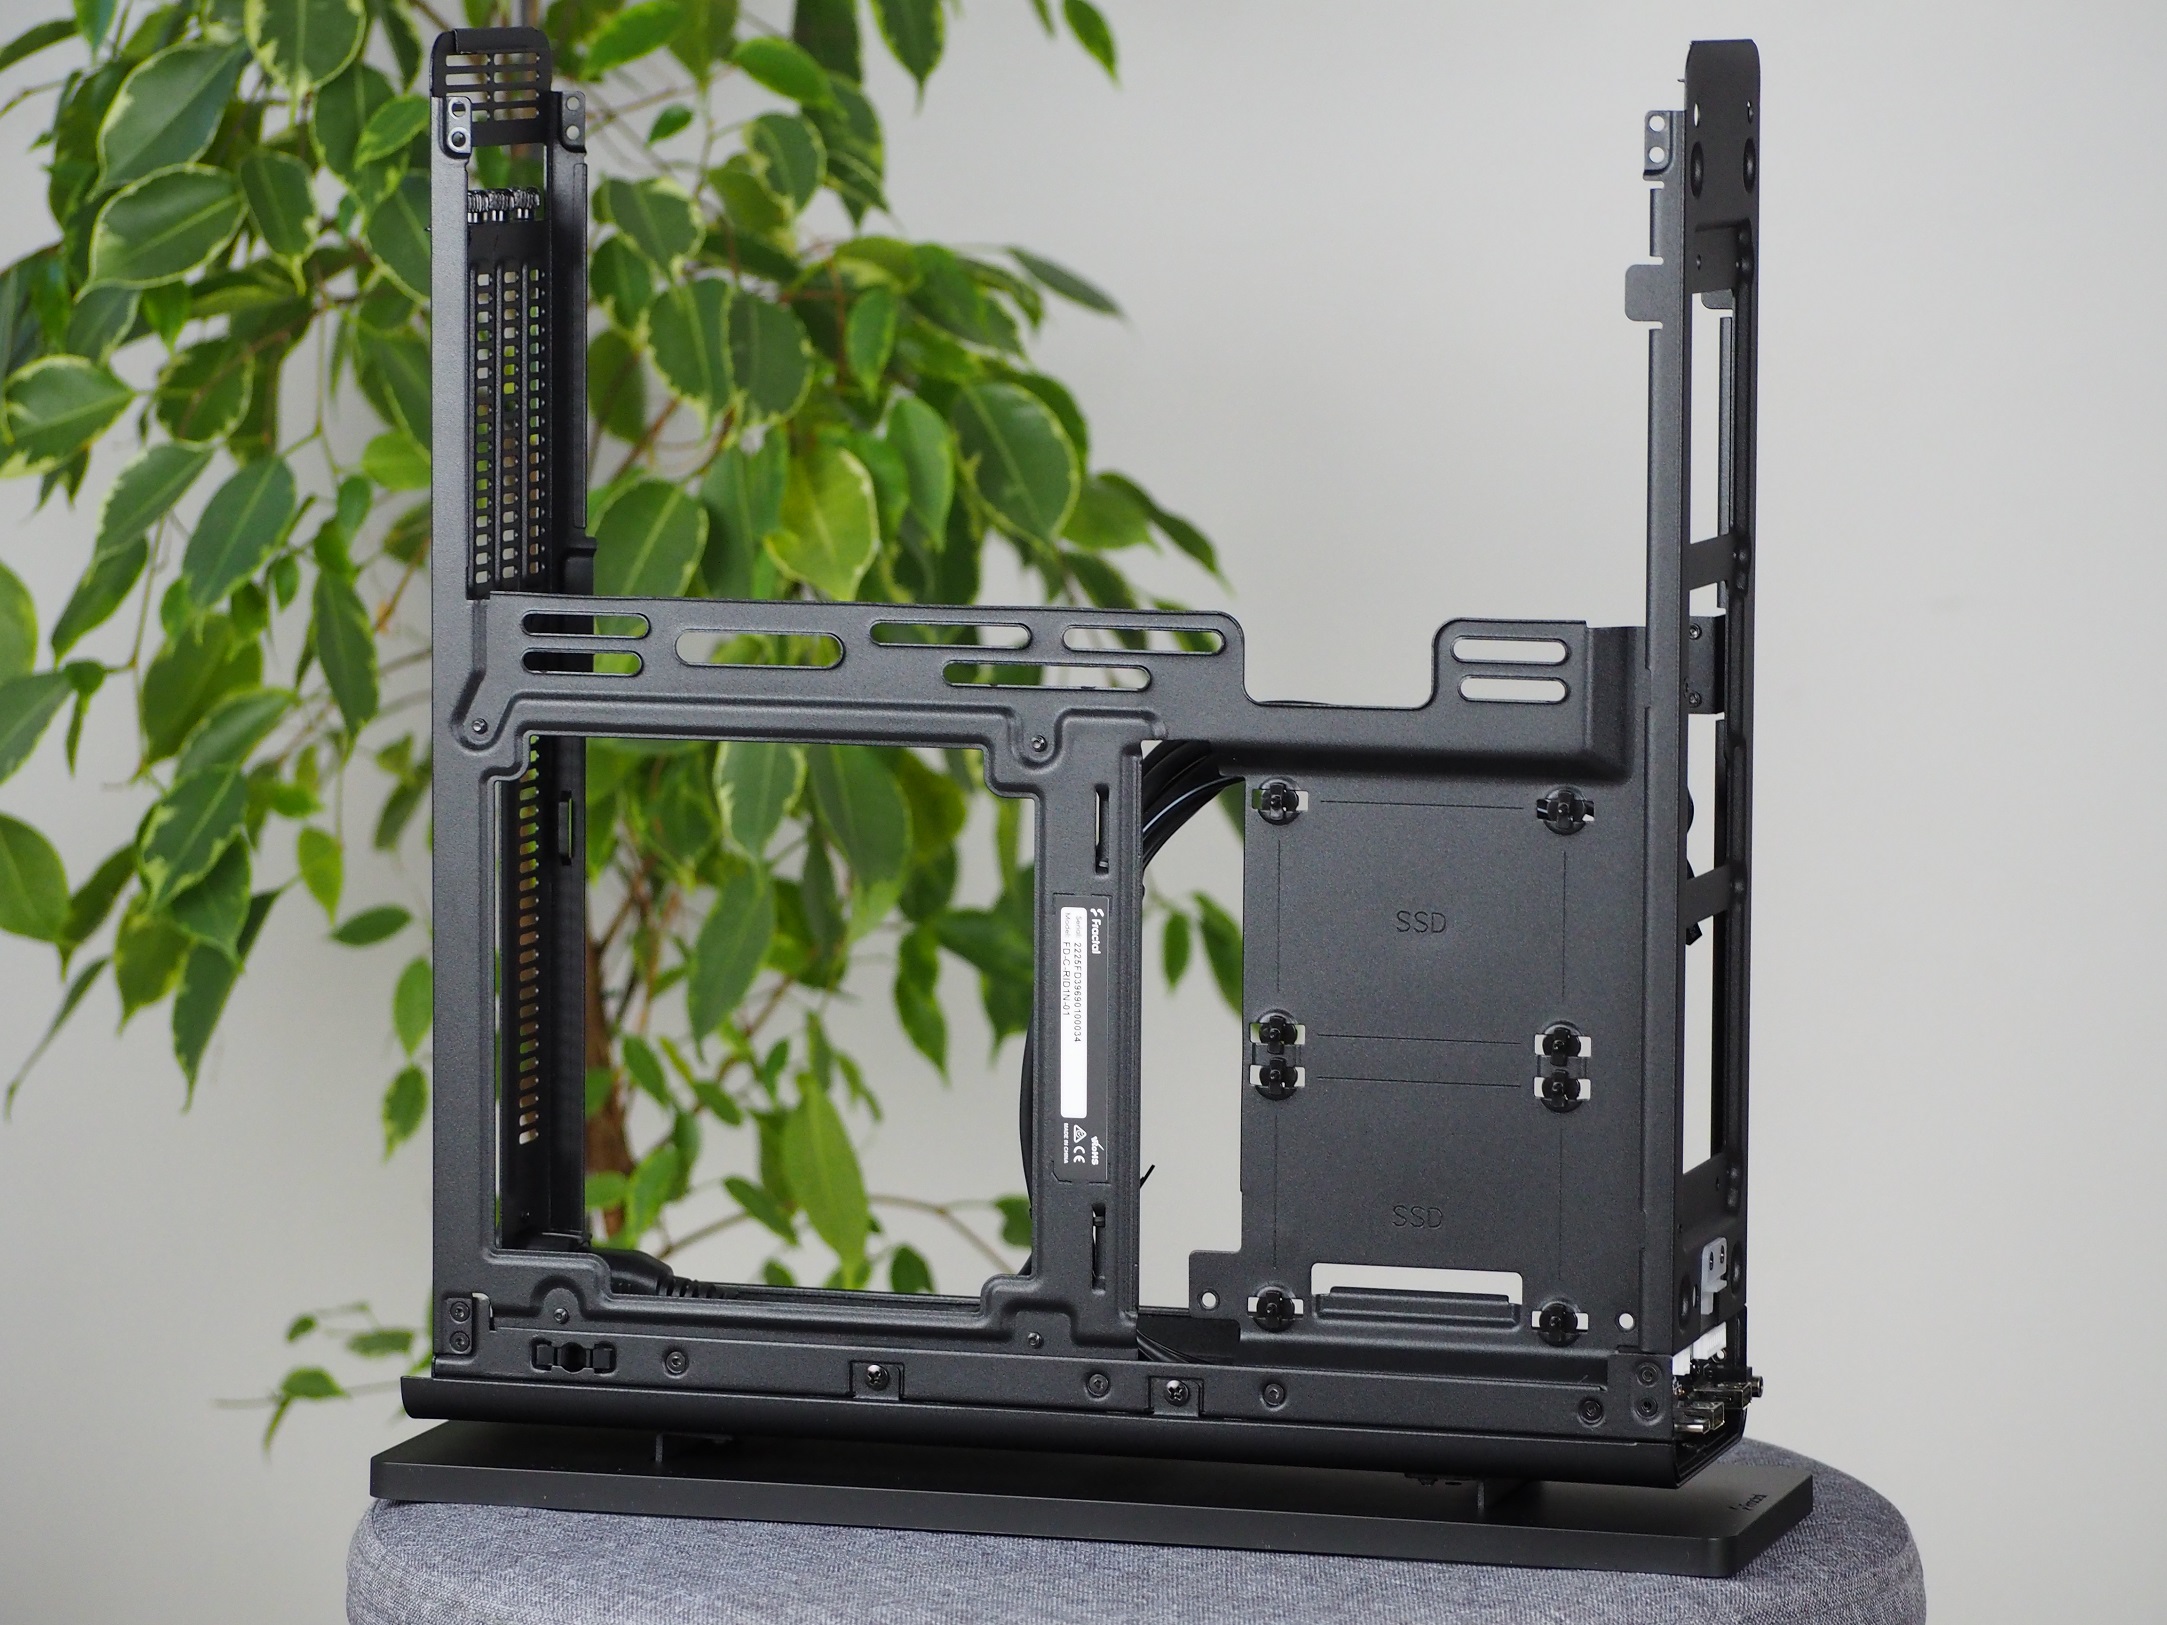
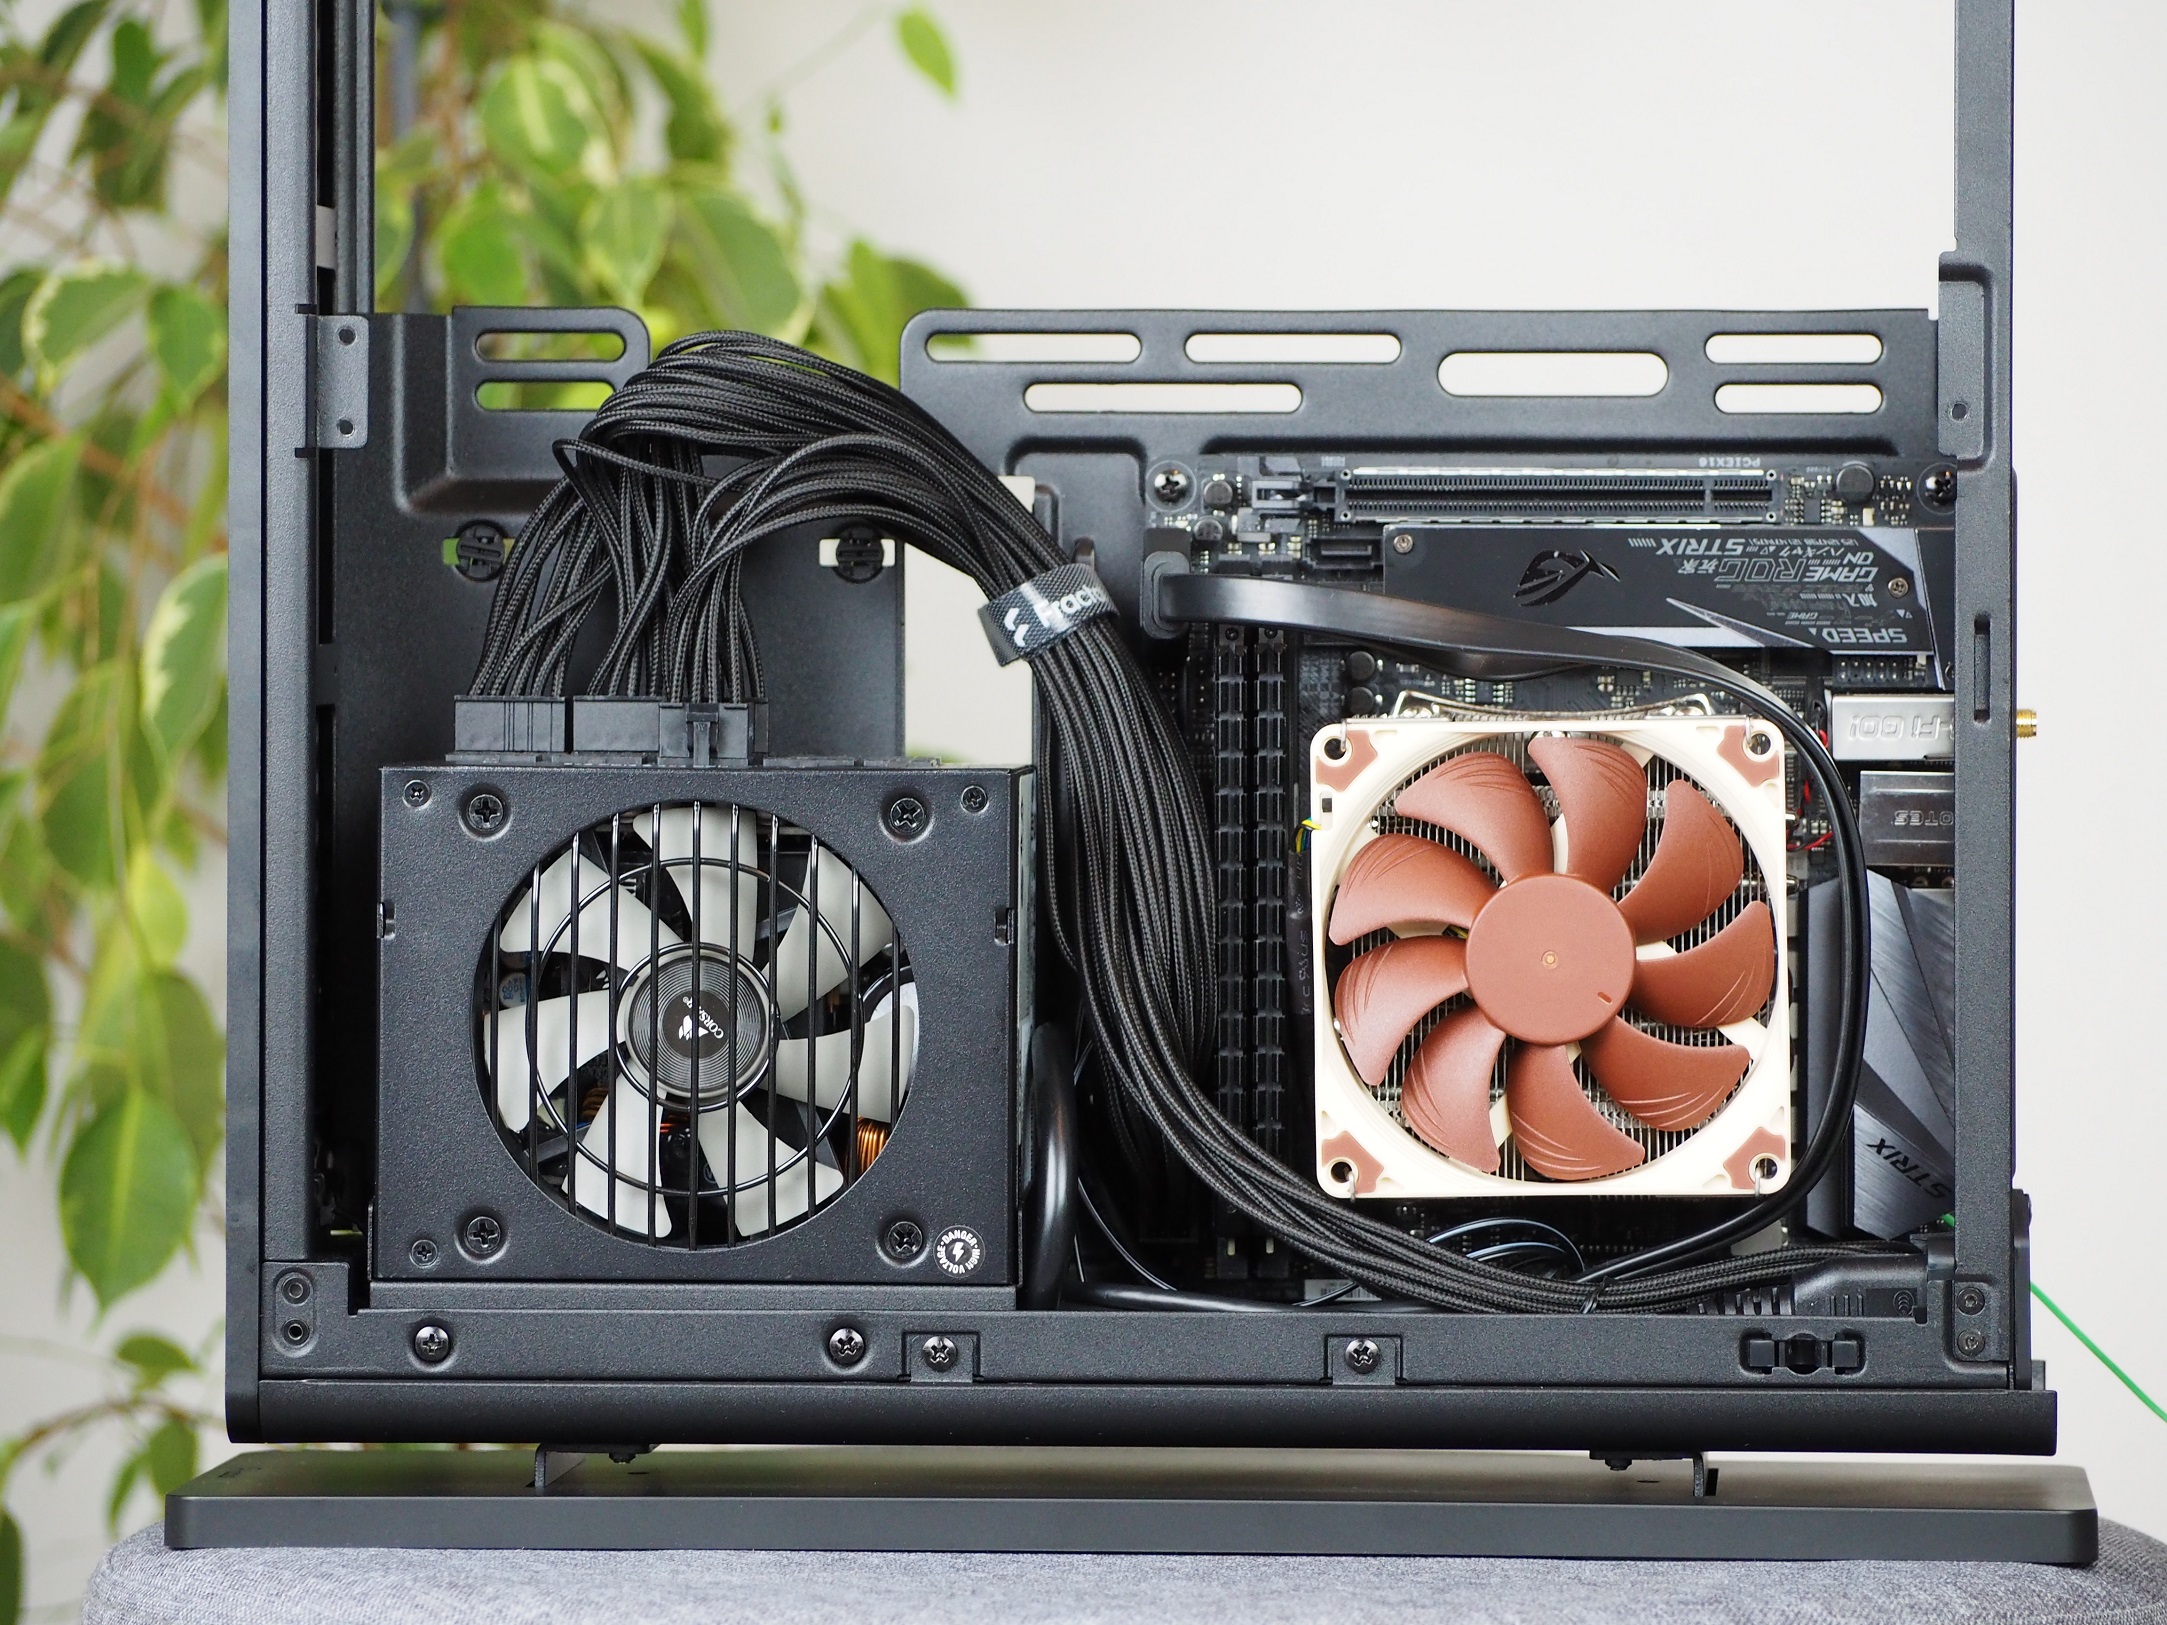
The perforated top panel differs from the bottom one only by the holes for the stand. I even happened to mix them up and put them on the wrong way. Underneath is a frame with positions for three 80mm fans. These will fit here but only if you have a graphics card with a maximum width of 125 mm including the power supply cable. Without the latter, it can have a width of 137 mm. The frame also serves as a holder for fans or liquid cooler radiators placed on the side. To remove it, you have to unscrew 12 screws.
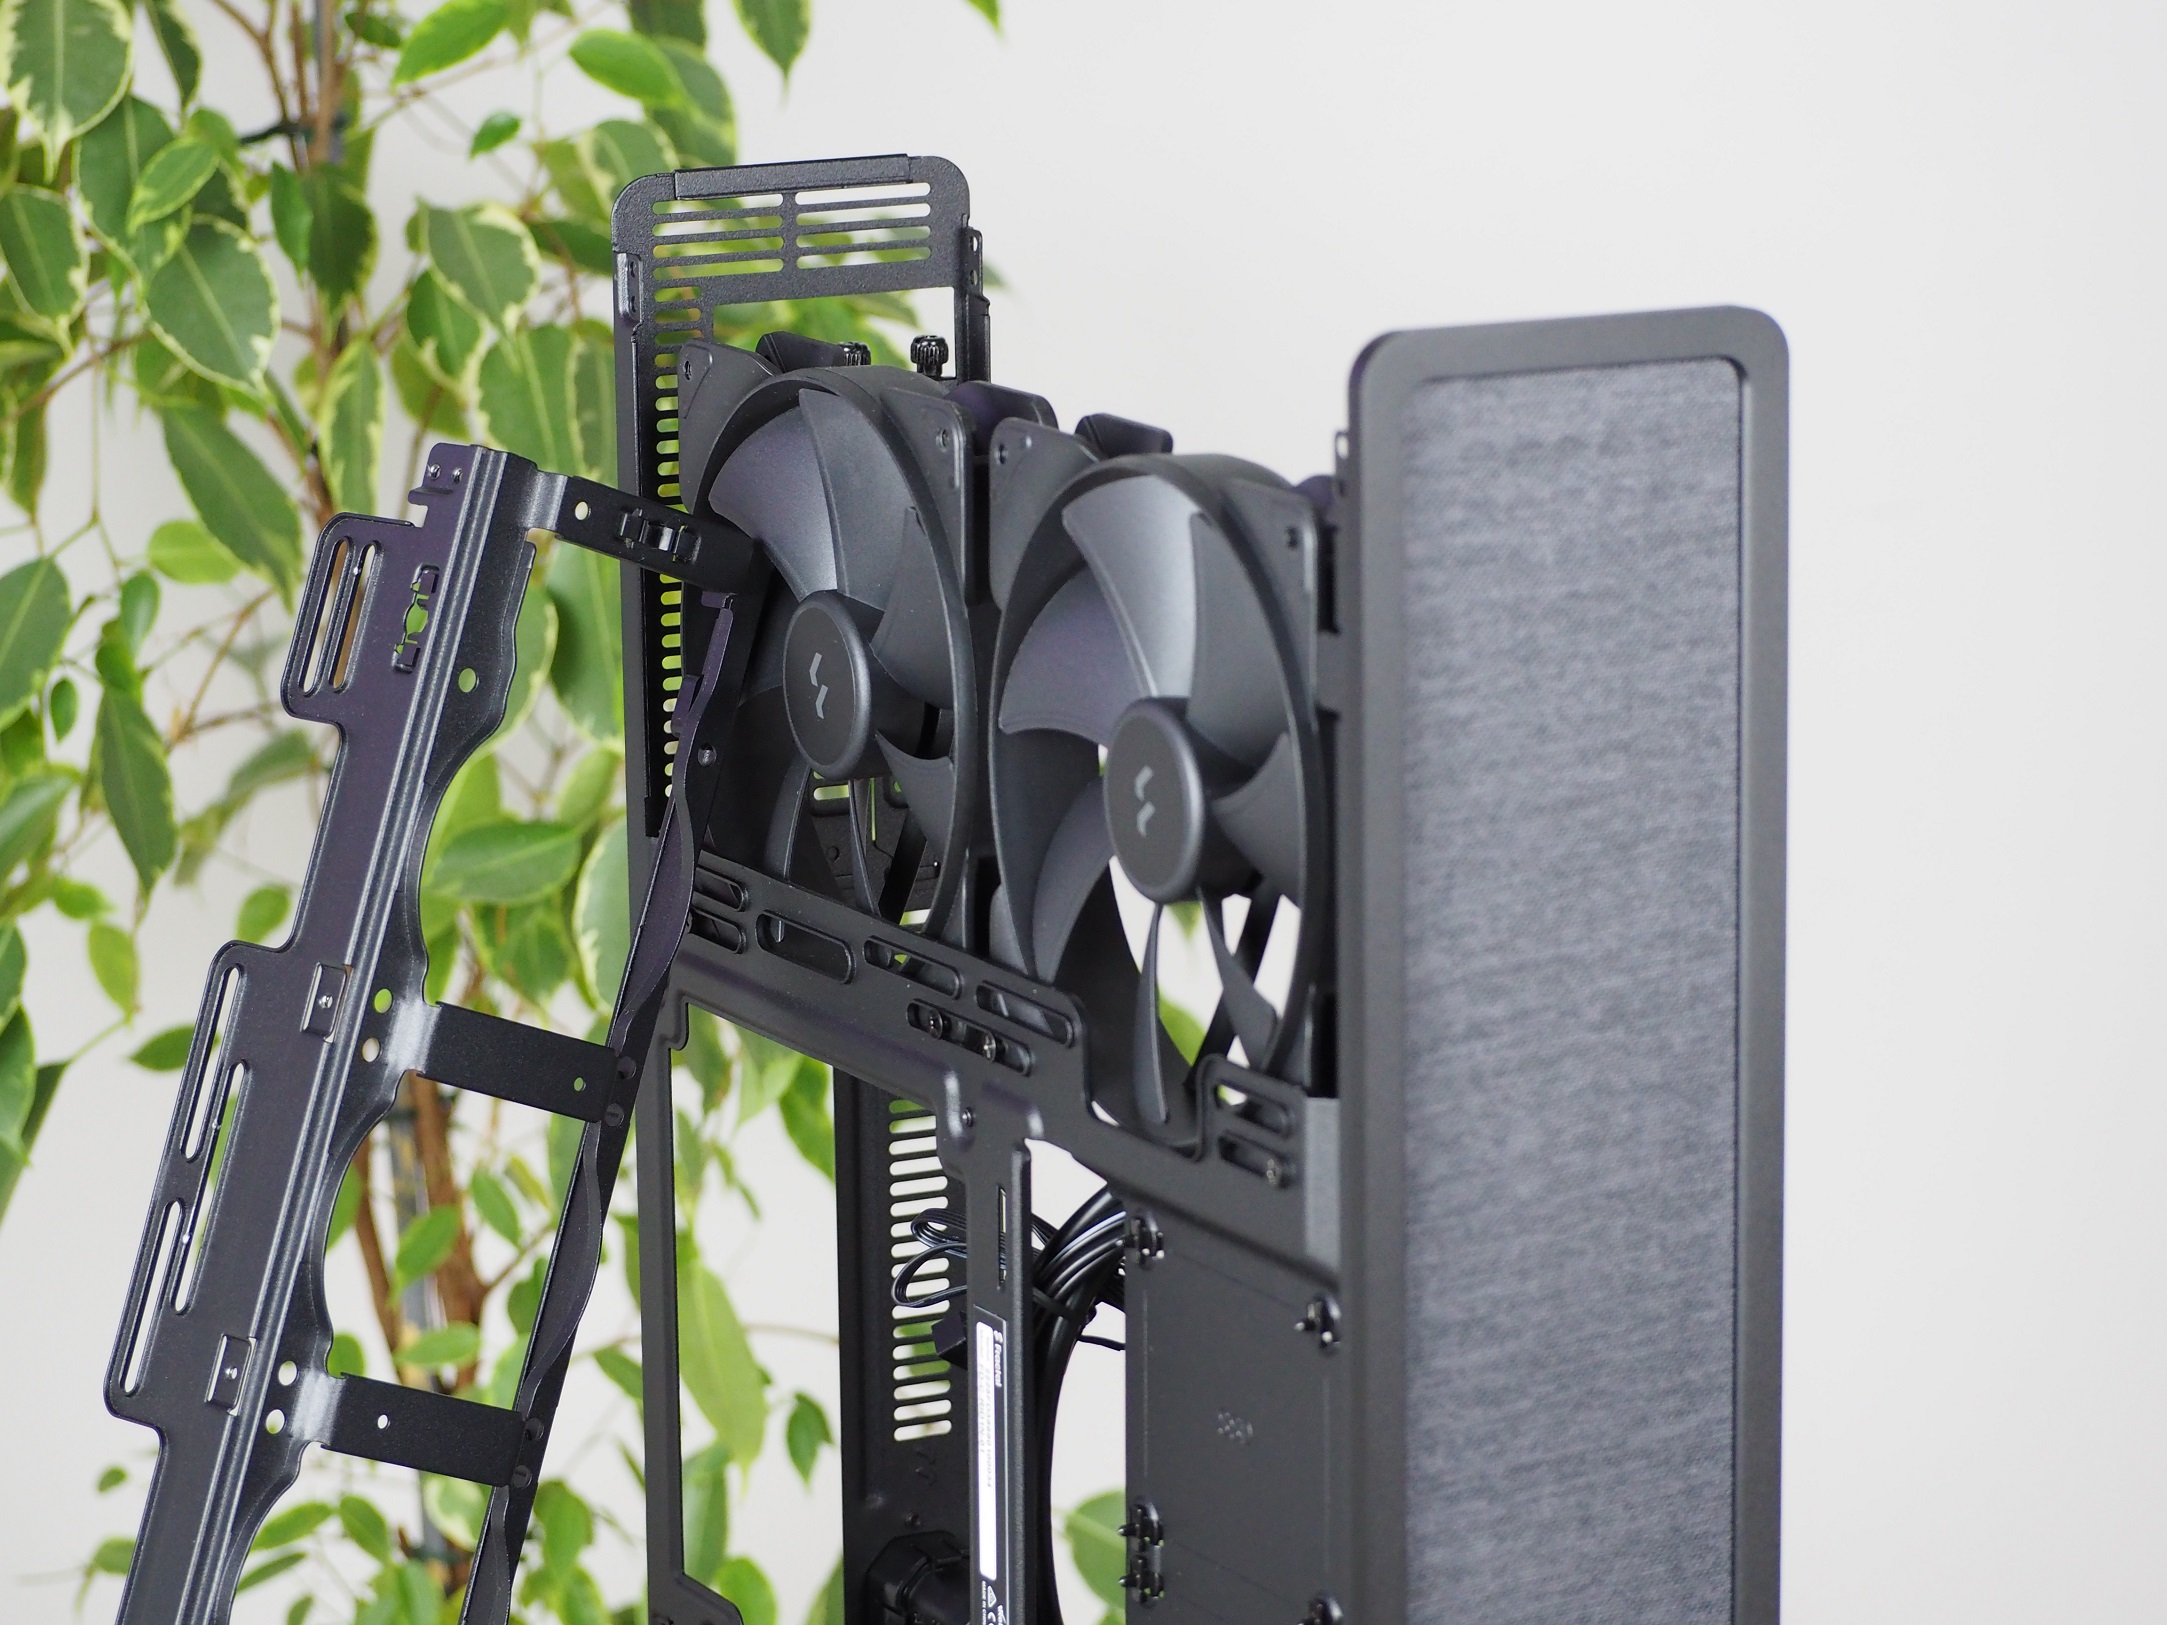
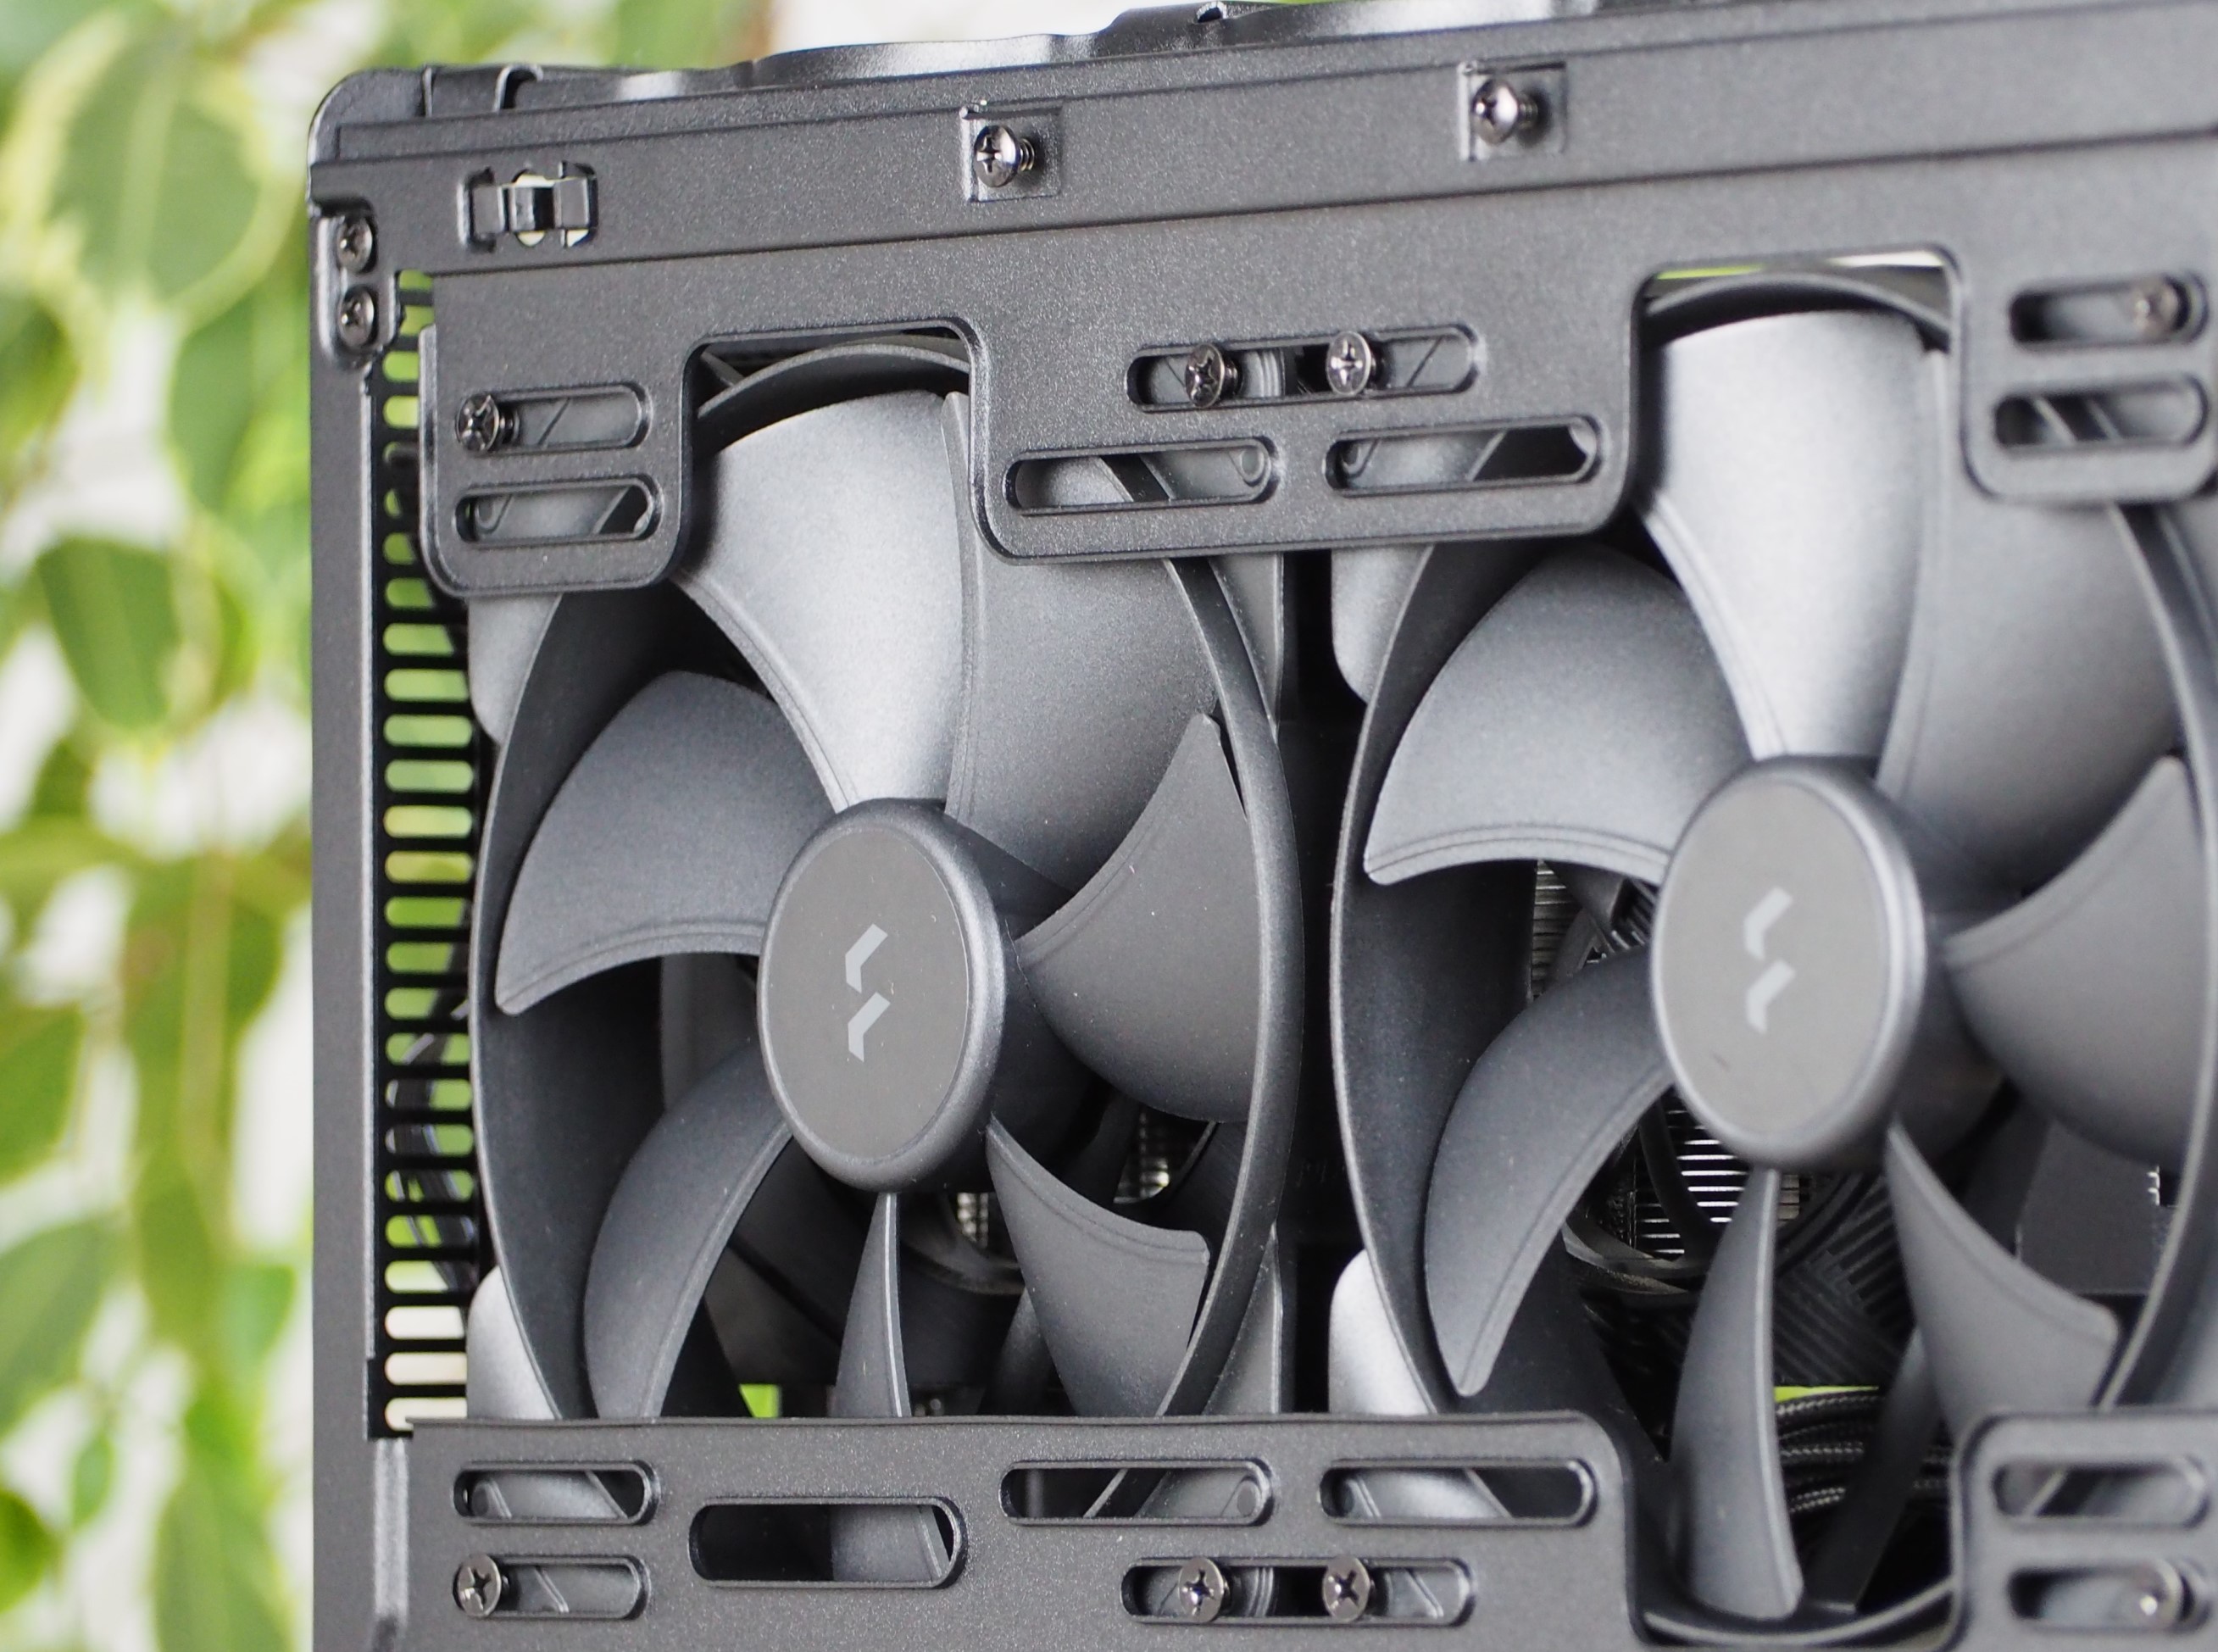
There are two powerful fans from the Aspect series in 140 mm format. They even used the PWM versions. If you’d like to swap them, you have the room to do so. The case is also ready for two 120 mm fans, or a liquid cooler radiator of up to 280 mm. But be aware that if you use a larger one than 120 mm, there will be no space left for the graphics card. And even with the smallest radiator you will be limited in your choice of graphics cards, only up to 175 mm in length.
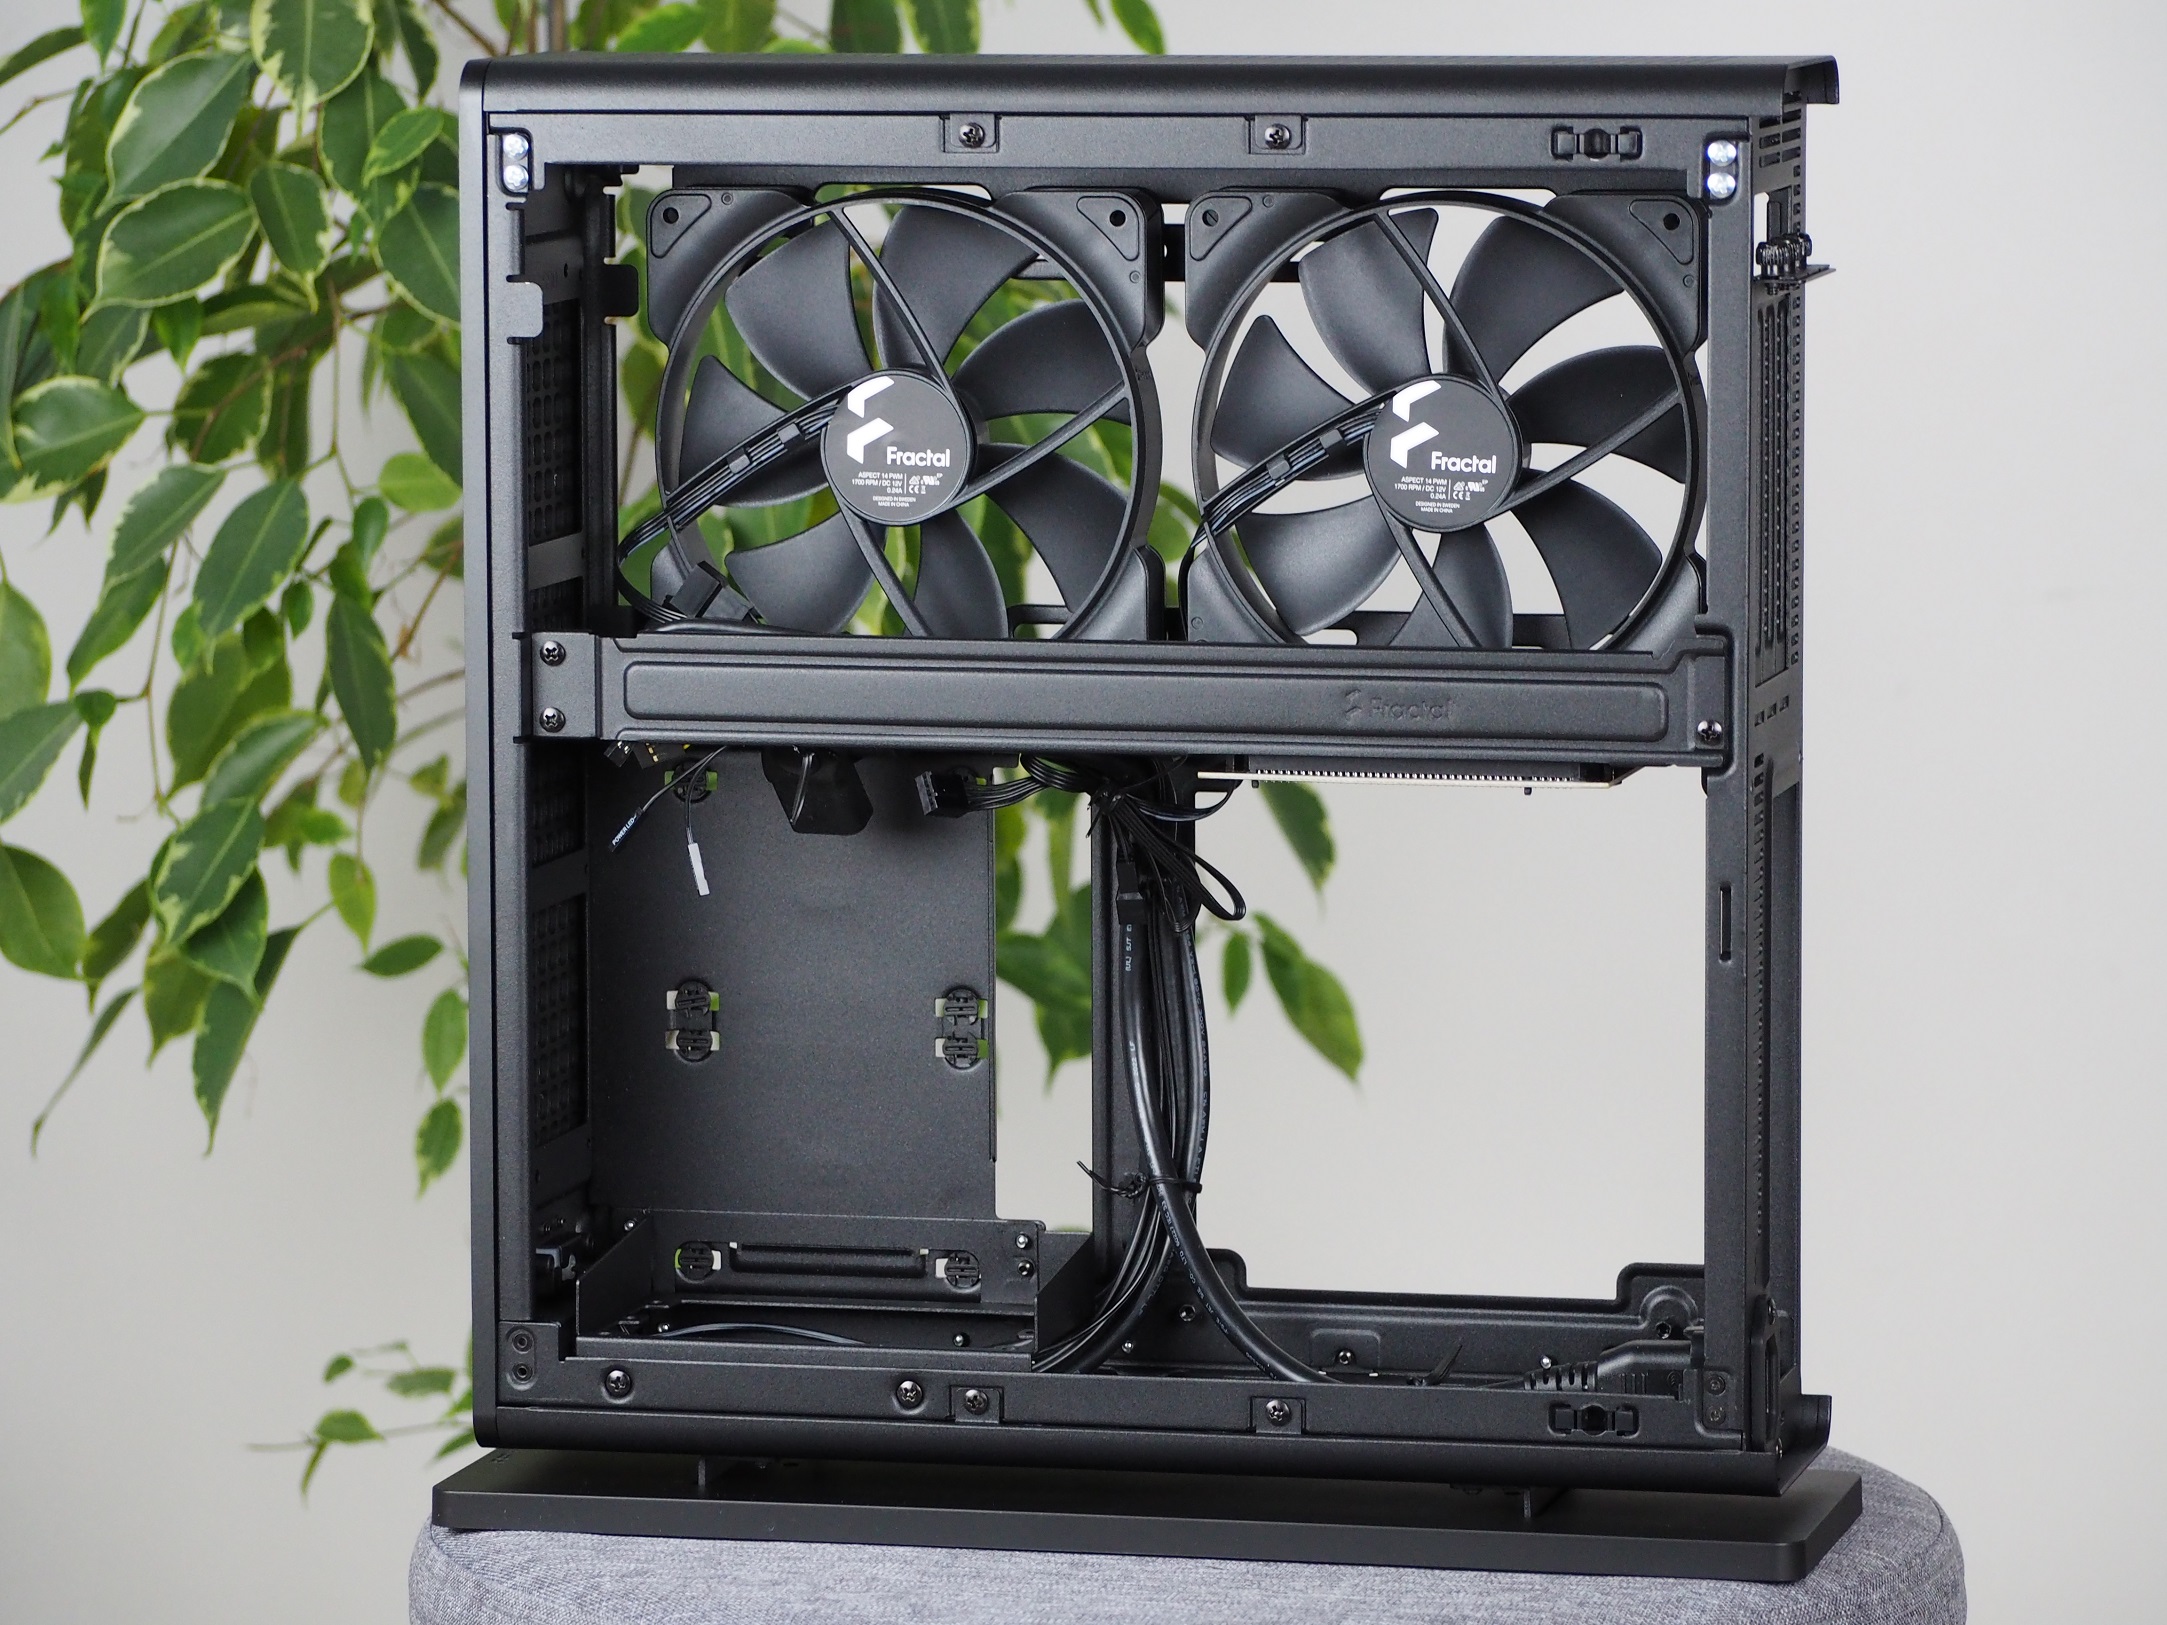
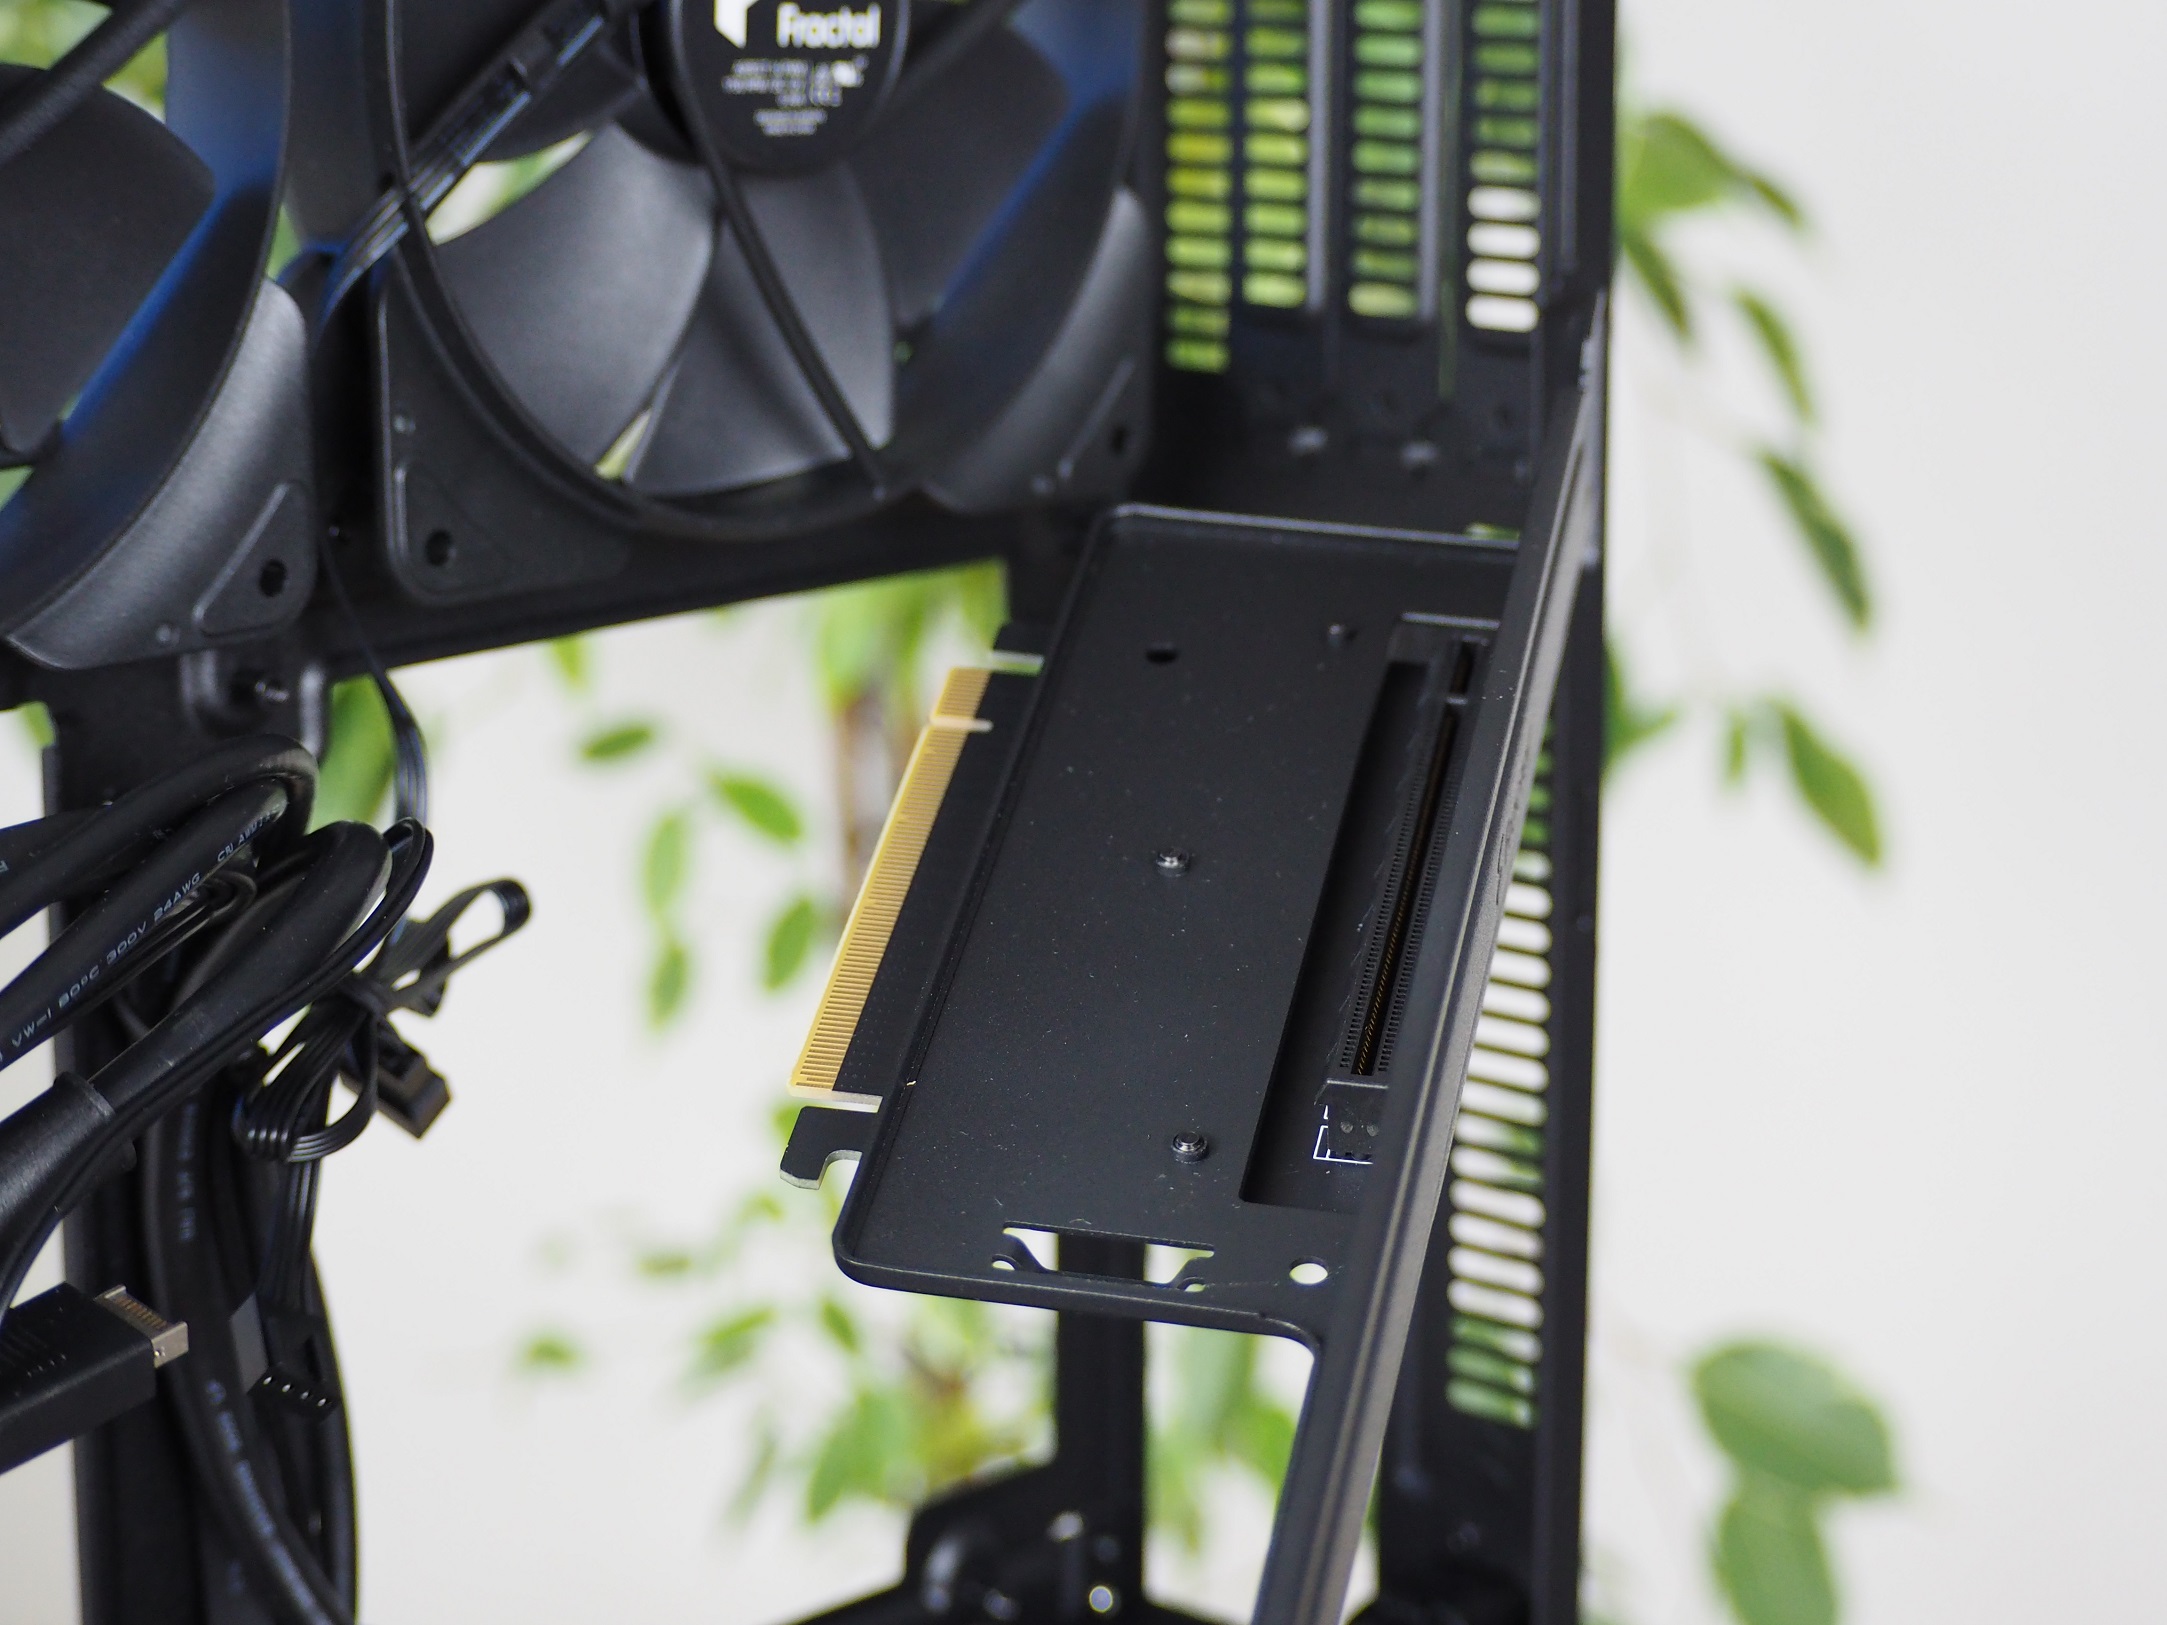
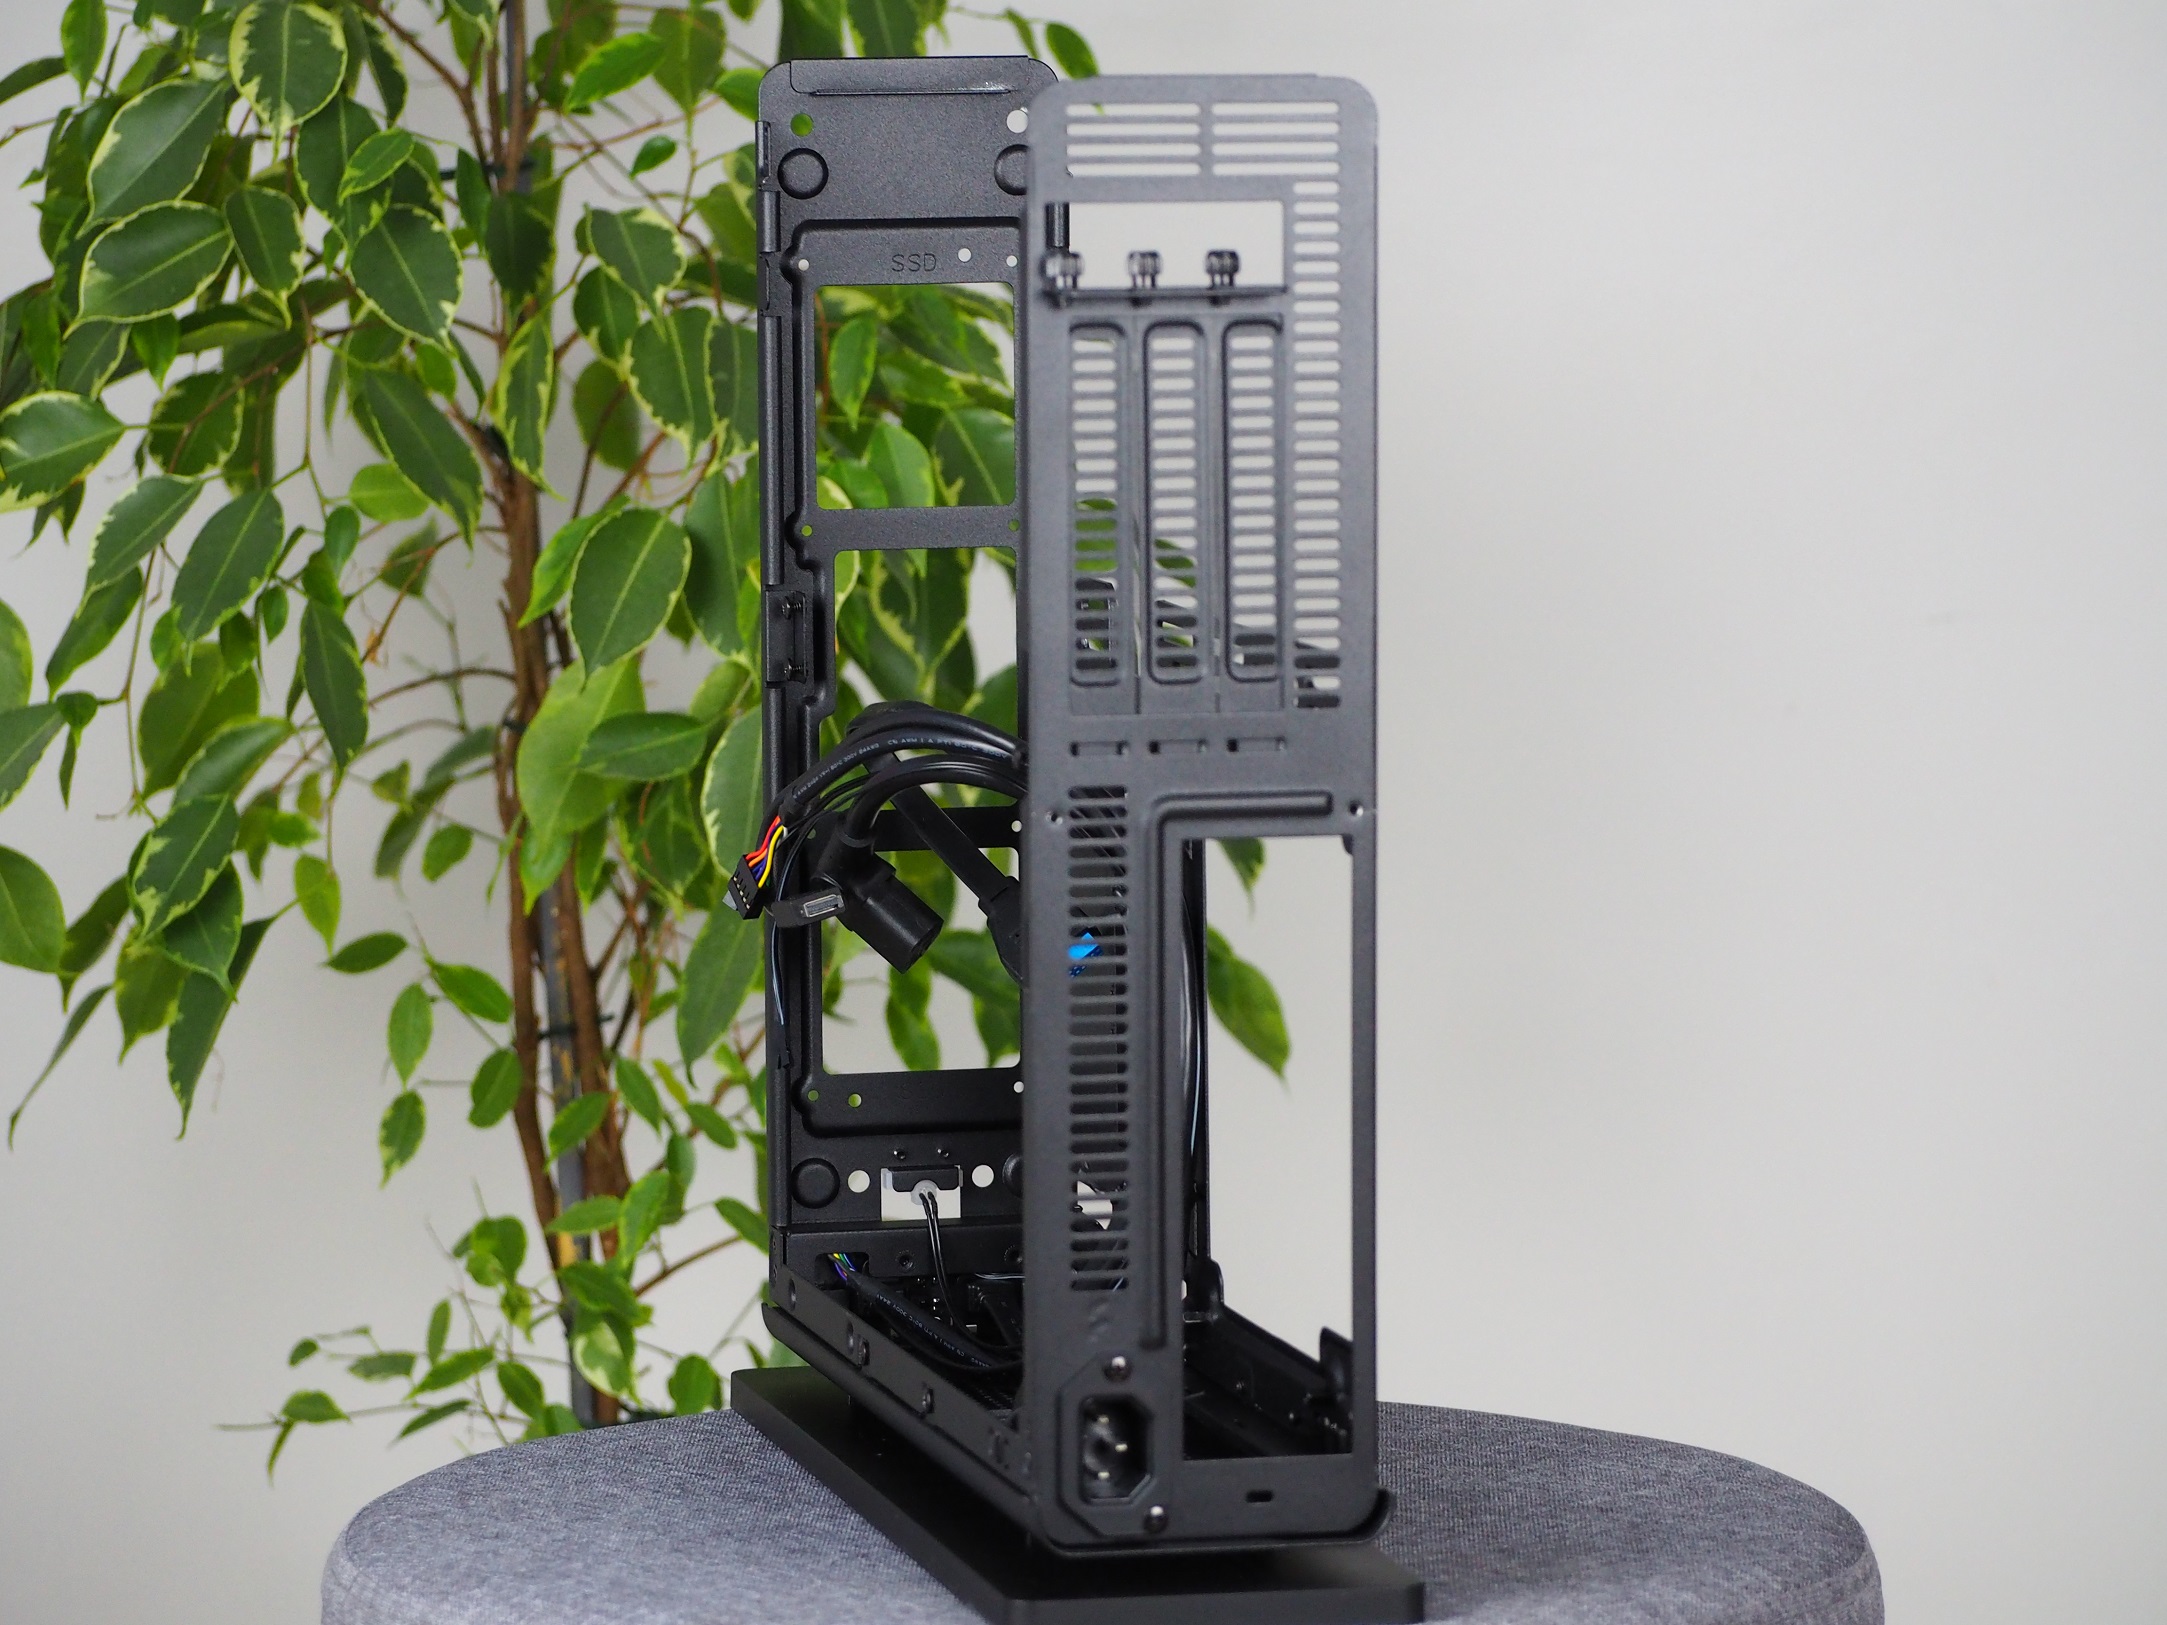
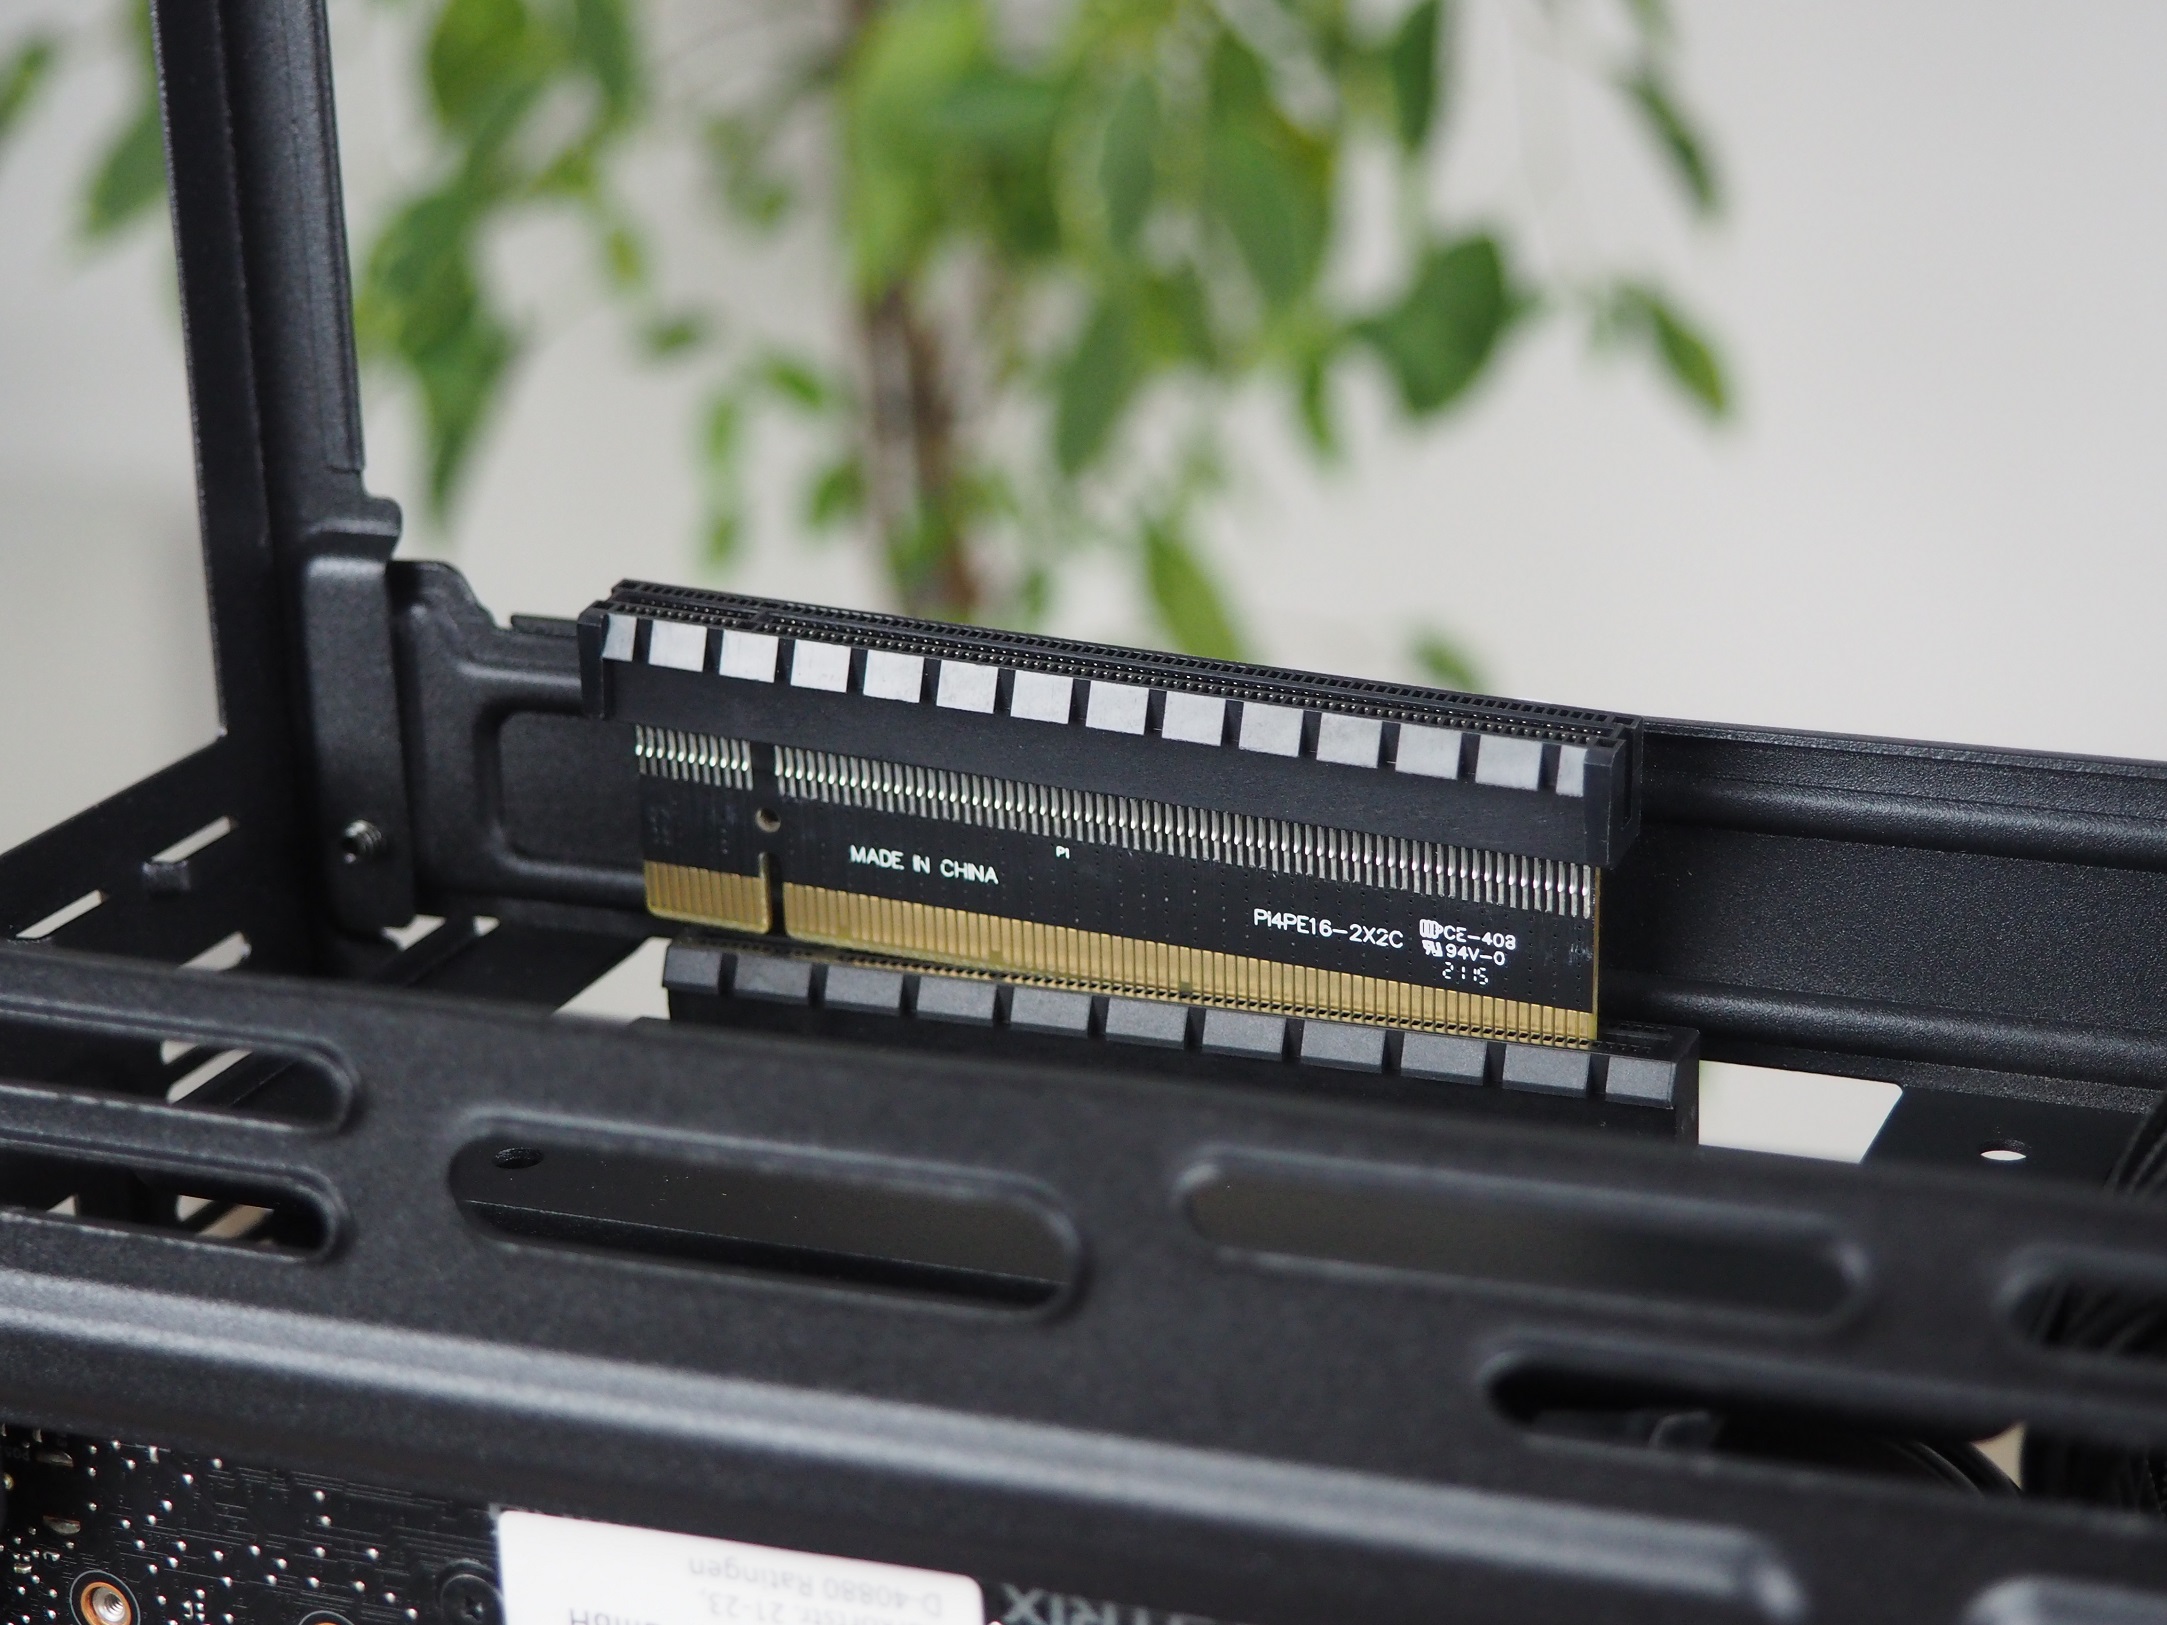
An adapter for the PCI Express connector is required to fit the graphics card in such a tight case. This is built into the rail, shaped to right angle (towards the top, to the expansion card outputs). This adapter is of the older but still relevant PCIe 4.0 interface. The rail on which it is placed also reinforces the structure of the case in its centre via three screws.
The bottom part belongs to the Mini-ITX motherboard and the SFX or SFX-L power supply. There is a special mounting frame for the power supply, under which the cables from the front I/O panel are routed. There is also a plus to the design for better organization of positions for cable management. There are up to ten of these available. At the back of the case, there is an extension cable screwed in for the power supply, as it is located all the way at the front. You can remove the power input from the case if you feel you’re better off fitting your hardware without it.
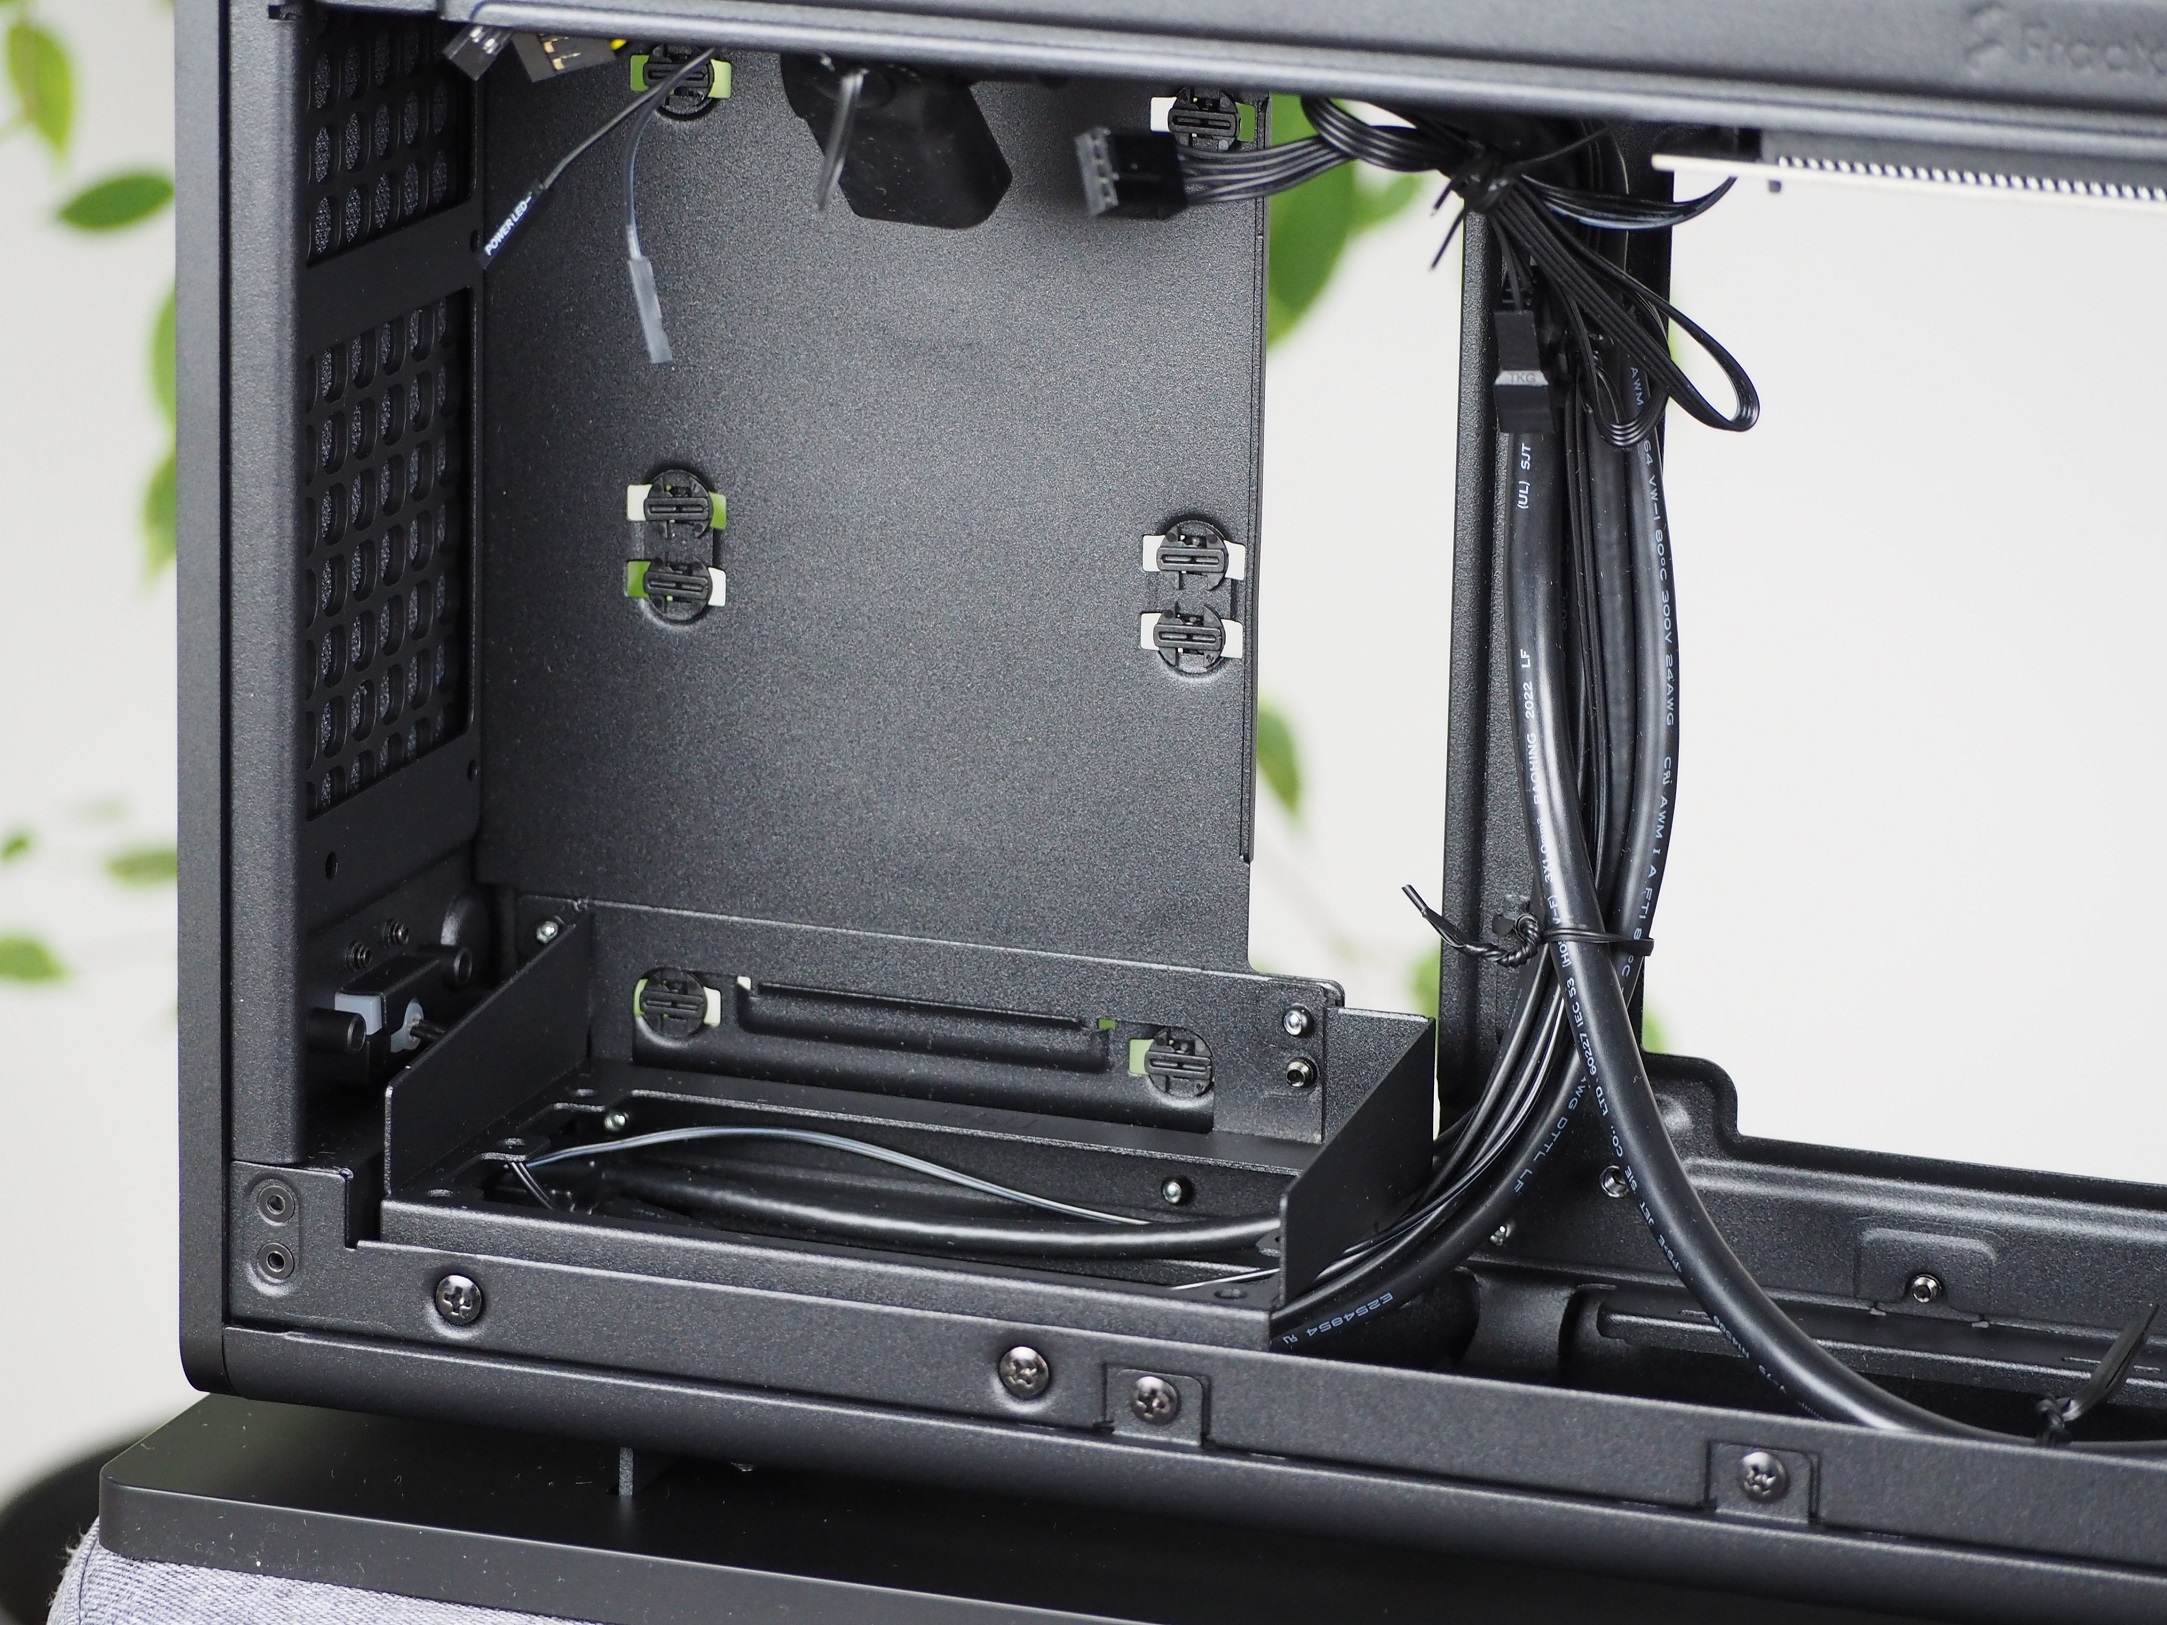
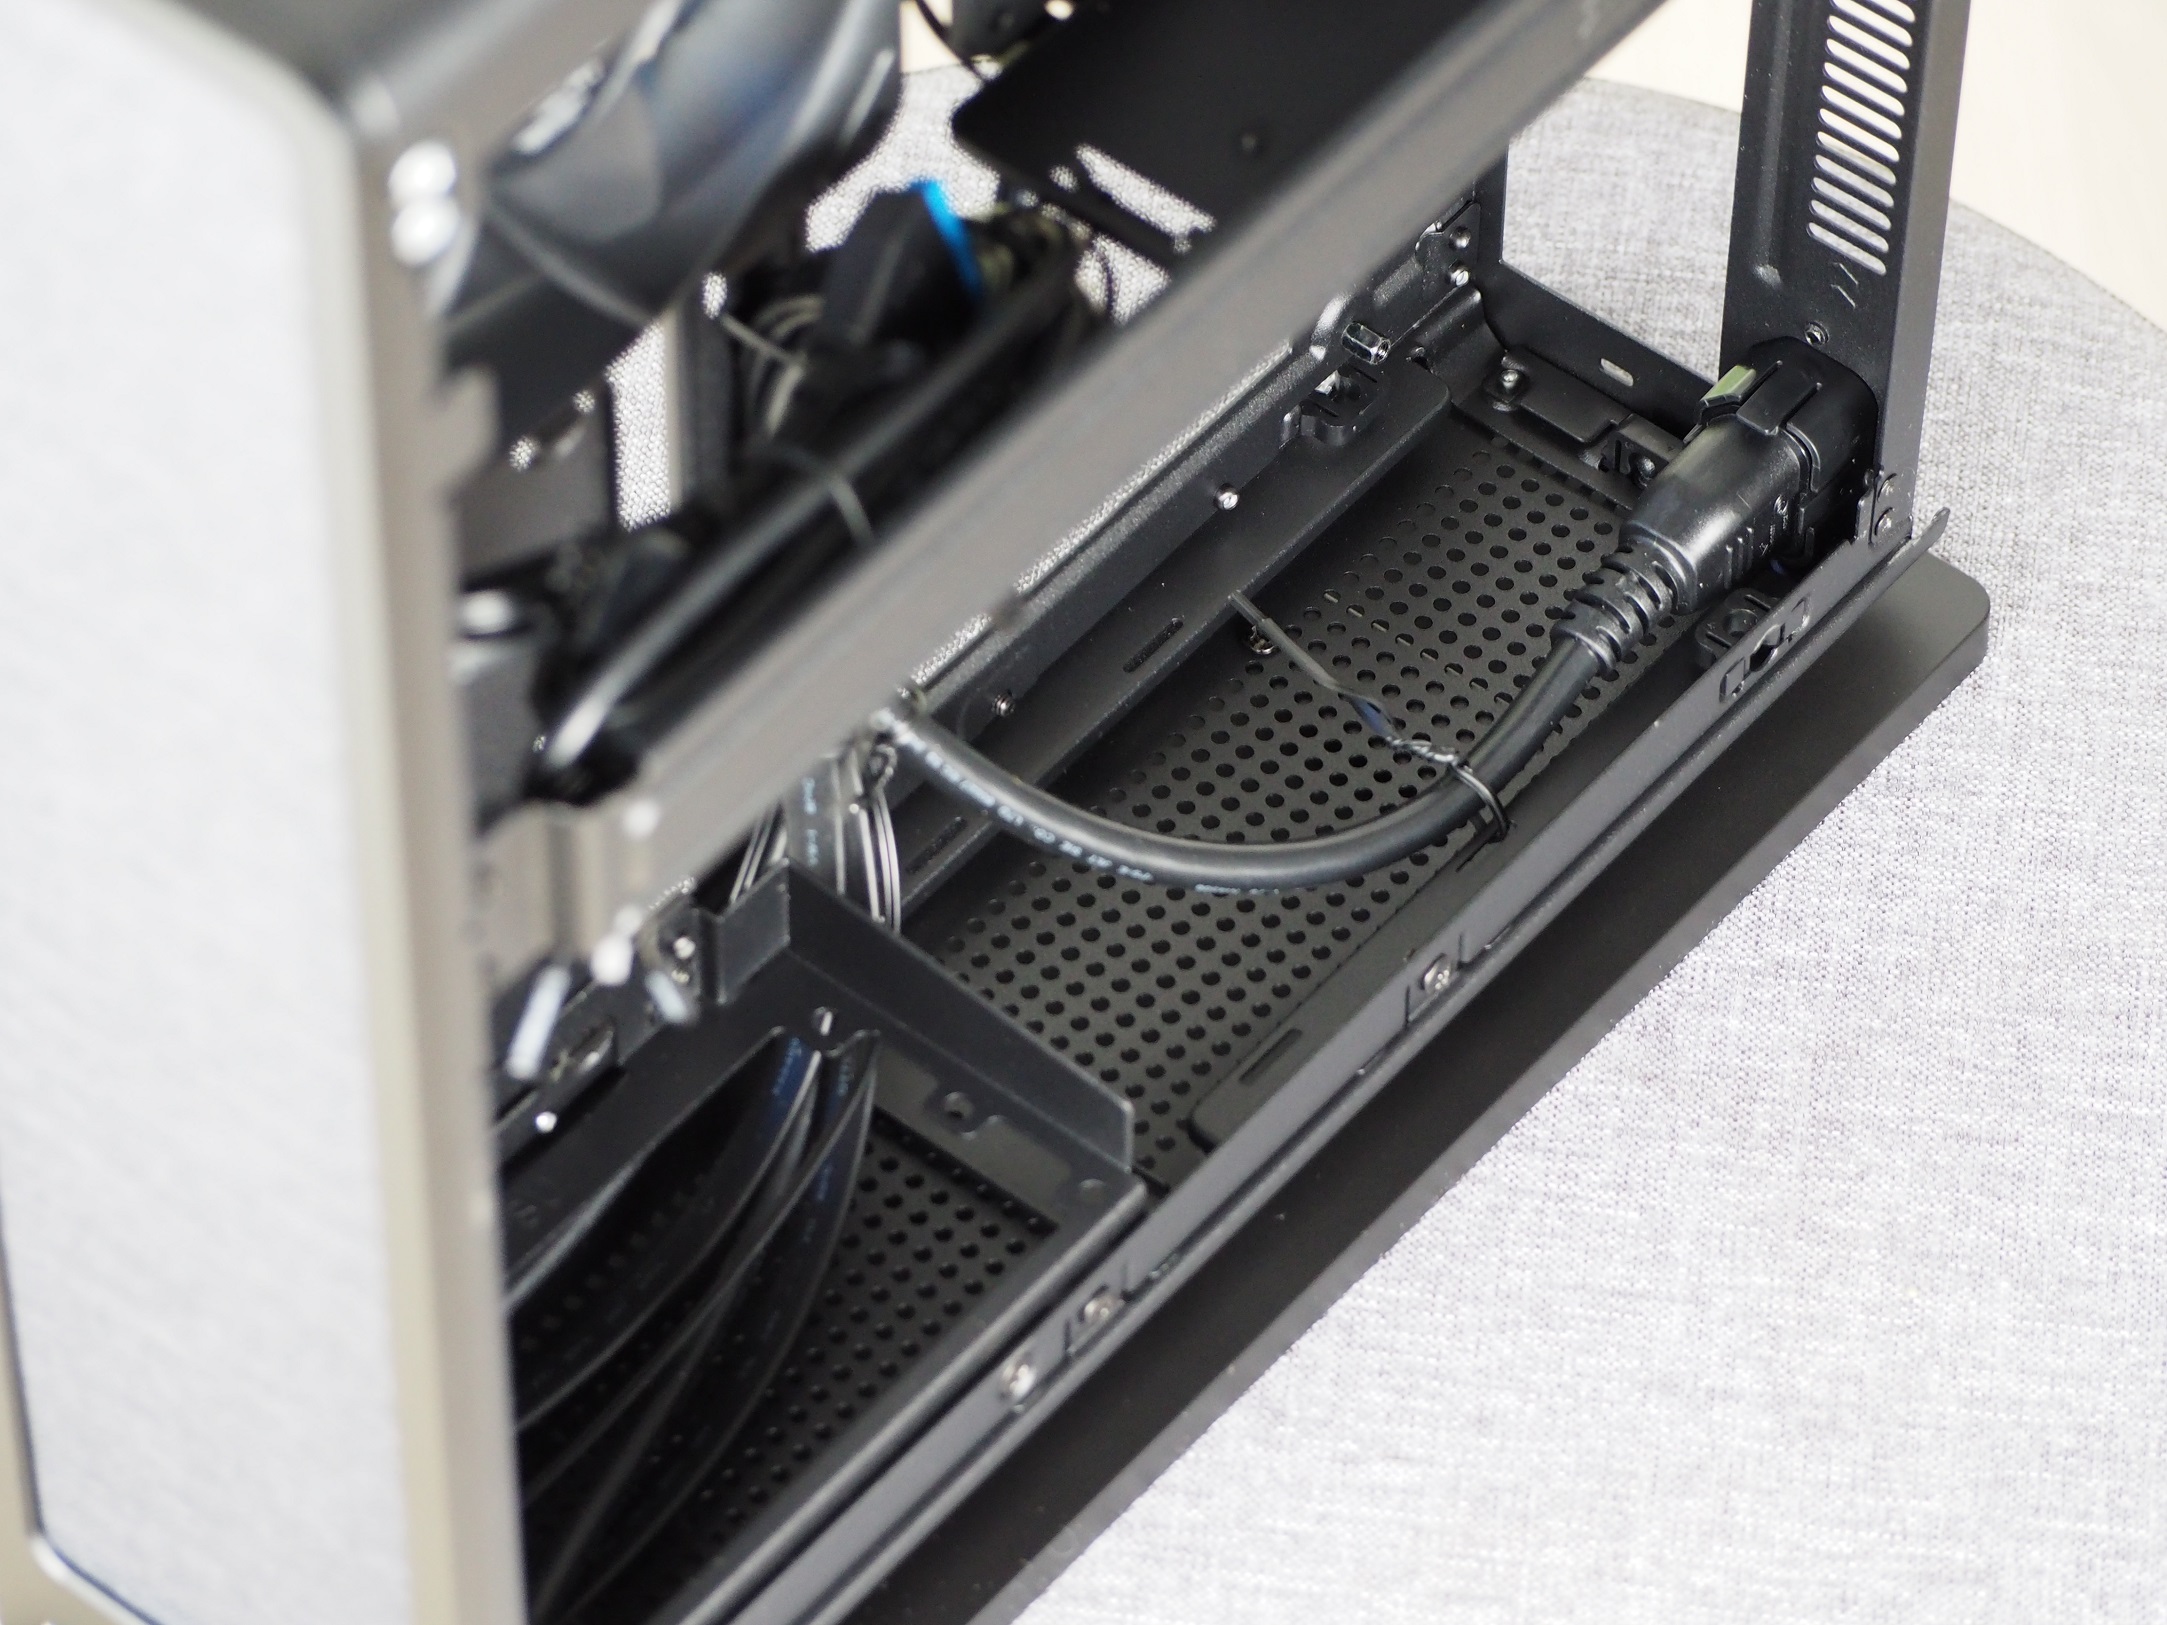
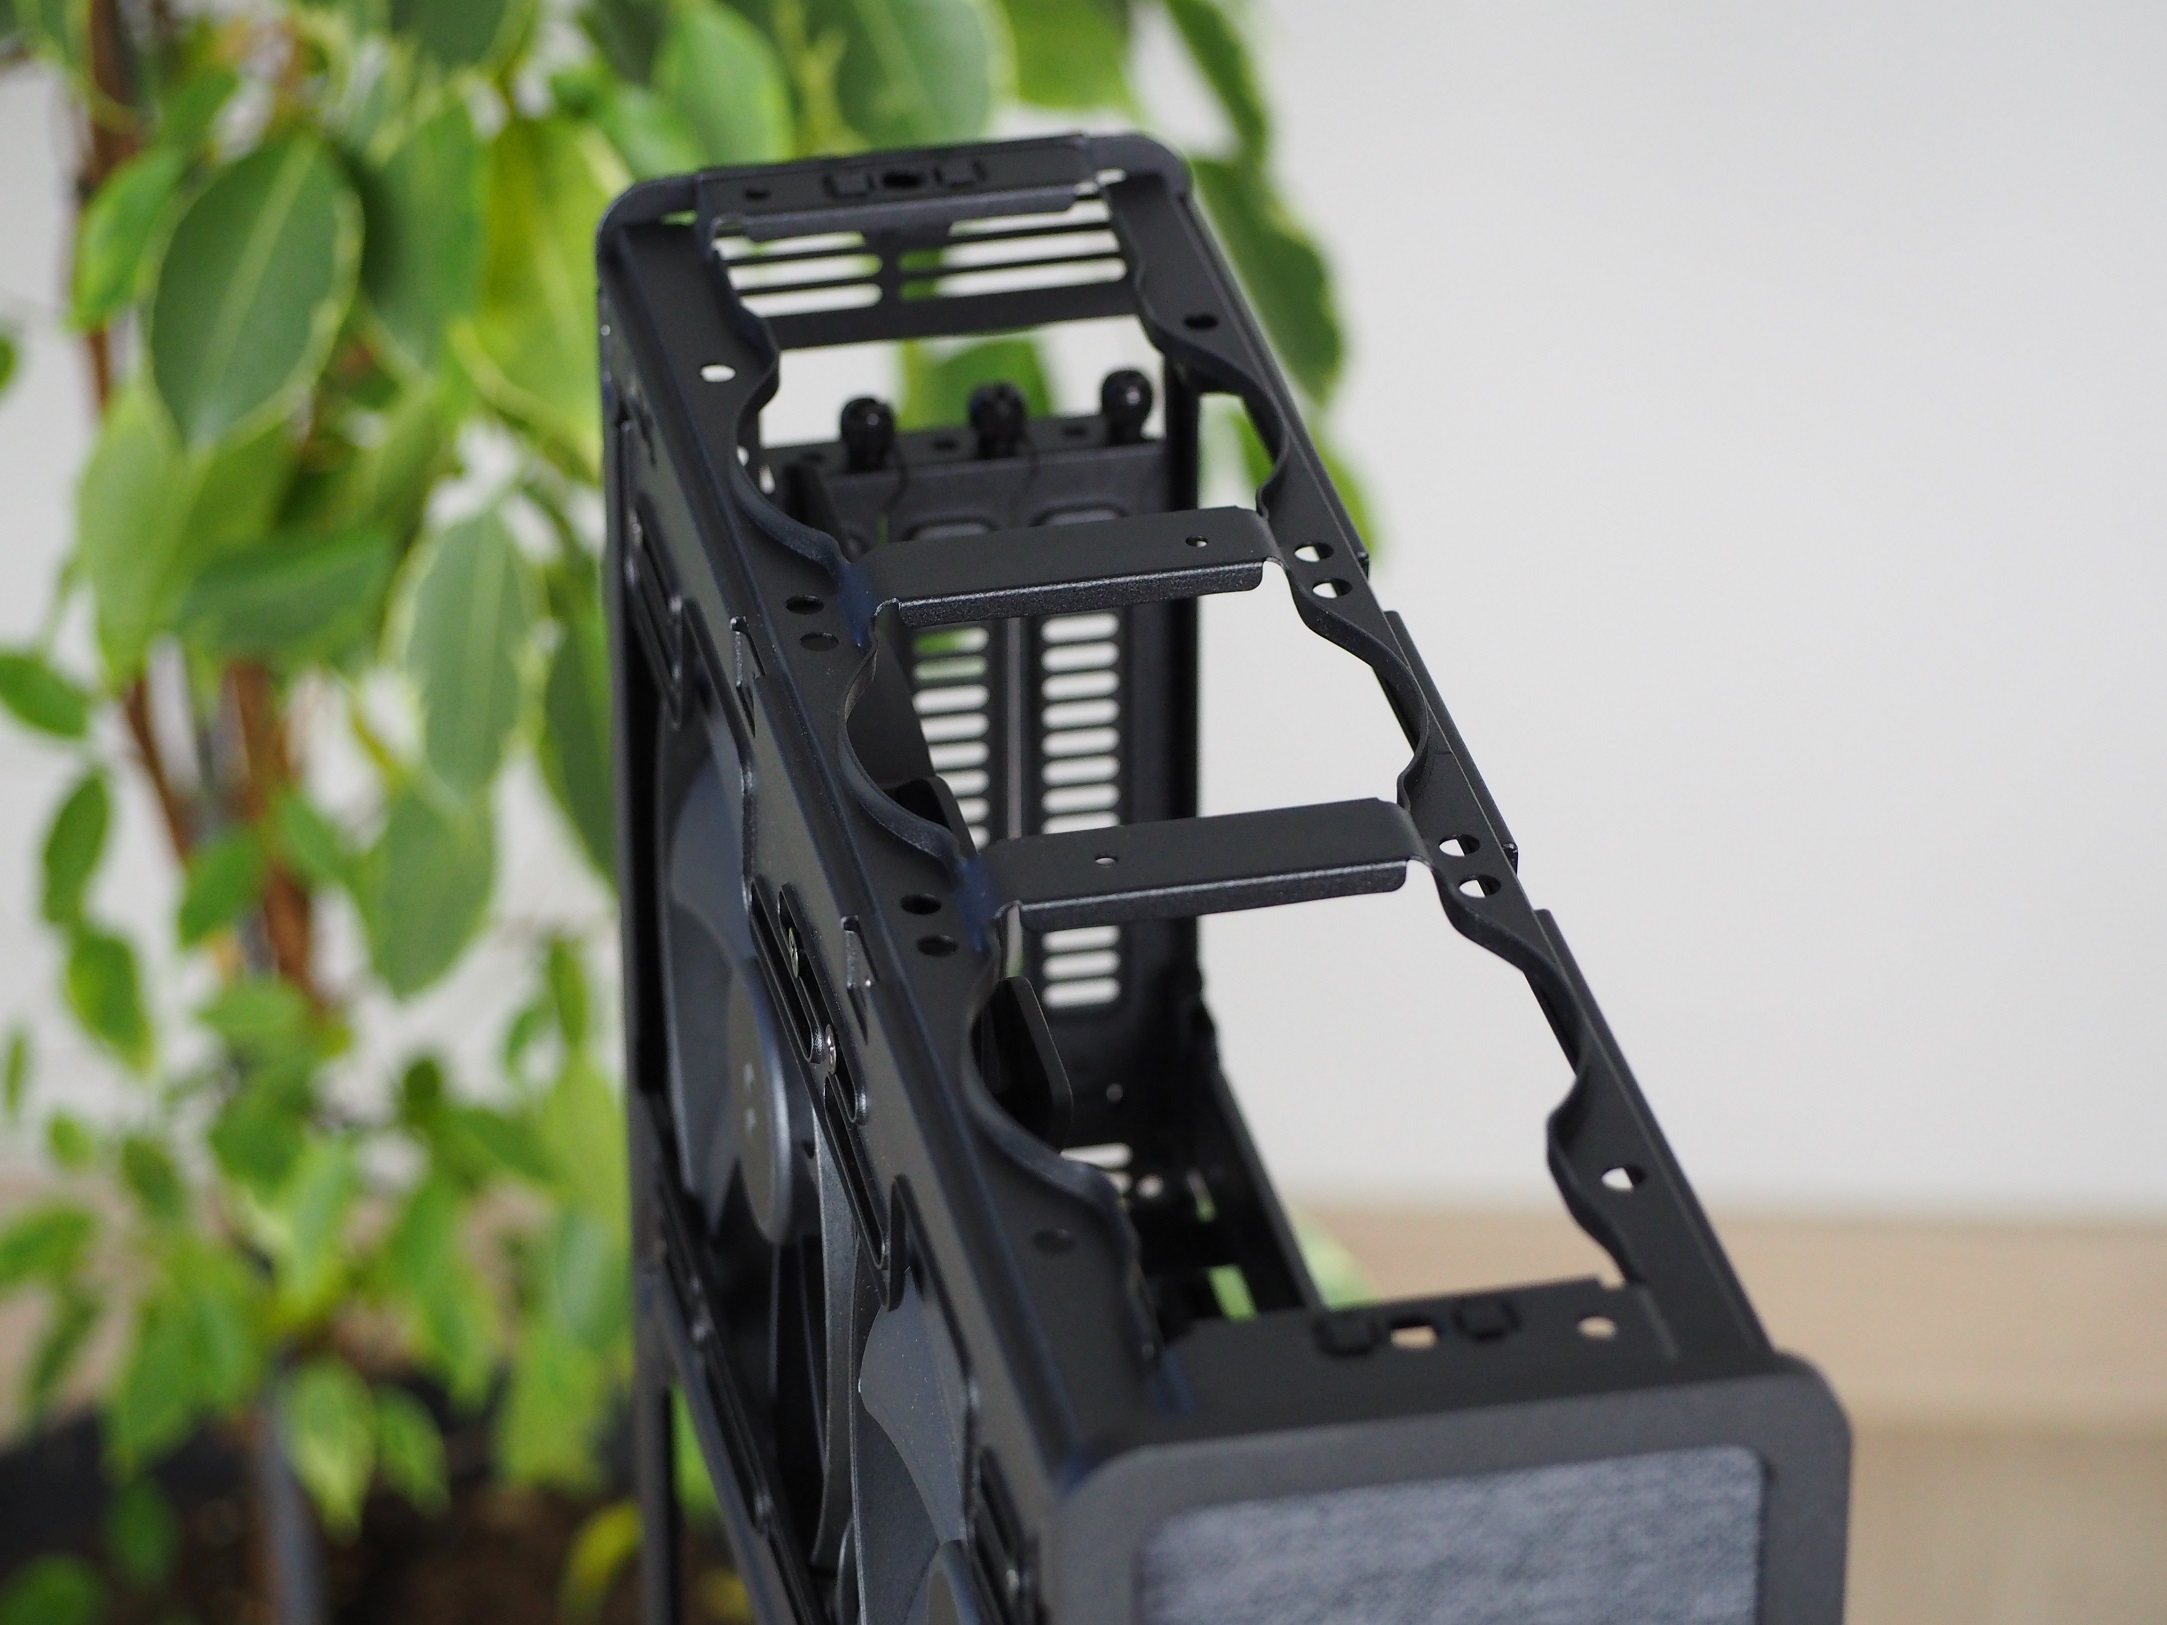
Inside the front part, two 2.5″ storage compartments can be placed using screws and rubber washers, which are also included. If that’s not enough, there are also two more positions on the left side of the case. You don’t need tools to access them, thanks to pins. Inserting the storage was easy and it held firmly, but was harder to take out. Every now and then I got stuck to the point that I was afraid of damaging the pins. I would use the sideways position primarily so you don’t clog the exhaust in the front. I’ll take up to four 2.5″ storage positions in such a small case as a nice bonus.
From the back you have three PCI Express expansion card slots if you would like to use a thicker card. Its maximum height can be 82 mm without the side fans mounted.
The thickness of the sheets on the structure varies from 0.9 to 0.95 mm, depending on the measuring point. But it’s more oftencloser to 0.9 mm.
The latest hardware from the Swedish company is a case for Mini-ITX boards. However, thanks to the sensible interior layout, it is also possible to mount larger components. Their cooling is taken care of by the ubiquitous perforation of the outer plates and two 140 mm fans. With or without them? You’ll have to decide what you want to cool more effectively. We measured four different scenarios in our tests.
Mounting
The motherboard mounting is standard, you don’t need to disassemble anything else. However, I struggled slightly with the power supply in the frame. Specifically with the placement of the power input cable from the case frame. But it also depends on which side you have the power connector on the power supply. You have to fiddle with the cable a bit to make sure you don’t pinch it between the frame and part of the case. Don’t forget to switch the power supply on before mounting it. If you forget anyway and find out after the case is fully fitted, don’t despair. Just remove the bottom panel to get to the button on the power supply.
Personally, two positions for holding the main cables in the case were enough for me. On the tray and on one the floor, under the CPU cooler. The latter can be mounted in the case but with a maximum height of 70 mm.


Simply plug the center panel with the PCI Express connector extension into the motherboard and tighten the rail with three screws. But that’s not all. From the accessories, another extension needs to be fitted to allow the graphics card to reach the holes for its outputs. With the fans mounted on the side, the dimensions of the hardware need to be considered. With fans, the graphics card should supposedly not exceed 57 mm in height. The test one is 58 mm thick and still lacks about 6 – 7 mm to touch the fans. But it’s good to have some distance between them.


Mounting the case went without any difficulties and it somehow intuitively worked itself out. I would even venture to say that, if you ignore the amount of screws, it was easier than fitting hardware into some of the larger cases. The only difference between an unfitted and a fitted case is the noise of the fans and the white LED on the front panel. It shines subtly through the fabric and doesn’t strain the eyes.


The latest hardware from the Swedish company is a case for Mini-ITX boards. However, thanks to the sensible interior layout, it is also possible to mount larger components. Their cooling is taken care of by the ubiquitous perforation of the outer plates and two 140 mm fans. With or without them? You’ll have to decide what you want to cool more effectively. We measured four different scenarios in our tests.
Test methodology
In addition to the two 140mm Aspect fans, the case has the option to install three more 80mm fans on top. These are from Noctua with the NF-A8 PWM designation. Although with a significant limitation from the graphics card, we managed to fit these fans in a combination of 2× intake or 1× exhaust. When fitting two pieces on the exhaust (see photo) the blades of the rear fan collided with the heatsink of the graphics card and so could not be used. There were no difficulties with the rear position in the intake position.
In the tests we will compare if there is a difference, and if so, how big, when adding additional fans to the ceiling, to those already fitted from the factory. We will also test how the case can cool the hardware without system fans. We will only test these alternatives in 42 dBA noise mode. They will no longer be shown in comparisons with other cases.

Testing is done in a home environment where I strive for the most accurate results possible. In the room during testing, the air temperature in front of the case is 23 degrees Celsius and the minimum noise level I can measure with the Voltcraft SL-100 noise meter is 32.4 dBA. The sensor of the noise meter is aligned to the center of the top of the case at a distance of 10 cm, for the best measurement of the speed difference of the fans, which I change using the motherboard. For easy comparison to other cases, they are always regulated to fixed noise levels.
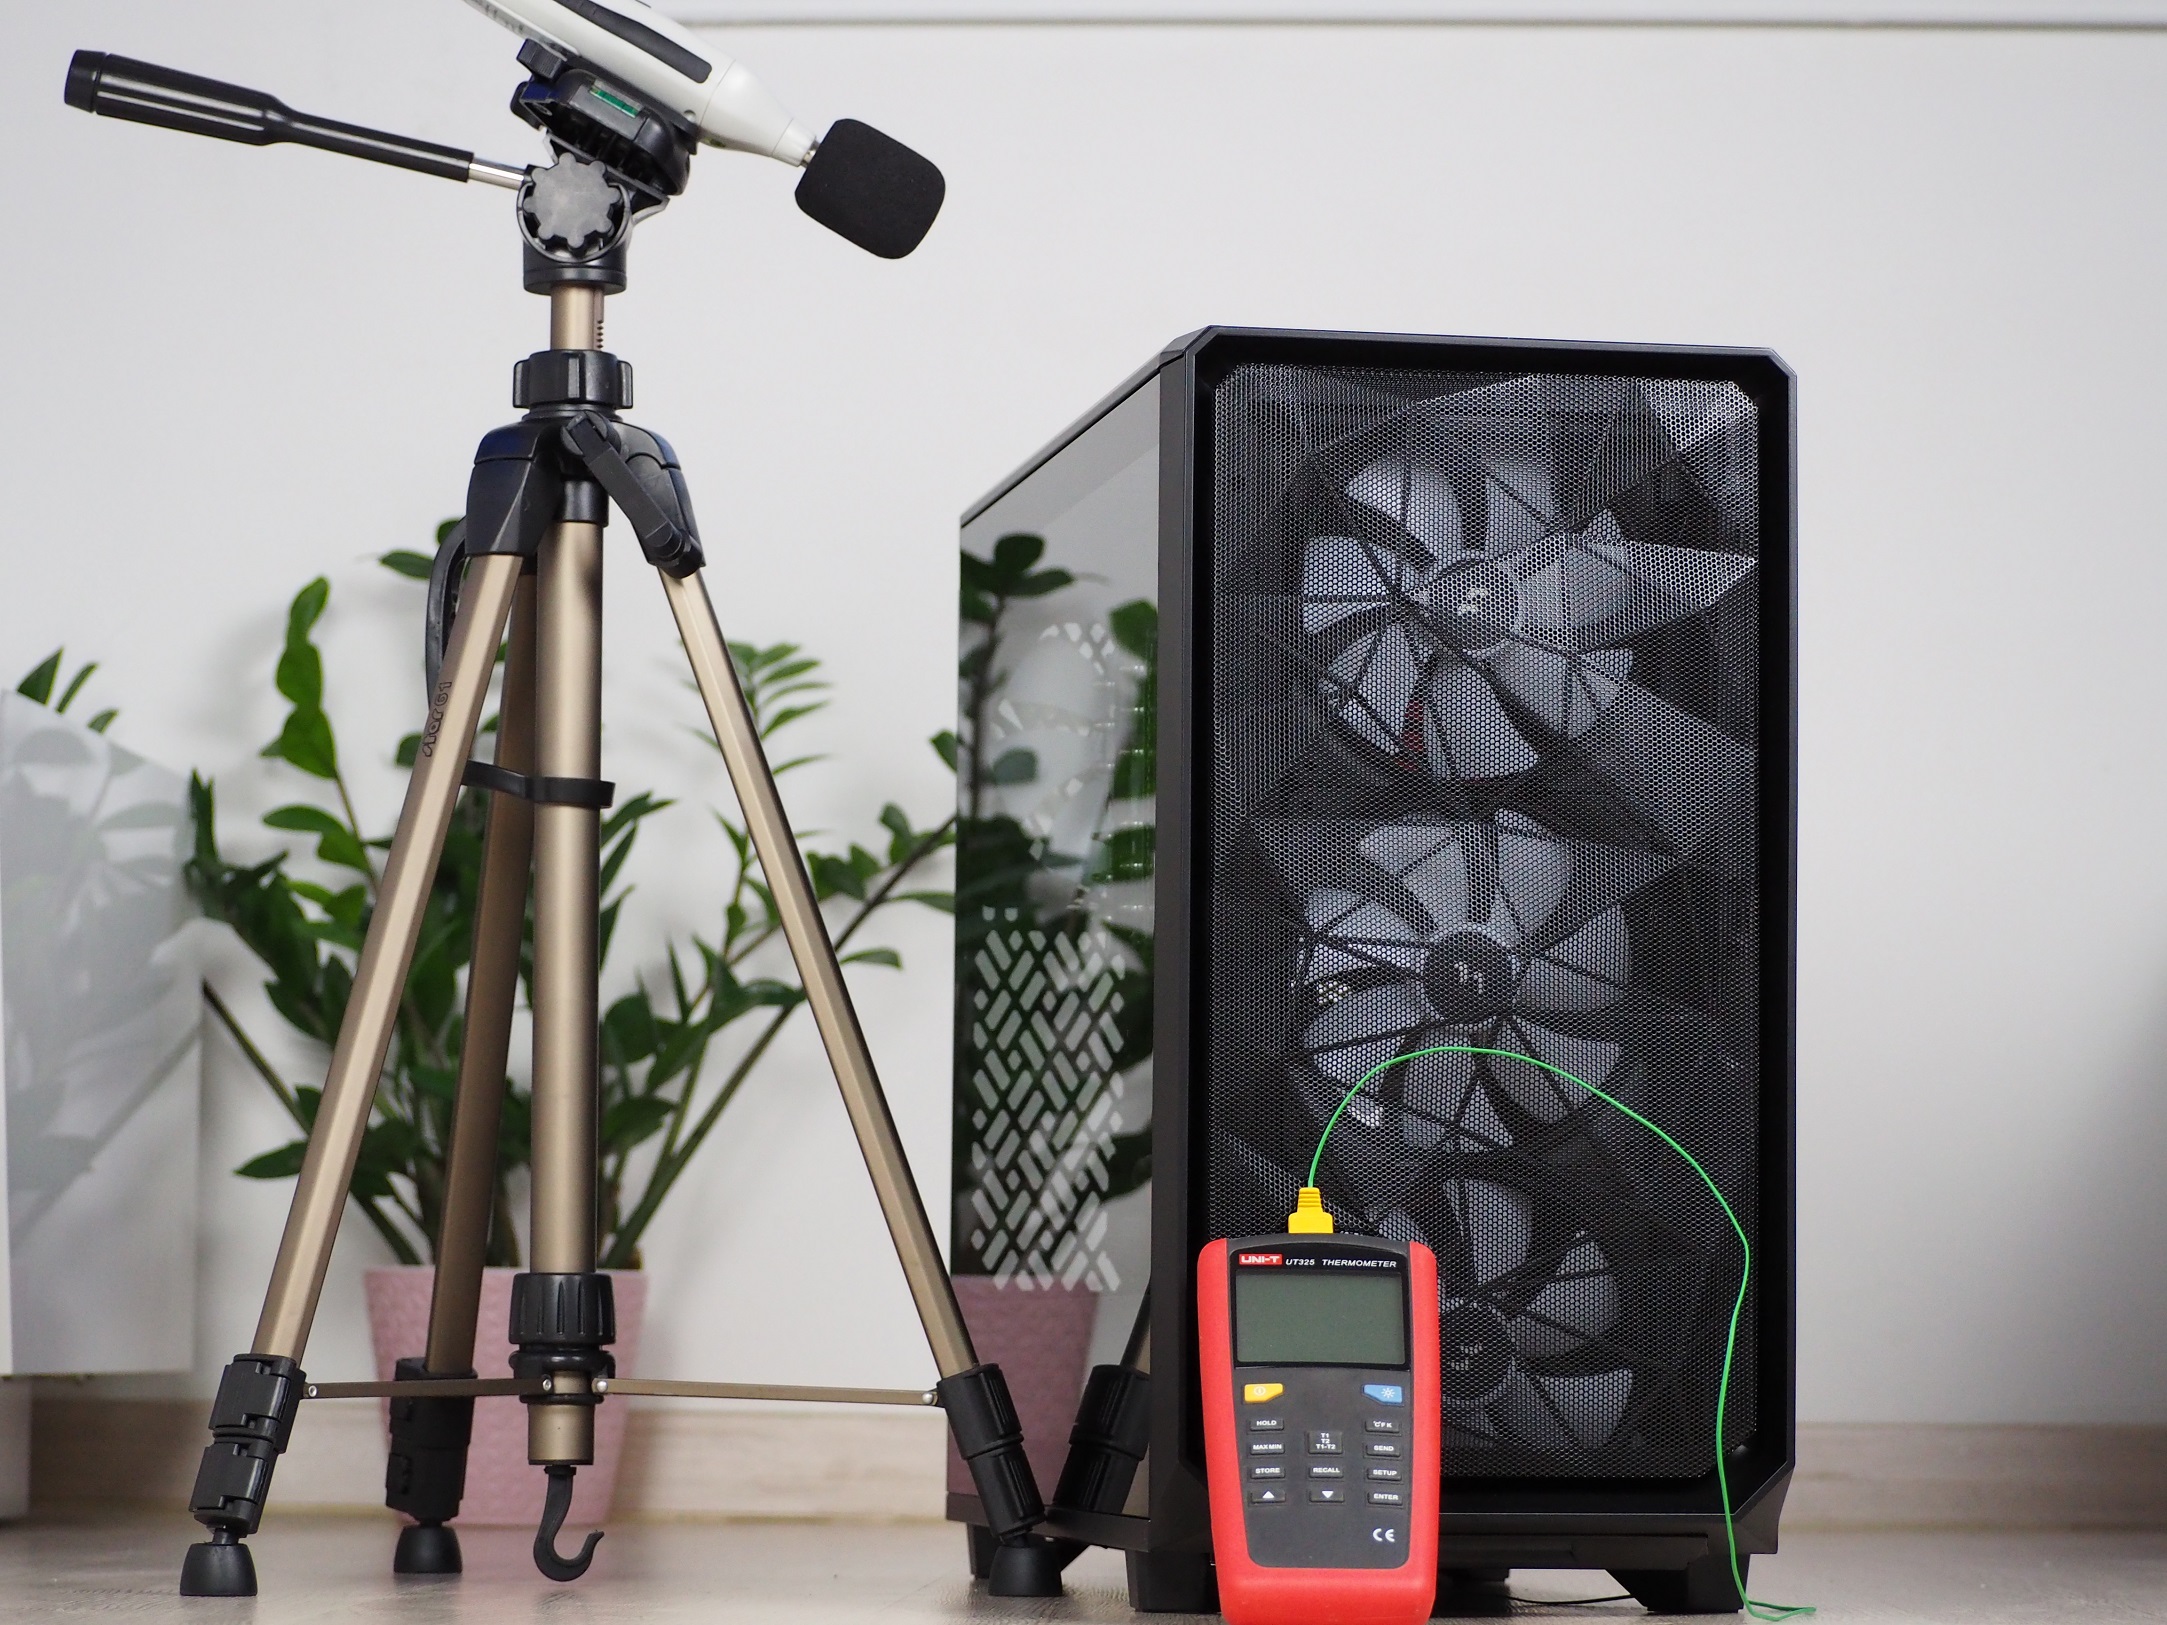
JIndividual components are heated for 10 minutes in FurMark synthetic stress tests and with Prime95 (custom settings) at the same time. This time is long enough to allow all components to warm up sufficiently. There are then 15-minute cooling breaks between tests, during which the component temperatures (and the case air temperature as well) are brought back to default.
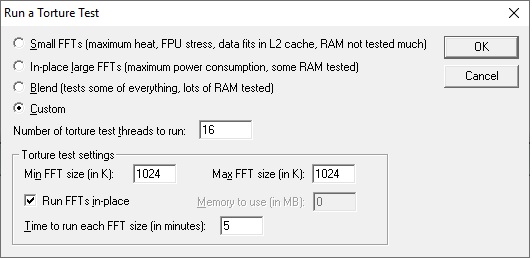
Noise mode levels:
- 36 dBA
- 39 dBA
- 42 dBA
| Test setup | |
| Processor | AMD Ryzen 7 3700X |
| Motherboard | Asus ROG Strix X470-I Gaming |
| CPU cooler | Noctua NH-L9x65 SE-AM4 |
| Thermal compound | Noctua NT-H2 |
| Graphics card | Asus RTX 2060 Super Dual |
| RAM | Patriot, 2× 8GB, 3600 MHz/CL17 |
| SSD | Western Digital Blue 500GB (2280) |
| Power supply | Corsair SF750 |
The latest hardware from the Swedish company is a case for Mini-ITX boards. However, thanks to the sensible interior layout, it is also possible to mount larger components. Their cooling is taken care of by the ubiquitous perforation of the outer plates and two 140 mm fans. With or without them? You’ll have to decide what you want to cool more effectively. We measured four different scenarios in our tests.
CPU and GPU cooling tests

The latest hardware from the Swedish company is a case for Mini-ITX boards. However, thanks to the sensible interior layout, it is also possible to mount larger components. Their cooling is taken care of by the ubiquitous perforation of the outer plates and two 140 mm fans. With or without them? You’ll have to decide what you want to cool more effectively. We measured four different scenarios in our tests.
Motherboard cooling tests
The latest hardware from the Swedish company is a case for Mini-ITX boards. However, thanks to the sensible interior layout, it is also possible to mount larger components. Their cooling is taken care of by the ubiquitous perforation of the outer plates and two 140 mm fans. With or without them? You’ll have to decide what you want to cool more effectively. We measured four different scenarios in our tests.
SSD cooling tests
The latest hardware from the Swedish company is a case for Mini-ITX boards. However, thanks to the sensible interior layout, it is also possible to mount larger components. Their cooling is taken care of by the ubiquitous perforation of the outer plates and two 140 mm fans. With or without them? You’ll have to decide what you want to cool more effectively. We measured four different scenarios in our tests.
Conclusion
In the test results, a phenomenon that we do not see with cases with standard mounting of hardware appeared. With two fans on the side, when the performance (noise) increased, the processor heated up more and not the other way around. While graphics card cooling is more efficient, the heat from the card is dissipated more into the case. In this case, the small CPU cooler does not keep the temperature down. While with no fans, the NH-L9x65 can get to a pleasant 58 degrees Celsius at 42 dBA. You’ll see a better result without them, even with the temperatures of the motherboard and the CPU VRM. But it’s the graphics card that suffers the most with a difference of six degrees.
The additional 80 mm fans do not make a big difference in either the “intake” or “exhaust” position. With their use, the temperatures of each measured component are kept almost at the same values as without them. I can imagine that they could be useful with taller graphics cards where the Aspects would have to be removed.
I don’t have any negative things to say about the build quality of the case, I guess I can only praise it. You get a case perforated on each side with thick metal plates, which can also be disassembled quickly and easily thanks to the latching system. Of course you have to count on screwing quite a bit during installation. If you need a lot of storage space, you’ll get it here, even with the smaller case dimensions. I see the main disadvantage in the inability to use a larger liquid cooling radiator at the same time as a graphics card. I also miss dust filters, at least on the side panels through which the fans suck in cool air.
Fitting the components was easy, mainly because everything fit together gradually from the bottom to the top. You can also manage the cabling without the slightest difficulty.
For a price of around 155 EUR, you get a perfectly built case with an elegant design. It can also save you a lot of desk space with its small dimensions. In regards to cooling, it can handle mid-range hardware at a not very obtrusive noise level. Basically, you get something along the lines of the case that full Trident builds from MSI use, except that you choose the hardware. There was very little that was missing for achieving the “Smart buy” award. For example, a dust filter on the intake, or a little more room for combining the graphics card with a water cooling radiator or ceiling fans. Thus it takes away a much deserved “Approved” award from the editorial team.
English translation and edit by Jozef Dudáš
| Fractal Design Ridge |
| + Precise workmanship |
| + Thick sheet metal |
| + Easy installation |
| + Space for a larger graphics card |
| + Up to four positions for 2.5" storage |
| - Lacks a dust filter |
| - Little room for fans above the graphics card |