


Unboxing and details
A very untraditional and relatively unique case has come to our editorial office. It is the ROG Z11, which the manufacturer introduced at the beginning of the year at CES 2020. The case hides several specialties, such as the possibility of vertical and horizontal positioning or a slightly curved motherboard tray. To make matters better, we fitted the case more or less exclusively with ROG components, thus creating a kind of full-on Asus build.
Basic specs
| Parameters | Asus ROG |
| Z11 | |
| Parametre | |
| Supported motherboard formats | Mini-ITX, Mini-DTX |
| Supported PSU format | ATX, up to 160 mm |
| CPU cooler | up to 130 mm |
| Graphics cards | up to 320 mm |
| Fan | 5× 120 mm, 3× 140 mm |
| Supported liquid radiators | 2× 120 mm, 1× up to 240mm |
| 2,5" positions | 4 |
| 3,5" positions | 1 |
| 5,25" positions | none |
| Dimensions [H/D/W] (and volume) | 531 × 386 × 196 mm (40 l) |
| Weight | 8.7 kg |
| Materials | steel + aluminium + tempered glass + plastics |
| Connectivity | 2× USB 3.1 gen 1 5 Gb typ A + 2× USB 3.1 gen 2 10 Gb typ C + 2× USB 2.0 typ A |
| Approximate price (czc.cz) | 6499 Kč/249 € |
Details
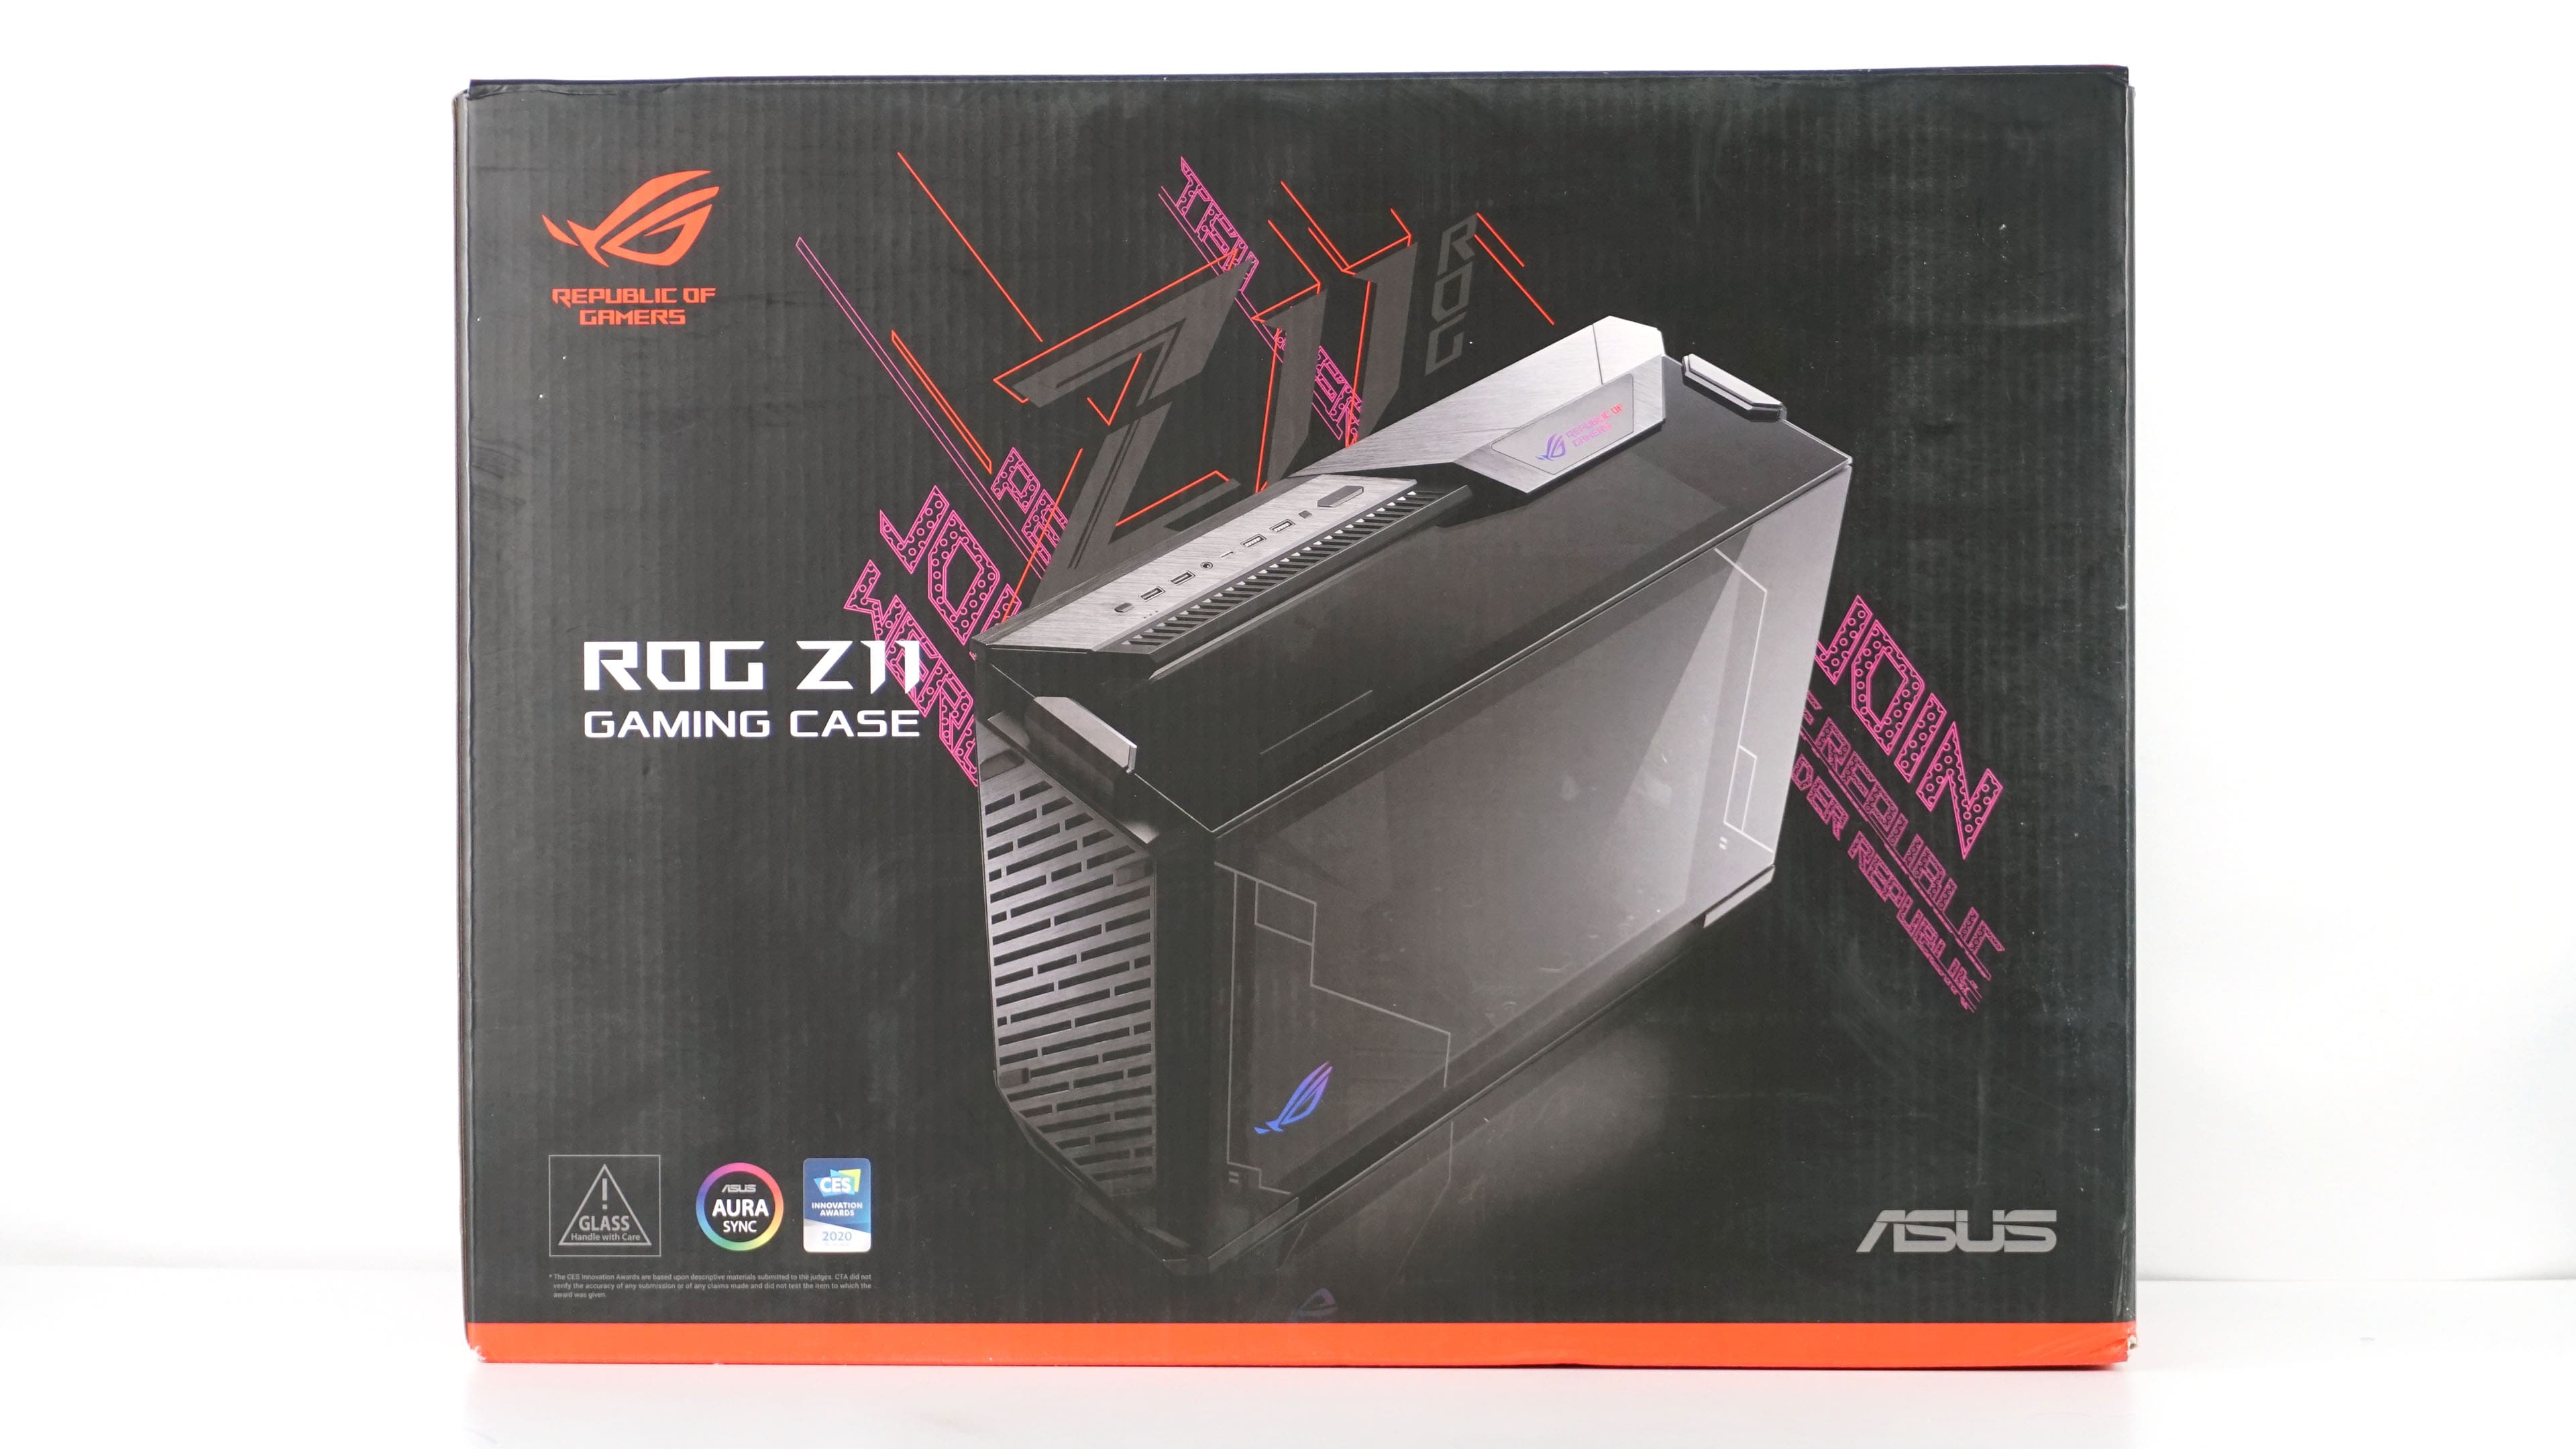
As is usual with Asus products, the box has sophisticated visual and displays the case in both vertical and horizontal positions.


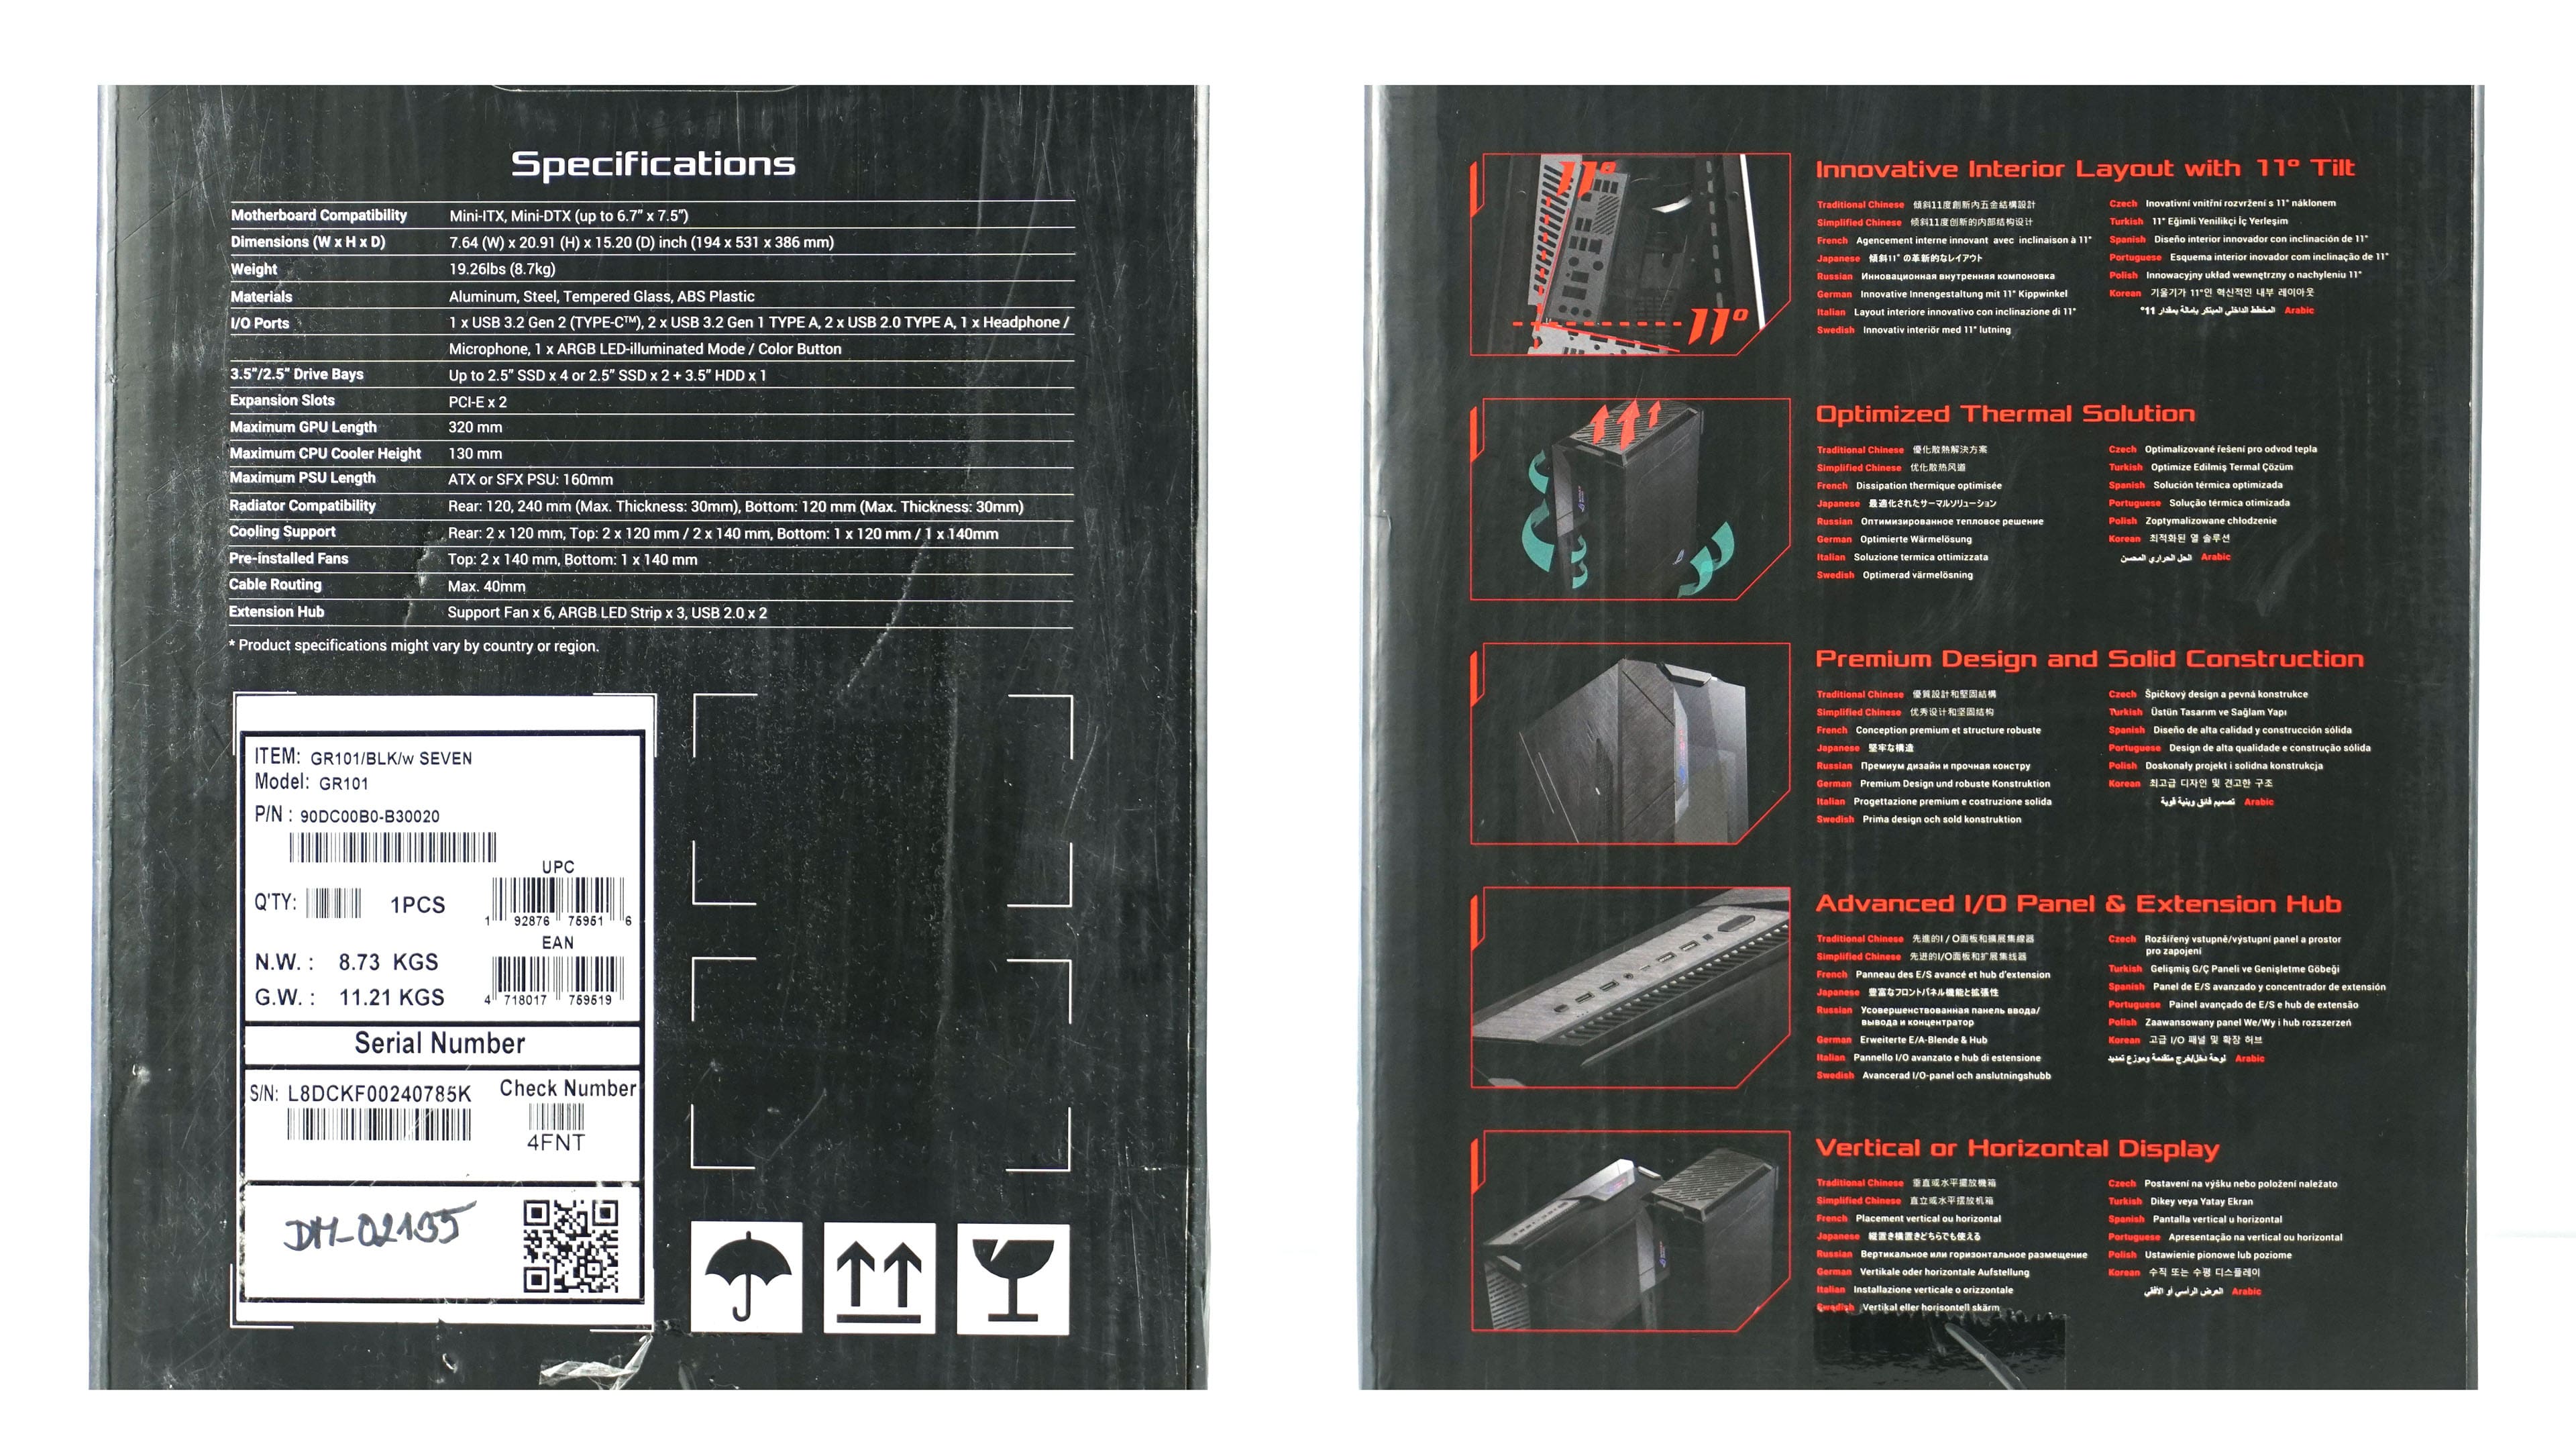
On the sides of the box, the specifications as well as the basic functions and gimmicks are displayed.
The packaging is also redesigned inside, where you will find a smaller box with accessories.
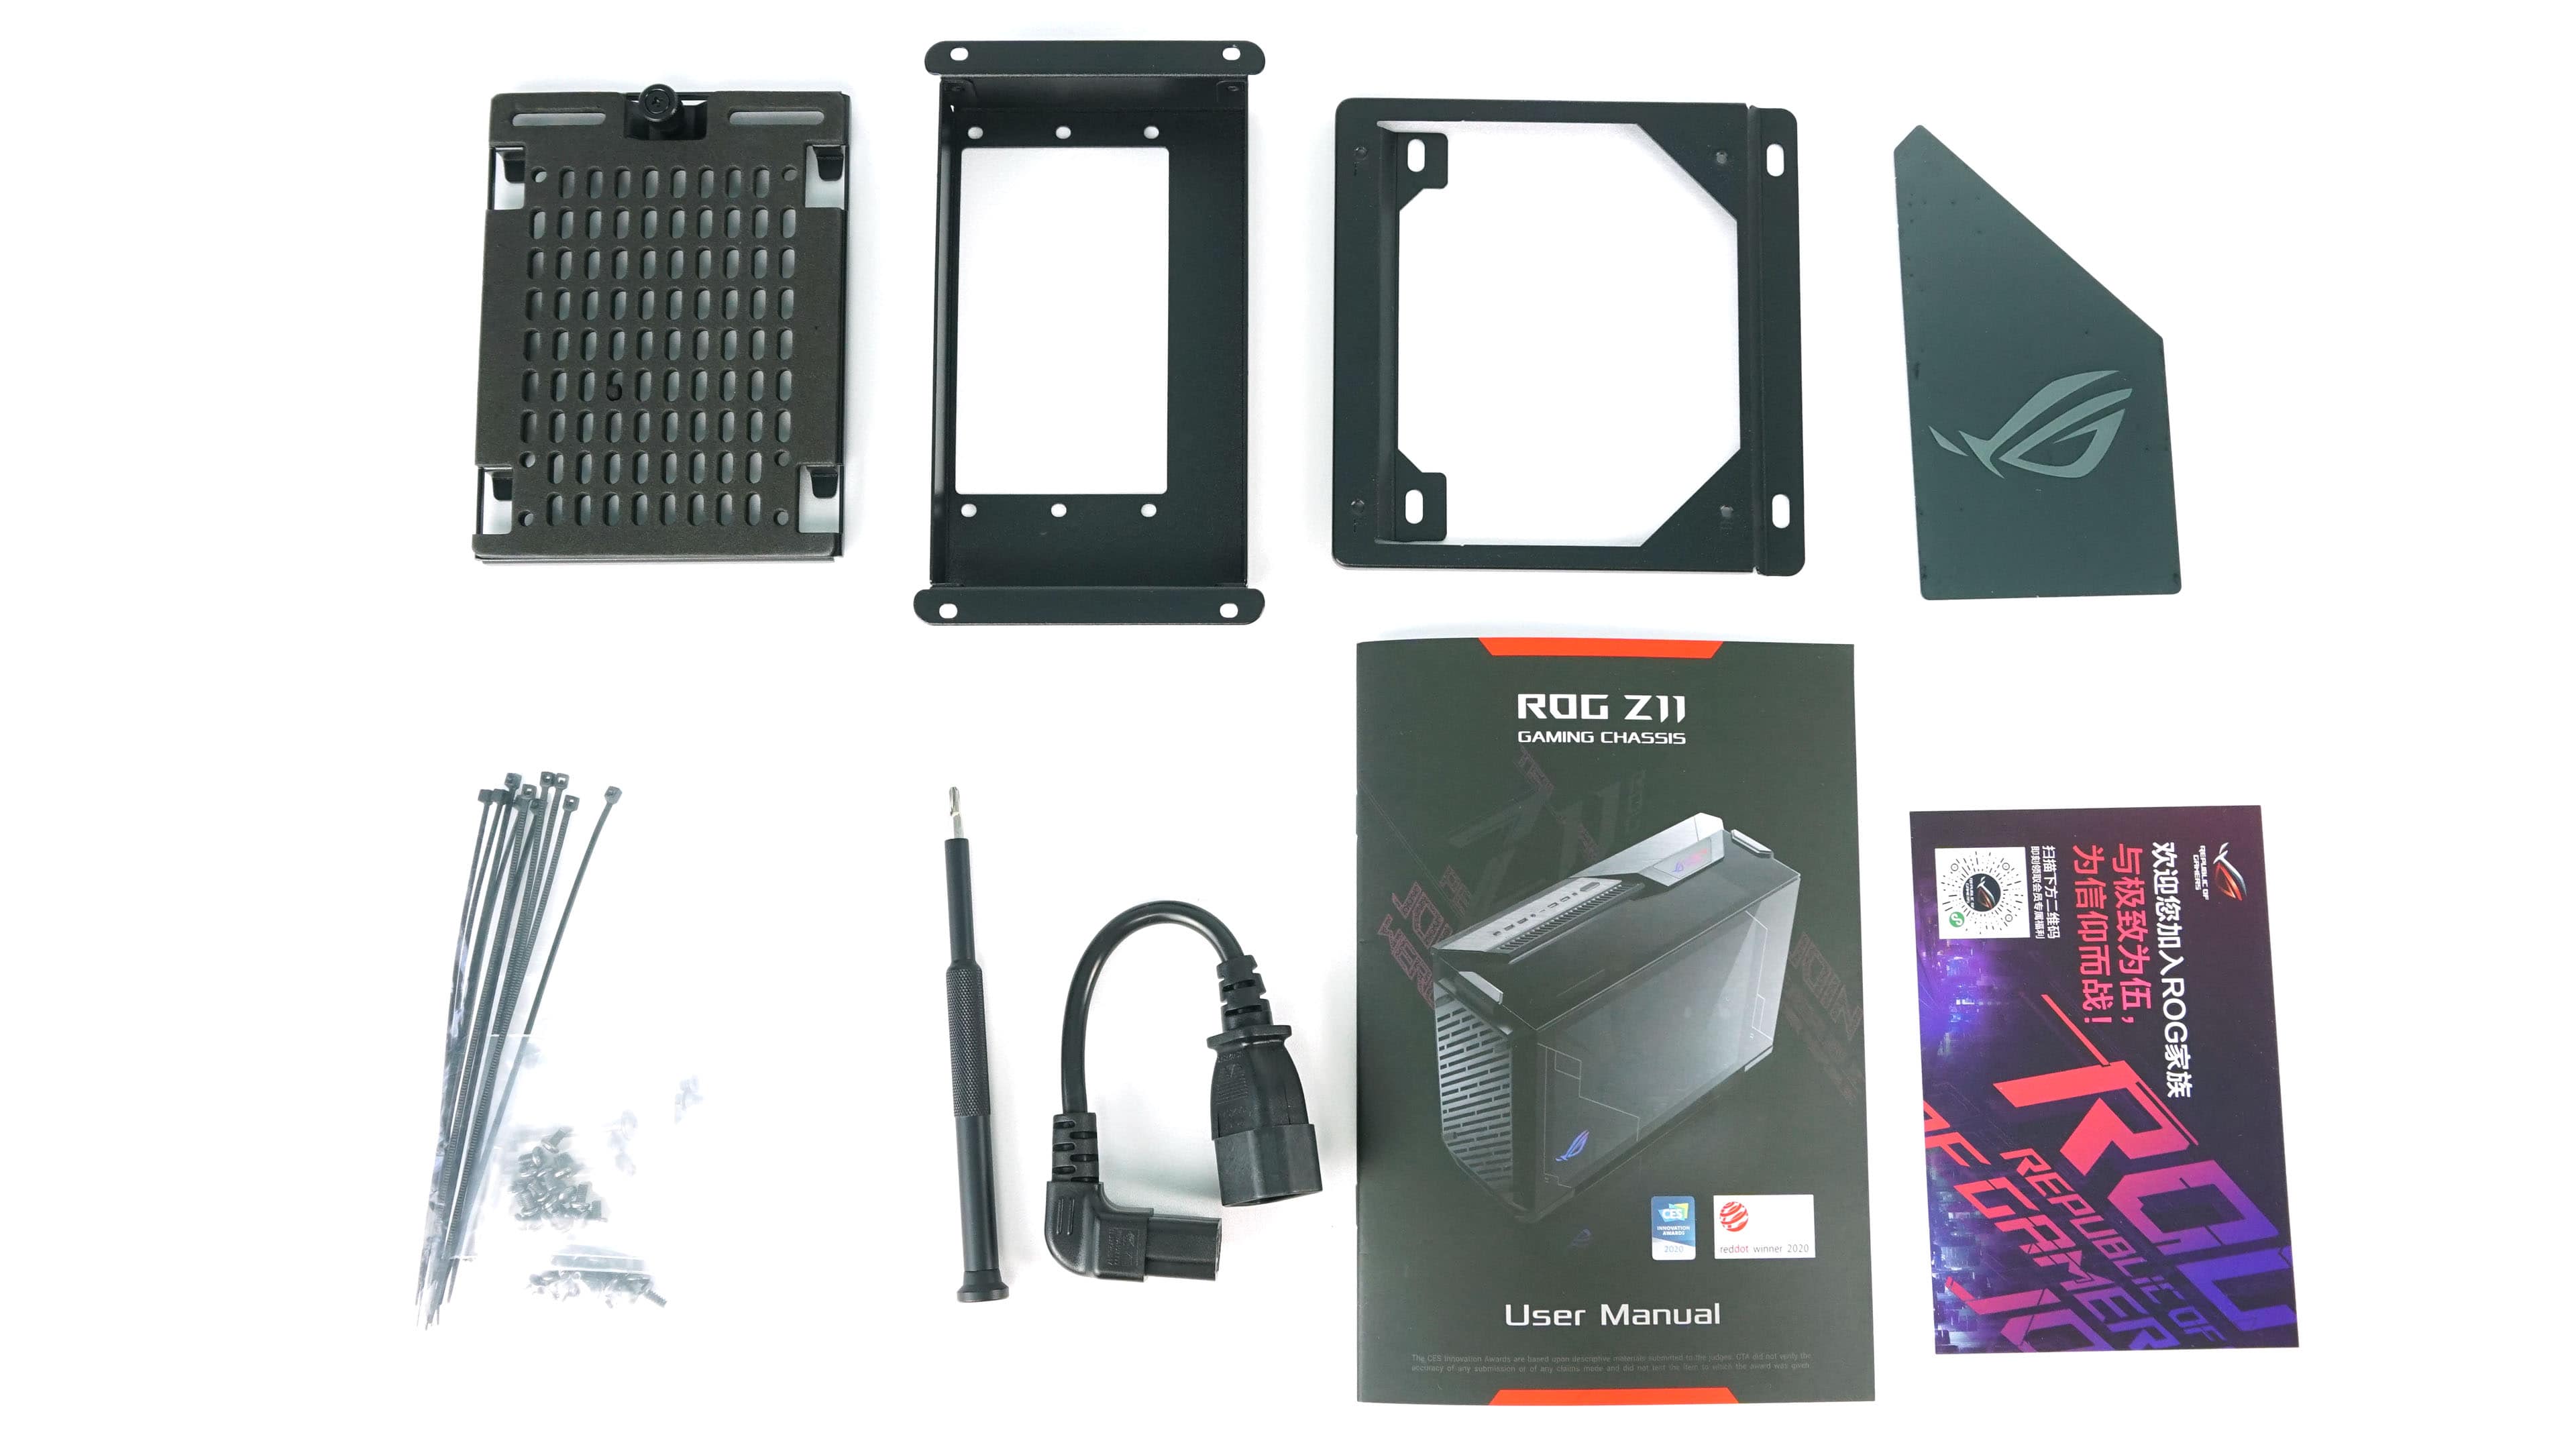
In addition to the documentation, the accessories also include a screwdriver, screws, tapes for cable management, SSD adapters, a power supply and replaceable logo.
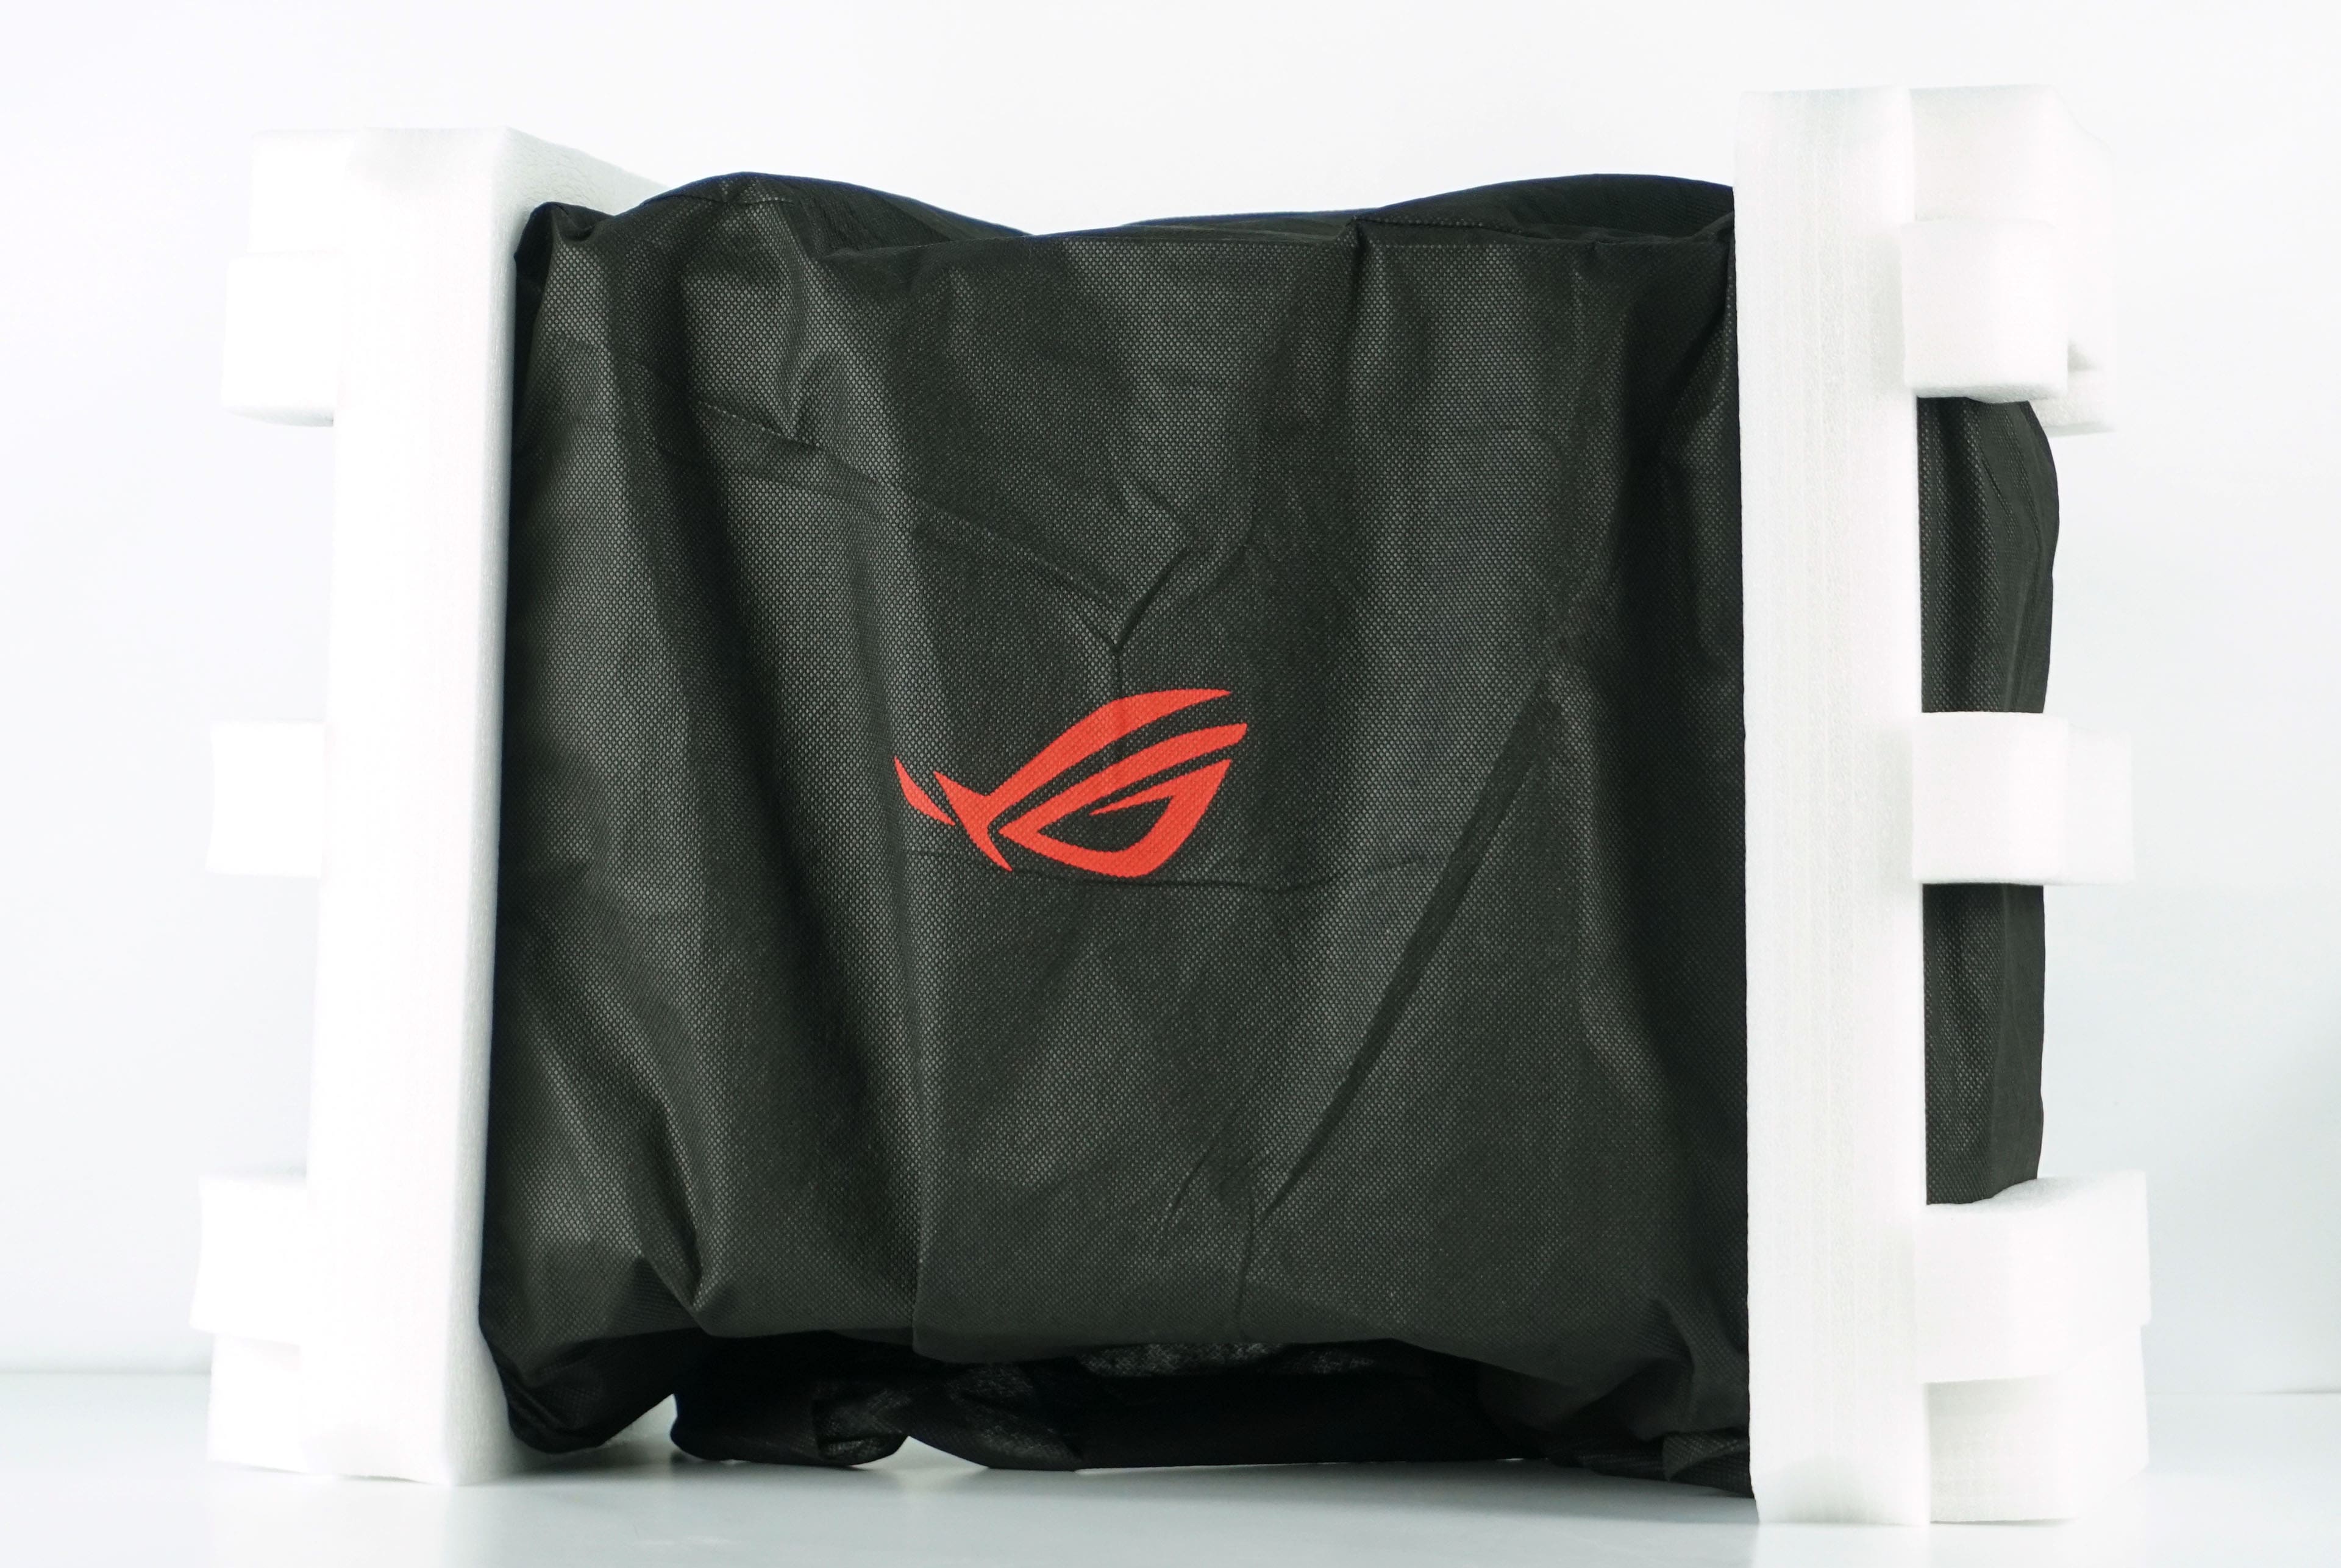
The box is very well protected to prevent damage during transport.
After removing all packaging and foam fillings, you will get the first view of the case in both vertical and horizontal position.
In order to get inside the case, it is first necessary to remove the side covers, which are attached by a clip and a hinge. Press the clip to release the panel and remove it.

The glass and metal side panels are both screwed into and, in addition, they have pins that get locked in the frame of the case. When you change its positioning, you really don’t have to worry about them falling out.
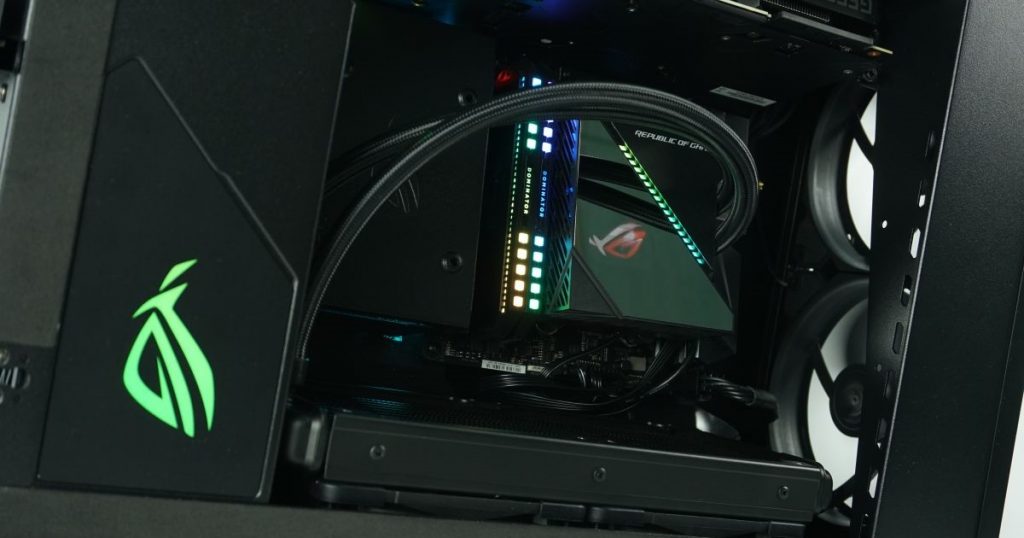
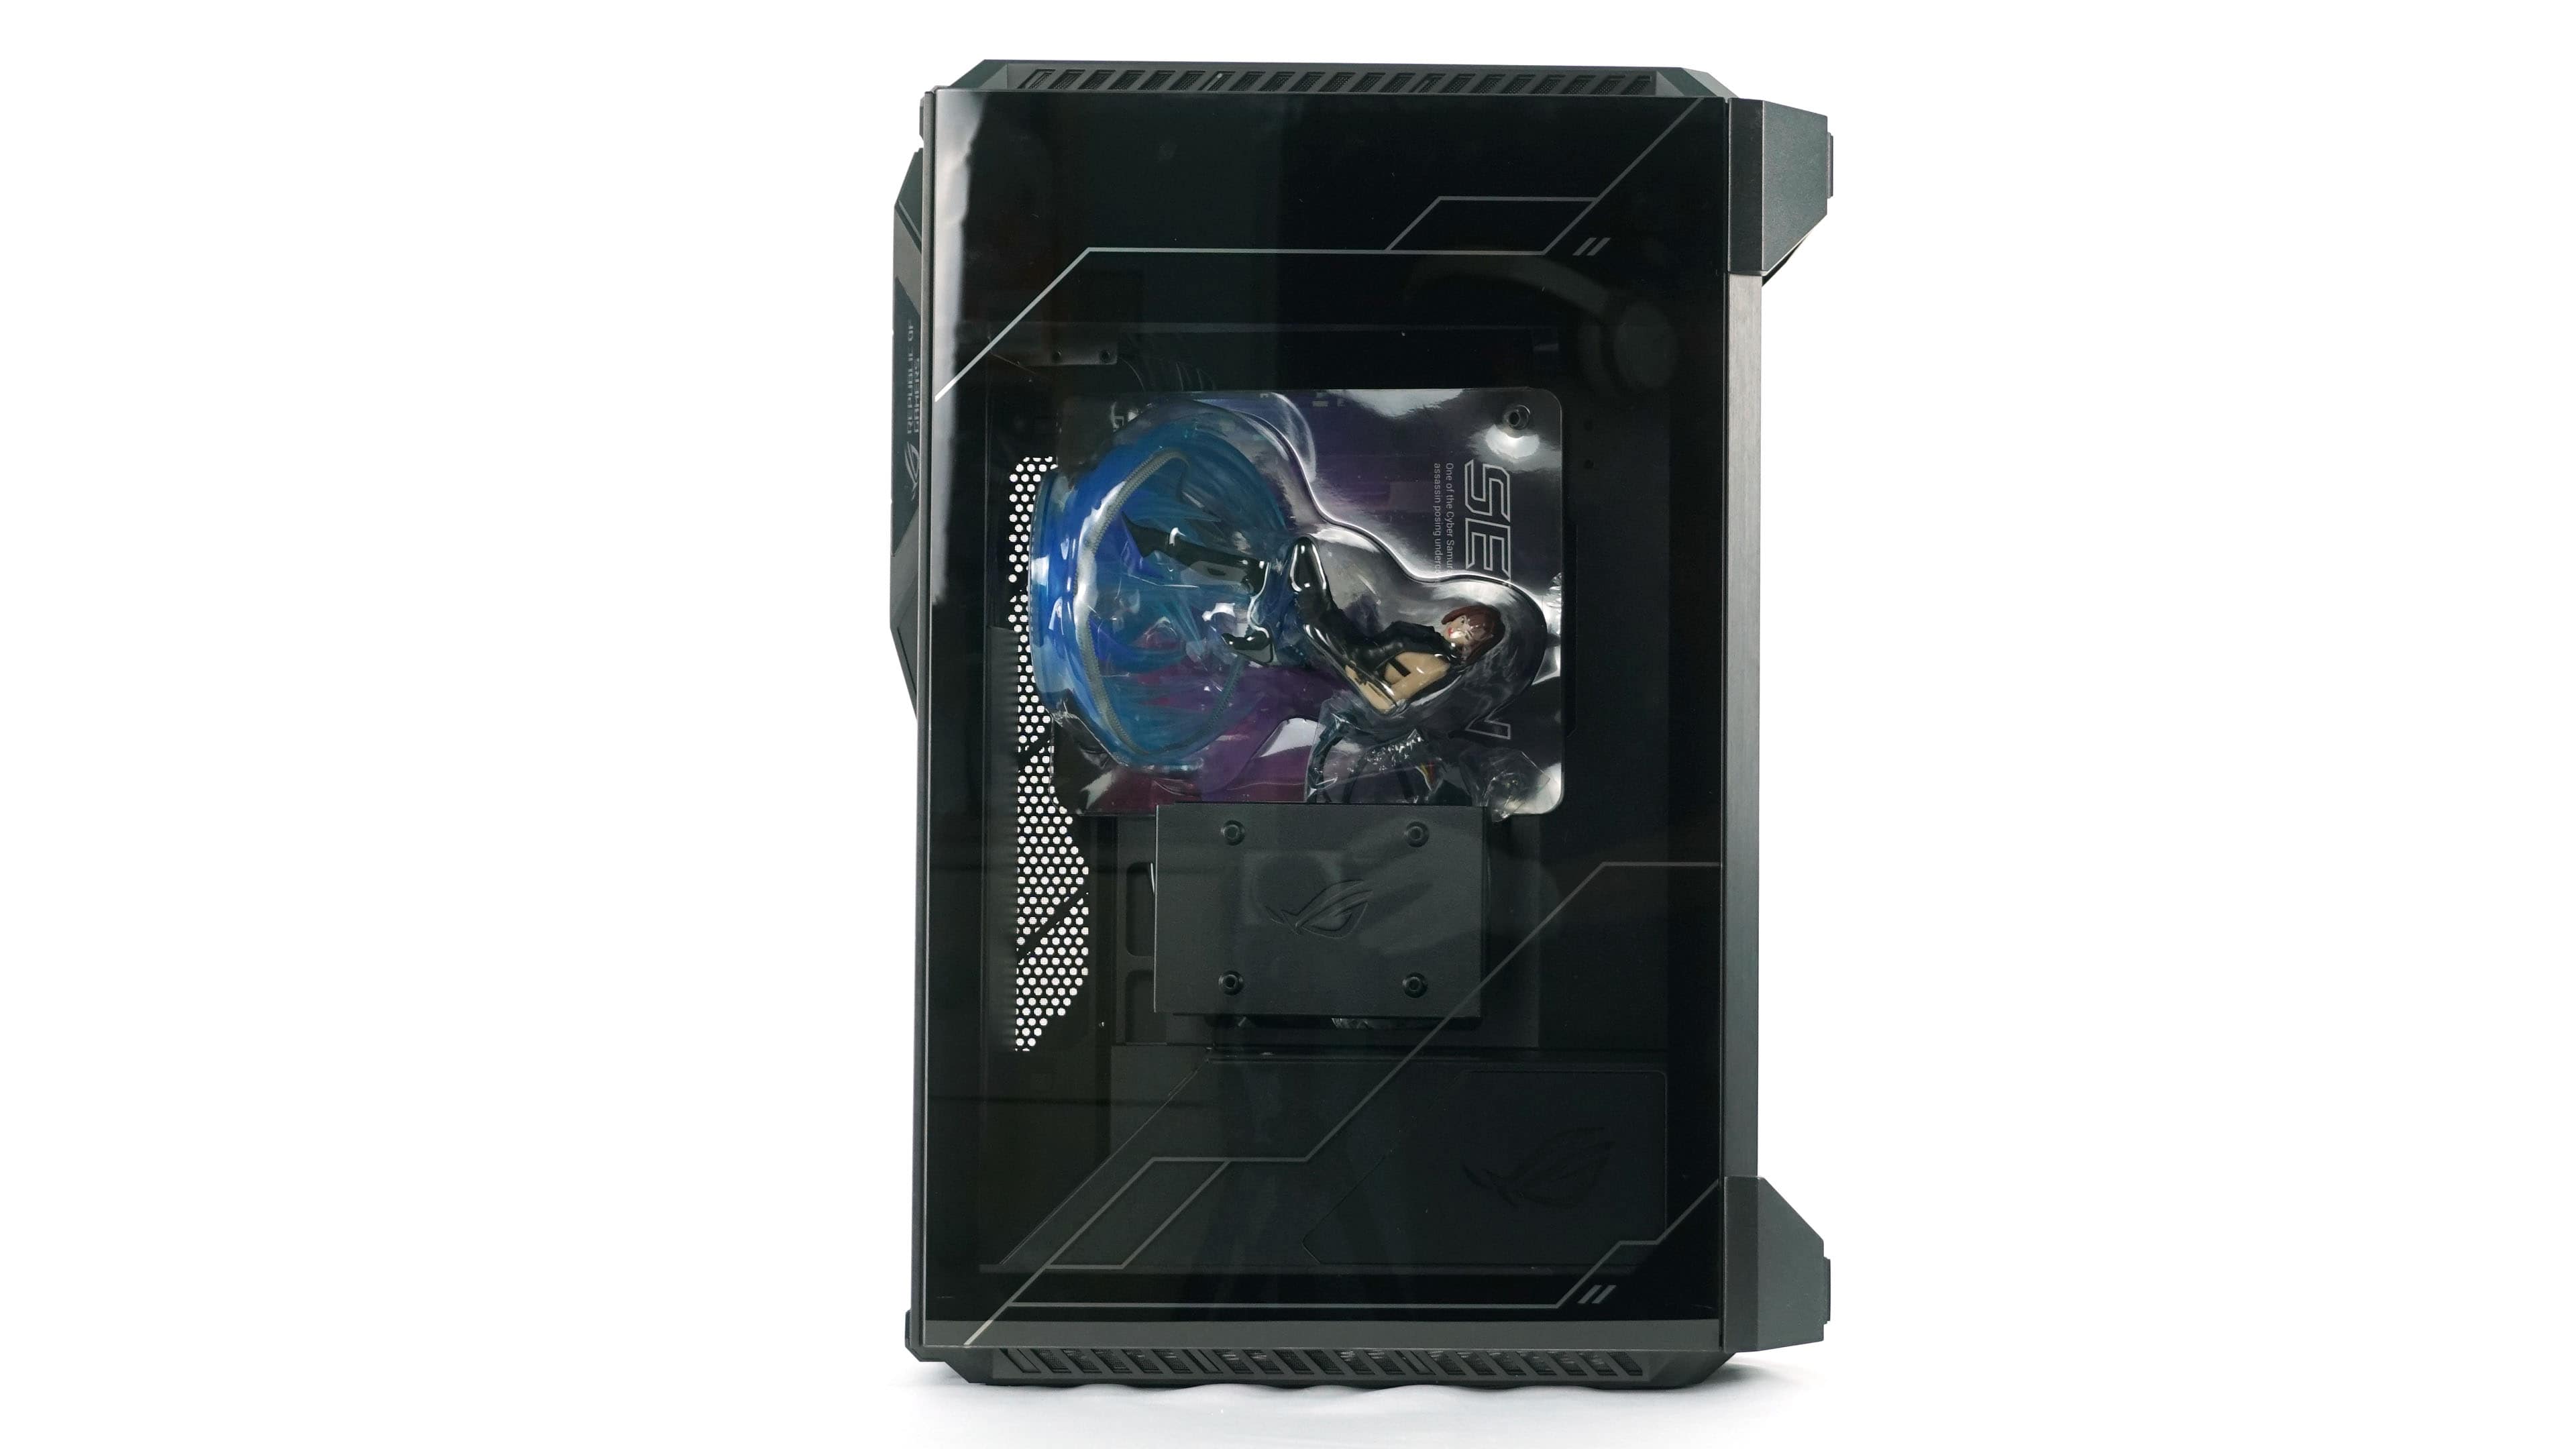
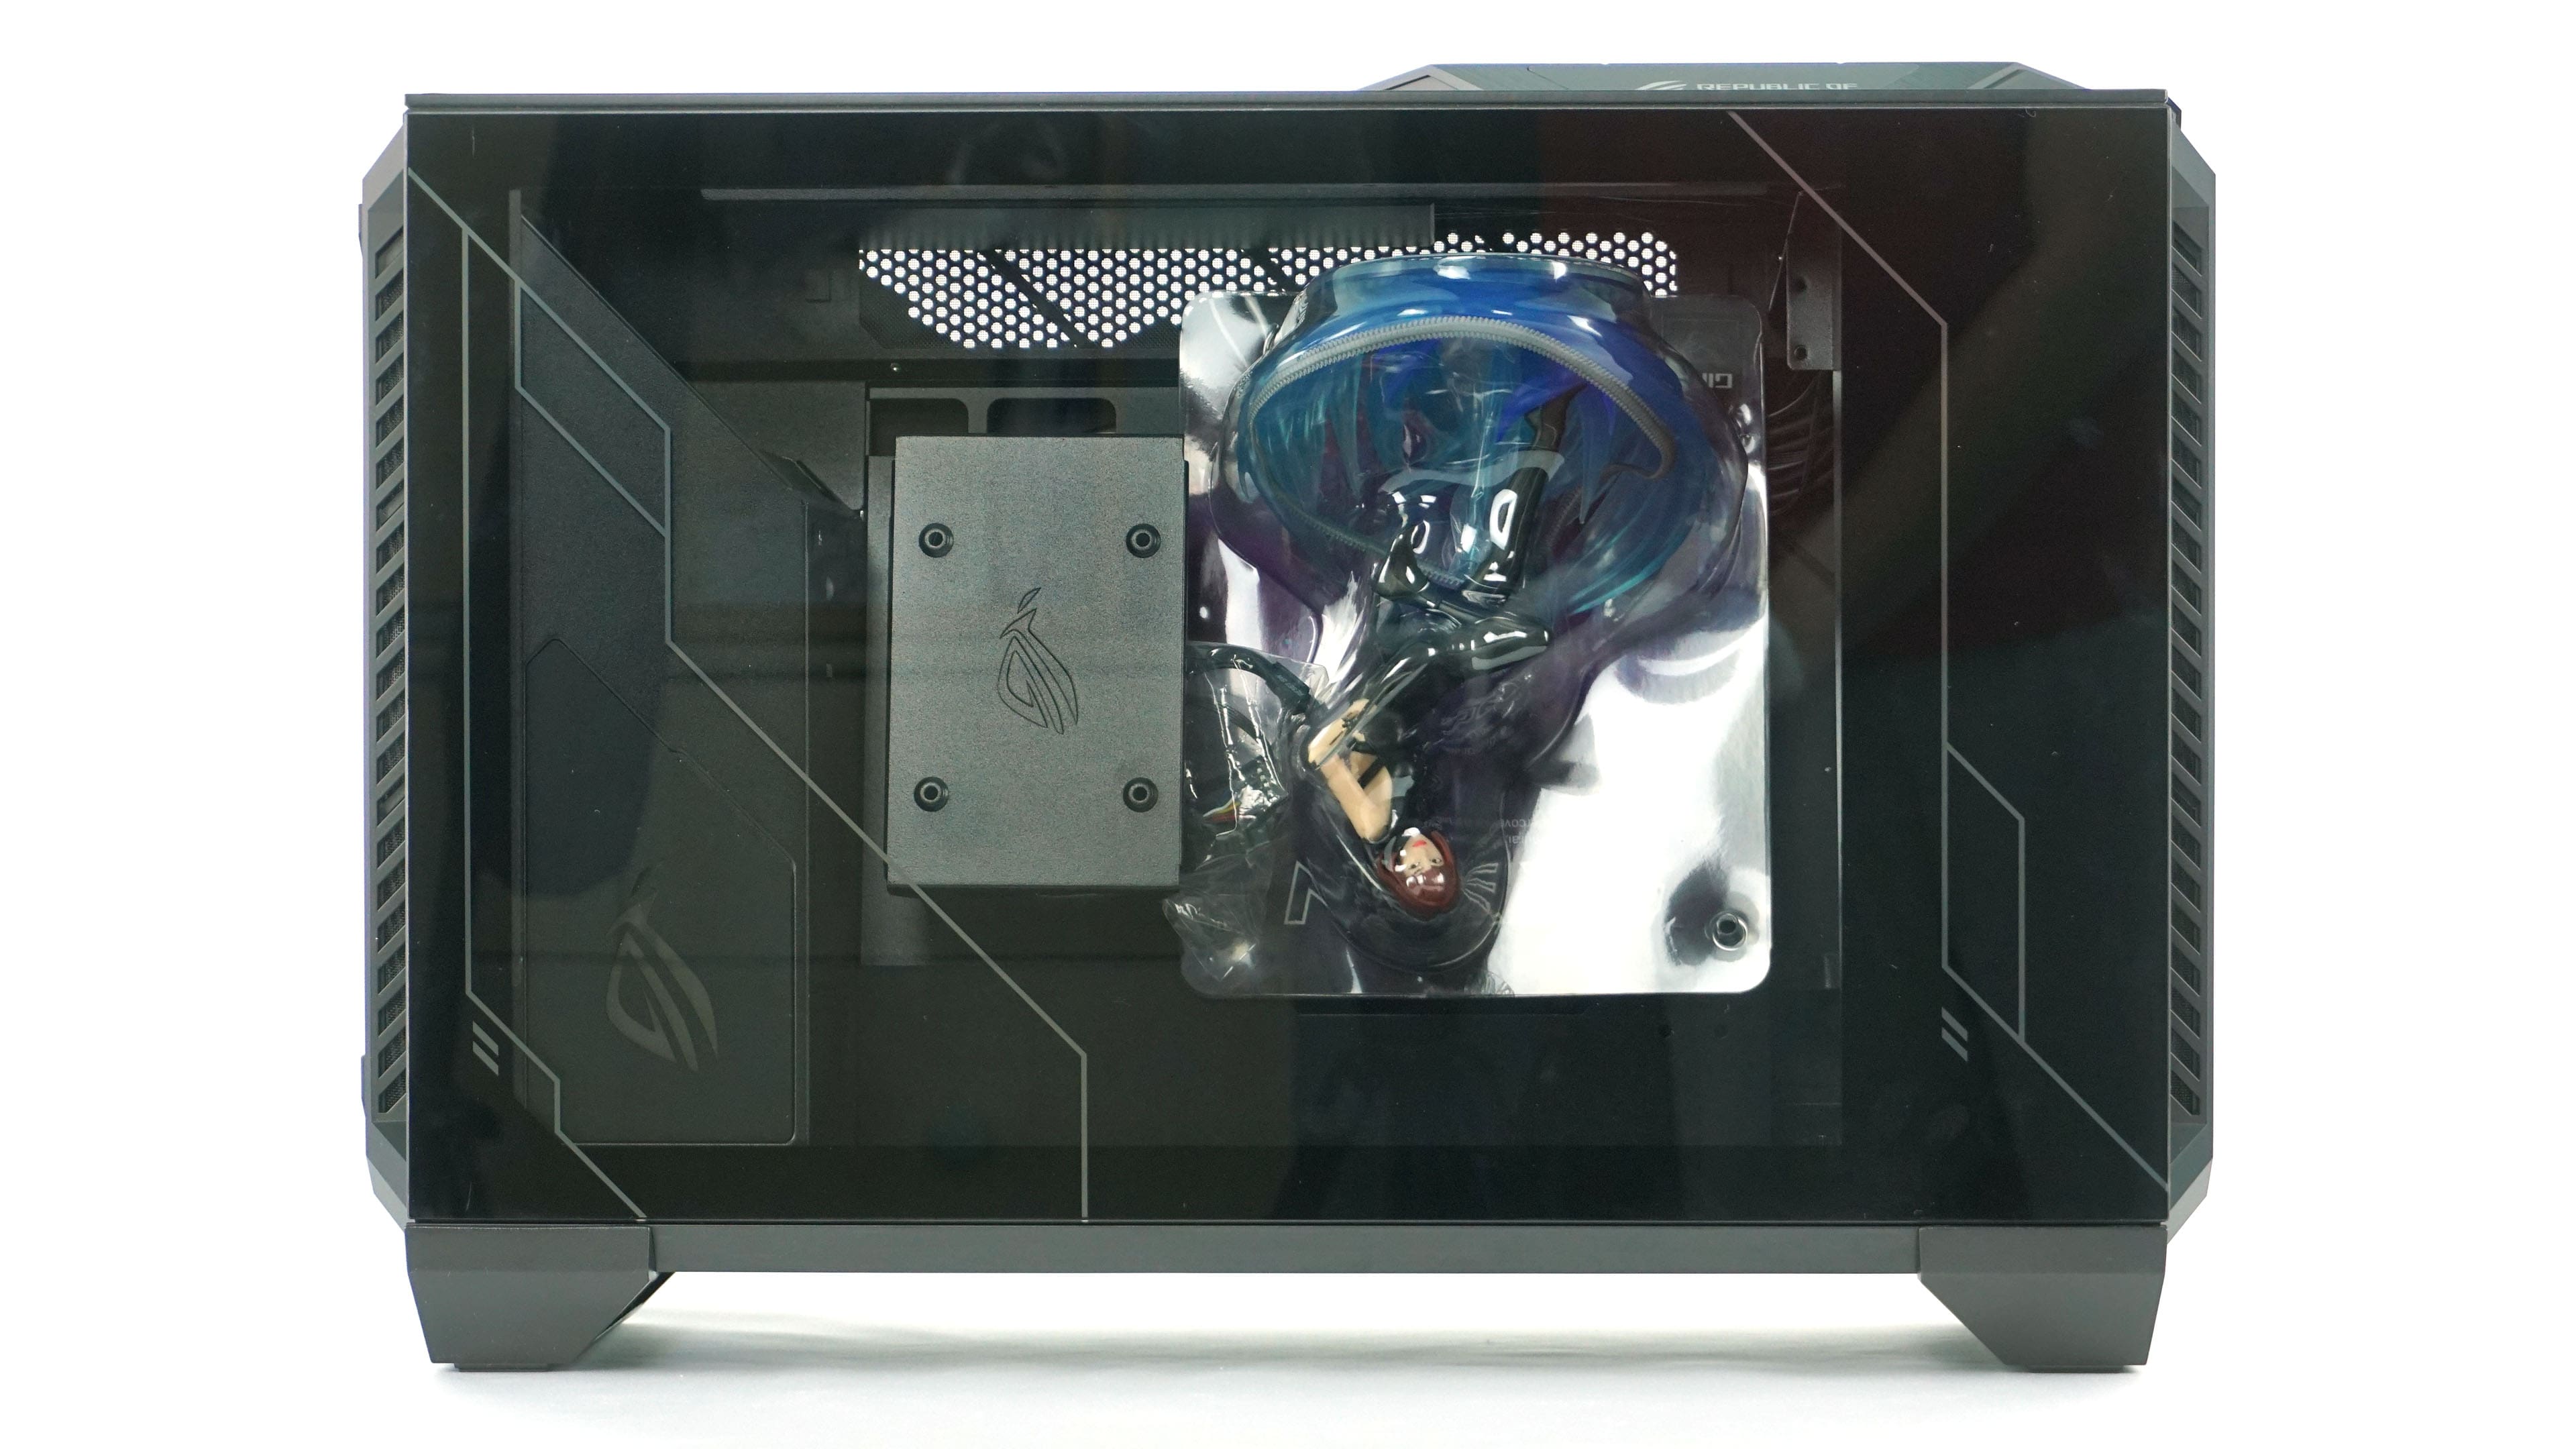
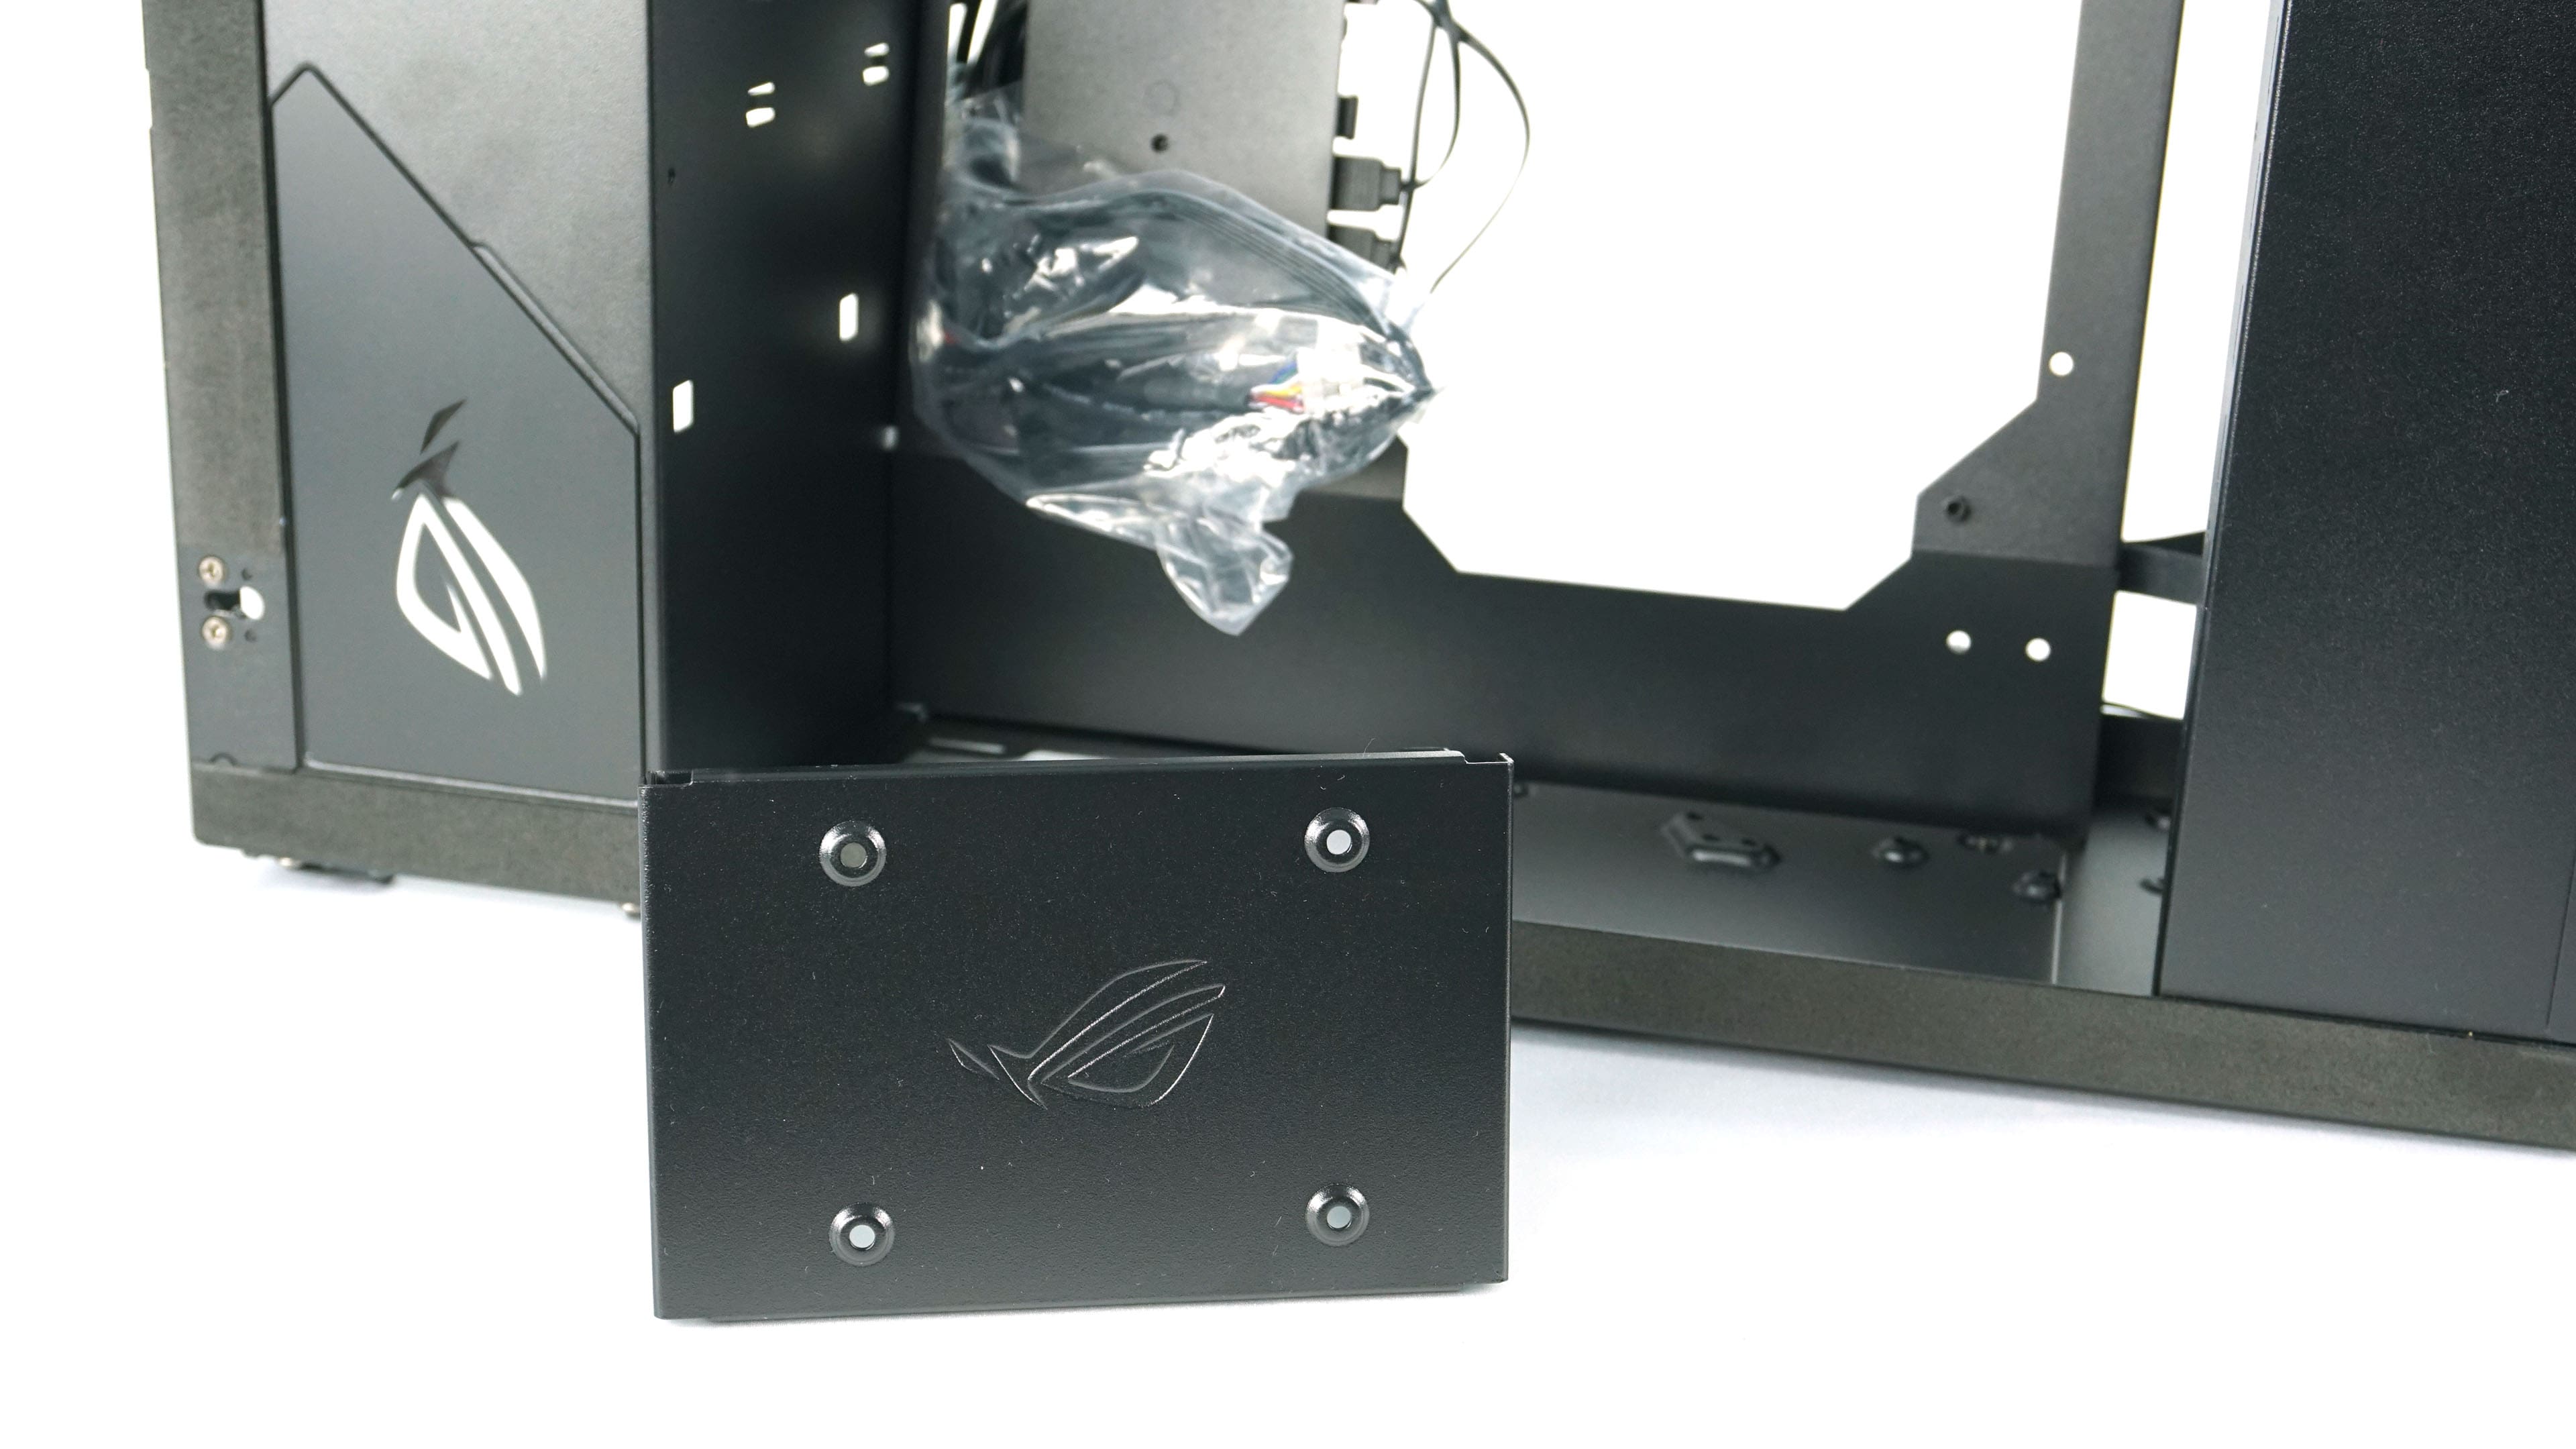
Inside the case, for a limited number of Z11 cases, there is also a collector figure of the killer SE7EN. It is attached to the motherboard tray for mini-ITX and mini-DTX motherboards.
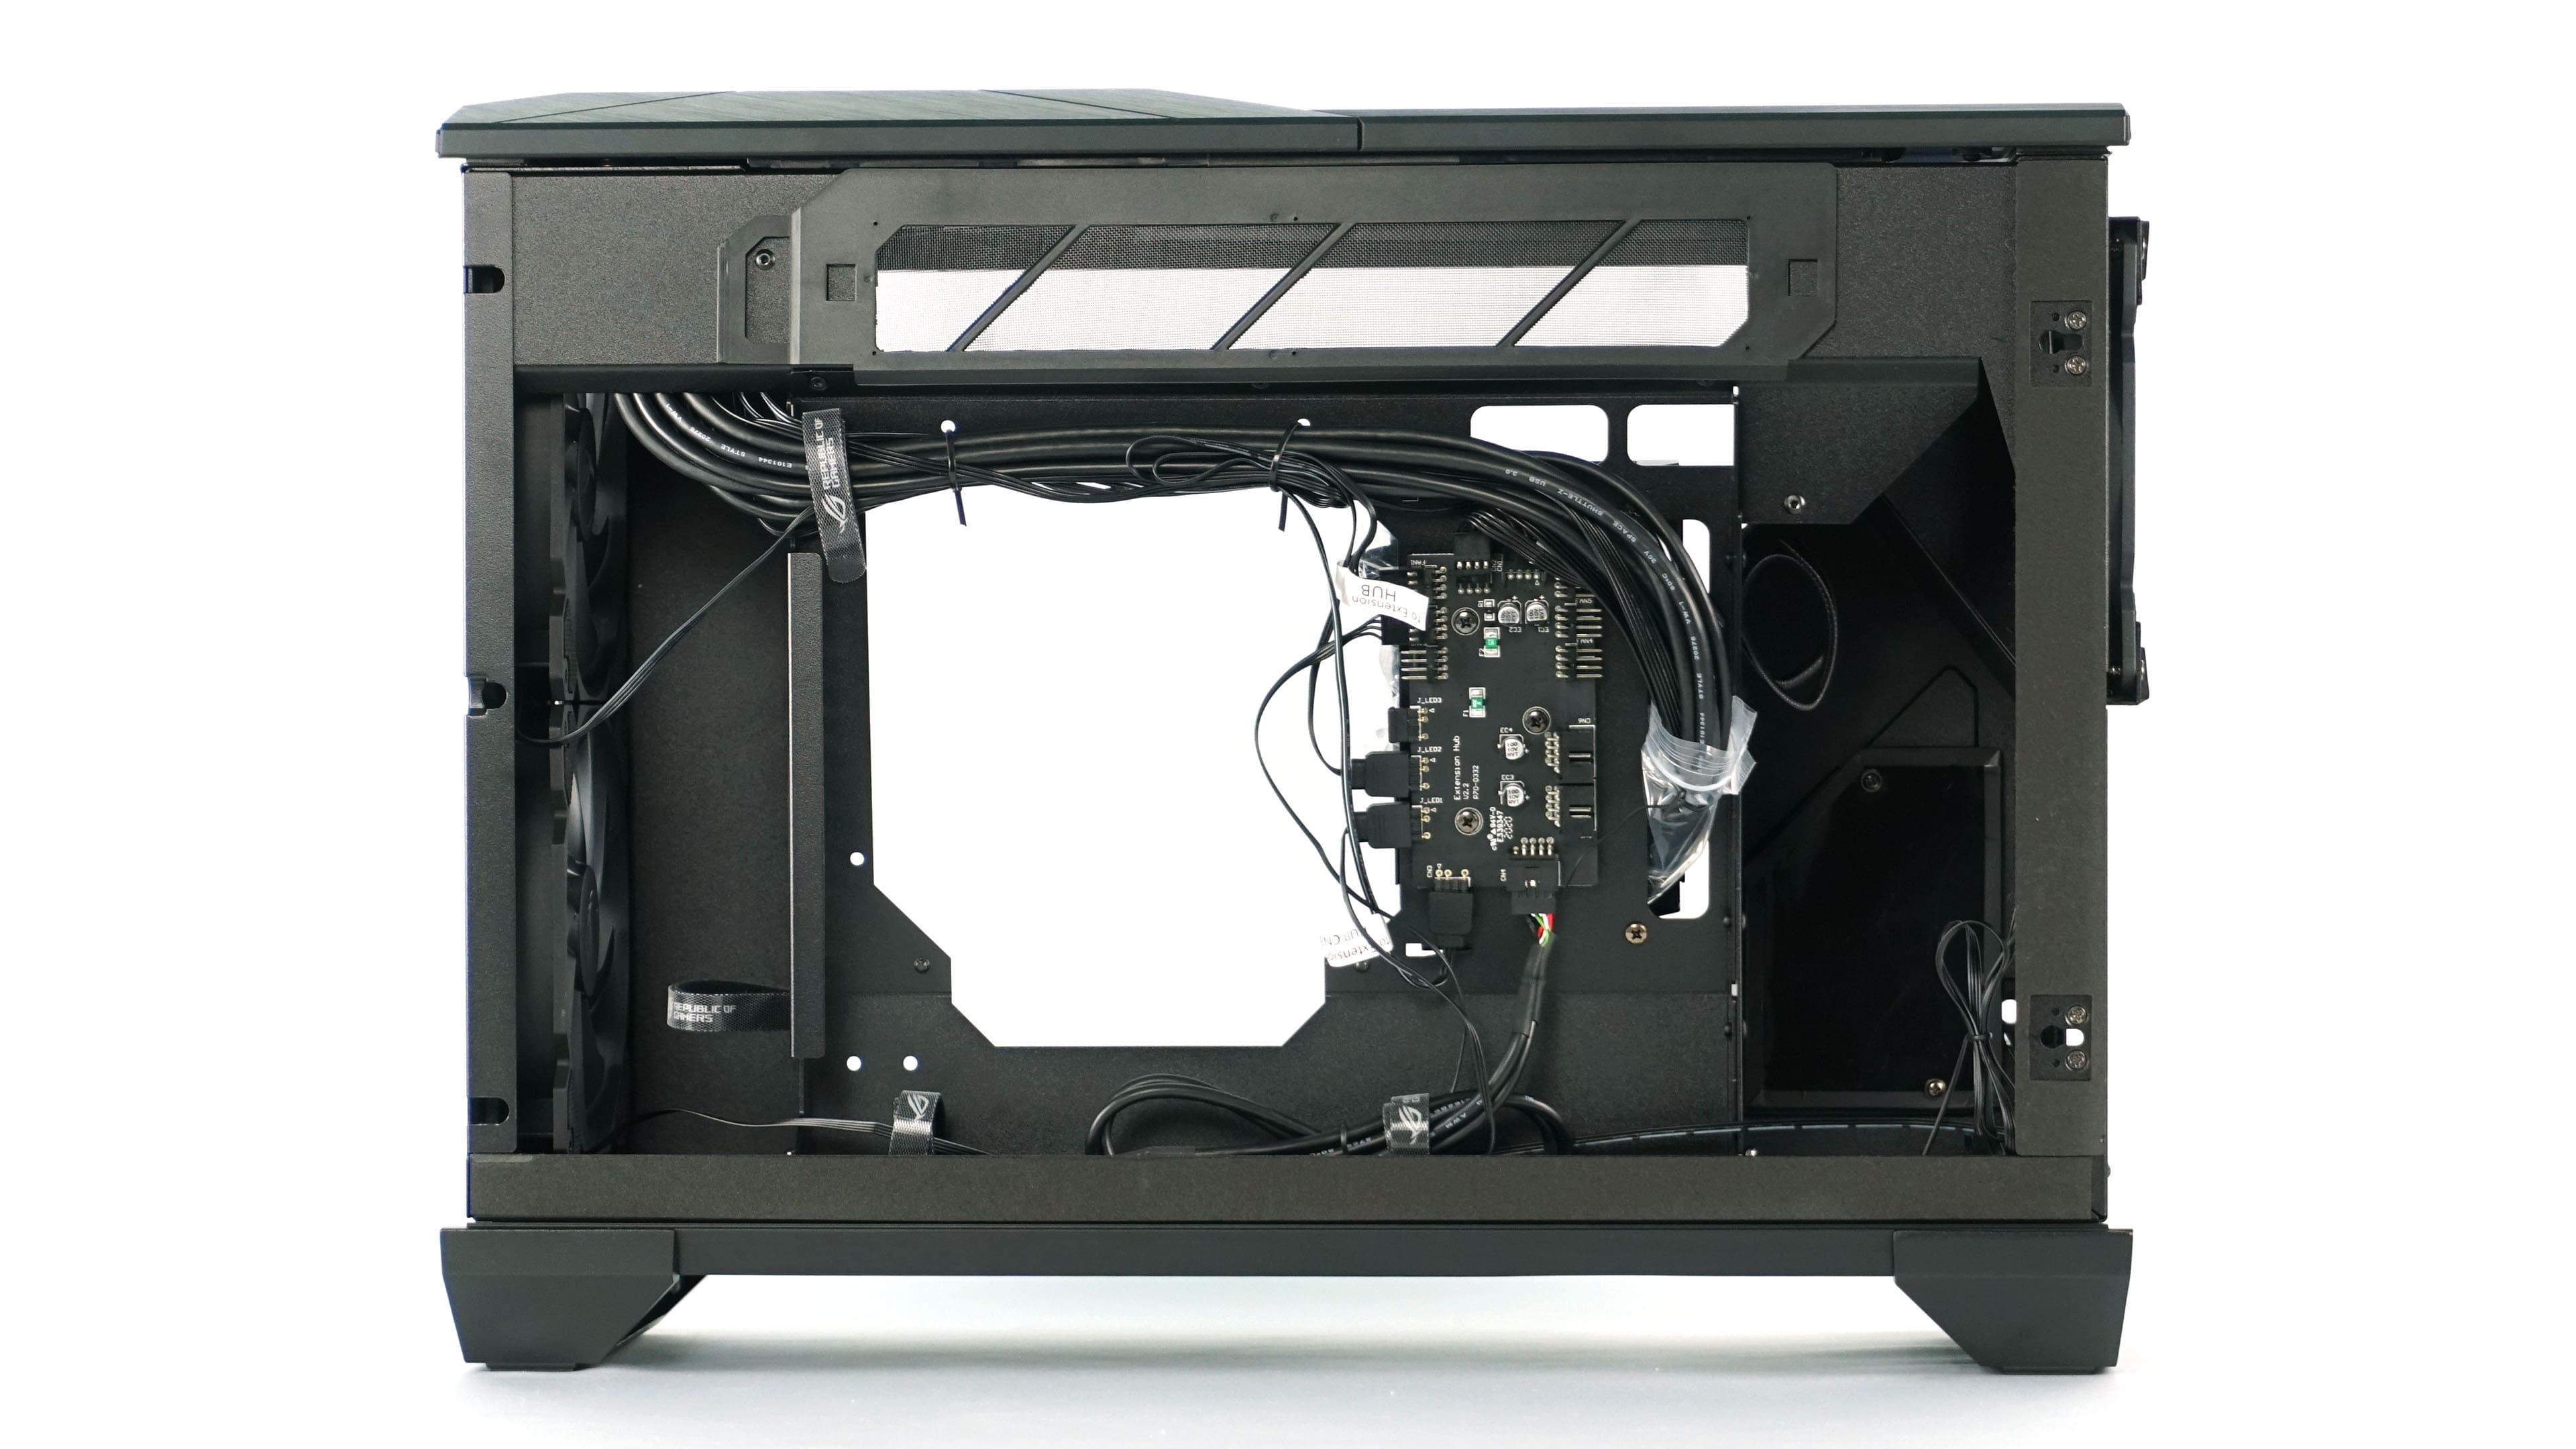
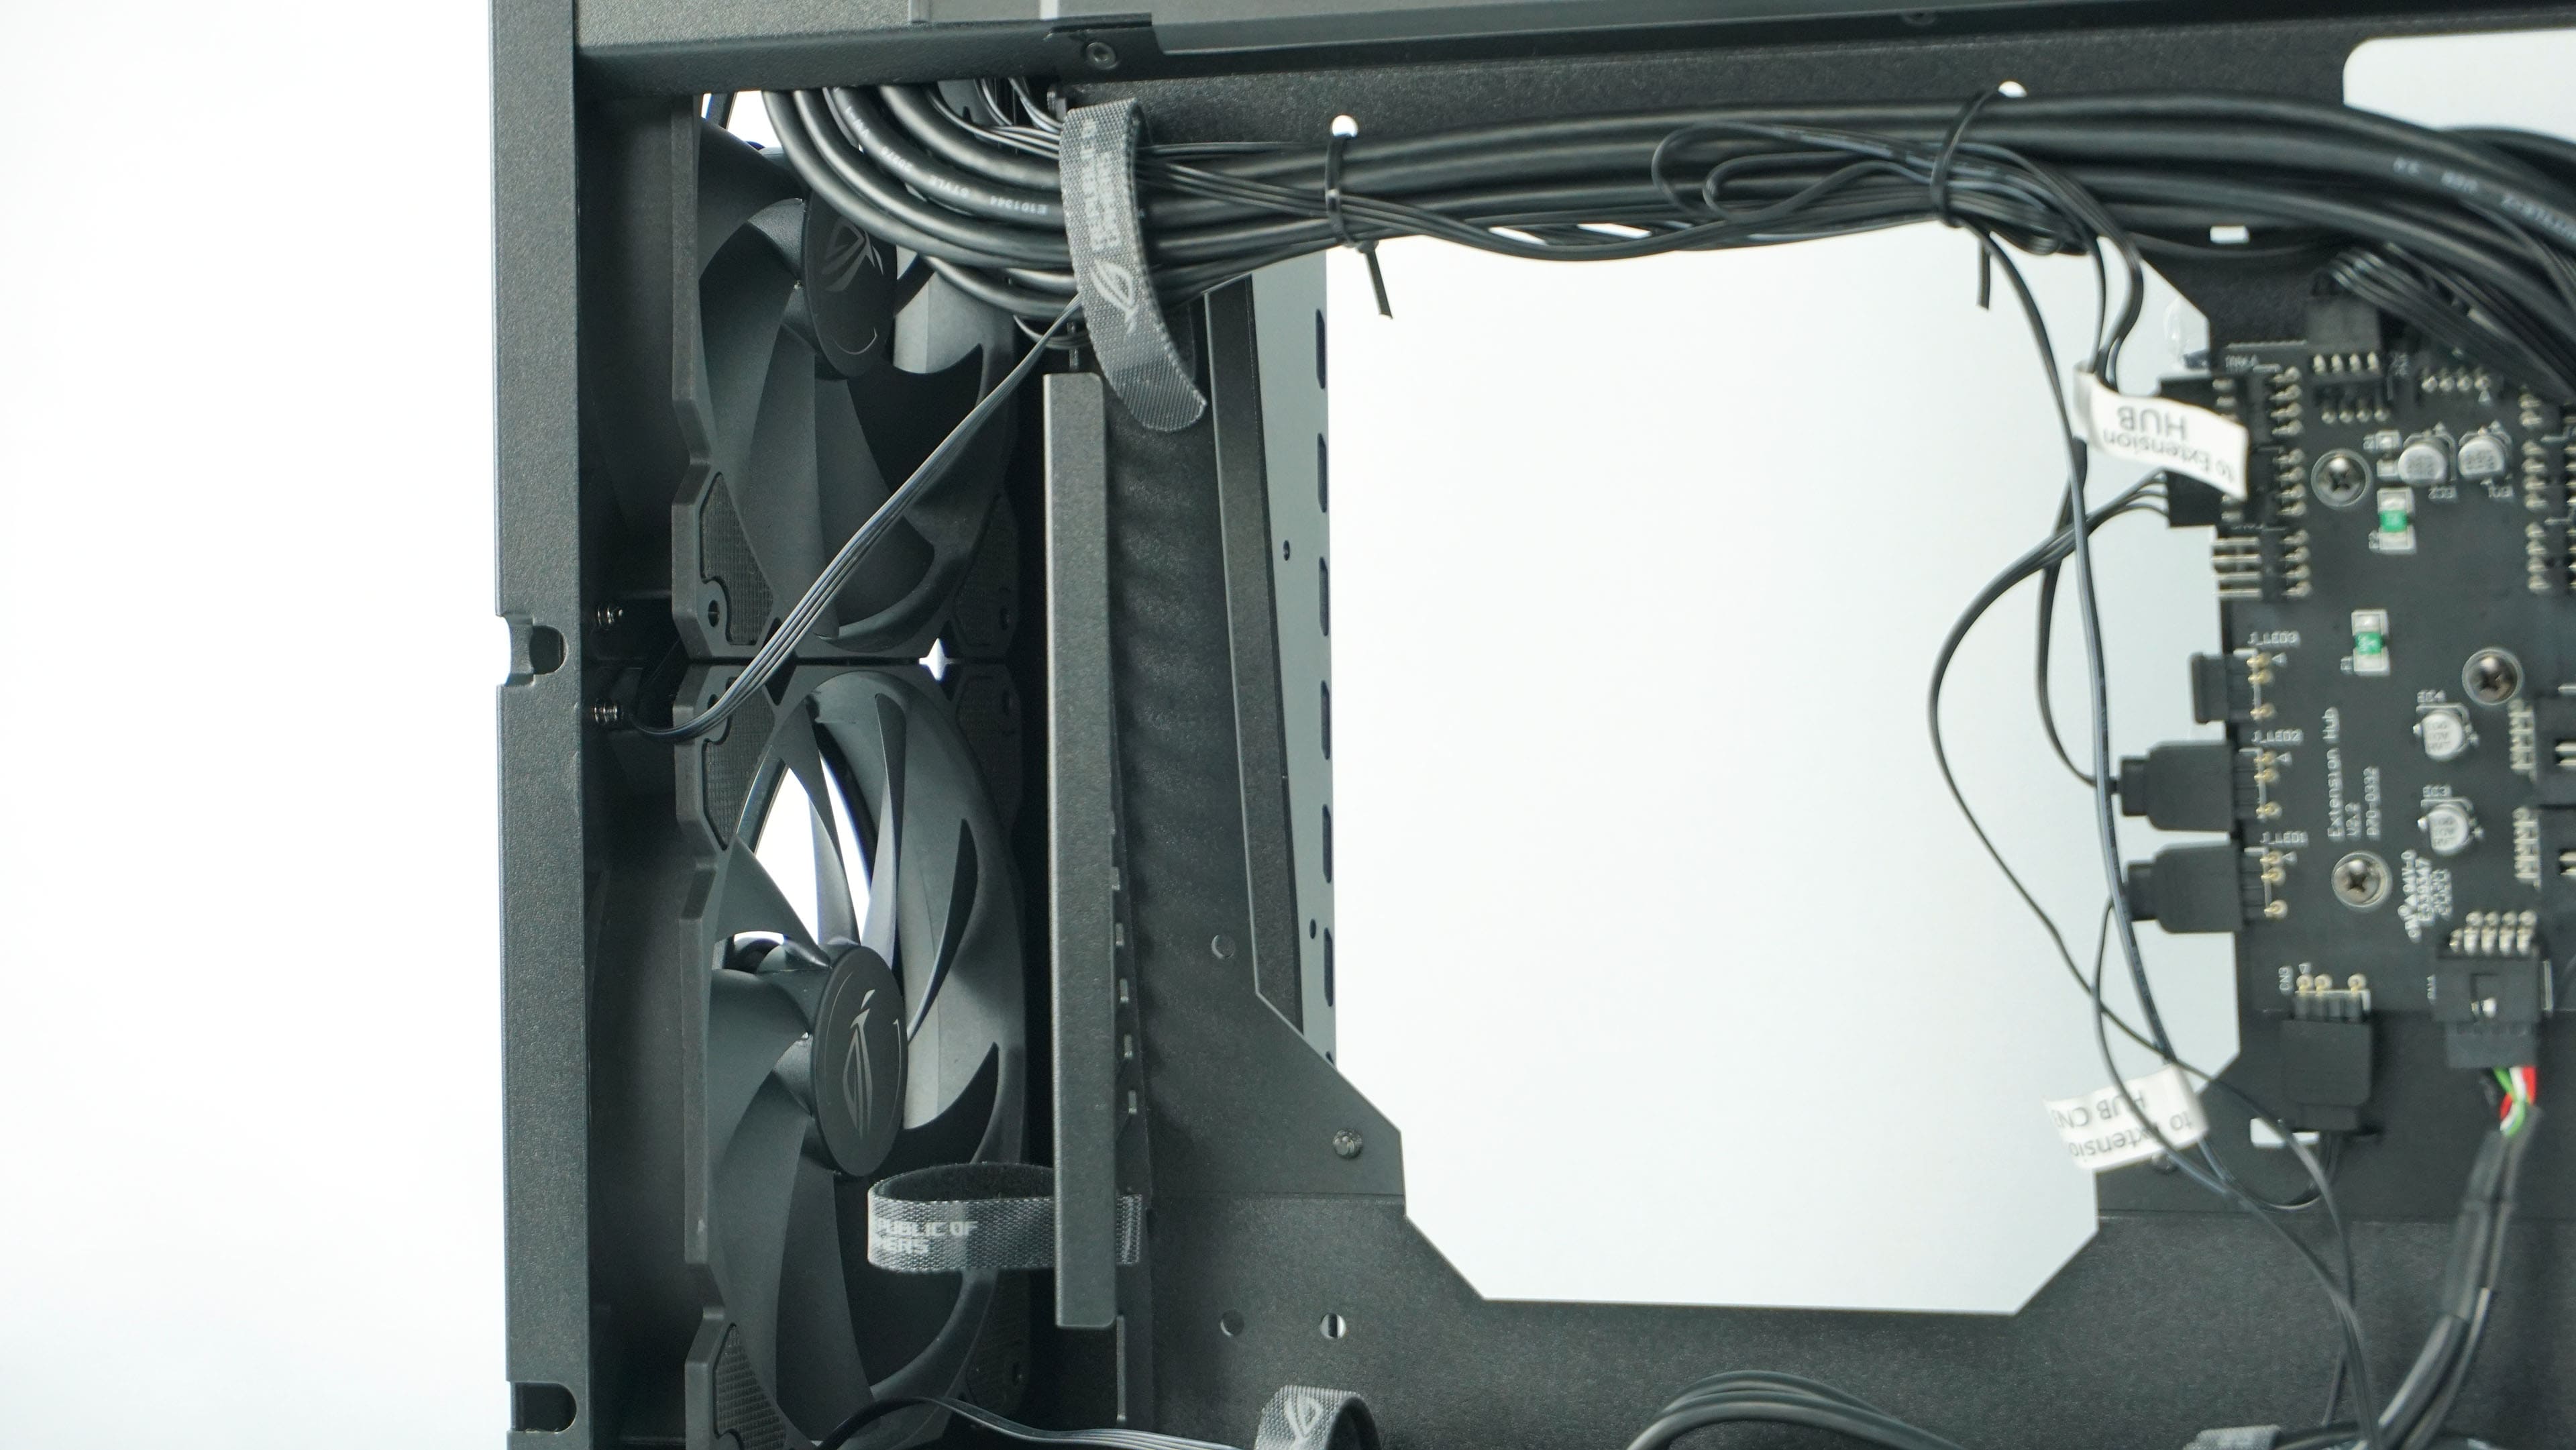

From the back of the motherboard you can see pre-wired cabling and a USB/RGB hub for fans and backlighting.

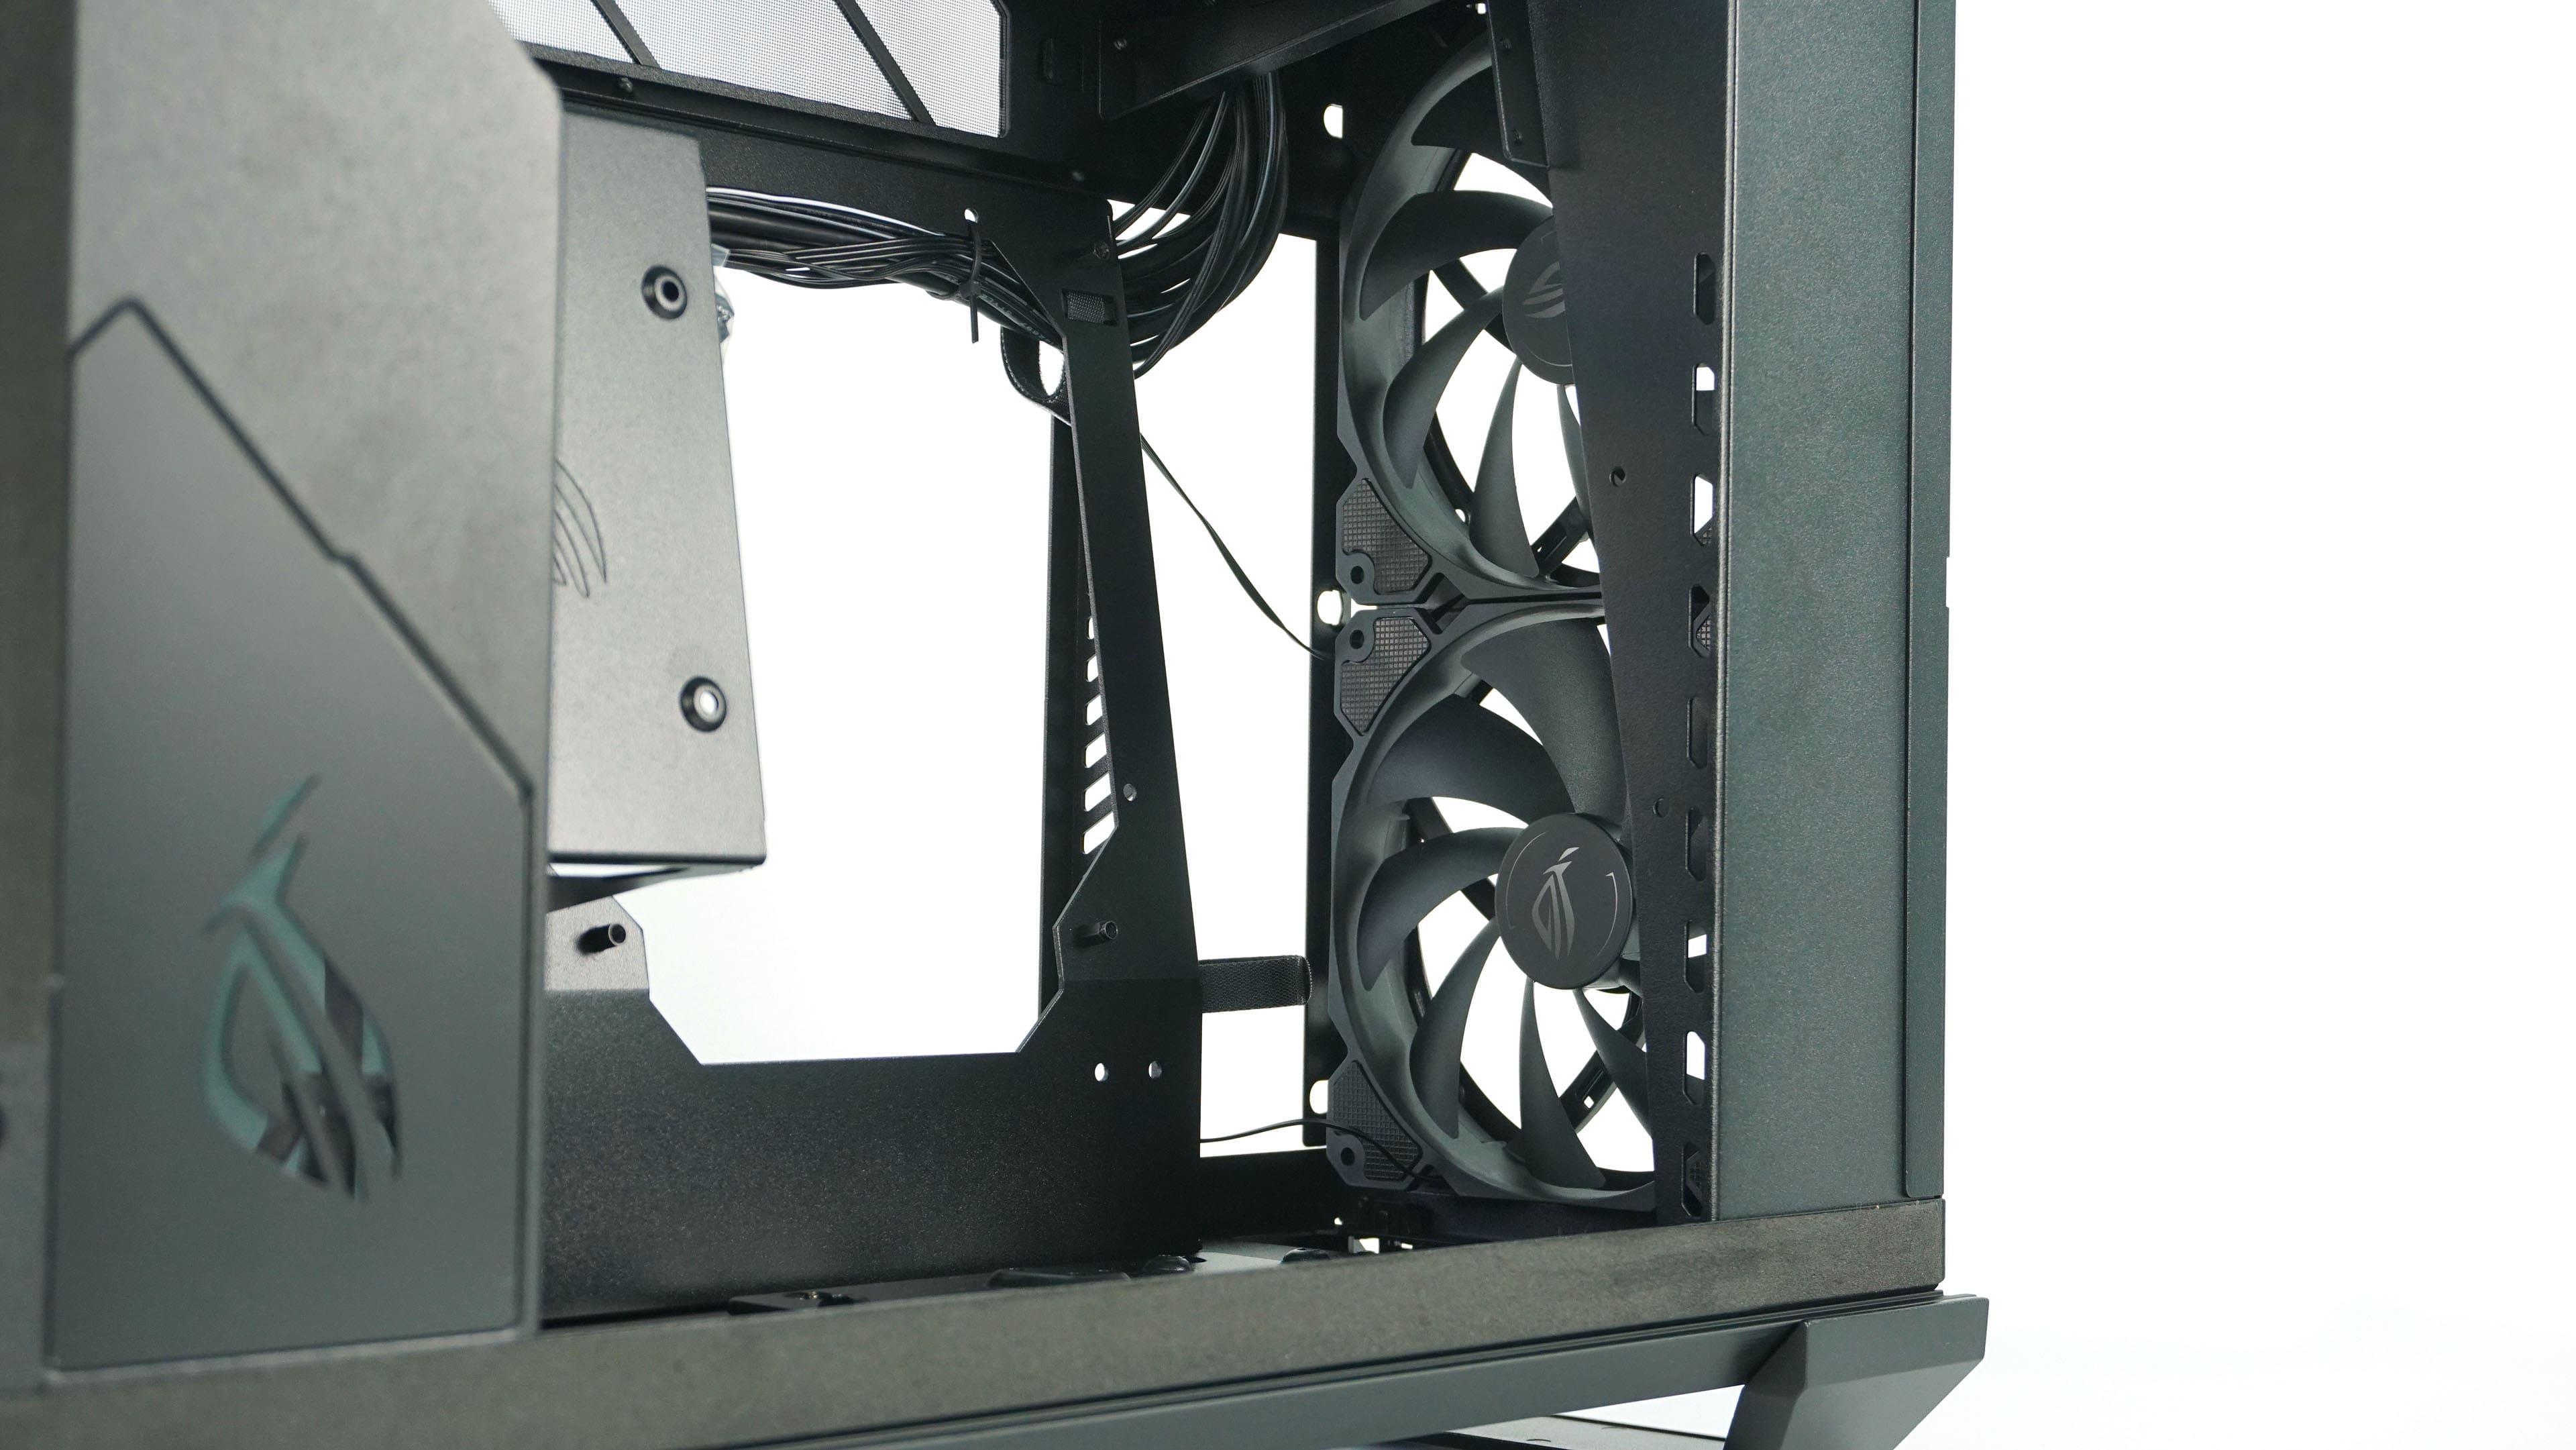
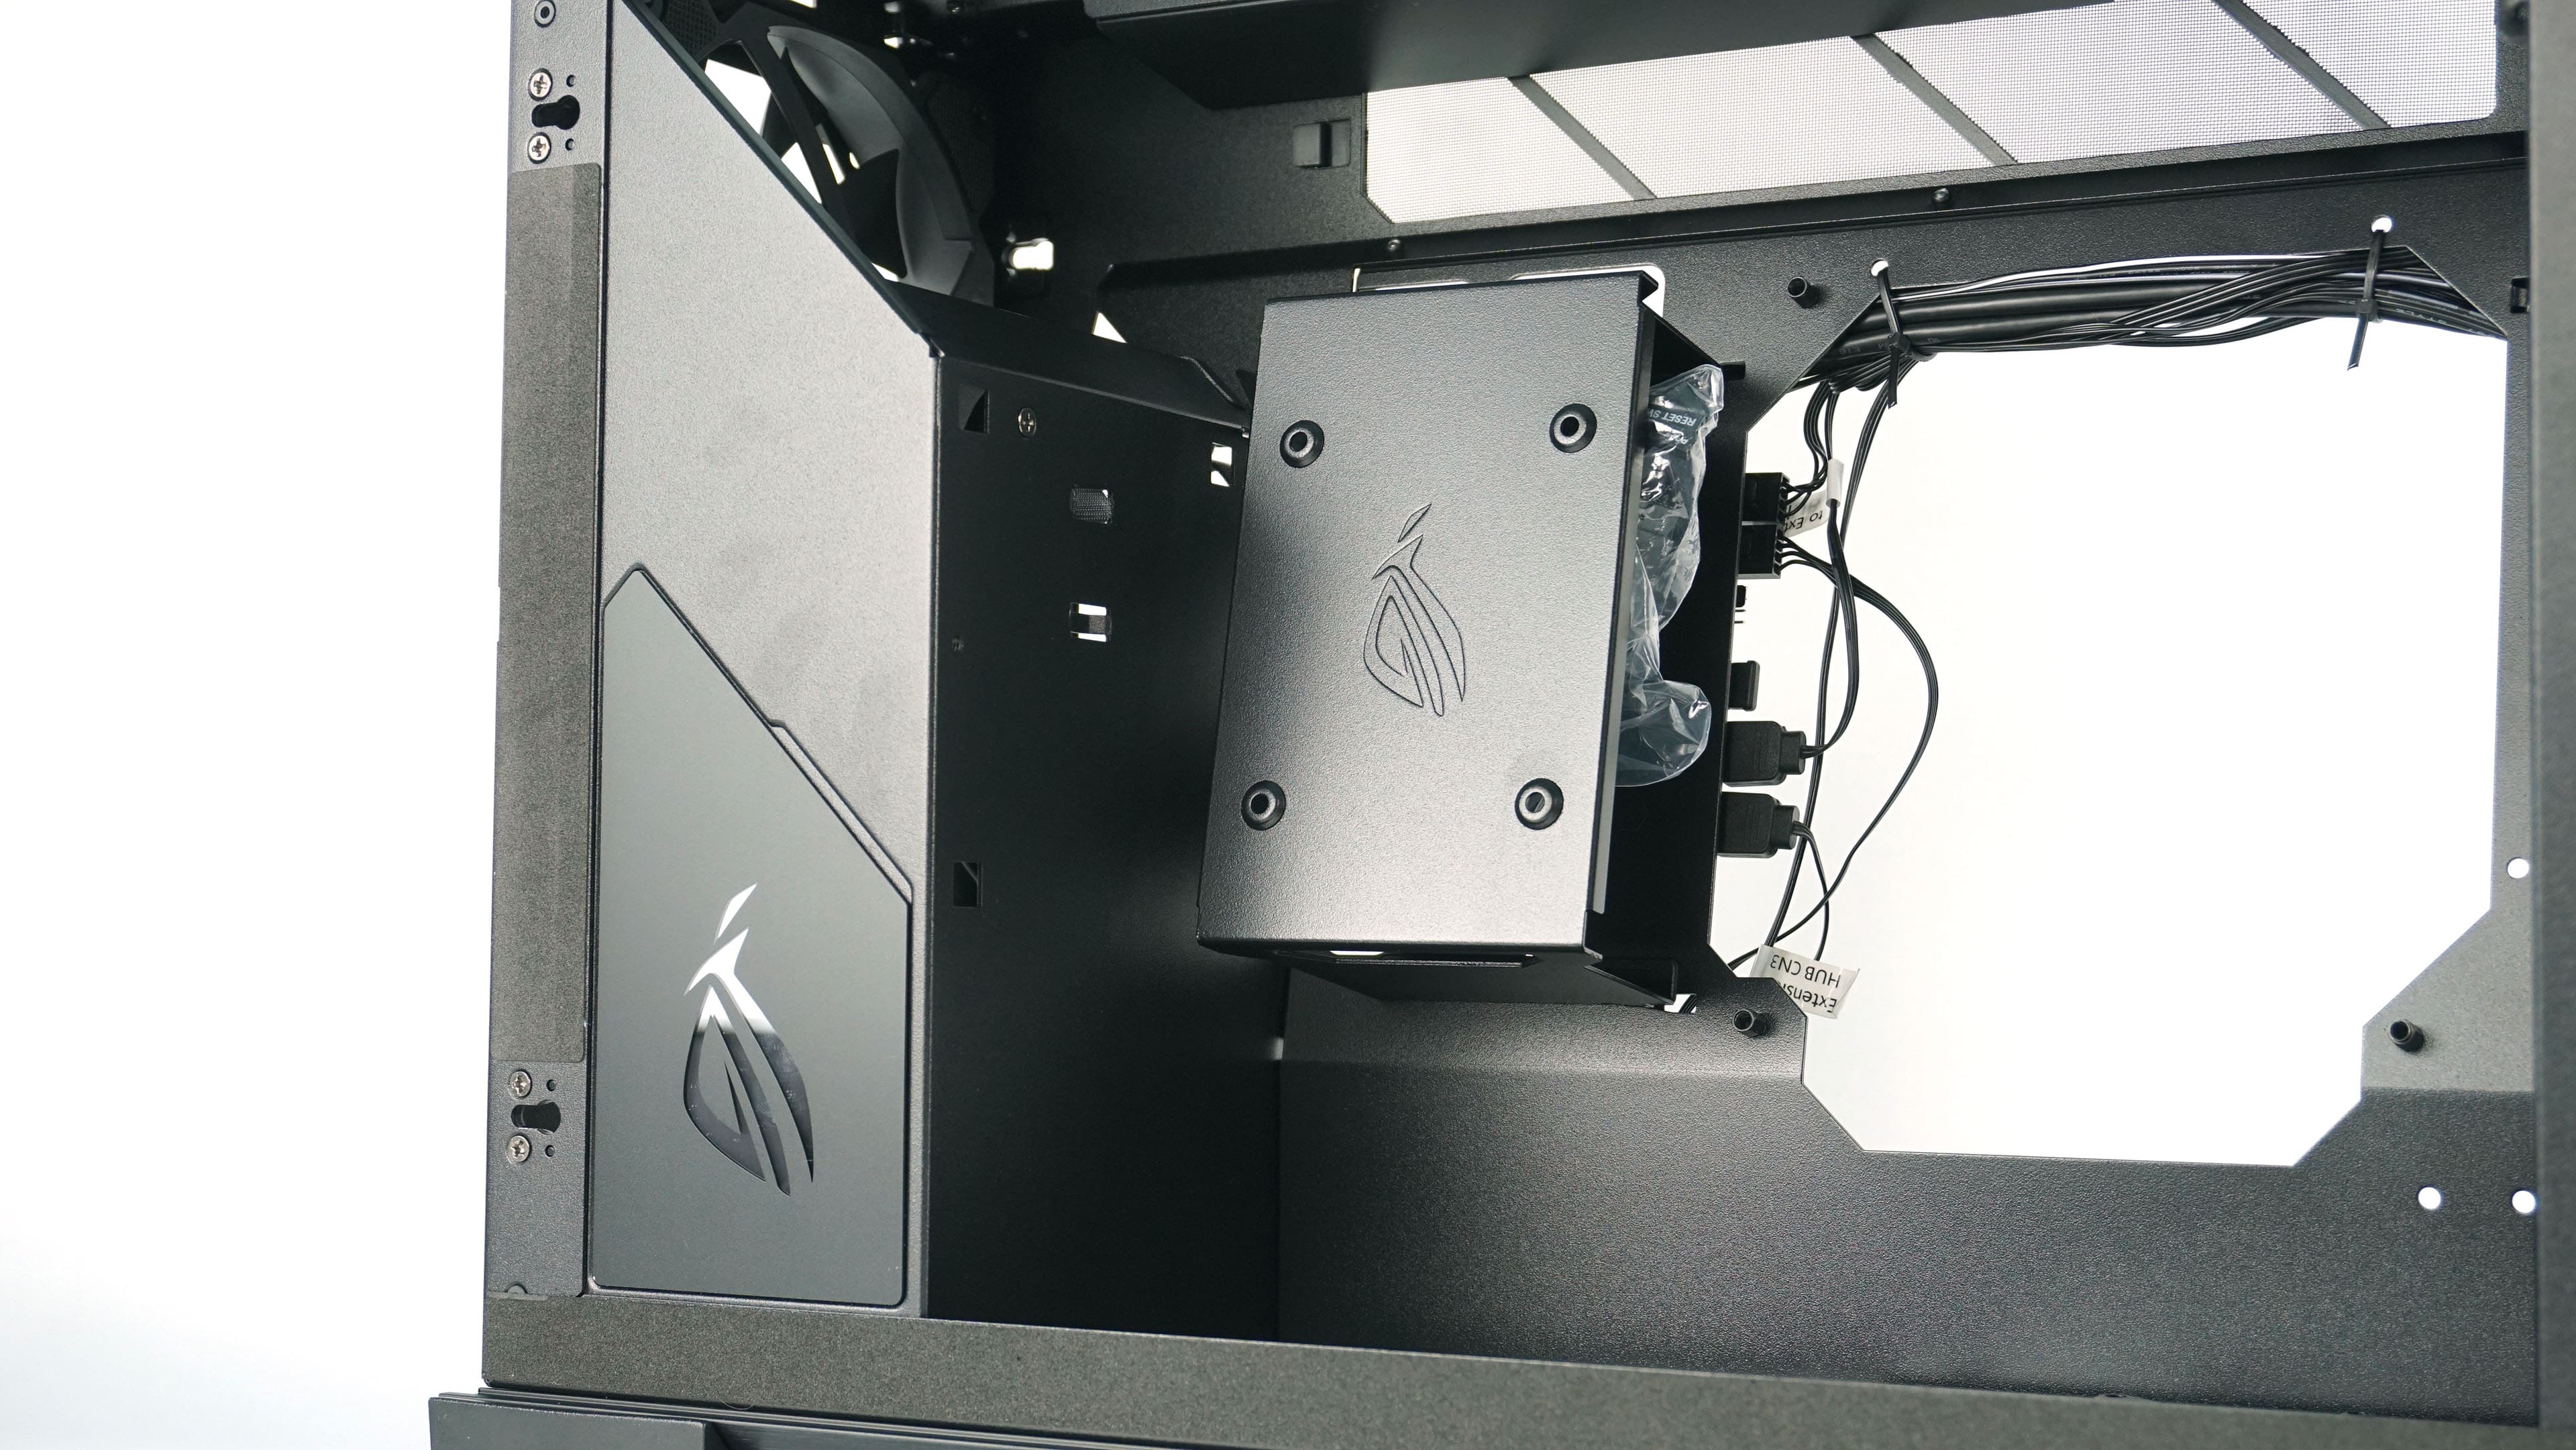
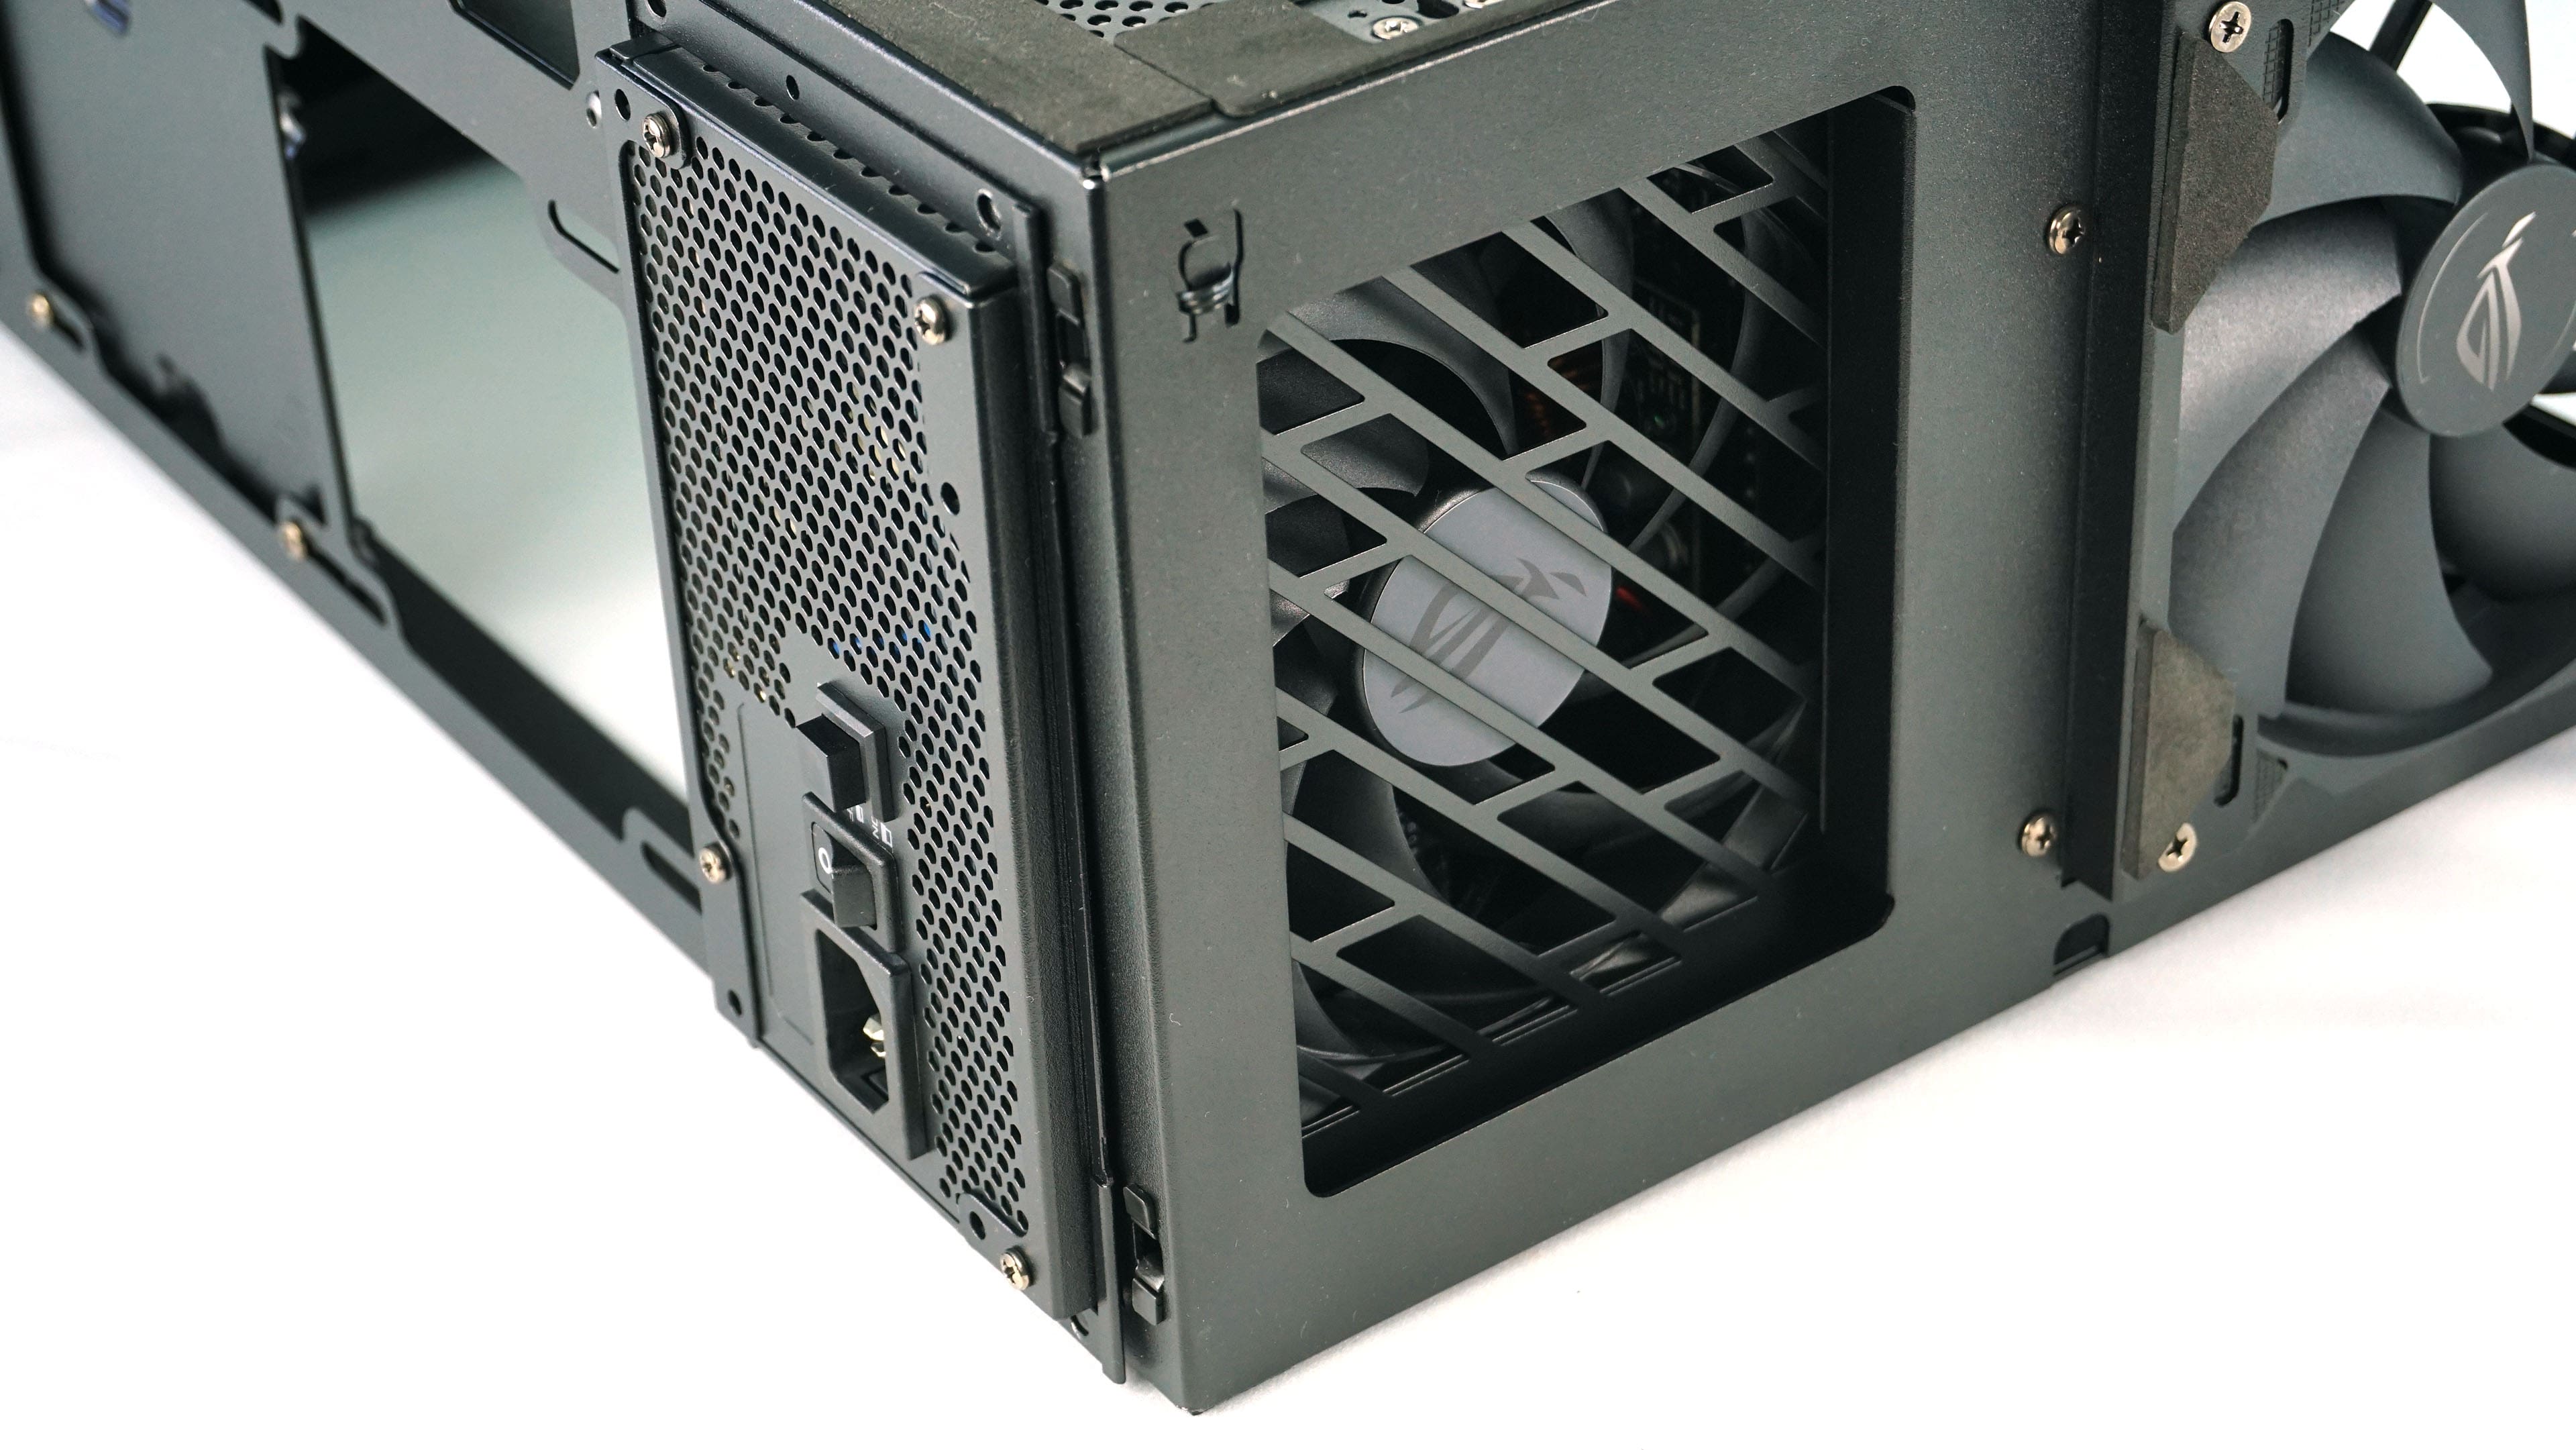
Next to the position on the motherboard, there is also a cabling cover, which also serves as a slot for an SSD. Looking to the right, you can see a pair of exhaust fans.
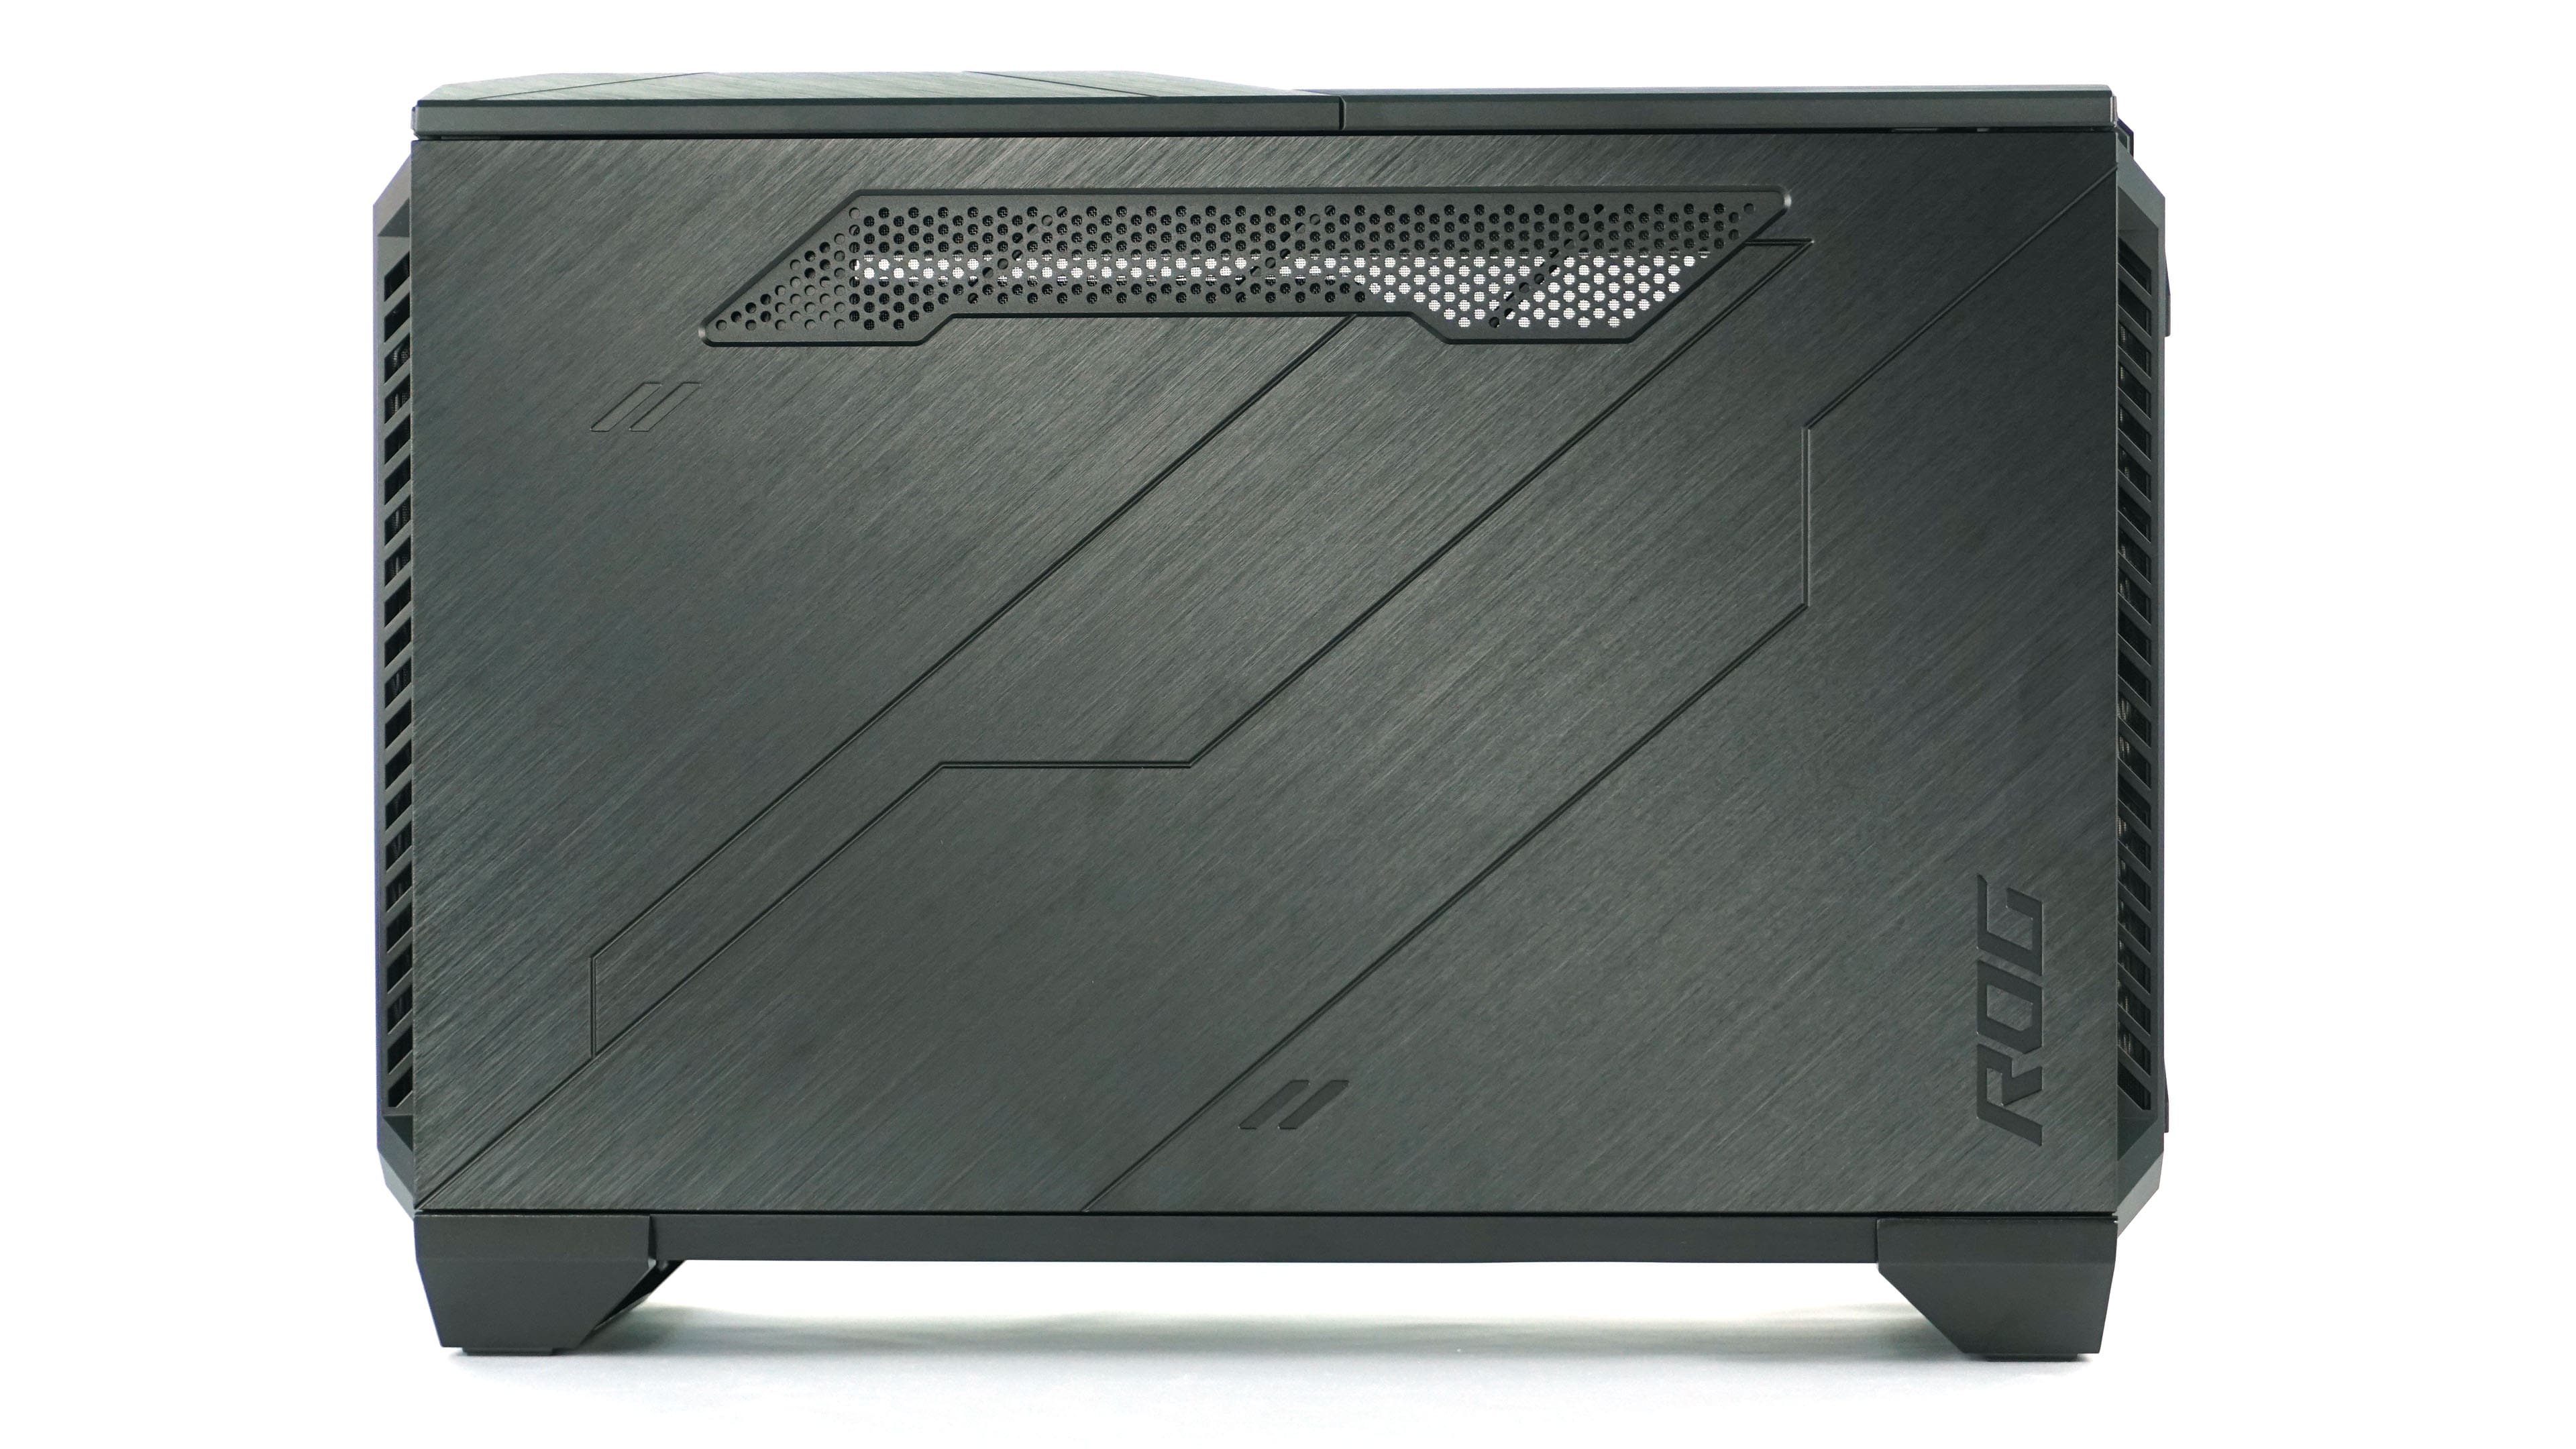
In the lower part of the case there is a perforation for ventilation as well as a removable cover with another position for an SSD. Looking upwards shows the glass side panel, but also the cabling and ventilation of the graphics card.

The top and bottom have several interesting features. The bottom has the already mentioned ventilation under the motherboard, but also an opening for the power supply and on the right there is an opening for cabling from the motherboard and graphics card. The upper part is a combination of glass and metal, through which you can see the inside of the case and specifically the graphics card in all its beauty.
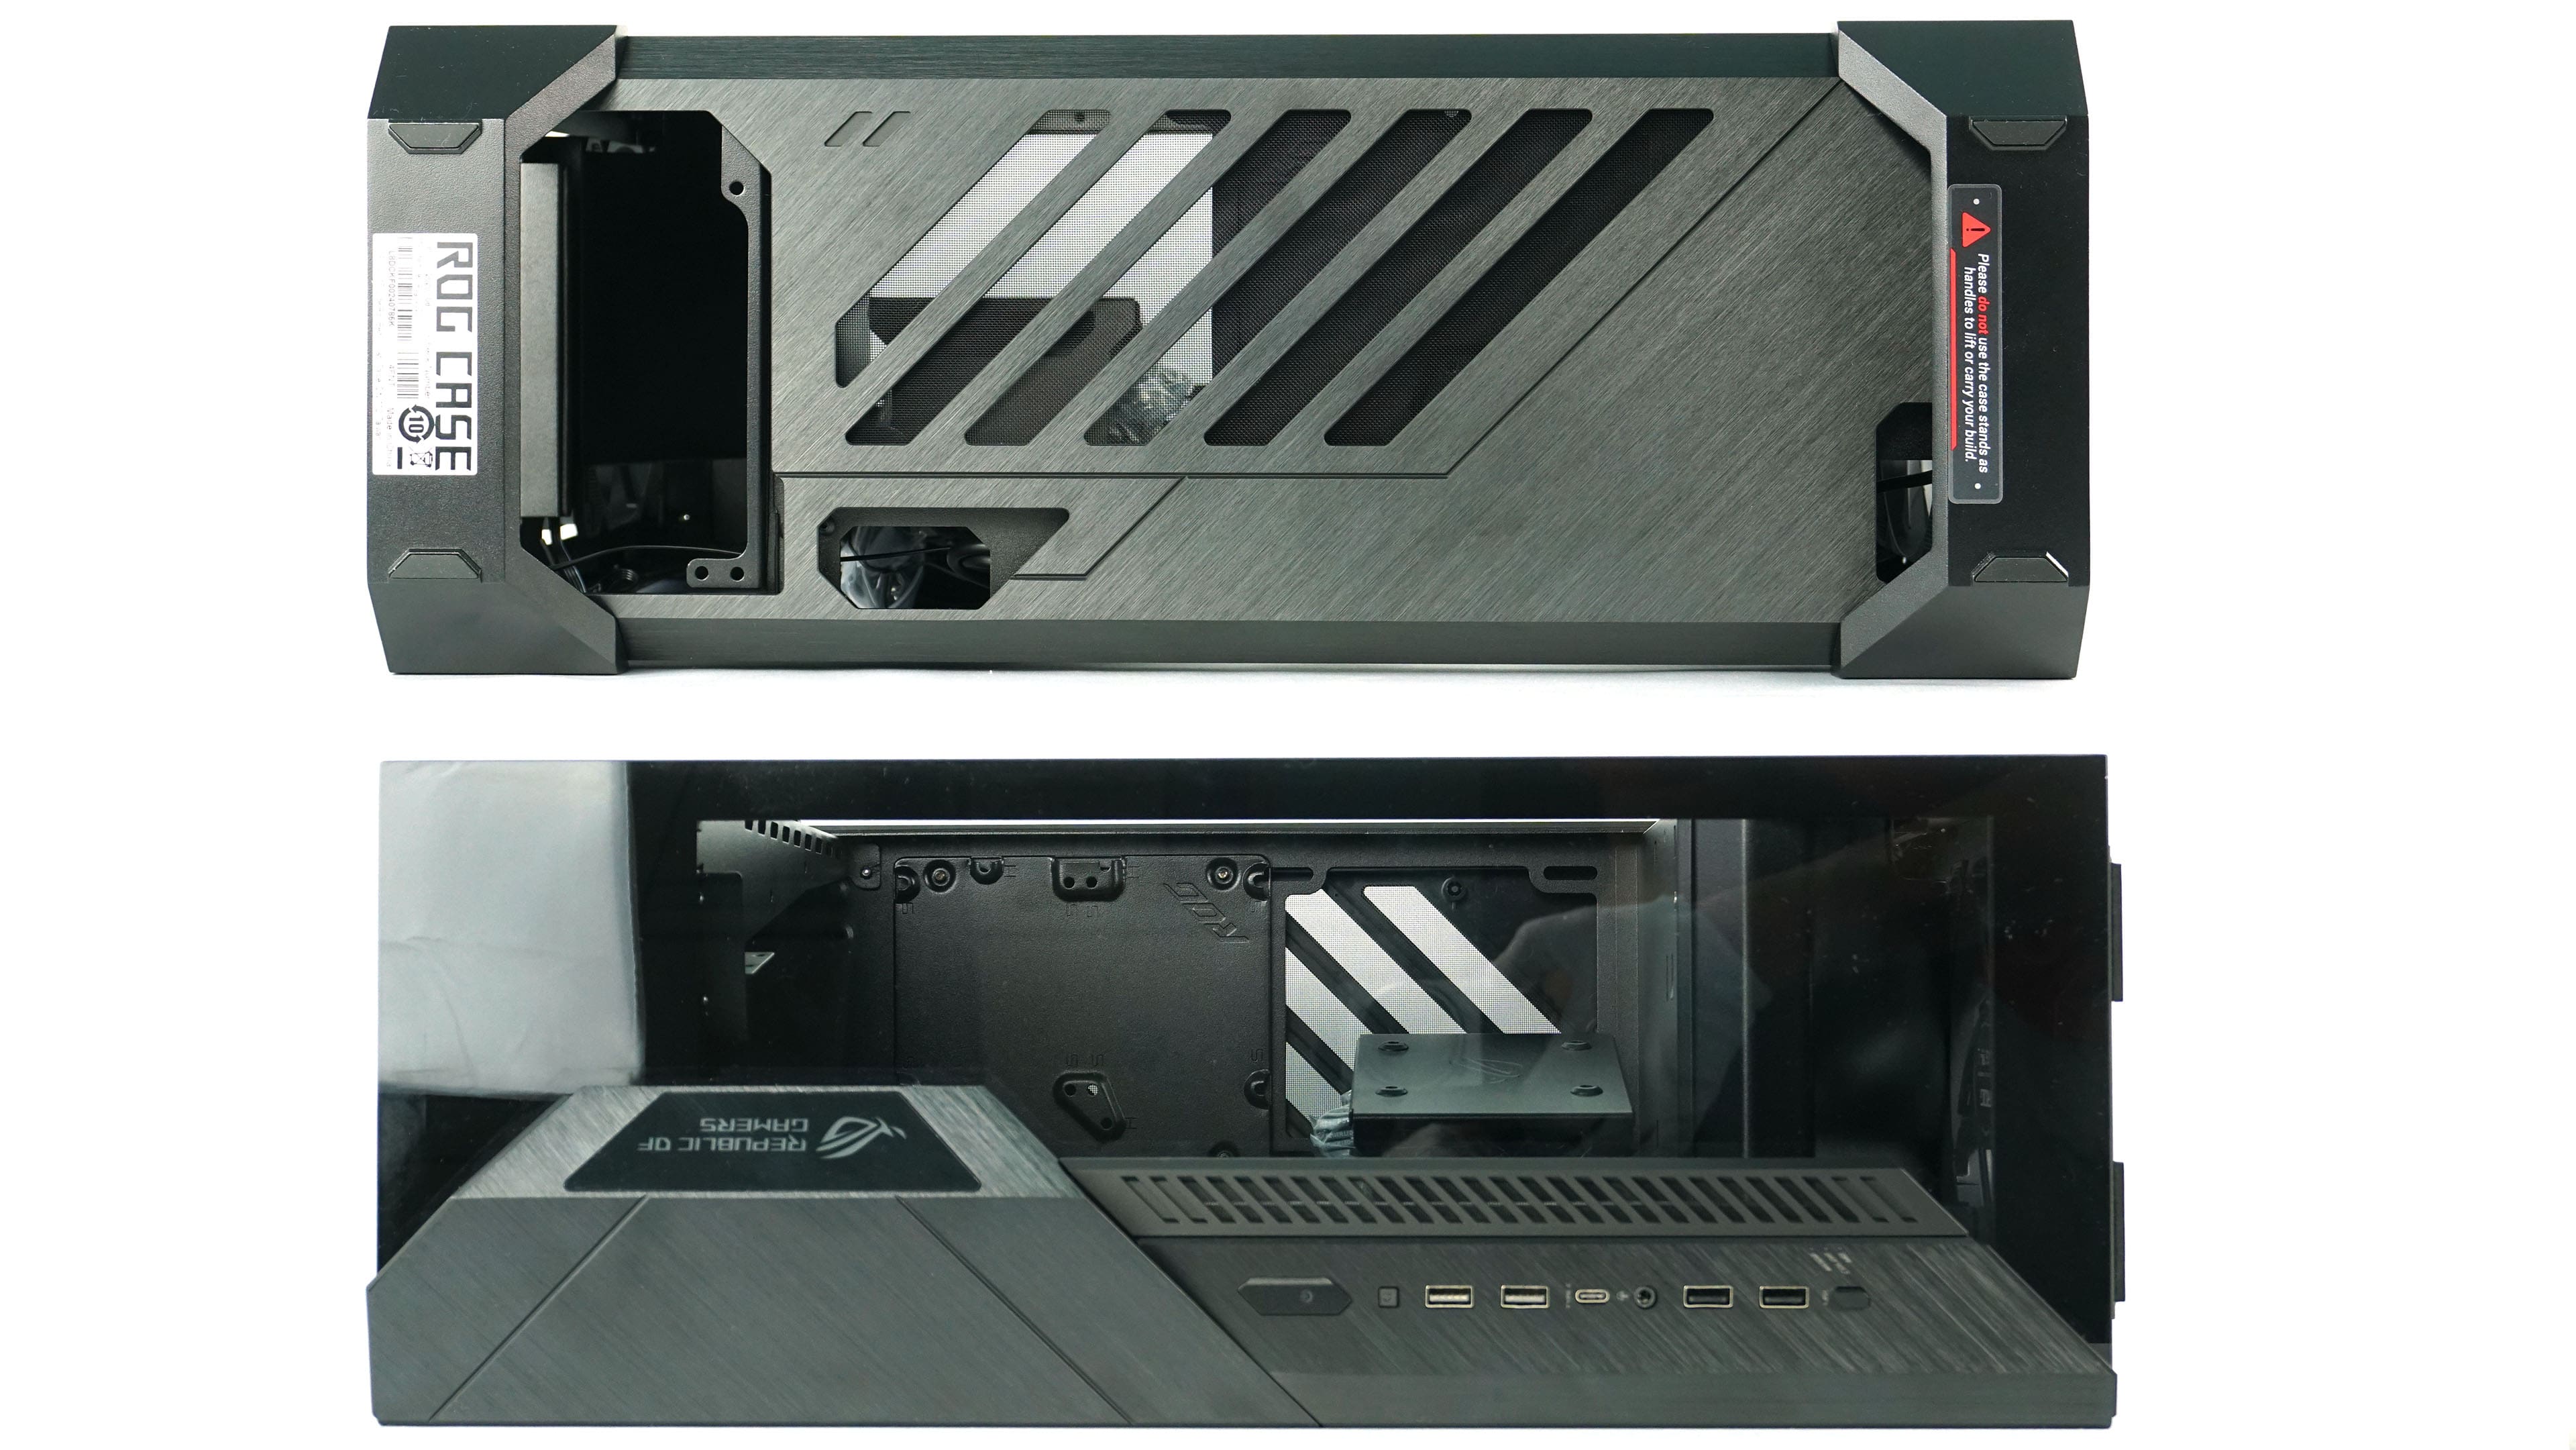
The port selection is good with four USB type A slots, of which two are USB 2.0 and two are 5 Gb USB 3.2 gen 1. There is also a modern 10 Gb USB-C. The power and reset buttons are a matter of course, but there is also a button to select the RGB backlight mode.

The bottom feet are only held by clips in four corners and one screw. On the feet, you can see a warning that you don’t grab and hold them when moving the case, which is easier said than done. In reality, the manipulation of the case is relatively complicated, as it is nowhere to be grabbed.

The cabling cover, which also serves as an SSD slot, can be easily removed for easier motherboard installation.
In the next part, we will look at the process of installing the components and the final builds with air as well as liquid AIO coolers.
A very untraditional and relatively unique case has come to our editorial office. It is the ROG Z11, which the manufacturer introduced at the beginning of the year at CES 2020. The case hides several specialties, such as the possibility of vertical and horizontal positioning or a slightly curved motherboard tray. To make matters better, we fitted the case more or less exclusively with ROG components, thus creating a kind of full-on Asus build.
Basic specs
| Testing configuration | |
| Processor | AMD Ryzen 9 3900X |
| Motherboard | Asus ROG STRIX X470-I GAMING |
| Graphics card | Asus ROG STRIX RTX2080S O8G |
| CPU cooler | Asus ROG RYUJIN 240 |
| RAM | Corsair Dominator Platinum RGB 16 GB (2x8GB) 3600 MHz |
| SSD | ADATA XPG Gammix S11 Pro 1TB |
| Power supply | ASUS ROG STRIX 650G |
Details
We installed only Asus components inside the case to complete the idea of a full-on ROG build.
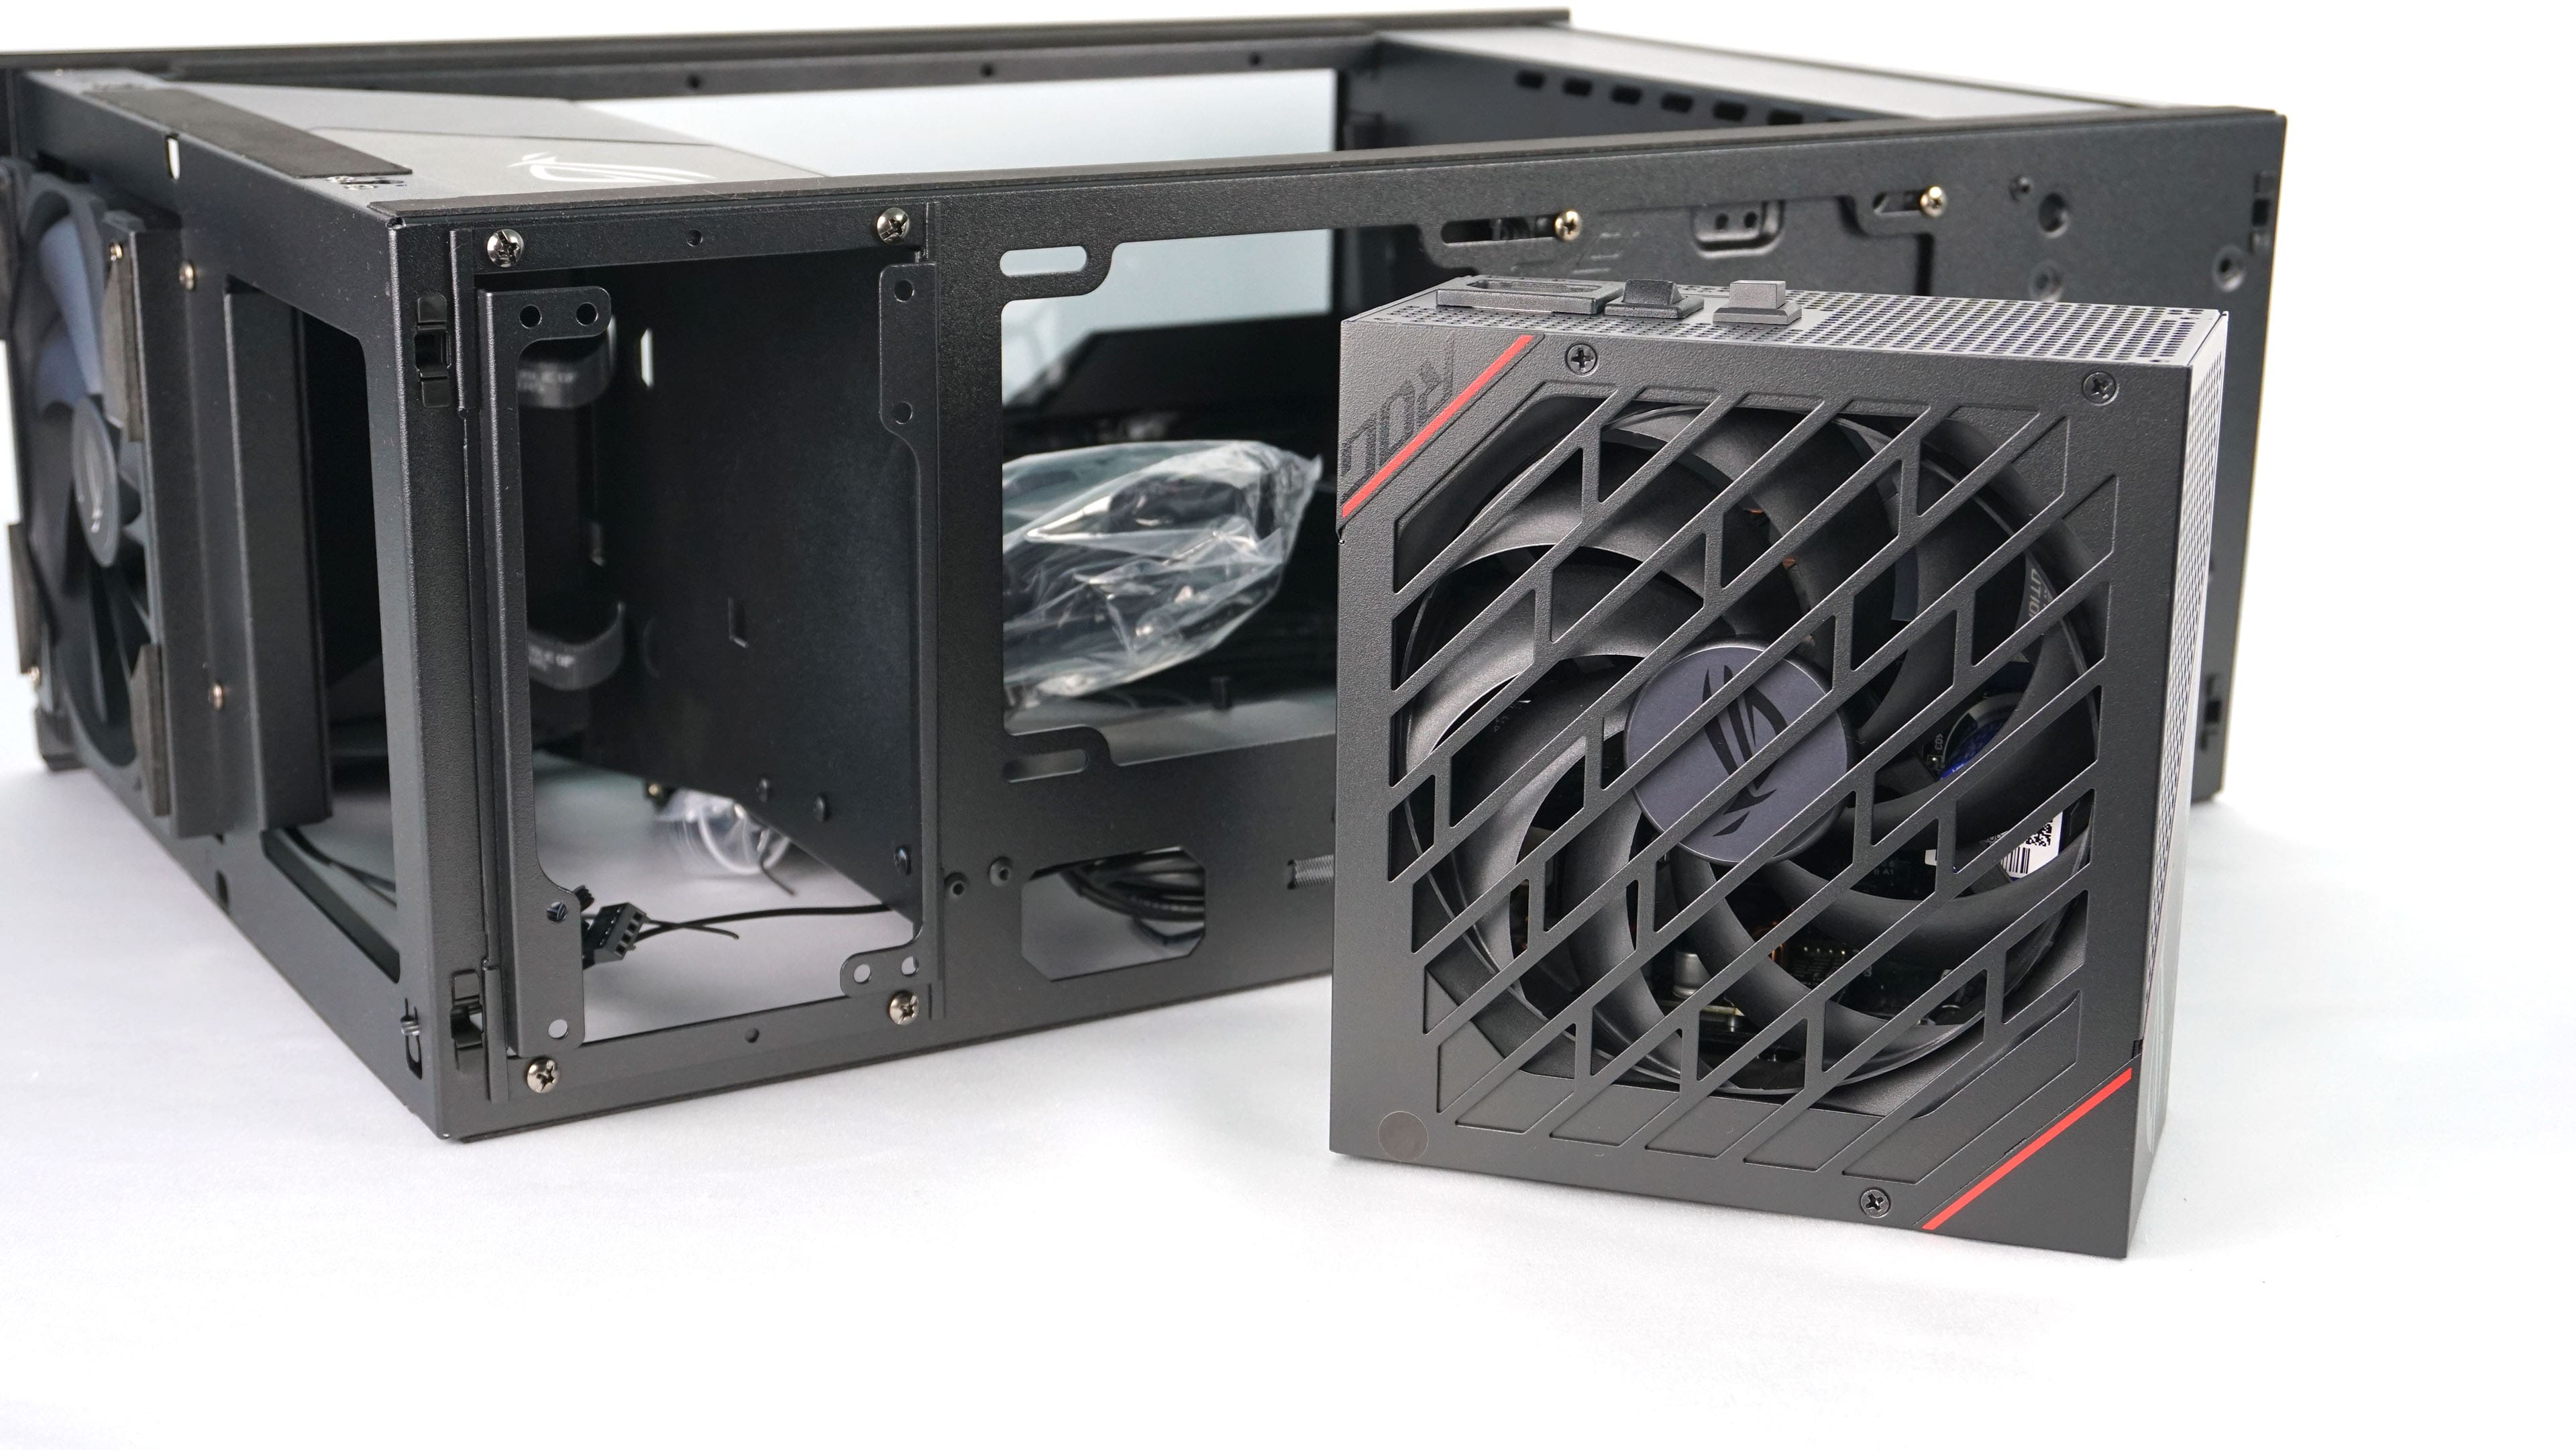
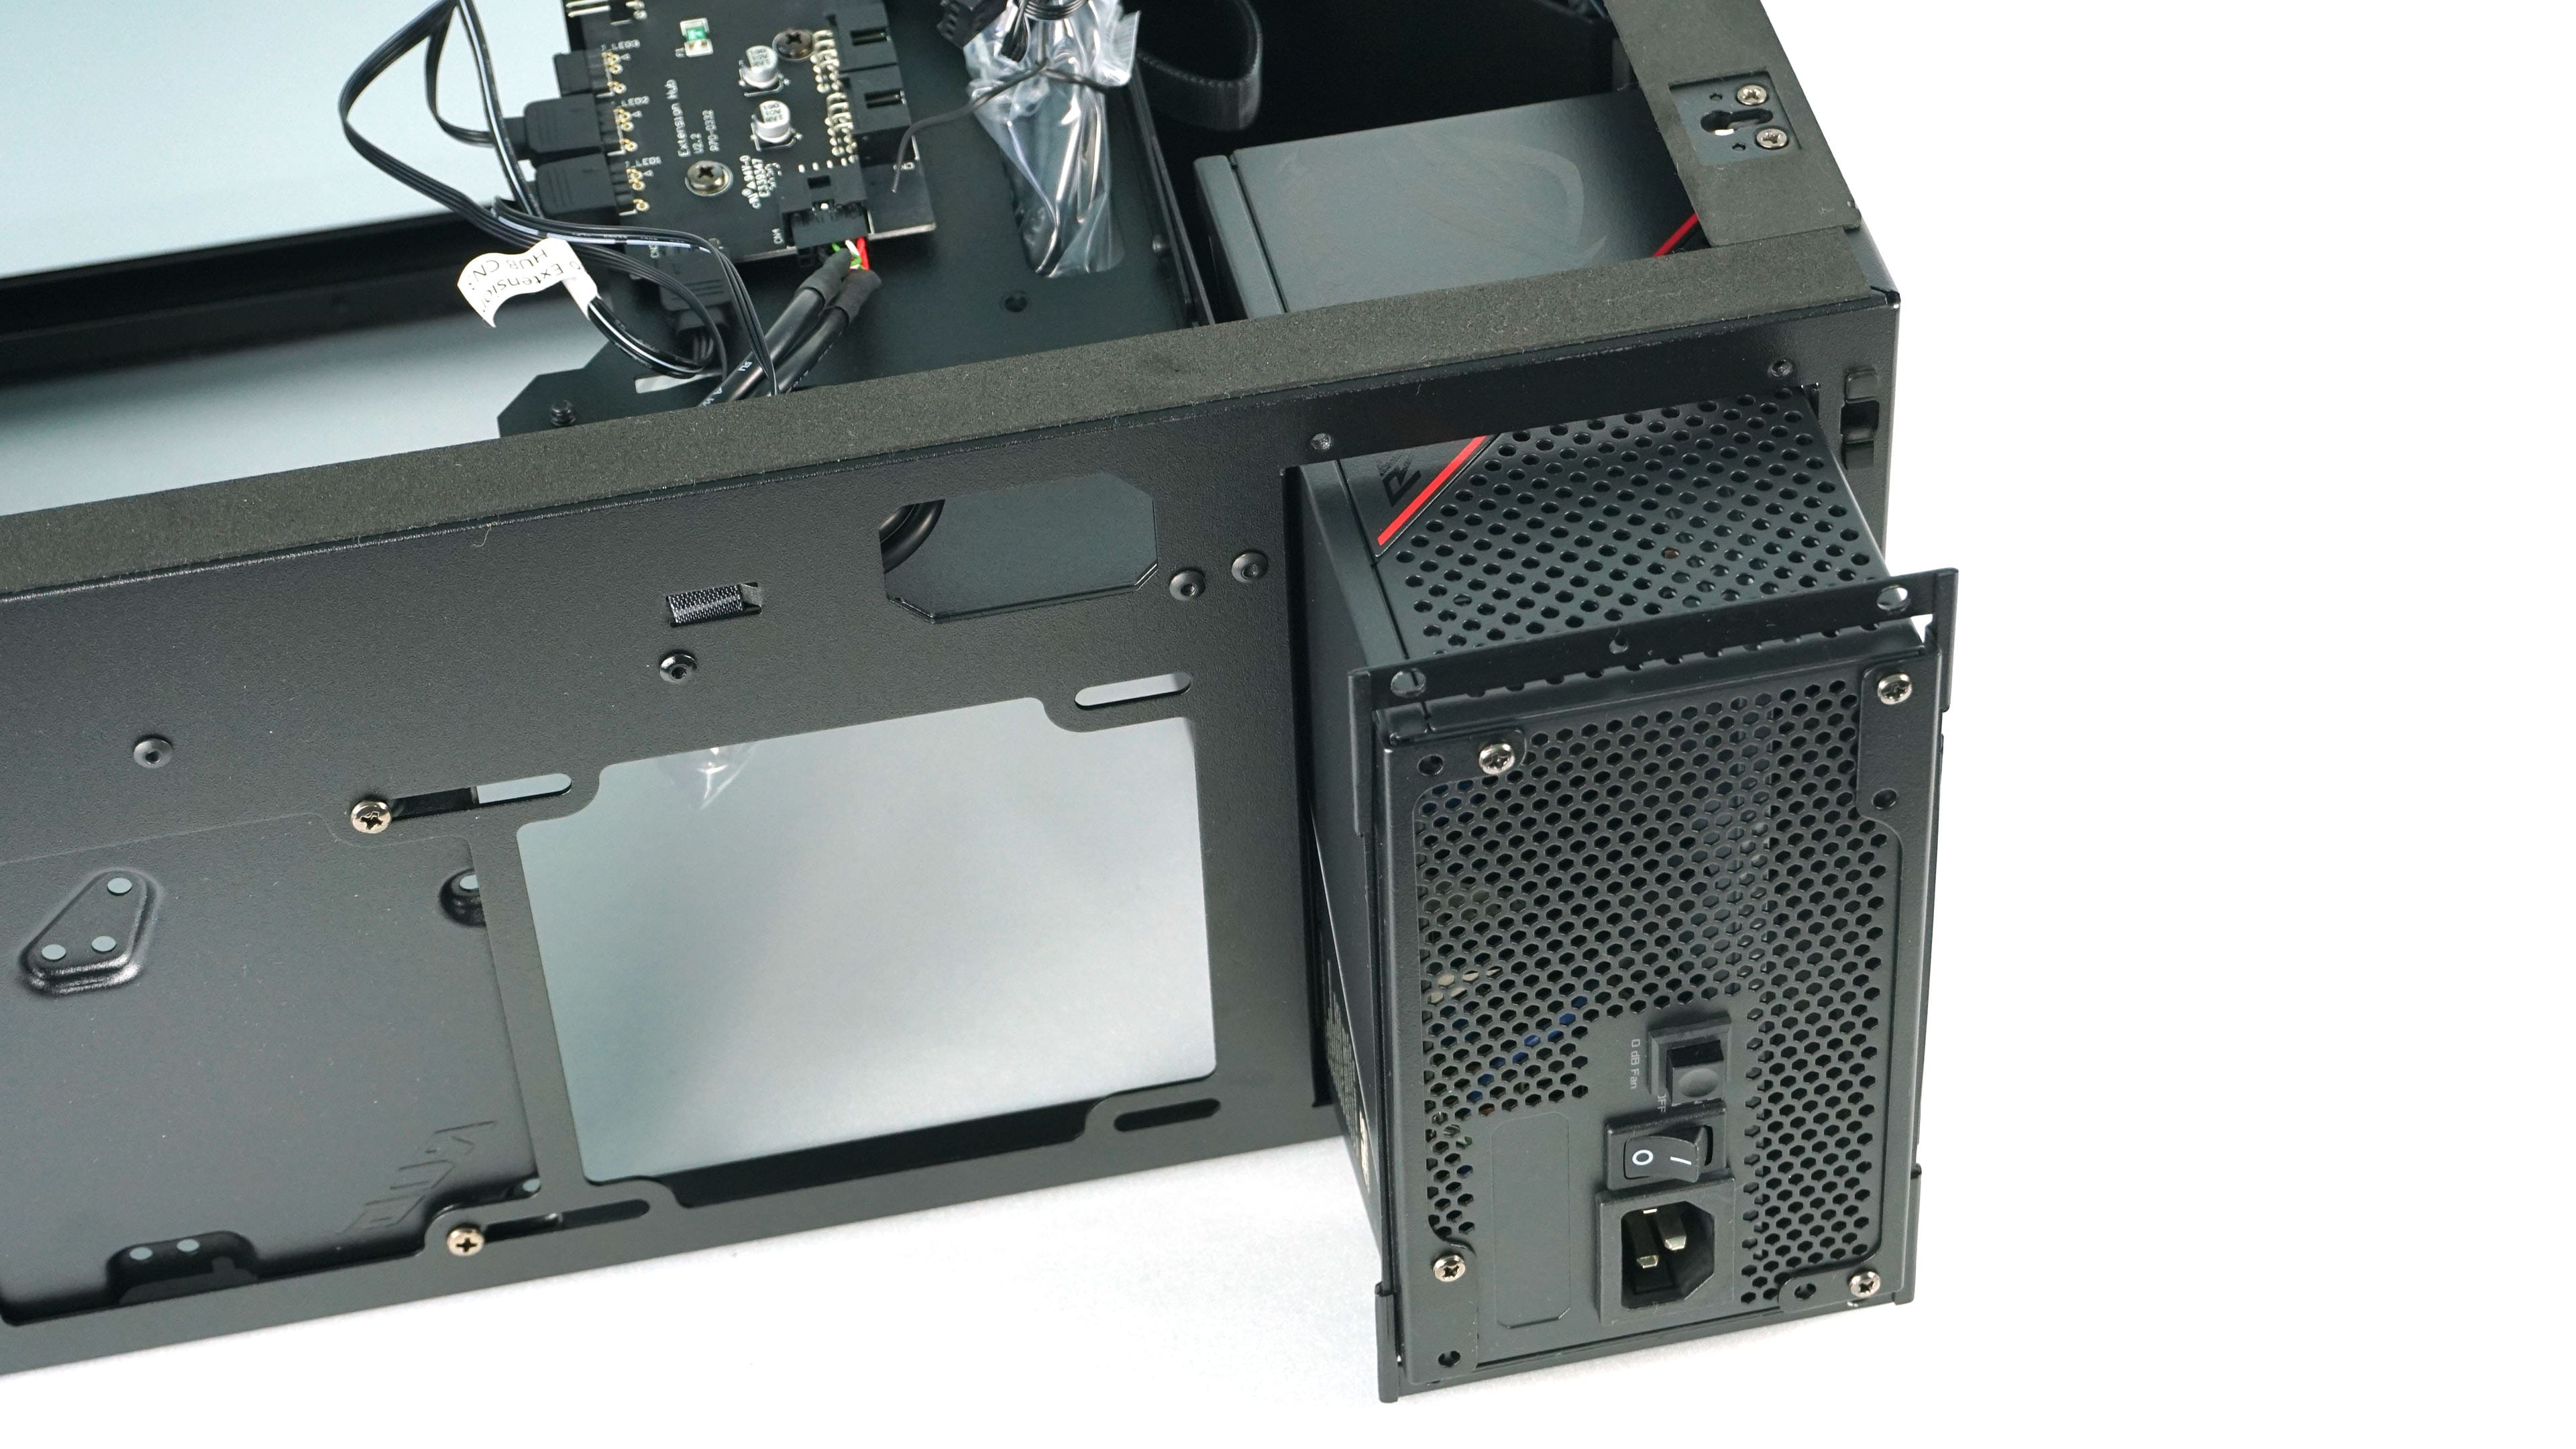
We start with a power supply that attaches to the frame and slides into the case. Next is the motherboard and graphics card along with the appropriate cabling. Their installation process images would not be enjoyable, so let’s look straight at the finished product.
We start with the CPU air cooler – AMD Wraith Prism.
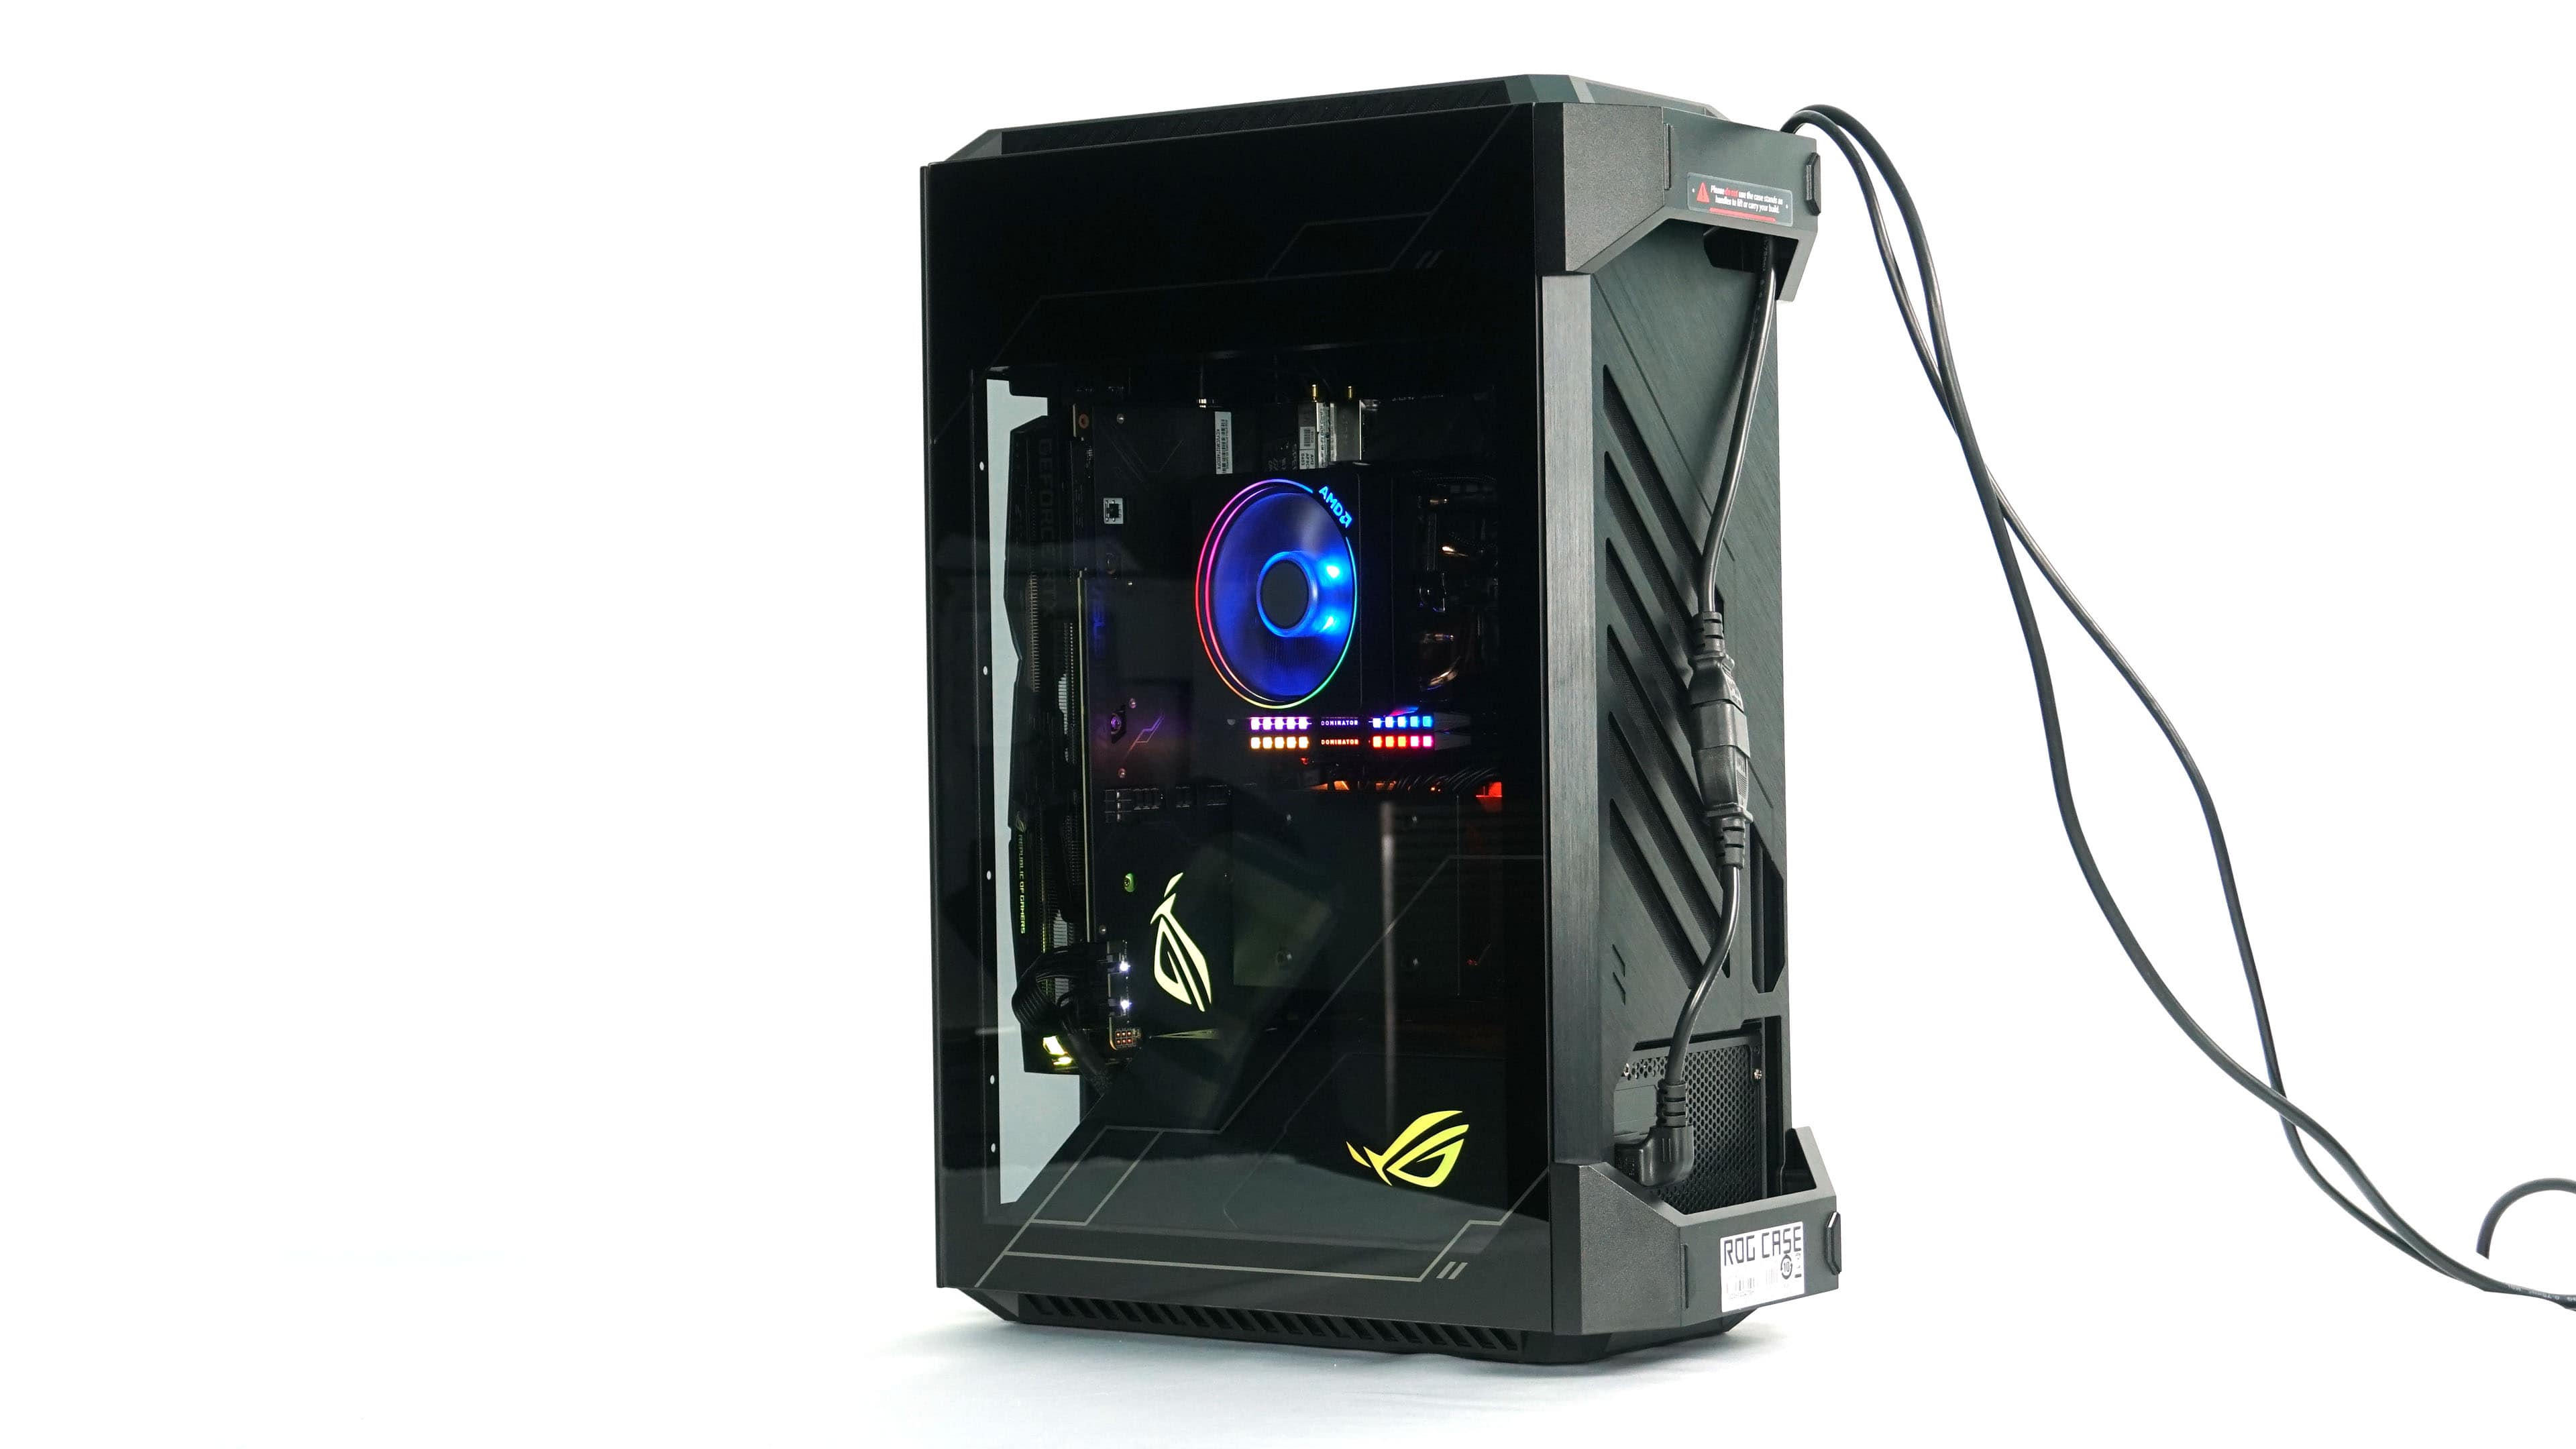
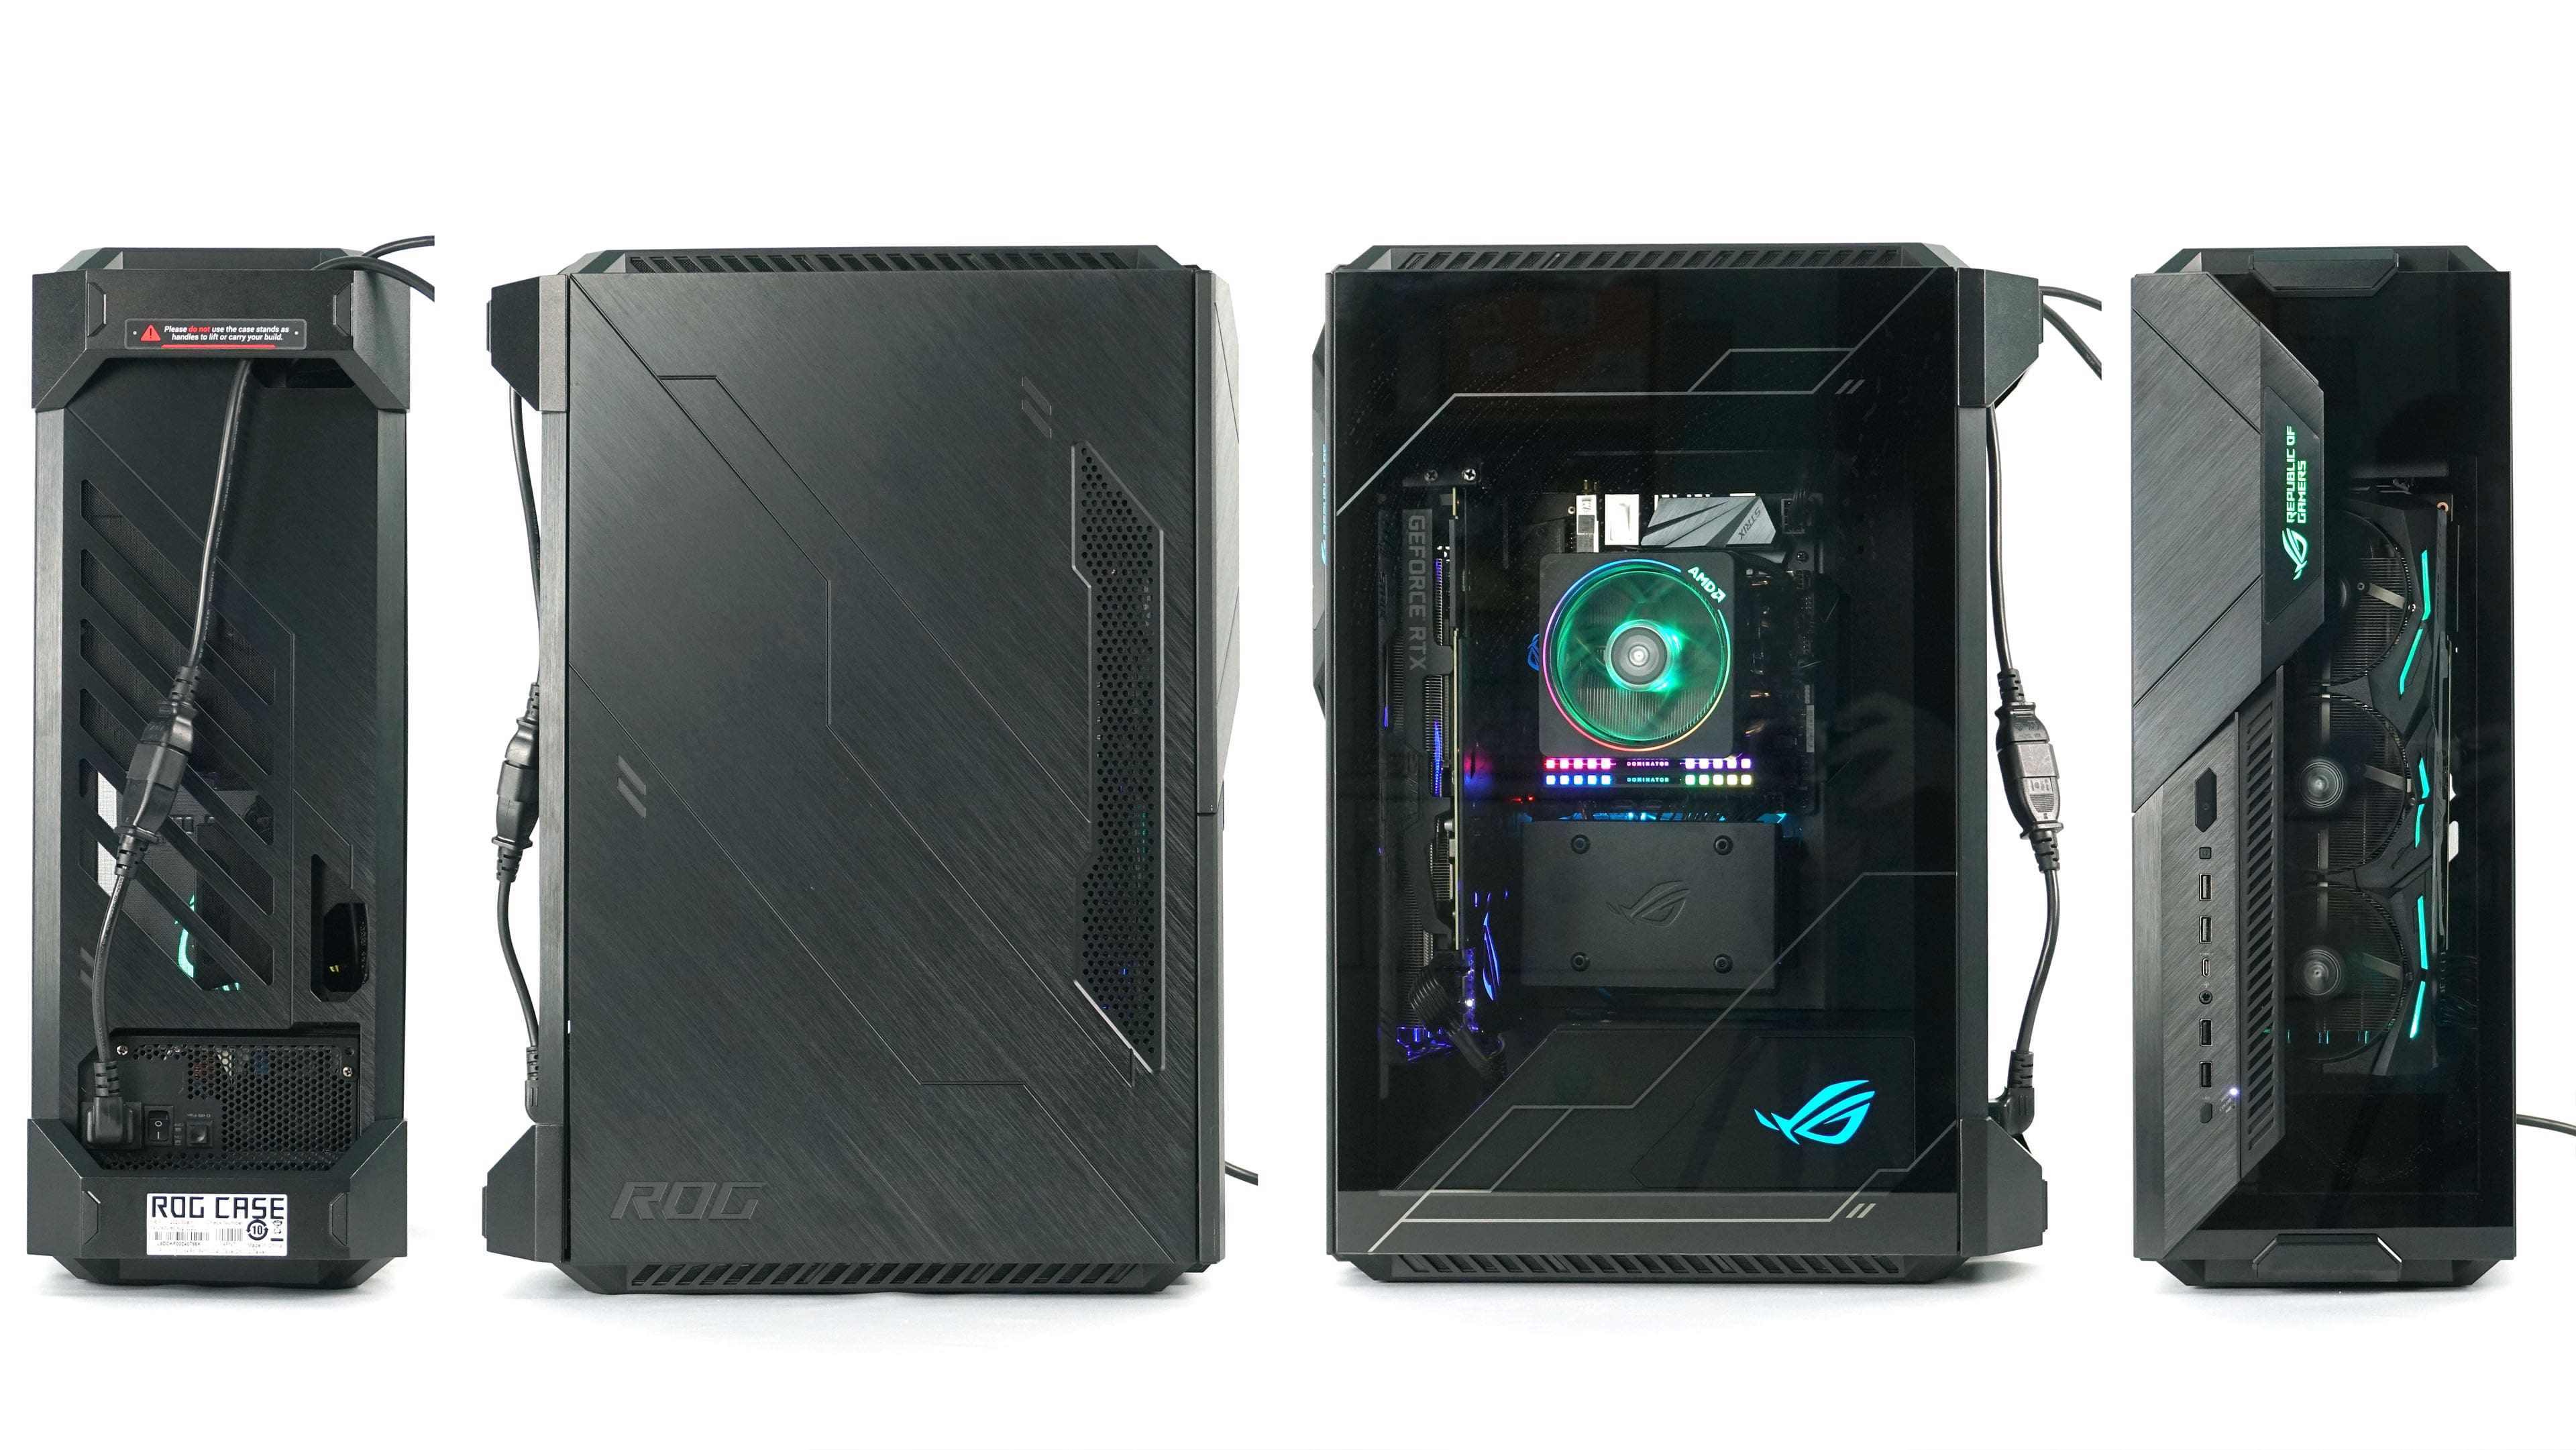
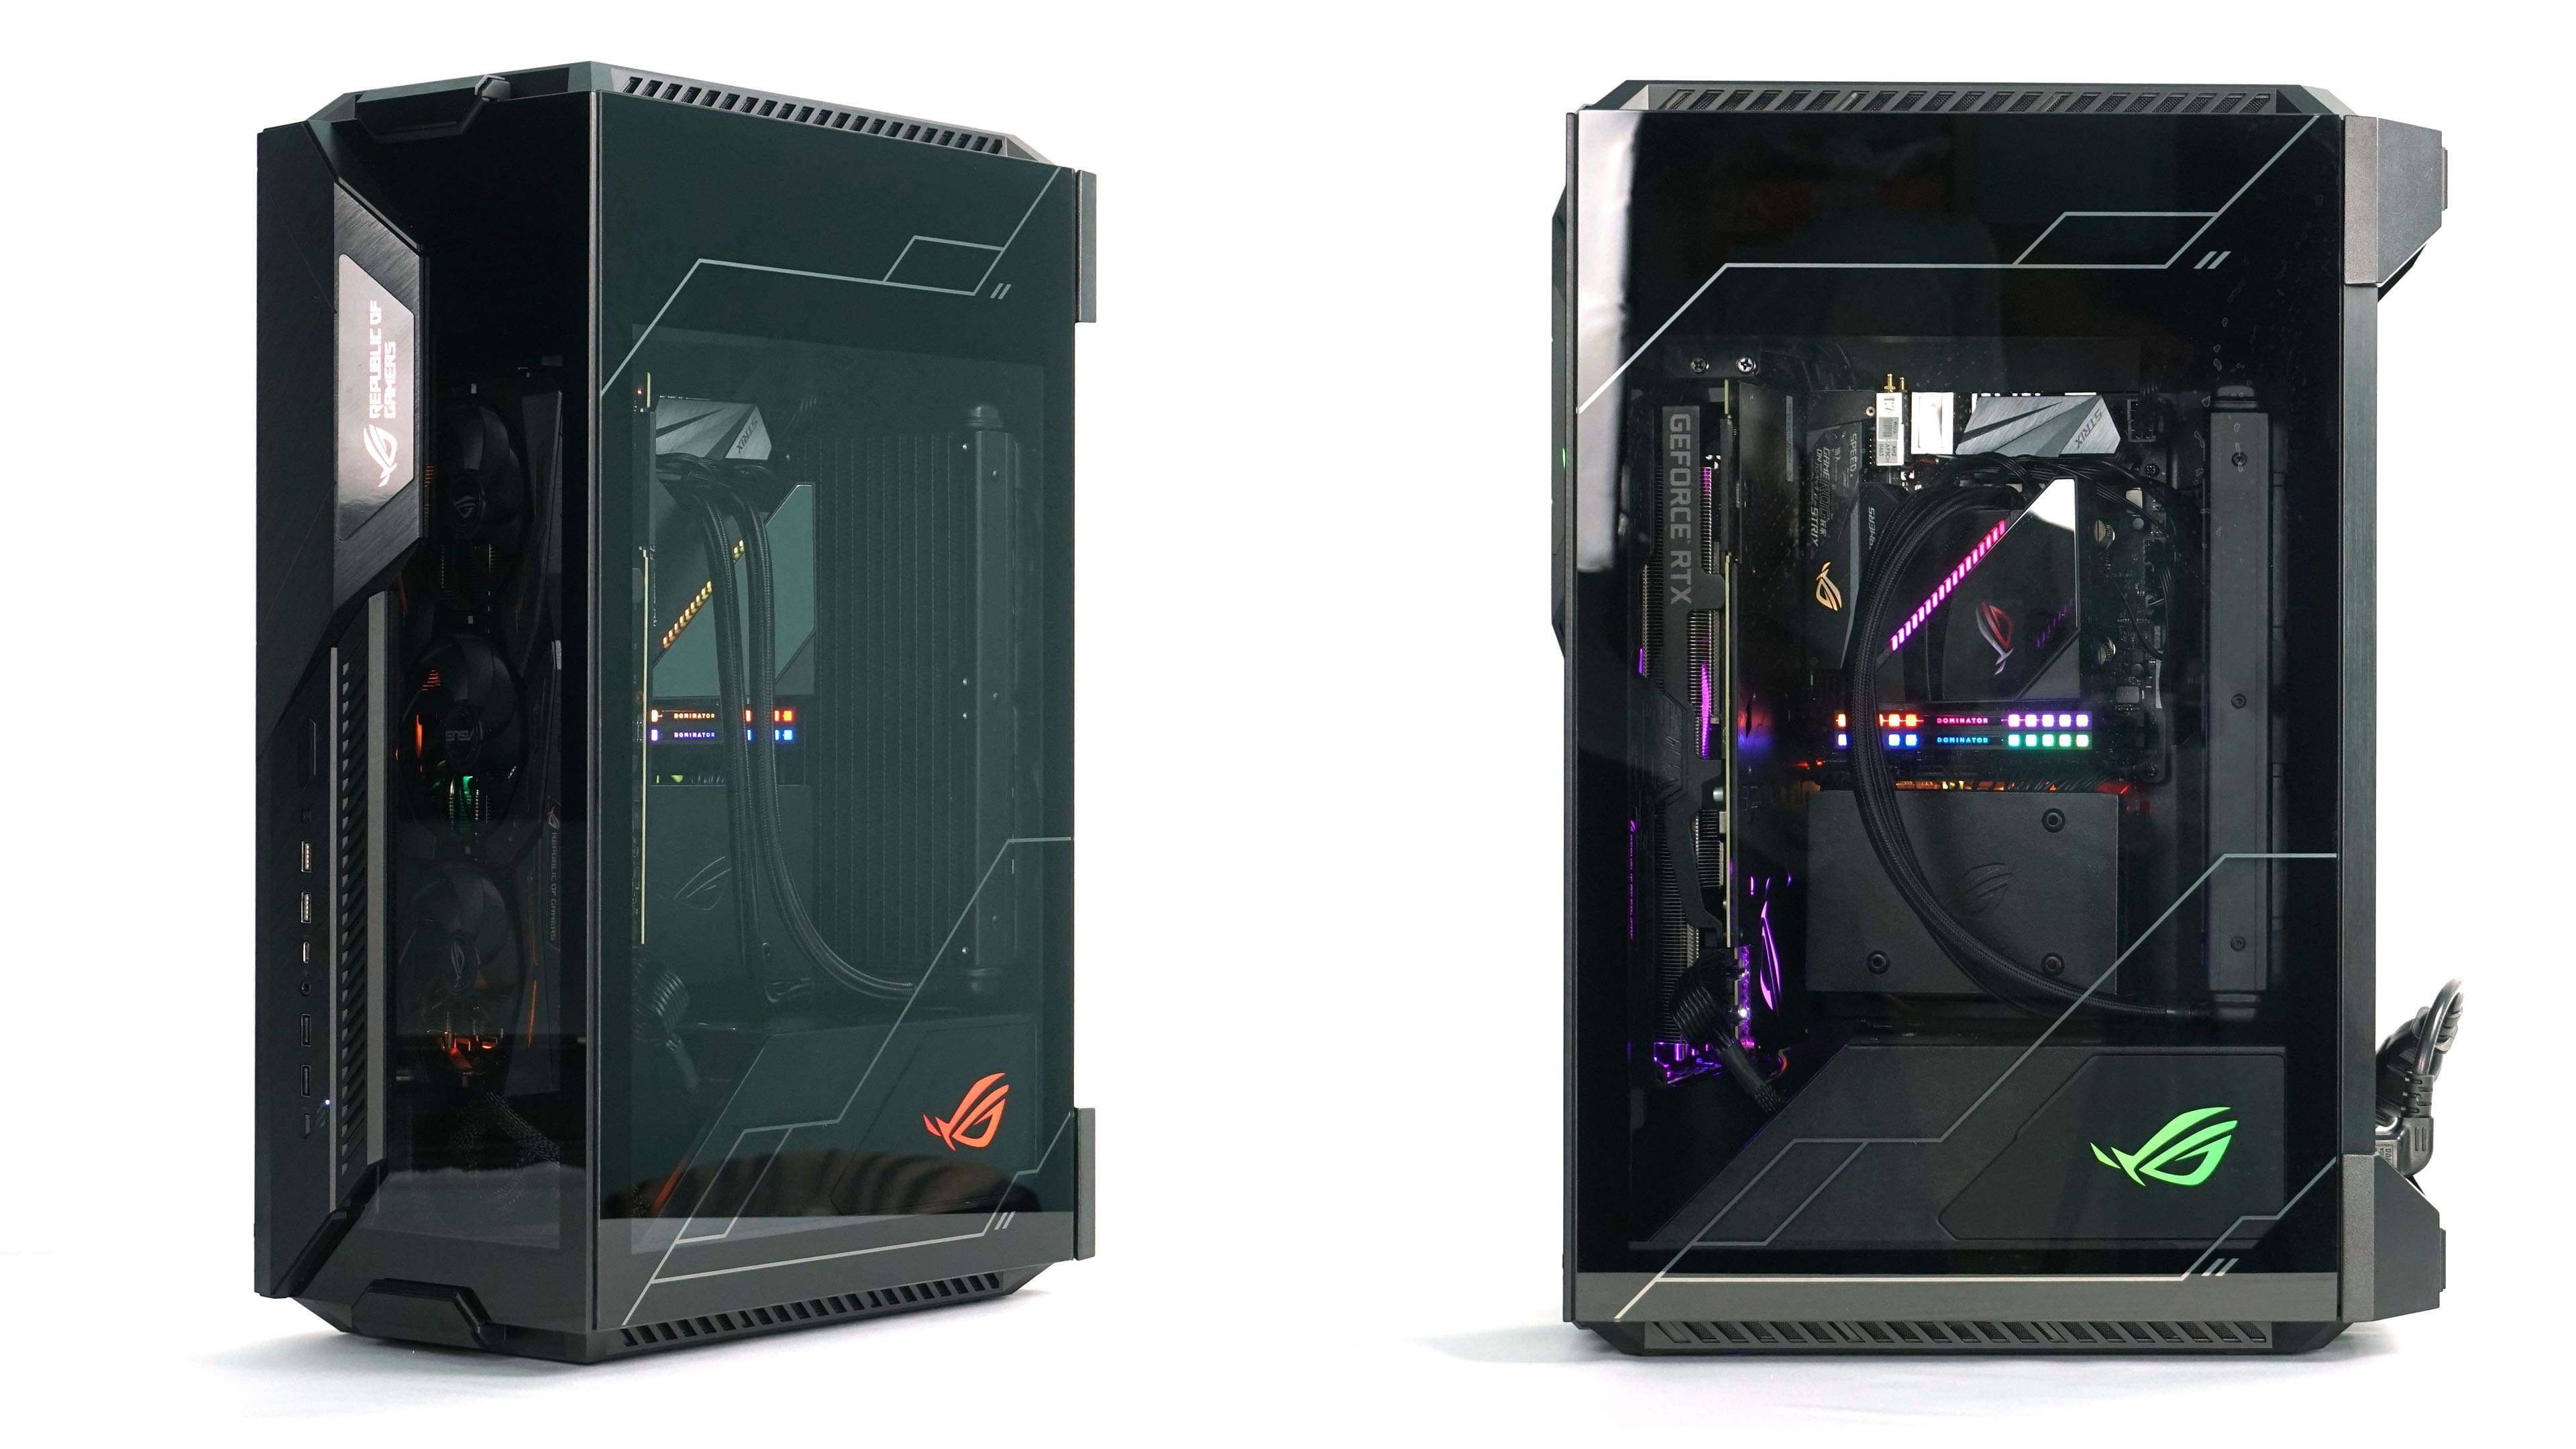
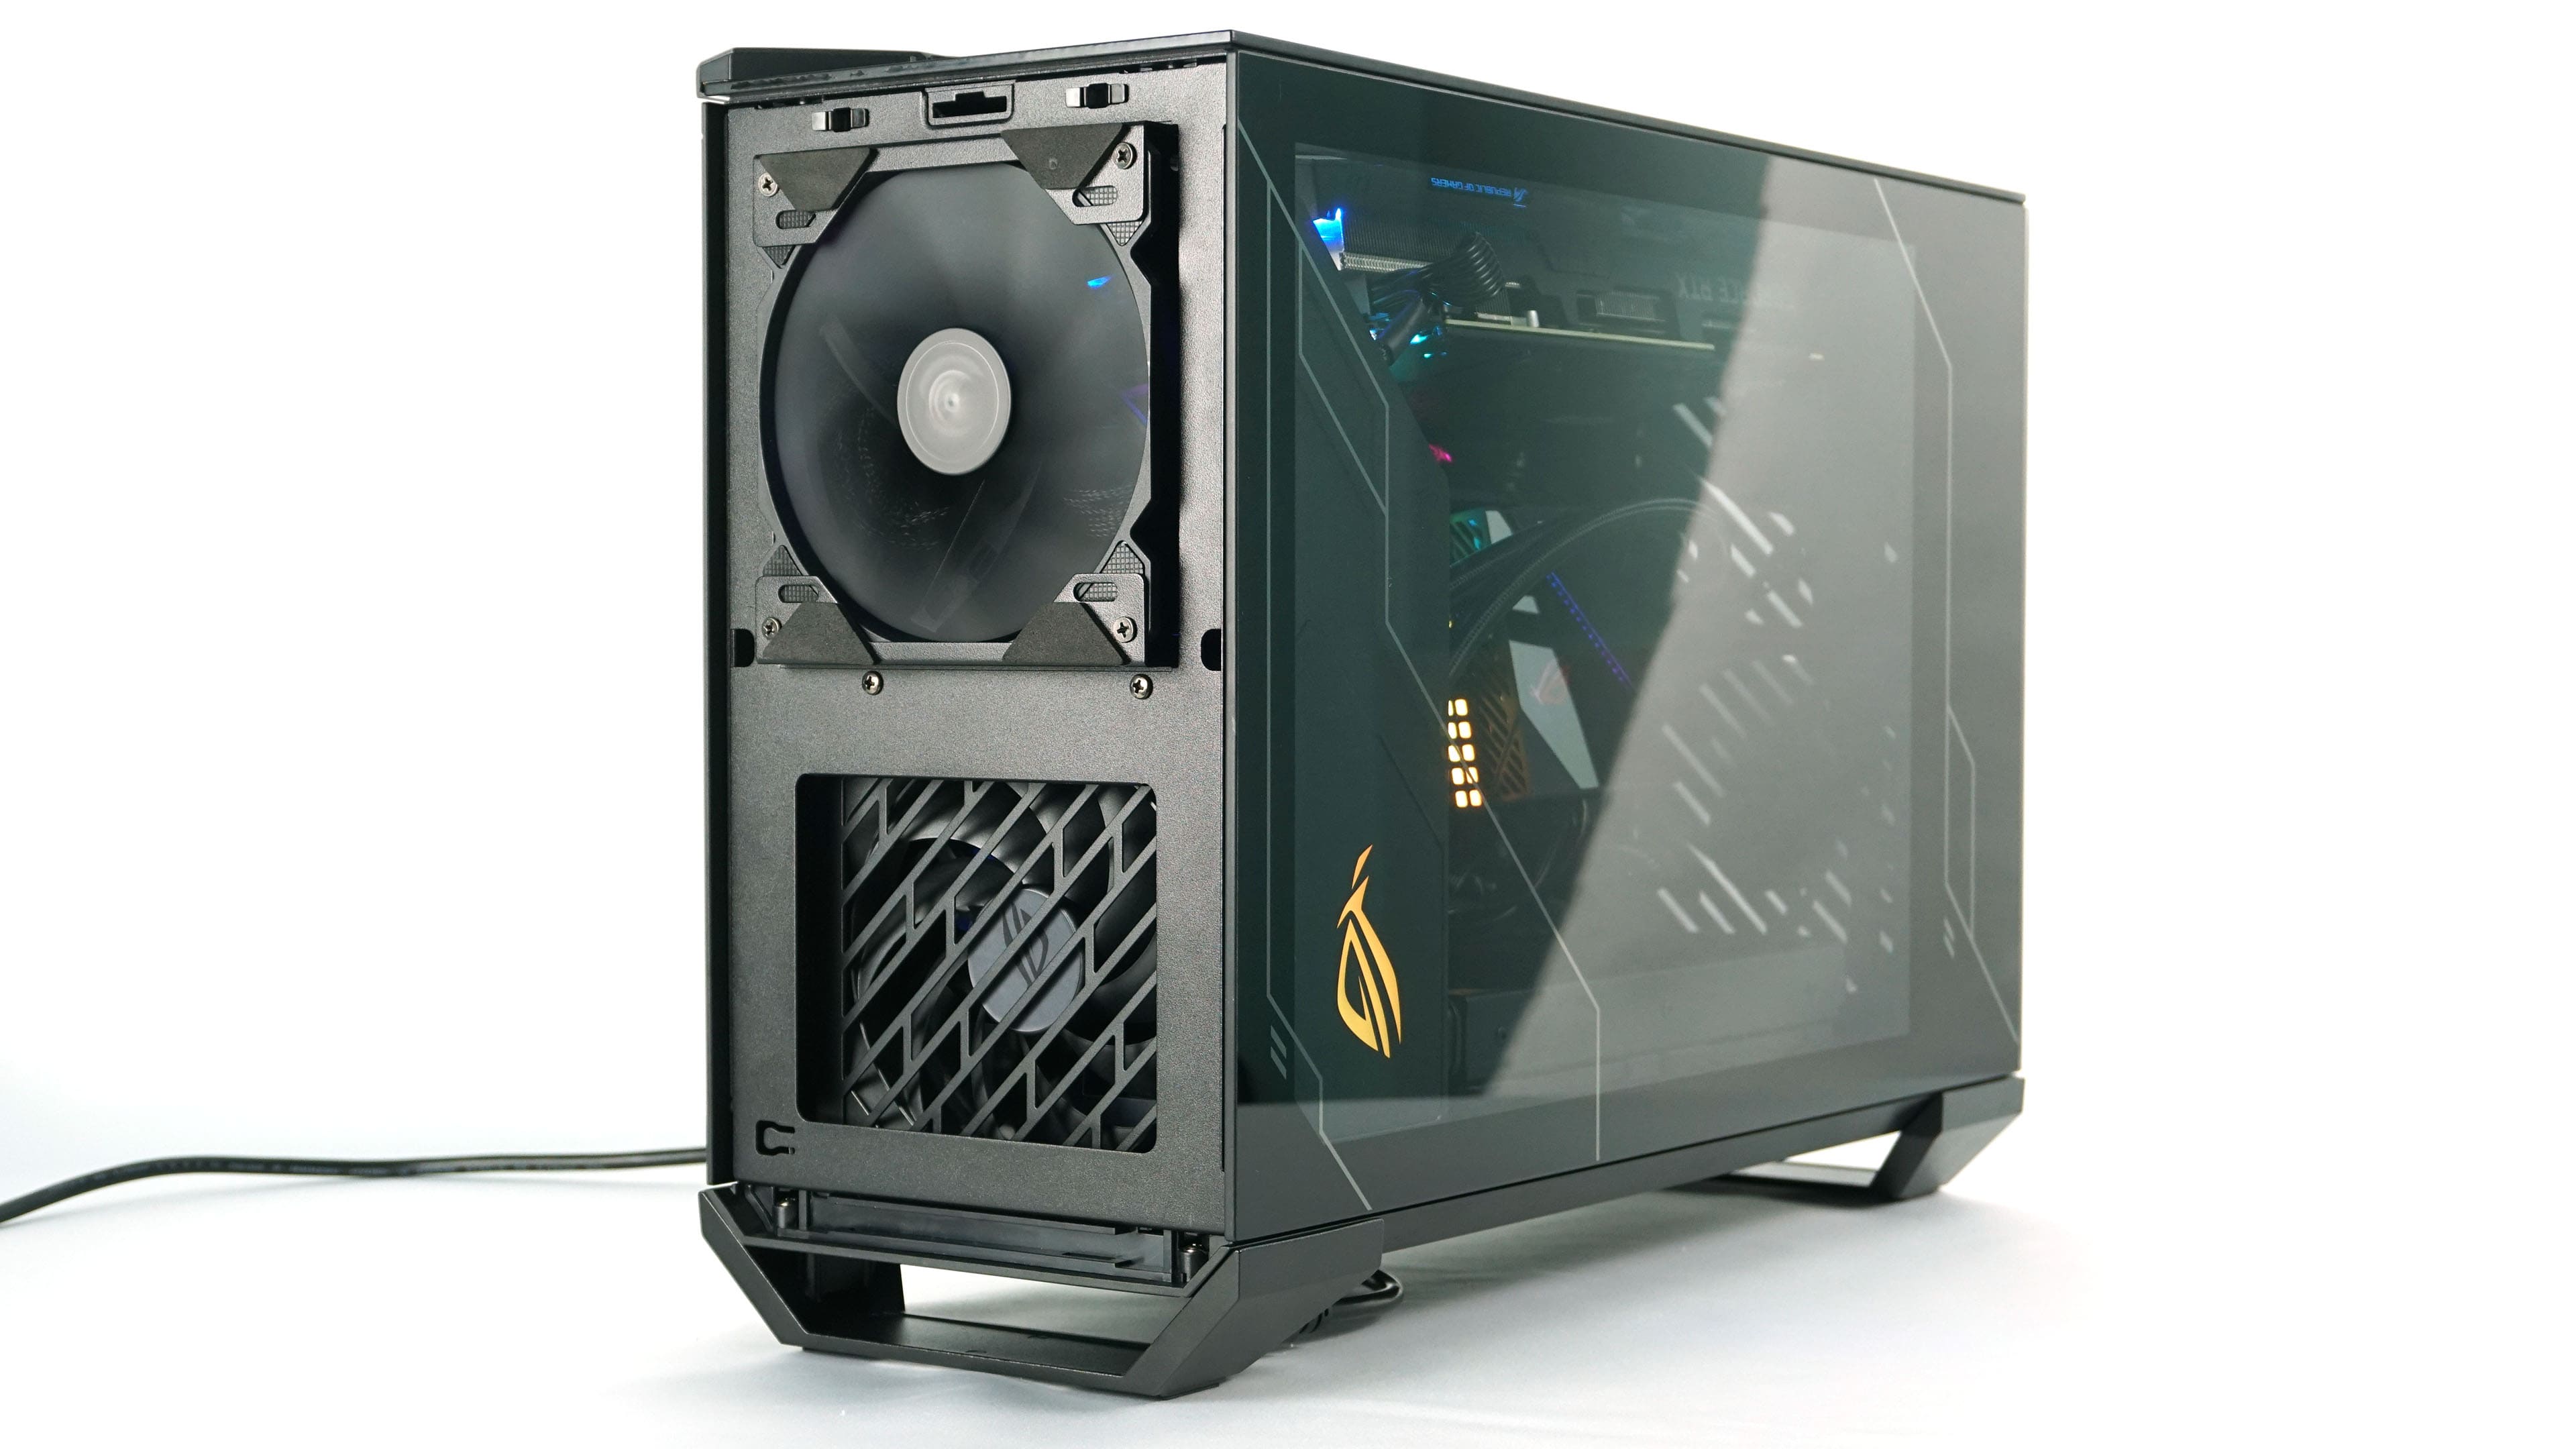
In the vertical position, there is a nice look at the graphics card, which occupies almost the entire front. The opening in the bottom panel for ventilation is also clearly visible.
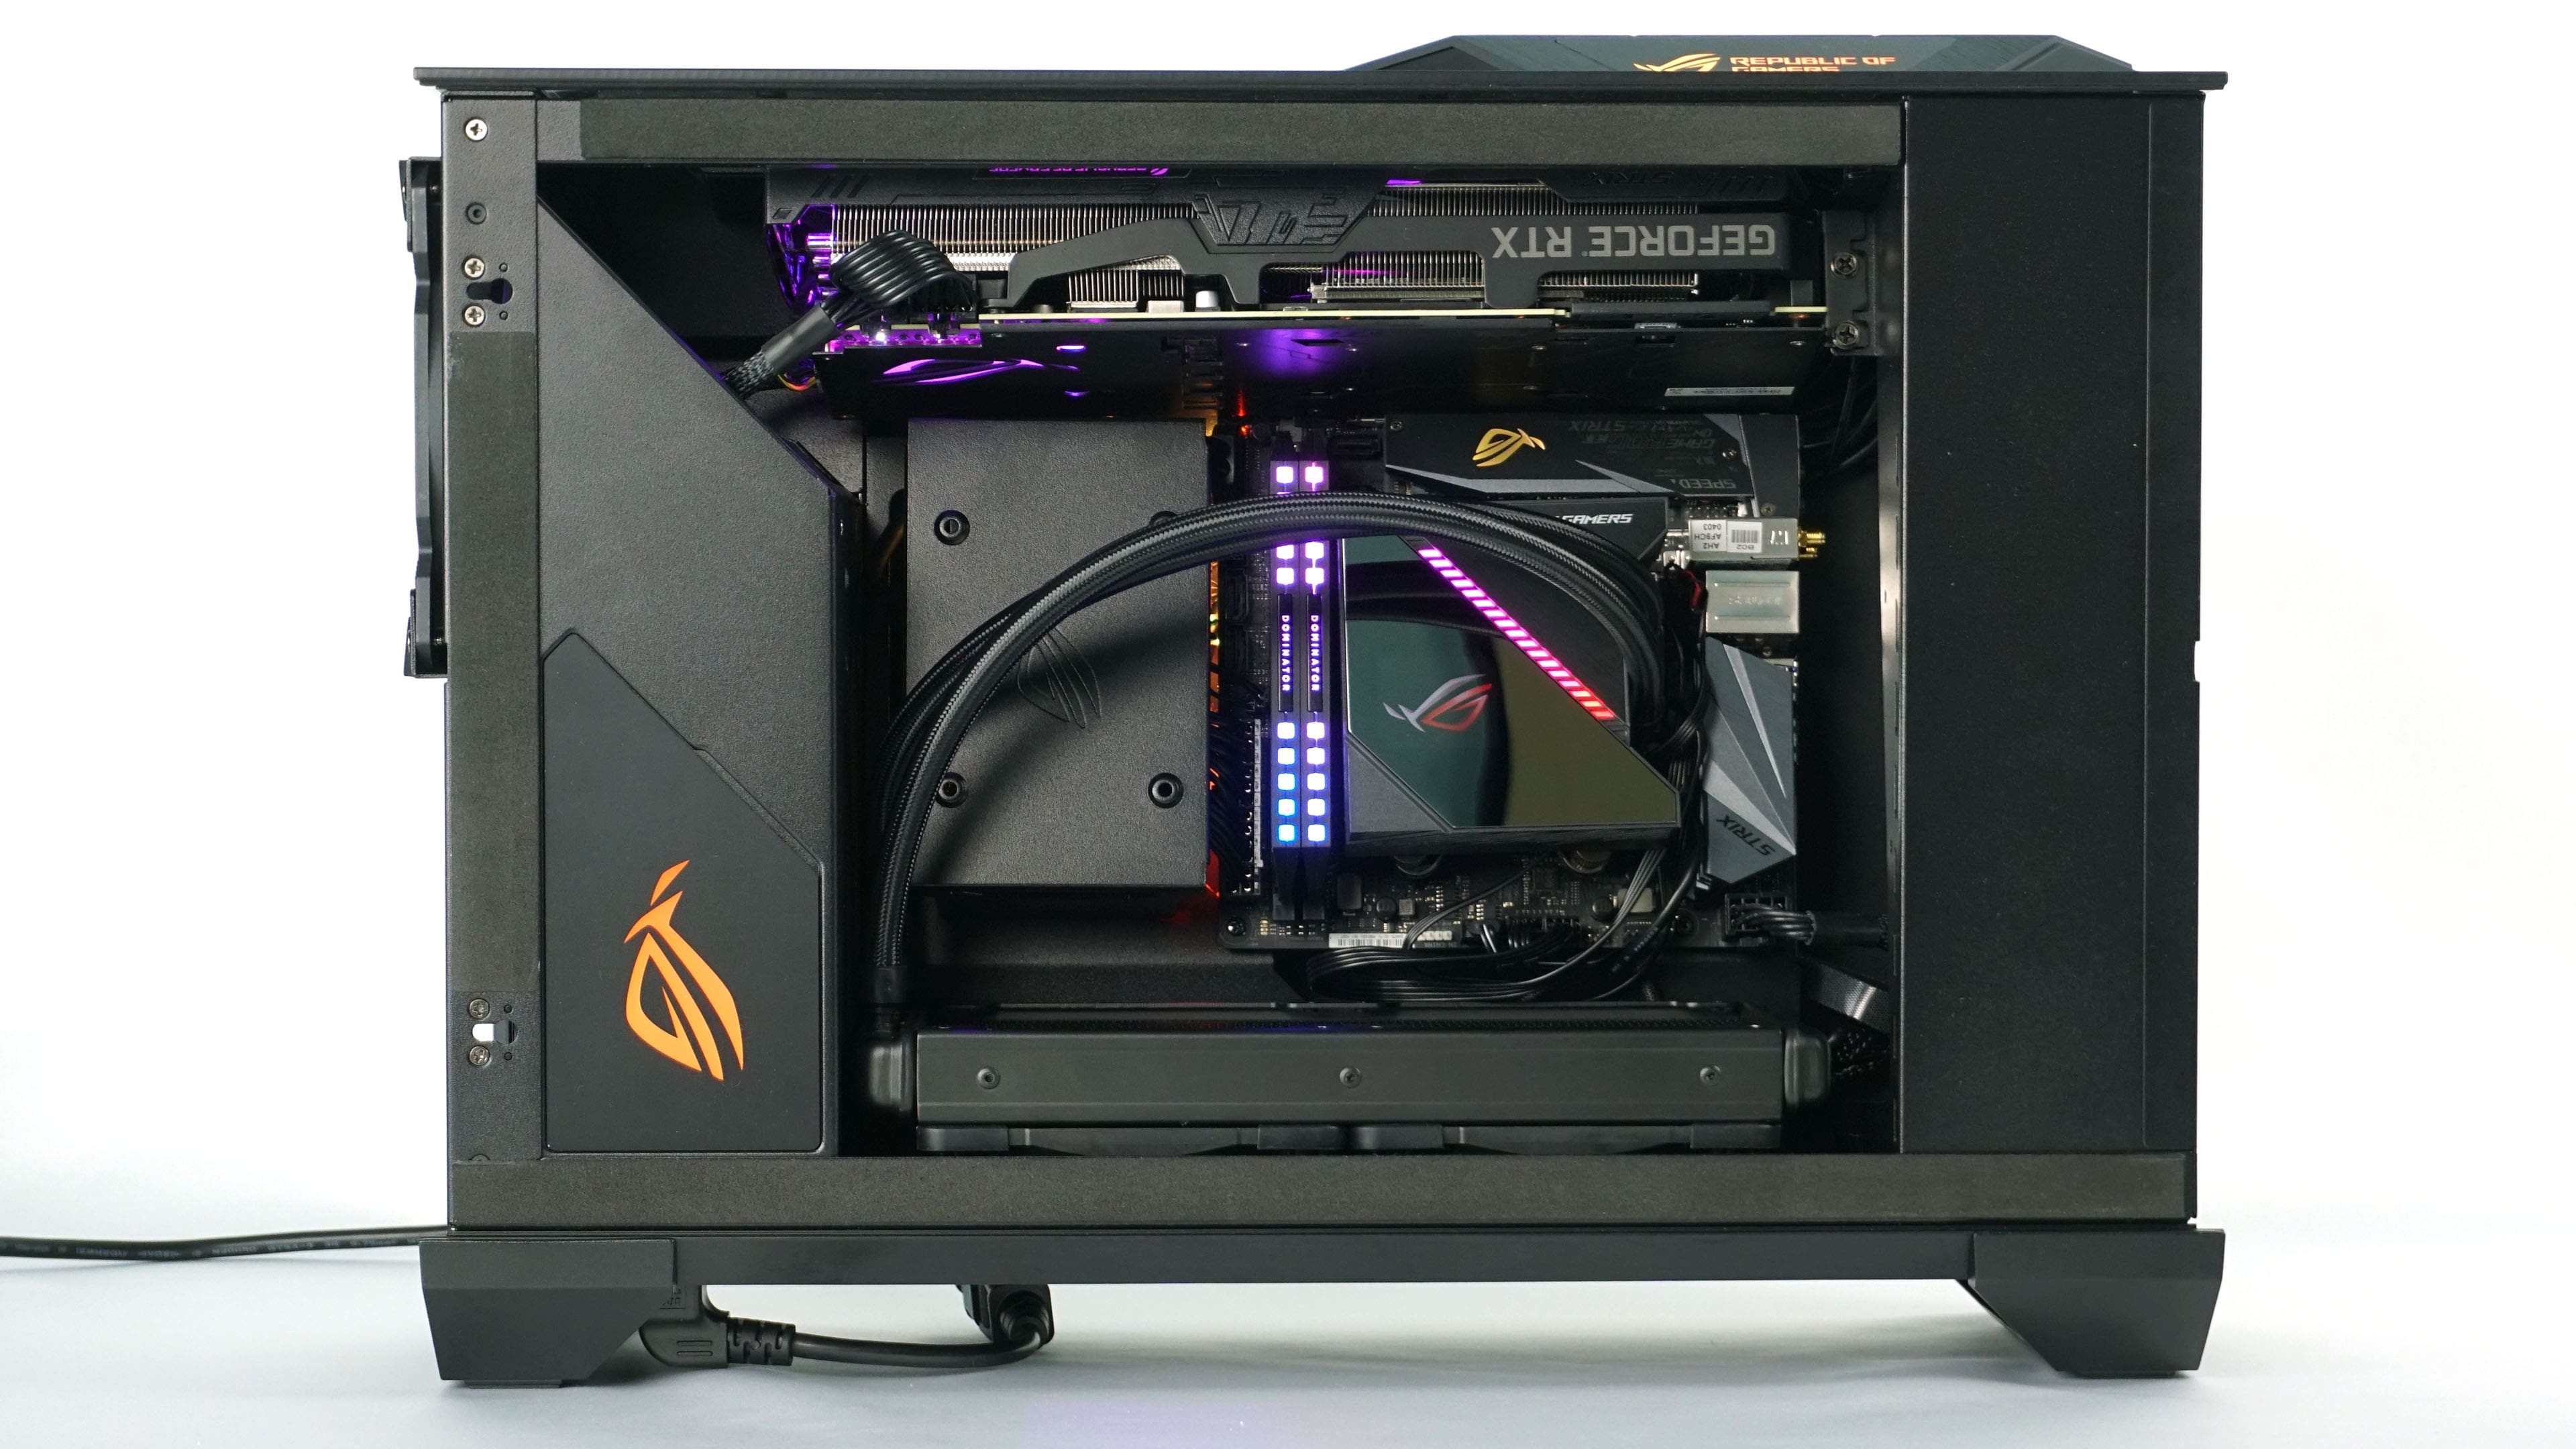
After being placed in the horizontal position, the build is dominated by the cooler and memory (RAM) sticks, the graphics card at the top is not very visible.
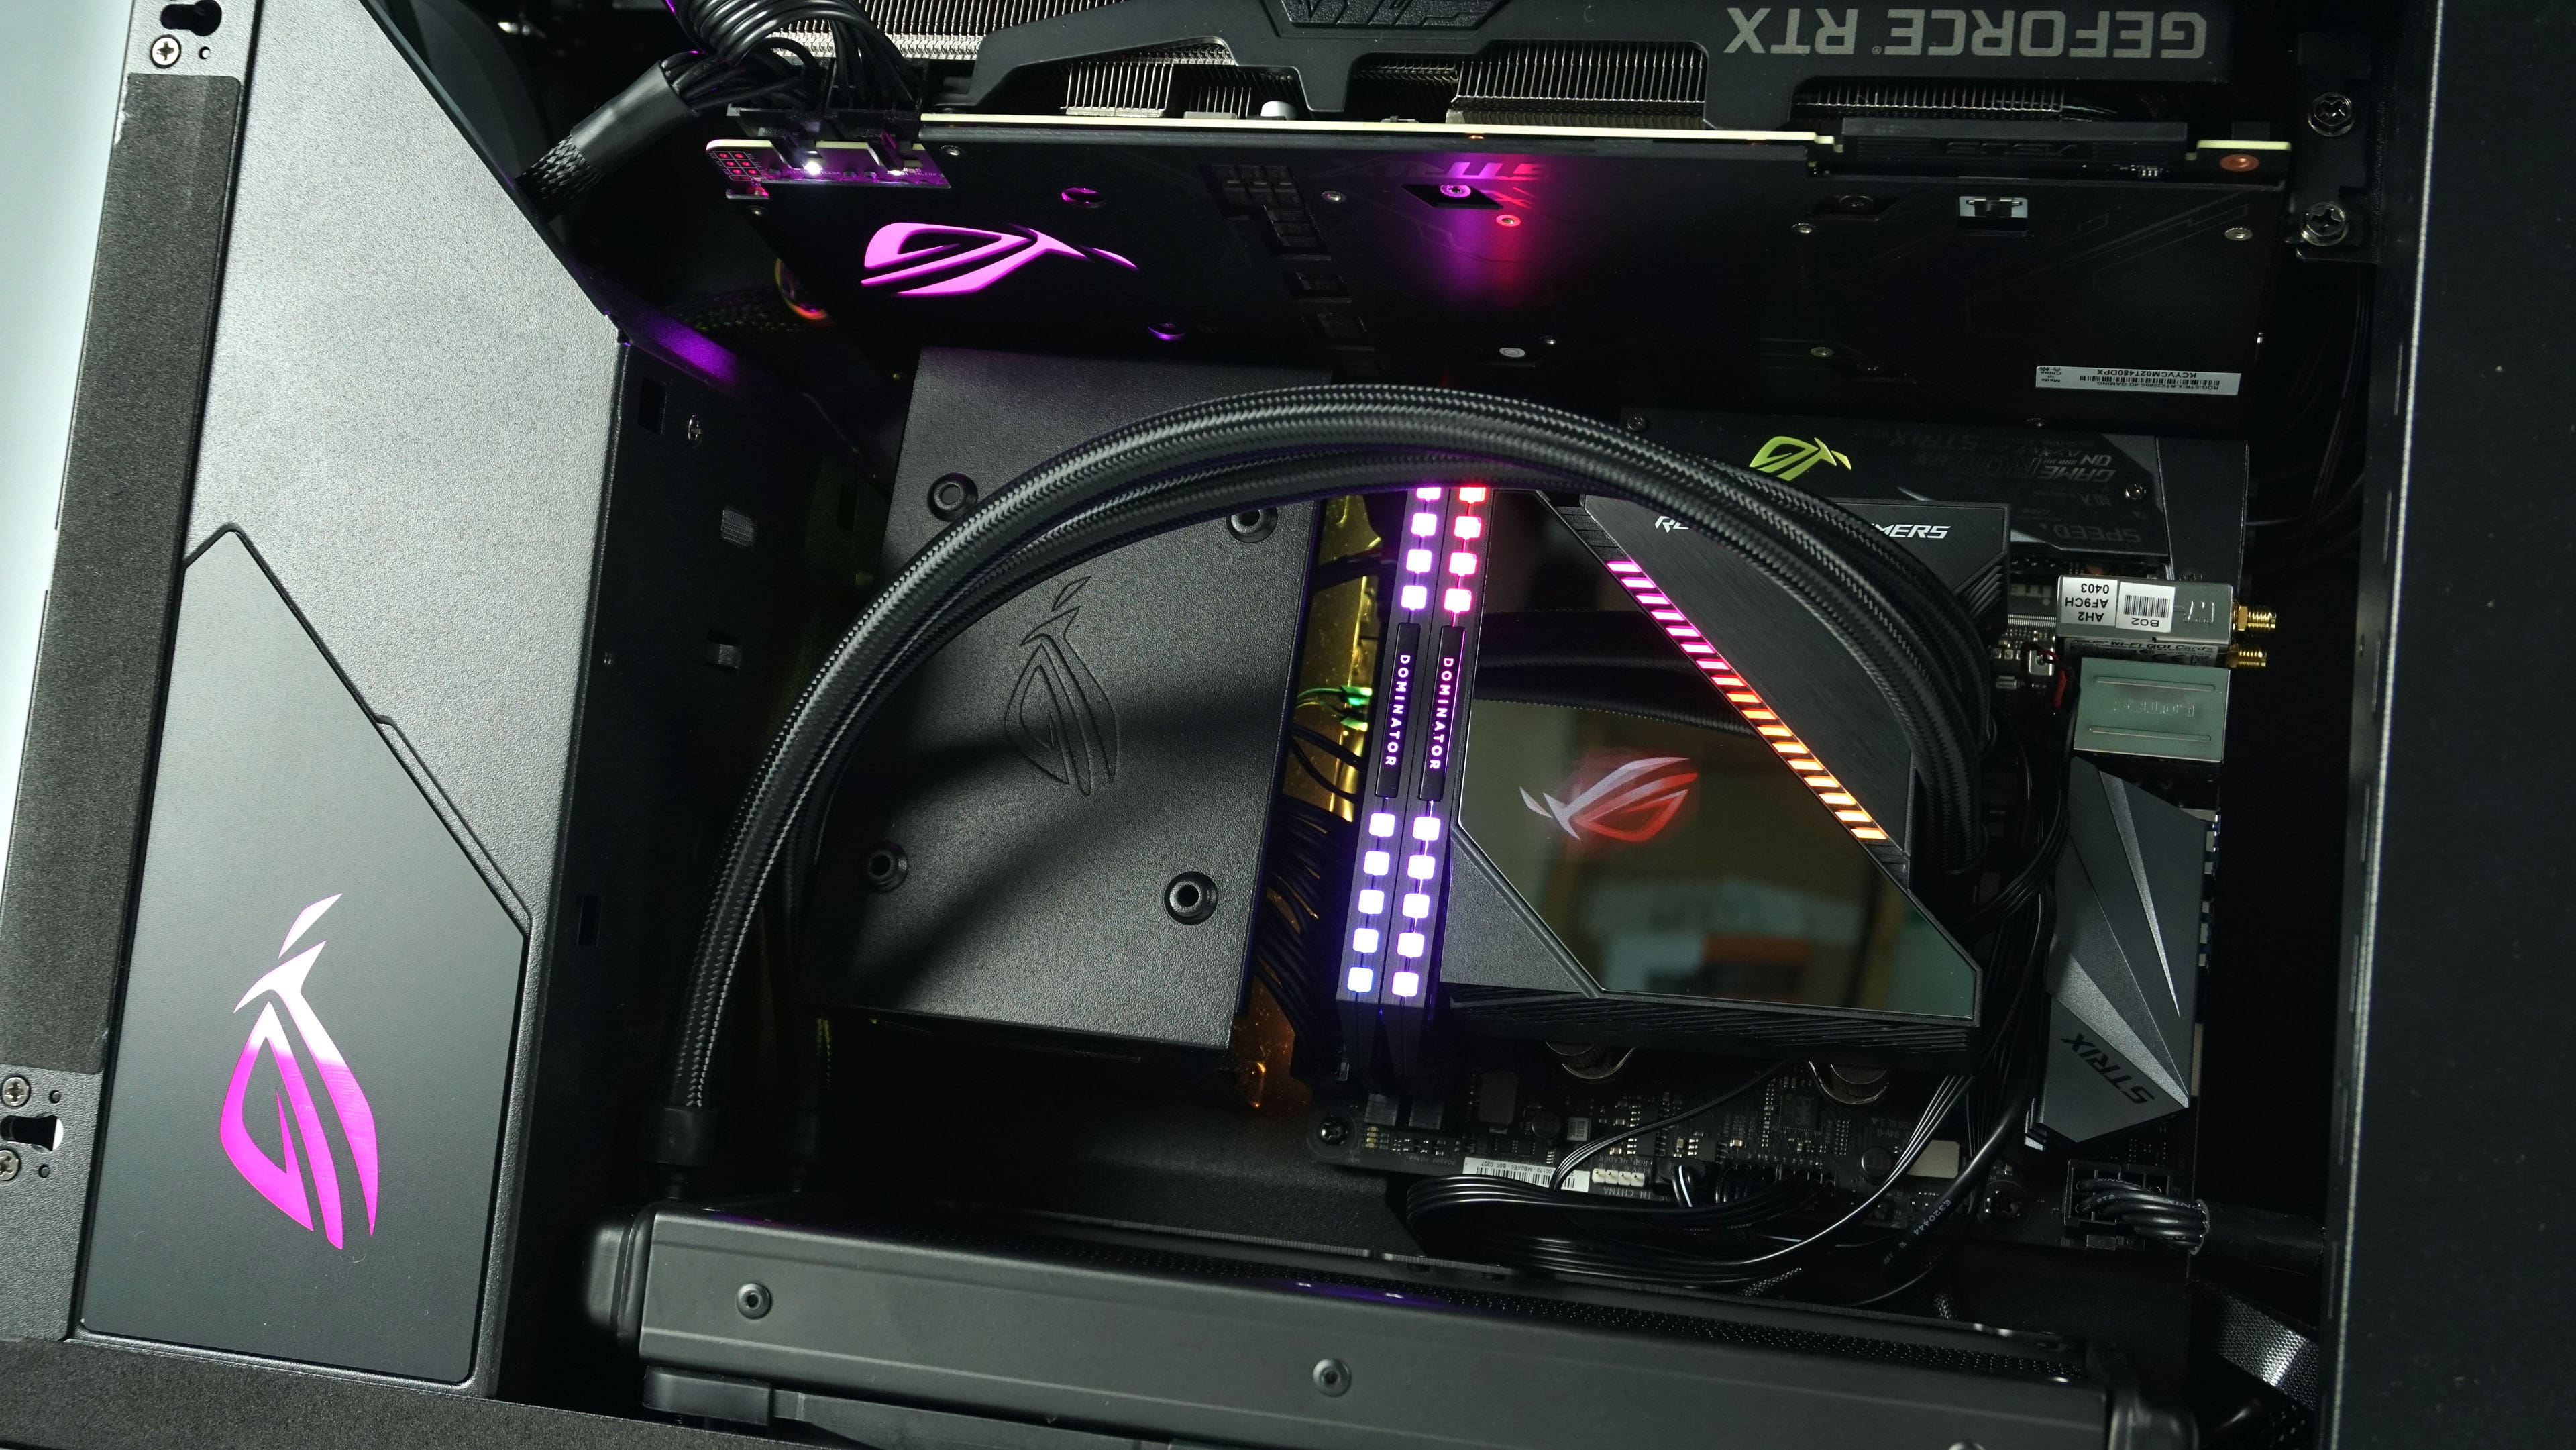
After air cooling, we also looked at the possibility of water cooling in the form of a liquid cooler AIO Ryujin 240, which is equipped with an interesting pump with RGB LED and OLED display.
The orientation of the pump and the display is a bit more complicated and in our case I chose to prioritize the horizontal position, where the display on the pump is visible well. The hoses could also be run to the other side, but there they can interfere with the cabling connected to the motherboard and also with the rotating fans.
For long-term use, think about how to position the pump and radiator so that no air accumulates in the pump and the liquid circulates as expected. In our short-term test, however, I focused more on aesthetics and the installation is rather illustrative.
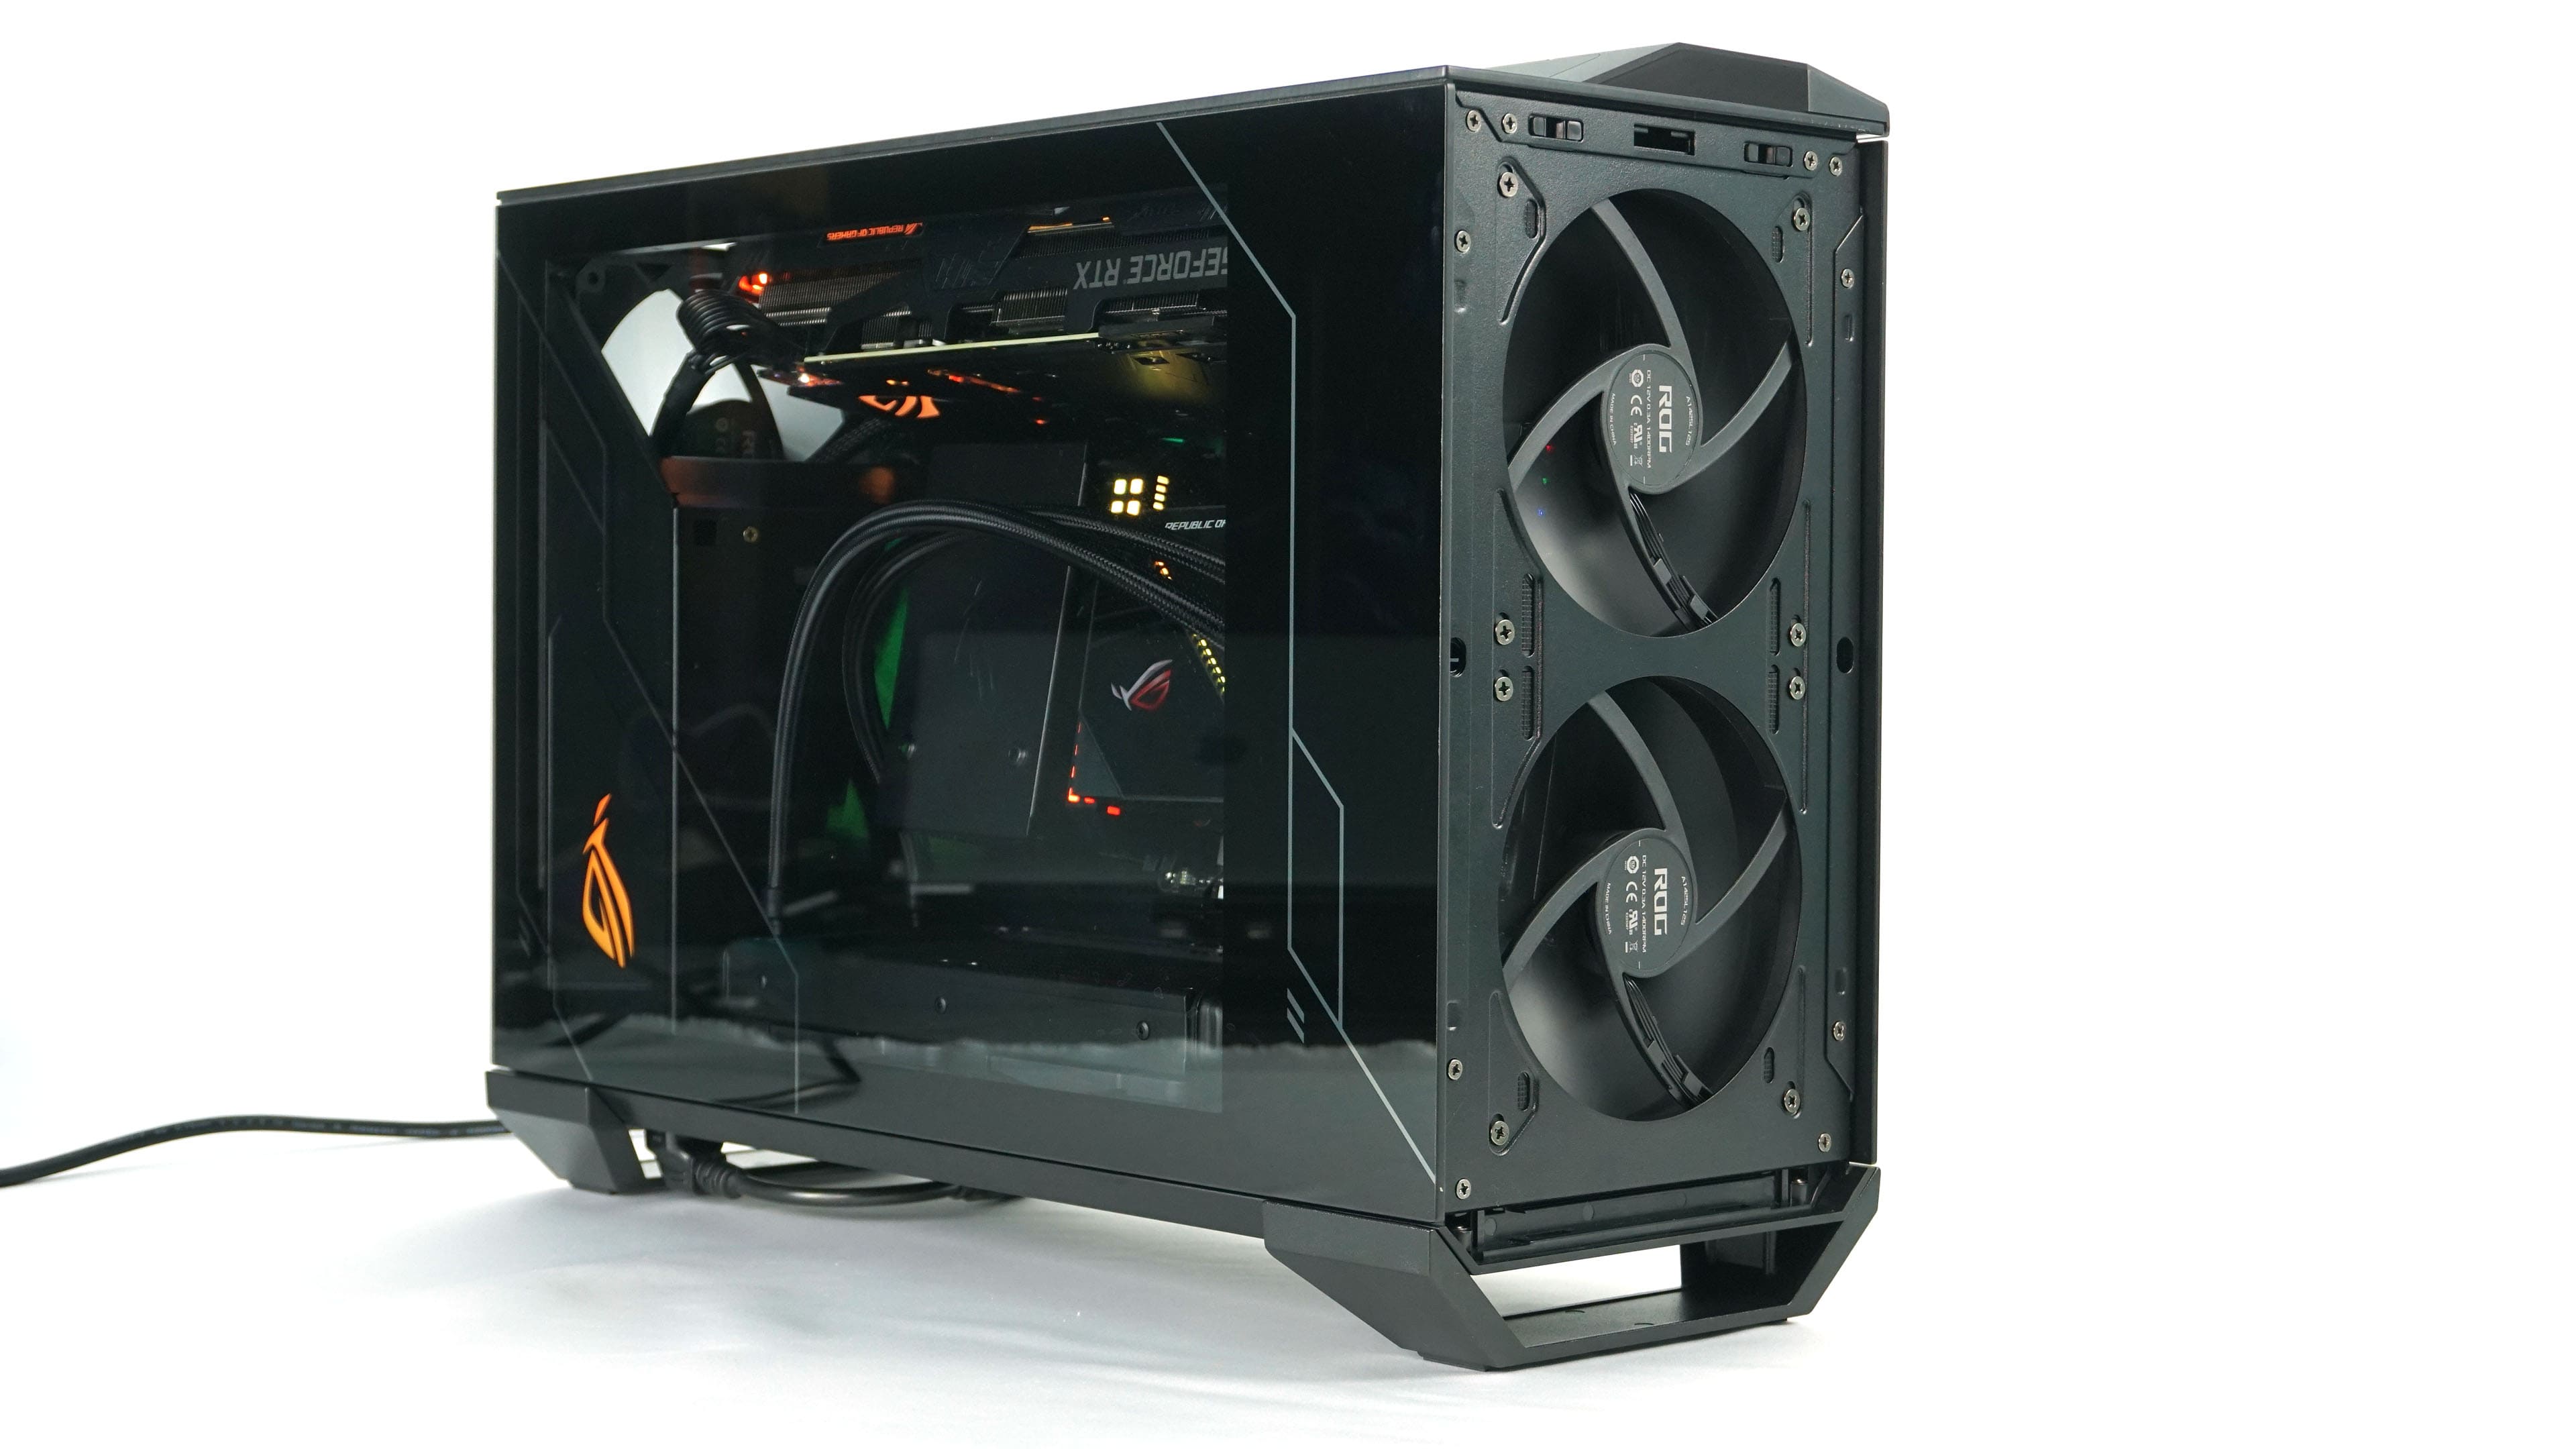
You can look inside the rig again after removing the pair of side panels. This will also reveal three fans in action together with the power supply.
After removing the glass and metal side panels, you can take a closer look at space optimization and cabling options.
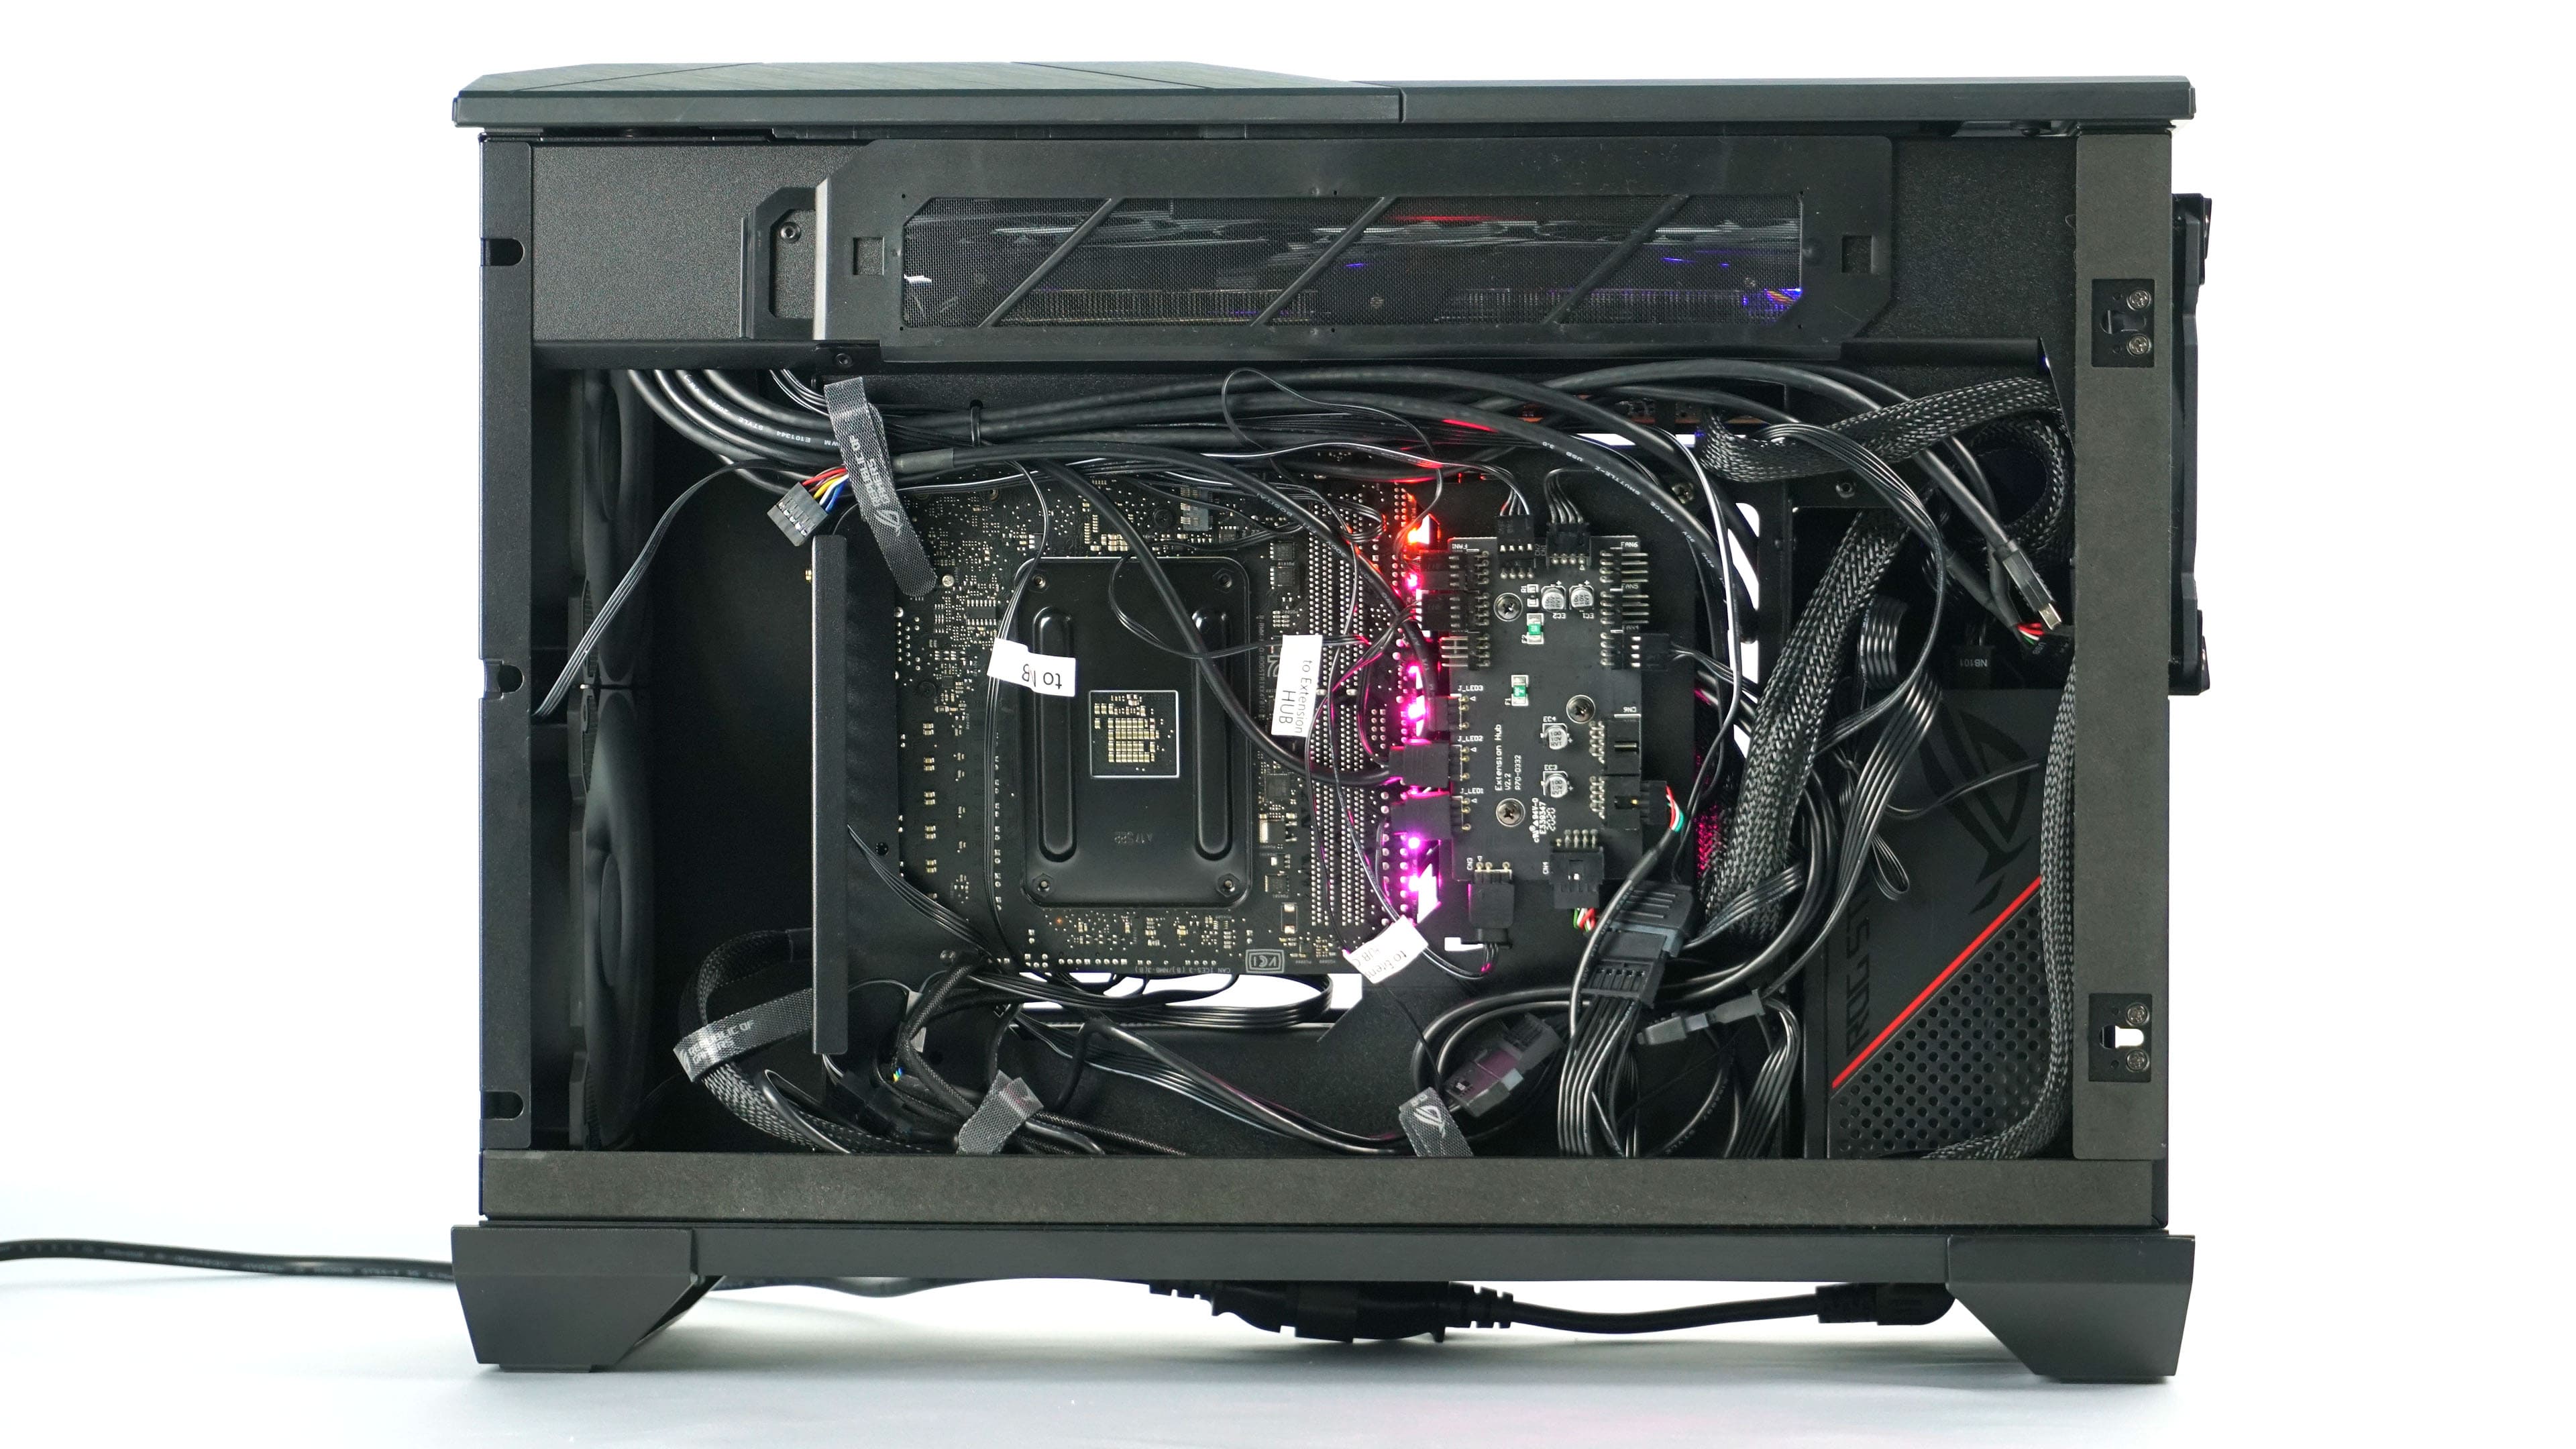
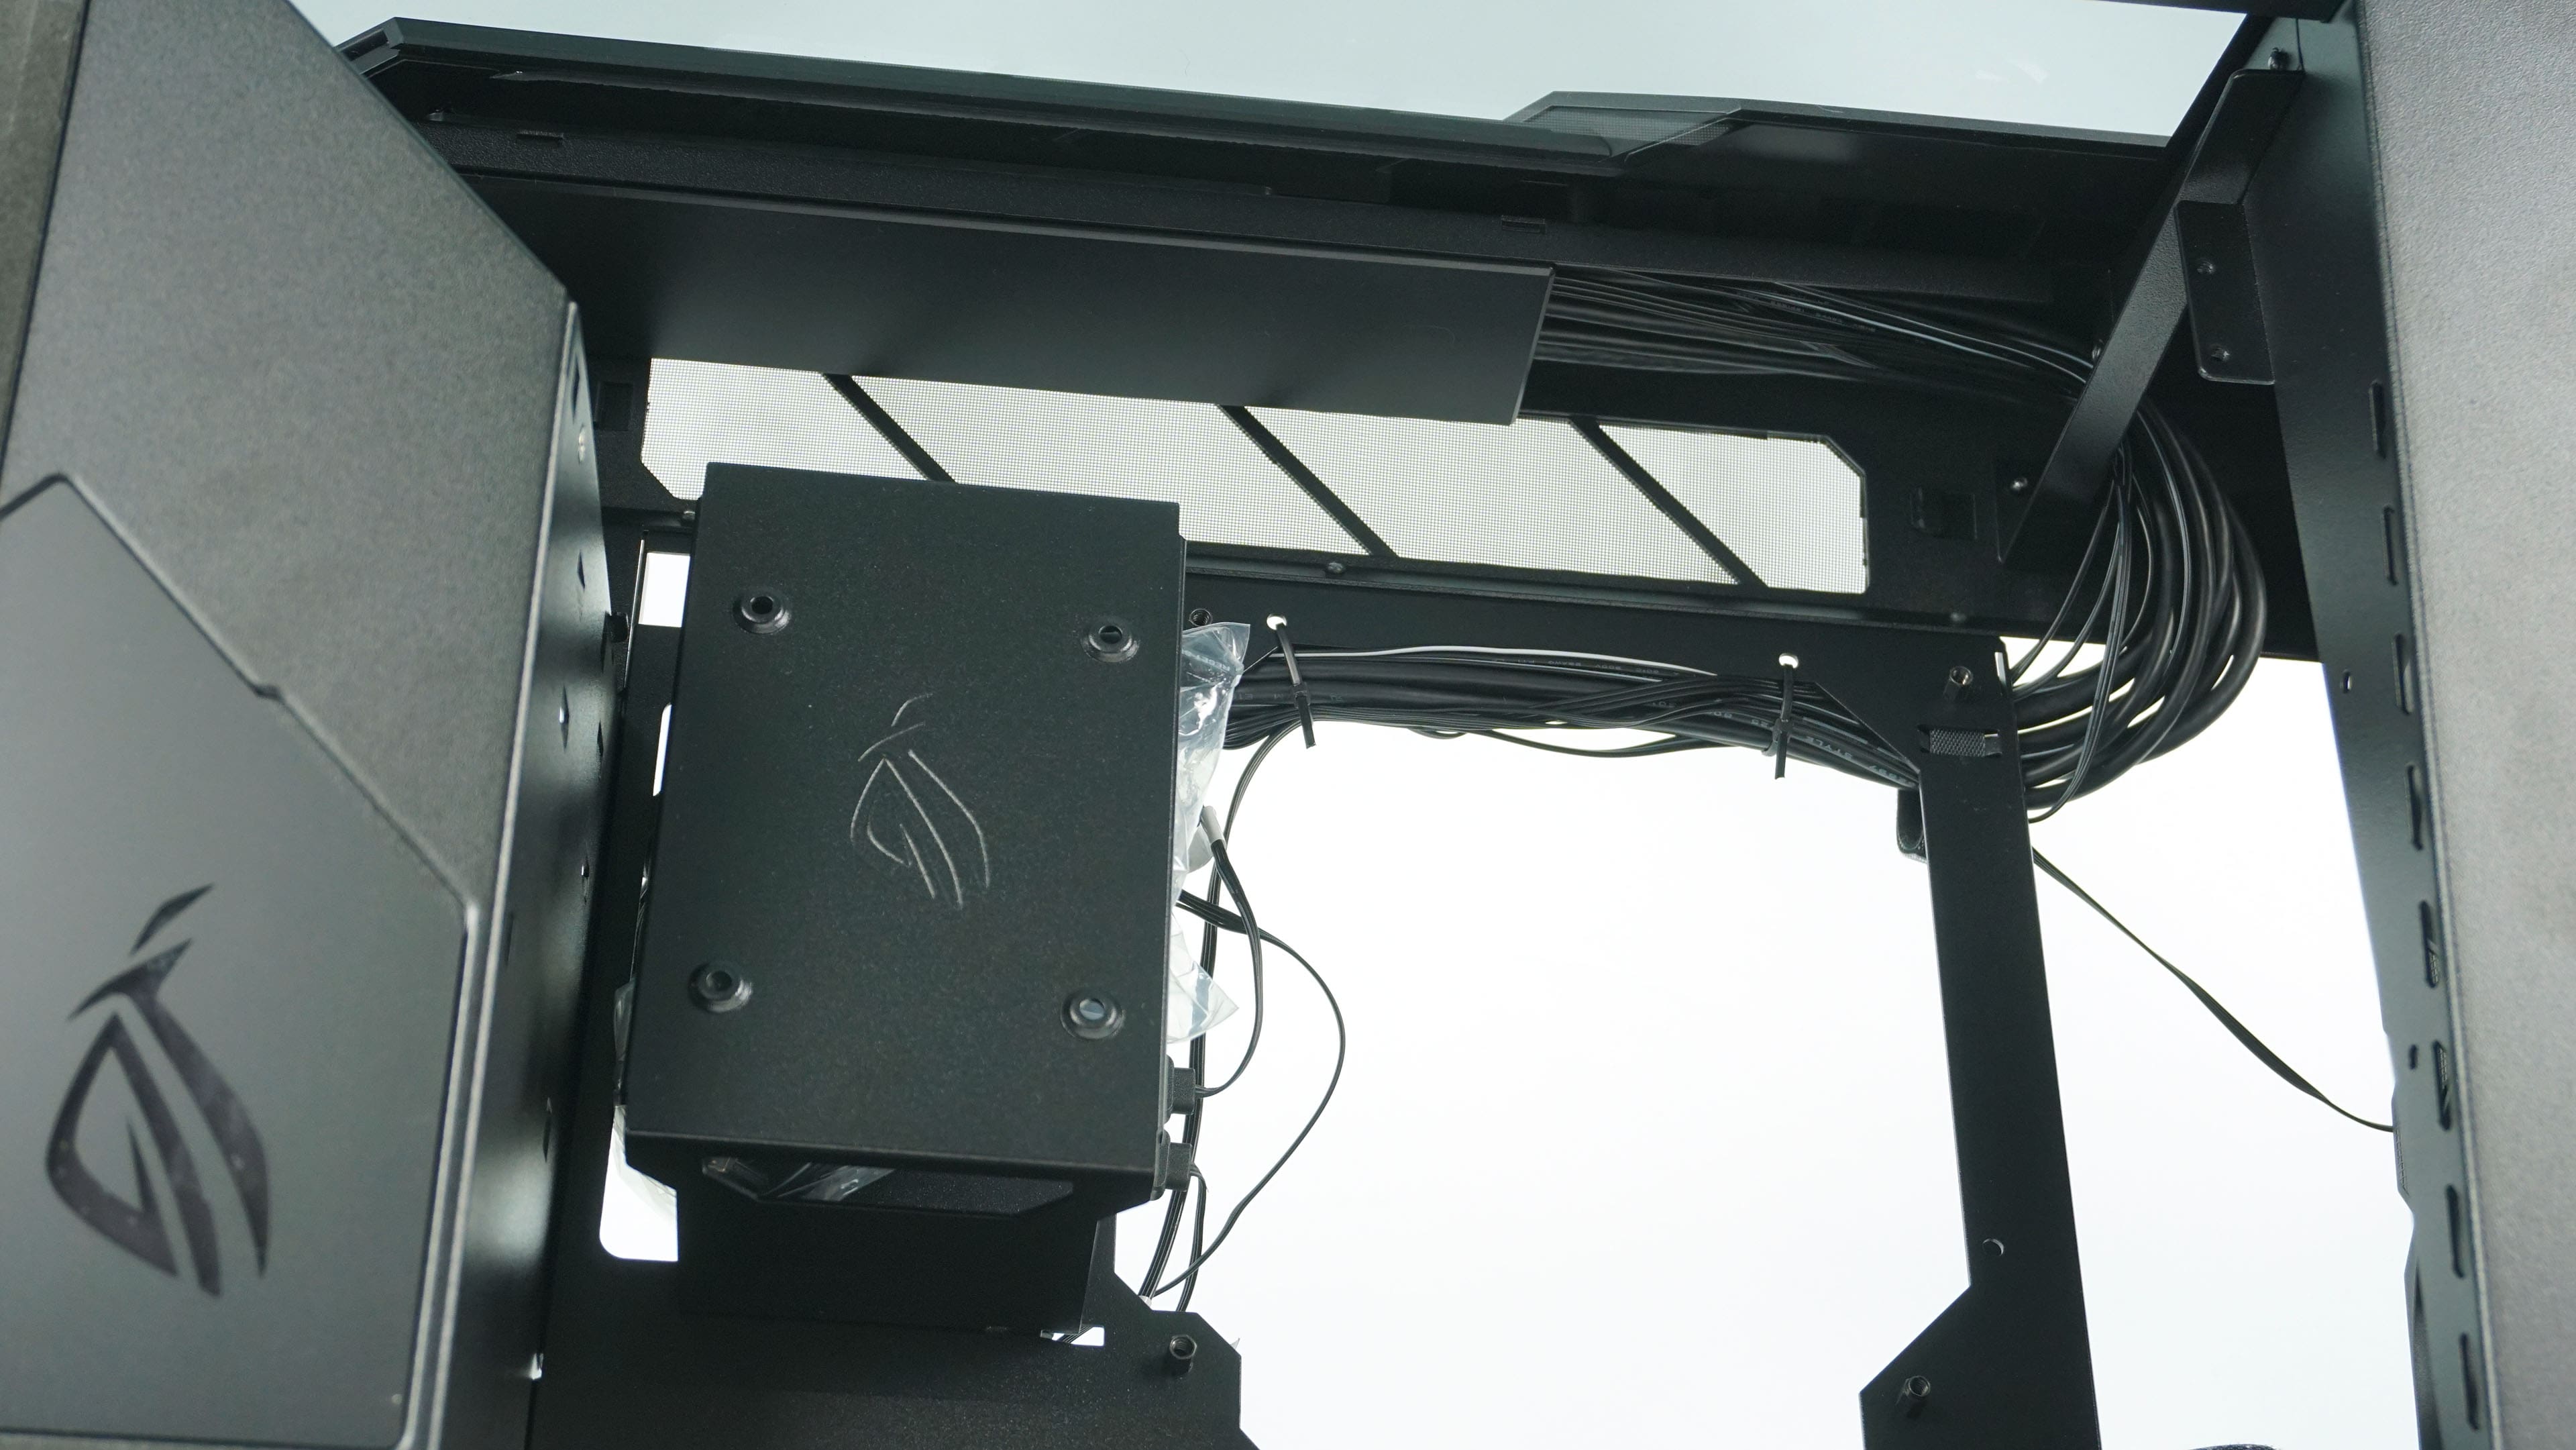
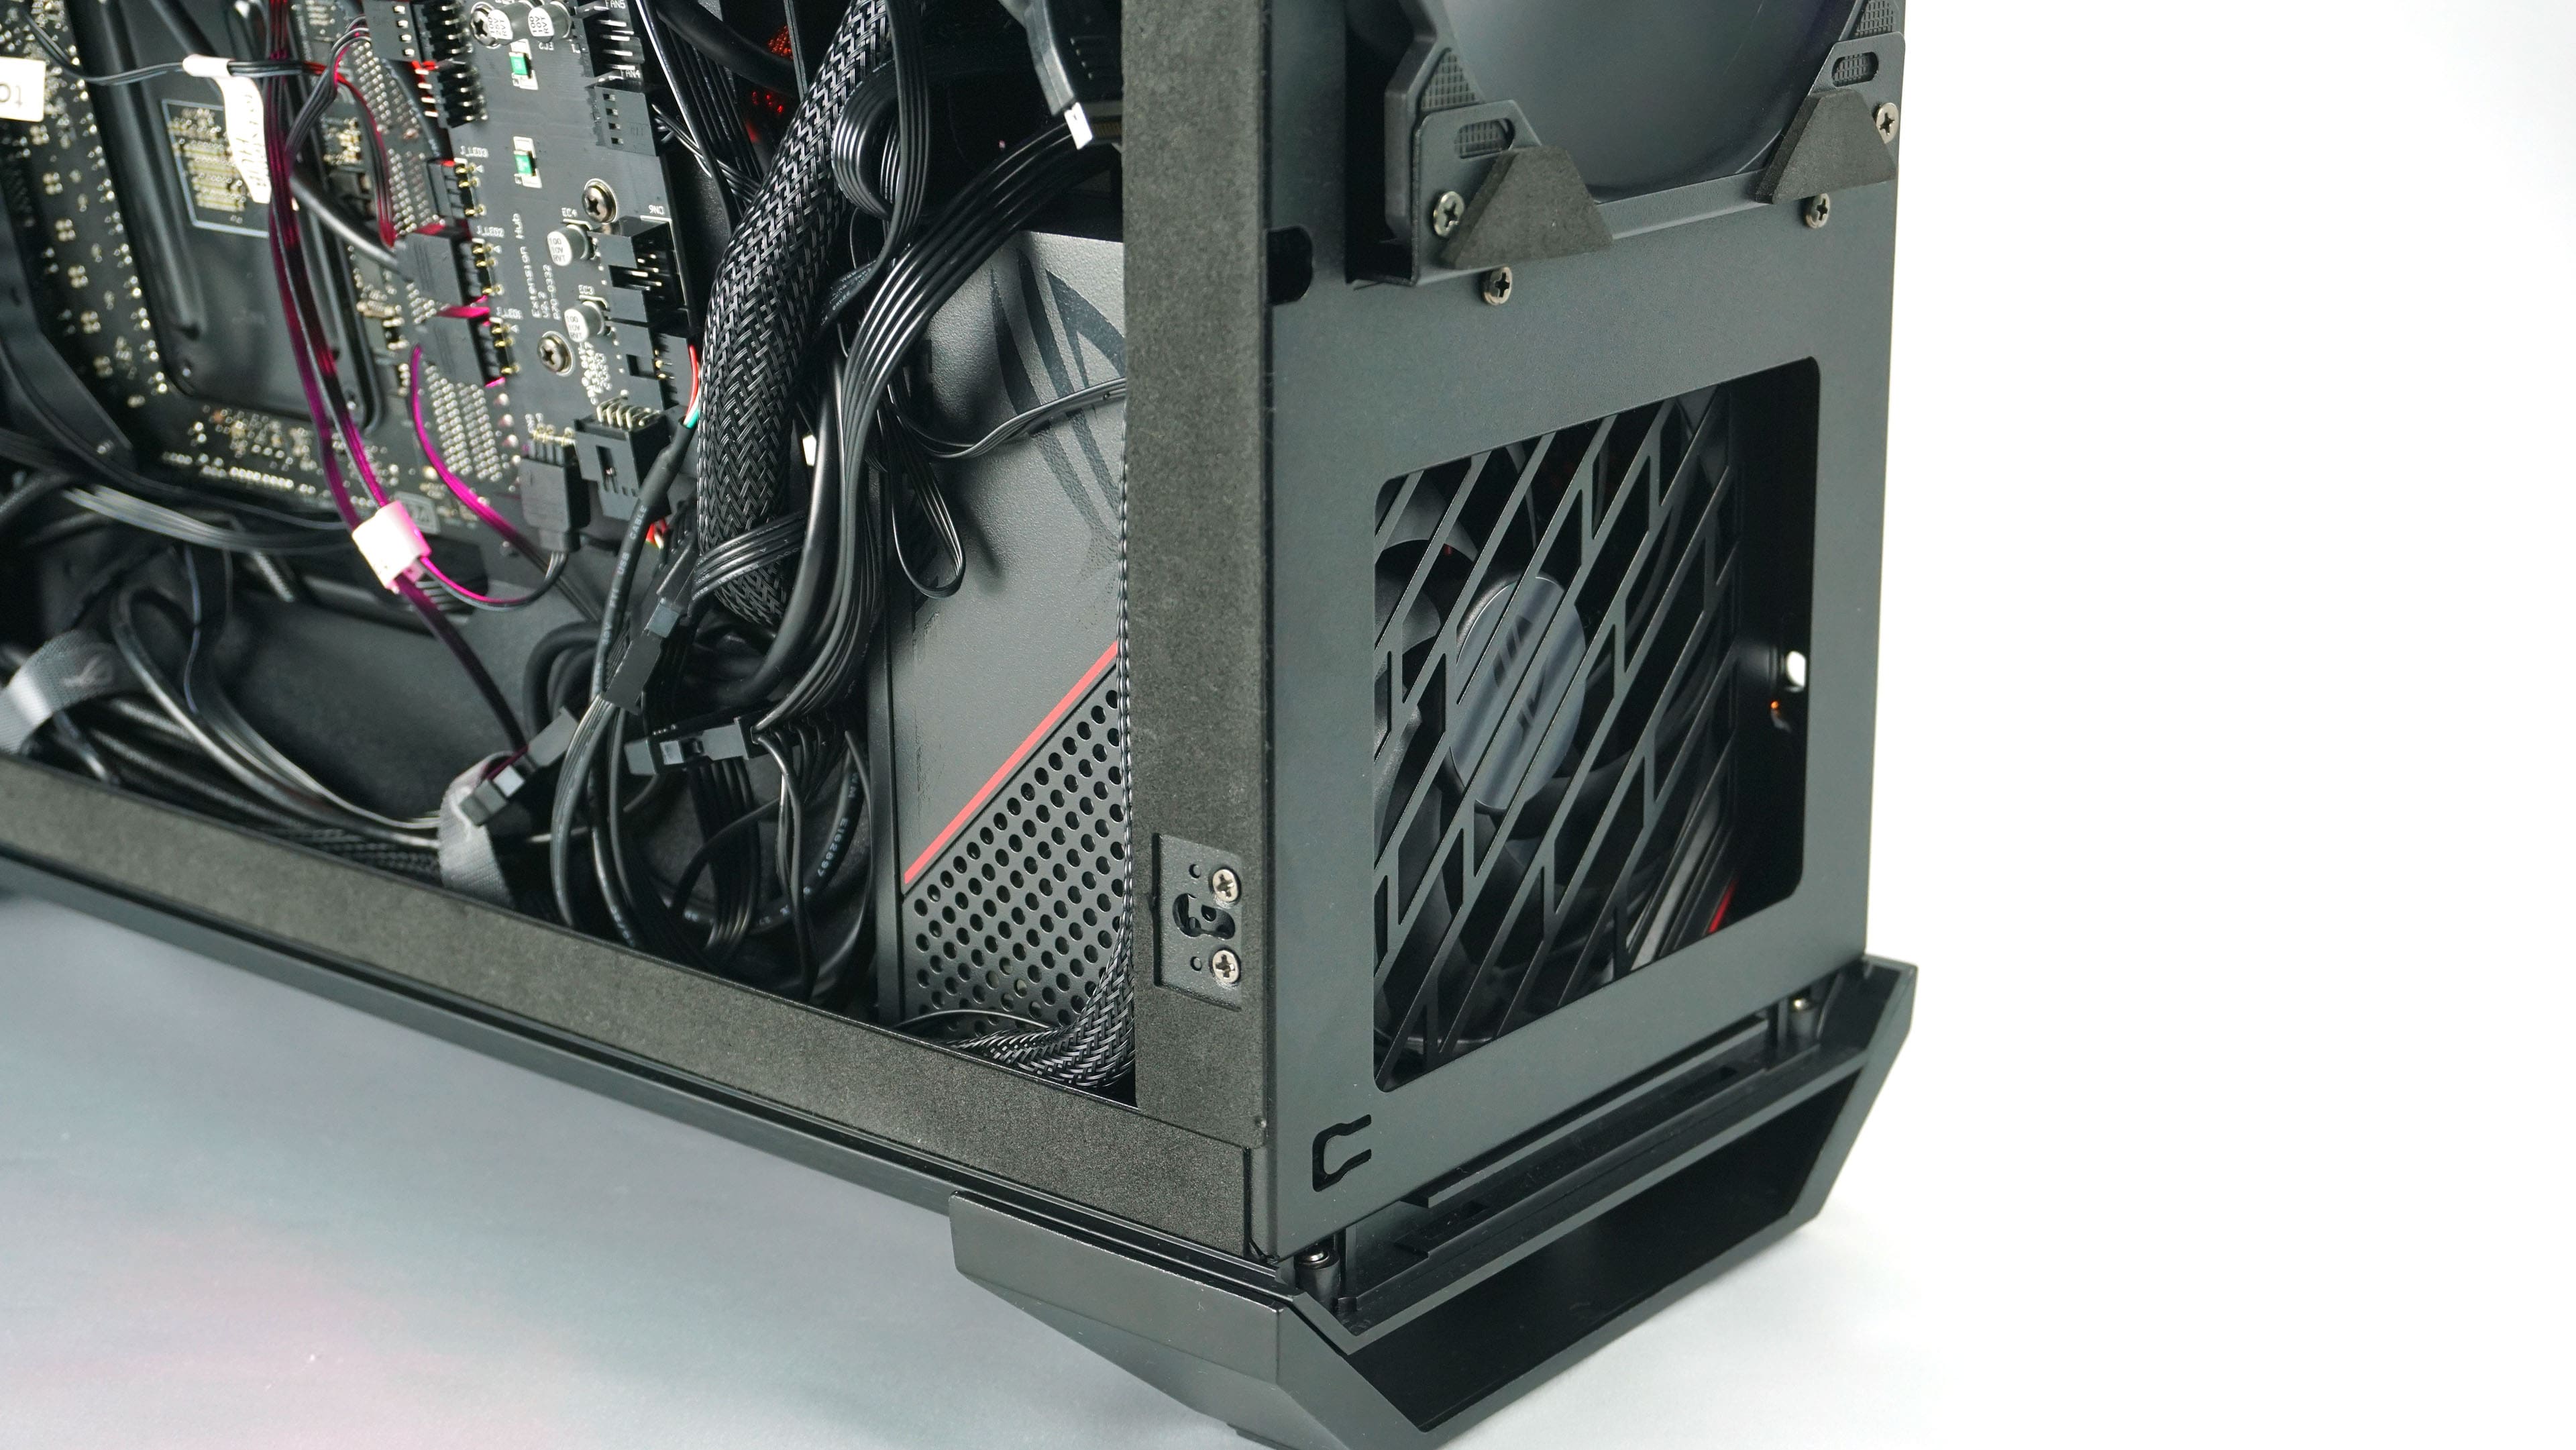
The cabling in the back is simply a mess. The case itself has too many cables, whether to control RGB LEDs, fans or connect USB ports. When you add a power supply with thick cables that have no clear channels except the bottom one, a relatively large tangle of cables is created, which has nowhere to hide and grows in thickness, which makes it more difficult to close the metal side.
The front side, on the other hand, looks very clean and neat, which is also the goal of the glass side especially in such a representative case.
The plug-in power supply is well designed, but somehow there was no thinking about where to run the cables out of it. The cable to the graphics card goes directly through the covers with the logo, but there is little space for other cables and there is nowhere to hide them.
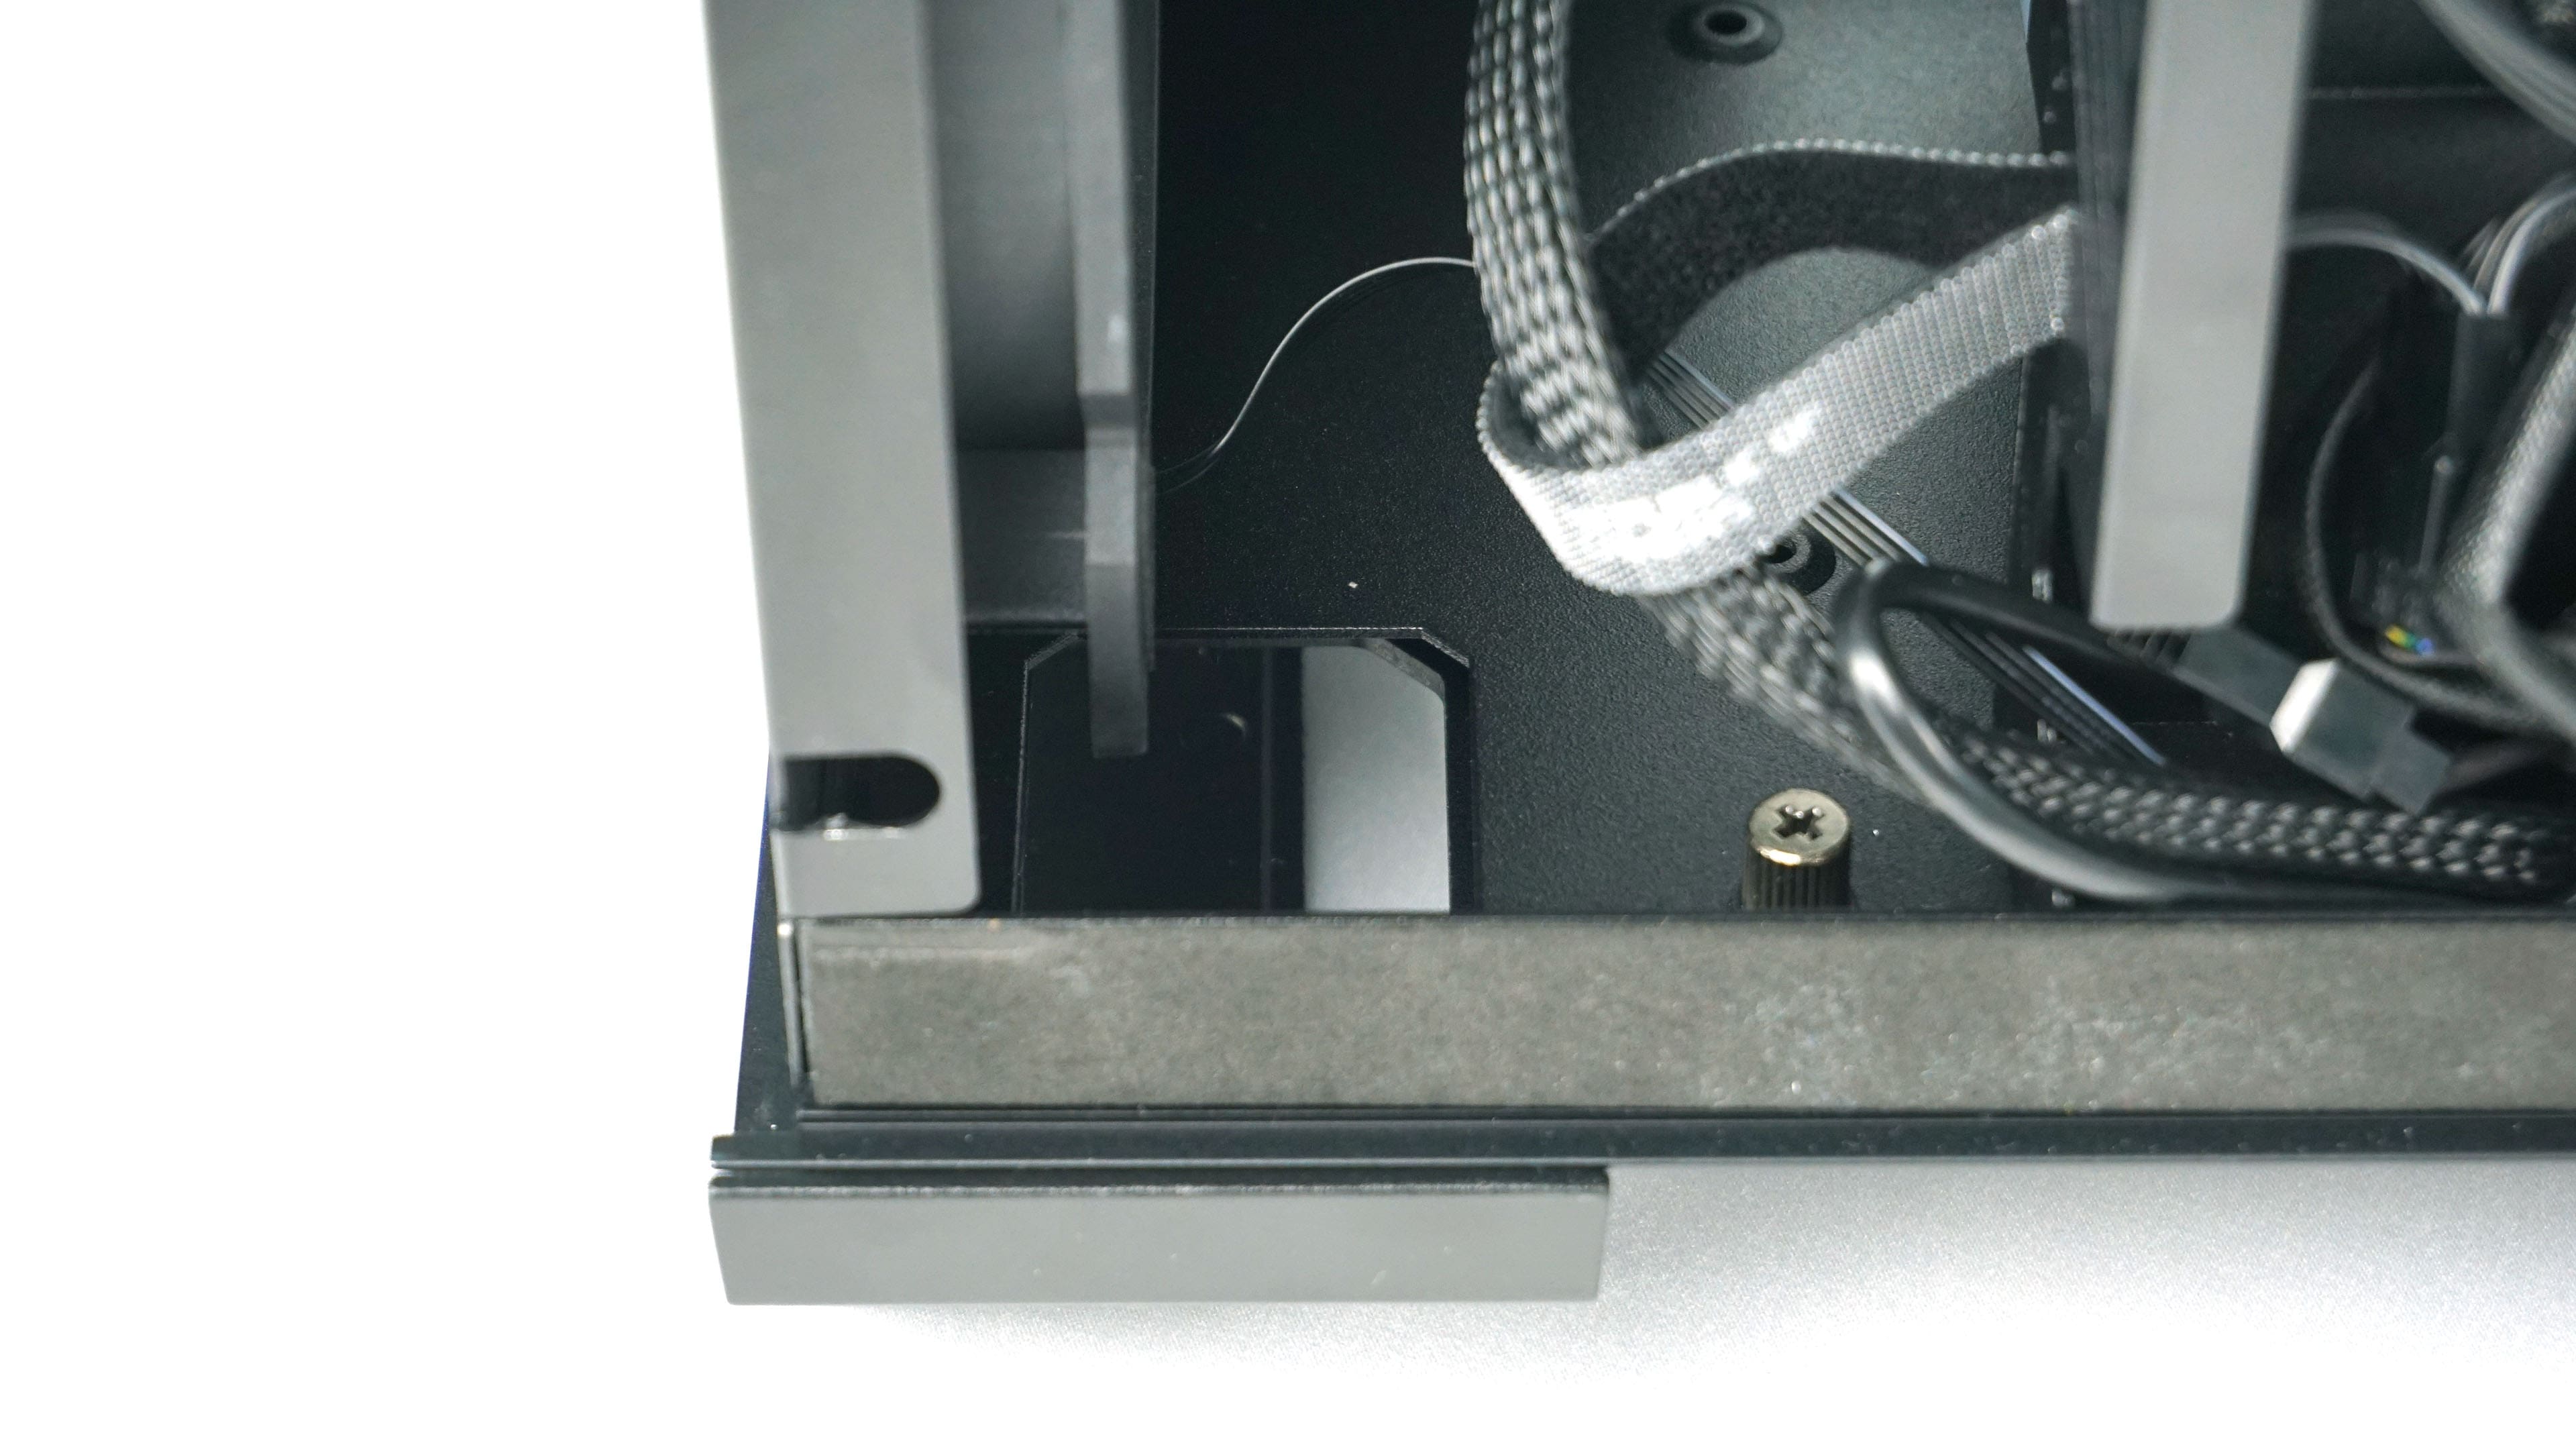
The access to the motherboard I/O and graphics card is performed poorly. At least a LAN cable and some USB cable you might want to plug in, although the case offers five USB ports on the front panel. The problem is, however, that at least on the tested motherboard there are not enough connectors for the whole front I/O of the case.

In practice, you will definitely run at least two or three cables from the motherboard and, of course, the graphics card. Only a small hole in the picture below is used to run them out of the case, and any manipulation and connecting is very complicated.
So that we don’t just look at the case outside, you are definitely interested in how it behaves under load and especially if water or air cooling is better and in what position.
A very untraditional and relatively unique case has come to our editorial office. It is the ROG Z11, which the manufacturer introduced at the beginning of the year at CES 2020. The case hides several specialties, such as the possibility of vertical and horizontal positioning or a slightly curved motherboard tray. To make matters better, we fitted the case more or less exclusively with ROG components, thus creating a kind of full-on Asus build.
Blender –a look at the CPU
First glance at the course of performance, we use our traditional BMW Blender (v2.9) test. We monitor the clock speed, power draw and temperature of the processor when using air and water cooling in both vertical and horizontal positions of the case.

In the first graph, you’re looking at the progress of processor clock speed during the render. Air cooling has lower clock than water cooling. Although the results are tight, it looks like the lowest clock speed is with air in horizontal position and the best with water vertically.
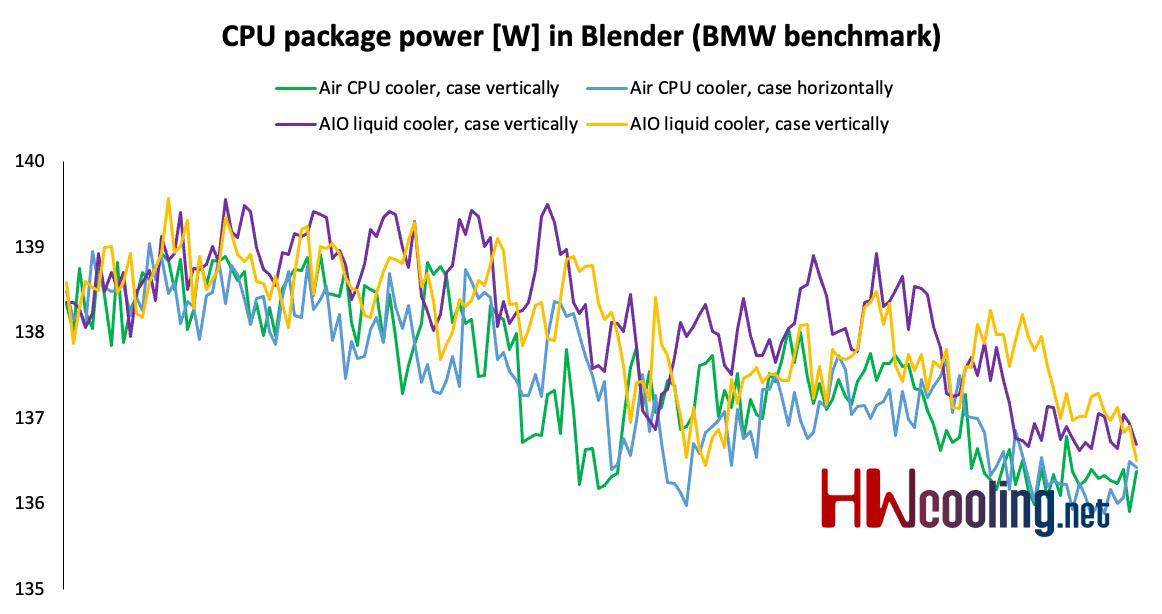
The situation is similar with power consumption, where again the air shows the lowest value, which is caused by lower clock. On the contrary, water vertically has the highest consumption, thanks to the highest clock.
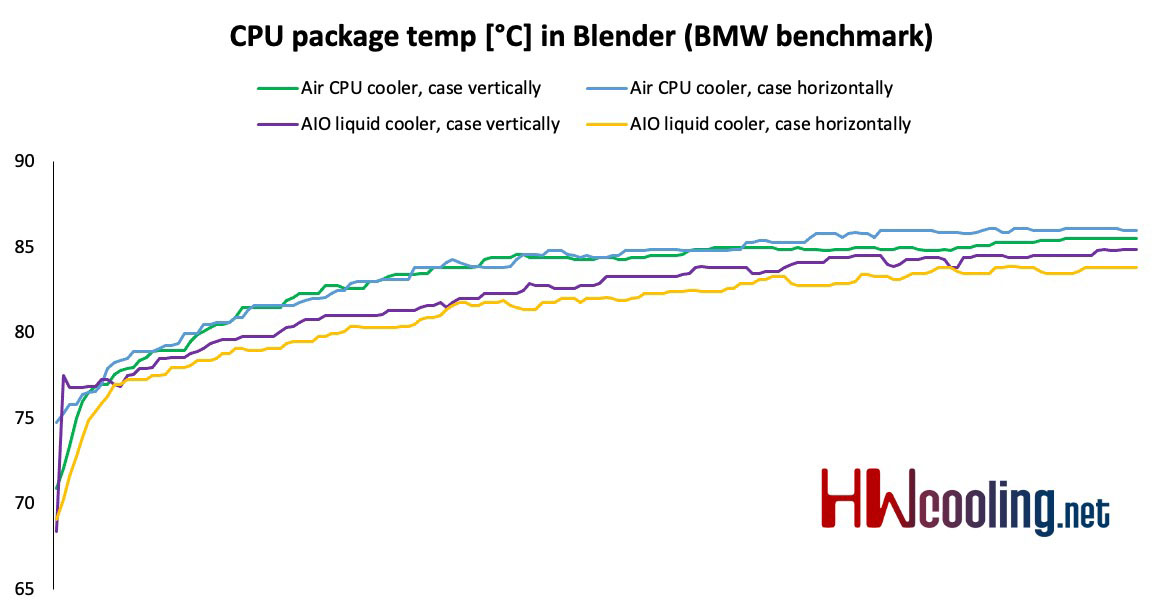
Processor temperatures more or less confirm the assumptions from the previous graphs and are therefore higher than air, although only by 2–3 degrees Celsius. The horizontal position with air proved to be the worst, the water in the same position is the best. However, you can see that higher clock is achieved with water vertically and the difference in temperature is not high, so this seems to be the most optimal solution.
Practical results show only a minimal difference. The rendering time with air was 2:50 minutes, with water 1–2 seconds slower.
A very untraditional and relatively unique case has come to our editorial office. It is the ROG Z11, which the manufacturer introduced at the beginning of the year at CES 2020. The case hides several specialties, such as the possibility of vertical and horizontal positioning or a slightly curved motherboard tray. To make matters better, we fitted the case more or less exclusively with ROG components, thus creating a kind of full-on Asus build.
3DMark – combined load
We saw the effect on the CPU performance in Blender, but what does it look like with a combined CPU and GPU load? See this in the 3DMark (Fire Strike) test.

The processor clock speed is again a bit higher with water cooling, which confirms the scenario from Blender.
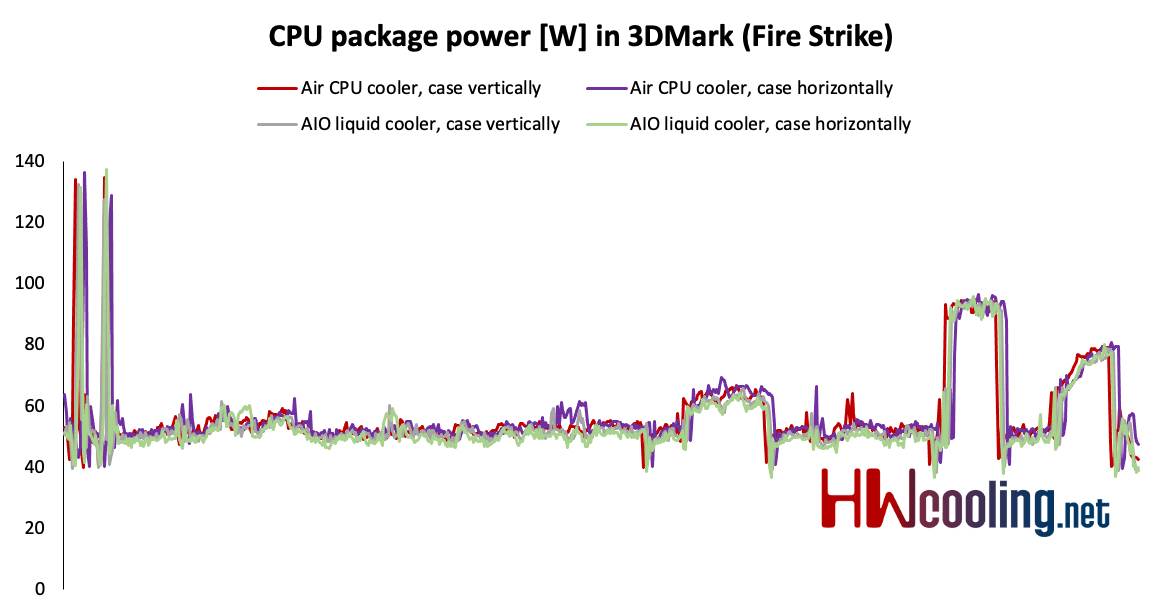
Differences in power draw are minimum.
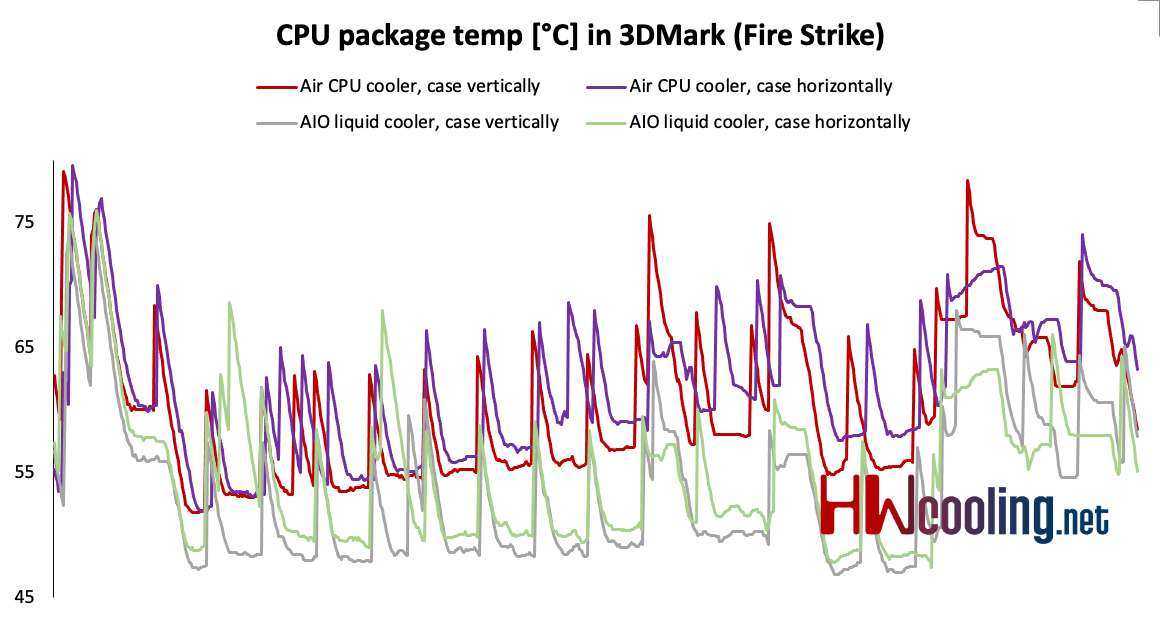
So far, you can see the biggest differences in CPU temperatures. The air is worse again, it’s no surprise. Compared to Blender, however, the difference has increased and now it looks like 5 degrees Celsius. The water comes out best vertically, the worst is air horizontally, although the air vertically has high fluctuations.
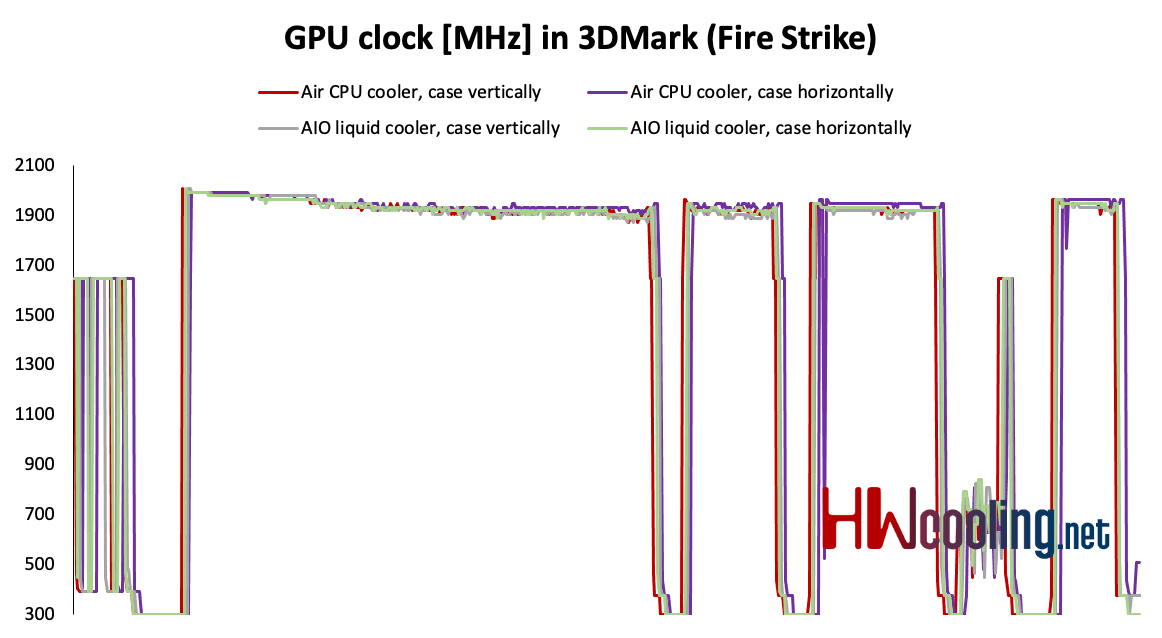
How’s the graphics card? No differences in the load as with Blender, so the GPU always works at full speed.
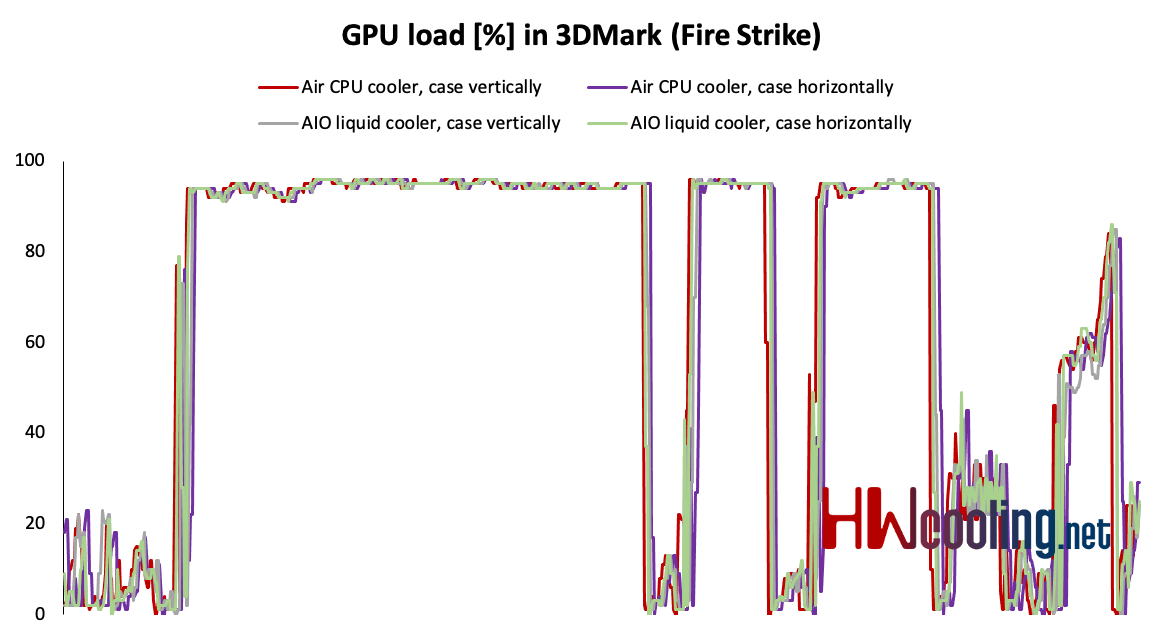
The GPU load and clock are more or less the same in all modes, without significant differences.
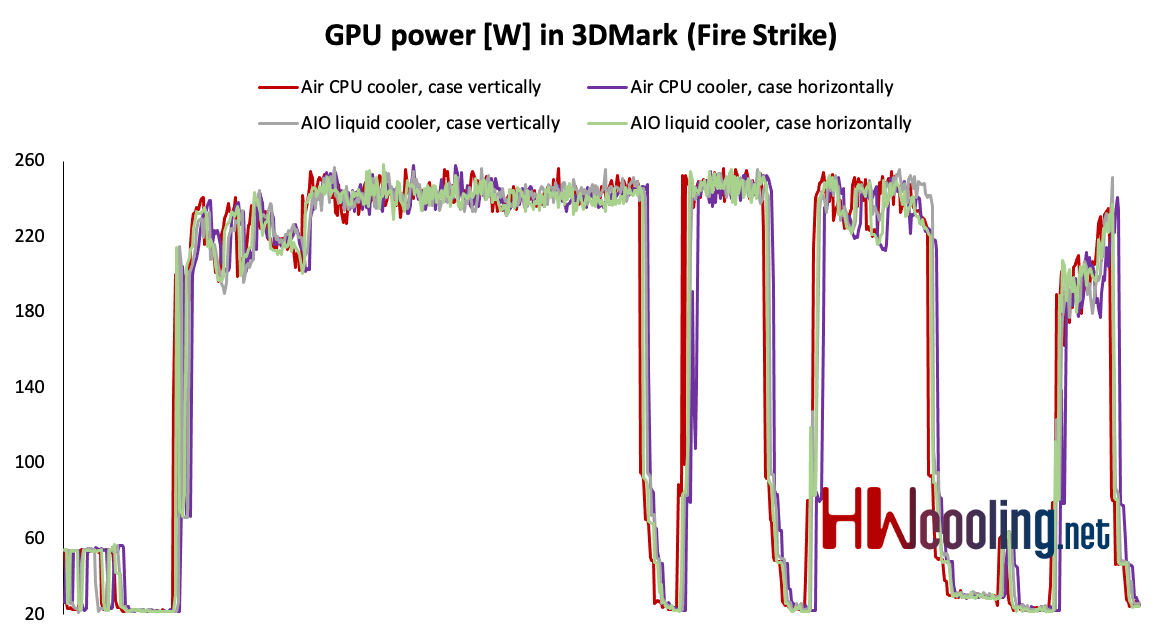
Slightly larger fluctuations are visible in power consumption, but the differences are still relatively small.
The most interesting is the graph of temperature progress. It shows us that for the GPU, the best solution is air horizontally, which achieved the worst CPU results though. On the contrary, we see the worst result with water vertically. Air vertically and water horizontally are almost identical.

From all the tests, it looks like a winning solution is AIO and the case in horizontal position.
A very untraditional and relatively unique case has come to our editorial office. It is the ROG Z11, which the manufacturer introduced at the beginning of the year at CES 2020. The case hides several specialties, such as the possibility of vertical and horizontal positioning or a slightly curved motherboard tray. To make matters better, we fitted the case more or less exclusively with ROG components, thus creating a kind of full-on Asus build.
Rating
Asus ROG Z11 is an unconventional case, which you will see mainly at exhibitions (probably not this year though :/) and on the tables of real fans of this brand. It brings several interesting and non-traditional solutions such as side panels on the hinges, unusual positioning of the motherboard and graphics card and, above all, the possibility of dual orientation. Build quality, packaging and presentation is at a high level, but at a price of 249 euros, nothing else could be expected.

Personally, I consider the Z11 as a concept and a demonstration of ROG design as a mass product that should be in every player’s room. The reason is not only the price but also several imperfect things of the case design. Probably the most fundamental drawback is the complicated access to the motherboard connectors and especially the graphics card, and only the minimal opening for the cables to exit the case. The second complication during the assembly was too many screws and cables and the need to disassemble the case almost to the bone before one can finally start inserting the components.
The screws in the package are unlabelled and it is not entirely trivial to know like 6 types of them. Also, the lack of space to run the cabling from the power supply and its management in the case without the use of hand-braided and accurately measured cables was quite complicated. I would therefore describe the overall building experience as difficult, which is not unusual for ITX cases, but the design focus of the case made the building process quite difficult.
ROG Z11 will therefore be a suitable product for really passionate fans of the brand, or as a collector’s item, as its uniqueness cannot be denied. However, the convenience is not so good.
| Asus ROG Z11 |
| + unique design |
| + high build quality |
| + untraditional side panels |
| + up to 5 USB ports on the front panel |
| + RGB backlighting |
| + possibility of two positions |
| - bad access to the motherboard and GPU’s I/O |
| - little space for cabling |
| - complicated manipulation |
| - price |
| - unlabelled screws in the package |
You can buy this PC case at our partner’s website czc.cz for 6,499 Czk/249 Eur