
What it looks like in the BIOS
From the B660 motherboard tests, we now move on to Z690. These are always better equipped at least at the chipset level. One of the main advantages is the ability to manually overclock processors with an open multiplier. The Tomahawk DDR4 seems to be an option that has a well prepared VRM for such performance boosts while still keeping to an affordable price. The important thing though is what kind of board it is from an overall perspective.
What it looks like in the BIOS
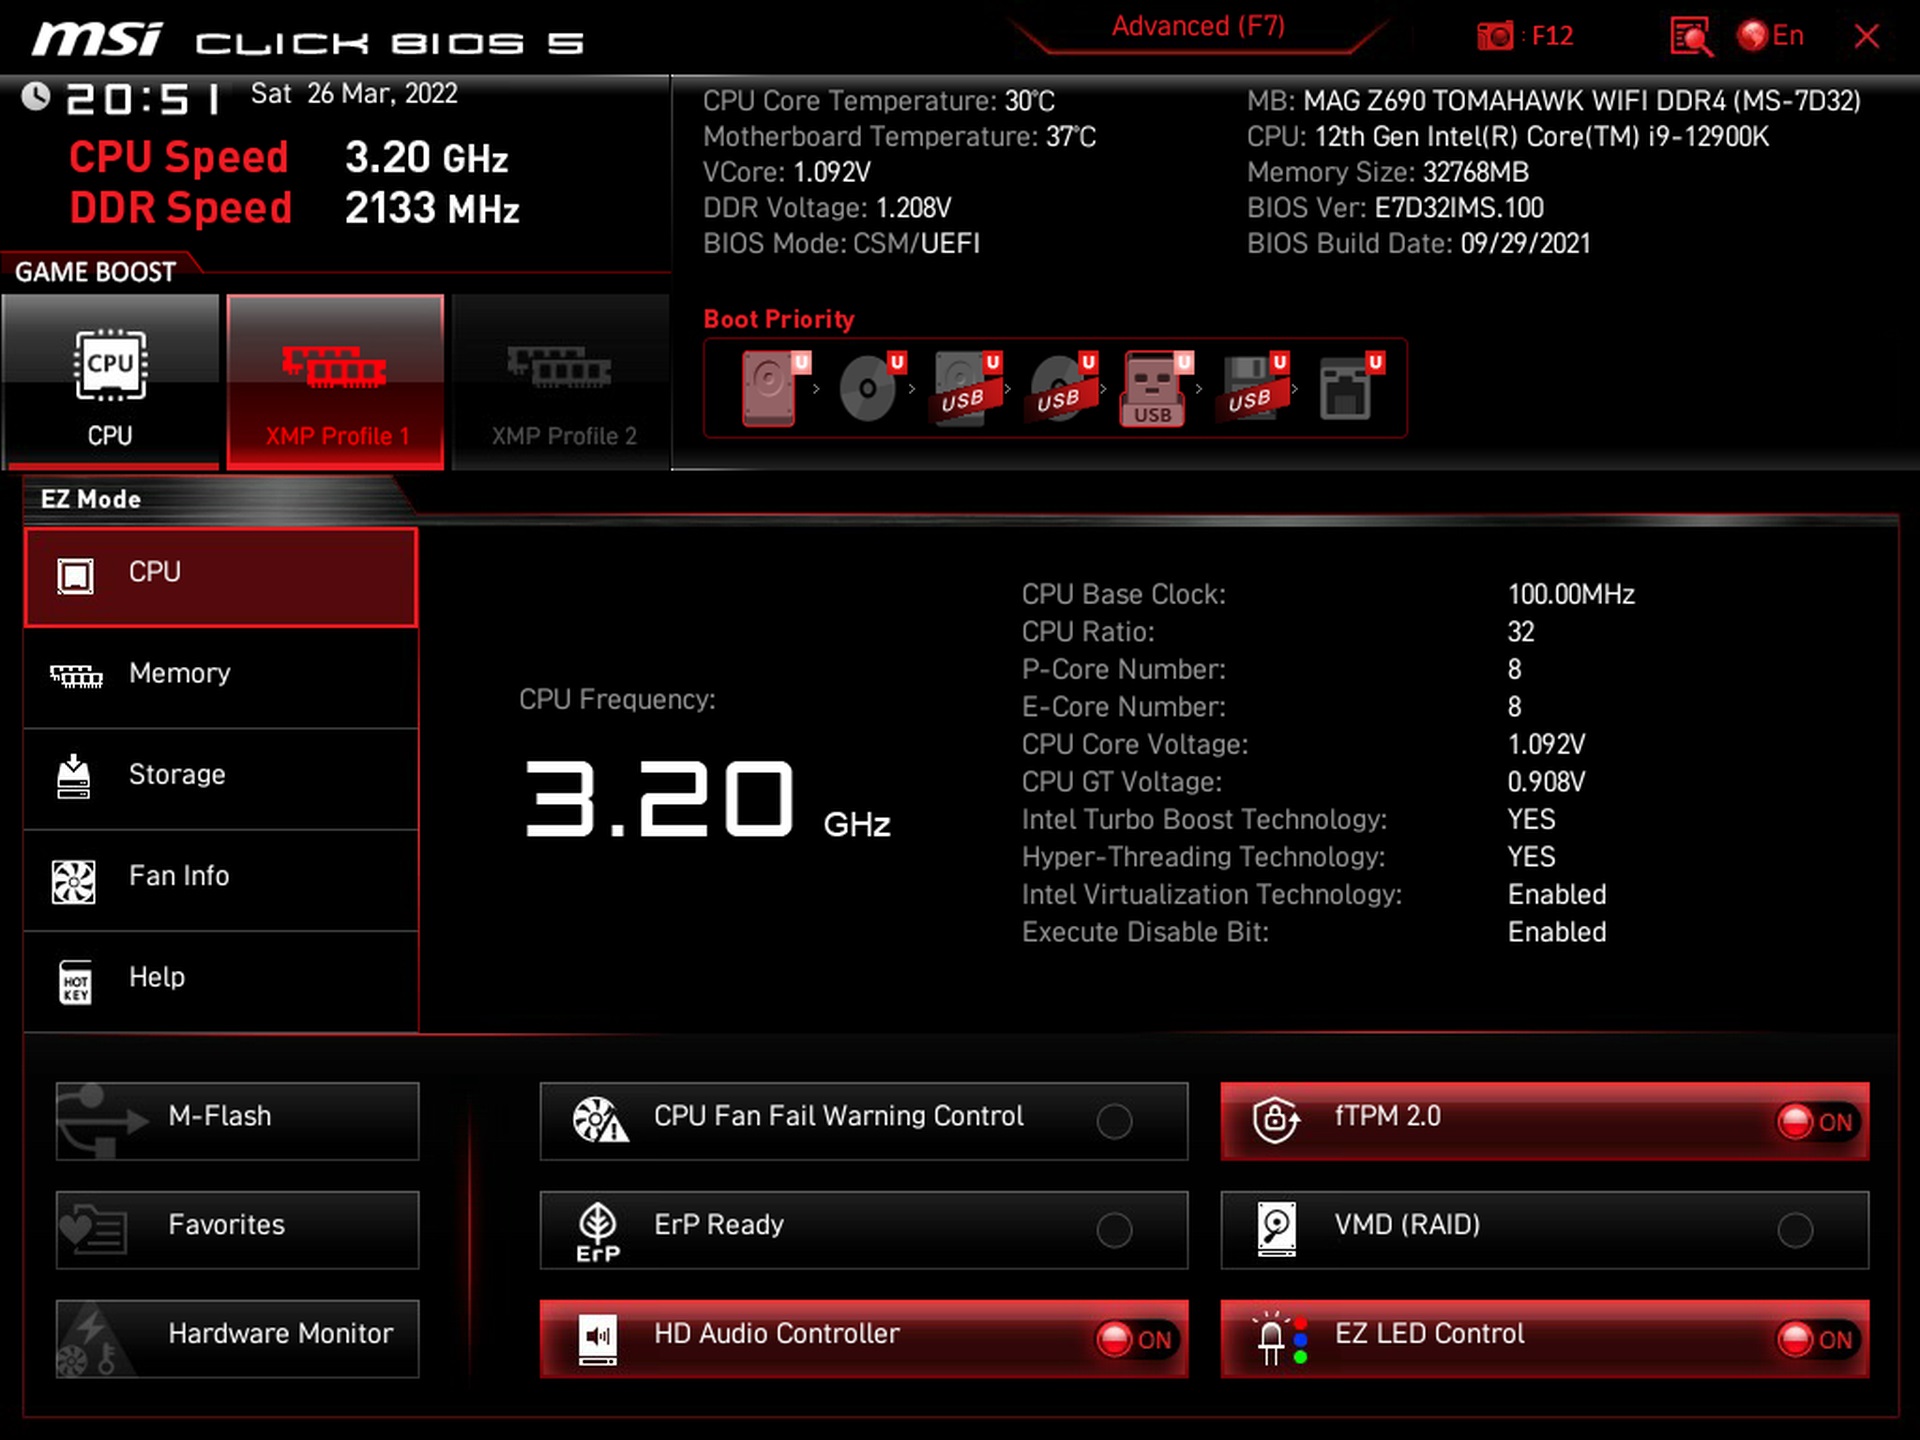
The EZ Mode screen is clear and allows you to manage and navigate key things. XMP, TPM and for example an alert in case of a malfunctioning CPU cooler fan, are enabled via prominent buttons. You can also click through them to update the BIOS or to monitor temperatures and fans.
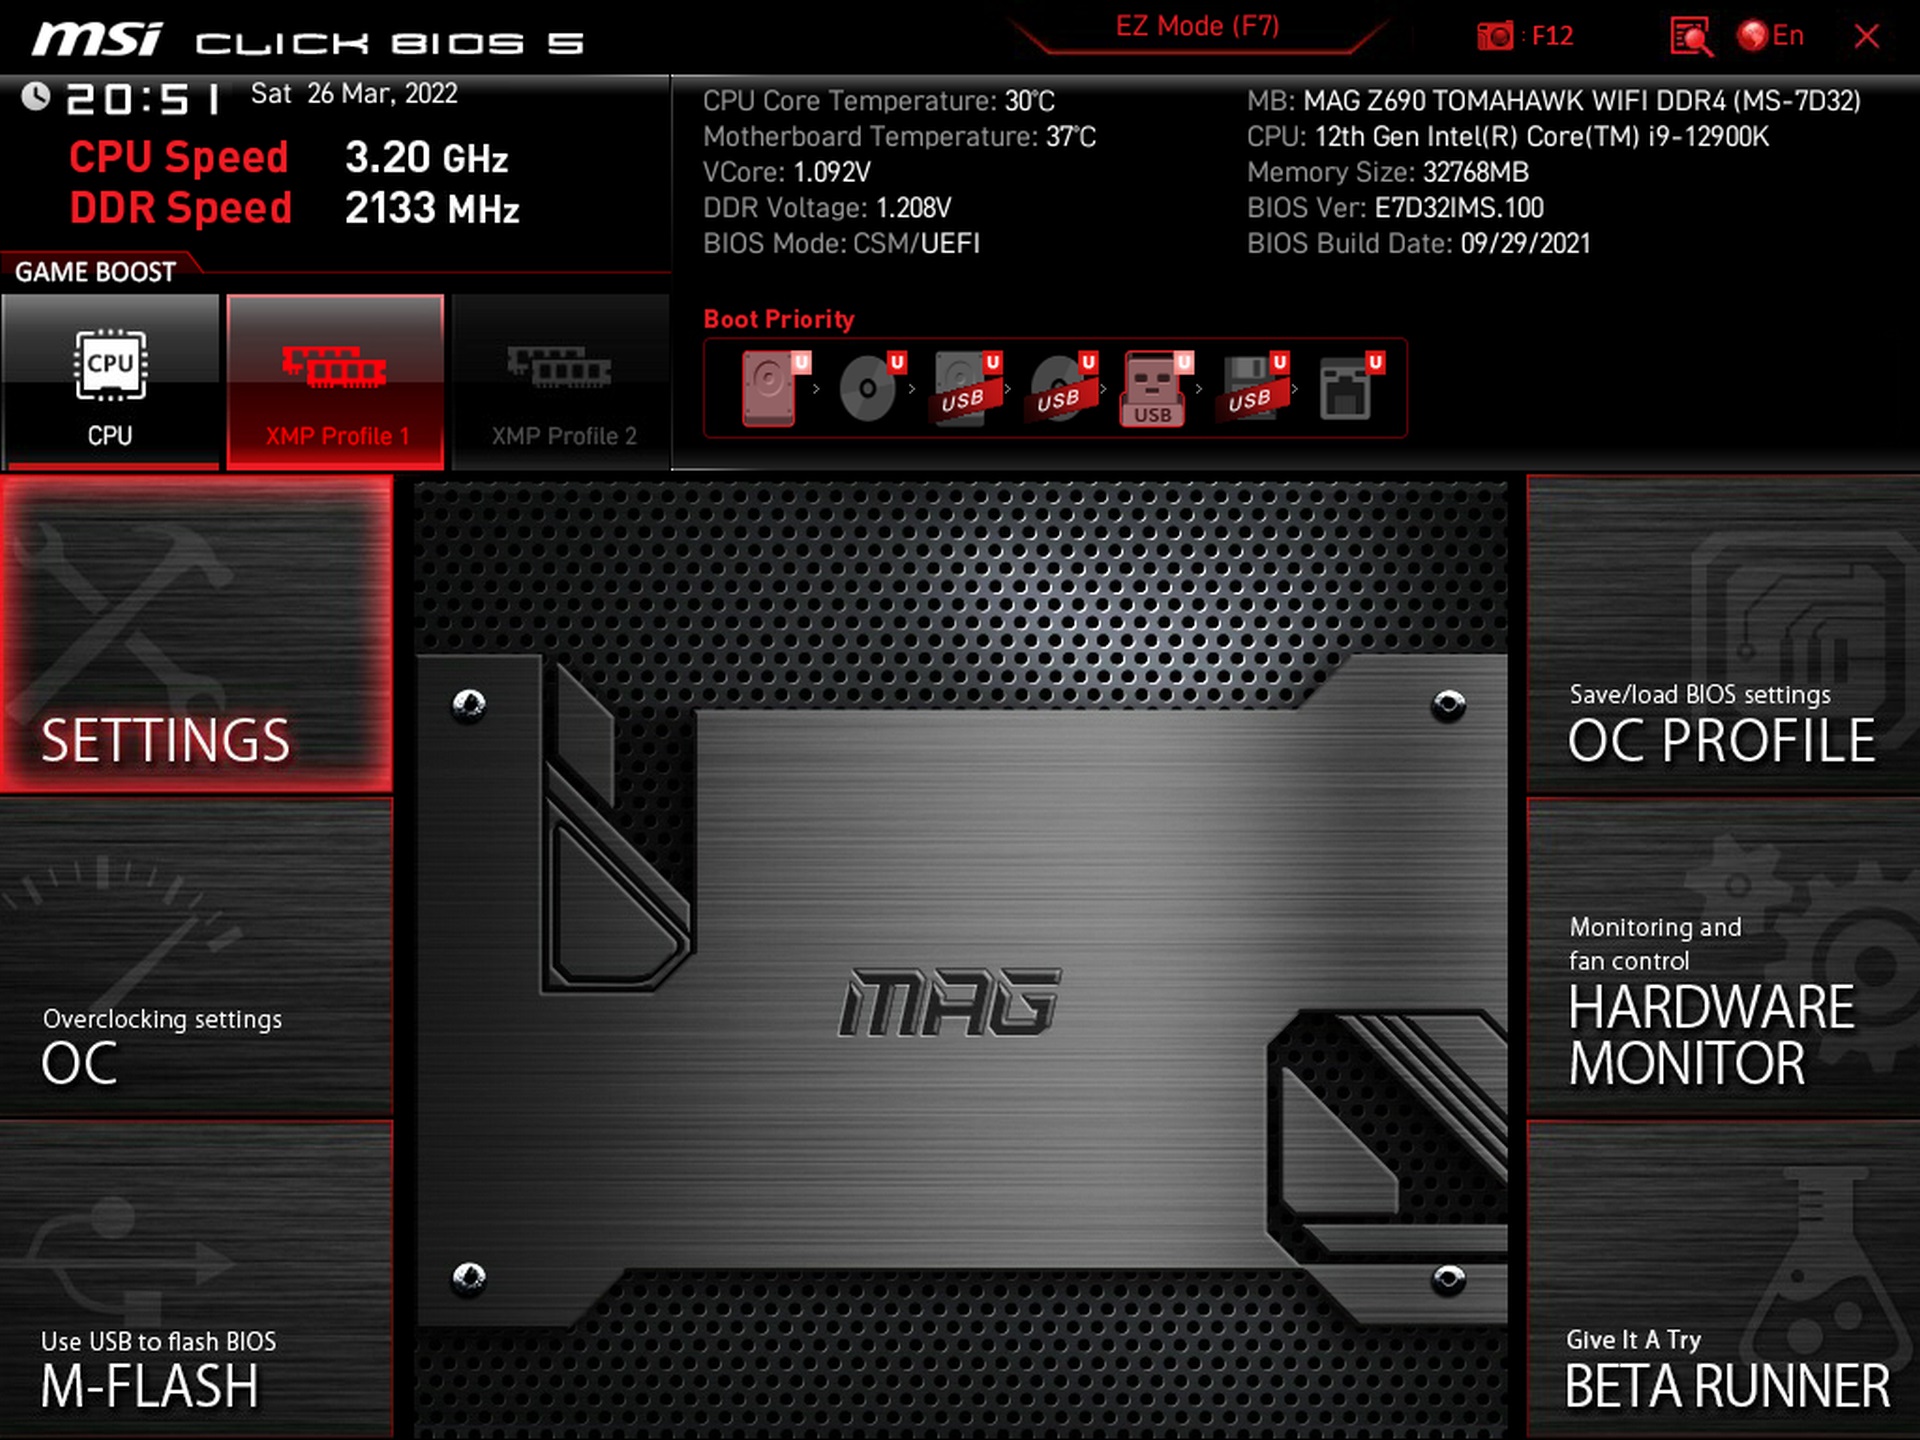
The intuitive interface is also in advanced view. The main navigation is divided into six tabs according to content – Settings, OC, M-Flash, OC Profile, Hardware Monitor and Beta Runner.
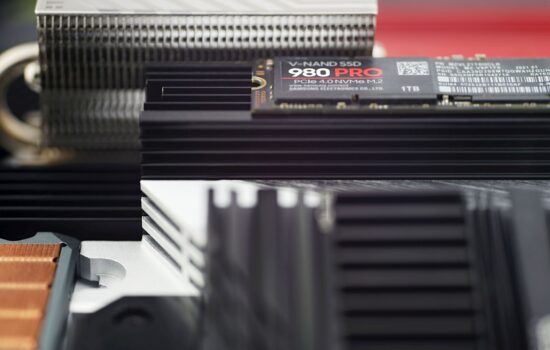
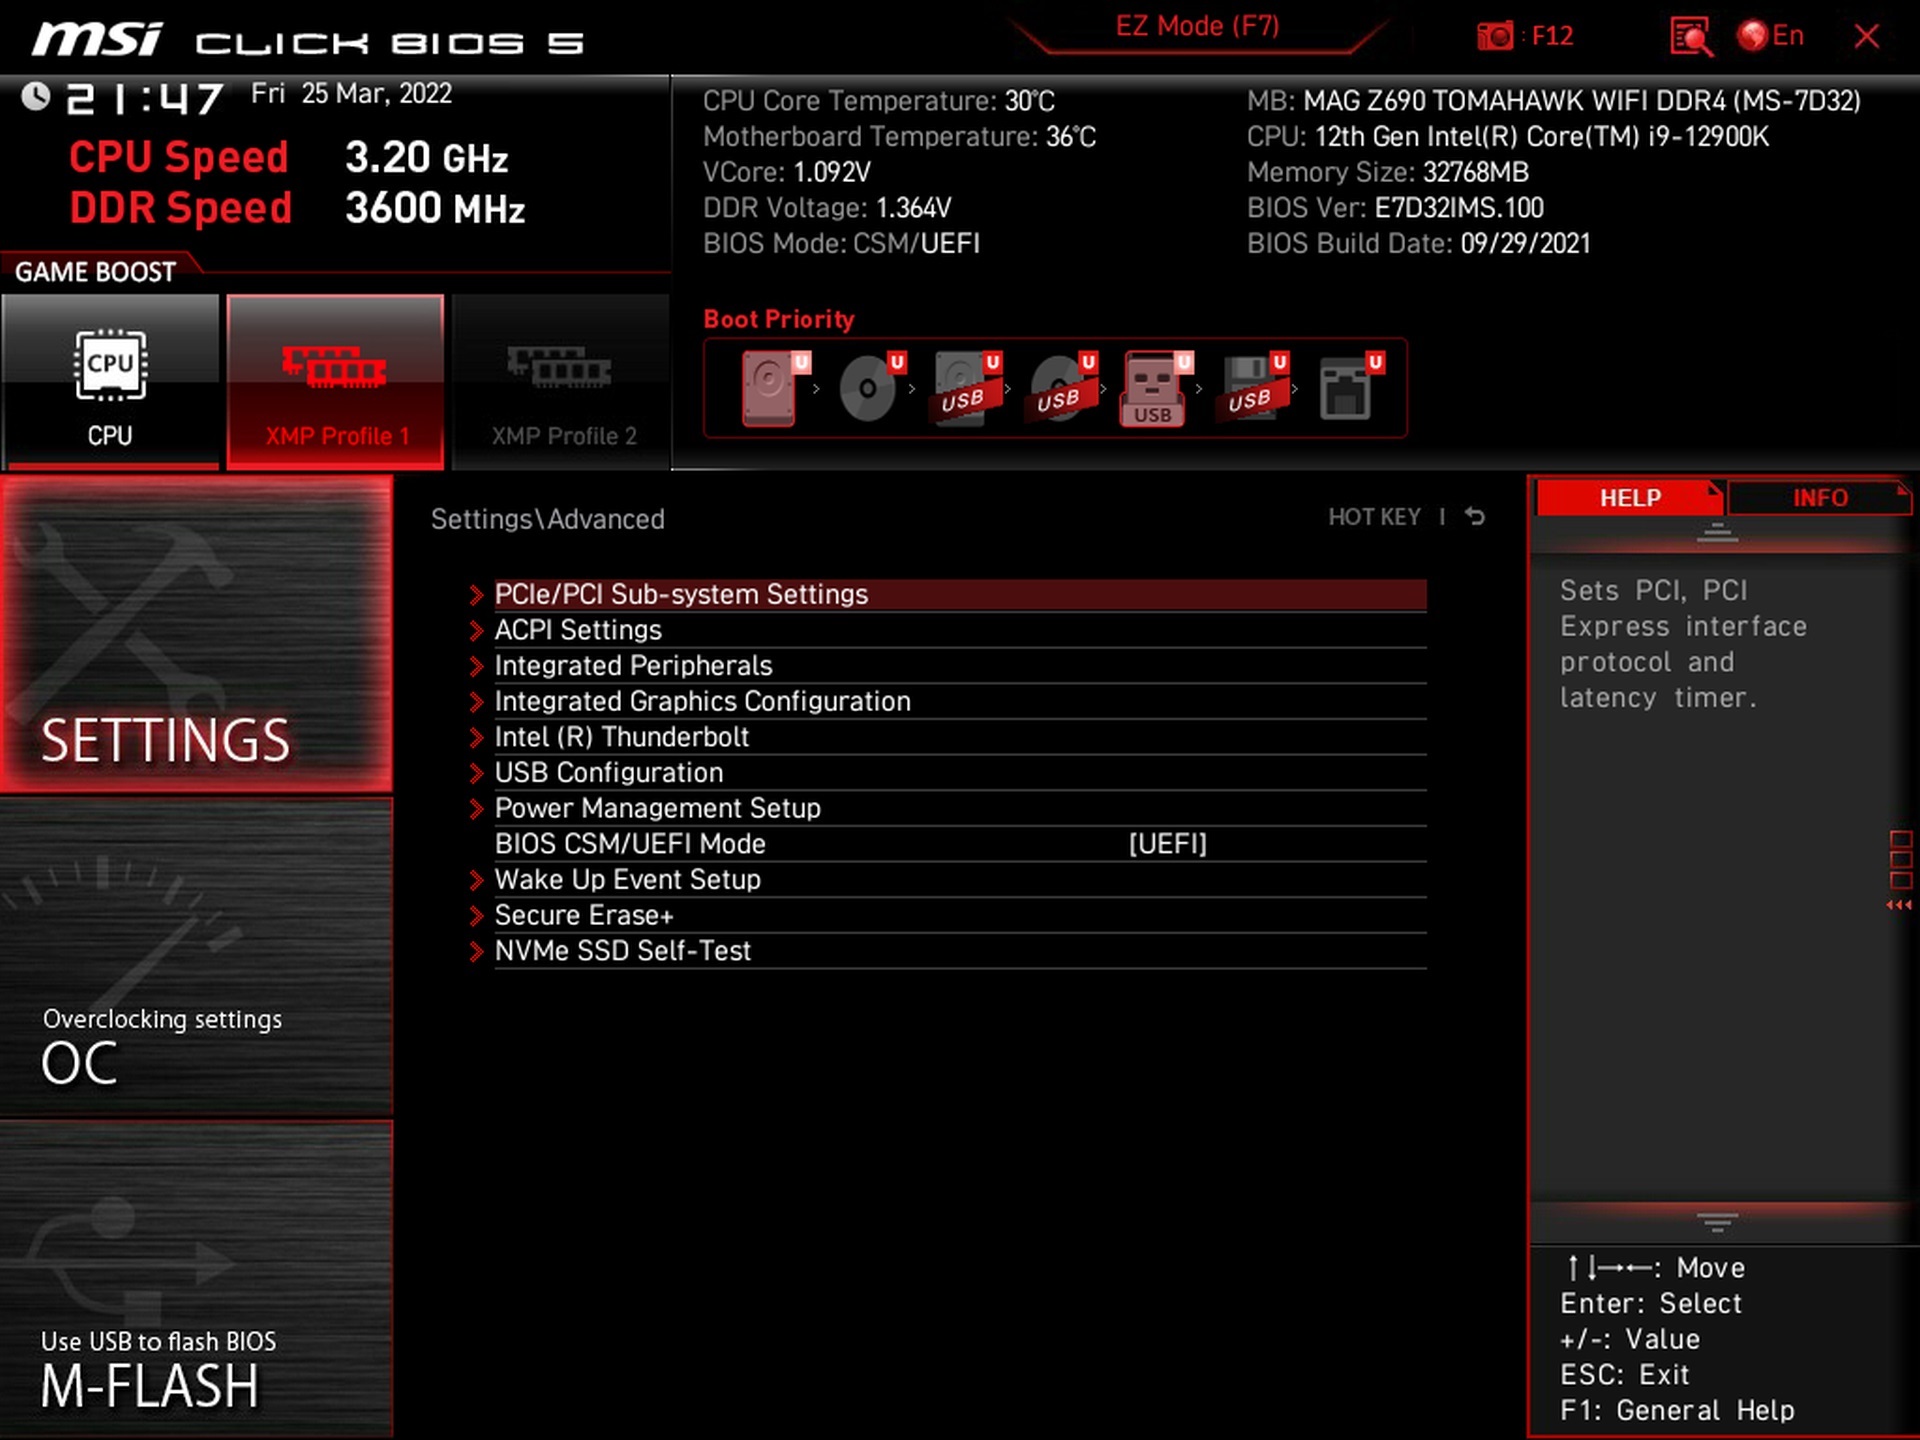
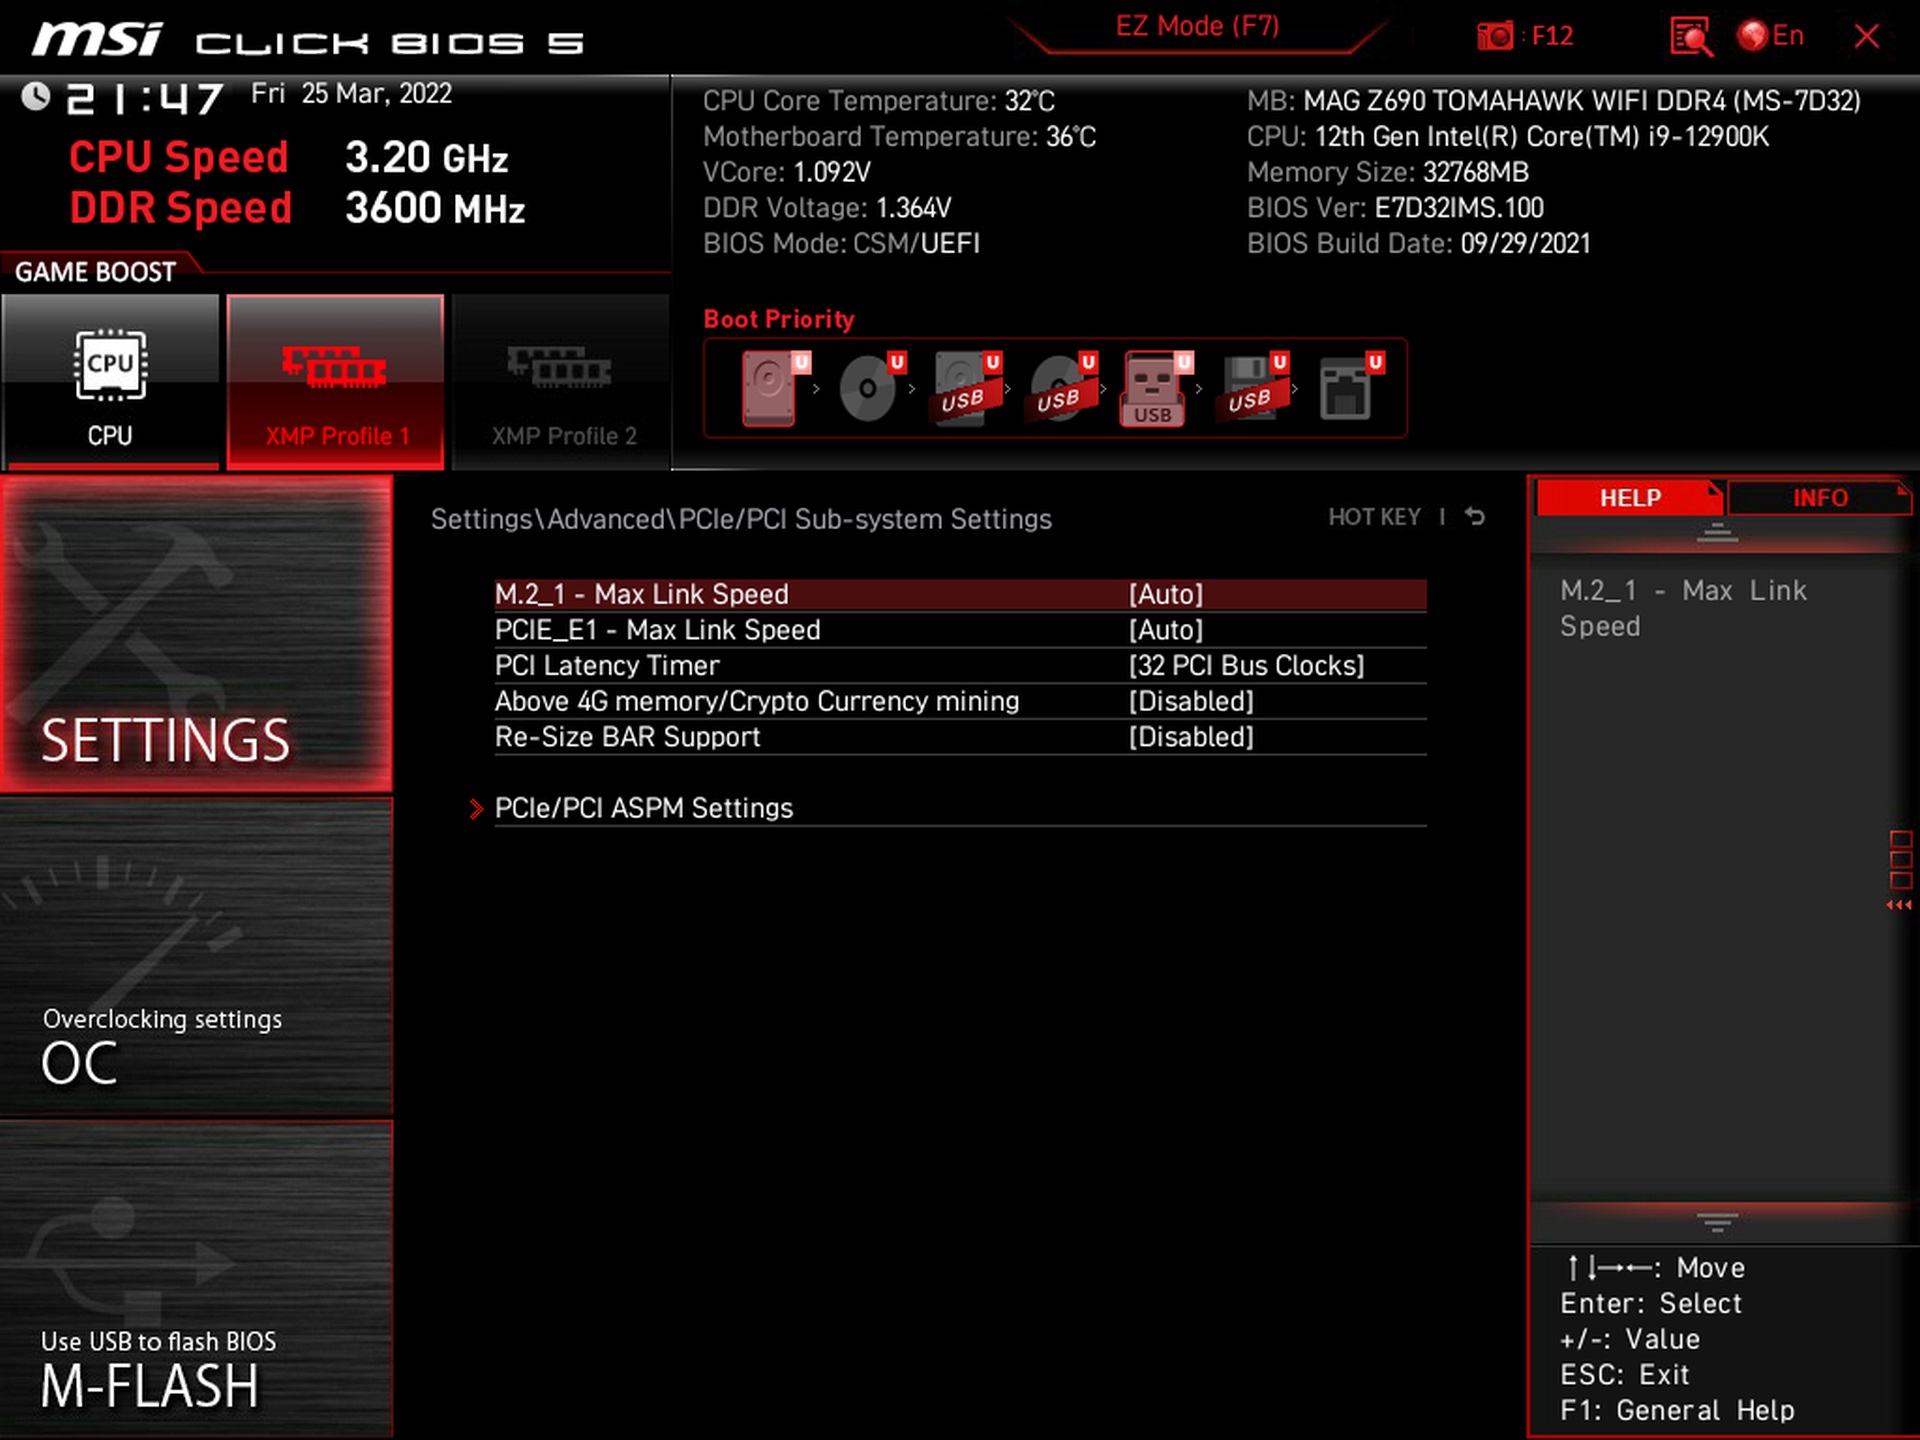
Within the PCI Express setup, older interfaces from generation 1.0 onwards can also be selected for the M.2 slots, which also applies to the first slot, which also supports generation 5.0 with a theoretical bandwidth of 15.8 GB/s. On the PCI Sub-system Setting tab there is also the option of Resizable BAR control for graphics cards. We do not use this option for testing motherboards, as this technology is still dynamically evolving and would bias the results over time, which would be inconsistent.
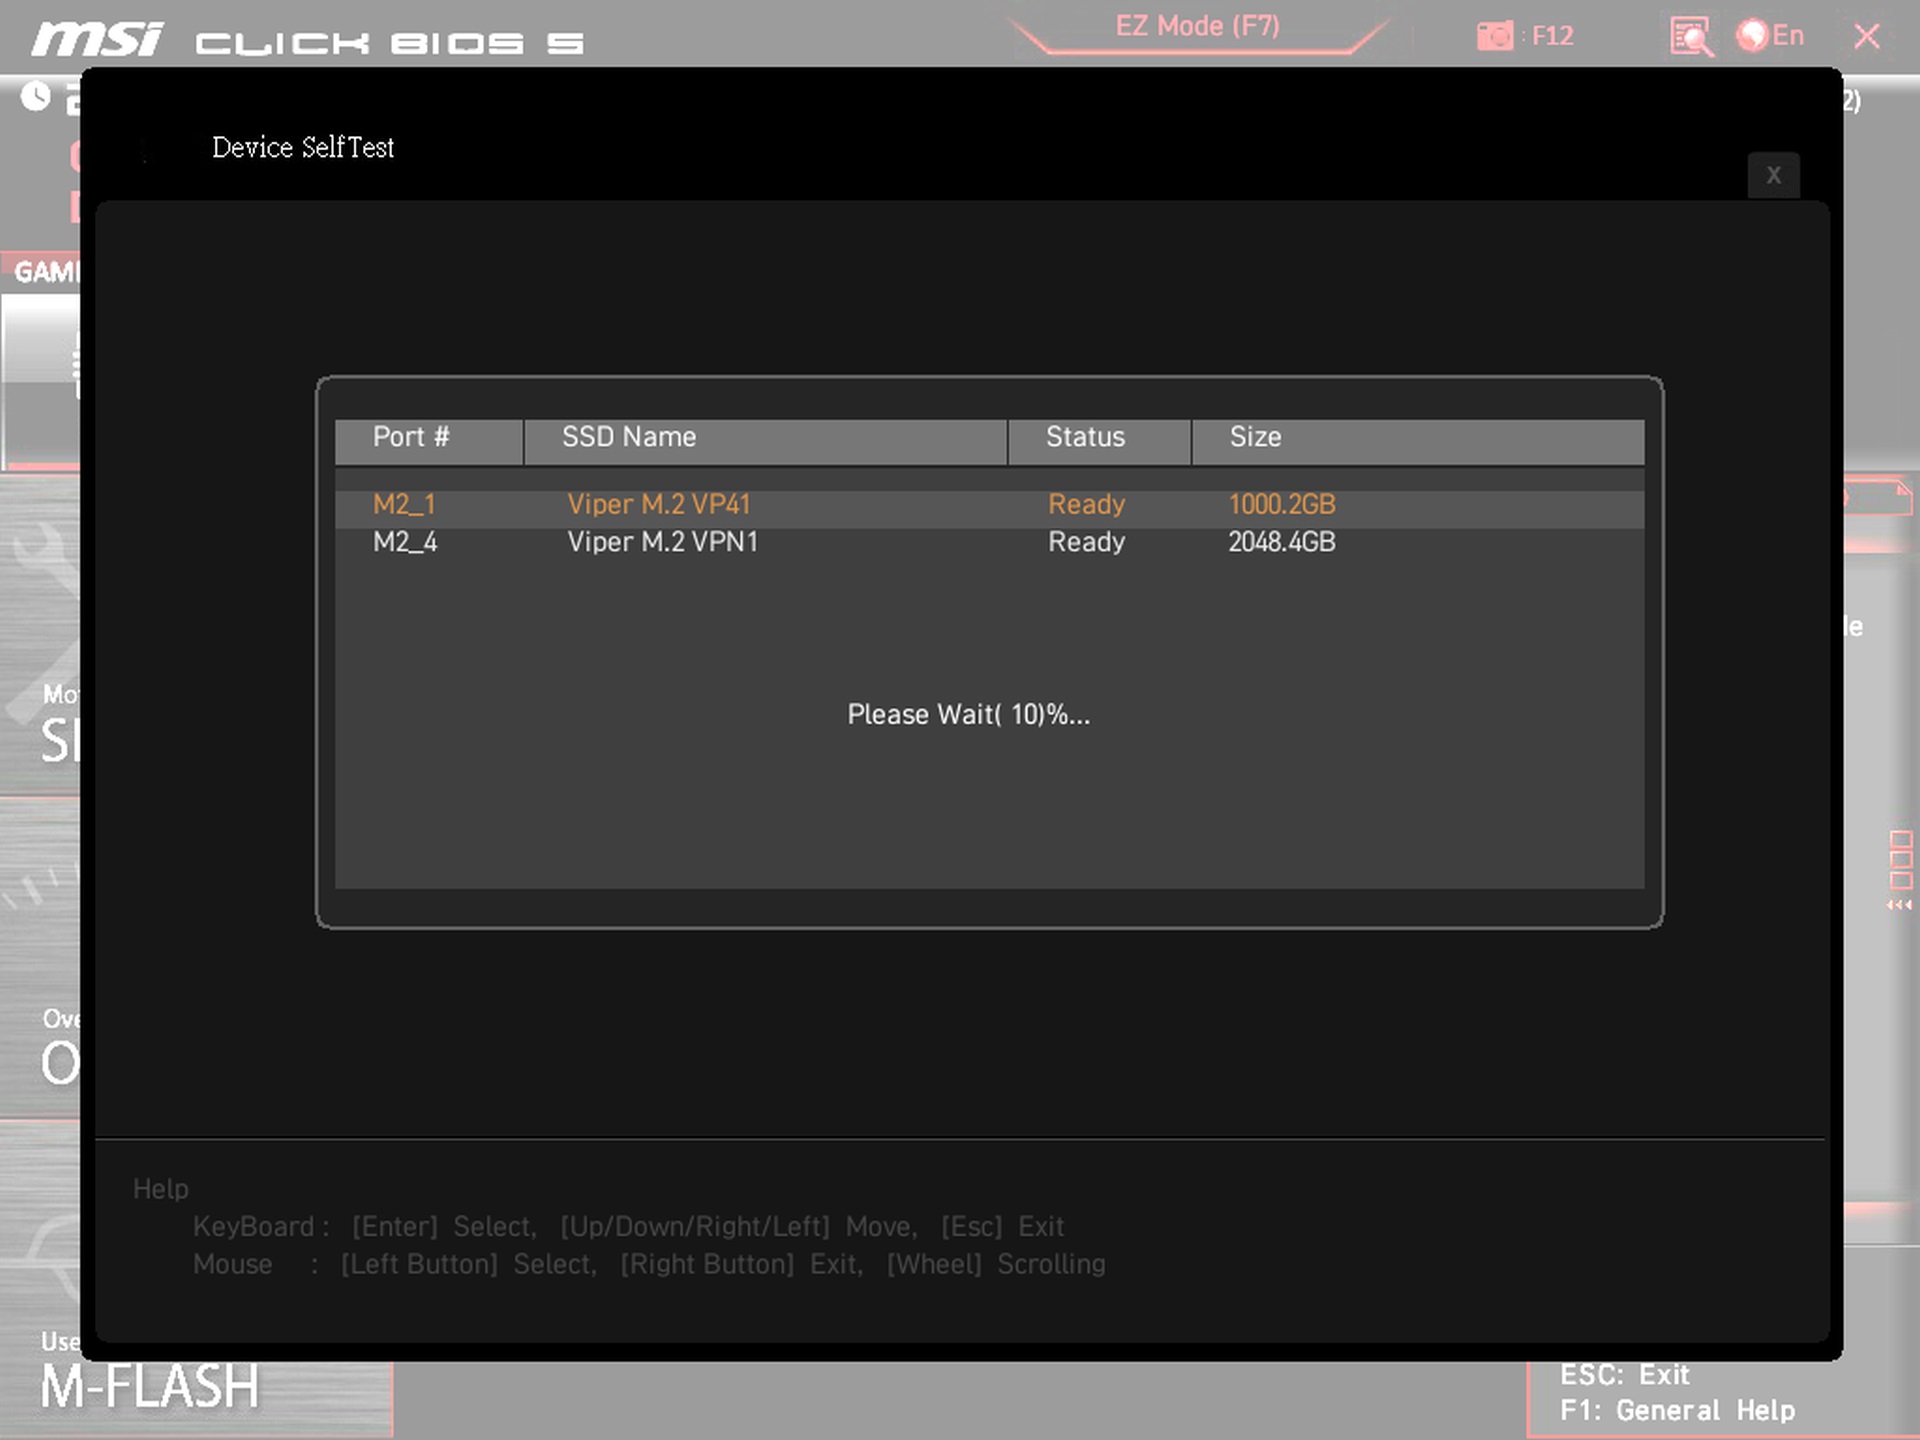
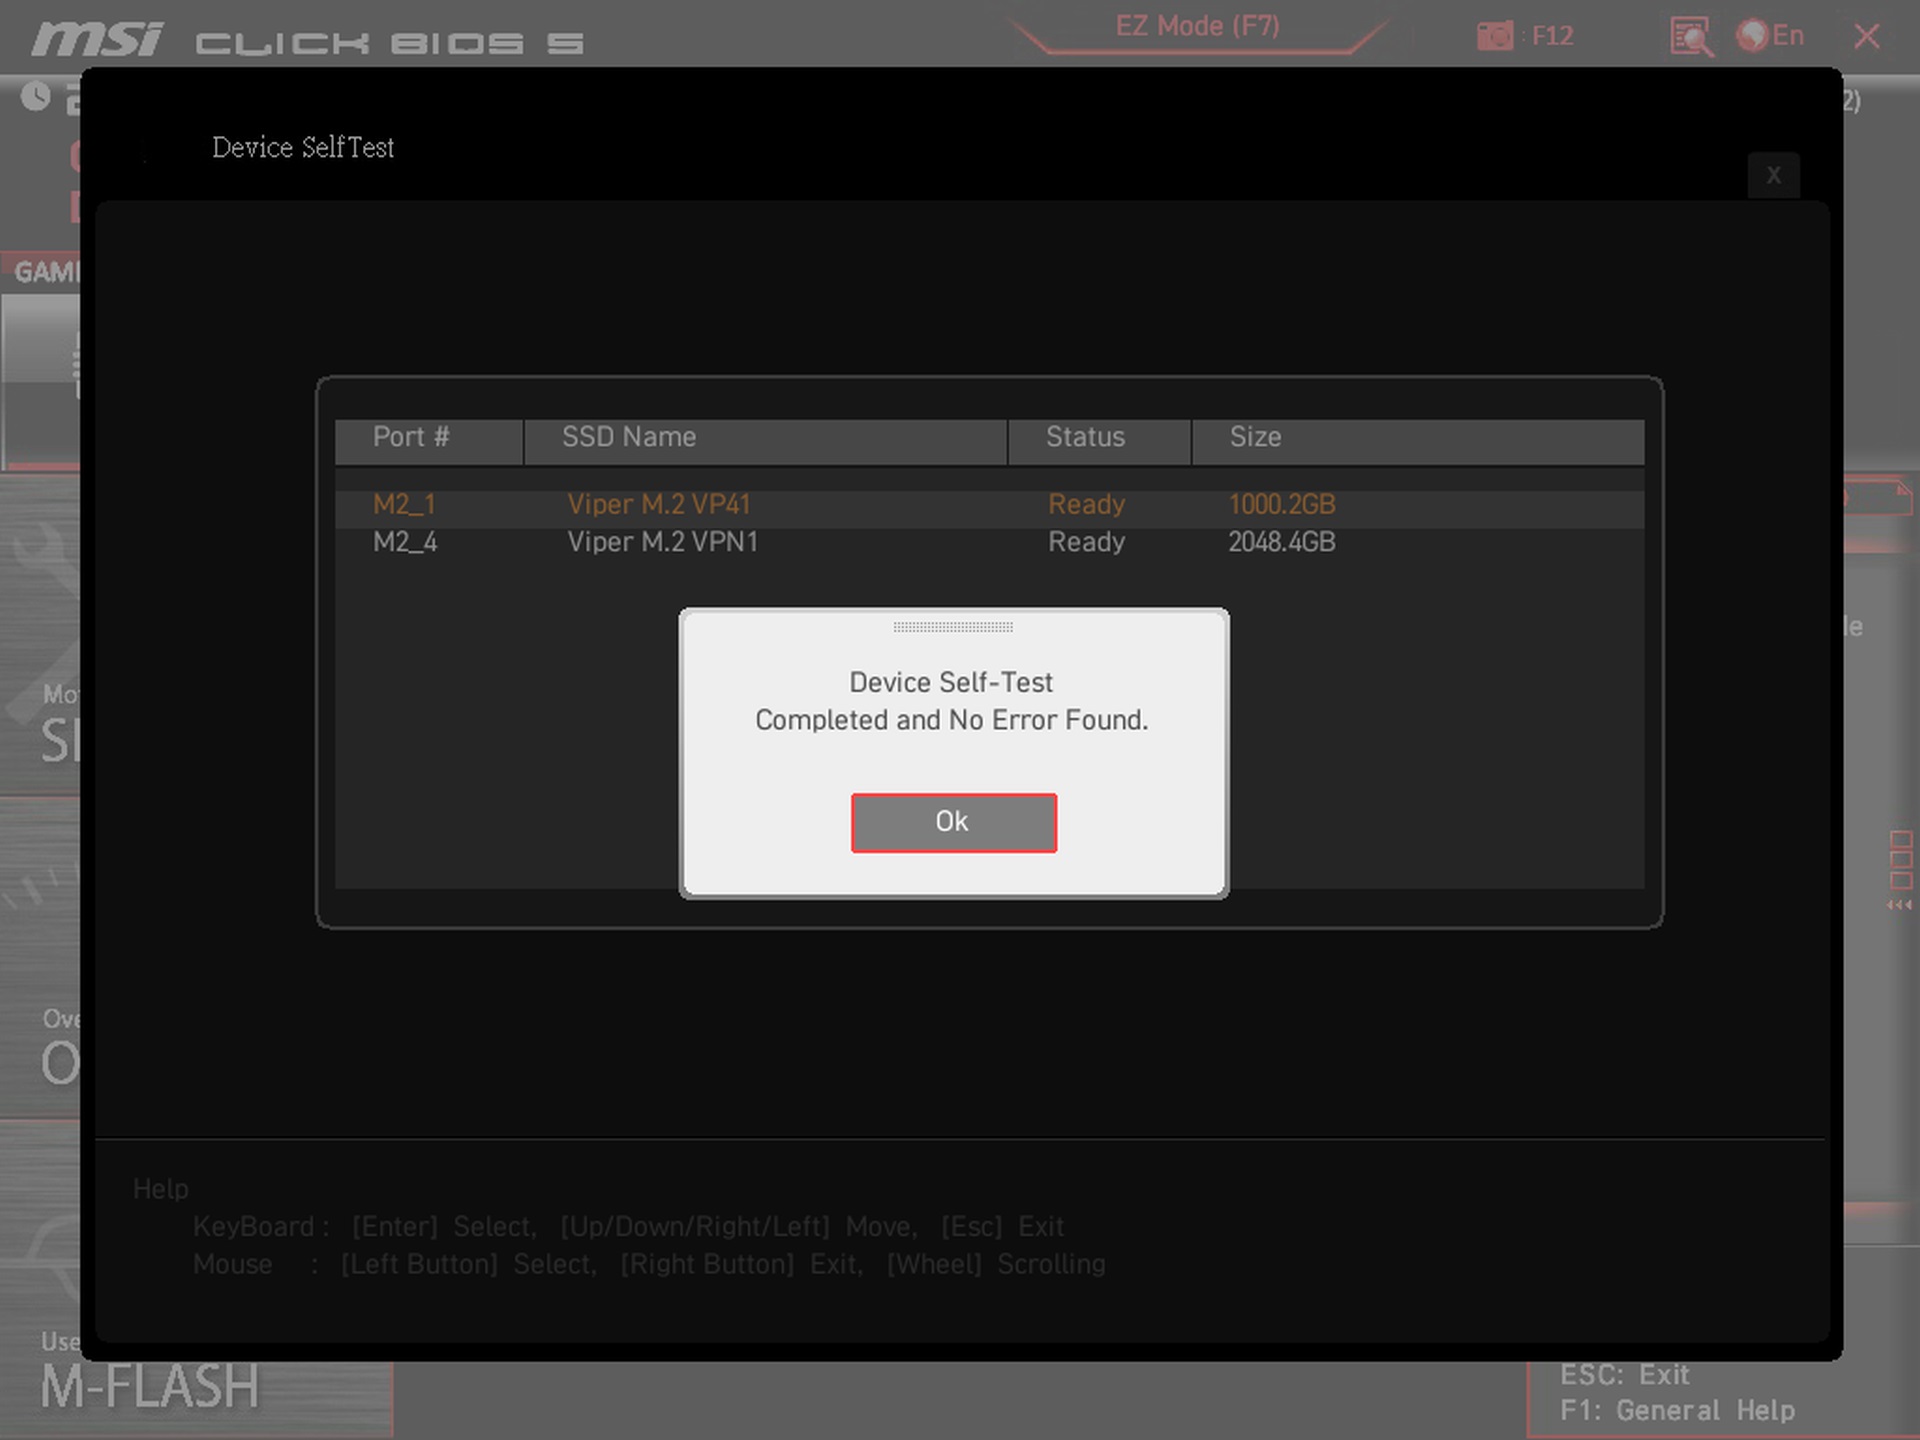
UEFI also offers the possibility to check the SSD status. How detailed is hard to guess. The test of a 1 TB PCIe 3.0 SSD takes about half an hour, which is not that short, and the report that no errors were found (or on the contrary some were found) may be relevant.
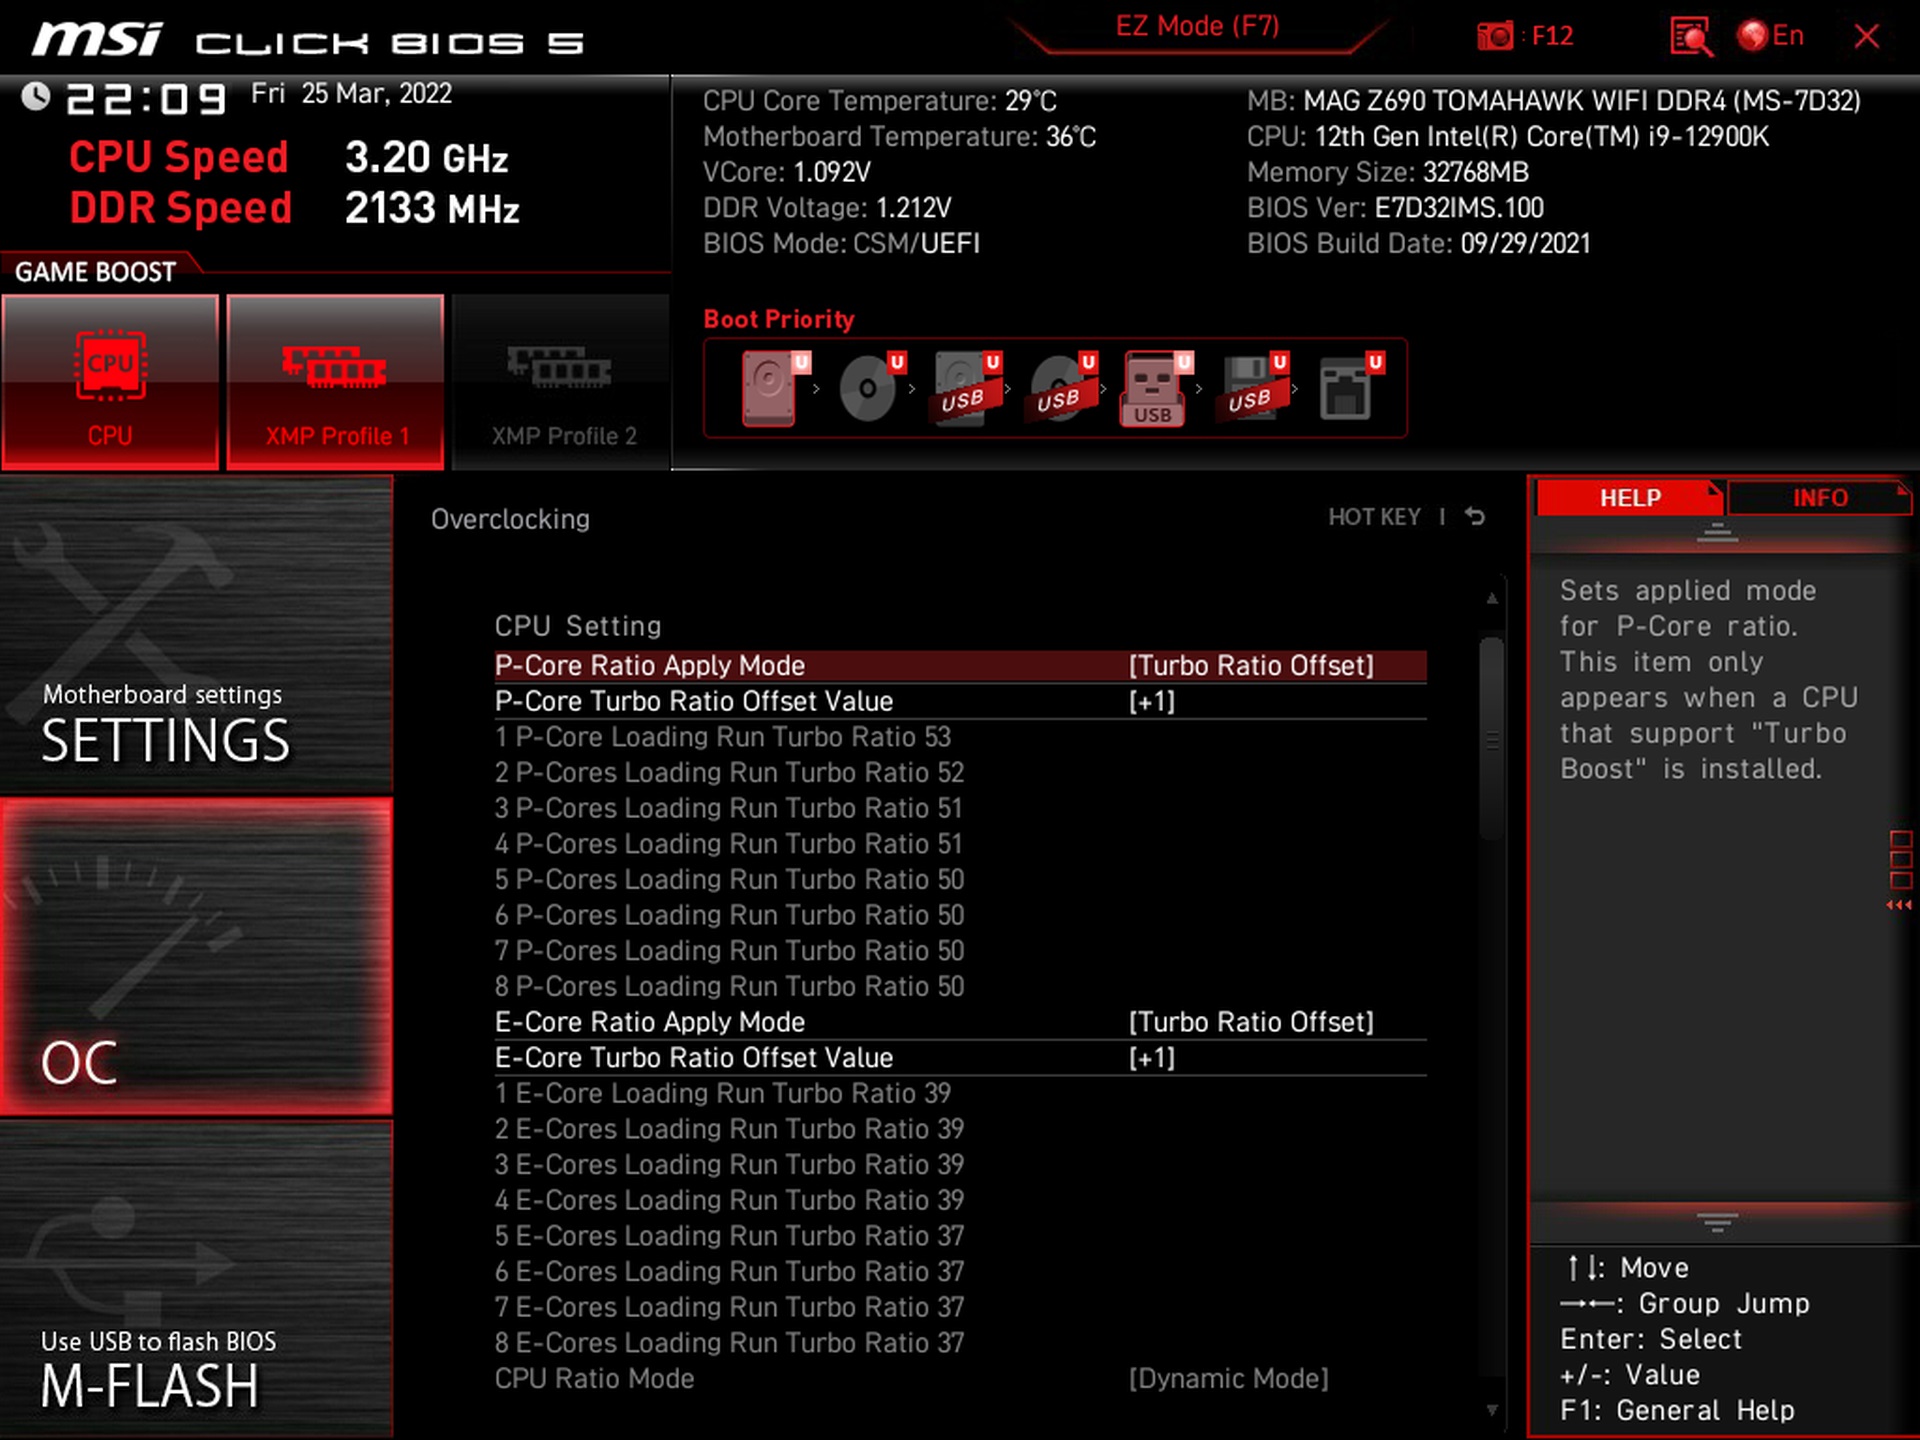
You can adjust the CPU multiplier or BCLK under the OC tab. There is also a more detailed option for AVX load, where you can customize the behavior of the multiplier when these instructions are detected. If you don’t interfere with these settings, the multiplier will be reduced at the board’s discretion, which may vary depending on the CPU used. But even in the case of the Core i9-12900K, this is only symbolically, -1. Owners of powerful liquid coolers can calmly set the offset value to 0.
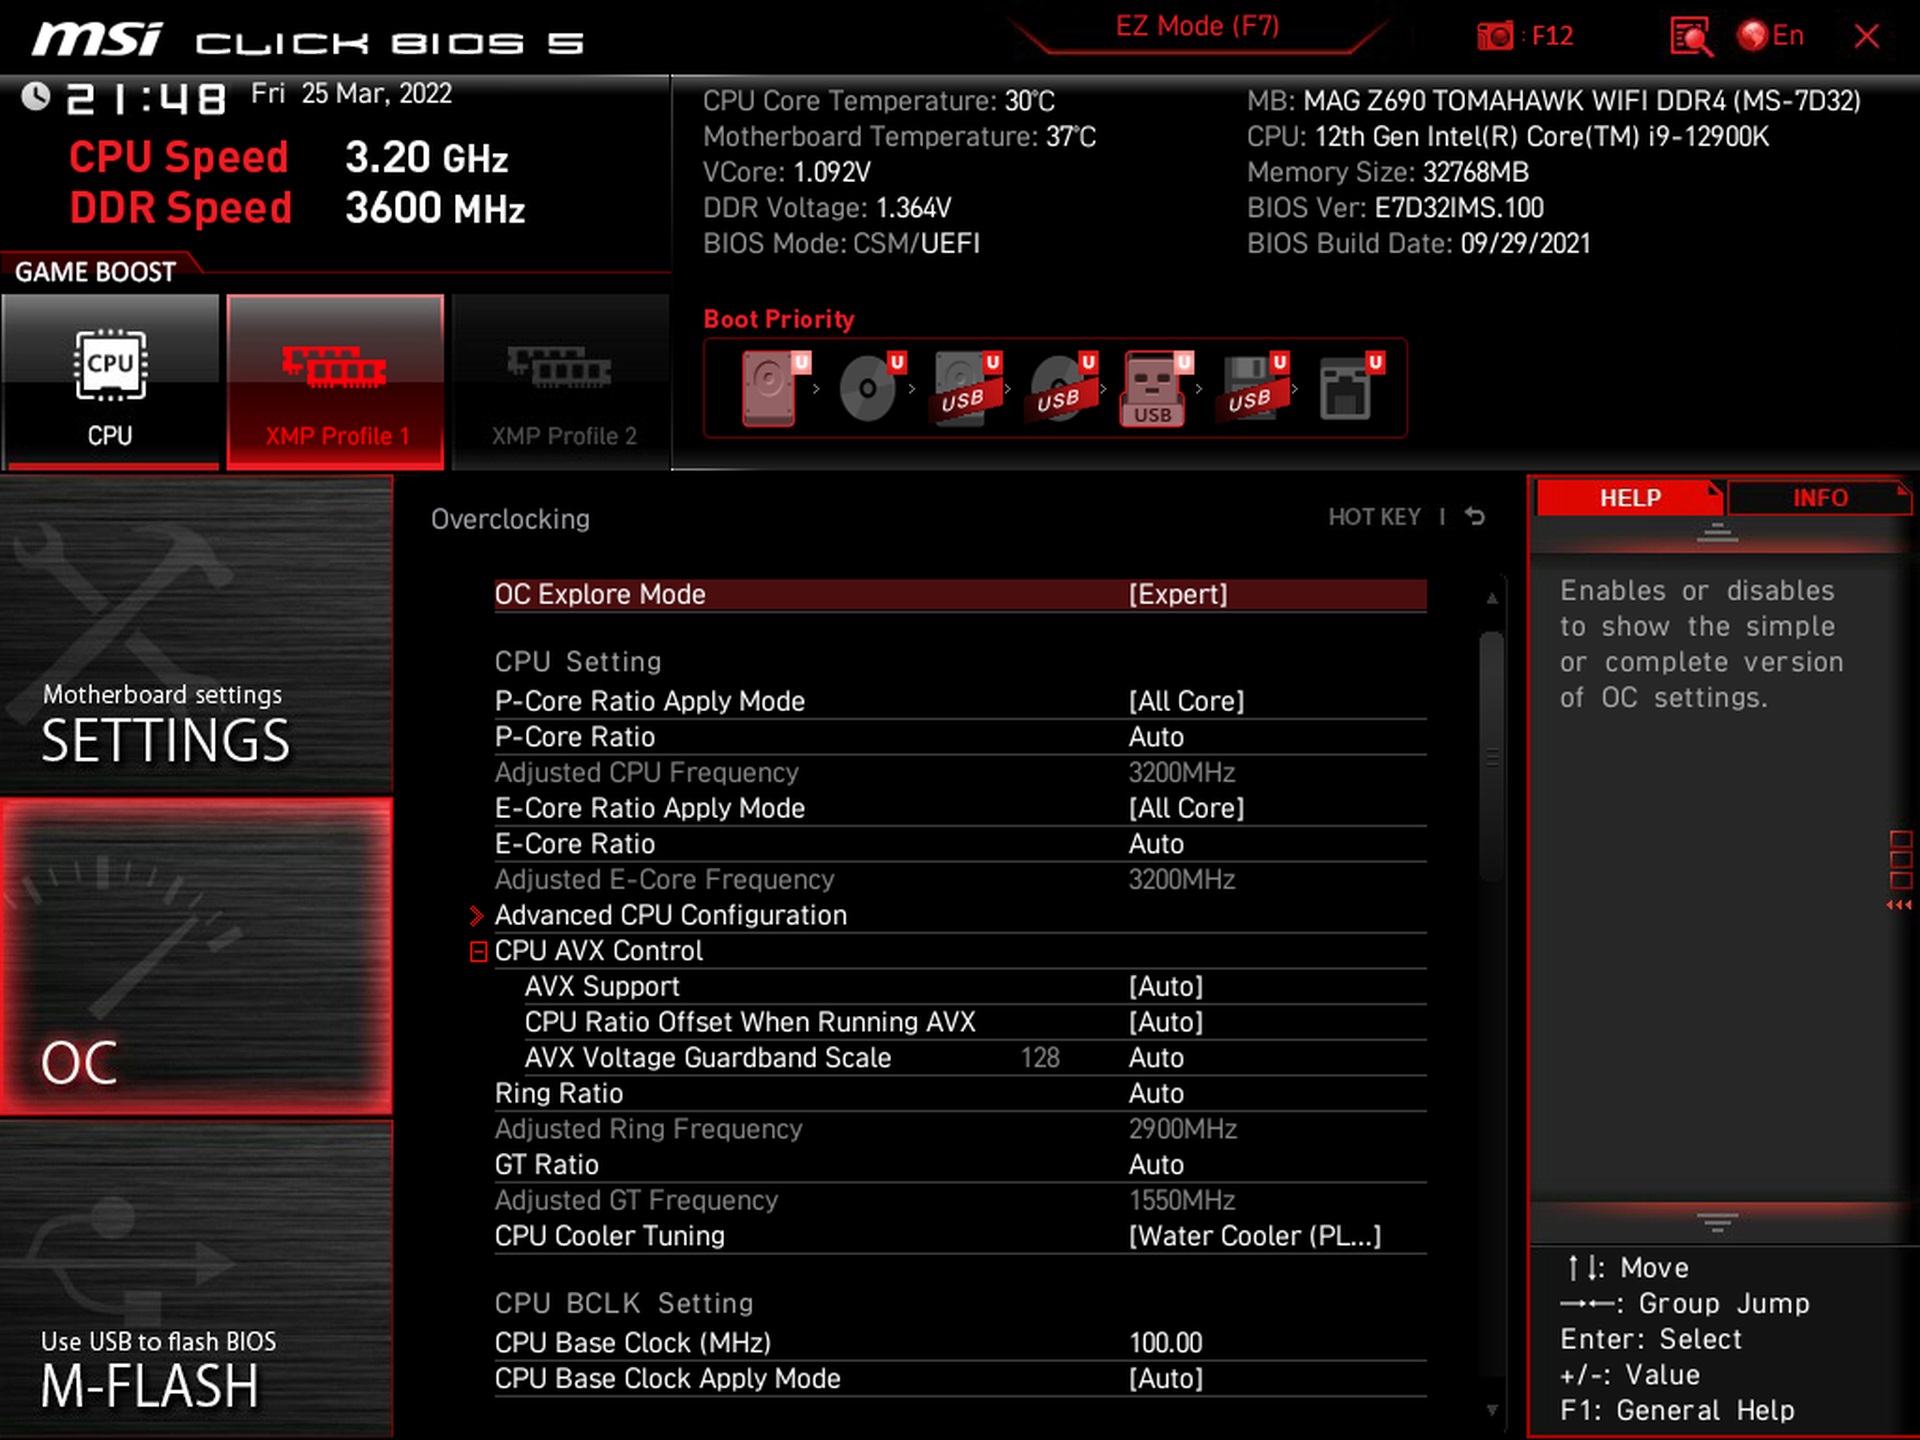
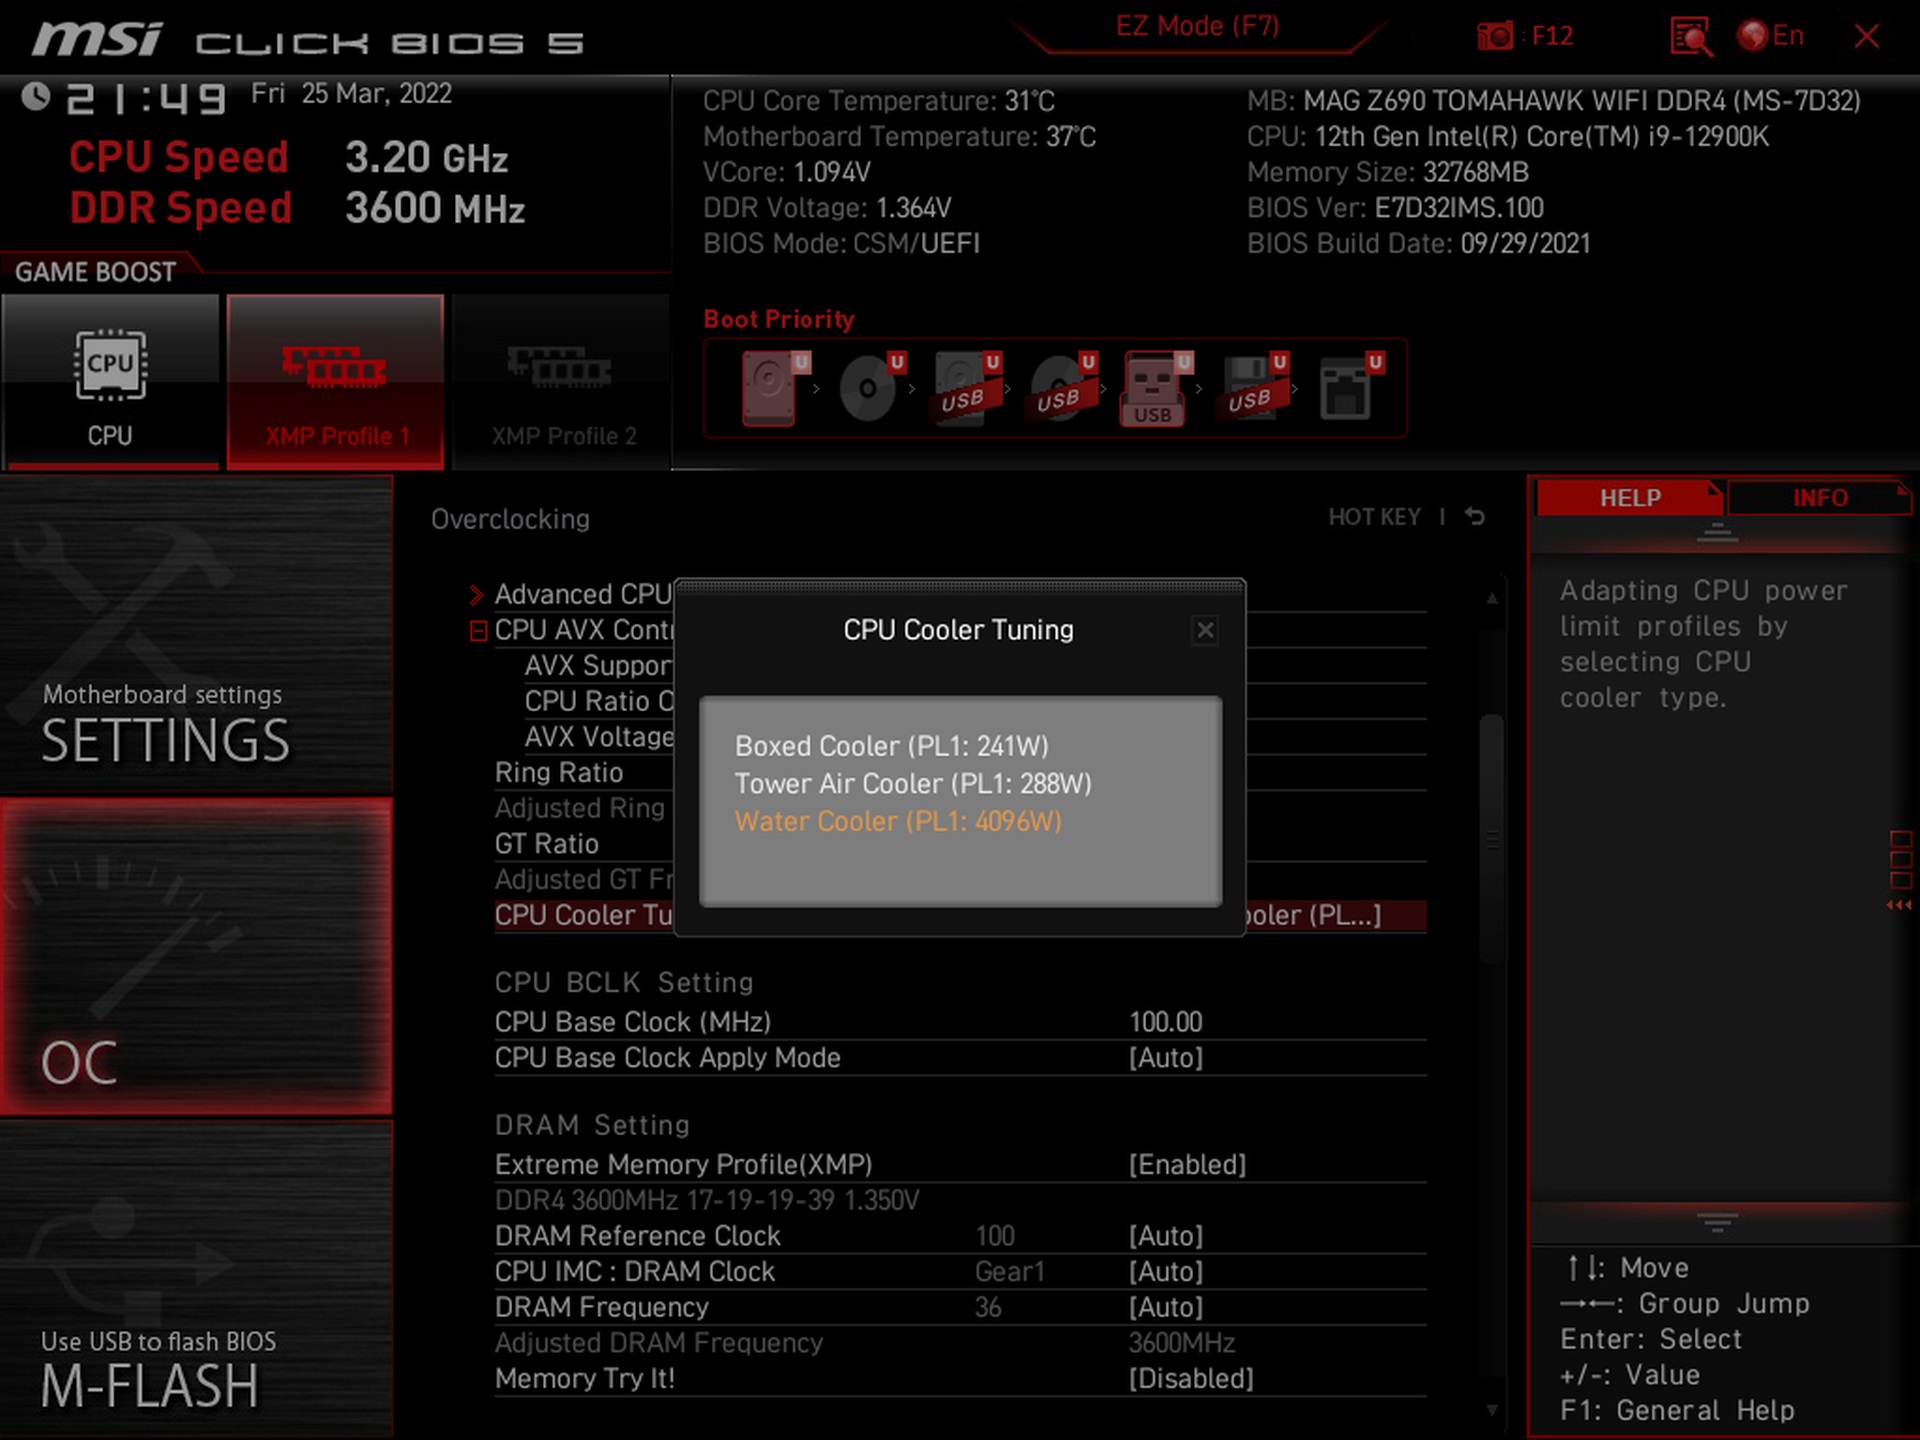
The preset profiles for power limits are also based on the potential performance of the CPU cooler. This is also the first thing you will encounter when entering the BIOS. Without any limitations is the “Water Cooler” profile. The middle profile “Tower Air Cooler” tends to be set so that the power draw in a long term load does not exceed the capabilities of the most powerful air coolers. With mid-range coolers, it is advisable to adjust the limits according to cooling capabilities.
In the lowest preset “Boxed Cooler” profile, 241 W looks a bit ridiculous. However, it should be noted here that such a value is set with a processor with a TDP of 125 W (Core i9-12900K), for which no cooler is even supplied. It could probably be noted that it’s a bit untuned for more powerful processors, but with the 65-watt models everything is already preset correctly. The PL1 value with the Core i5-12400 in box cooler mode is 65 watts.

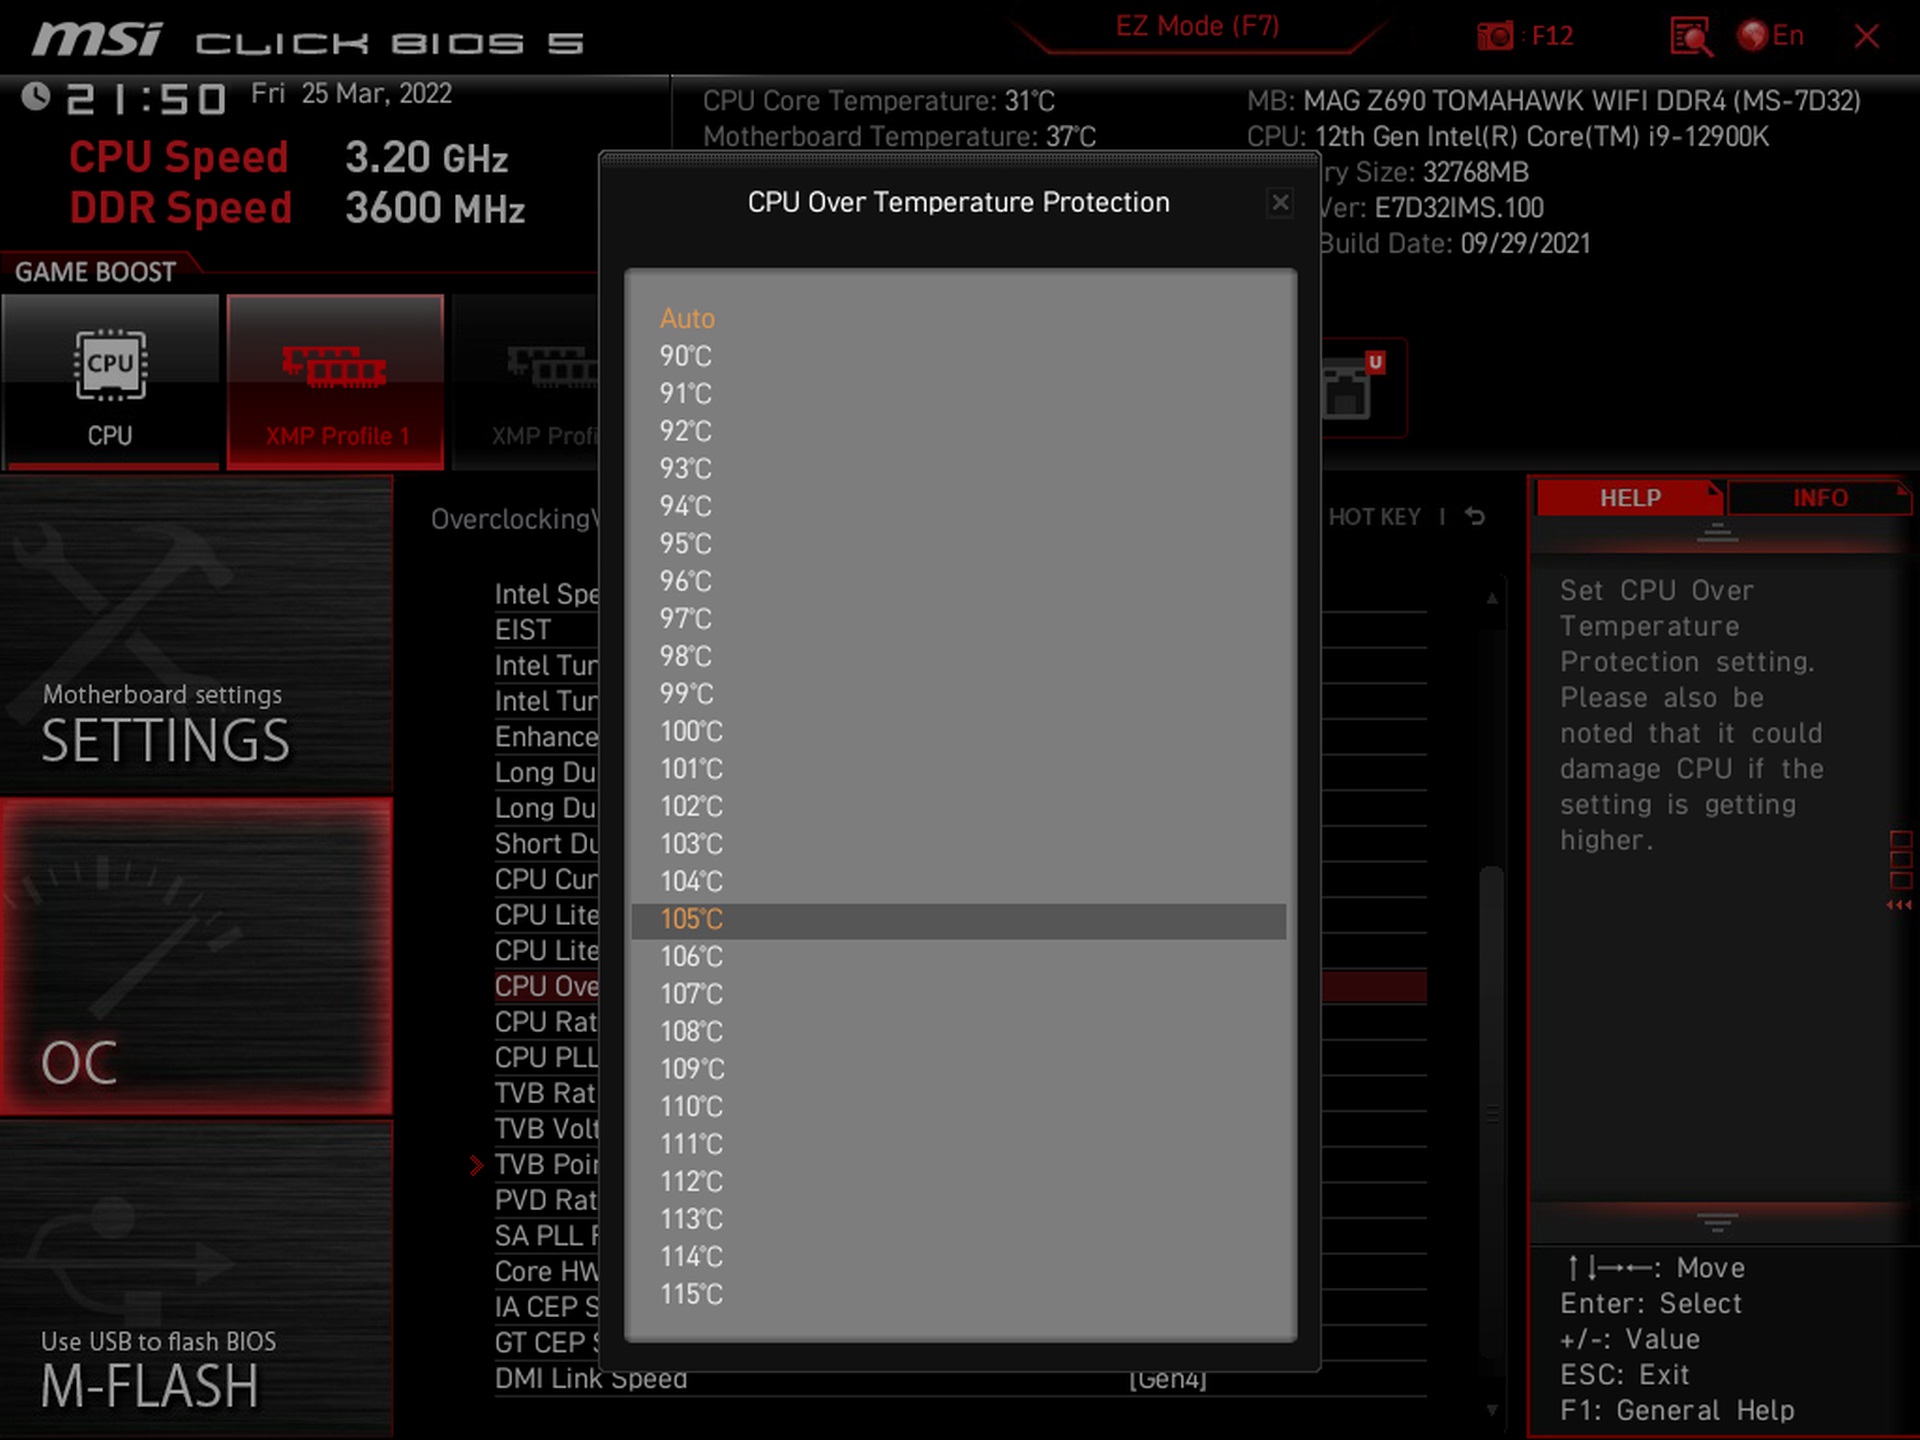
High temperature protection is there for both VRM and CPU. You can also set the upper limit after which the board will shut down at your own discretion. Alder Lake processors are able to operate even at very high temperatures without degrading performance. The question, of course, is for how long. Here too, the effect of high temperatures naturally leads to a shortened service life.

There is also a “Game Boost” button in the Tomahawk WiFi DDR4 BIOS, which is interesting for boosting performance. It does this by forcing a higher multiplier than the natural all-core boost value. At factory settings it’s +1, you can also try a more intense boost. Power draw in games is significantly lower than a hard multi-threaded load, and while cooling demands will increase, it’s not a dramatic increase that a better cooler can’t handle. There used to be a rotary mechanical button for Game Boost as well (it was still on the MEG X570 Ace, for example), but this has disappeared from MSI boards due to redundancy, now that this BIOS control is a full-fledged replacement.
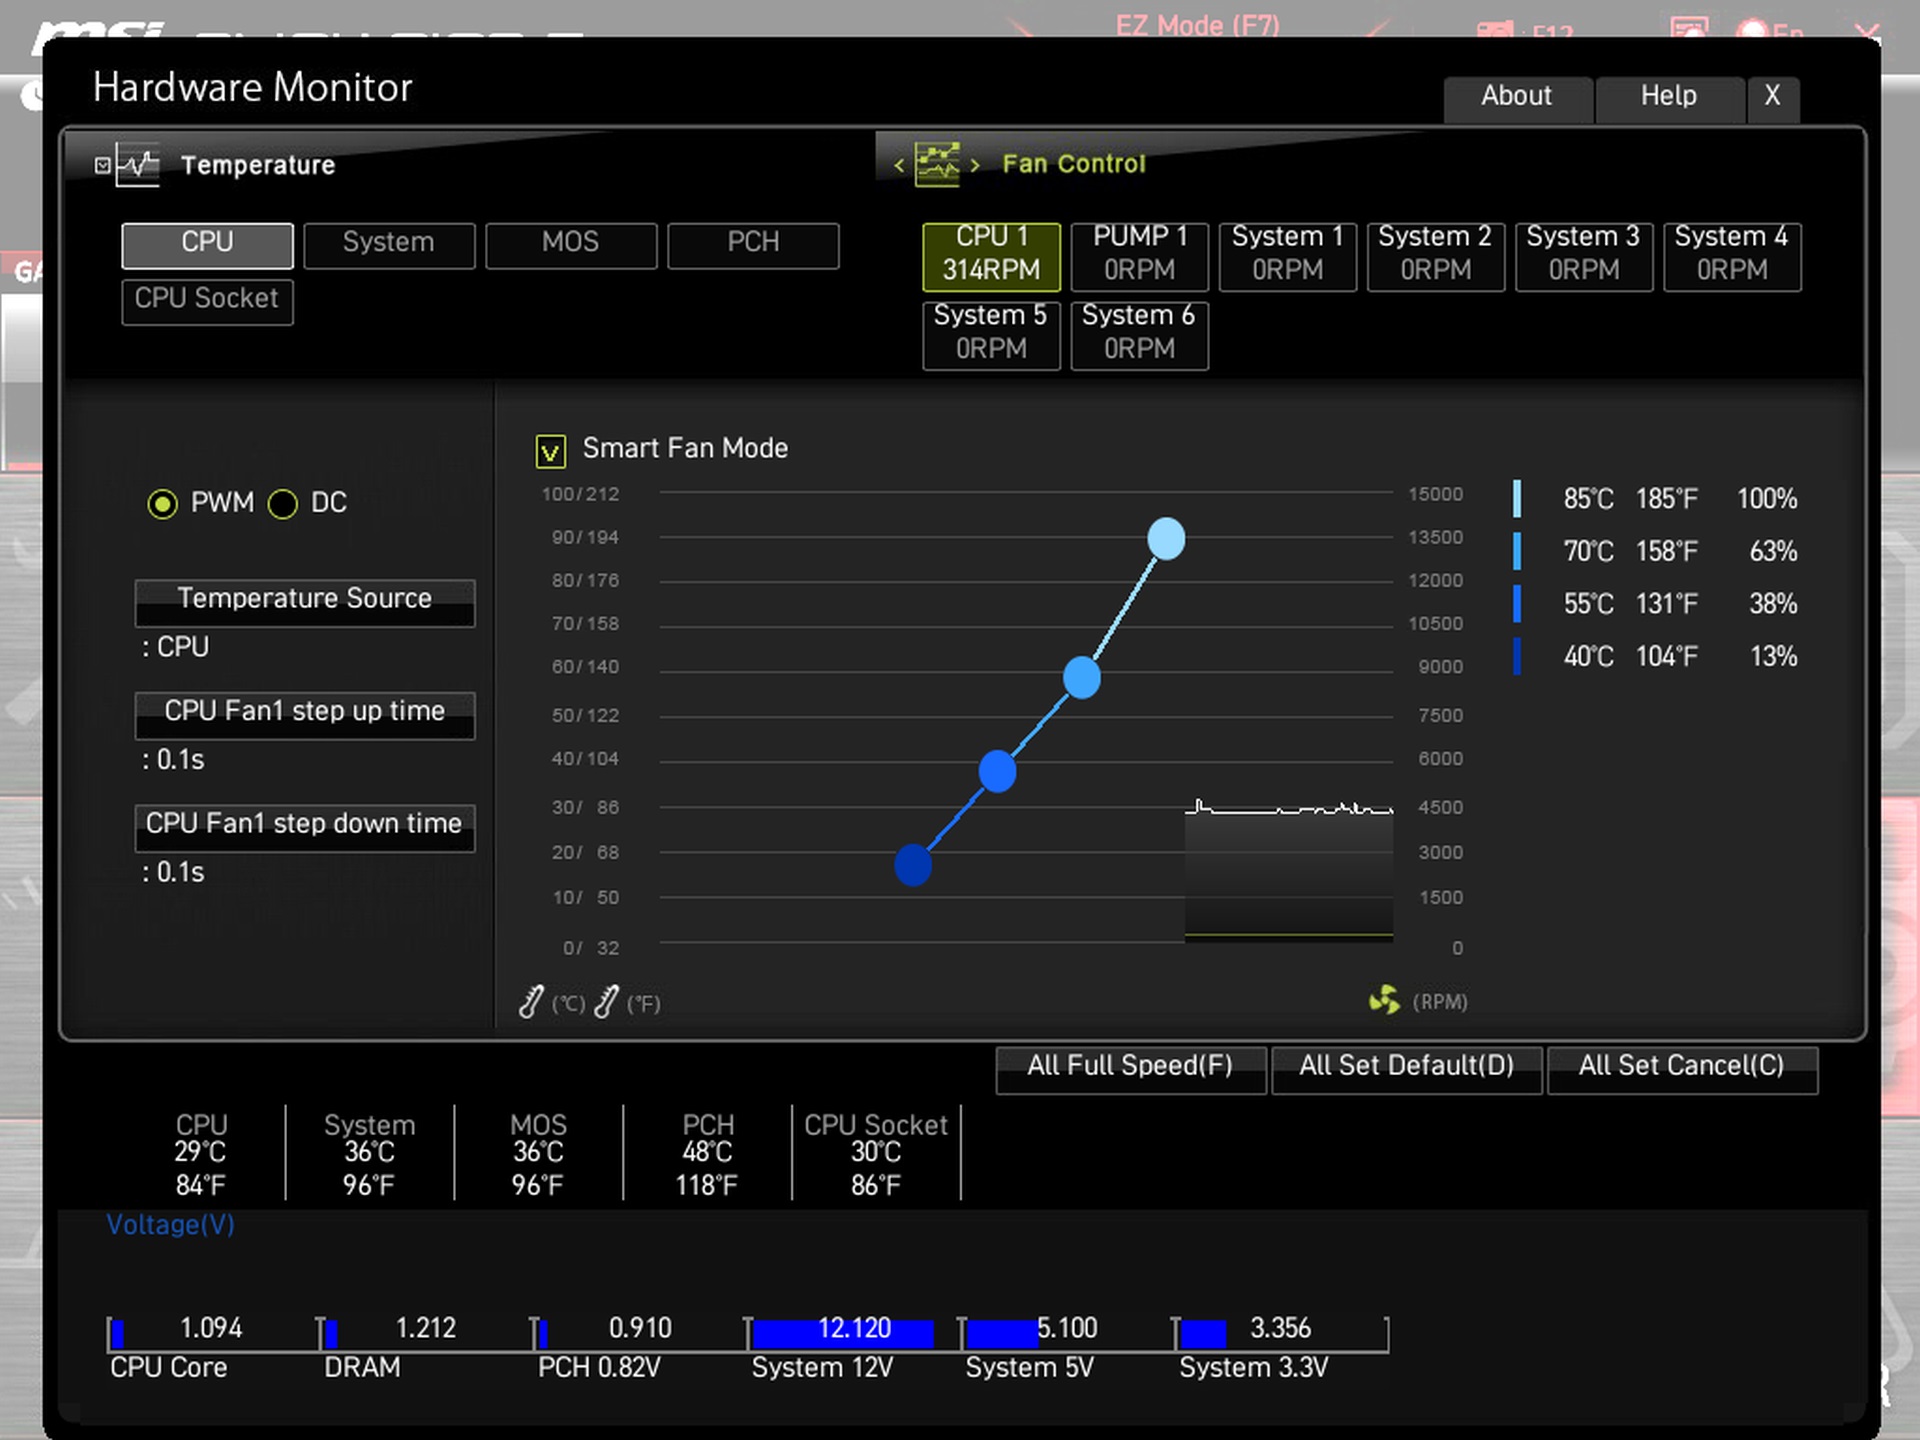
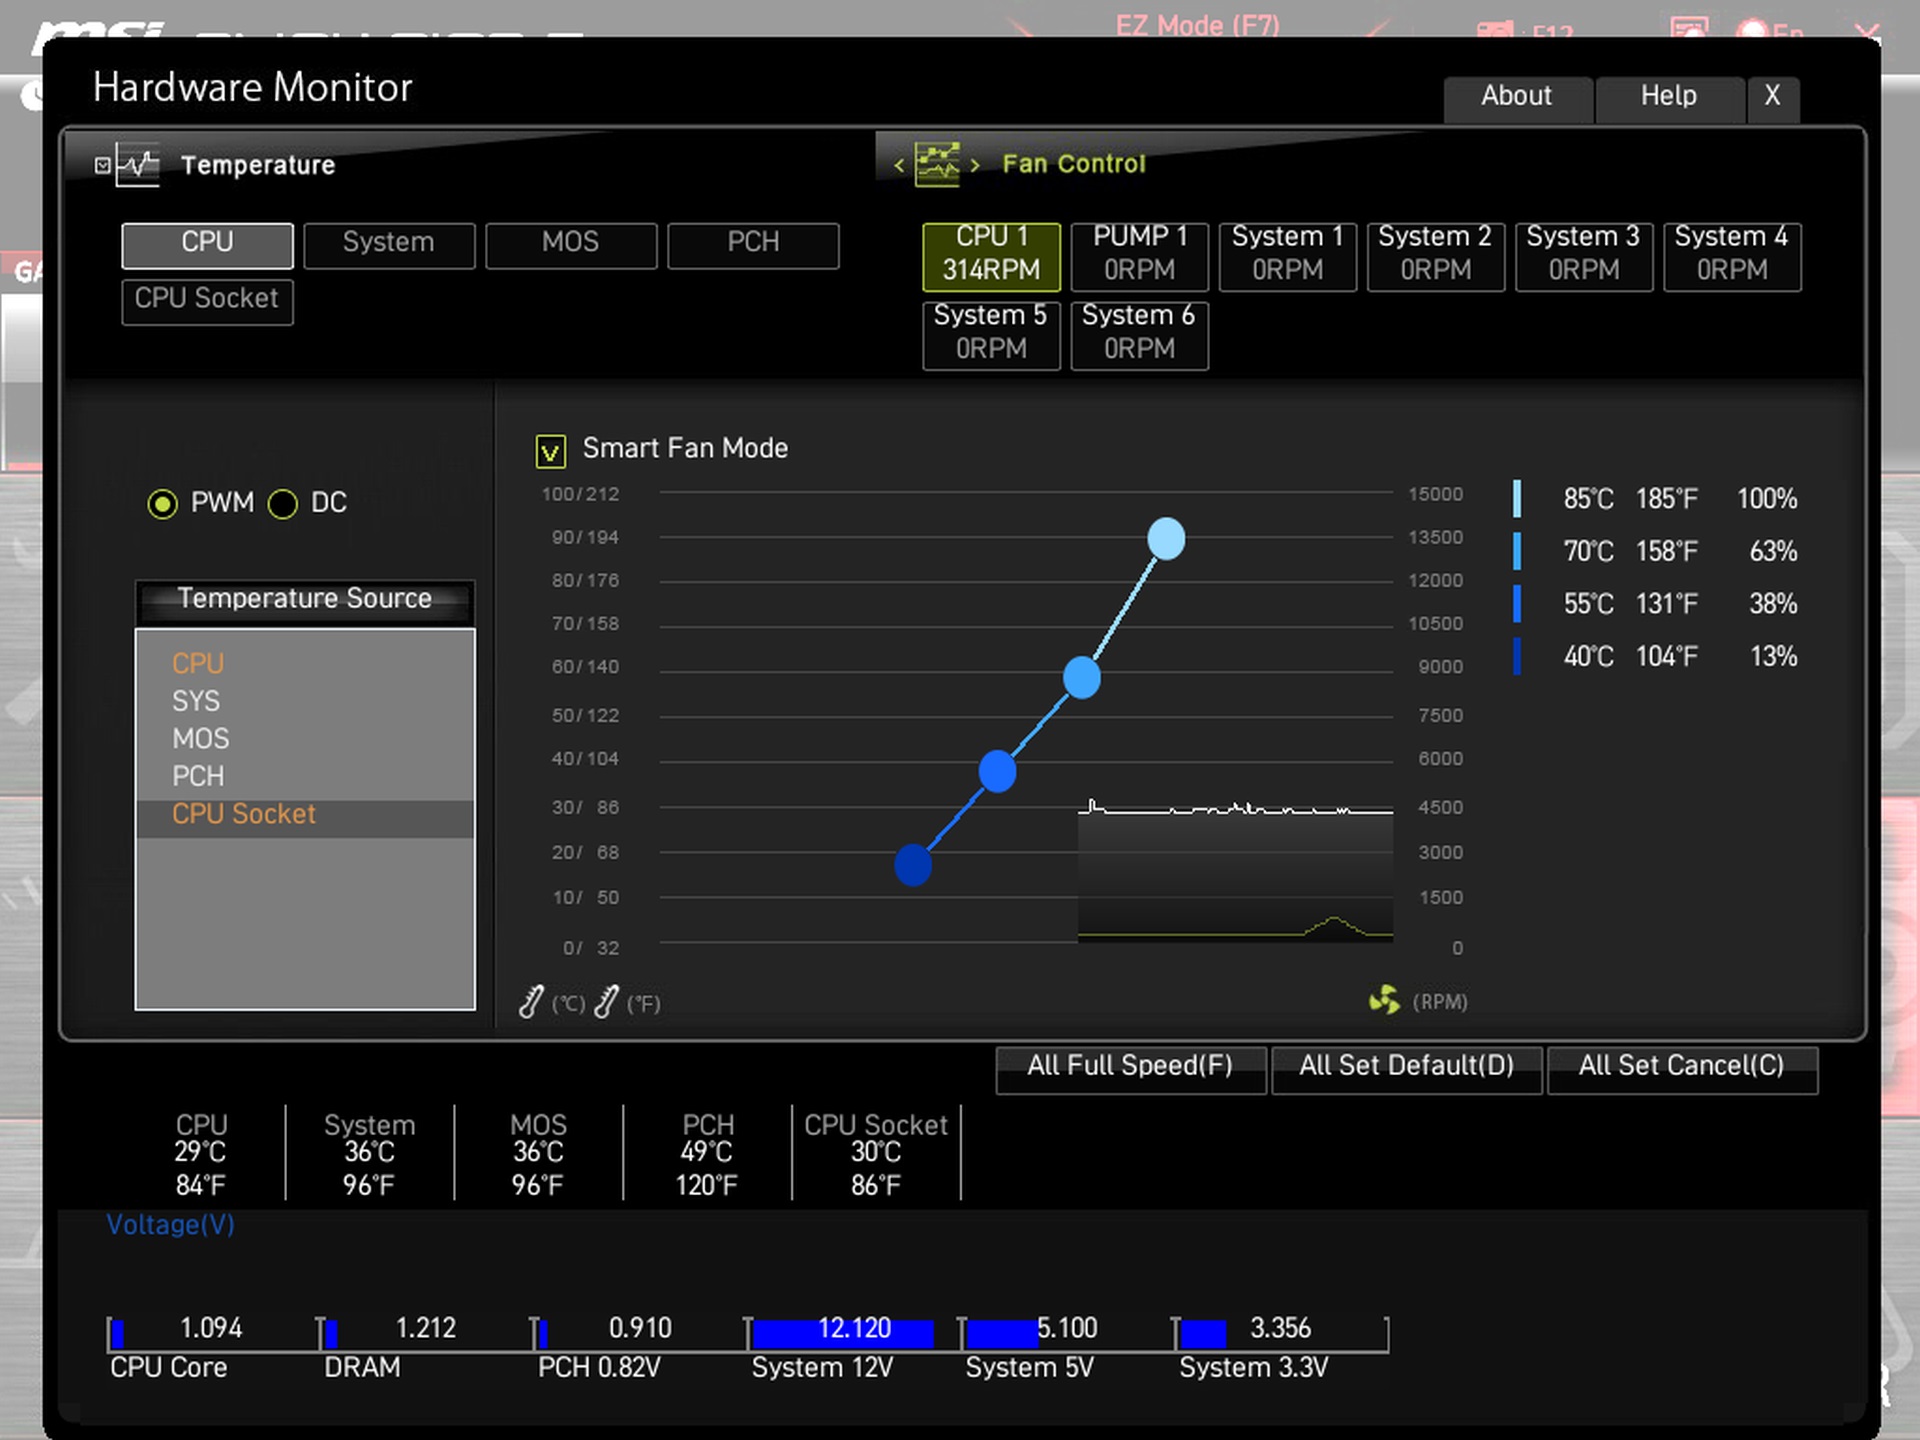
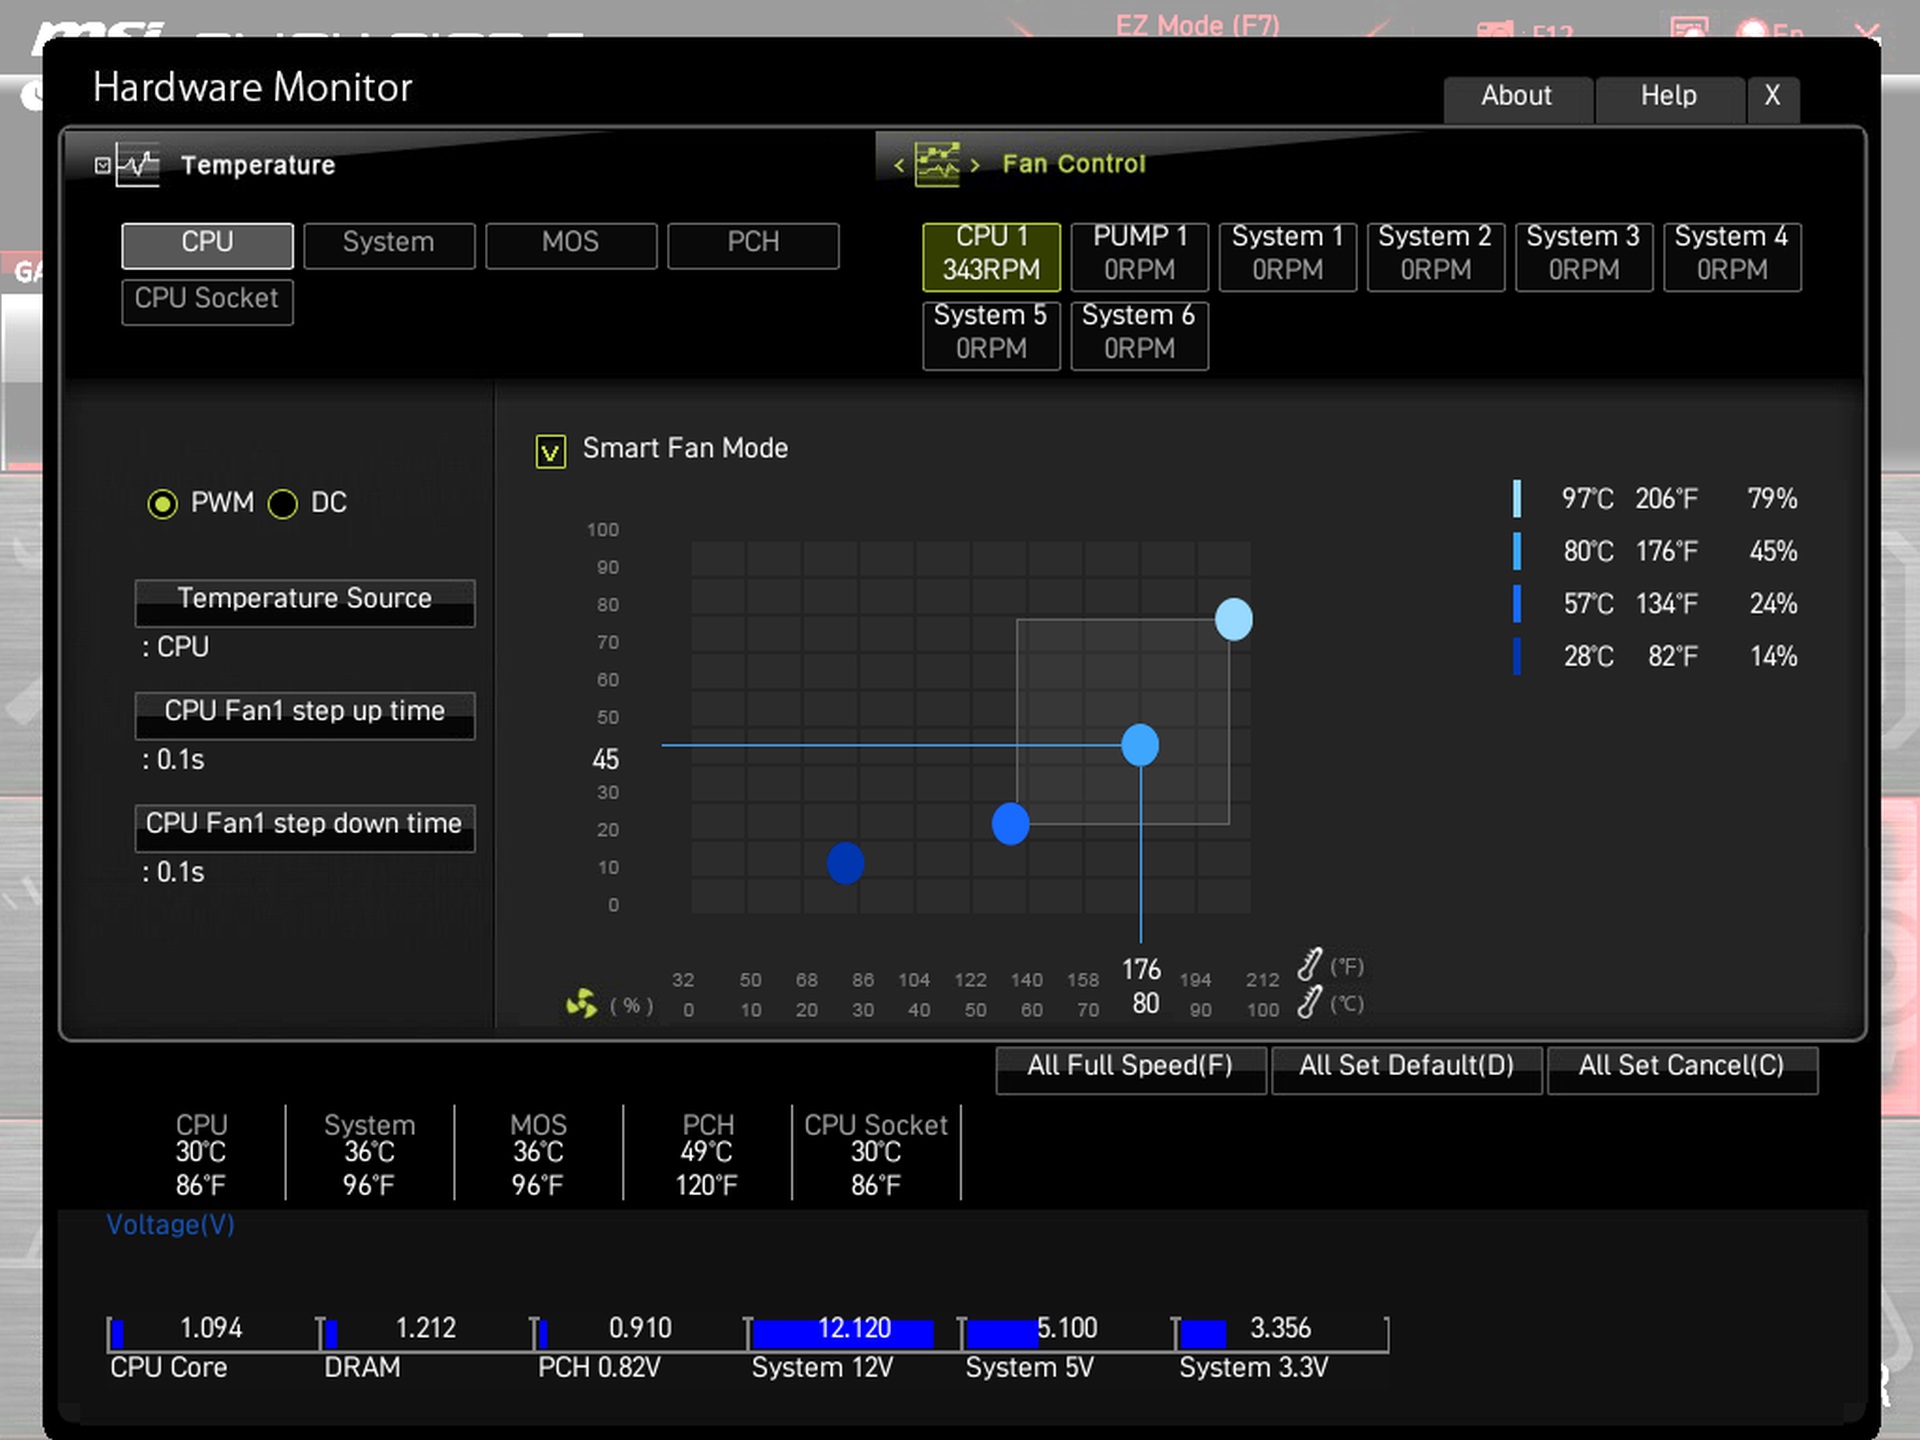
The fan tuning interface is of a very high standard. All connectors can be adapted, both with regard to PWM and DC control. The dependence of the speed curve development can be adjusted according to different temperature sources. The fan speed can thus be dependent on the temperatures of the components around the processor socket.
- Contents
- MSI MAG Z690 Tomahawk WiFi DDR4 in detail
- What it looks like in the BIOS
- Methodology: Performance tests
- Methodology: How we measure power draw
- Methodology: Temperature and frequency measurements
- Test setup
- 3DMark
- Borderlands 3
- F1 2020
- Metro Exodus
- Shadow of the Tomb Raider
- Total War Saga: Troy
- PCMark and Geekbench
- Web performance
- 3D rendering: Cinebench, Blender, ...
- Video 1/2: Adobe Premiere Pro
- Video 2/2: DaVinci Resolve Studio
- Graphics effects: Adobe After Effects
- Video encoding
- Audio encoding
- Photos: Adobe Photoshop, Affinity Photo, ...
- (De)compression
- (De)cryption
- Numerical computing
- Simulations
- Memory and cache tests
- M.2 (SSD) slots speed
- USB ports speed
- Ethernet speed
- Power draw curve (EPS + ATX connector) w/o power limits
- Power draw curve (EPS + ATX connector) with Intel’s power limits
- Total power draw (EPS + ATX connector)
- Achieved CPU clock speed
- CPU temperatures
- VRM temperatures – thermovision of Vcore and SOC
- SSD temperatures
- Chipset temperatures (south bridge)
- Conclusion