


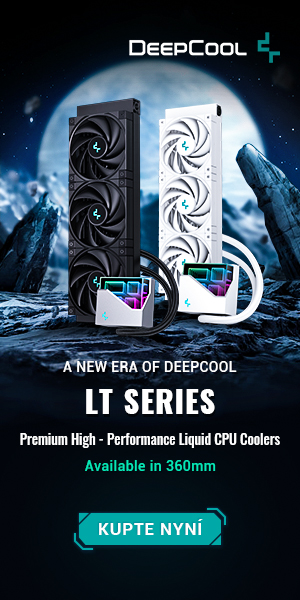

What it looks like in the BIOS
Most motherboards from the same classes look pretty much the same. While they differ in color scheme and heatsink shape, the layout, features, and overall operation (including power management) are like a carbon copy. The Biostar B660GTA goes upstream in many ways and presents an attractive option for those users who always find something lacking on boards in this price range.
What it looks like in the BIOS
The UEFI GUI is unique in many ways, or rather, if you don’t already have some experience with Biostar boards, some of the details will be new to you. There are differences in the layout of individual elements, settings and some “special” features (or designations) across all manufacturers, but Biostar bypasses the conventions the most.
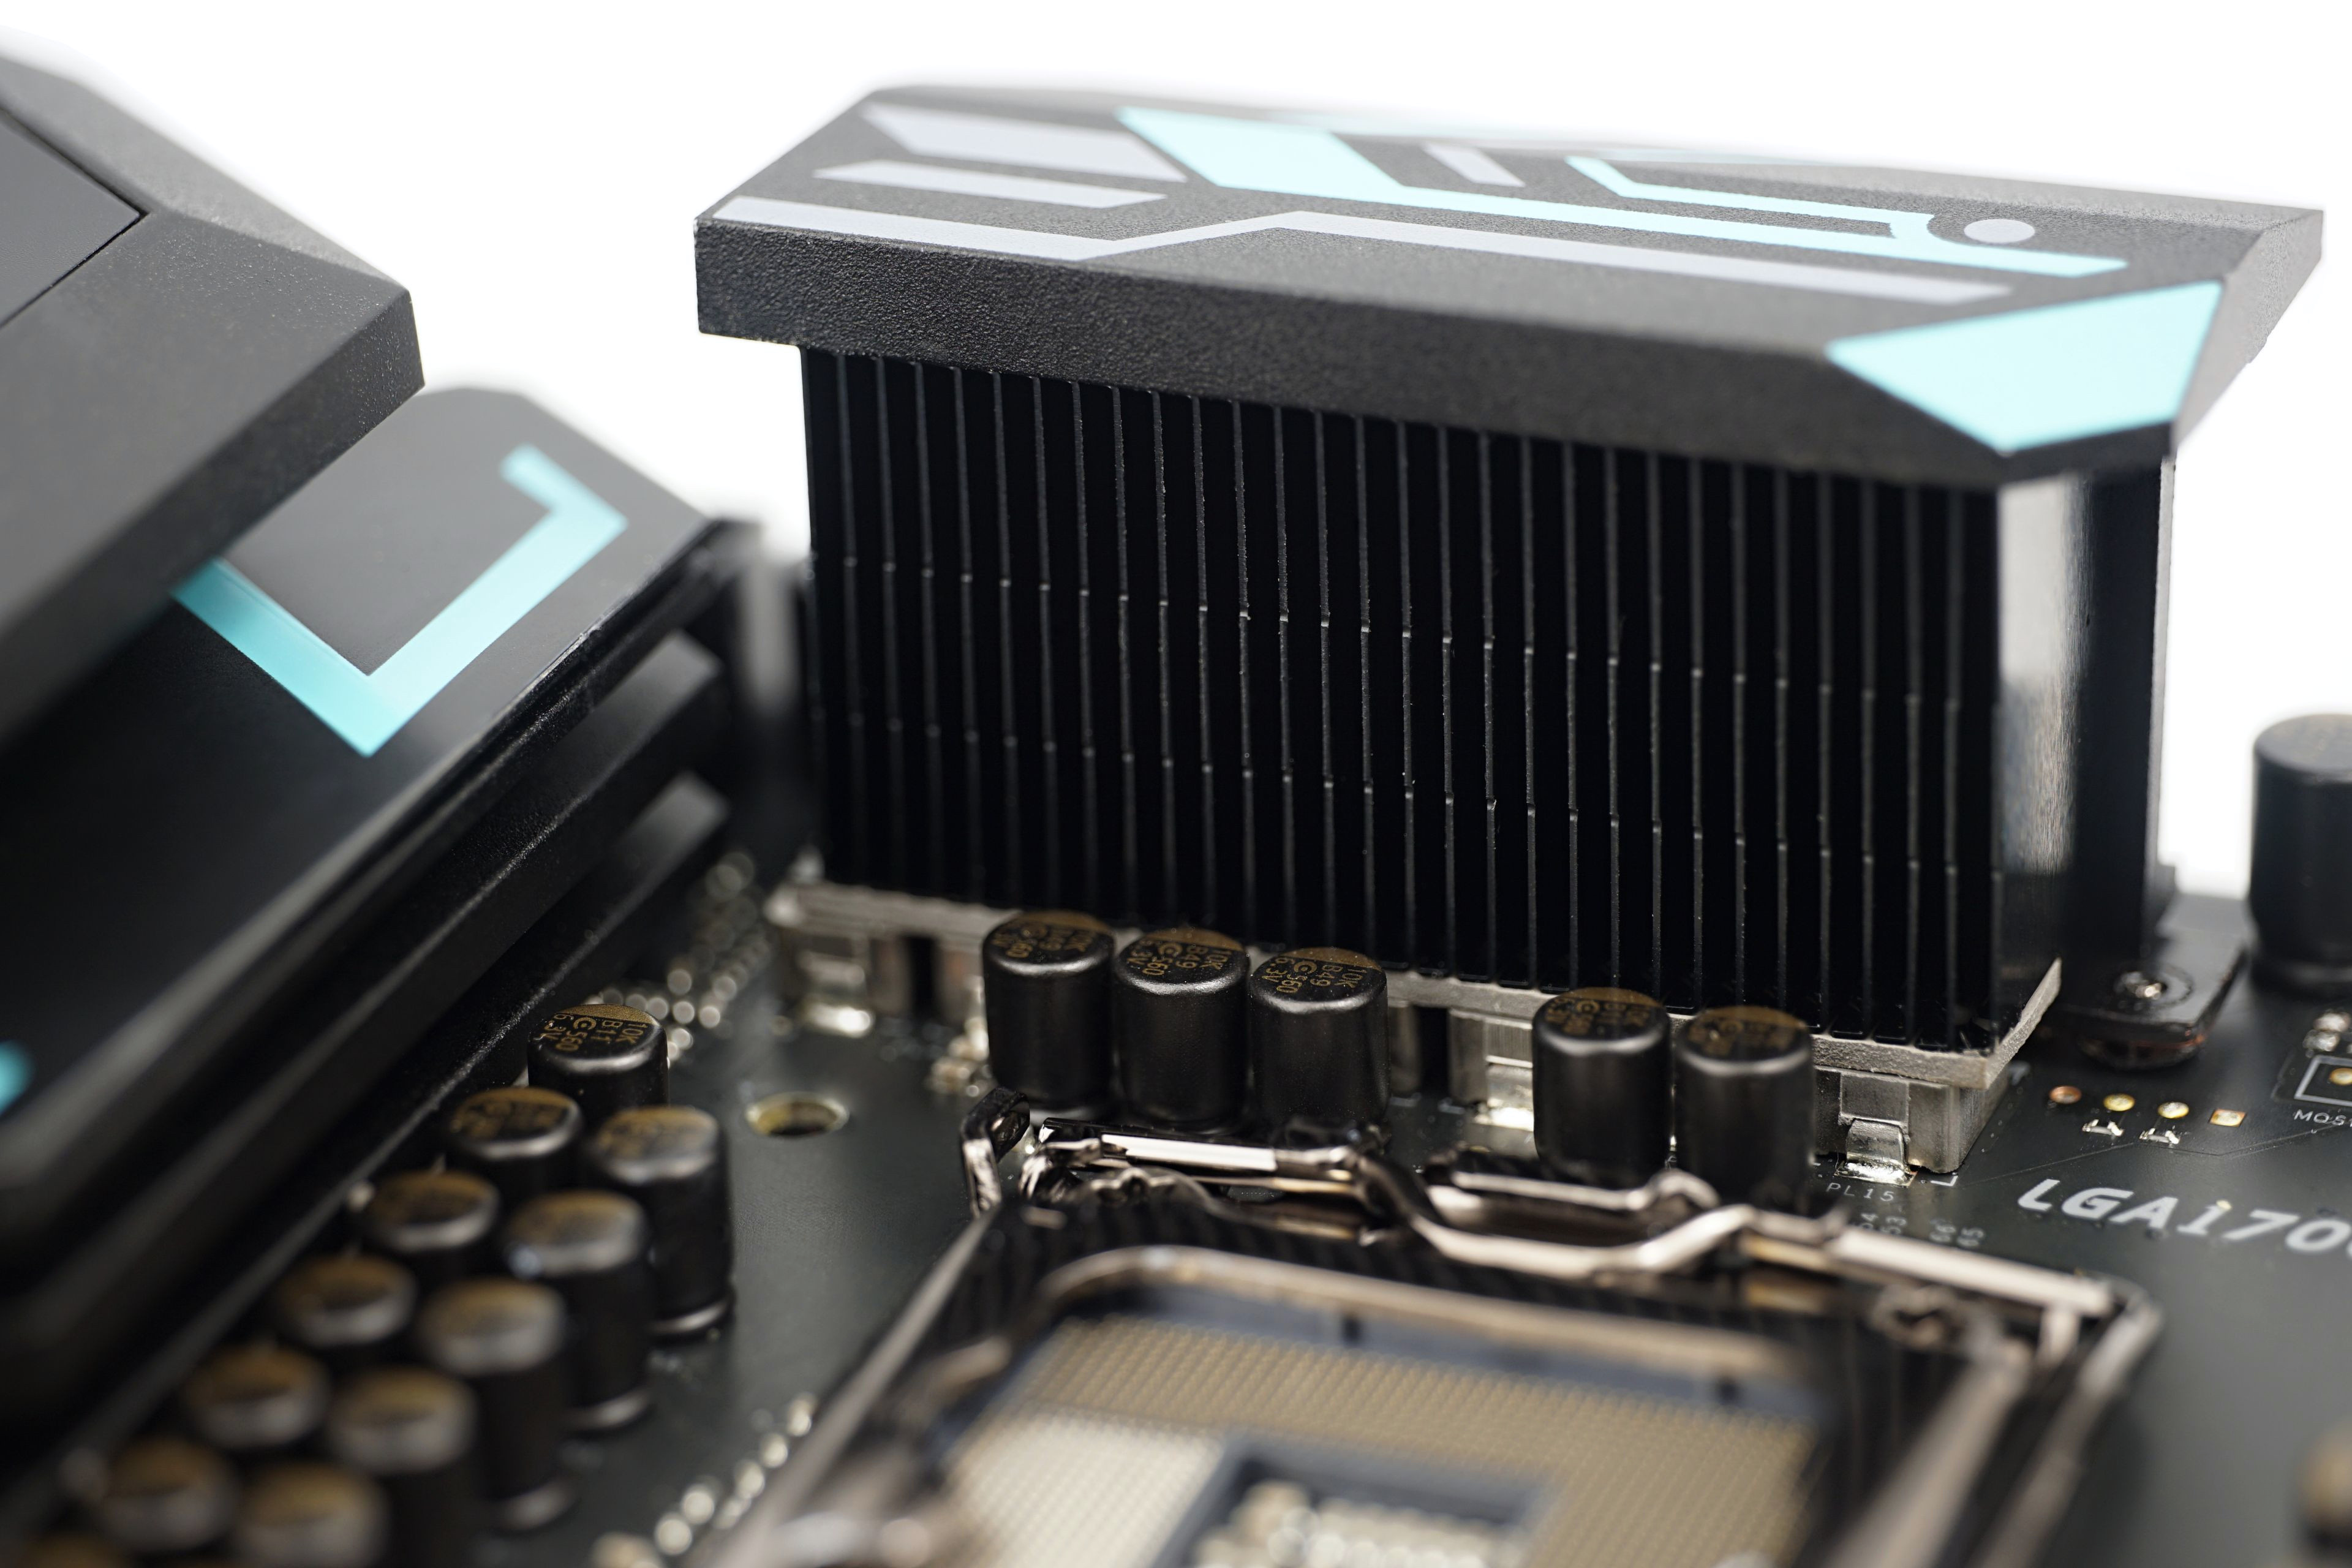
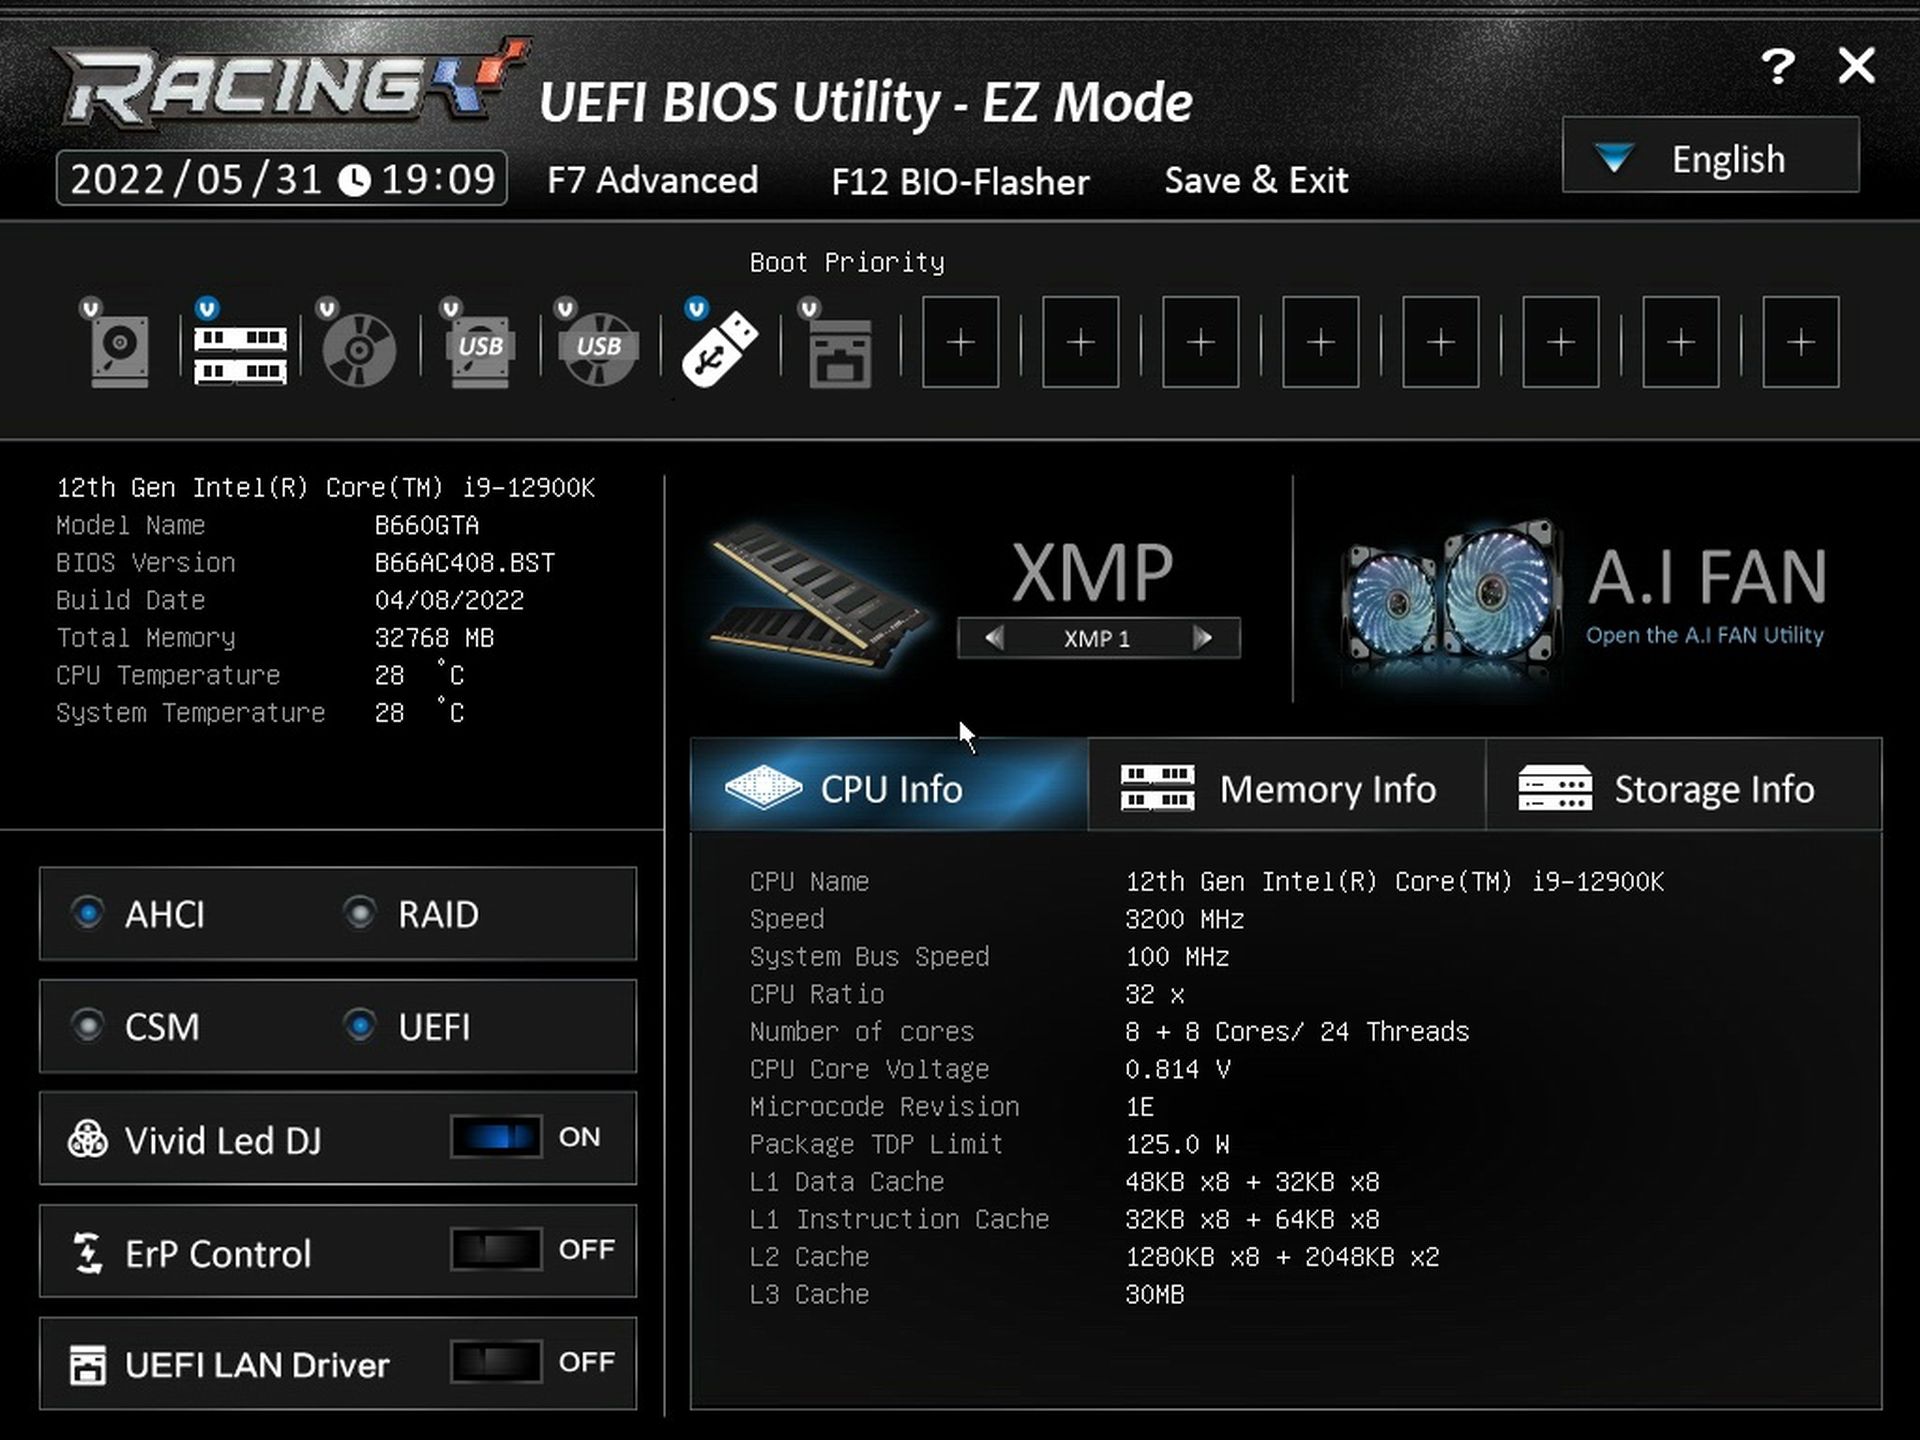
There is also a simplified view here. EZ Mode allows you to activate the memory profile (XMP), enable RAID or CSM with one button, set the boot priority or go to the fan management interface. A large space is also reserved for CPU, memory and attached storage information. It’s actually very similar in content to MSI’s Click BIOS, although the individual elements are in different places. We’ll leave it up to you to decide whether Biostar’s layout fares better or worse.
Although Biostar doesn’t use the same keyboard shortcuts for some things as others, the F7 key to go to a more advanced view has been retained. But screenshots, for example, are taken via F11 (instead of the traditional F12 key), and it’s also notable that you have to name the photo somehow before you can save it. A generic name with a changing number at the end of the file is commonly used.
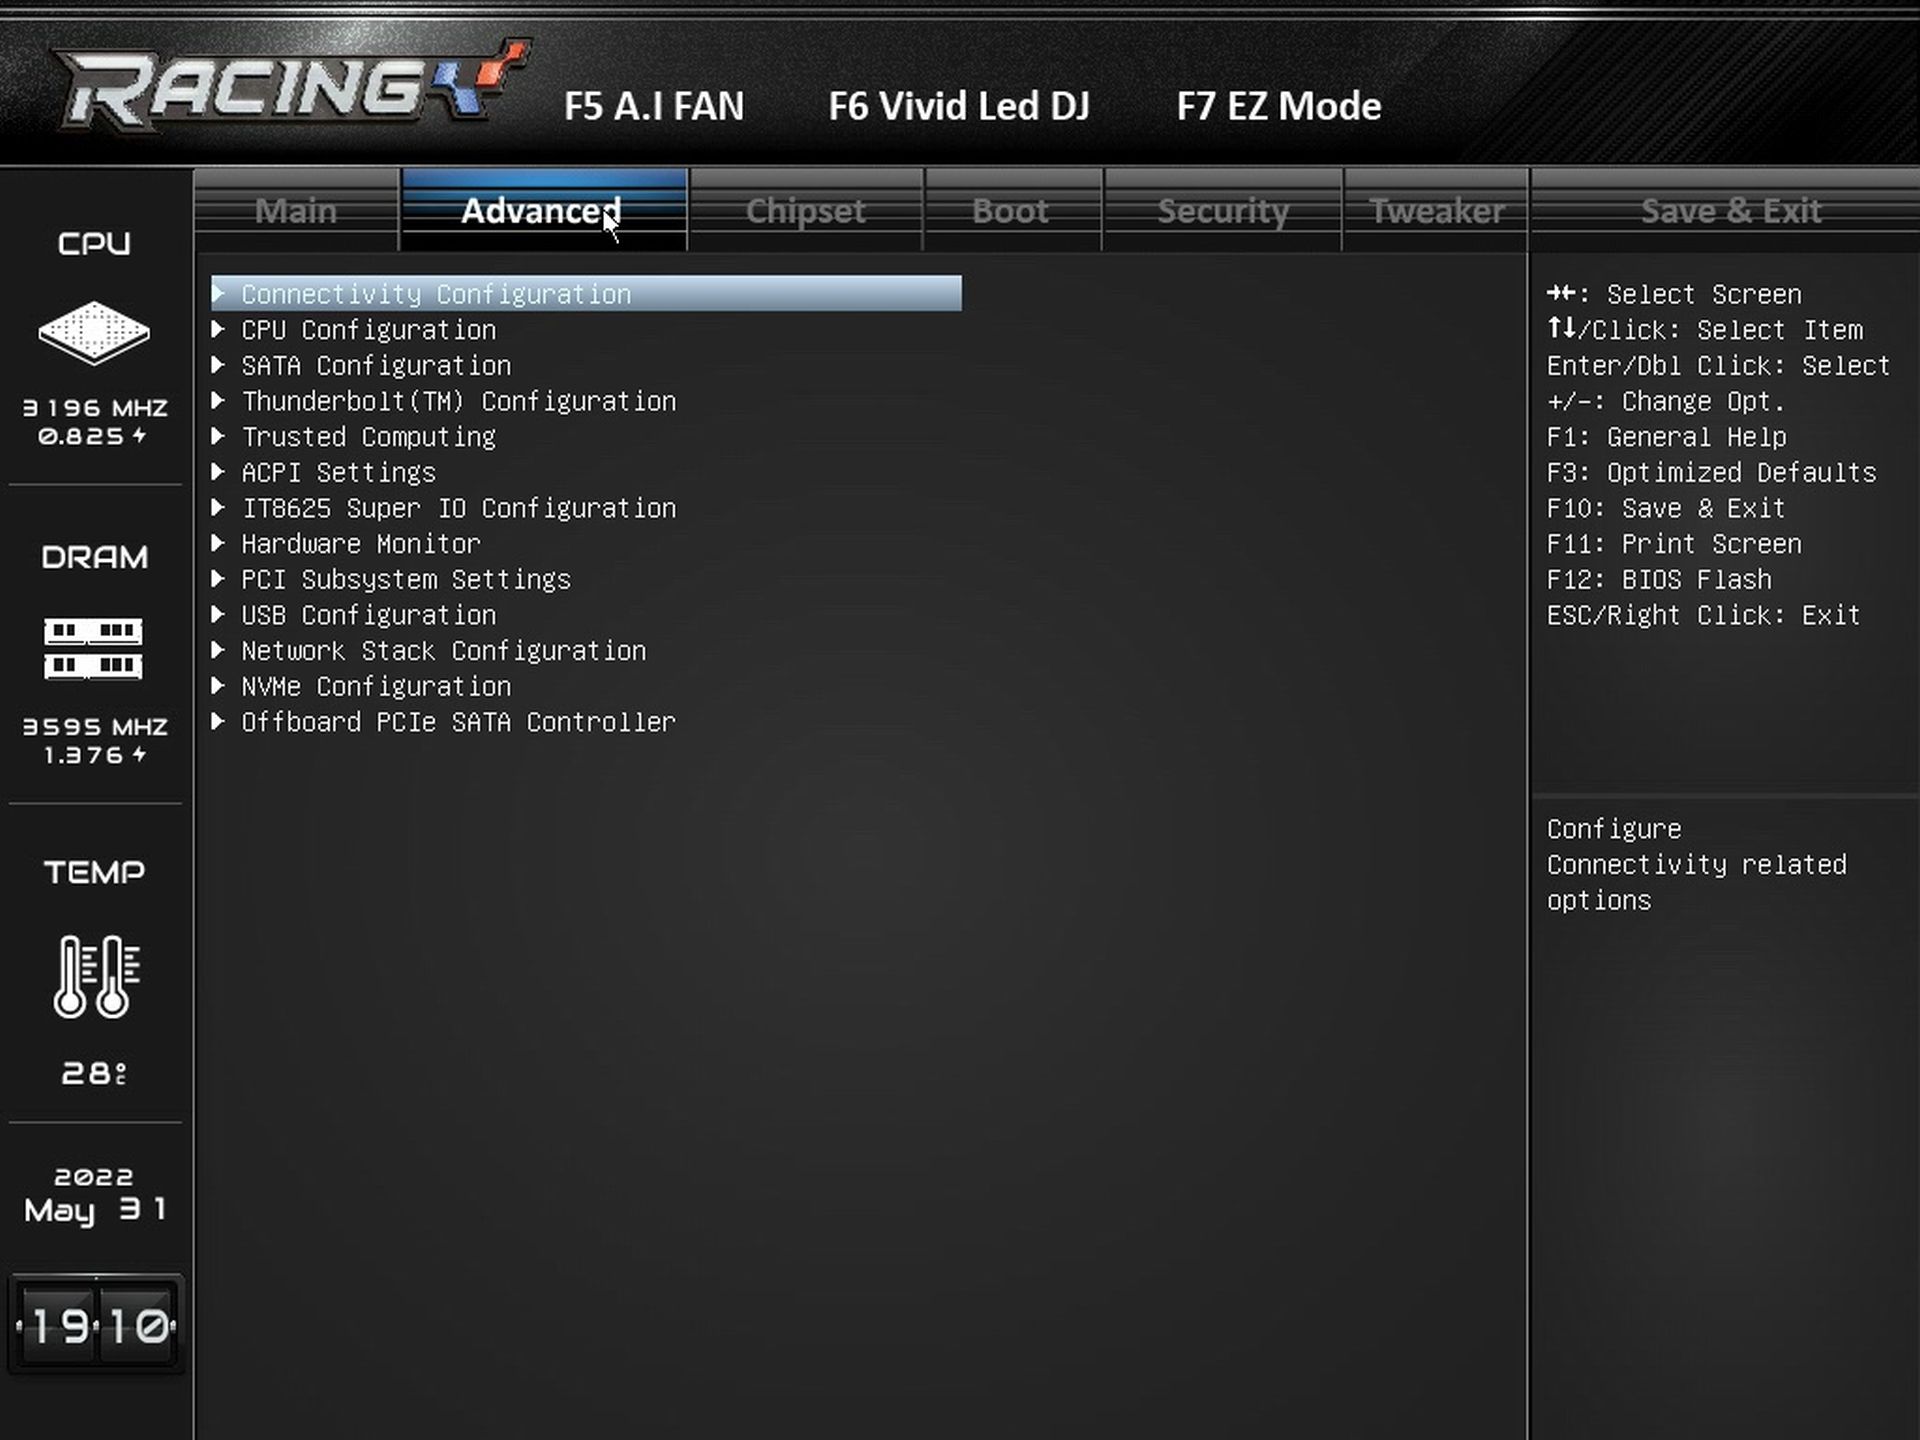
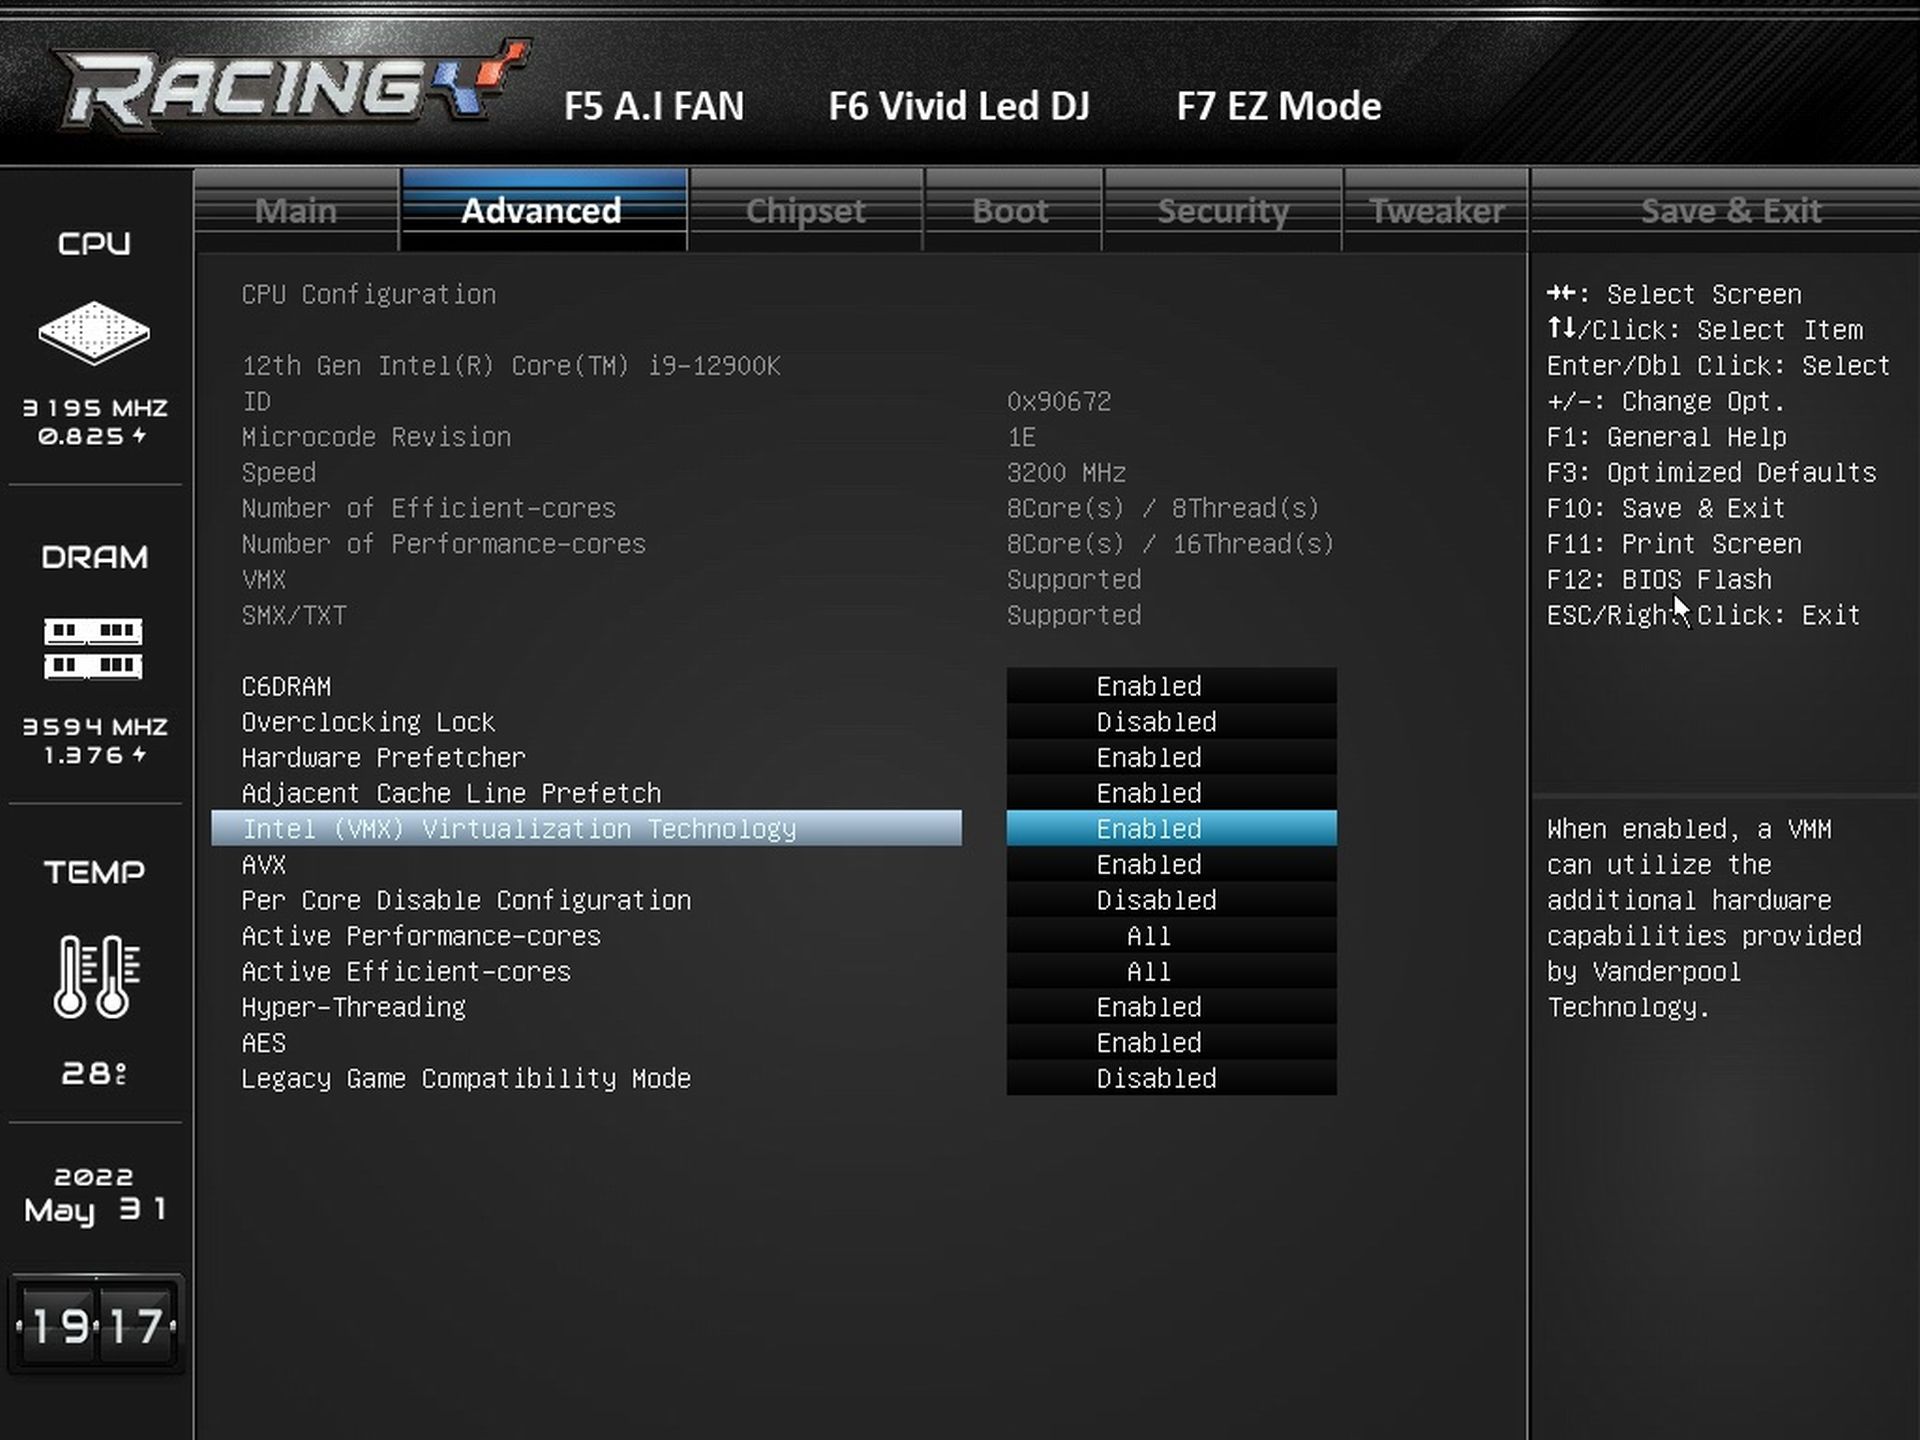
On the “Advanced” tab there is a signpost to the basic settings that are also on other boards. Nothing that other manufacturers have is missing here. Detailed enough are the SATA settings, where you can configure the individual ports (AHCI/RAID, Hot Plug, …), NVMe or PCIe, where you can enable, for example, the Resizable BAR to increase the performance of the graphics card. The management of CPU settings is also fully featured.
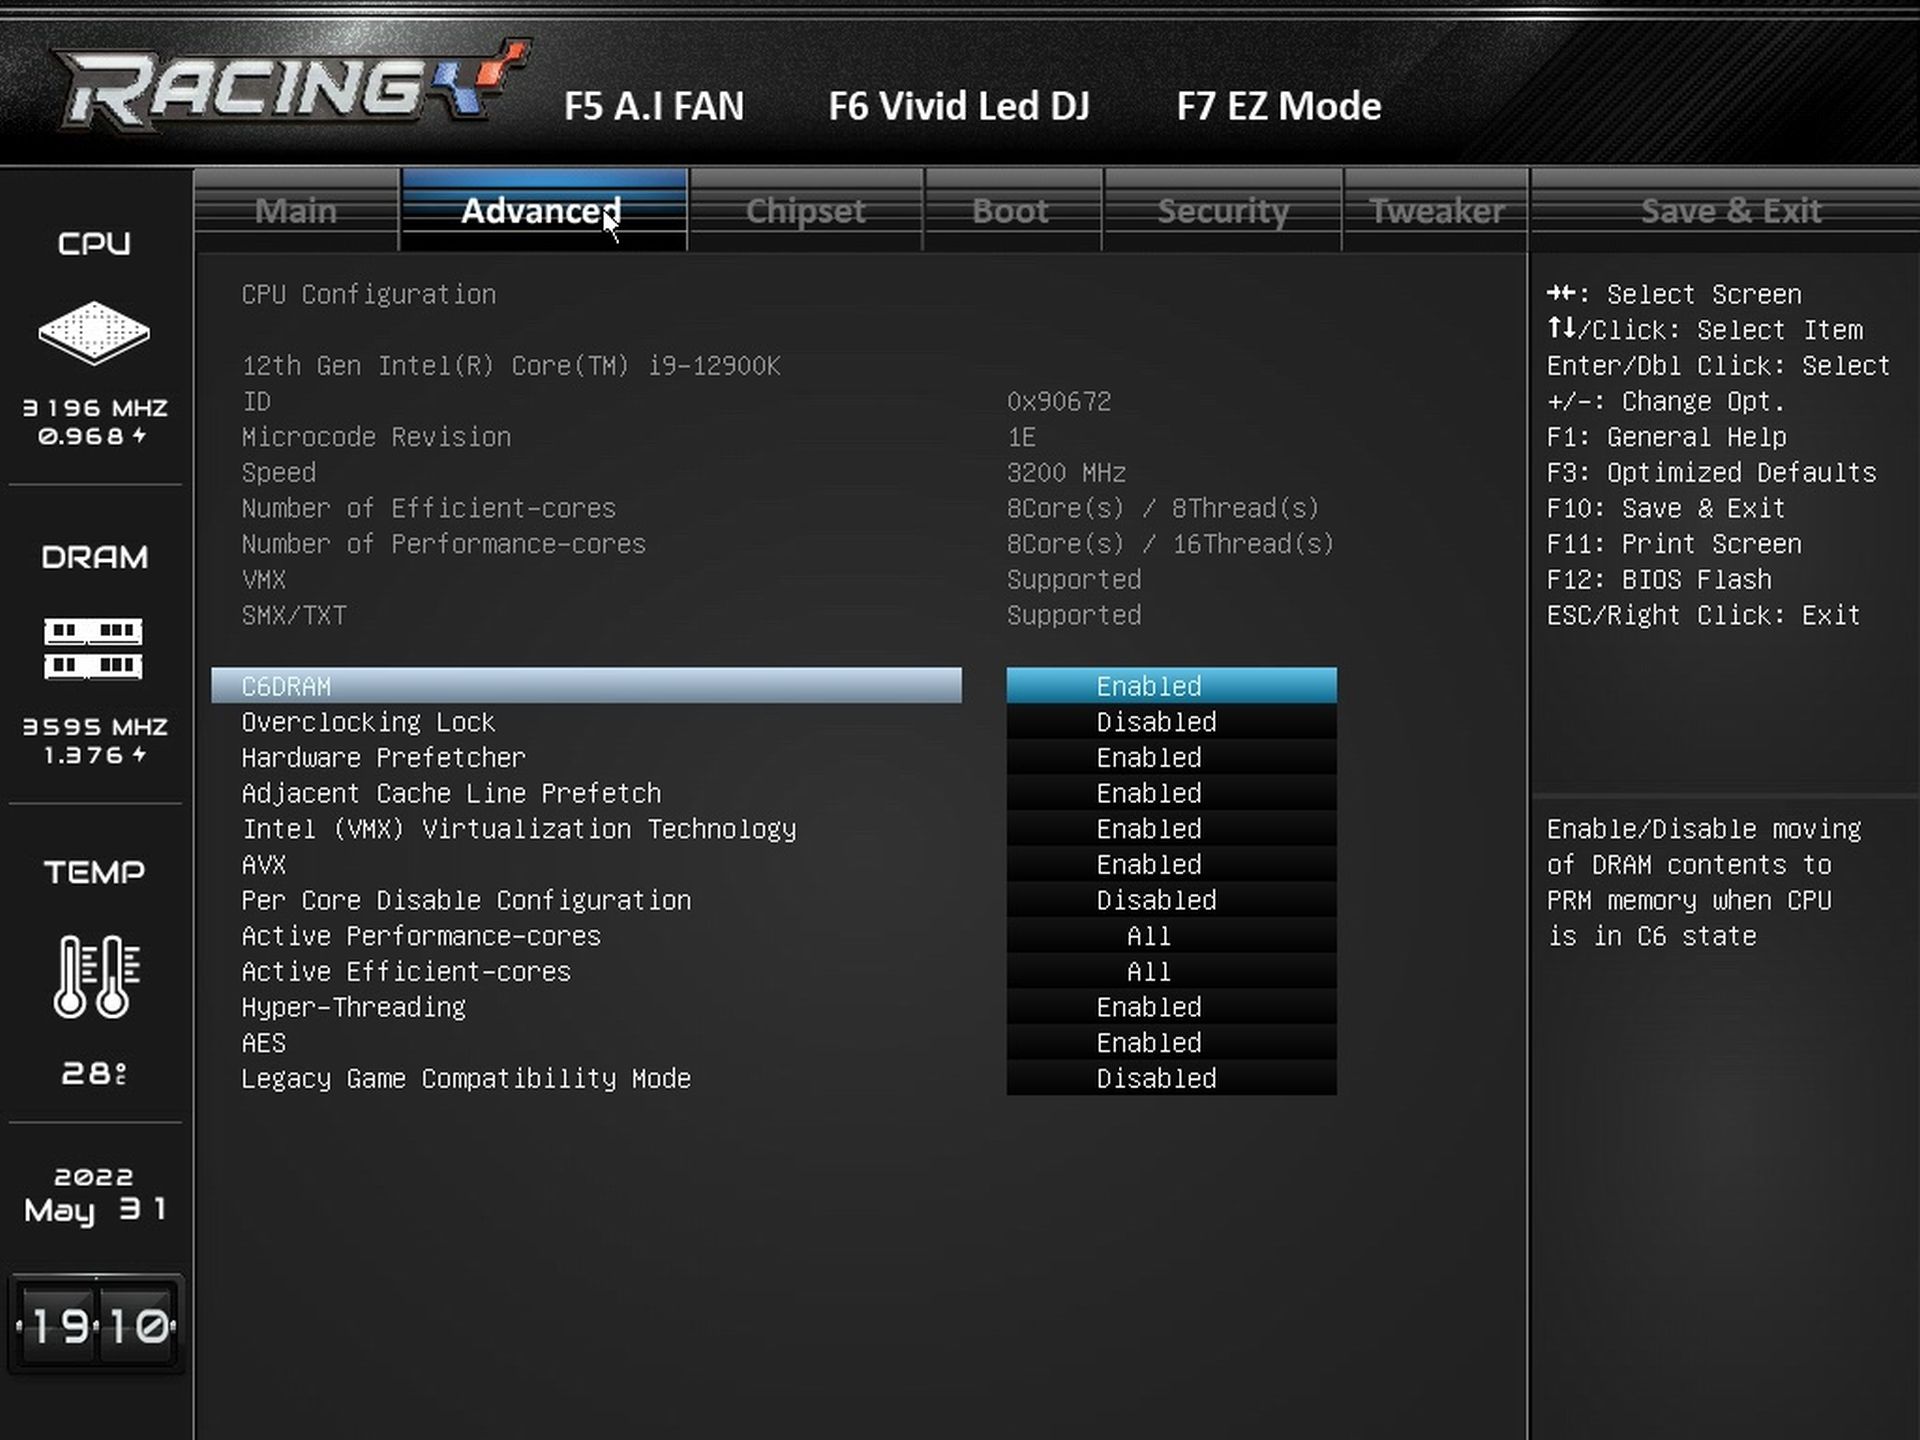
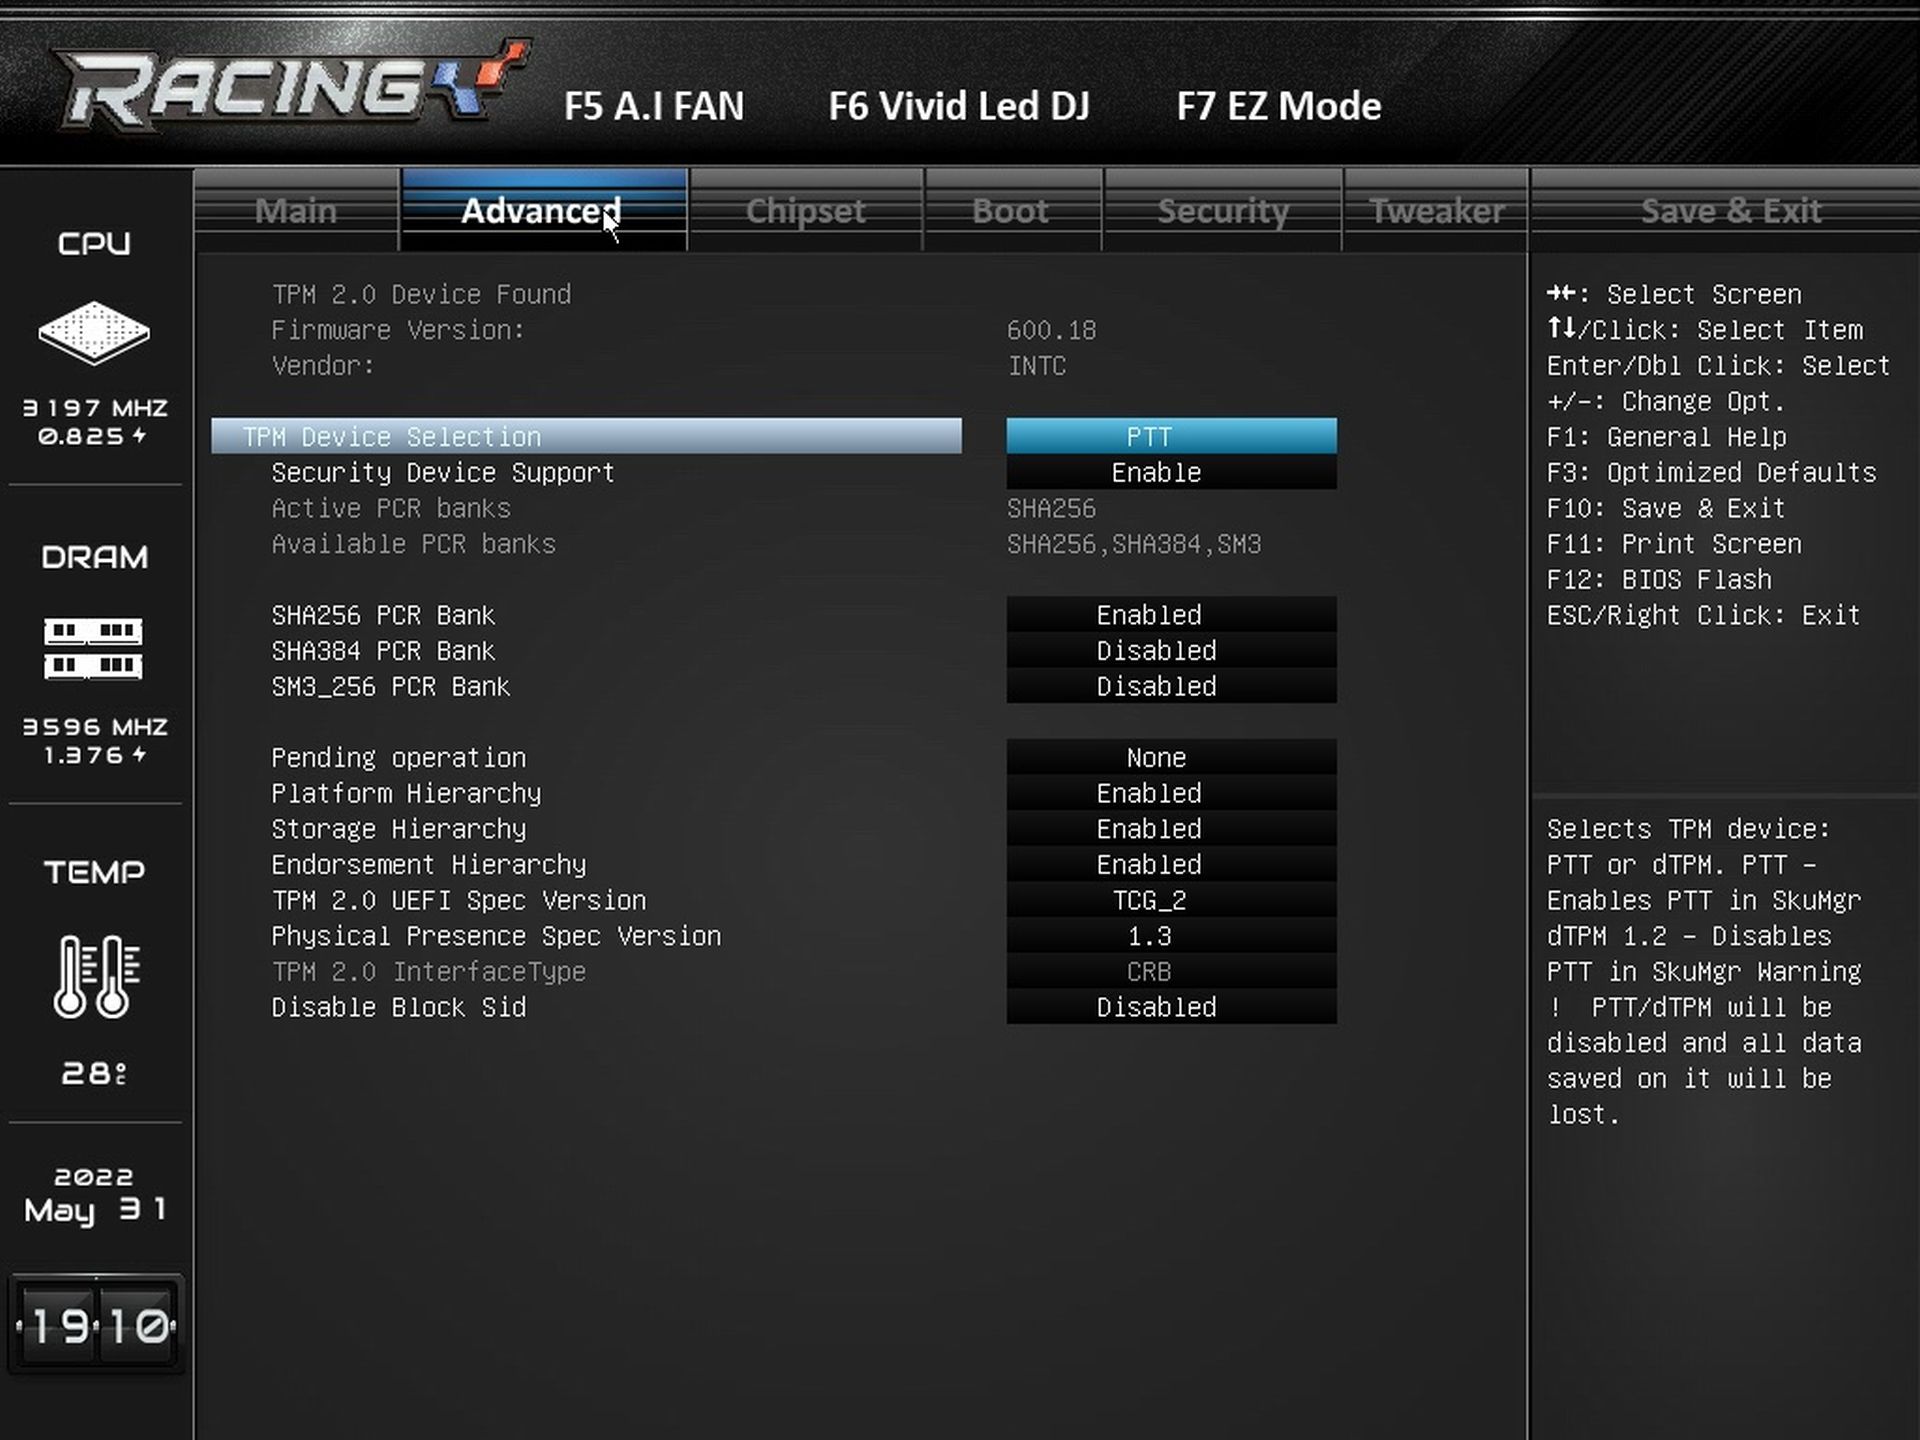
In addition to the possible disabling of arbitrary P/E CPU cores, you can disable virtualization, AVX instructions, AES encryption, Hyper-Threading, and similar basic things in case you need to. The TPM 2.0 settings also go into the greatest detail.
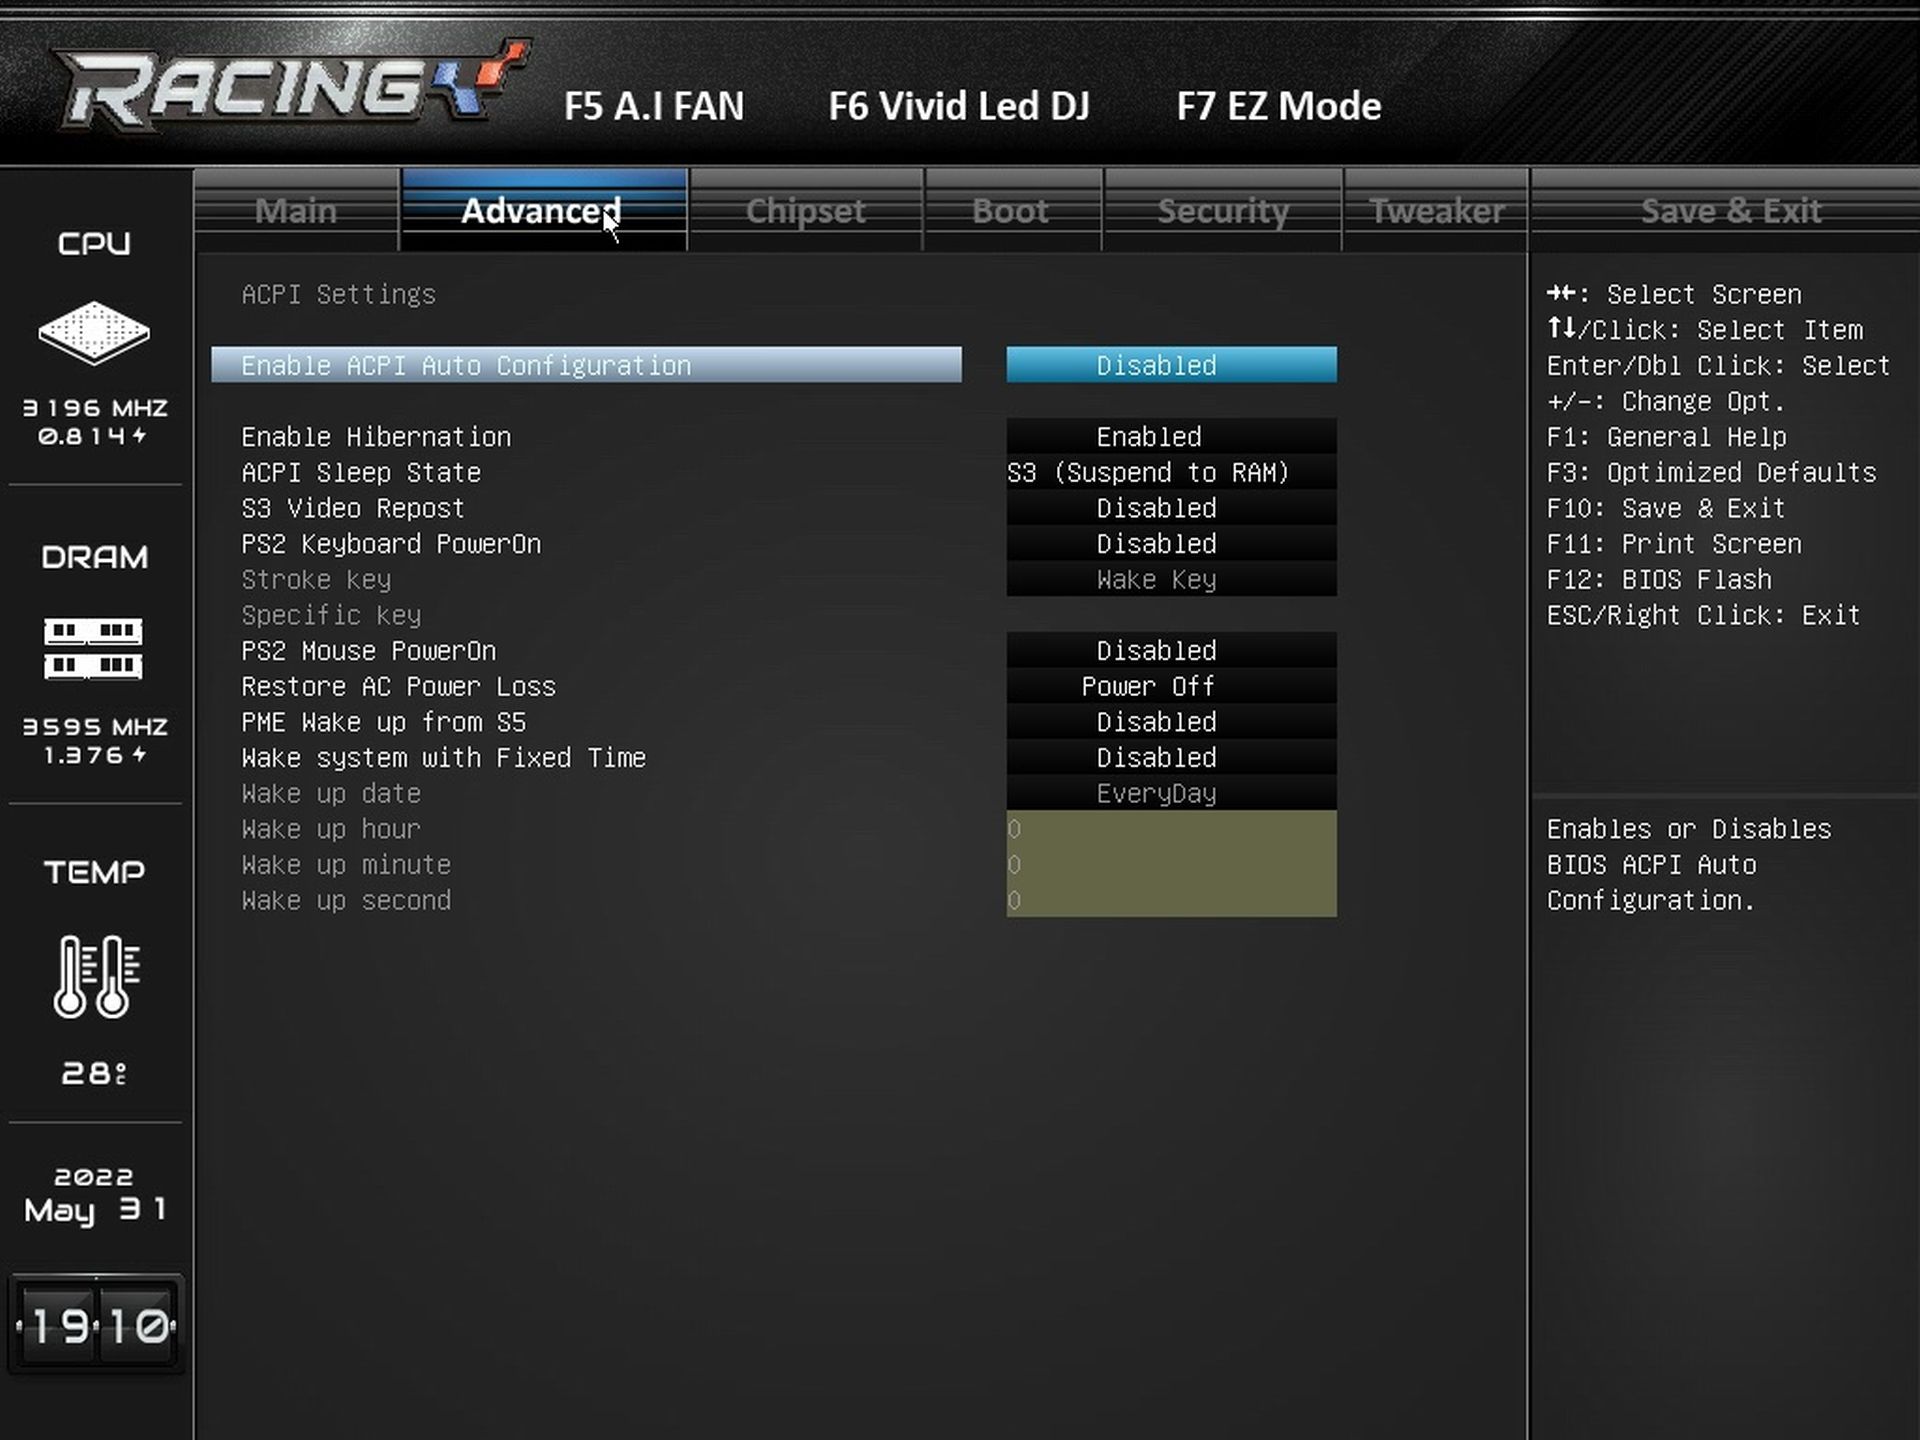
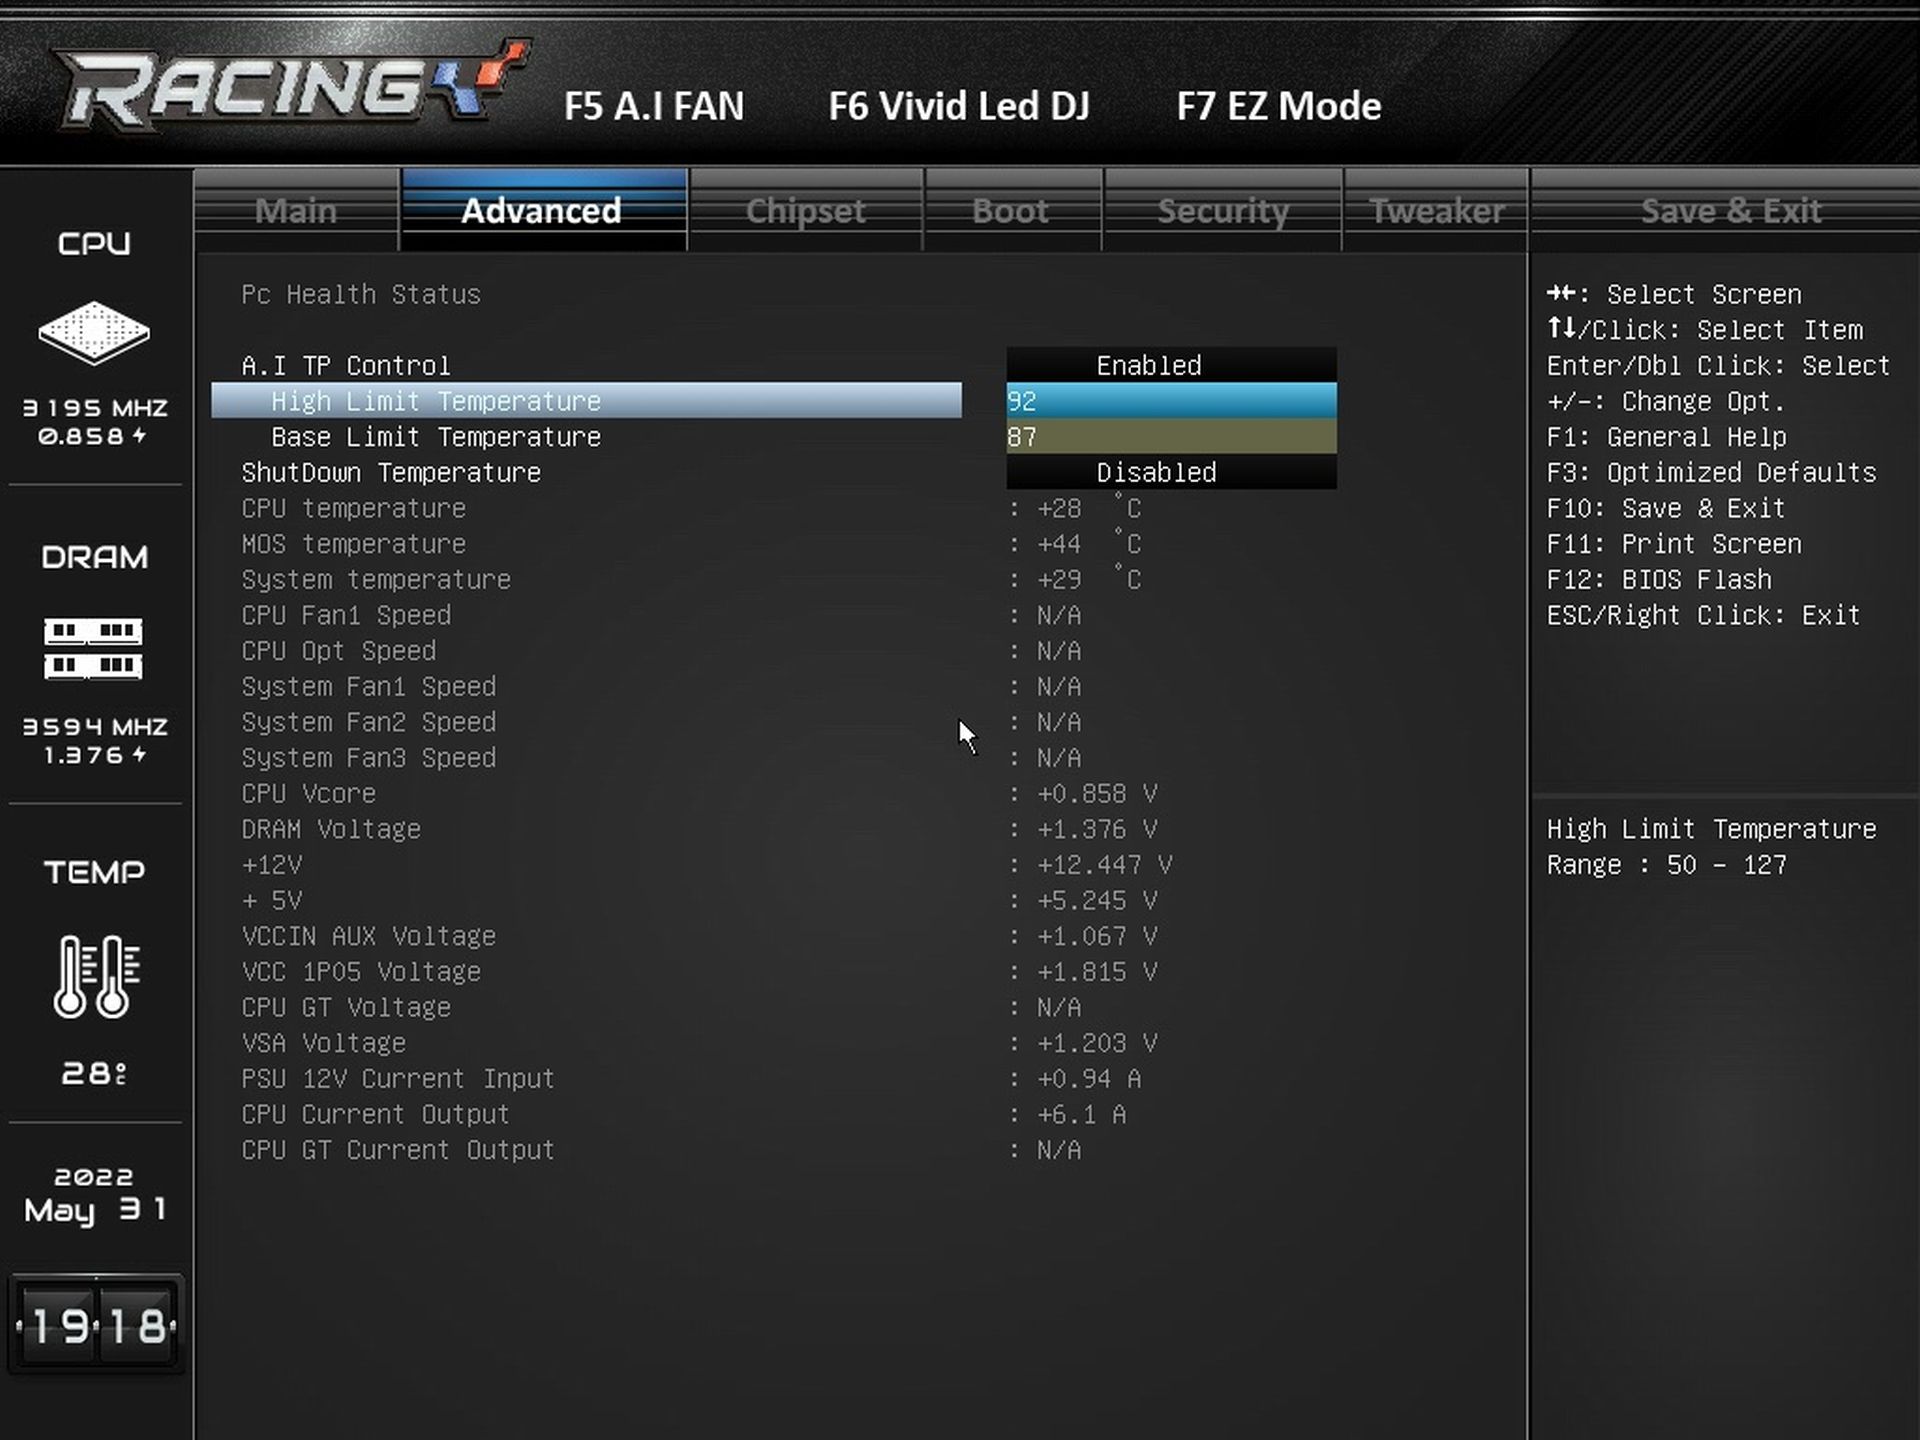
Temperature management allows you to set the temperature ranges that the board should hold the processor at and regulate the power supply accordingly. You can also set the maximum CPU temperature at which the board will shut down. Among the temperature sensors, the PCH (south bridge of the chipset) is missing, but again you have control over the temperature of the voltage regulators via the “MOS temperature”.
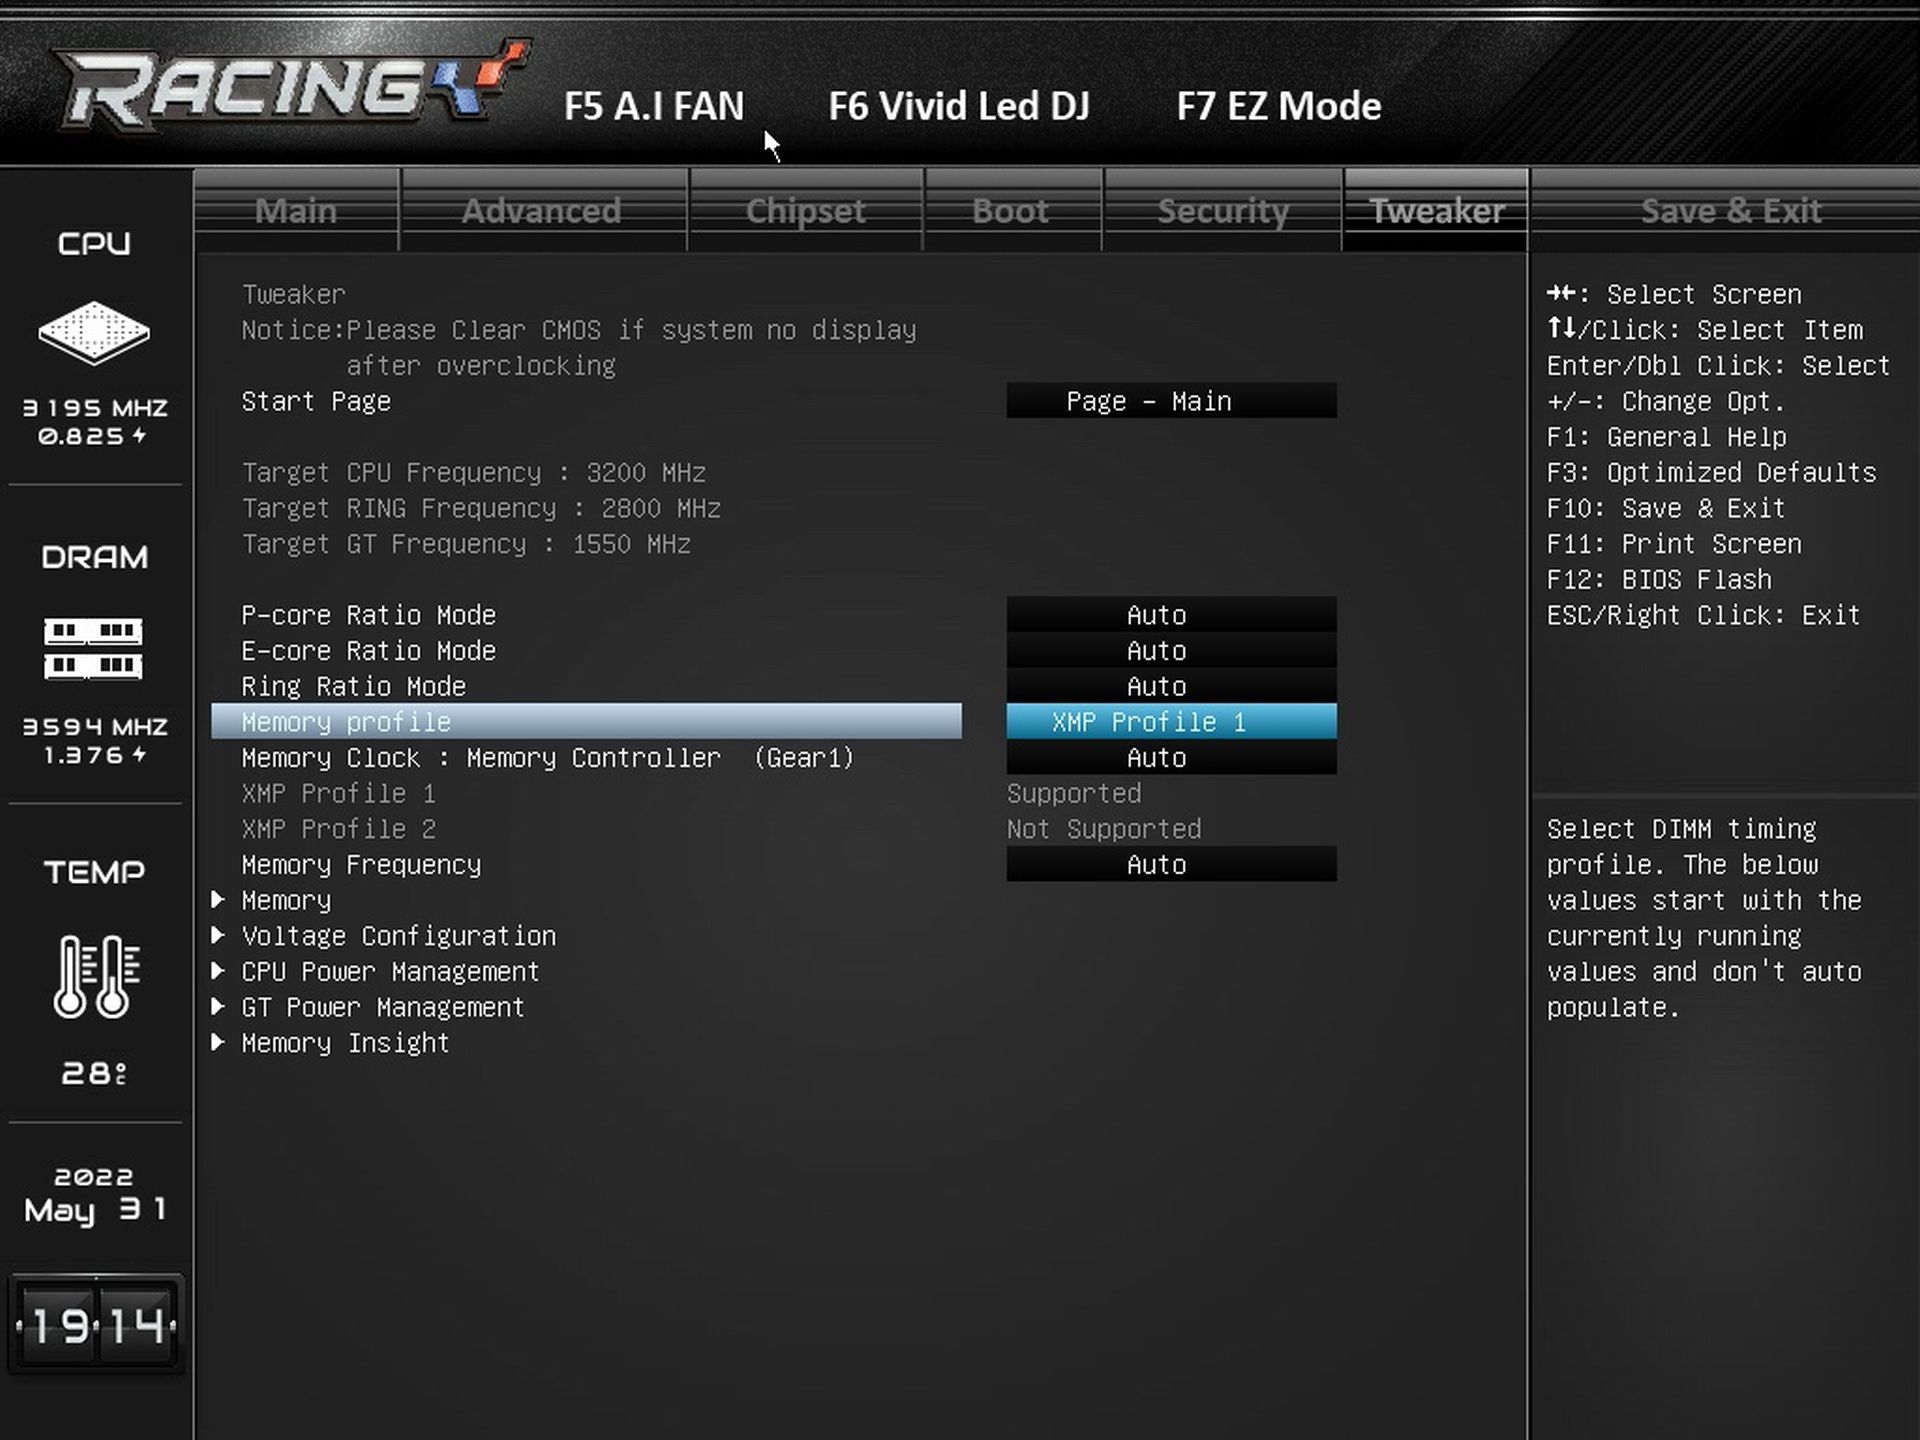
Power limits are set in the Tweaker tab, CPU Power Management section. By default both PL1 and PL2 are set to “Disabled”, then the CPU goes to full power regardless of the time. But for performance tests in mode without power limits, we still manually set them an maximum 4000 W. More often you will enter lower values, typically 125 W or 65 W. These values are always entered in milliwatts, so you would enter 125 W numerically as 125000. The Tau settings don’t allow you to specify a timeout, but the board accounts for it, and the power draw and clock speeds are according to PL2 the first 40 seconds or so.

If you haven’t already done so in EZ Mode, the XMP setting is also possible in the Tweaker tab. This, of course, at a more detailed level where you can also adjust the memory controller clock speed or timing in the case of an optional setting.
“Vivid LED DJ” is an RGB LED lighting management interface. Either built-in or expansion peripherals (typically coolers or fans) via internal connectors. Older devices with analogue connections via 12 V 4-pin can also be synchronised with modern (5 V 3-pin) devices. If you prefer an operating system interface for these things, you can download the Racing GT app on Biostar’s website.

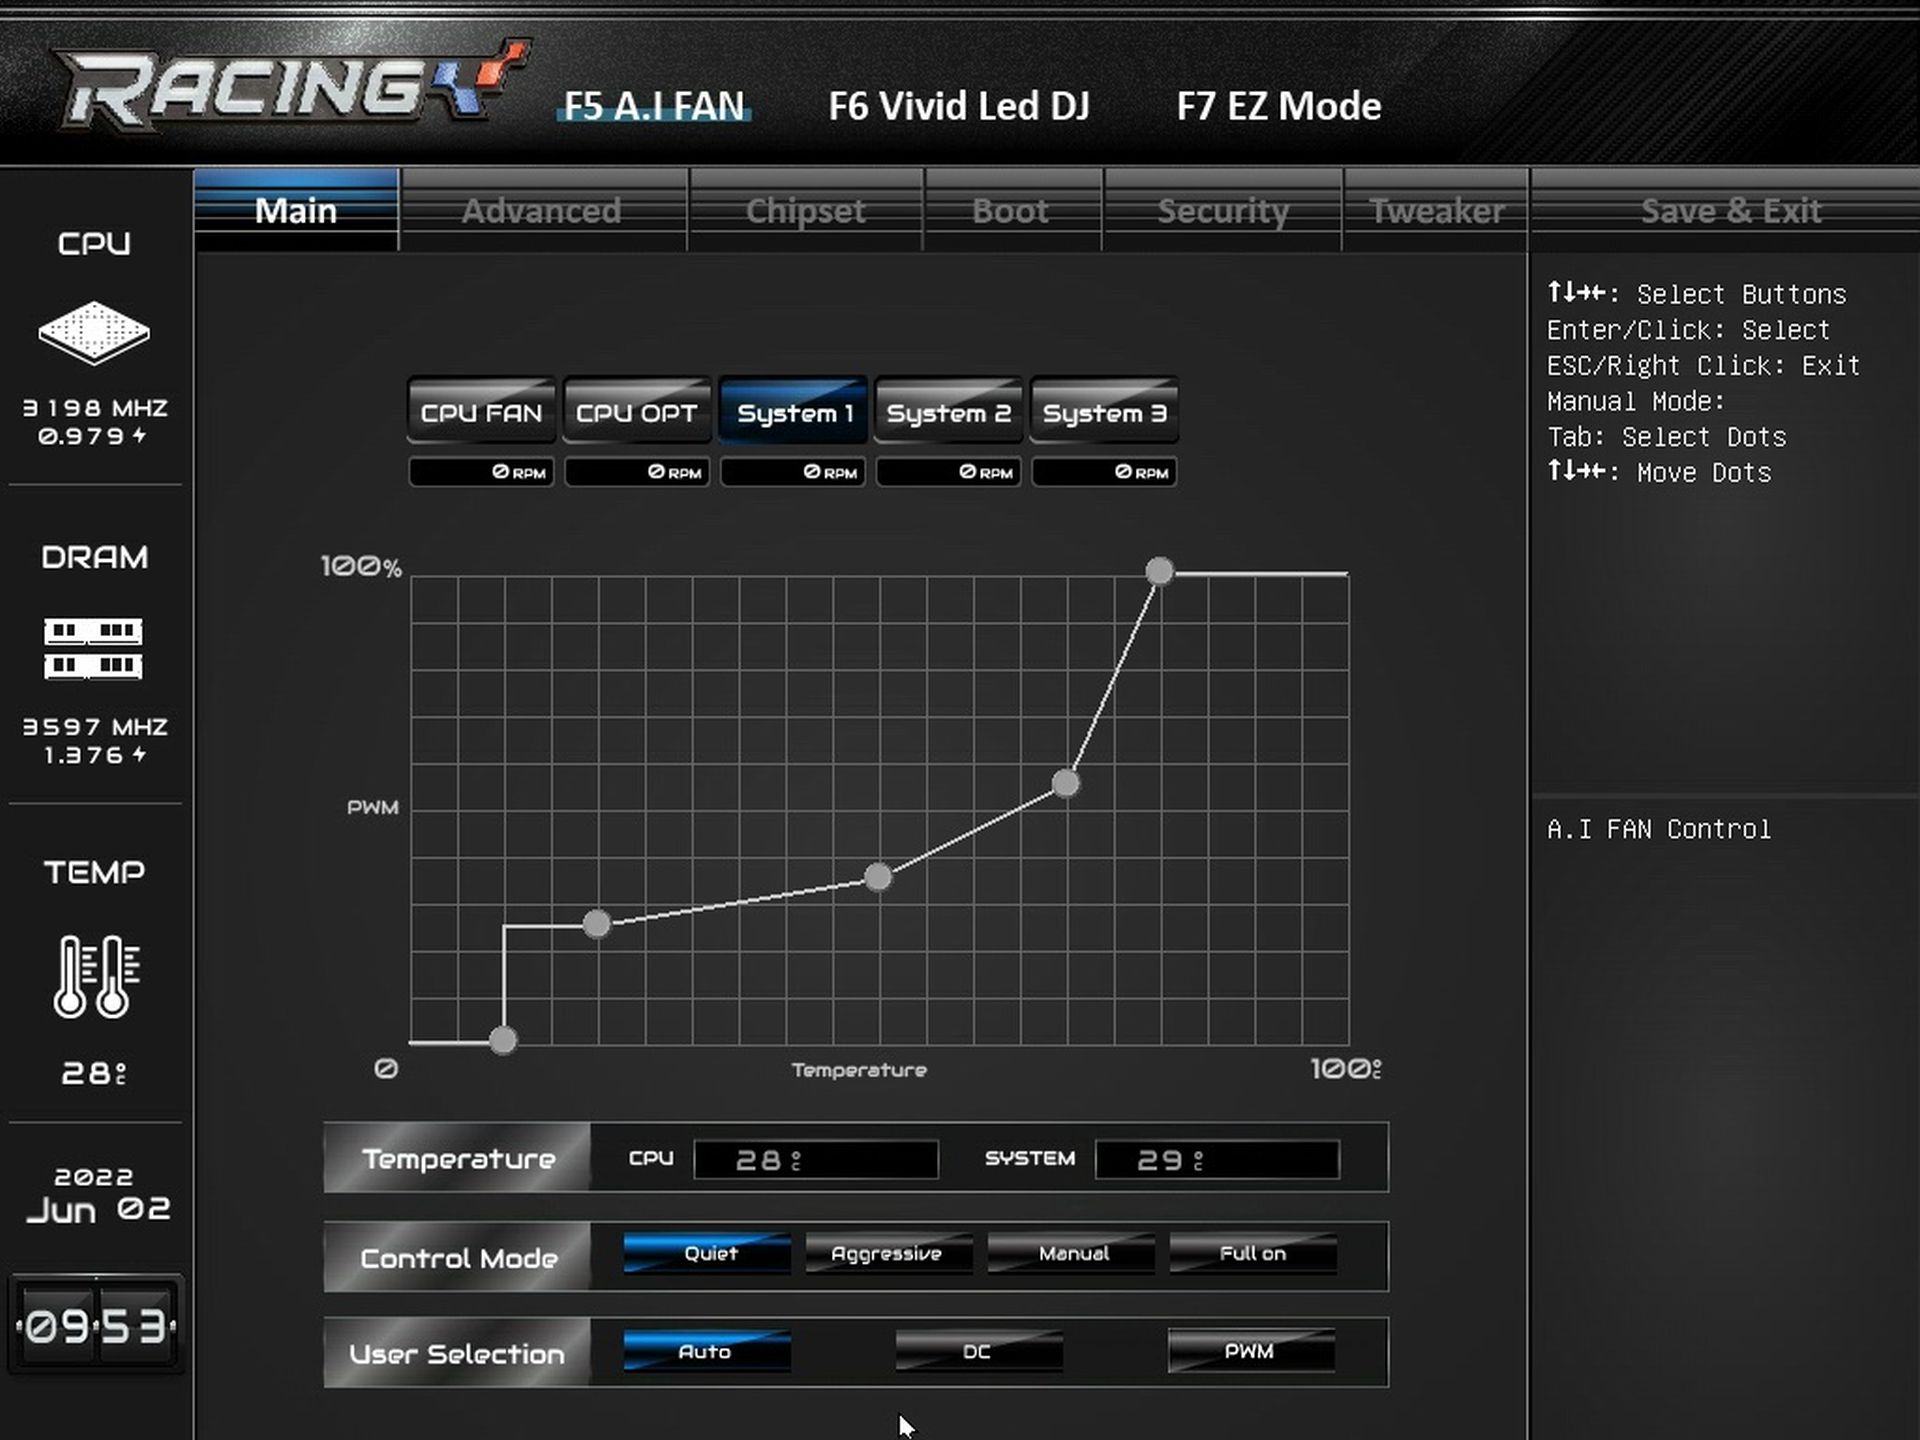
The settings options fall a little short in fan management. It’s a shame that the PWM curve can’t be matched to temperatures of sources other than the CPU sensor. Especially when the board can read the VRM temperatures. Otherwise, you have a choice of three preset PWM profiles (Quiet, Aggressive, Full on) and there is also a manual setting option. The control method is supposed to be detected automatically, but we always recommend setting this type of control manually in the case of PWM fans.

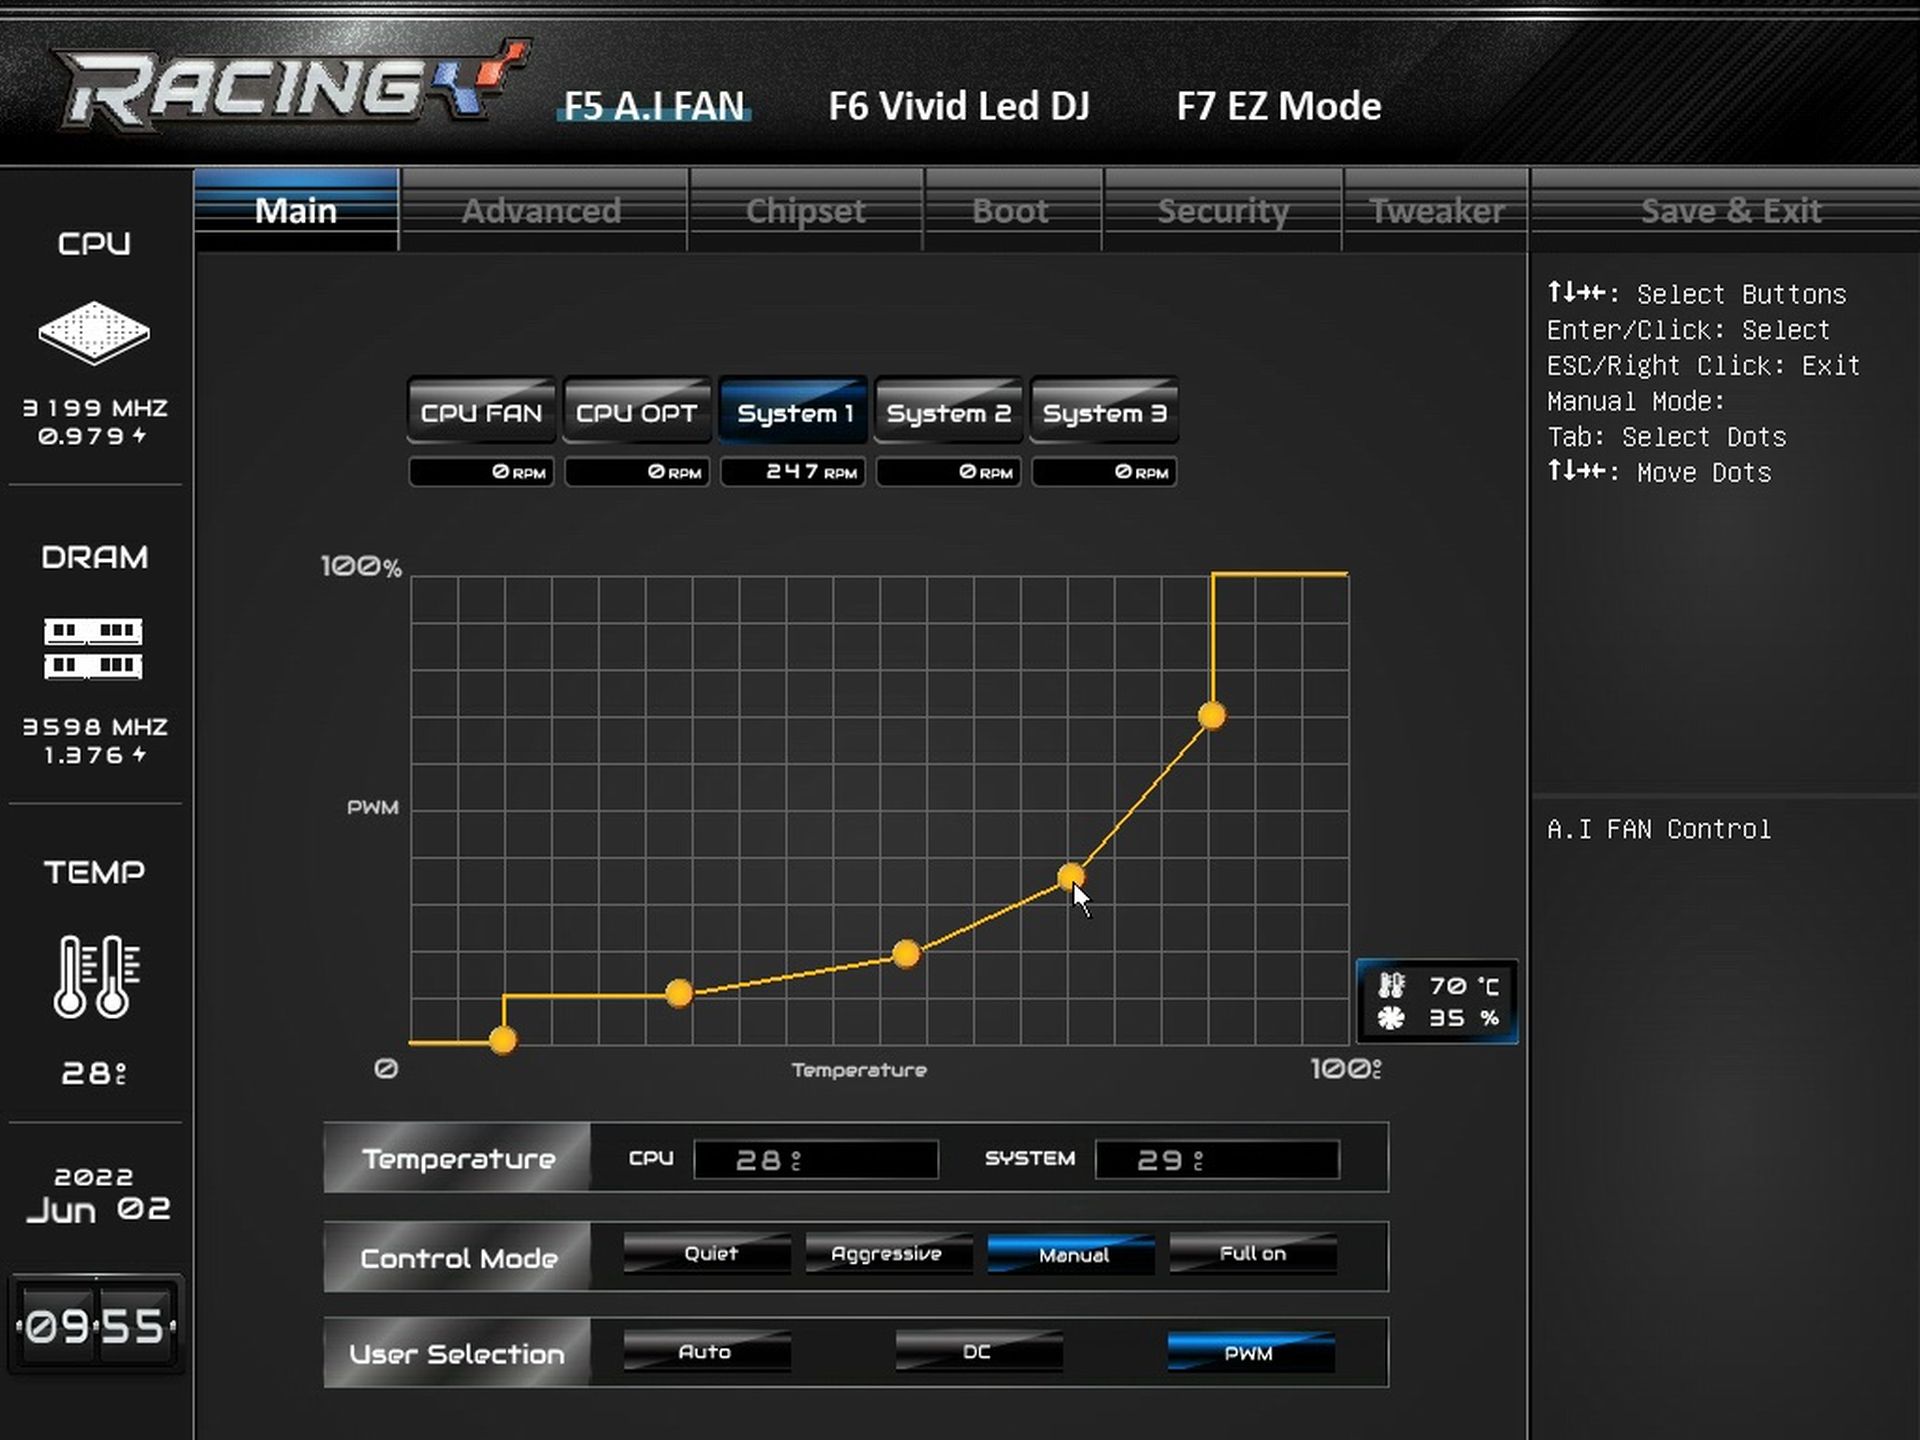
+
In fact, the detection of the board is rather unreliable. As you can see in the first two images from A.I Fan, the same fan (Noctua NF-A12x25 PWM) did not spin up at all on “Auto” and had to be manually switched to “PWM”. At that point, the fan was easily tuned to its minimum speed as well.
- Contents
- Biostar B660GTA in detail
- What it looks like in the BIOS
- Methodology: Performance tests
- Methodology: How we measure power draw
- Methodology: Temperature and frequency measurements
- Test setup
- 3DMark
- Borderlands 3
- F1 2020
- Metro Exodus
- Shadow of the Tomb Raider
- Total War Saga: Troy
- PCMark and Geekbench
- Web performance
- 3D rendering: Cinebench, Blender, ...
- Video 1/2: Adobe Premiere Pro
- Video 2/2: DaVinci Resolve Studio
- Graphics effects: Adobe After Effects
- Video encoding
- Audio encoding
- Photos: Adobe Photoshop, Affinity Photo, ...
- (De)compression
- (De)cryption
- Numerical computing
- Simulations
- Memory and cache tests
- M.2 (SSD) slots speed
- USB ports speed
- Ethernet speed
- Power draw curve (EPS + ATX connector) w/o power limits
- Power draw curve (EPS + ATX connector) with Intel’s power limits
- Total power draw (EPS + ATX connector)
- Achieved CPU clock speed
- CPU temperatures
- VRM temperatures – thermovision of Vcore and SOC
- SSD temperatures
- Chipset temperatures (south bridge)
- Conclusion


Super awesome review, very complete