
What it looks like in the BIOS
Zatiaľ čo iní na plnohodnotné testy základných dosiek dávno rezignovali, tak my ich práve rozbiehame. Testy s rôzne výkonnými procesormi, bez limitov napájania, ale aj s limitmi nastavenými podľa Intelu. A keď testovať výkon, tak aj v rámci slotov M.2, USB či ethernetu. Analýza spotreby musí byť na úrovni jednotlivých vetiev a termovízia s testami zahrievania (vrátane meraní efektivity chladičov SSD) vo veternom tuneli sú jasná vec.
What it looks like in the BIOS
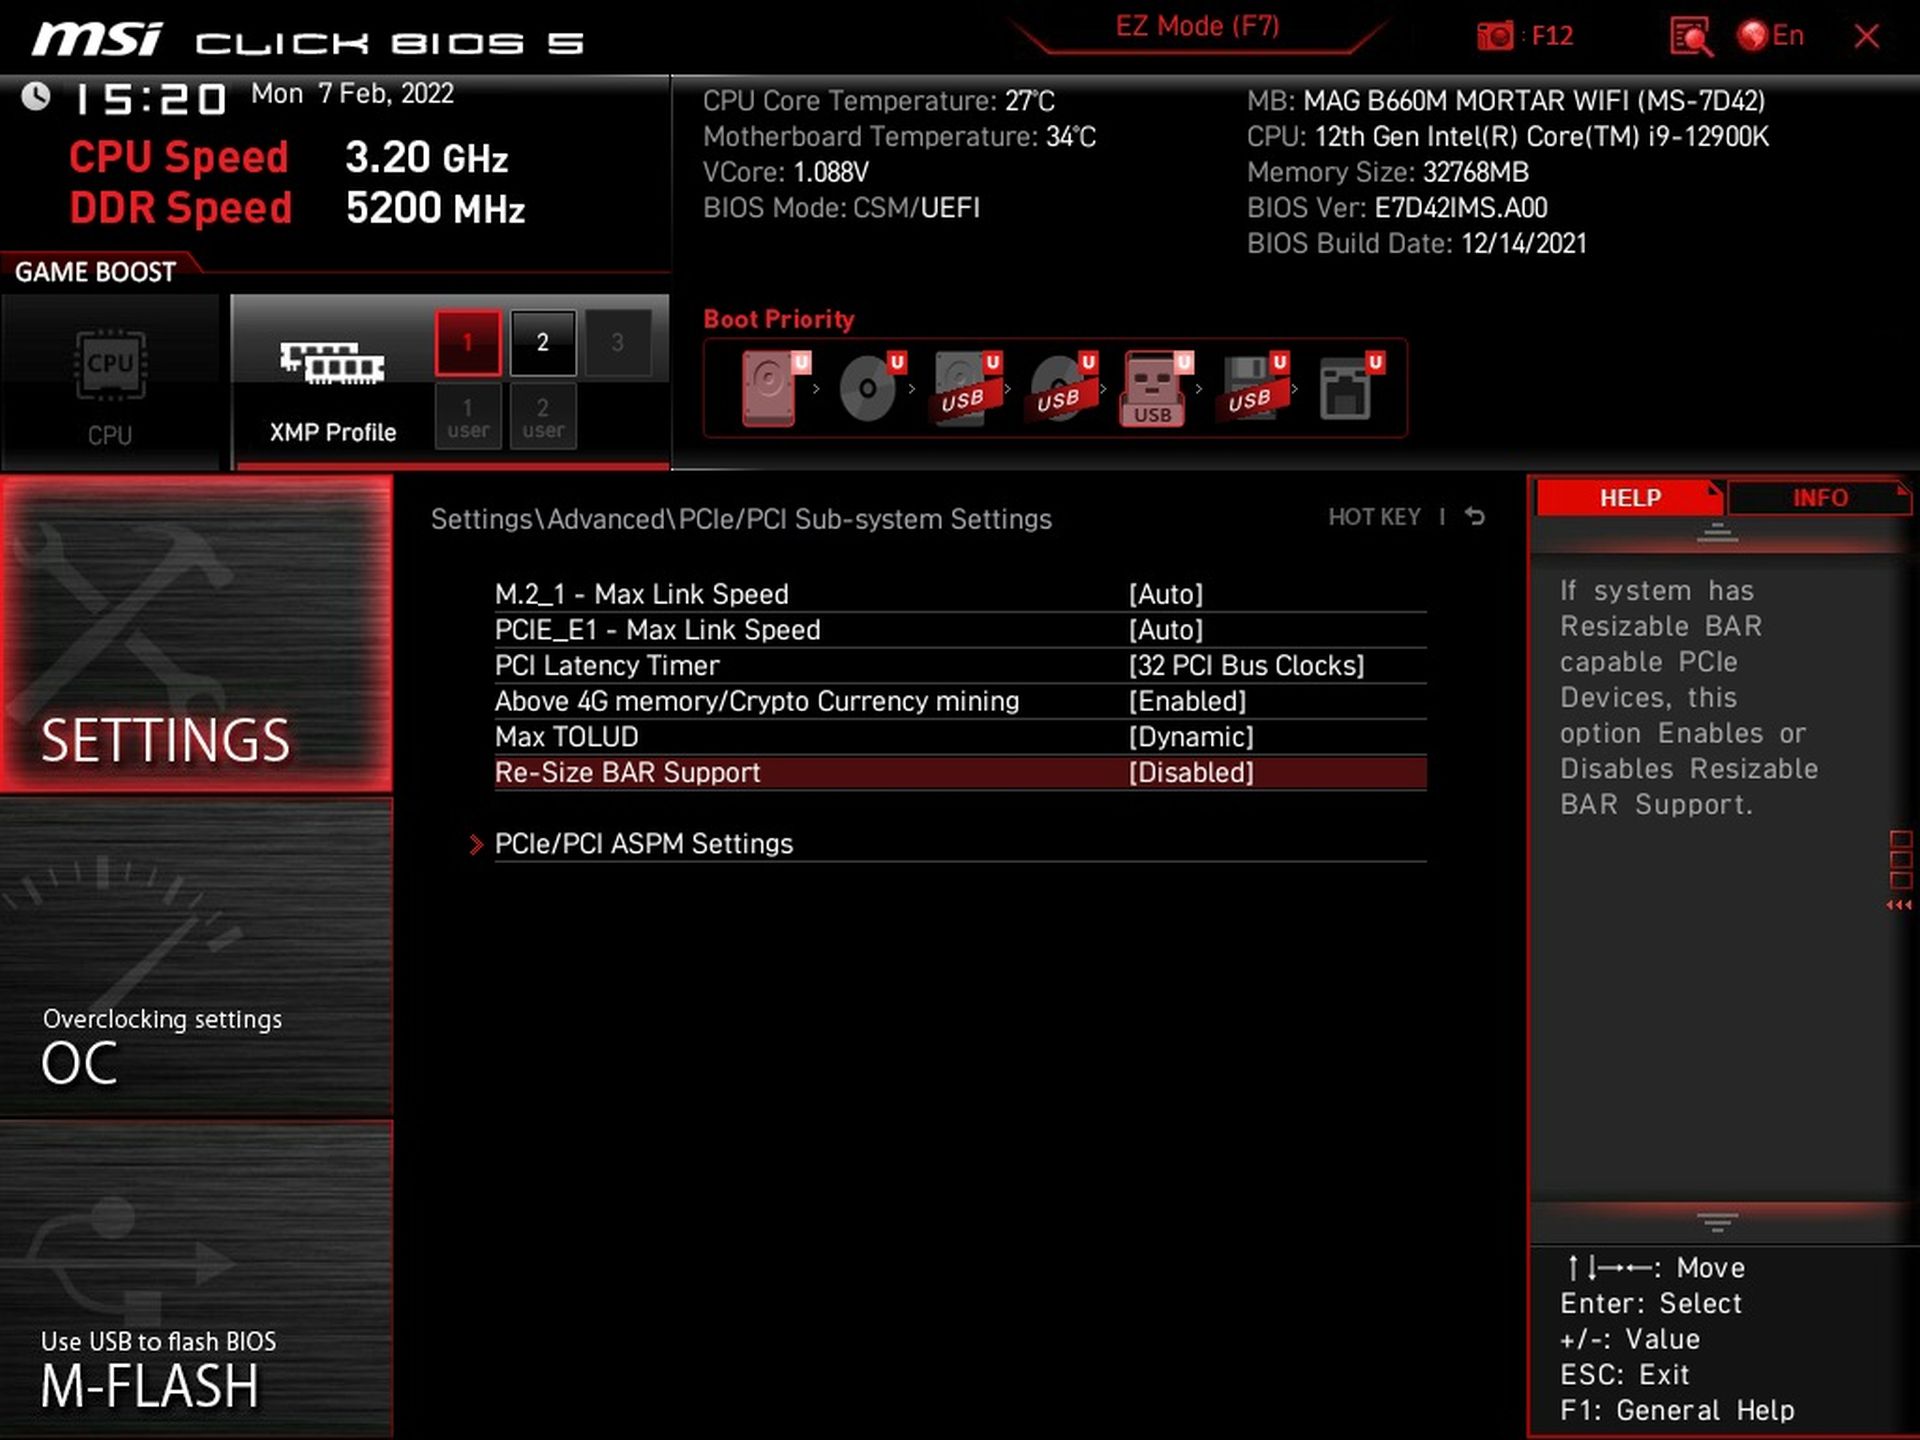
Traditionally, the entry to the BIOS is via the Delete key. The basic navigation is clearly divided into six sections – Settings, OC, M-Flash, OC Profile, Hardware Monitor and Beta Runner.

Let’s quickly run through the basics. Within the PCI settings, you can easily enable Resizable BAR for graphics cards. However, we don’t use this option and leave it disabled. As you already know from graphics card tests, the ReBAR evolves dynamically, with associated changes in performance, and such a volatile environment is of course undesirable for comparing motherboards.
The board also has a TPM module that is enabled by default, so you don’t have to set anything special in the BIOS before installing Windows 11.

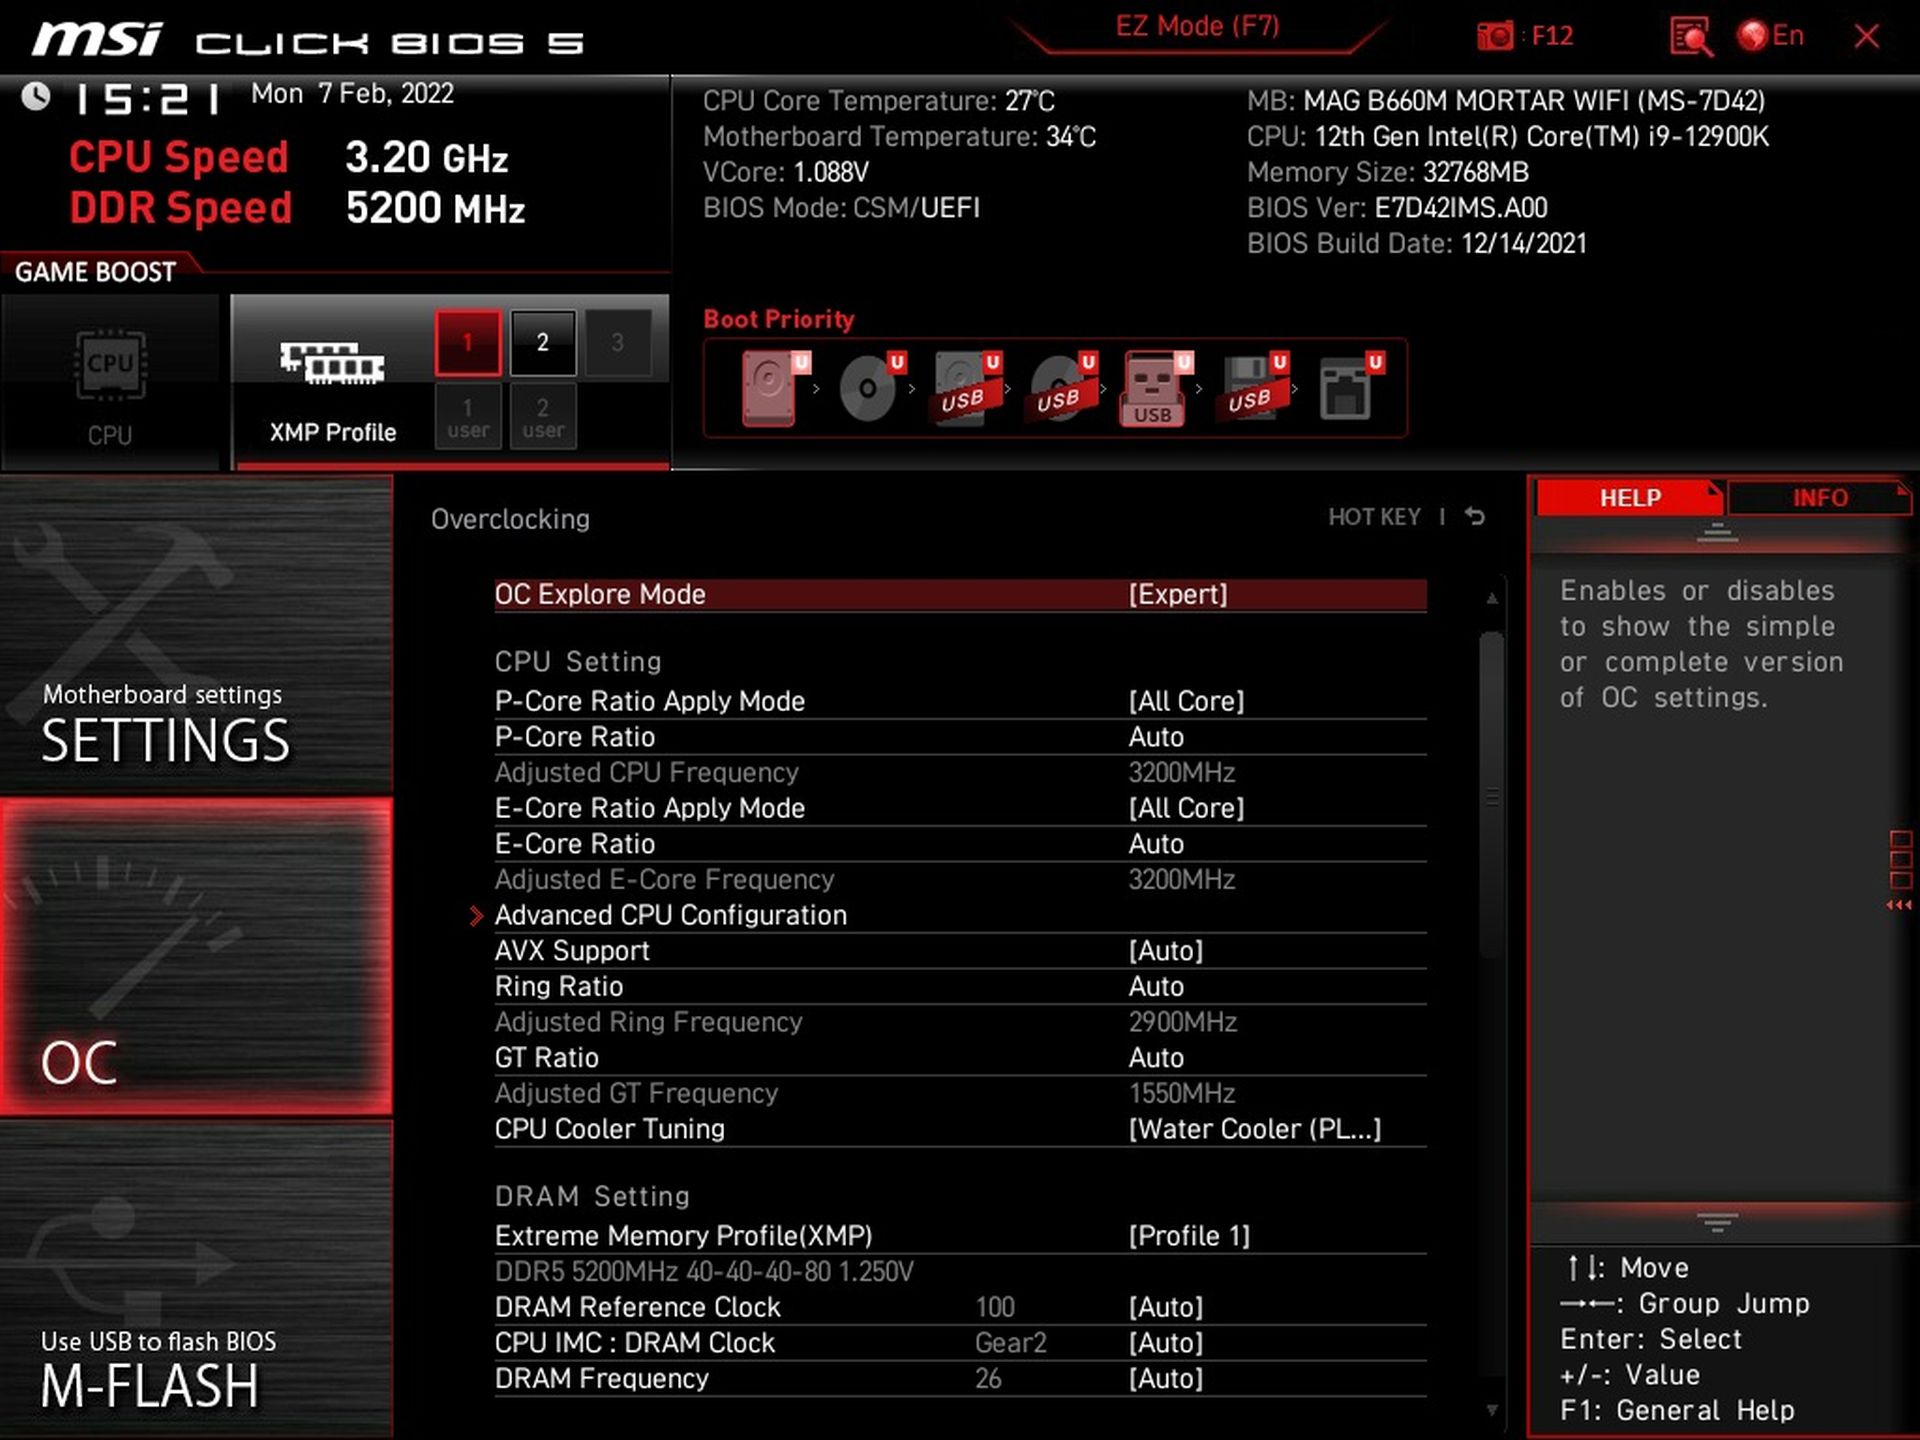
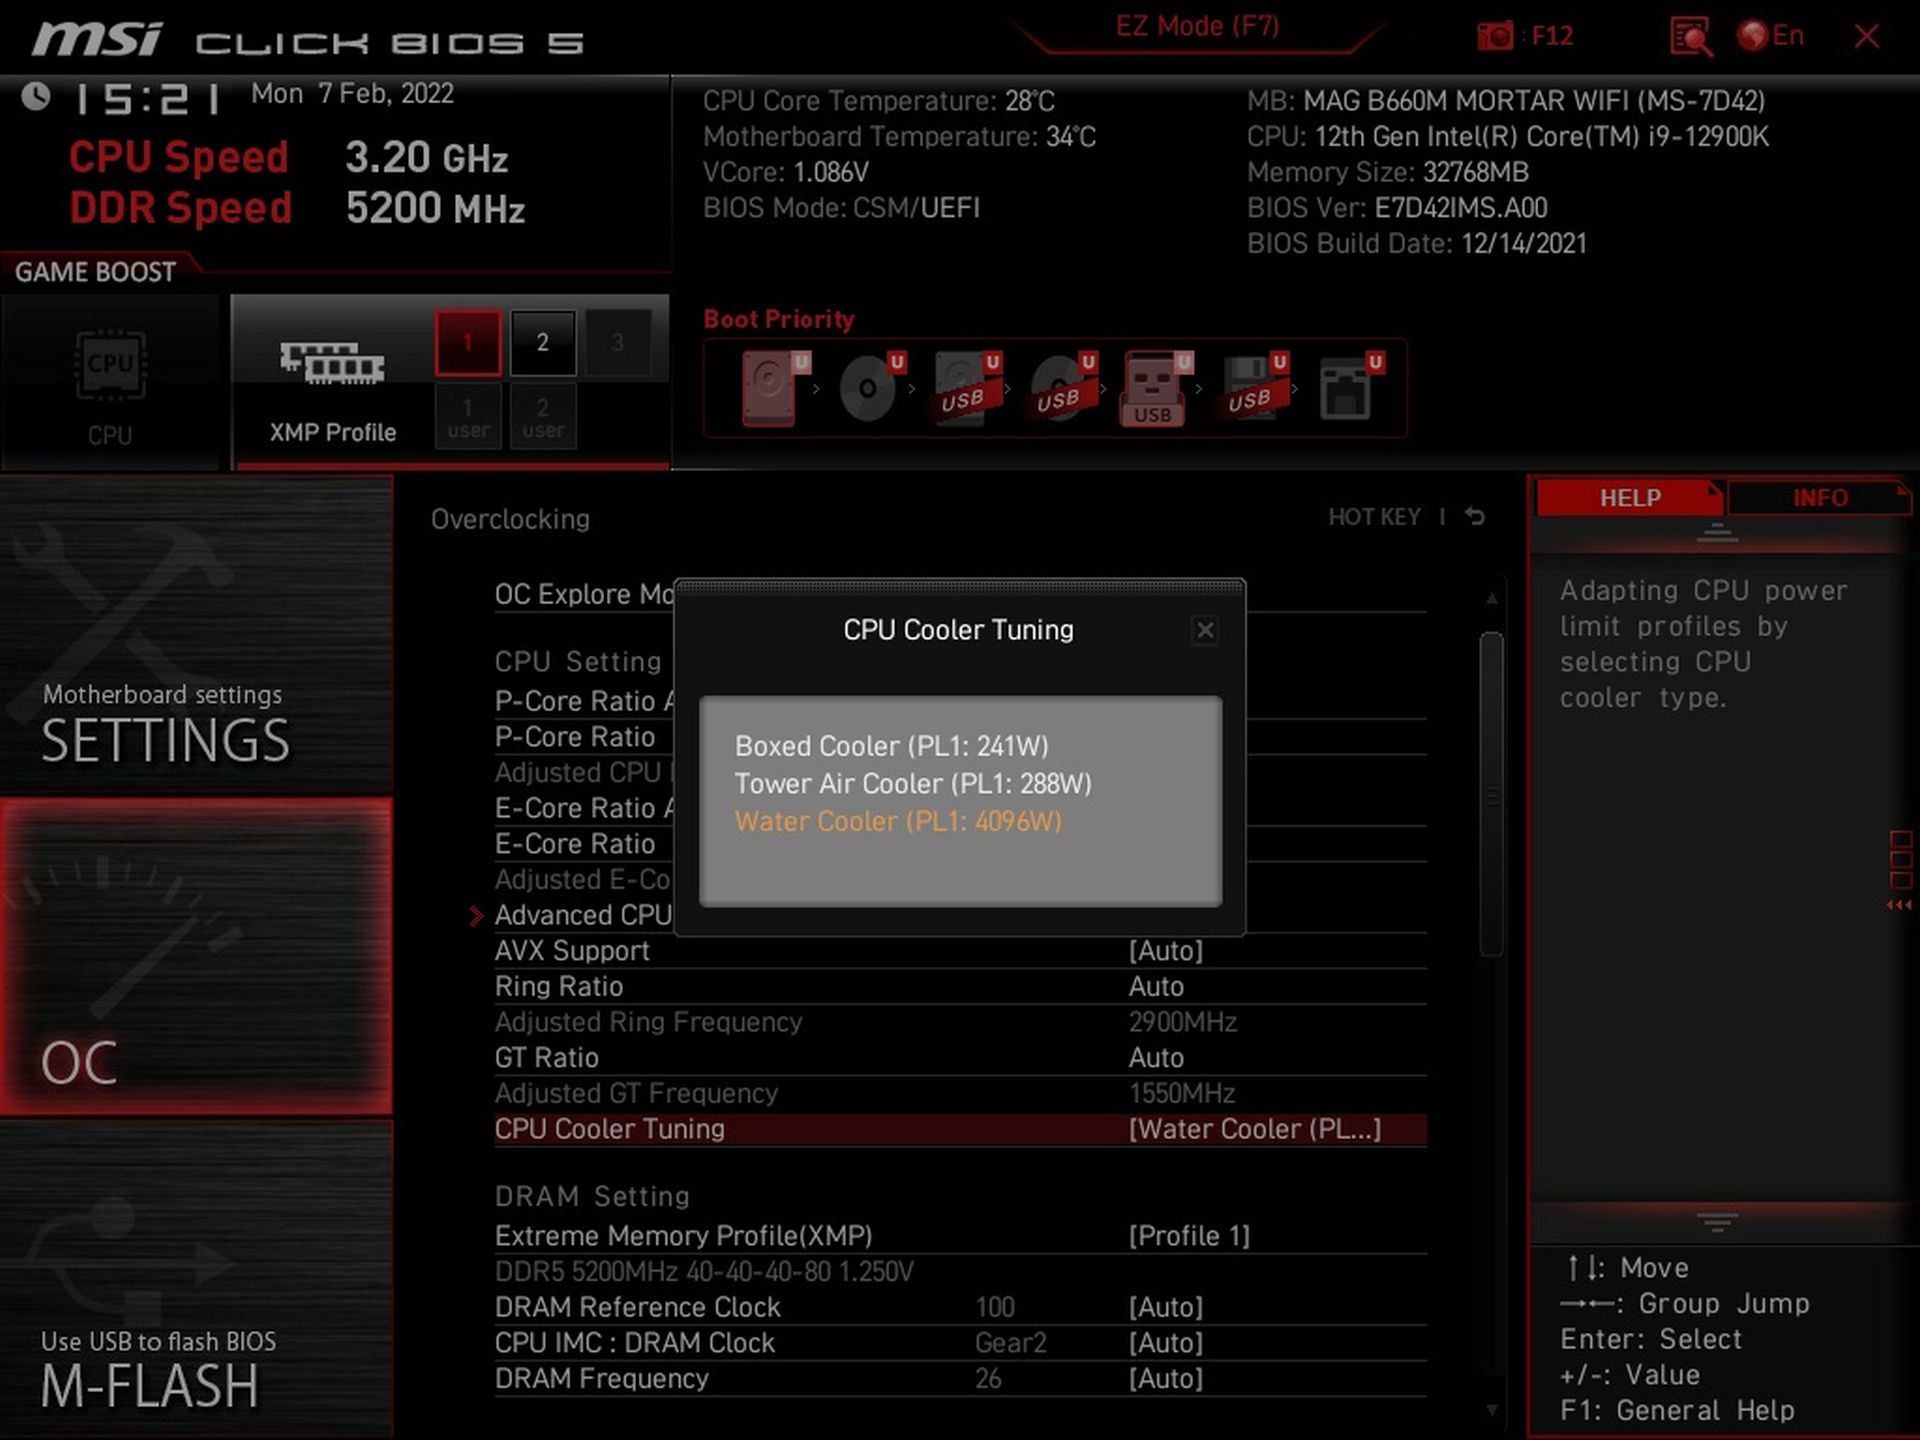
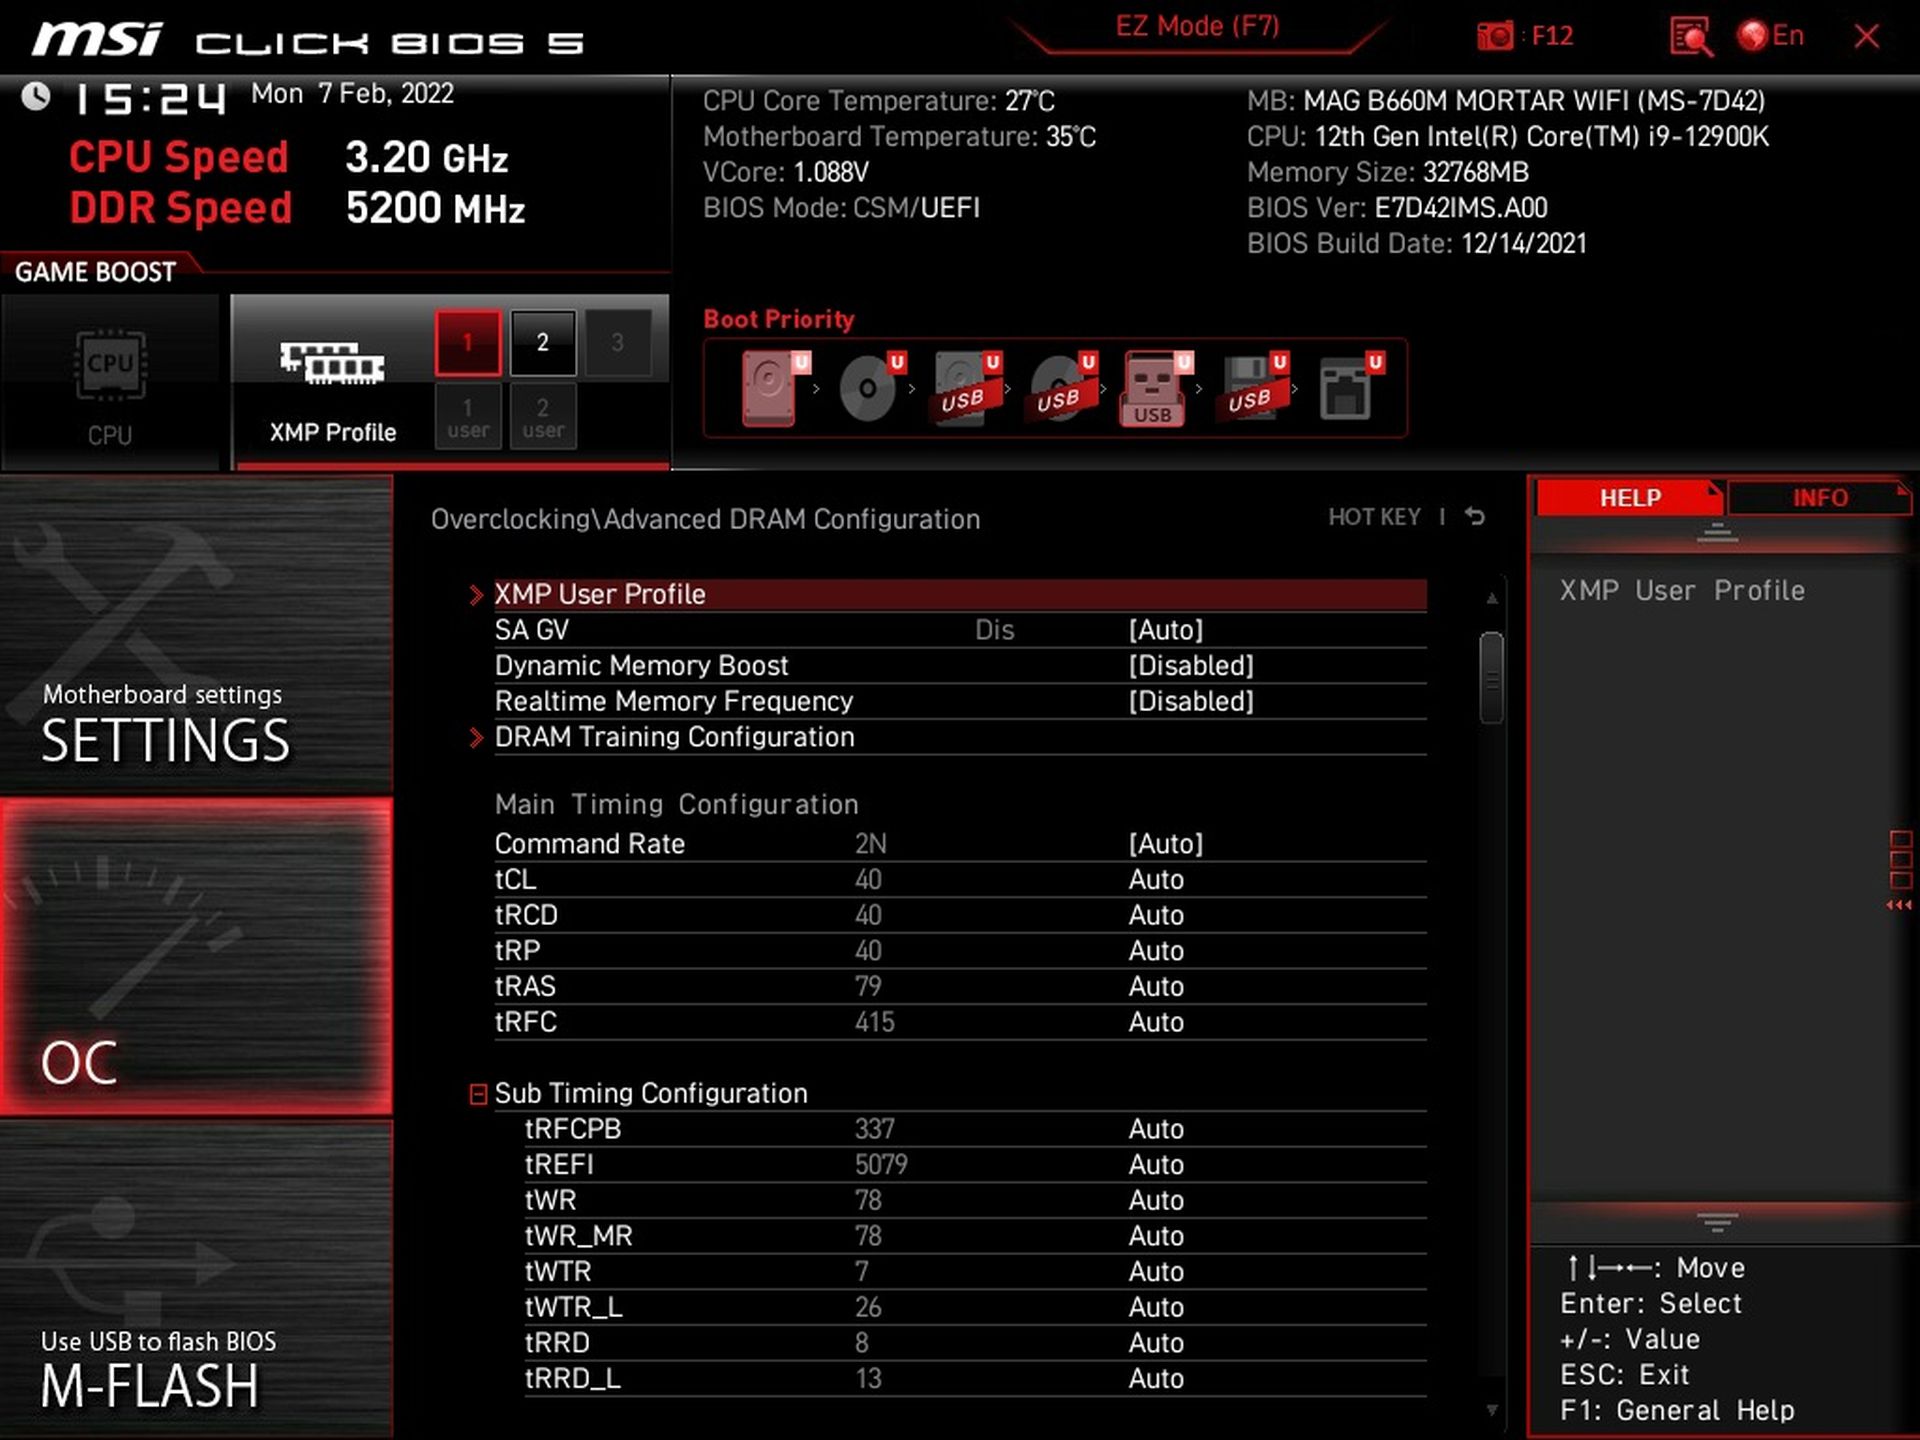
Through the “OC” tab it is possible to customize the processor and memory to your own needs. In addition to the management (switching on/off) of the individual P or E cores of the processor, XMP, detailed frequency and memory timing settings are also available. These are all familiar things that you must have encountered many times before. However, the options around “CPU Cooler Tuning” are worth noting.
Once the processor is installed, the BIOS first greets you with a window with a crossroads where you have to set the power limits. To make it easy enough for everyone, MSI has created three profiles according to the indicative power of the cooler. The assumption here is that a liquid cooler (for which the PL1 and PL2 limits are fully unlocked at 4096W) will be more powerful than a tower cooler (the middle profile), and that one more powerful than the box cooler. However, it should be added here that the PL1/PL2 limits are not the same for all processors.
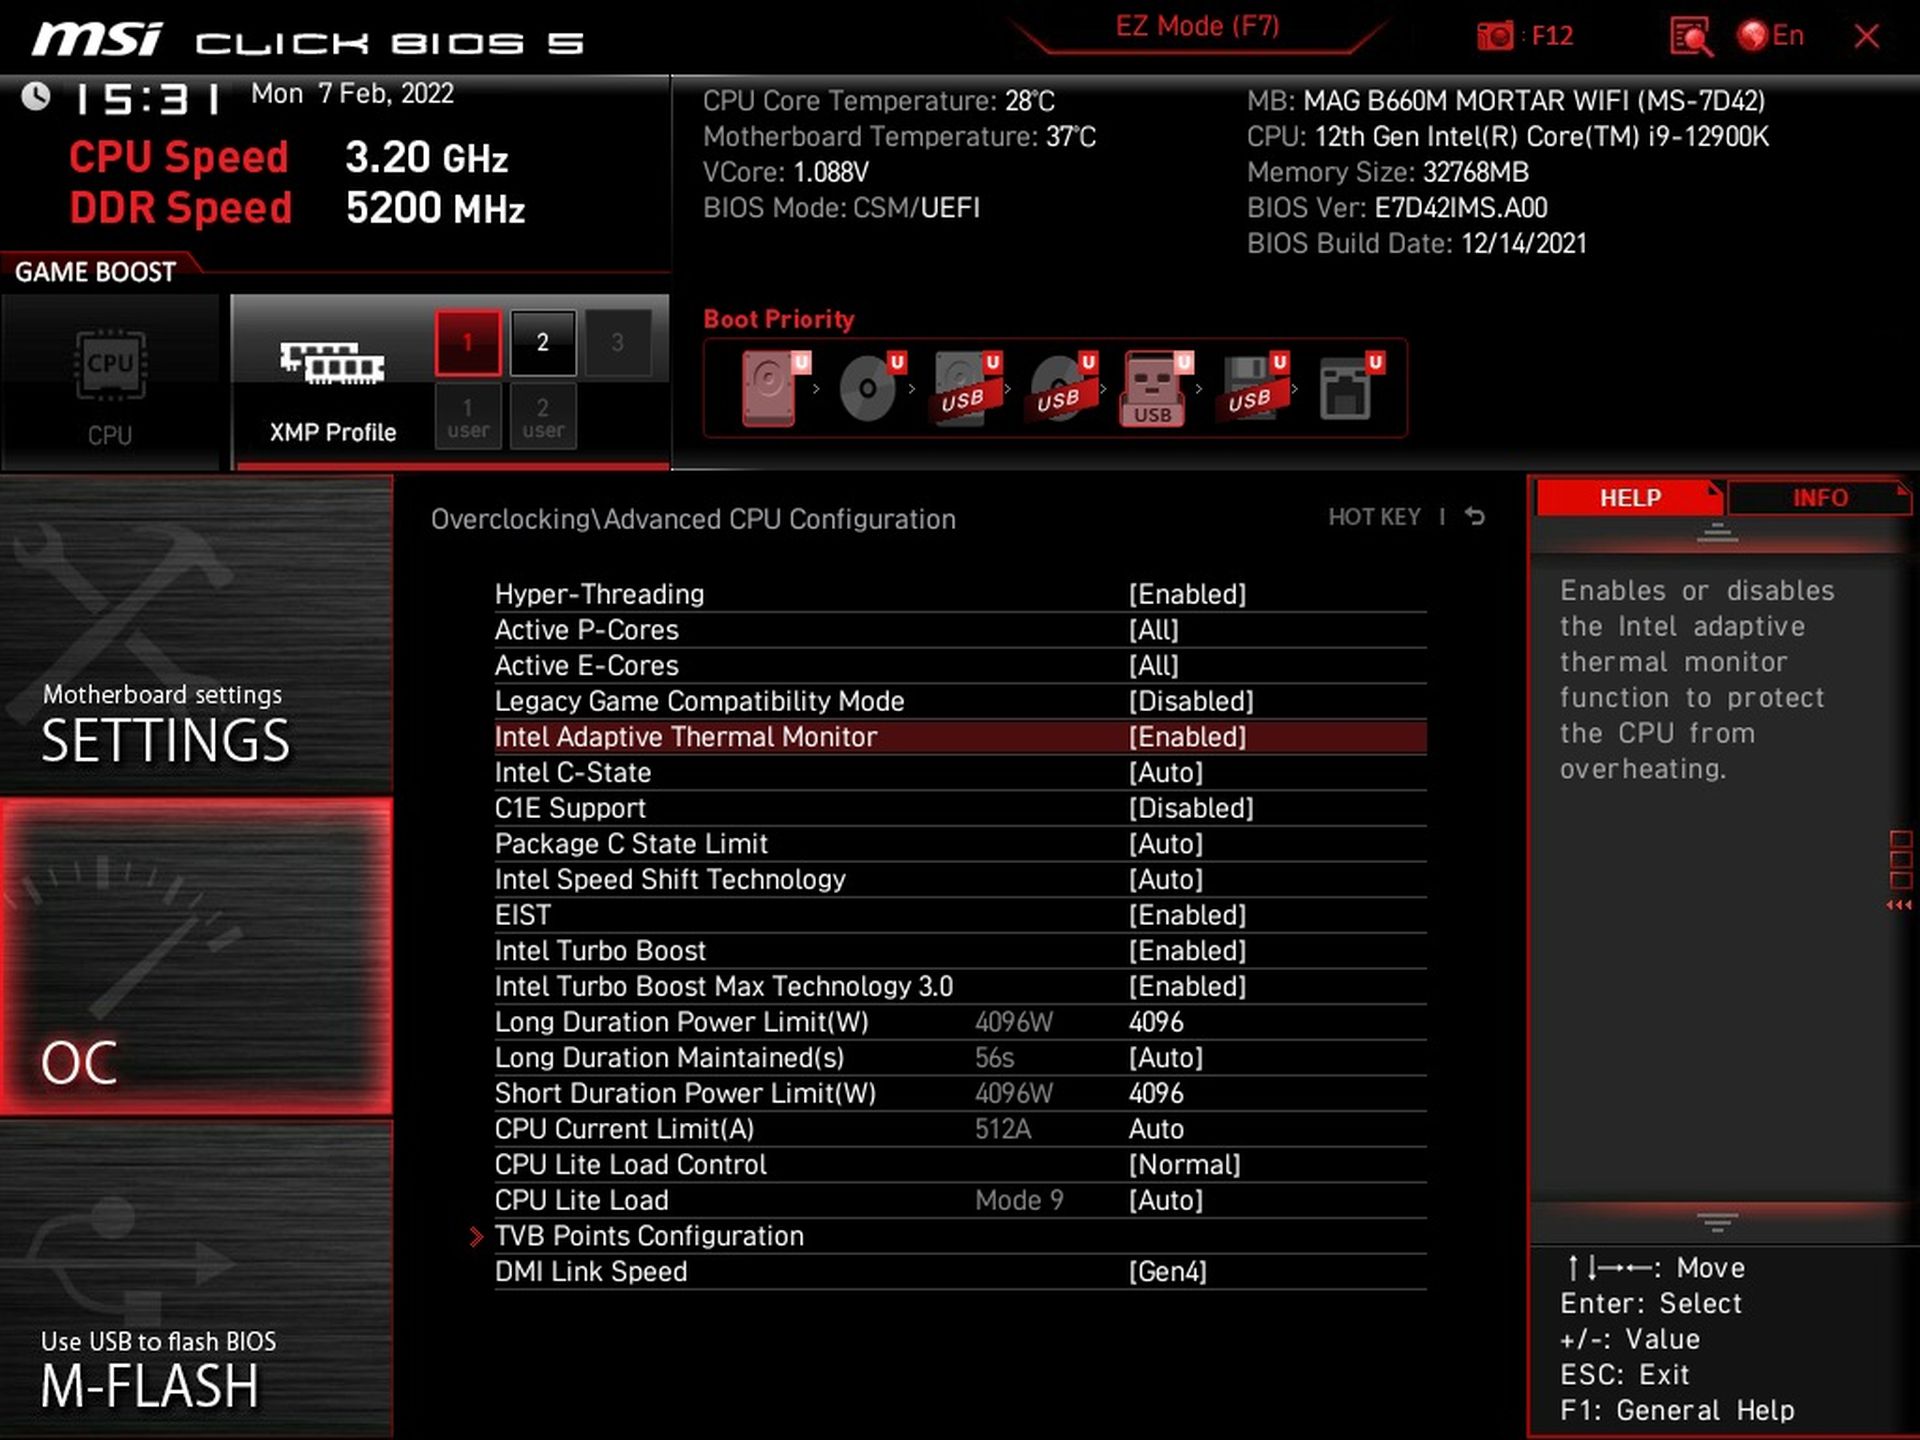
For example, the “box cooler” mode with Core i9-12900K is quite strange and both PL1 and PL2 set to 241 W. This mode (for the box cooler) works better with Core i5-12400, where it sets PL1 to the TDP level (65 W) and PL2 to 169 W. However, everything (including the timeout length for PL2) can be fine-tuned manually and hence for Core i9-12900K you can set the power limits according to Intel’s recommendations as we do for testing purposes, where PL1 equals TDP/125 W and PL2 equals 241 W.

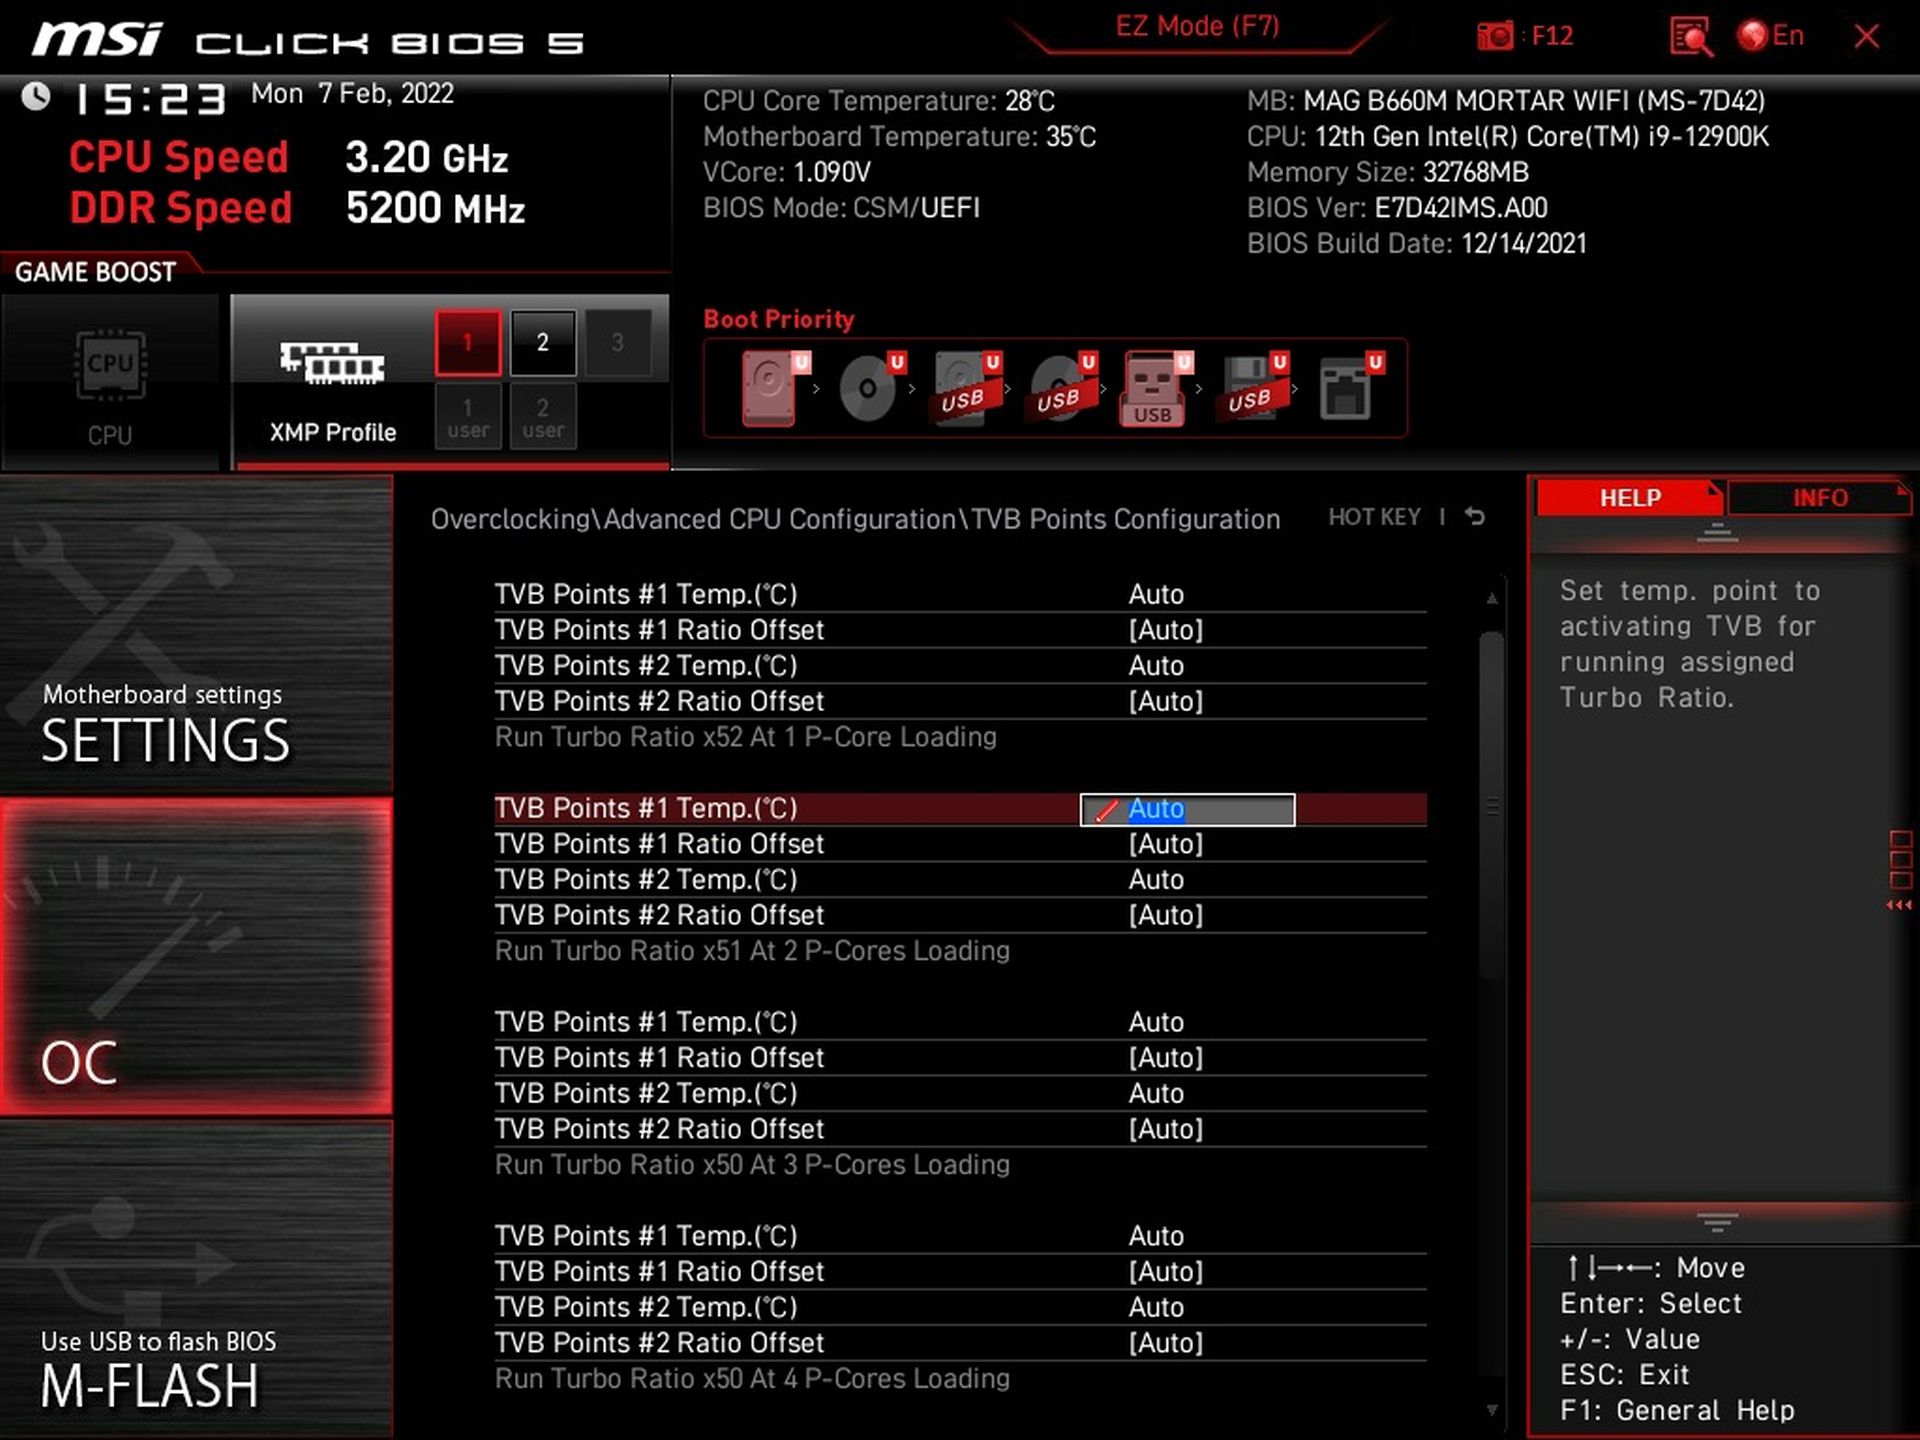
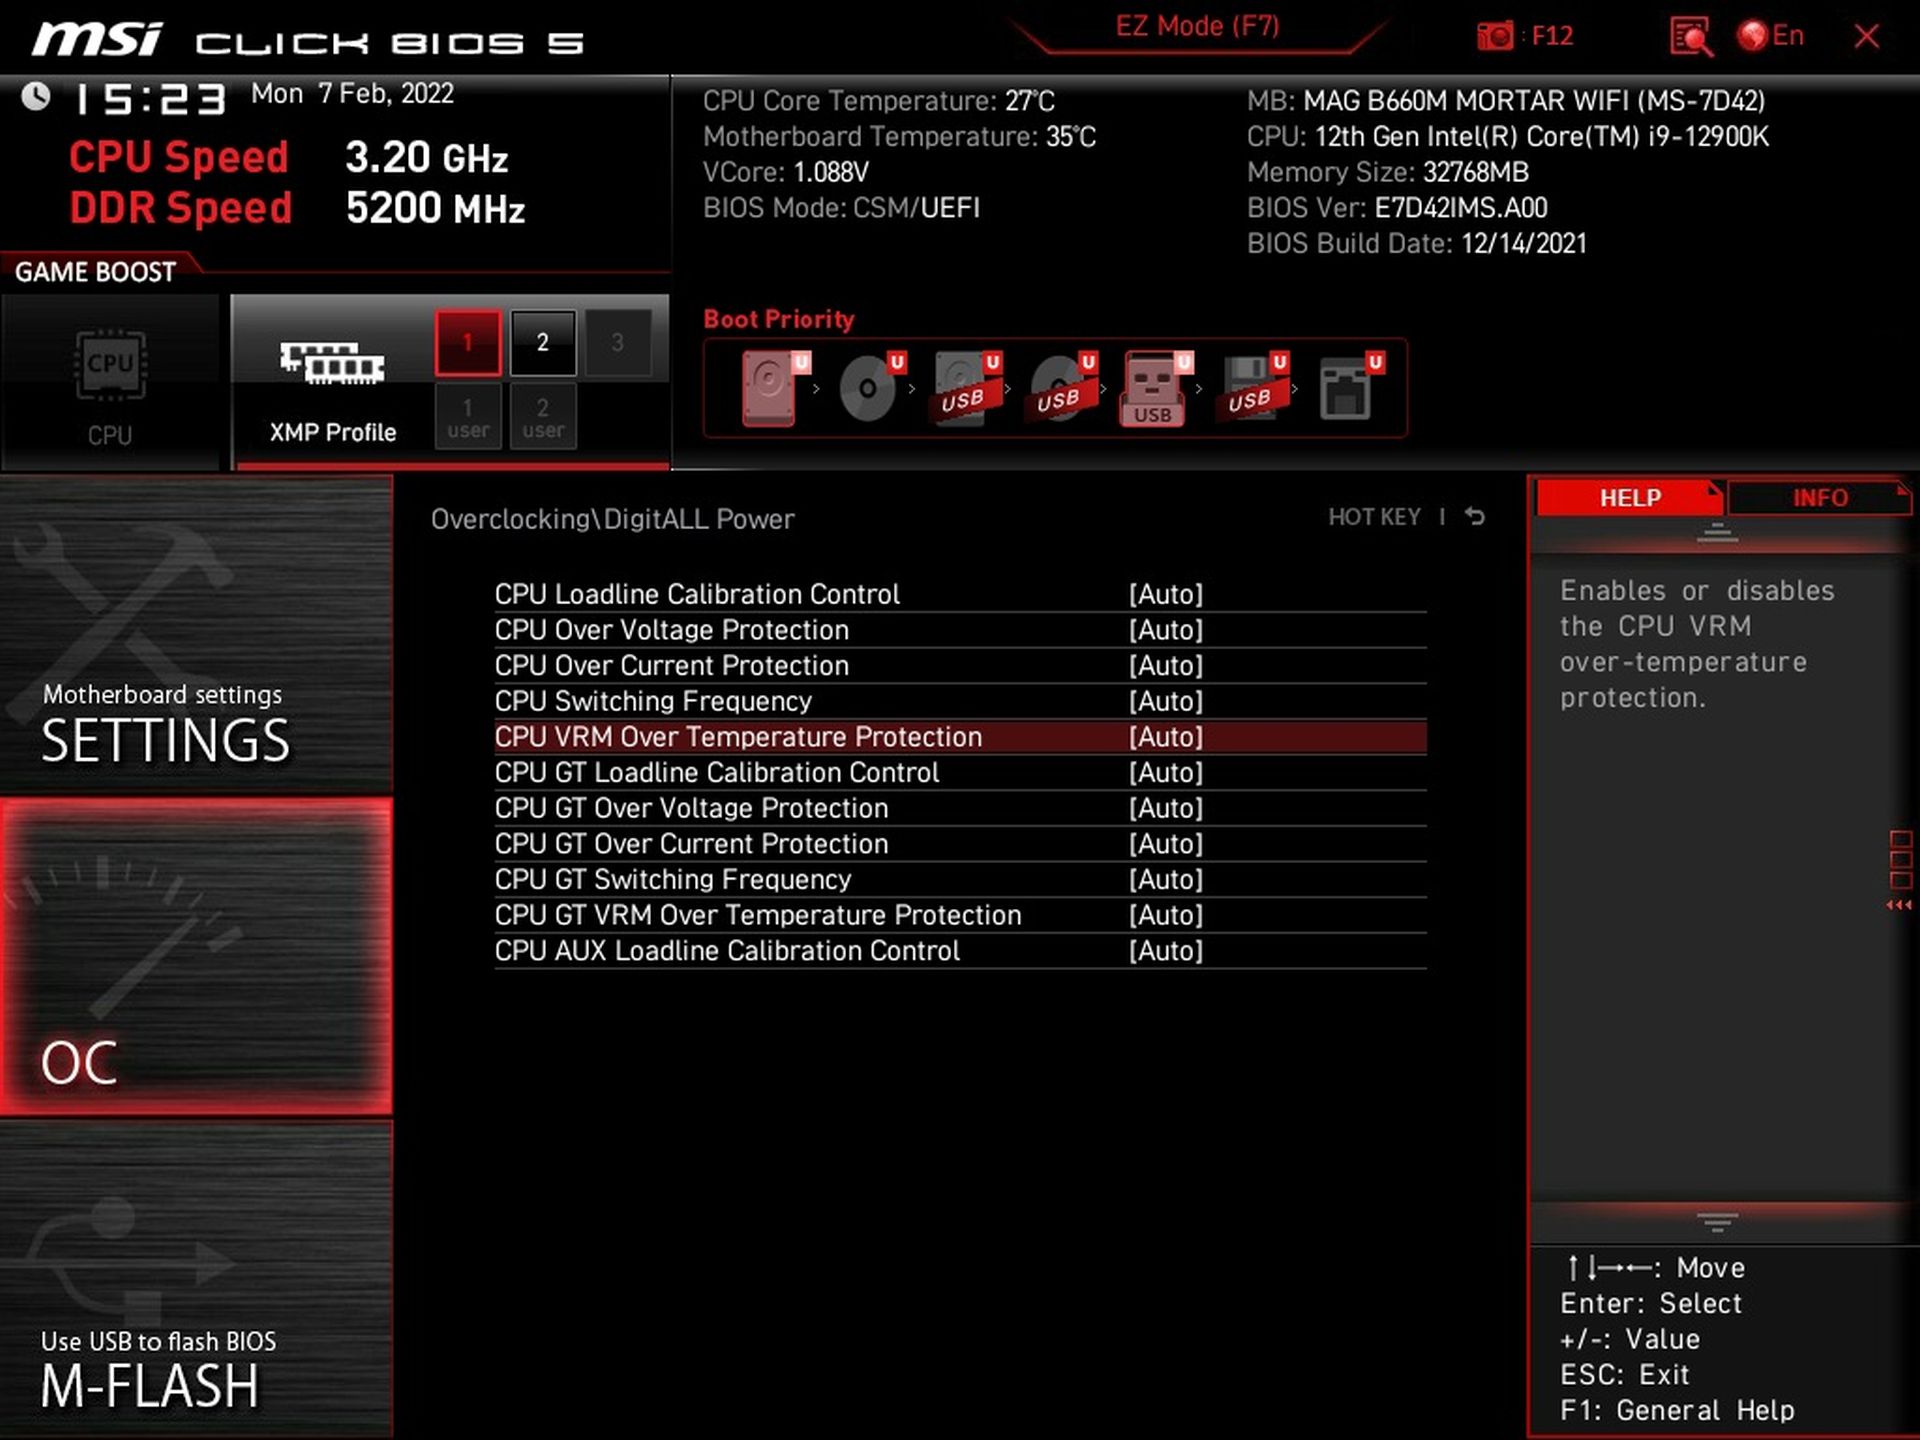
Then there are also settings to redefine the values for Thermal Velocity Boost or to set the upper limit of VRM temperatures. This can be useful, for example, within extremely quiet builds where the CPU cooler is significantly oversized, but the temperatures on the MOSFETs can sometimes (for example in summer) be critical.
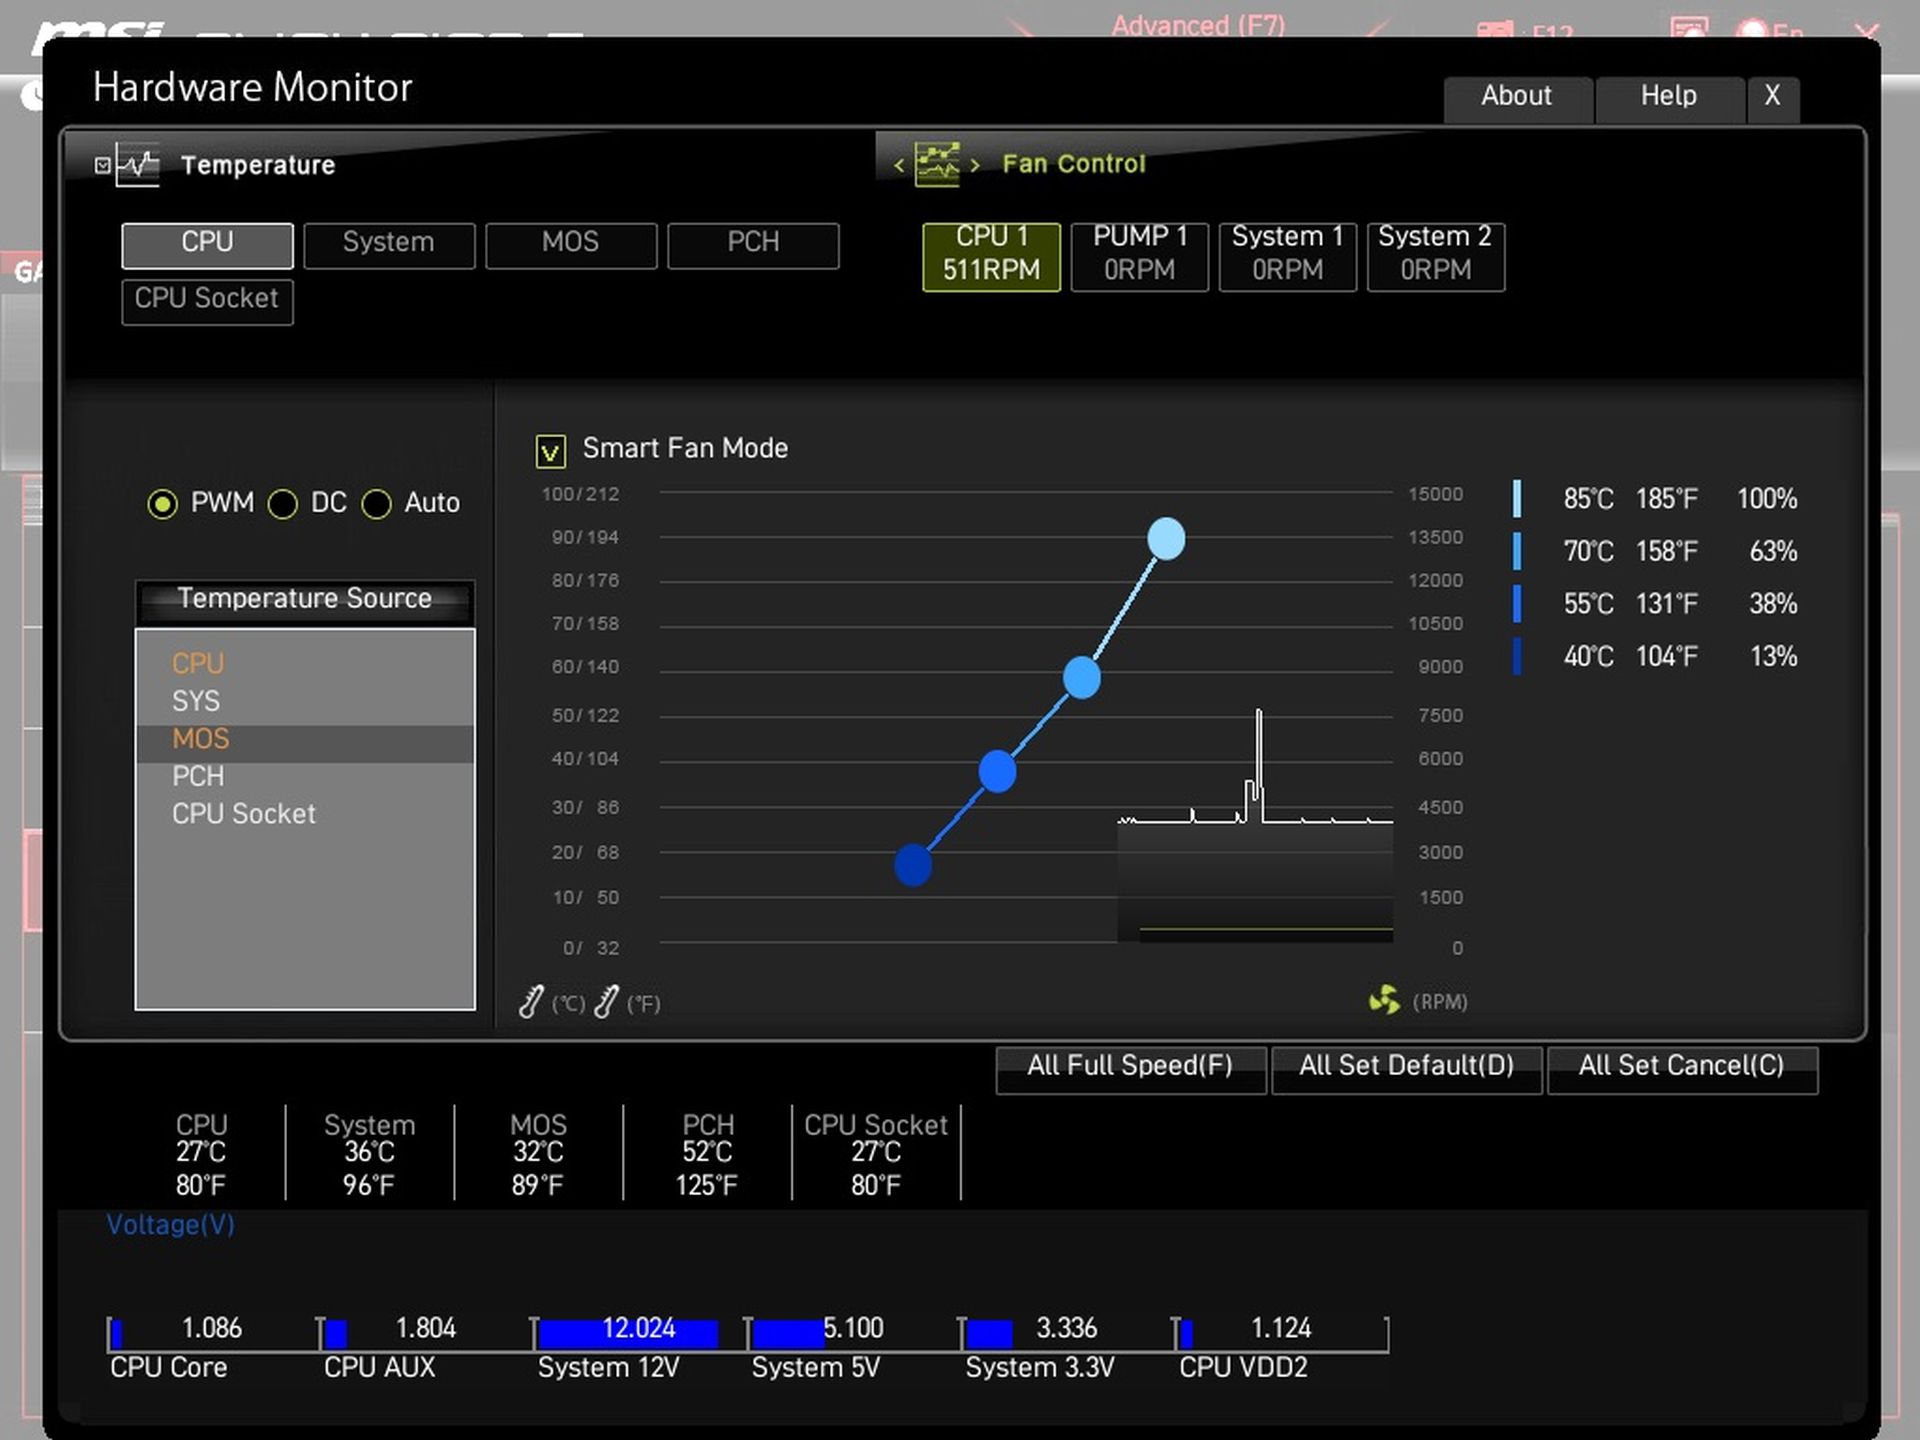
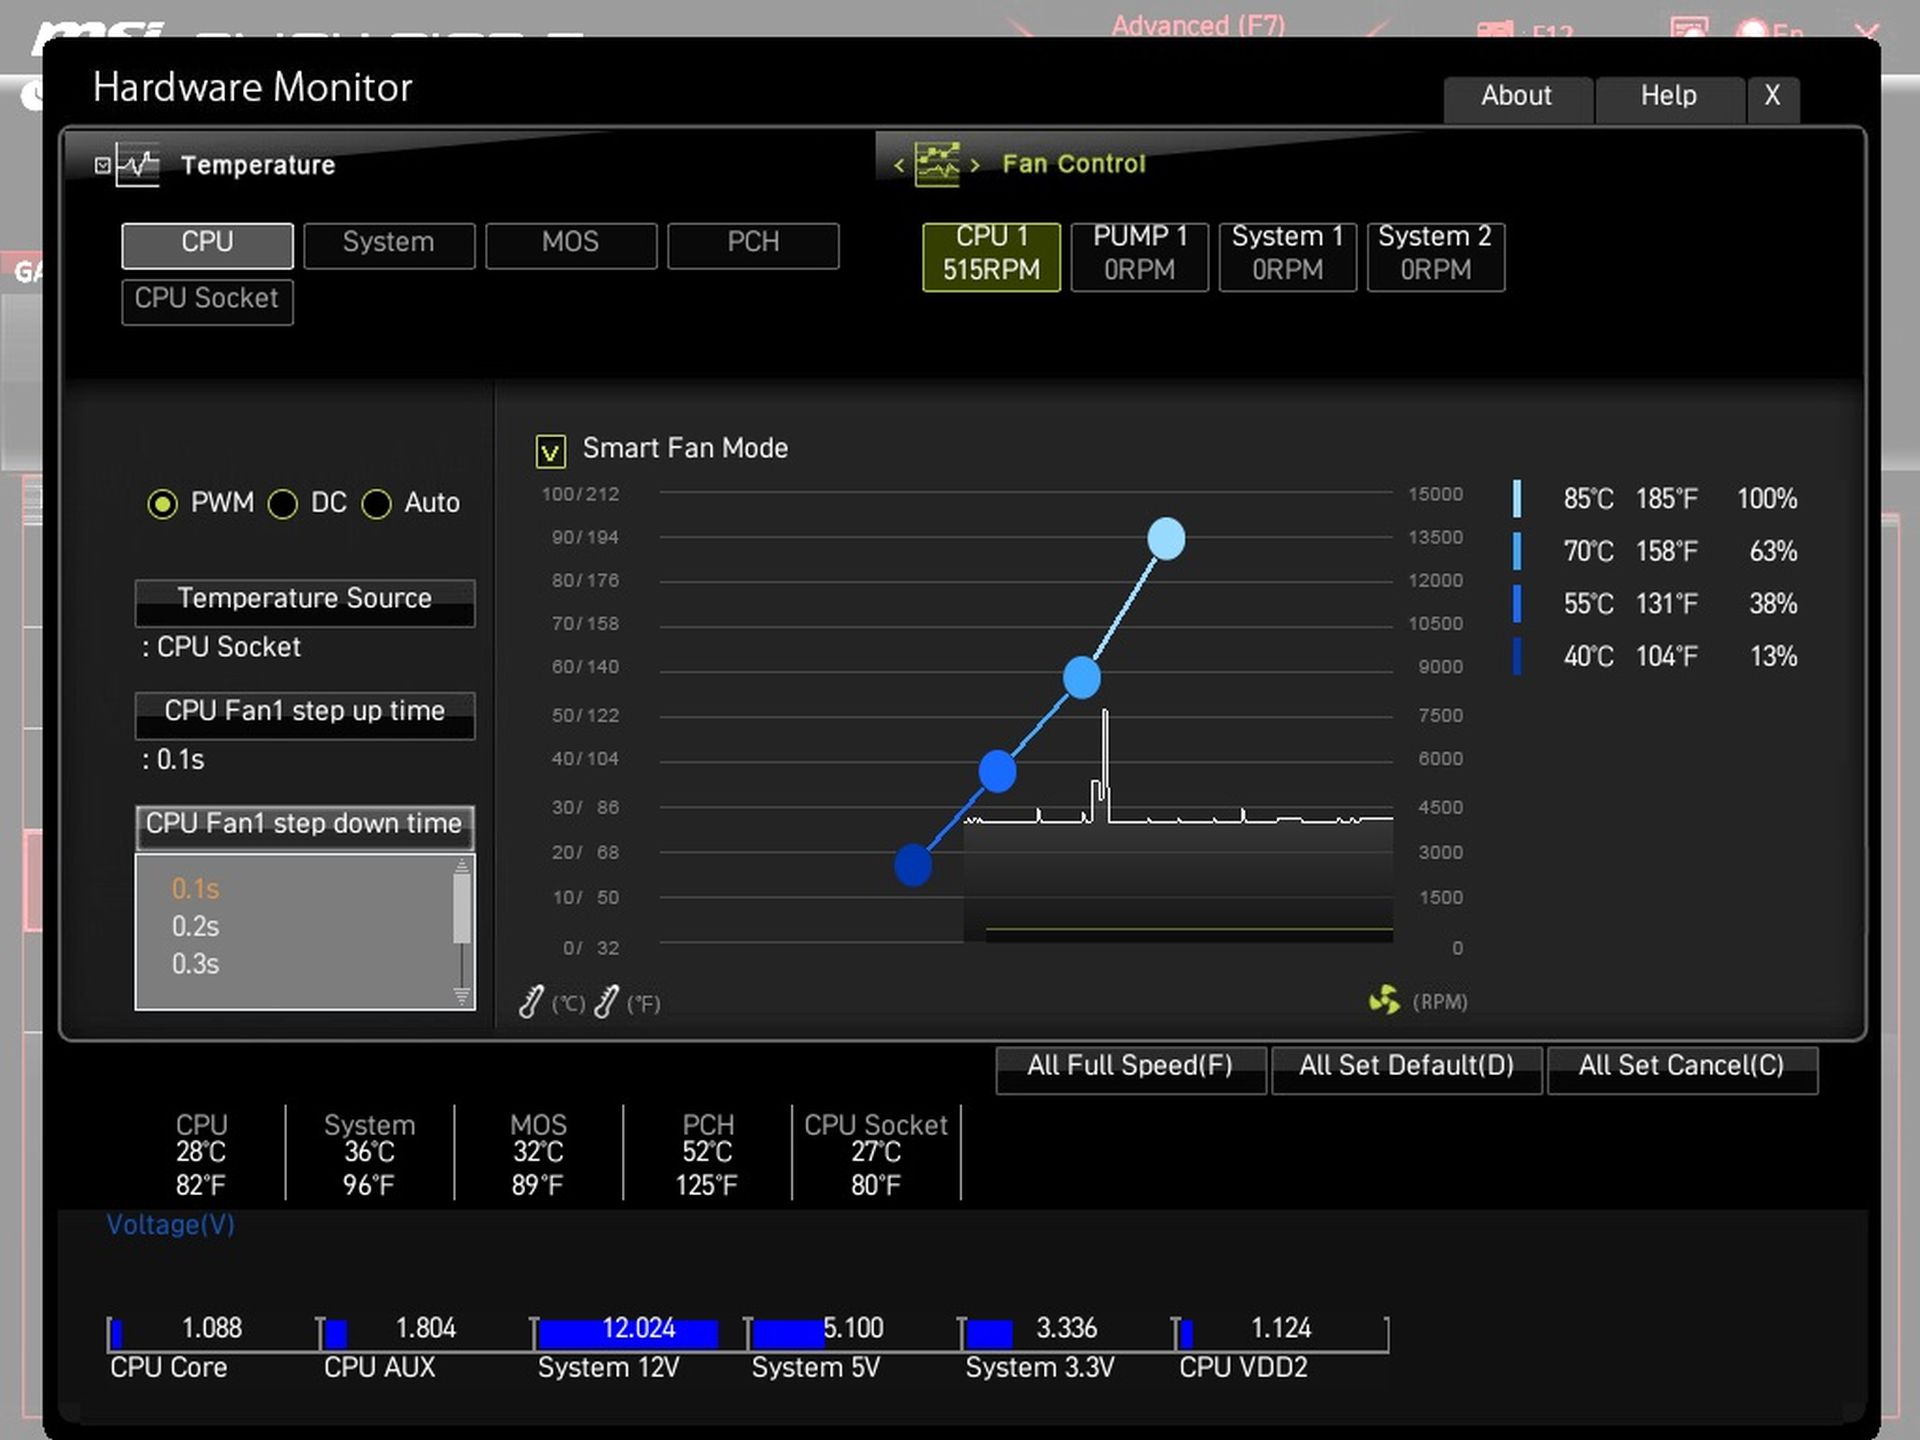
The “Hardware Monitor” environment for fan control is intuitive and functional. The PWM curve can be conveniently adjusted for each of the four available connectors. The development of the speed or PWM intensity can then be dependent on one of the five temperature sensors. Among them, the “CPU socket” or MOS, which makes sense to tinker with if the goal is to always have the power delivery and its surroundings under control as well.
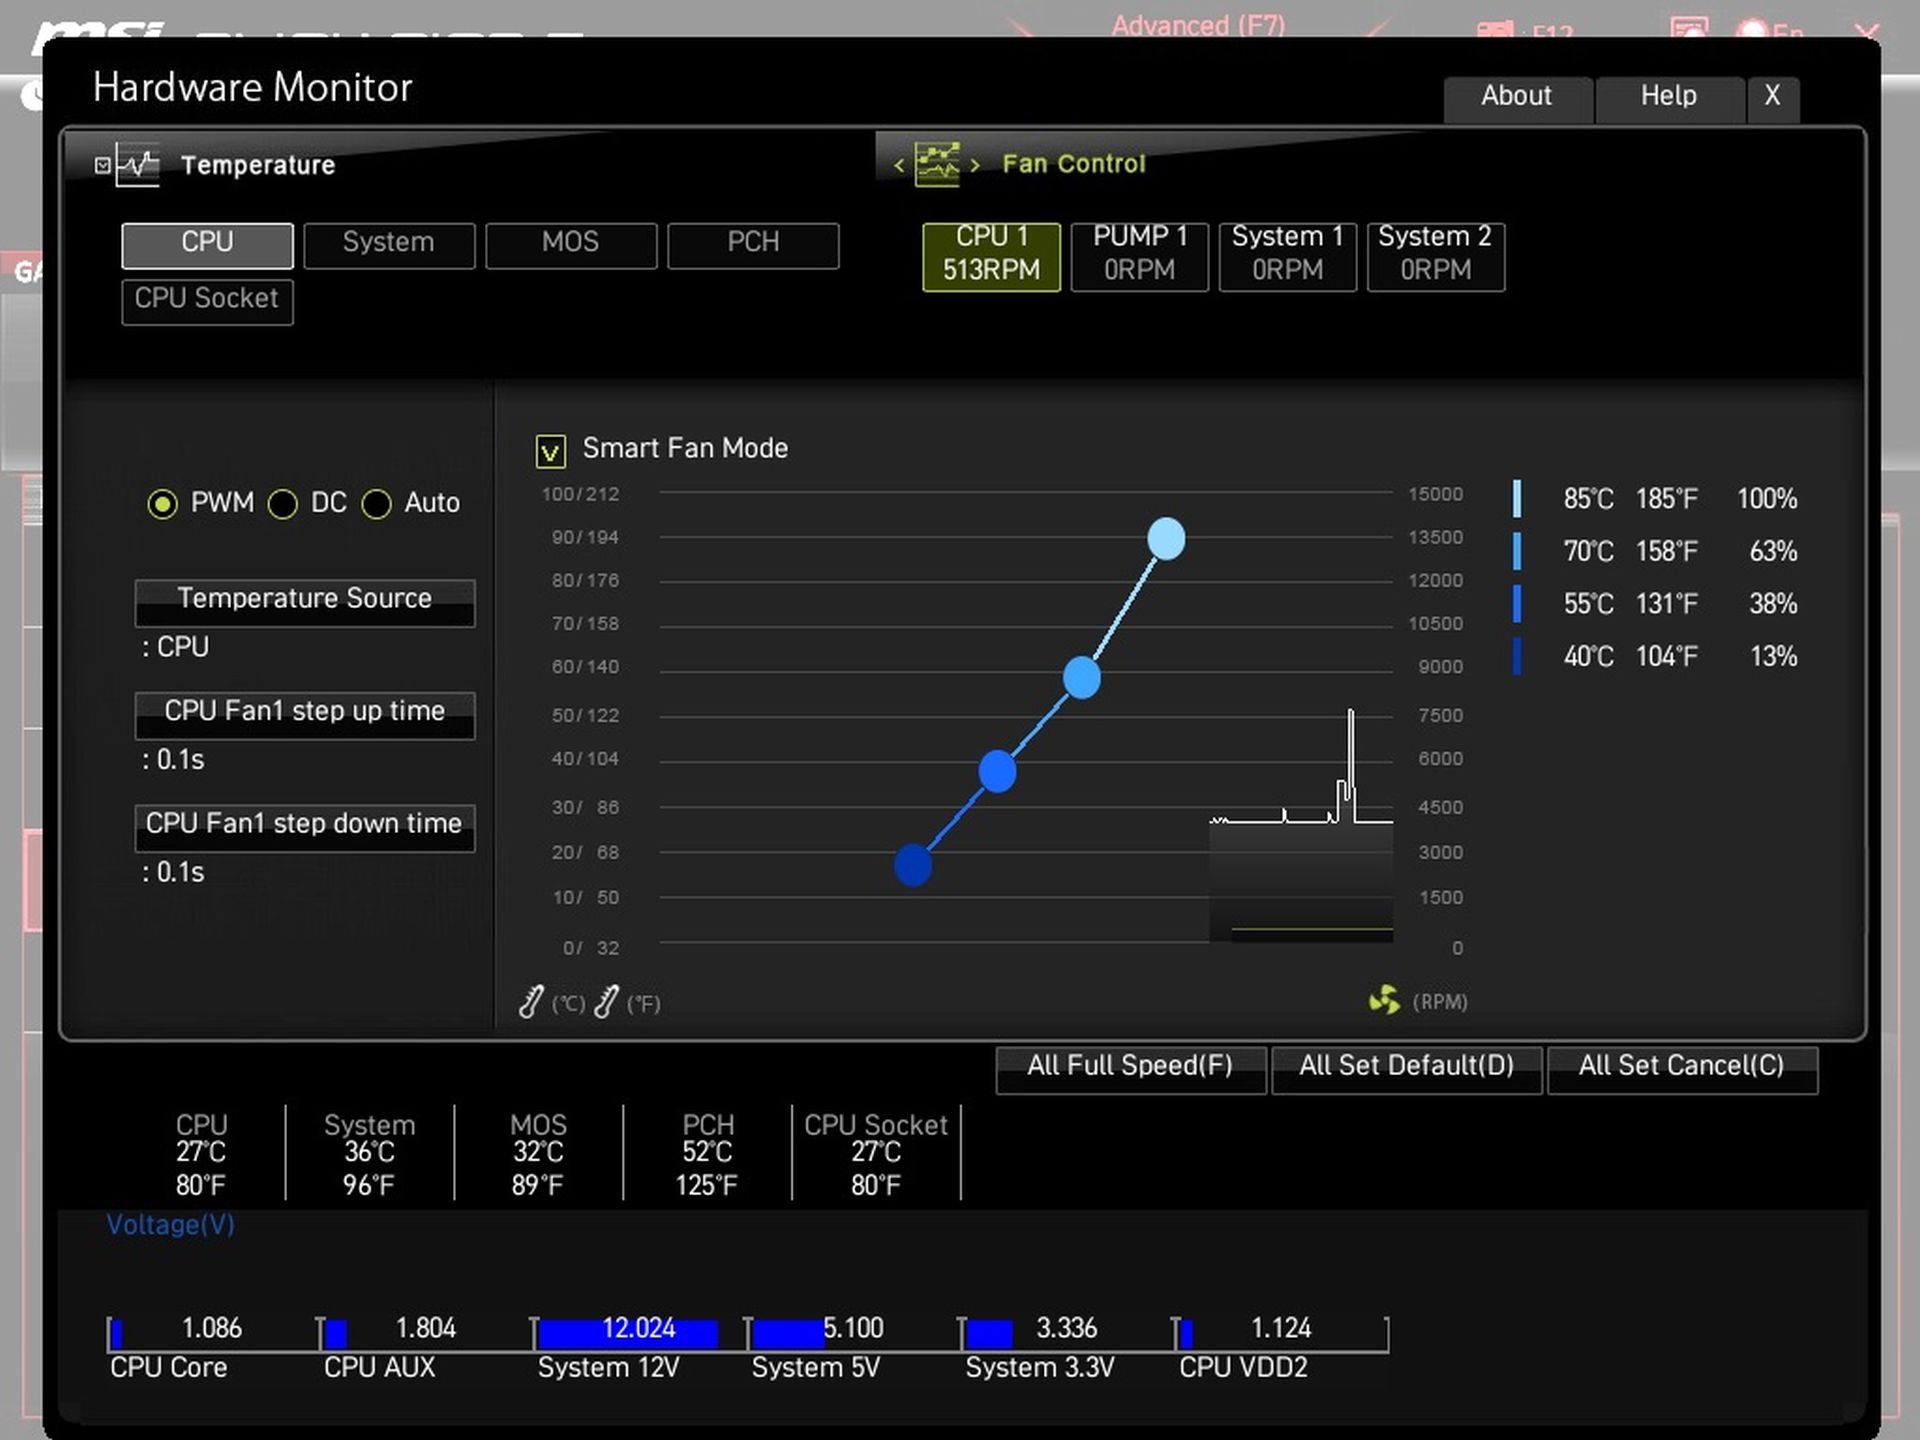
In addition to PWM control, there is also DC control, i.e. linear control by changing the fixed voltage. Among the options there are also step up/down time items, through which you can slow down the PWM cycle, which can prevent unwanted fan speed changes during short-term higher loads, such as typically application initializations and the like.
And finally, a look at EZ mode, which you enter by pressing F7. All the key things, whether in terms of settings options (XMP, TPM, boot priority, …) or monitoring (CPU frequency, RAM, temperature, RPM, …) are nicely together on one screen. Switching between memory profiles (XMP) is also possible in this window. Alternatively, this is also possible via the OC tab, but this is generally intended for more advanced users.
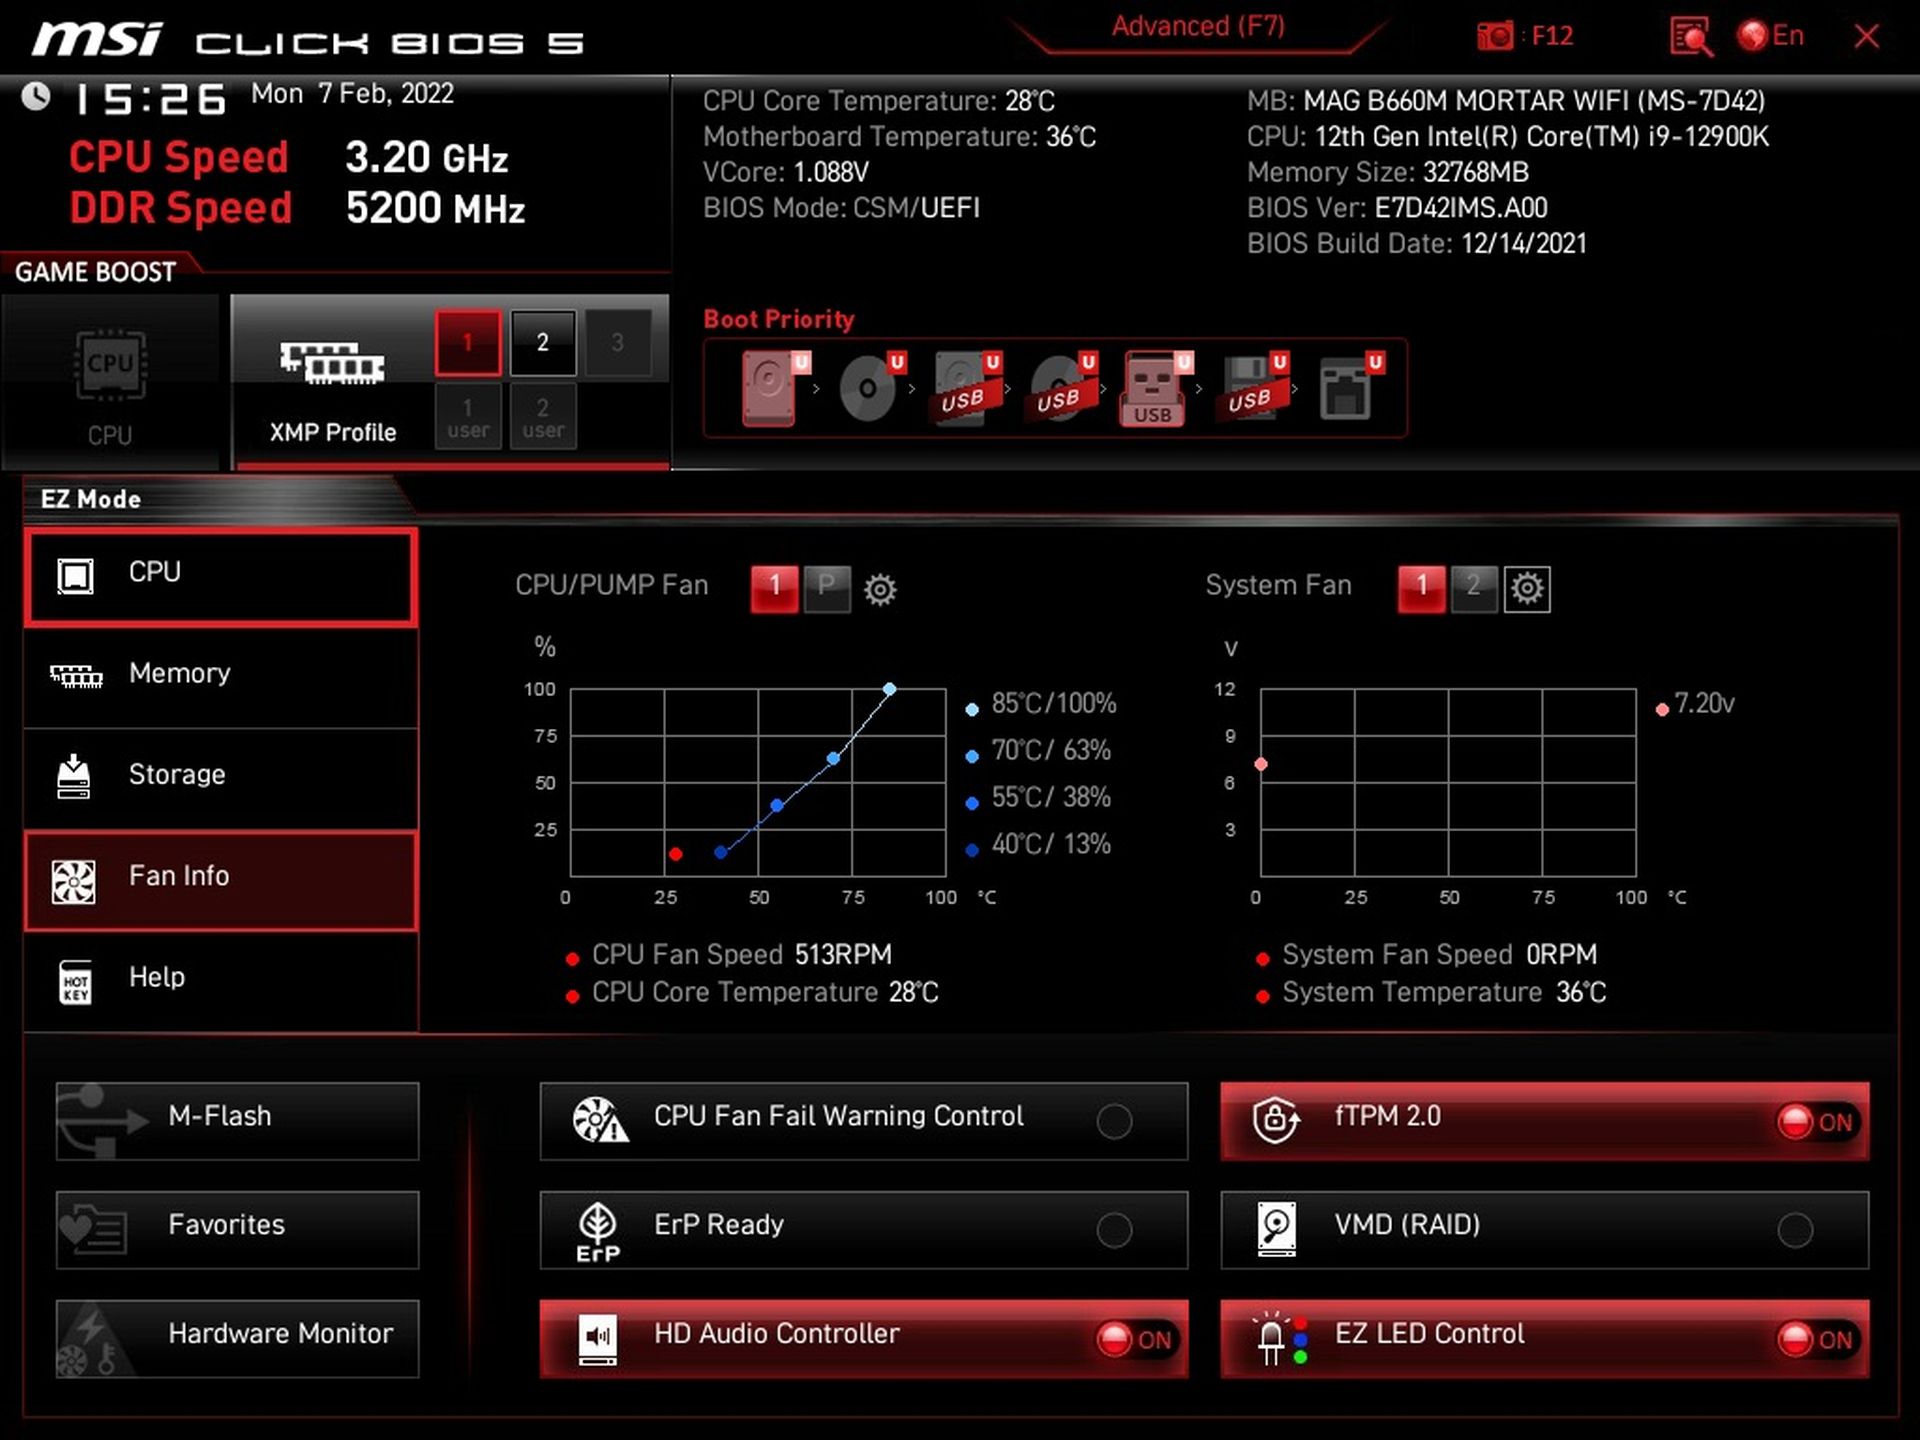

We have virtually no complaints about the UEFI – everything works properly, reliably, the responses are fast… what more could you ask for? Sure, with exaggerated expectations there would certainly be something, but within the price range everything is sufficient for this board even in terms of tuning details of all kinds.
- Contents
- MSI MAG B660M Mortar WiFi in detail
- What it looks like in the BIOS
- Methodology: Performance tests
- Methodology: How we measure power draw
- Methodology: Temperature and frequency measurements
- Test setup
- 3DMark
- Borderlands 3
- F1 2020
- Metro Exodus
- Shadow of the Tomb Raider
- Total War Saga: Troy
- PCMark a Geekbench
- Web performance
- 3D rendering: Cinebench, Blender, ...
- Video 1/2: Adobe Premiere Pro
- Video 1/2: DaVinci Resolve Studio
- Graphic effects: Adobe After Effects
- Video encoding
- Audio encoding
- Photos: Adobe Photoshop, Affinity Photo, ...
- (De)compression
- (De)encrypting
- Numerical computing
- Simulations
- Memory and cache tests
- M.2 (SSD) slots speed
- USB ports speed
- Ethernet speed
- Power draw curve (EPS + ATX connector) w/o power limits
- Power draw curve (EPS + ATX connector) with Intel's power limits
- Total power draw (EPS + ATX connector)
- Achieved CPU clock speed
- CPU temperatures
- VRM temperatures – thermovision of Vcore and SOC
- SSD temperatures
- Chipset temperatures (south bridge)
- Conclusion