


What it looks like in BIOS
The X670E Tomahawk WiFi motherboard is a combination of the highest-end AMD chipset and a relatively lower price. At least by X670E motherboard standards. In addition to broader connectivity (that’s first and foremost), there’s also PCI Express 5.0 support. The decent VRM is also well prepared to run efficiently with even the most powerful processors that can be used on the AM5 platform.
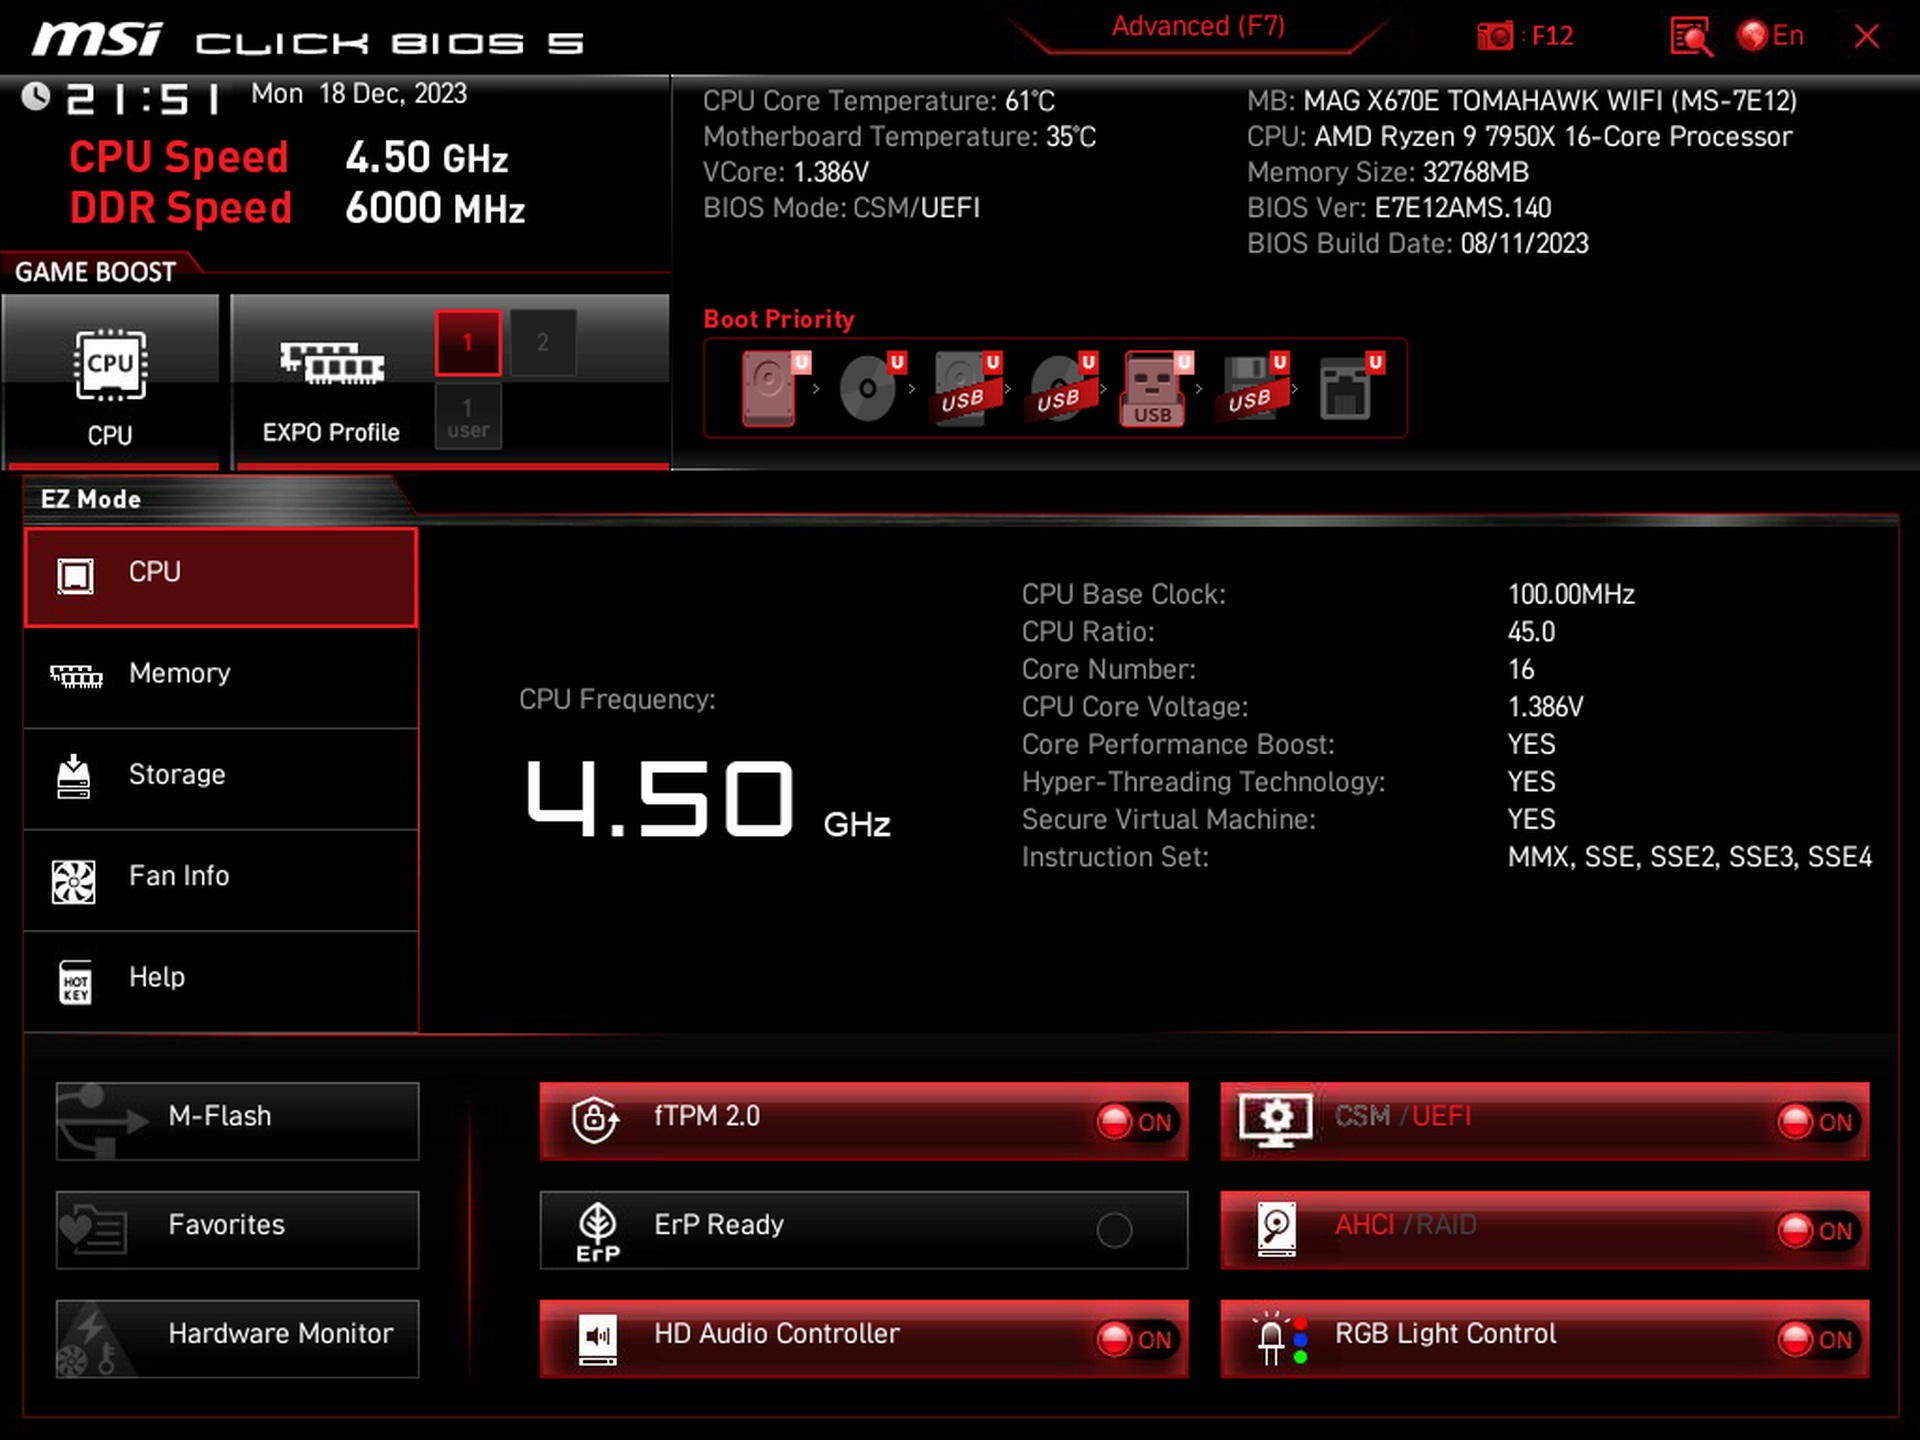
What it looks like in BIOS
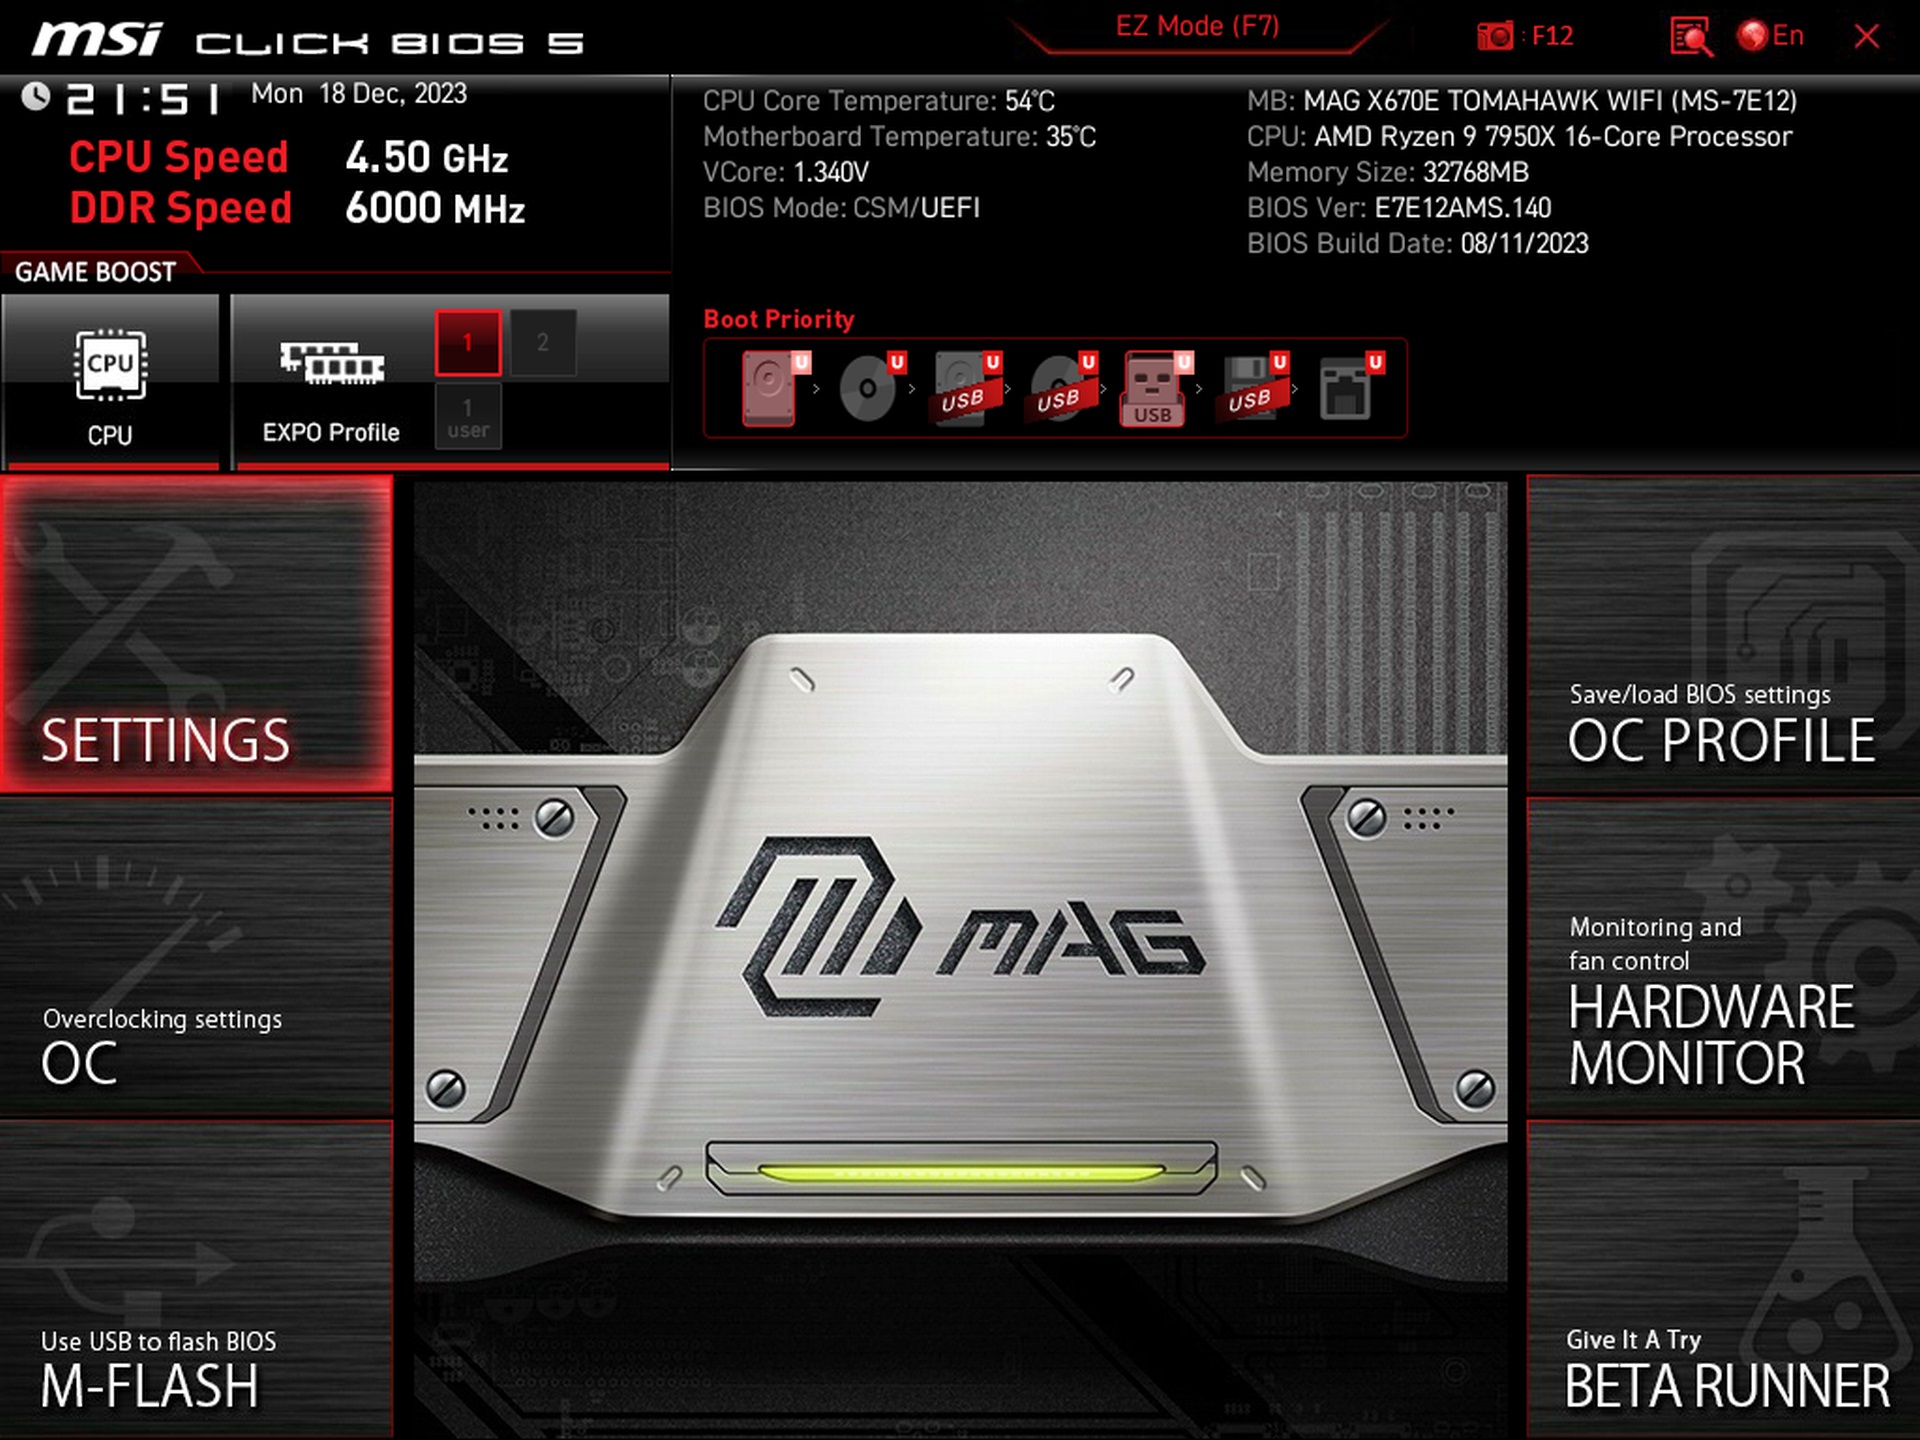
The user interface is clear, and you won’t get lost in the initial screens of both the simplified or the advanced mode. And the initial screens already have most of the buttons you’ll need for a “quick setup” of your configuration. In addition to activating the memory profile (EXPO) and much more, you can also force the CPU clock speeds a bit higher via the Game boost button, for example, with which, naturally, the power draw and cooling requirements will rise.
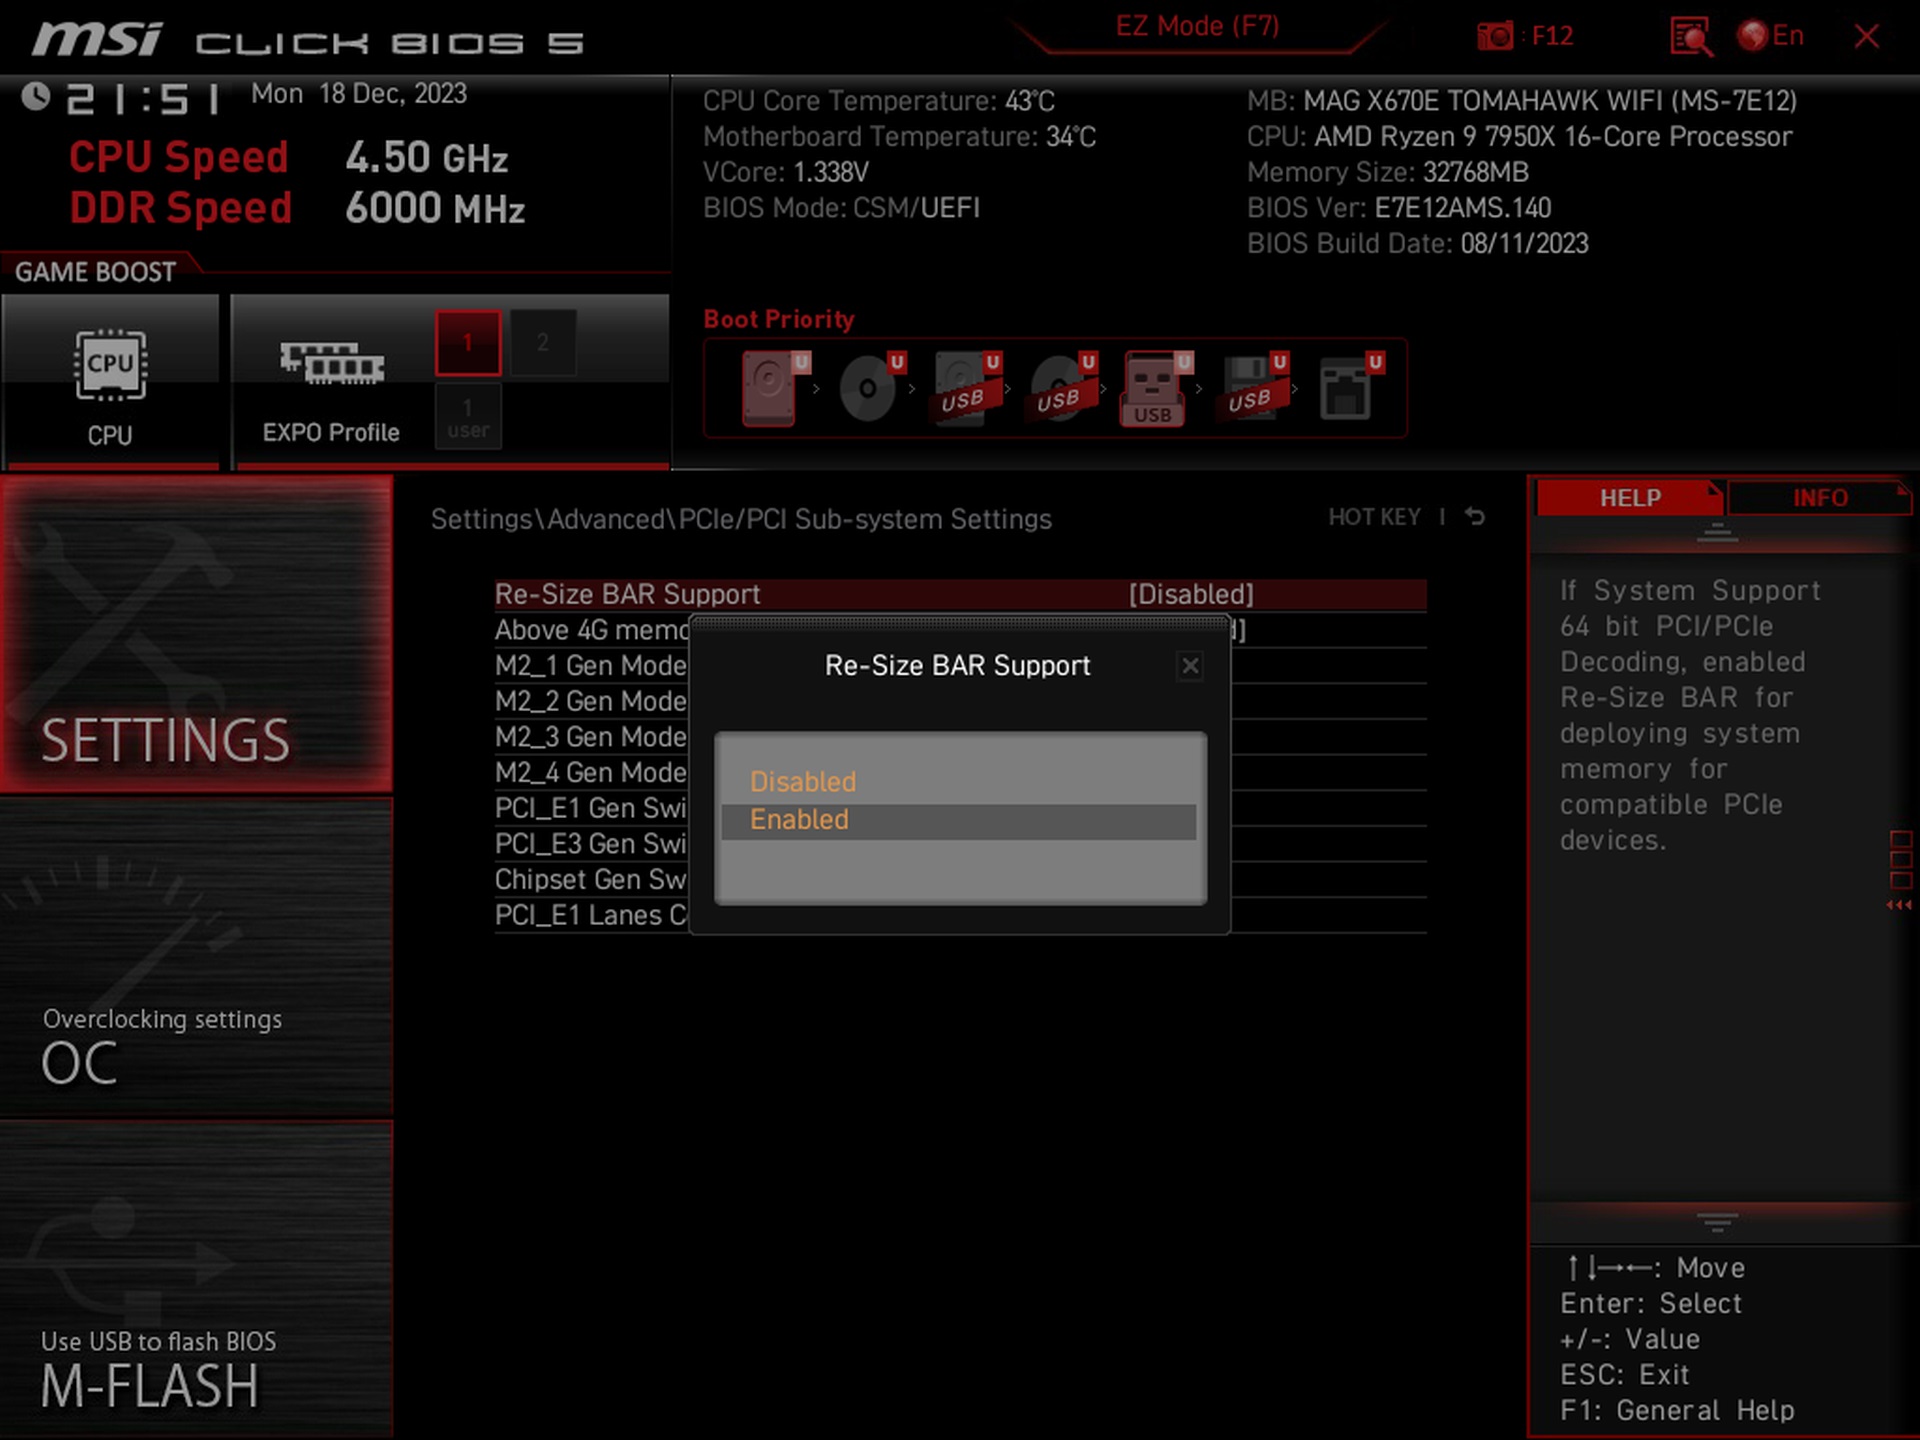
To adjust the ReSizable BAR technology, or disable it if necessary (ReBAR is enabled by default), you have to dive into the more advanced settings already in the PCI Express options section.
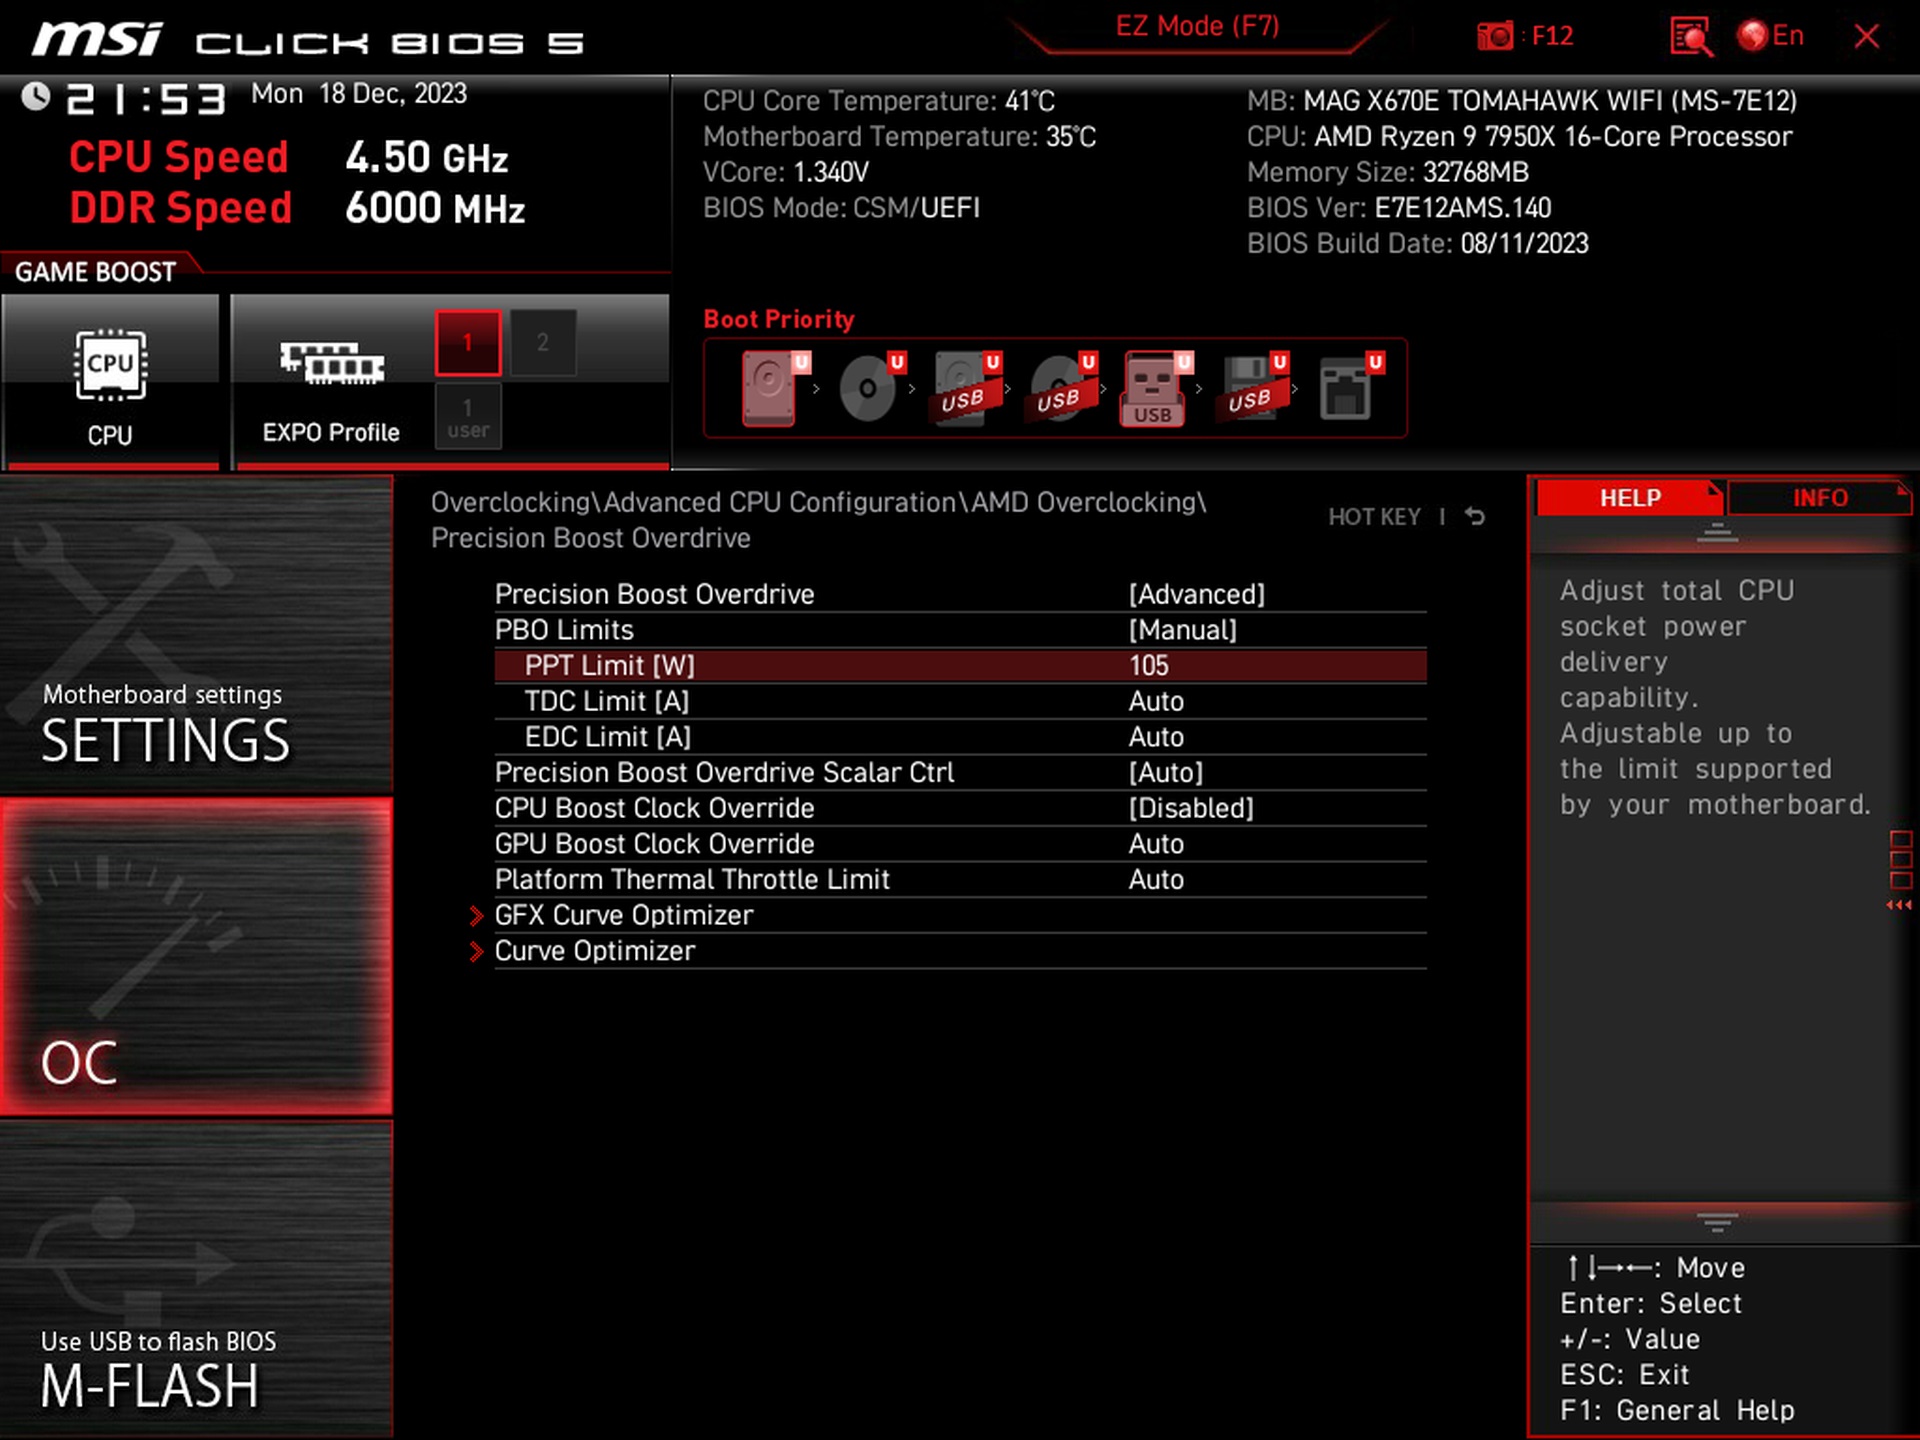
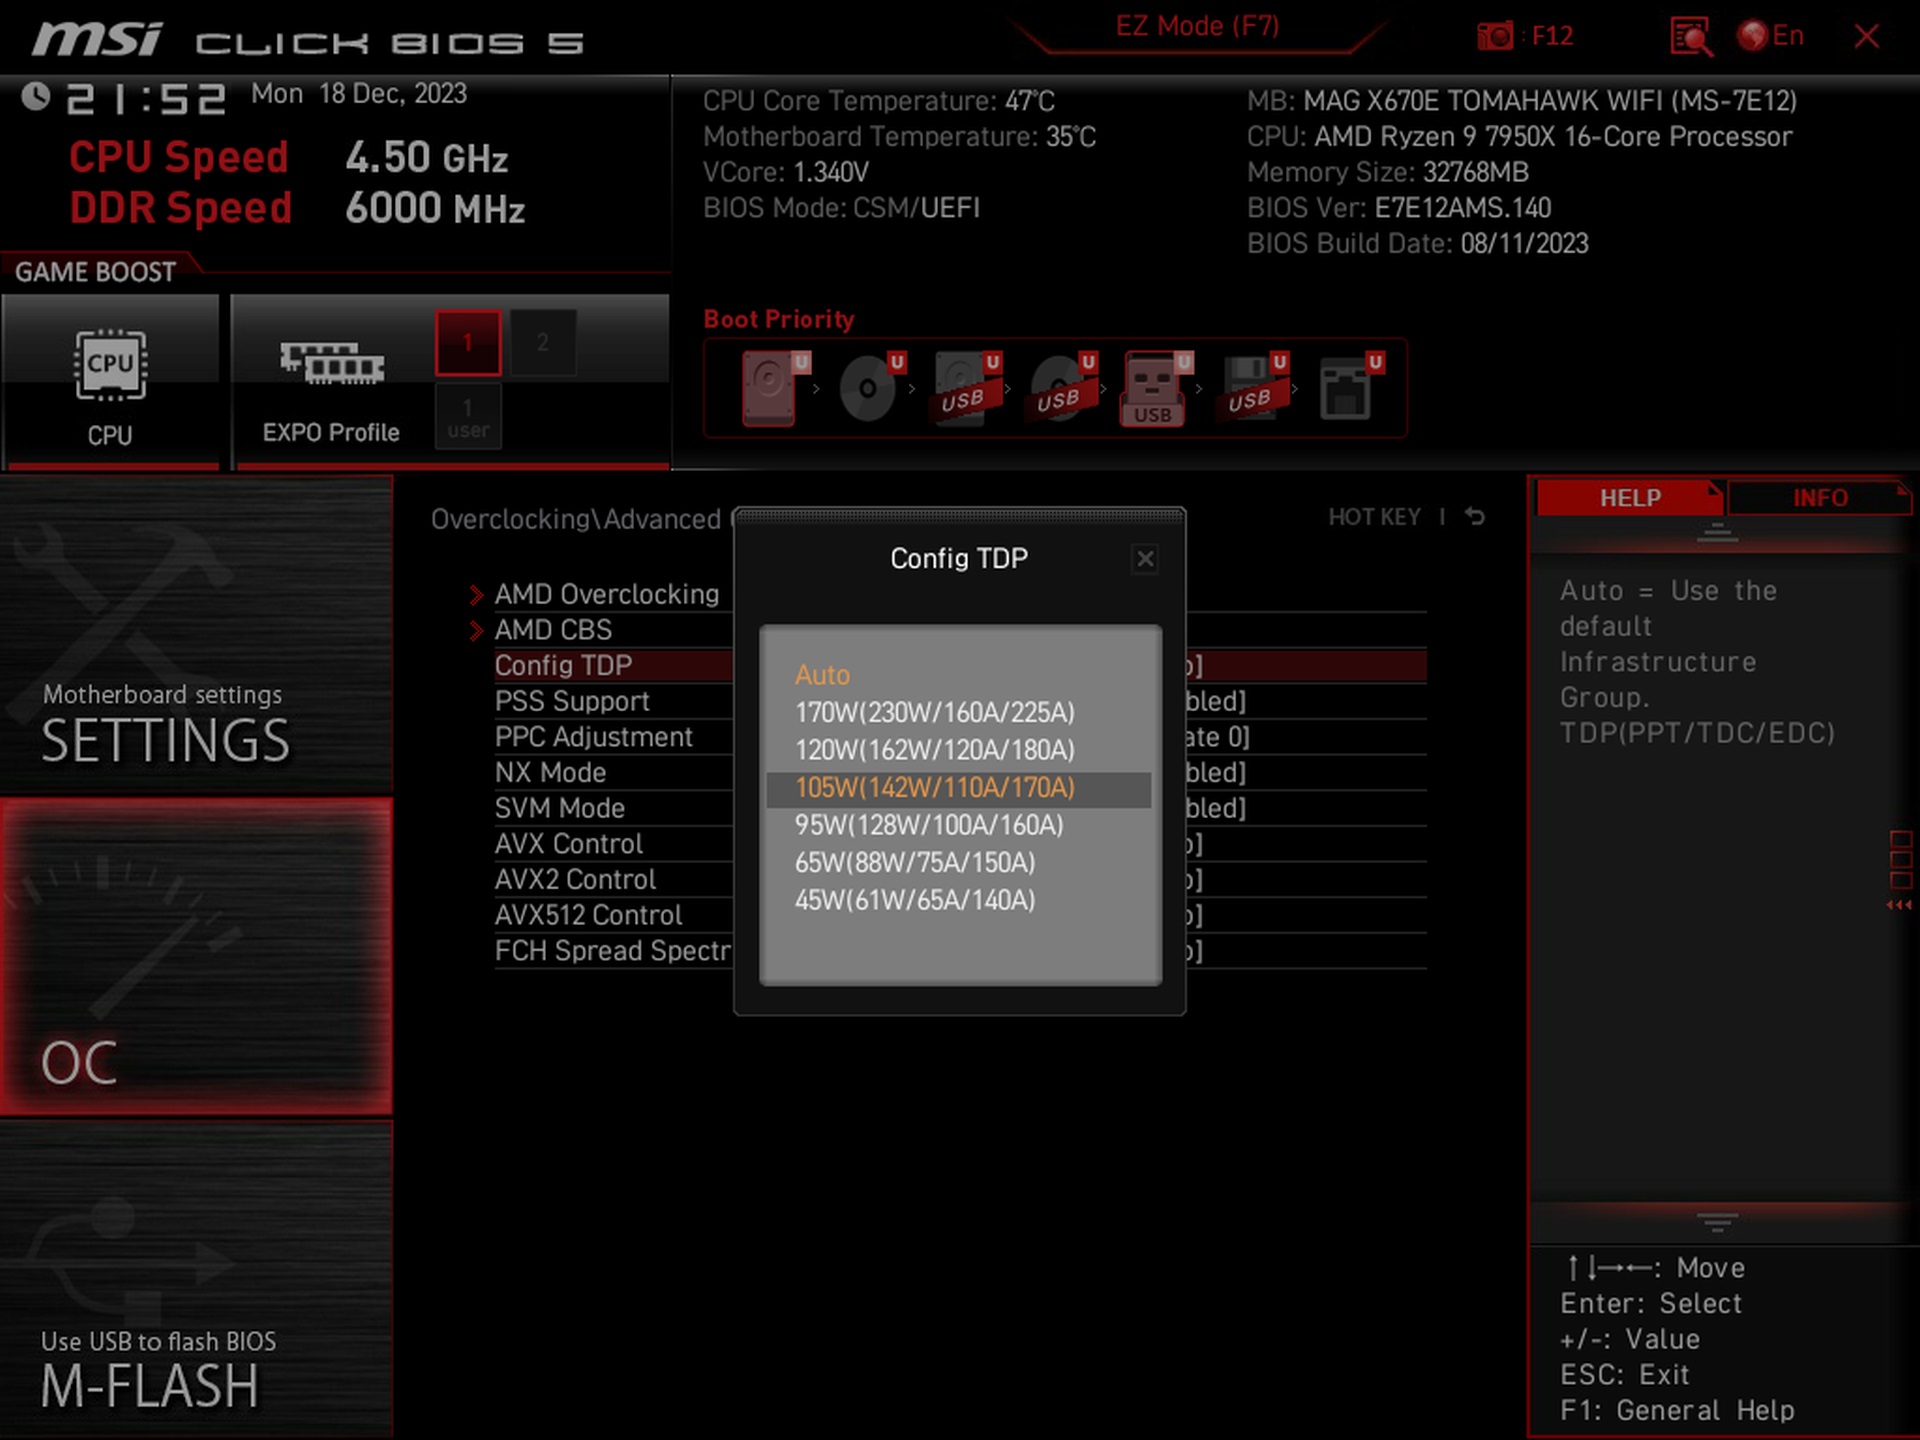
Power management is traditionally on the “OC” tab, where there are multiple ways to adjust TDP/PPT. By typing in specific values you can go at it via the PBO (Precision Boost Overdrive) section or also AMD CBS. Preset profiles with smooth TDP scaling in six levels (from 45 to 170W) are also there, in the TDP Config sub-section. All of these settings around power limit control fall under the “Advanced CPU Configuration” tab.


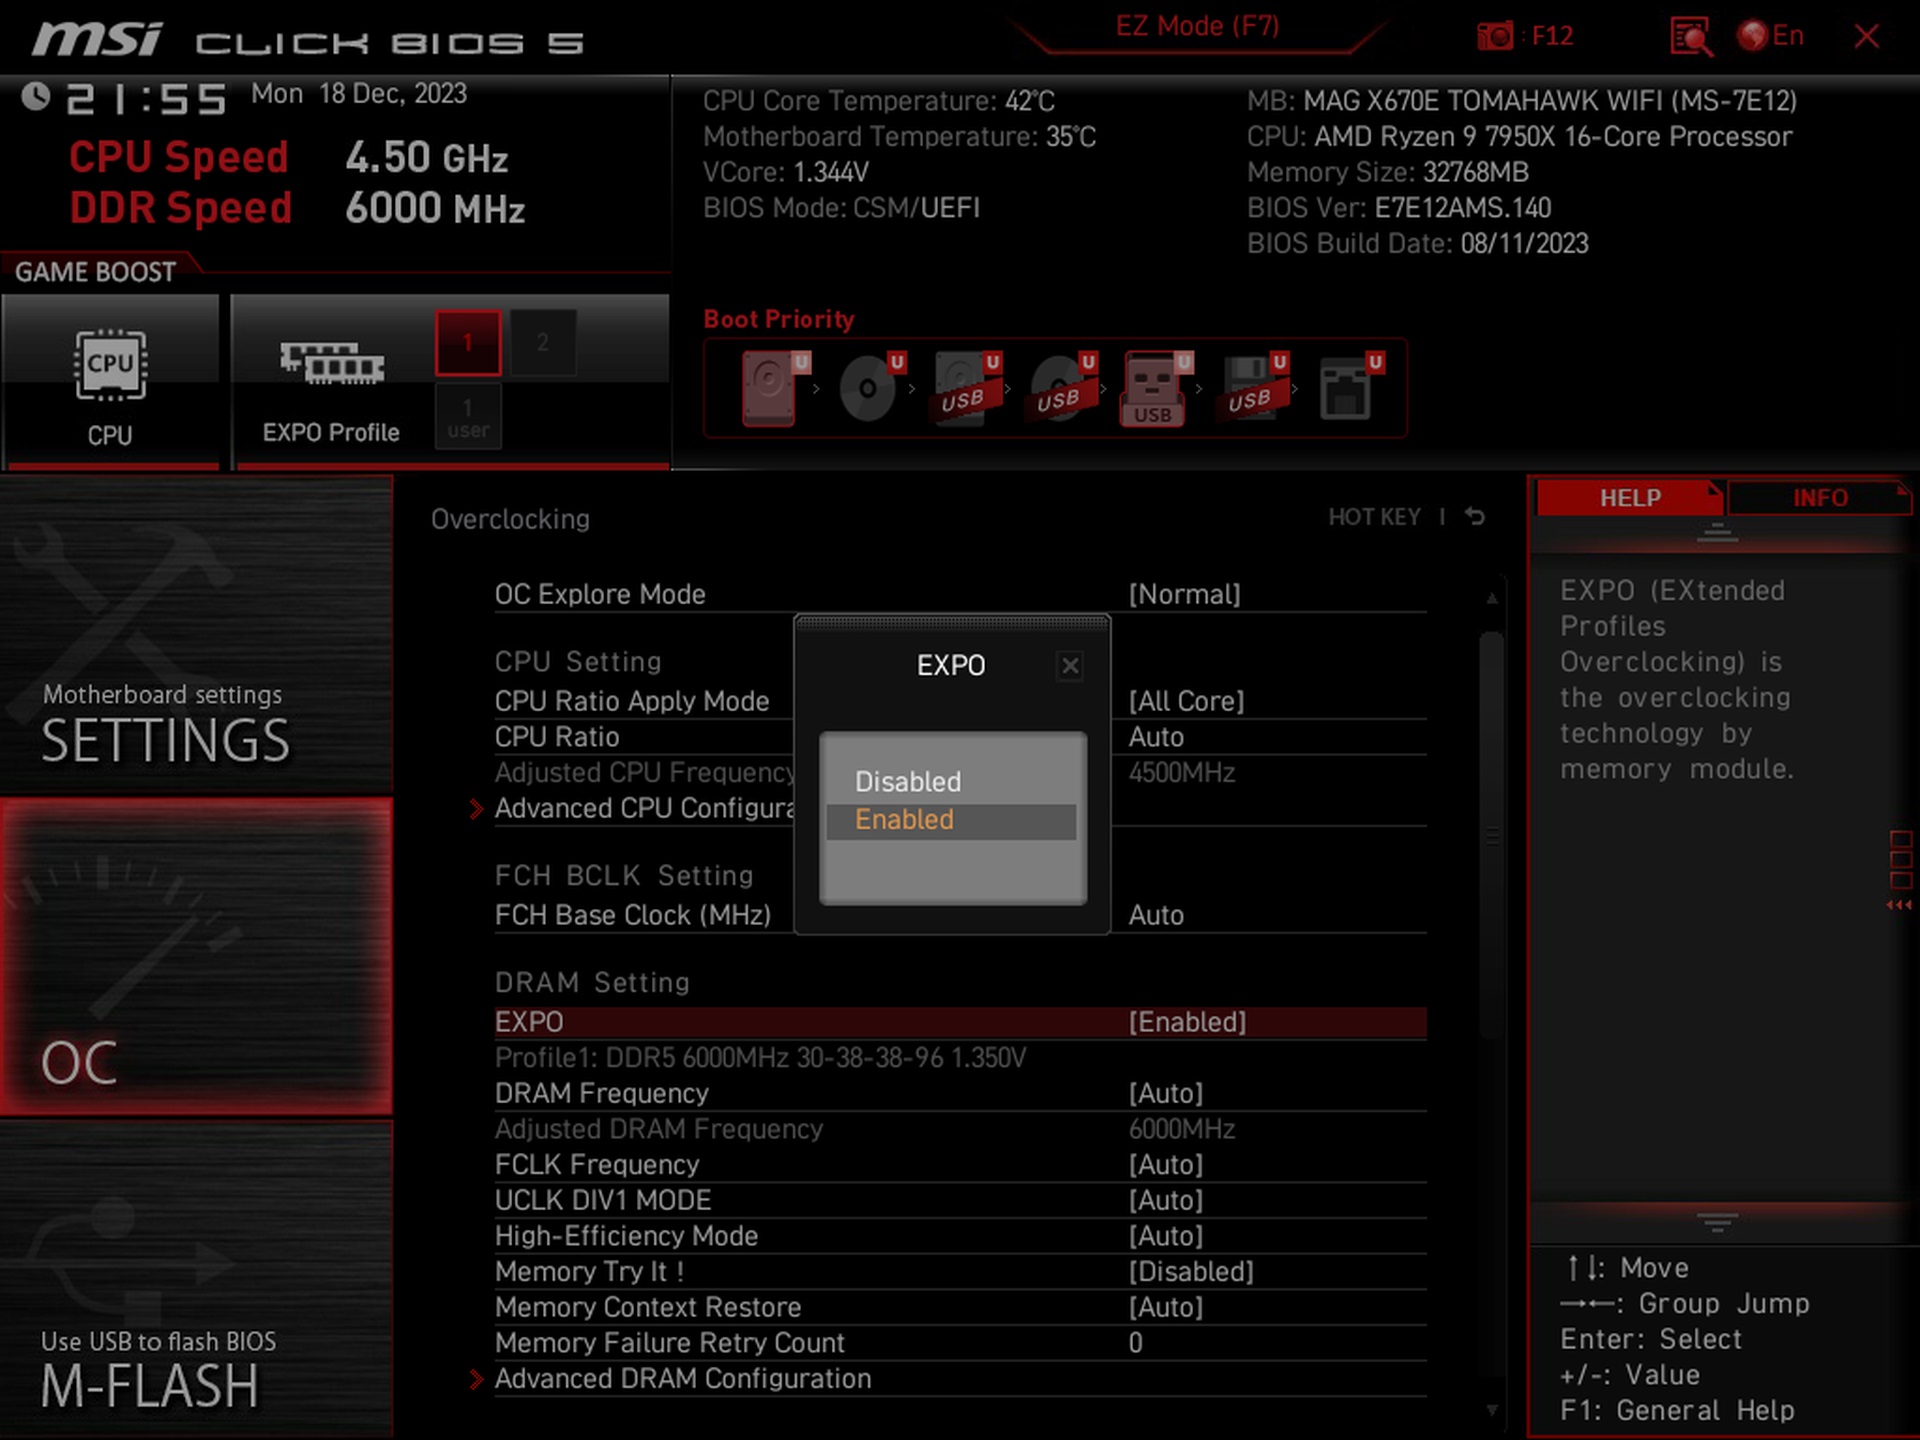
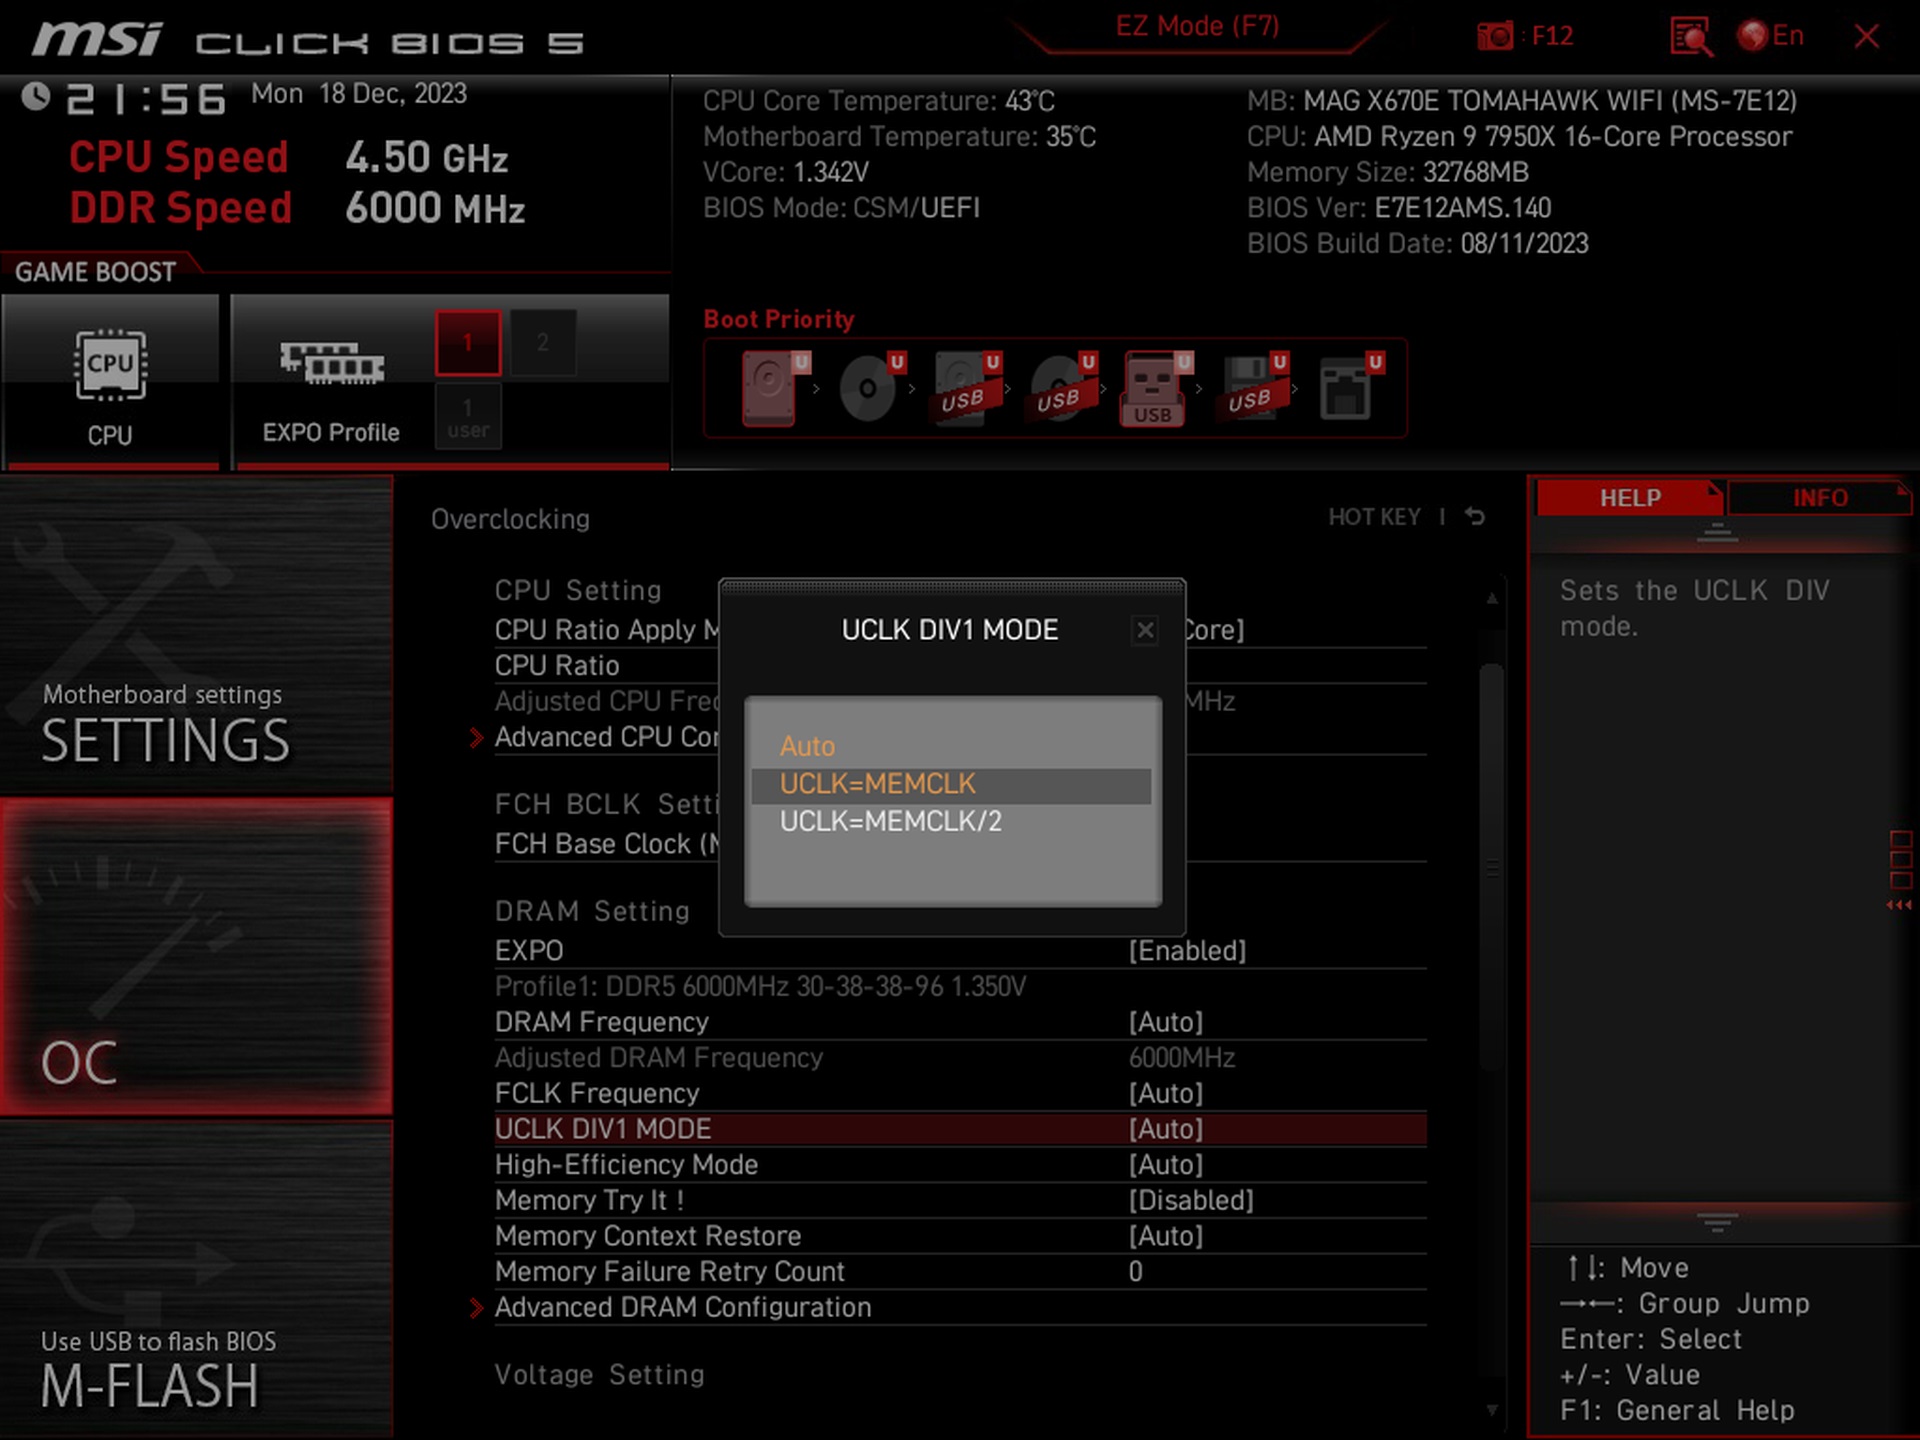
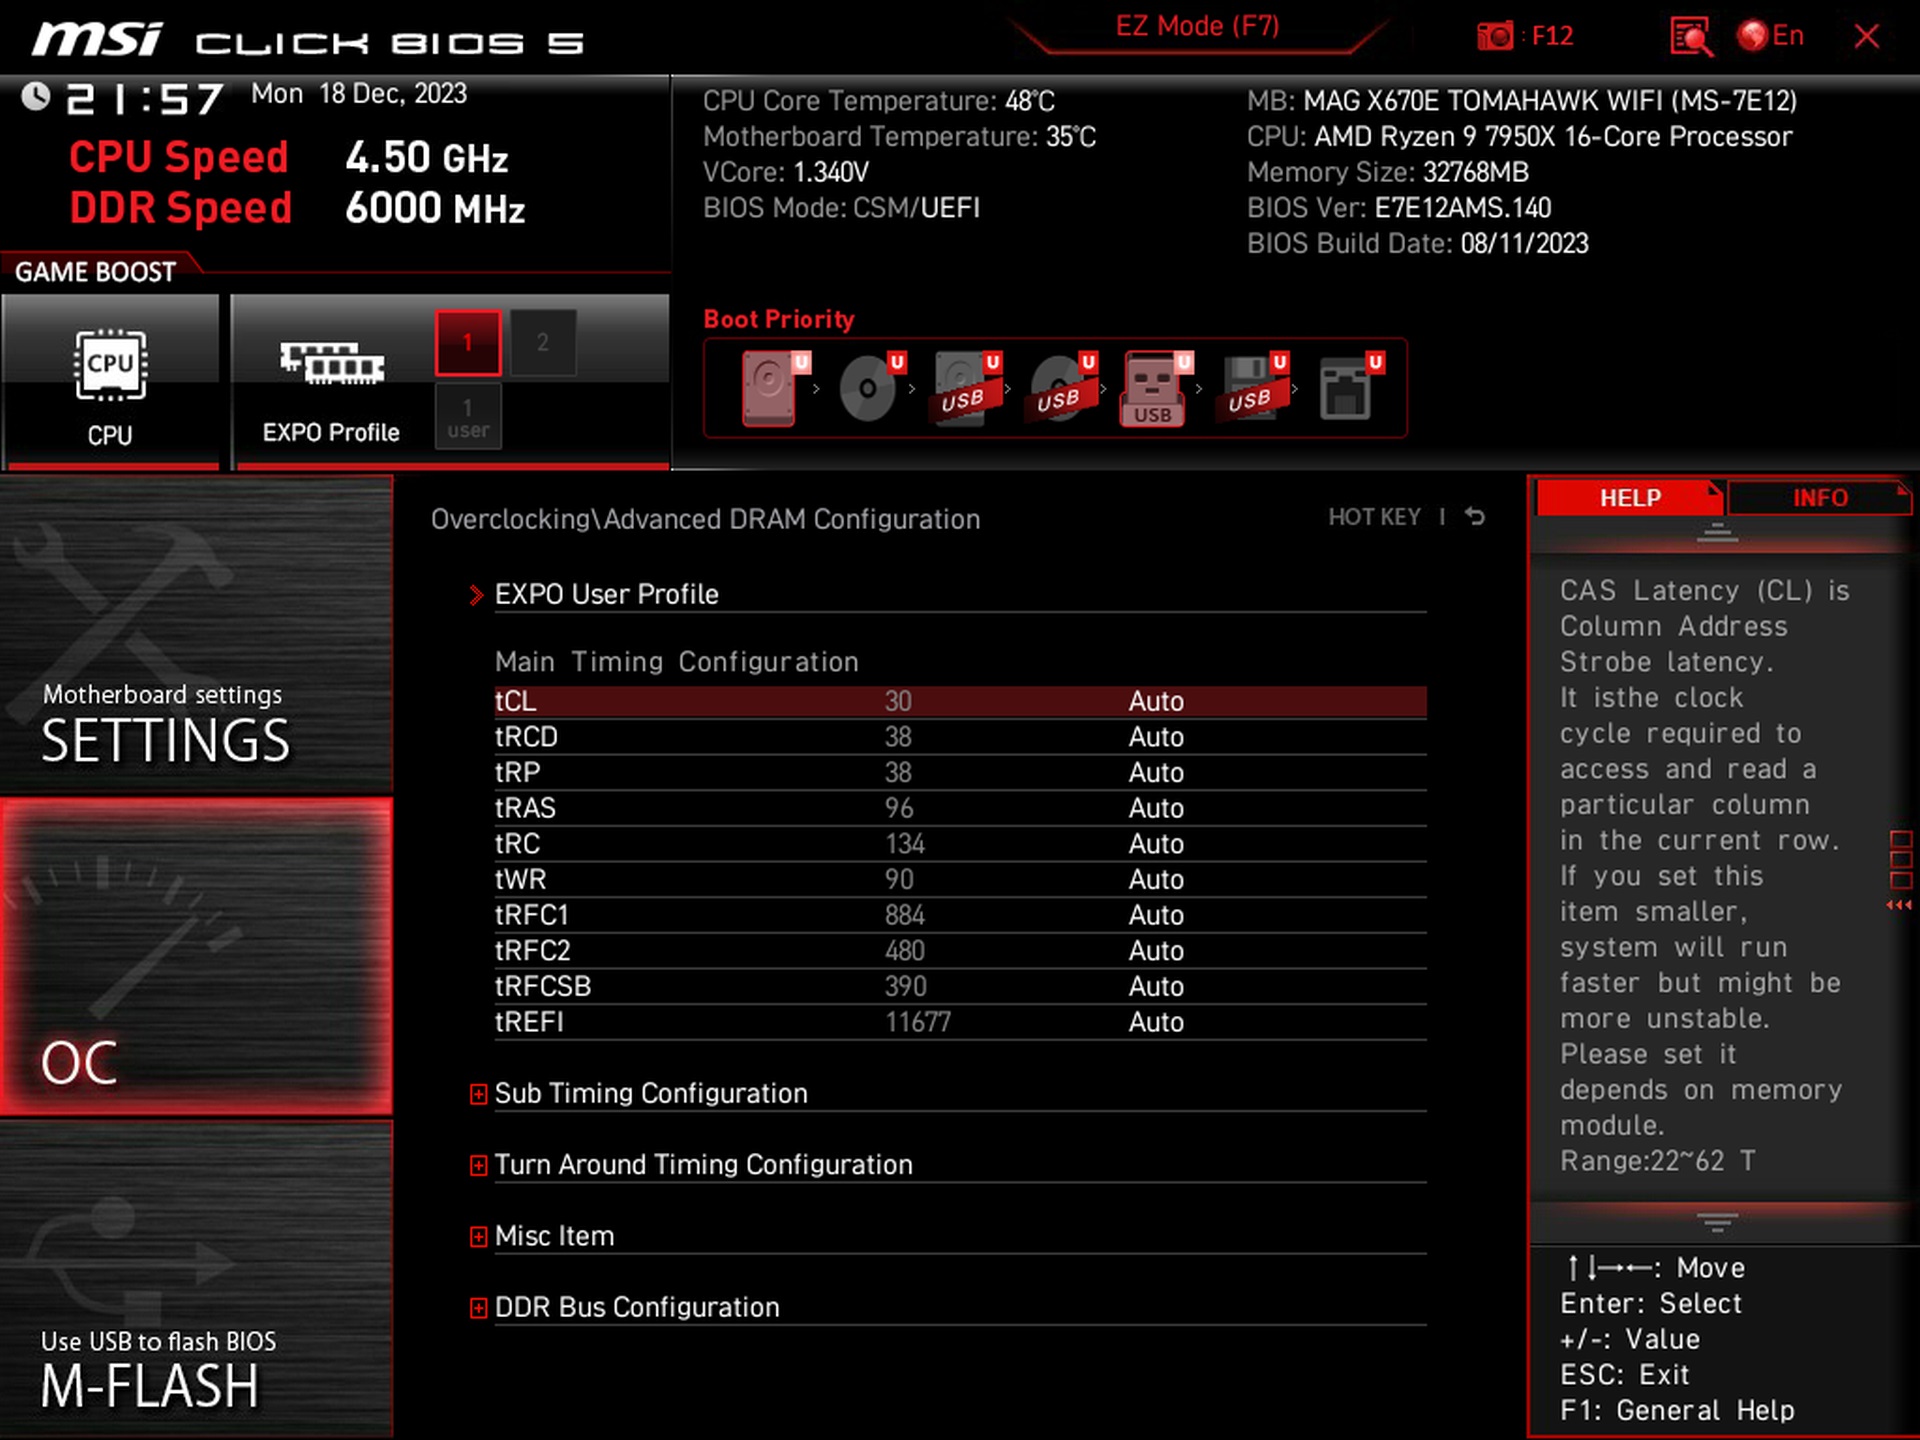
The memory profile you bought your modules with can also be enabled in the advanced settings, where further adjustments to the memory subsystem are possible. For example regarding the bandwidth of the IMC (integrated memory controller) in the CPU. Even with medium-speed DDR5-6000 modules, the board (BIOS 7E12v14) sets Uncore to 3000 MHz, i.e. the maximum bandwidth, after activating AMD EXPO. This has a significant impact on the speed of the platform as a whole. To what extent depends on how which application scales with higher bandwidth or lower RAM latency.
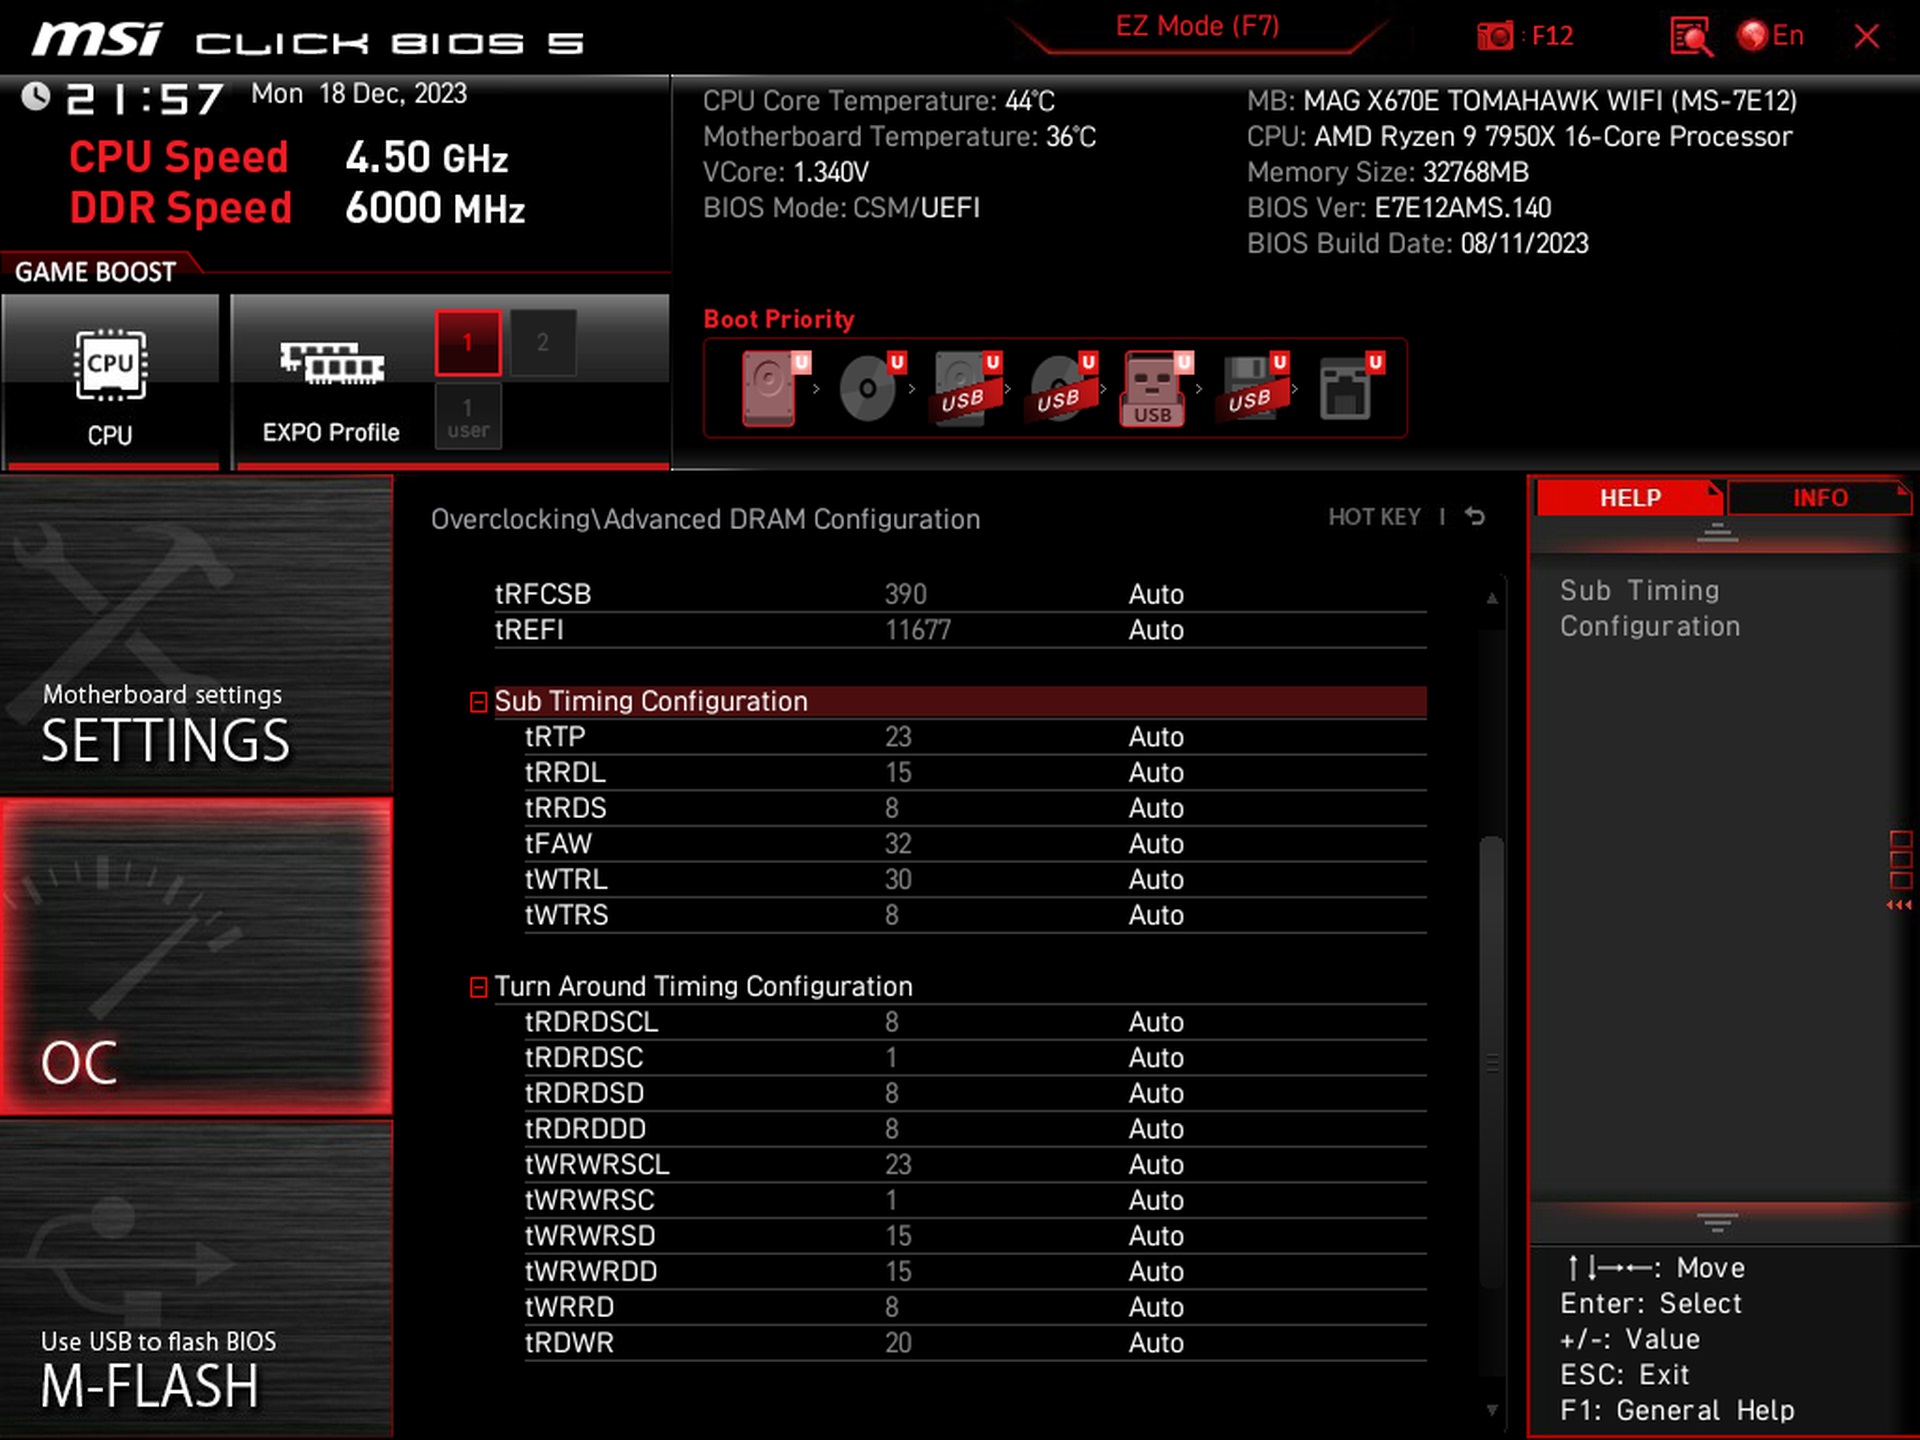
For enthusiasts, detailed timing tweaking options are also available.
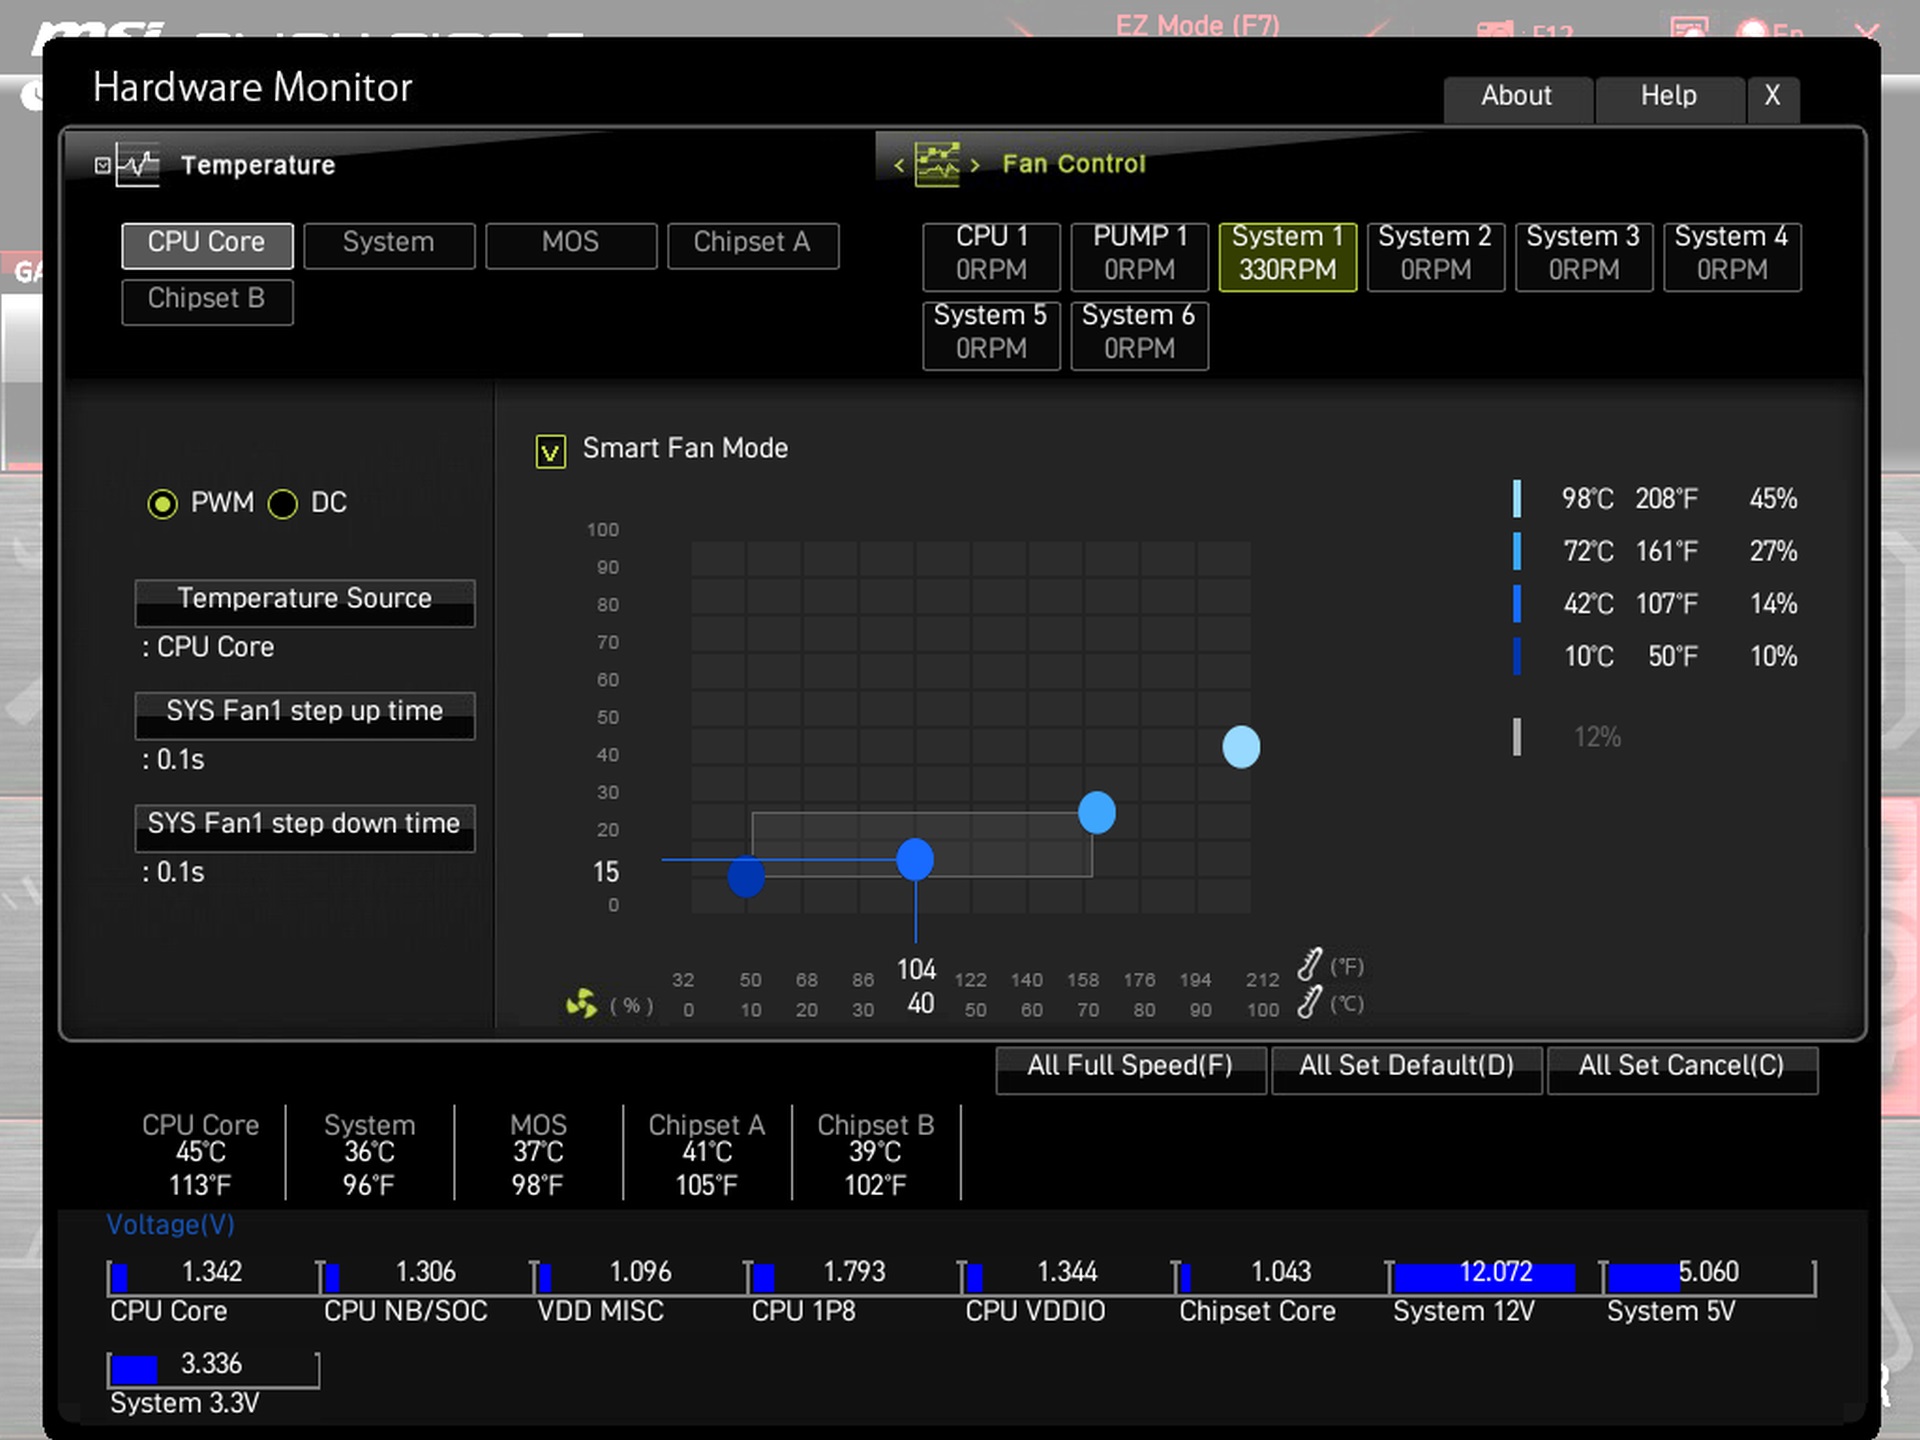
To adjust the fans, you have to go to “Hardware Monitor”. This interface, by the way, can also be accessed via the main navigation of the initial screens of both simplified and advanced mode. All eight fan connectors are adjustable, and the speed curve can be based on multiple sources where the board detects temperatures.

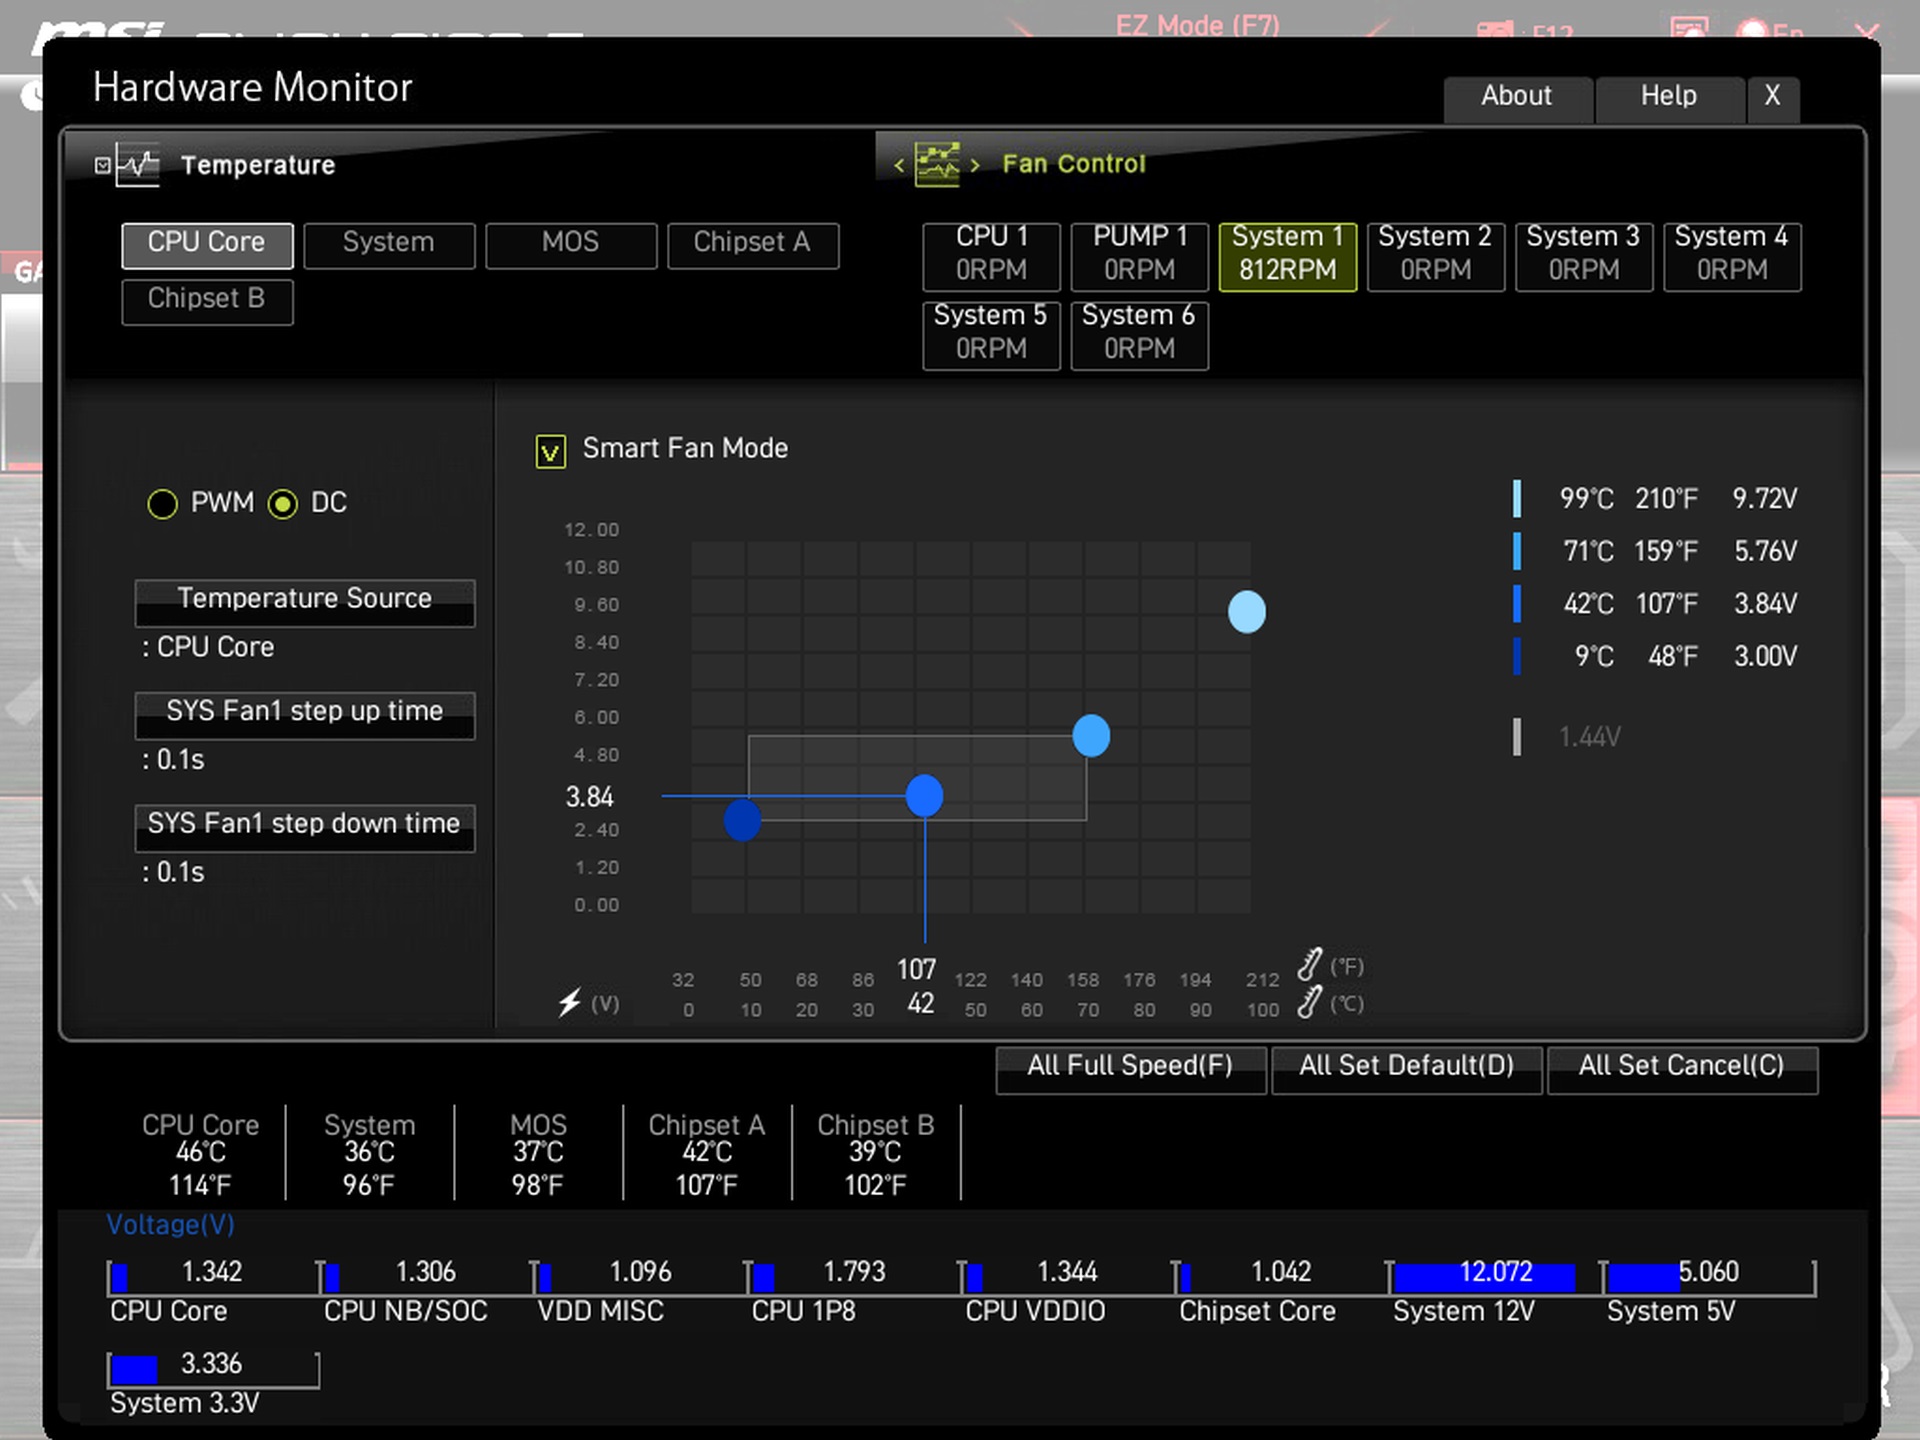
For quick reference, we also quickly tested the PWM and DC control options, which you can switch between. With PWM control, on the system connectors with the Noctua NF-A12x25 PWM fan, we’ve practically reached its own minimum (unaffected by PWM quality), so everything is fine in that regard. For linear (DC) regulation, do not count on very low voltages, the lower limit is somewhere around 3.8 V.
- Contents
- MSI MAG X670E Tomahawk WiFi in detail
- What it looks like in BIOS
- Methodology: Performance tests
- Methodology: How we measure power draw
- Methodology: Temperature and frequency measurements
- Test setup
- 3DMark
- Borderlands 3
- F1 2020
- Metro Exodus
- Shadow of the Tomb Raider
- Total War Saga: Troy
- PCMark and Geekbench
- Web performance
- 3D rendering: Cinebench, Blender, ...
- Video 1/2: Adobe Premiere Pro
- Video 2/2: DaVinci Resolve Studio
- Graphics effects: Adobe After Effects
- Video encoding
- Audio encoding
- Photos: Adobe Photoshop, Affinity Photo, ...
- (De)compression
- (De)encryption
- Numerical computing
- Simulations
- Memory and cache tests
- M.2 (SSD) slots speed
- USB ports speed
- Ethernet speed
- Power draw without power limits
- Power draw with power limits
- Achieved CPU clock speed
- CPU temperature
- VRM temperature – thermal imaging of Vcore and SOC
- SSD temperature
- Chipset temperature (south bridge)
- Conclusion


Could you highlight specific examples of the extra features on the MSI MAG X670E Tomahawk WiFi that contribute to its affordability compared to other motherboards in the market? Greeting : Telkom University
It is definitely the weaker feature set that makes this board more affordable compared to the more expensive X670E models. Those (more expensive X670E boards) tend to be built on E-ATX formats, so with a bigger PCB, and precisely to fit more stuff on it. Even among MSI boards, you can compare the features across different price ranges. For example with the X670E Ace tested last year, which costs twice as much (as the X670E Tomahawk WiFi), but is significantly better equipped. Not only in terms of interfaces and connectivity, but the VRM is also more robust. This all adds up to a higher price, but I can’t guess which and to what extent. That’s more a question for those in charge of pricing than for us reviewers. 🙂
PS: In this price class, of course, other manufacturers also have their models and the differences will be in the details according to who gave higher priority to what elements. We always try to discuss this in the technical details analysis in the first chapters of motherboard tests.