


What it looks like in the BIOS
MSI’s second cheapest motherboard with the Intel Z690 chipset costs significantly less compared to the higher-end Tomahawk DDR4. The difference in features is small. And perhaps too small, as the specifications artificially downgrade some components. The power delivery is less efficient and the heatsinks are more modest, but the roughly 80 EUR saved is almost as much as the cost of upgrading from a Core i5-12600K to a Core i7-12700K(F).
What it looks like in the BIOS
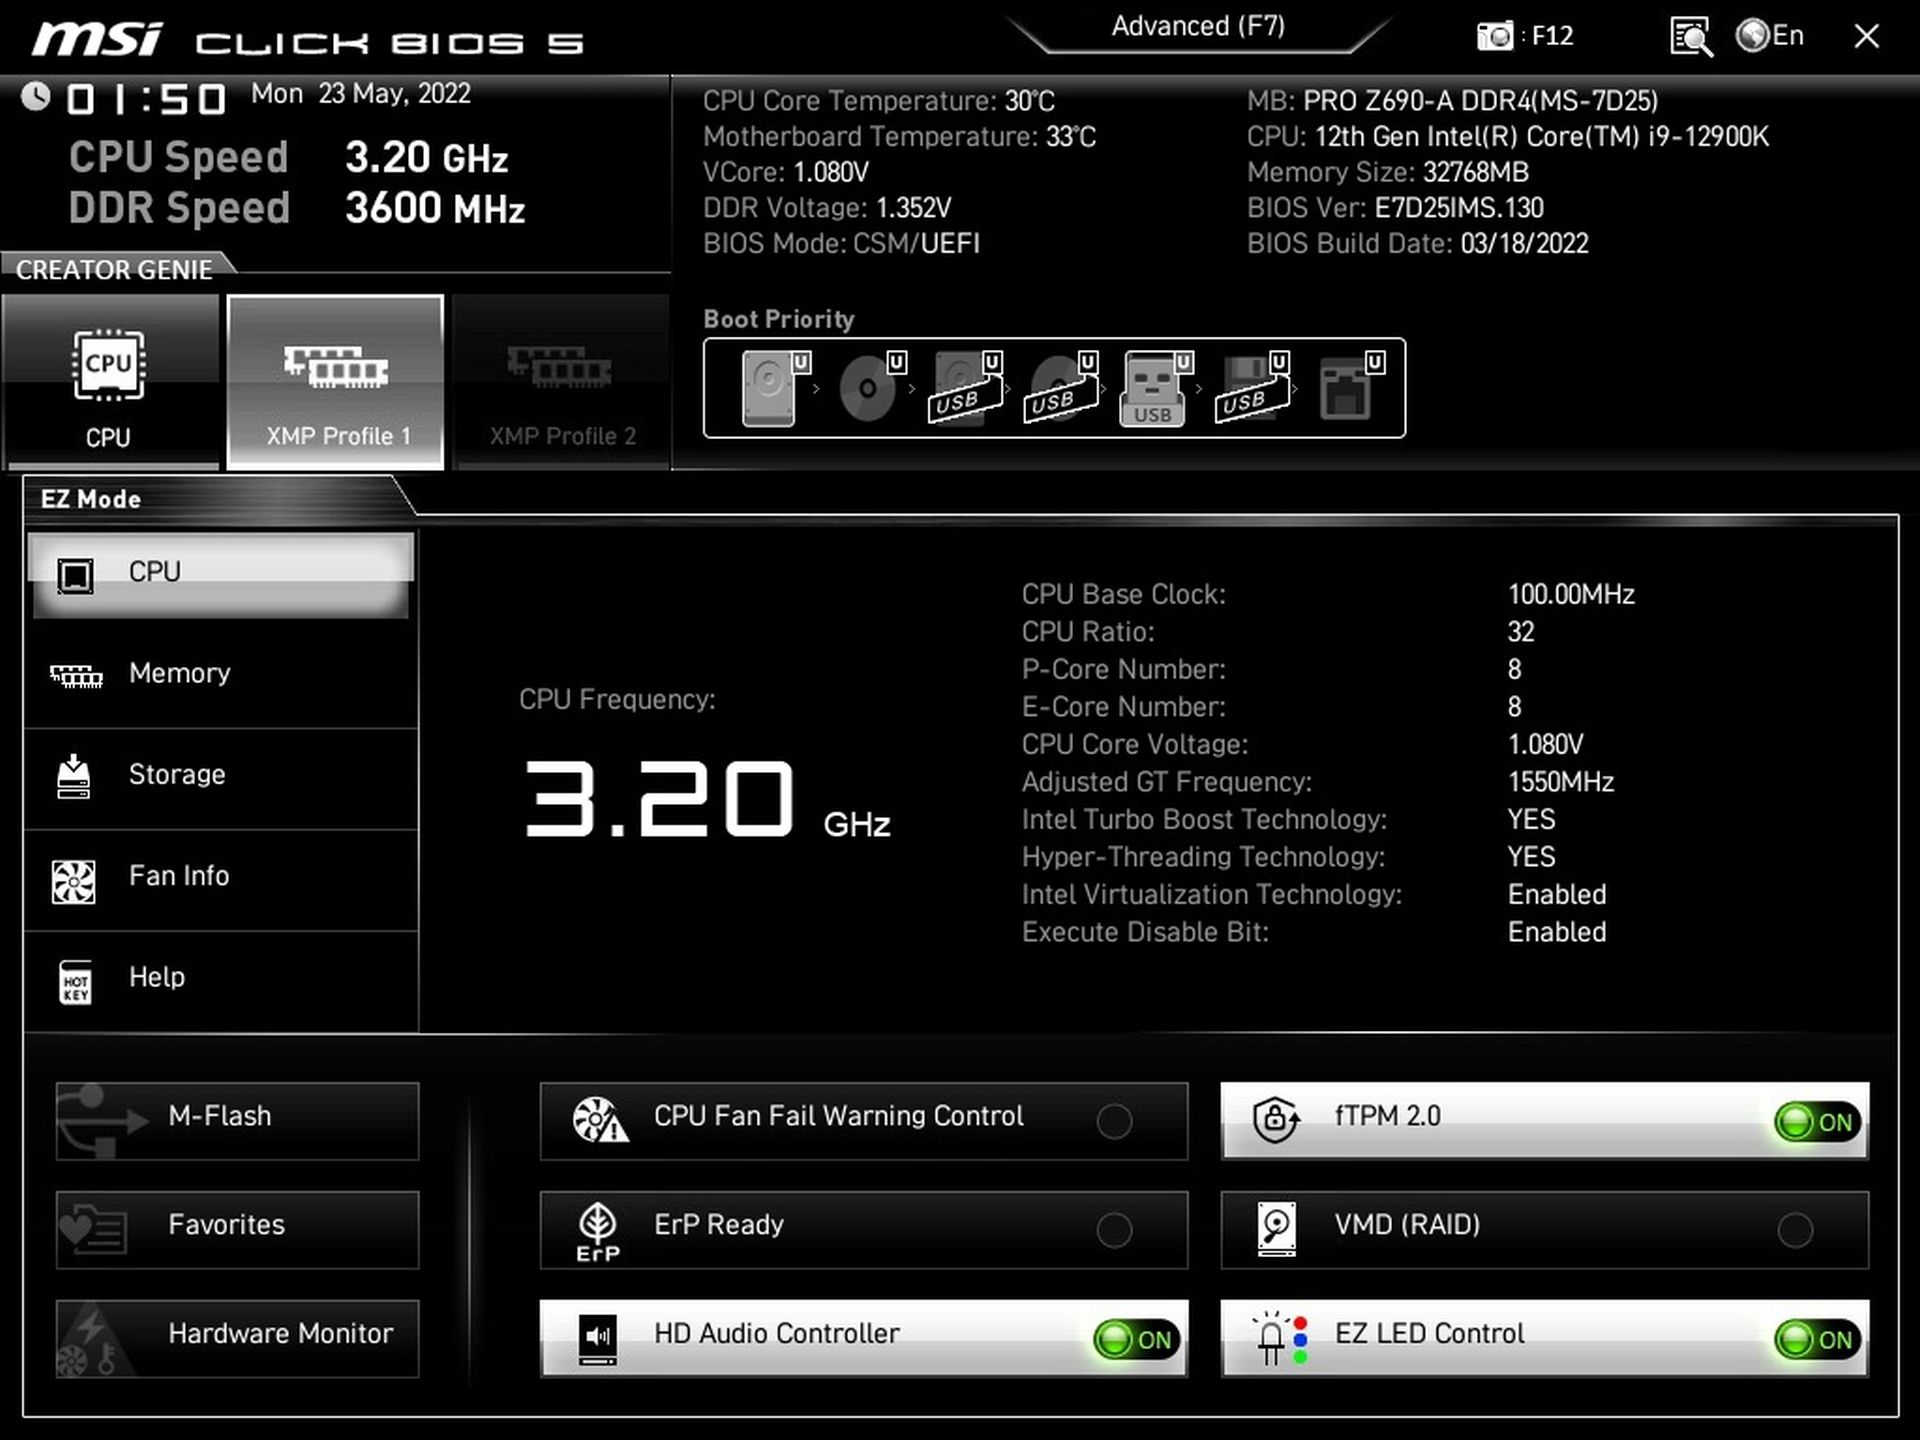
Instead of MSI’s typical black-and-red graphical interface, there’s a black-and-silver one. But that’s just cosmetics and functionally “Click BIOS 5” is no different from the one for gaming boards.
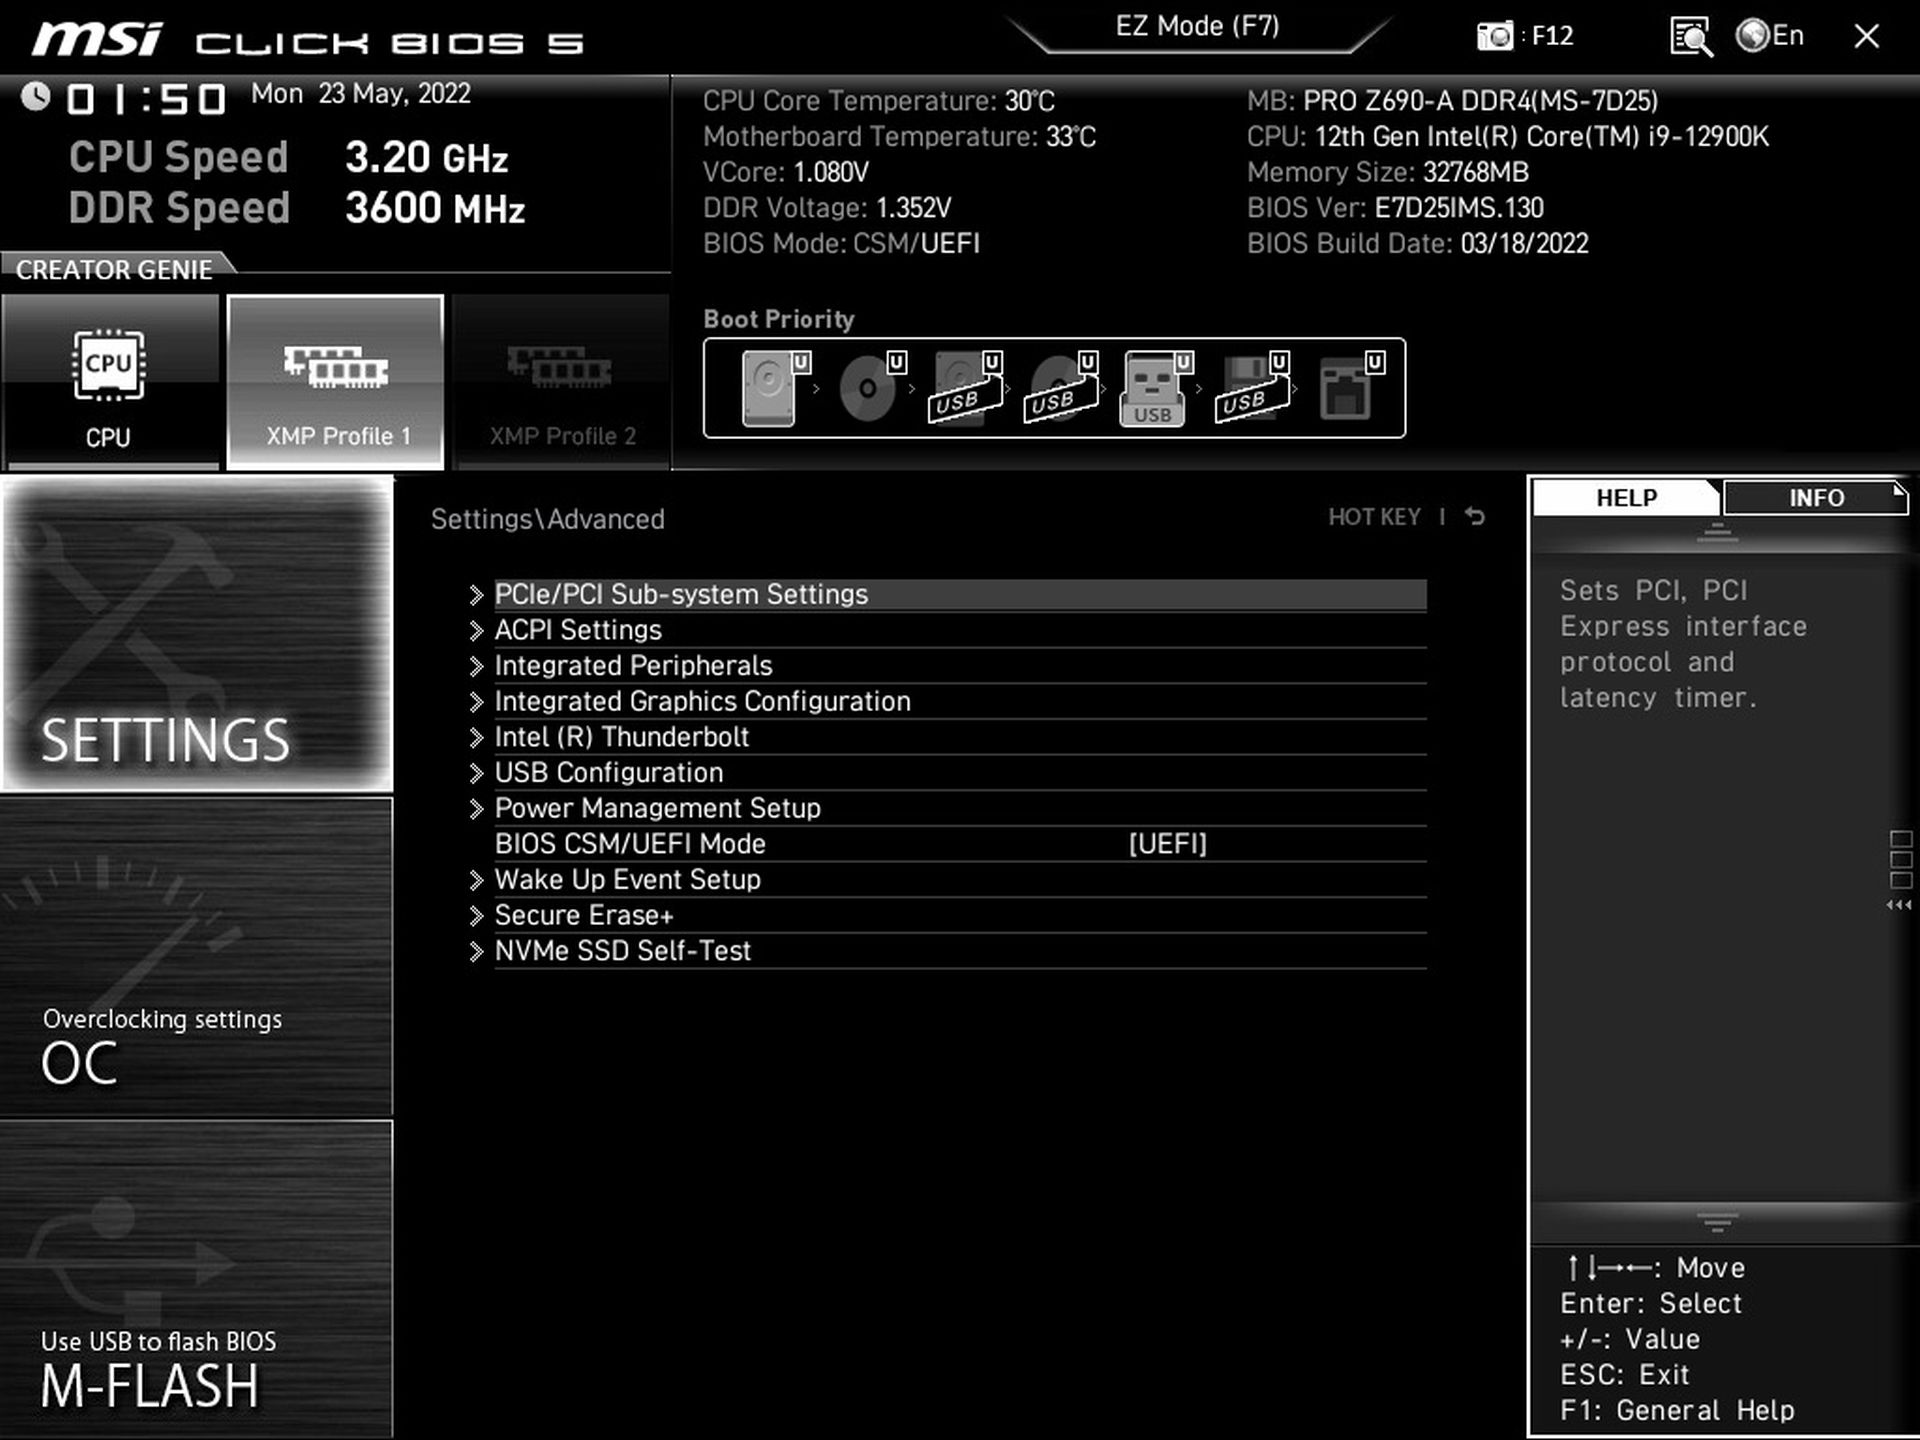
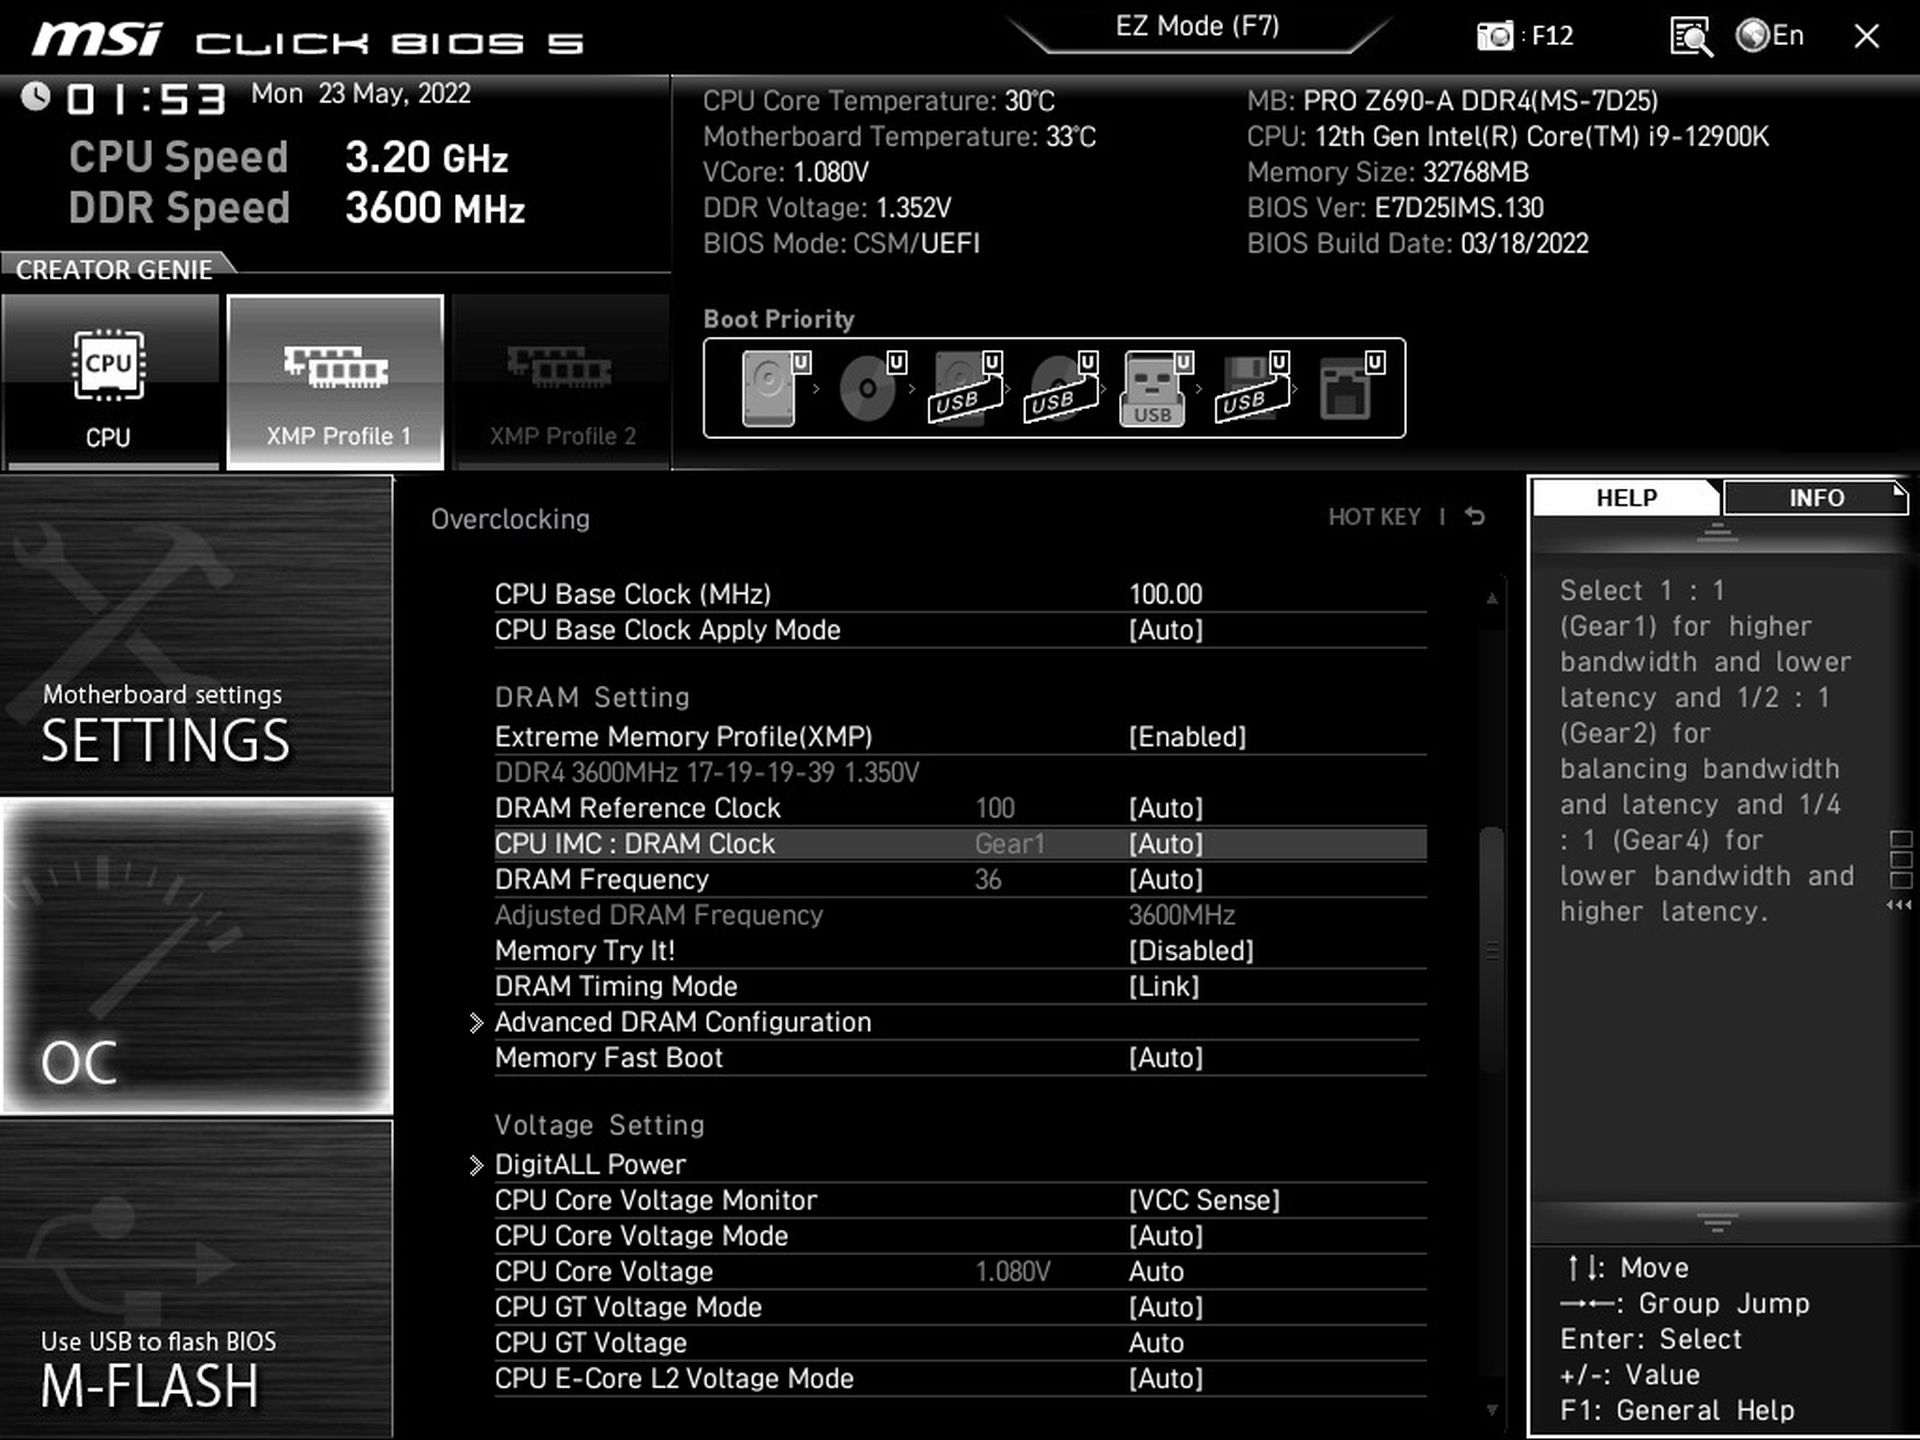
EZ Mode contains all the basic information about the processor and memories. There are also some buttons on this tab to (de)activate basic things like EZ LEDs or fTMP 2.0, and this screen is also a signpost to more advanced settings. For example to manage storage, fans or update the BIOS (M-Flash). The “advanced” mode is traditionally accessed via the F7 key.
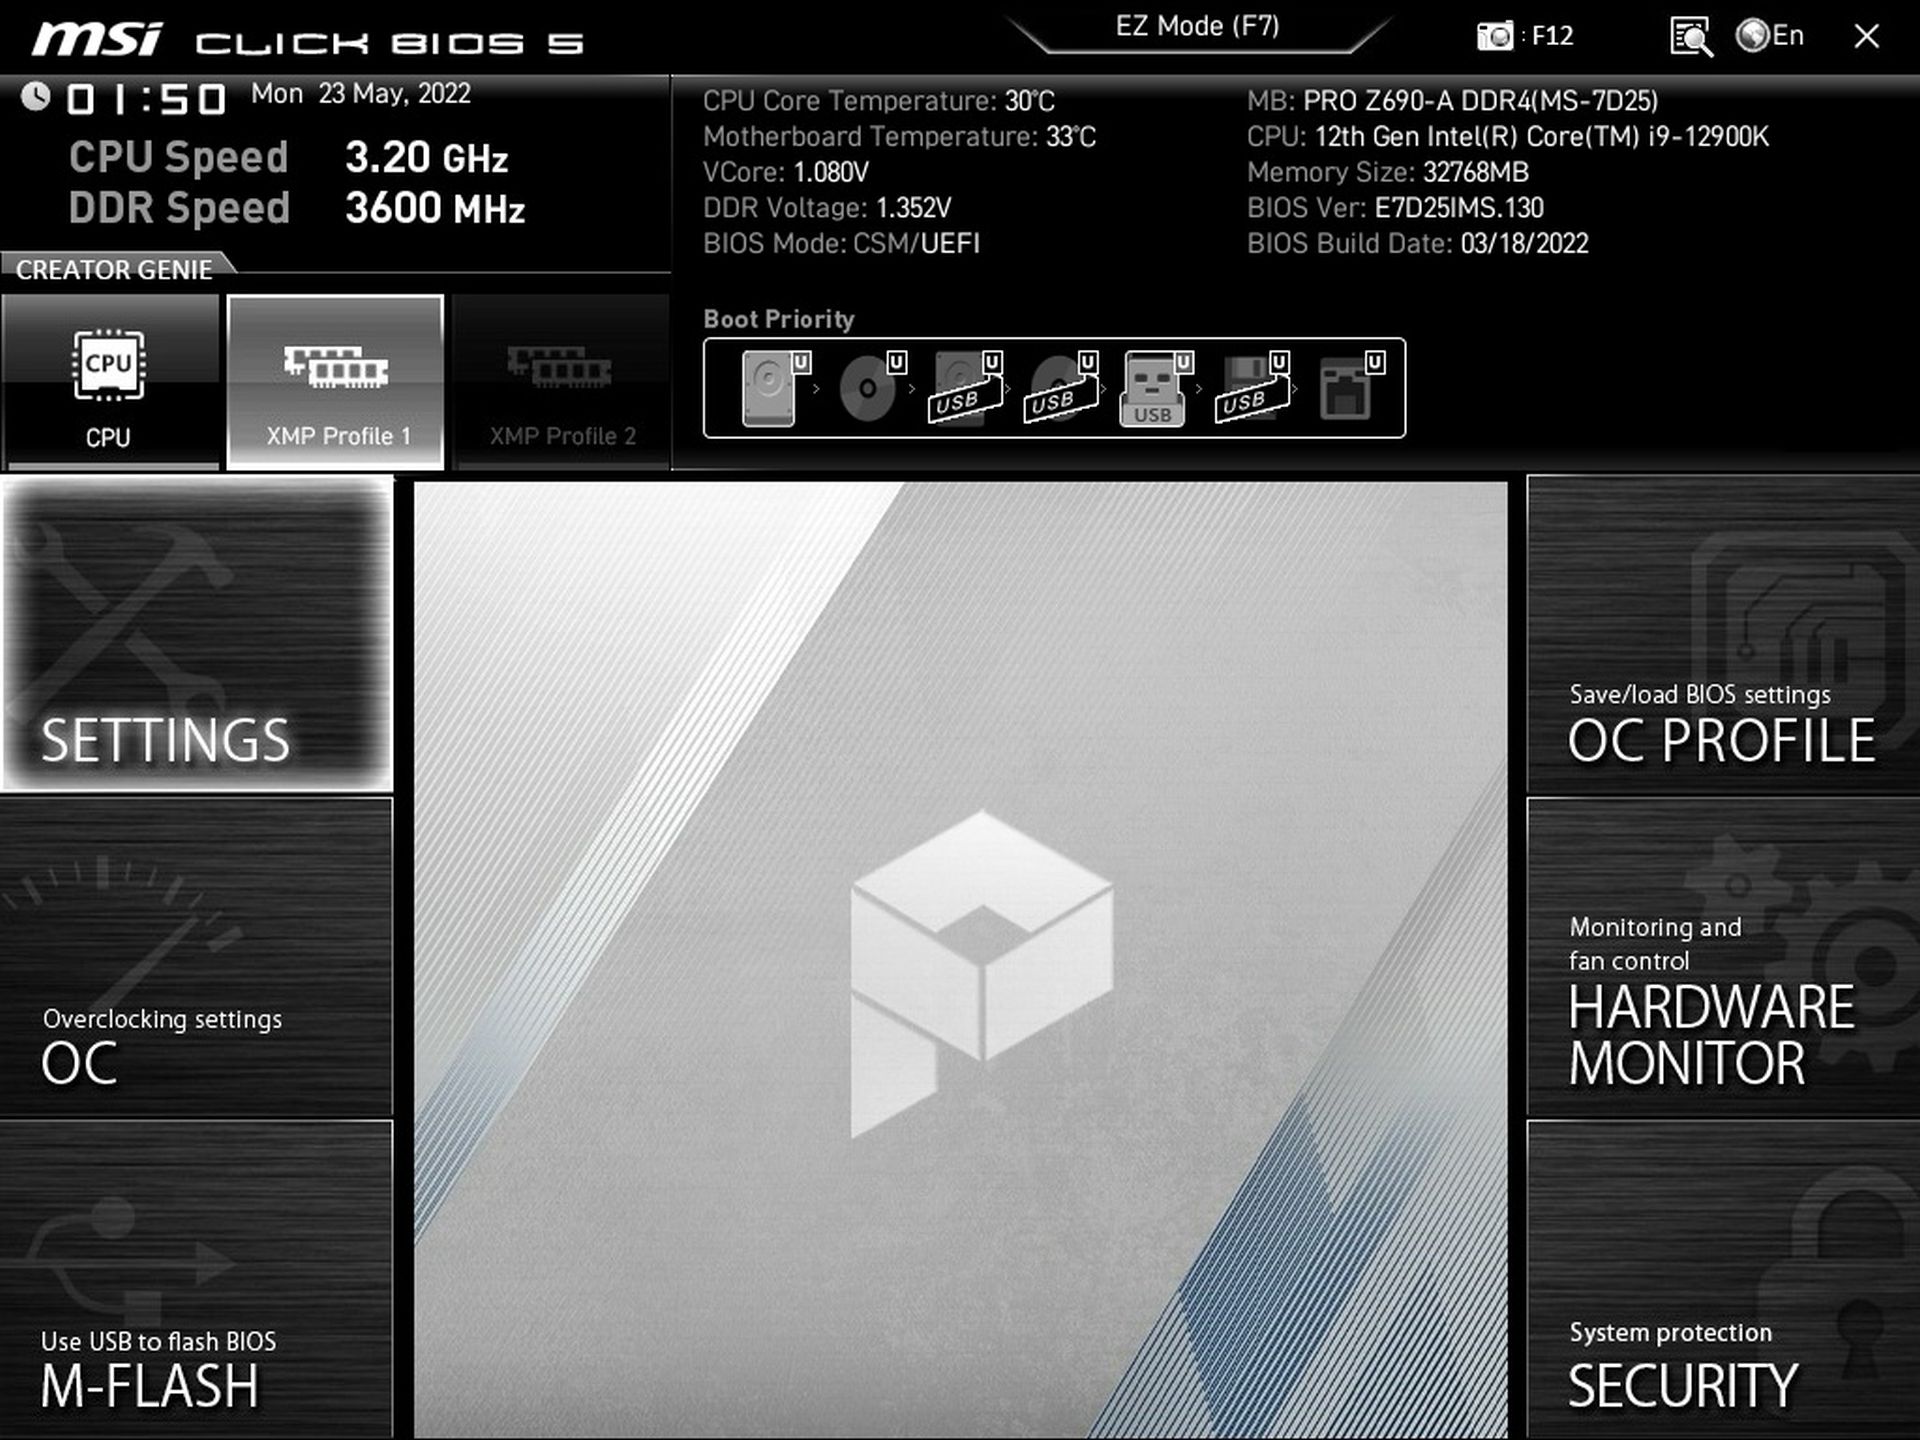
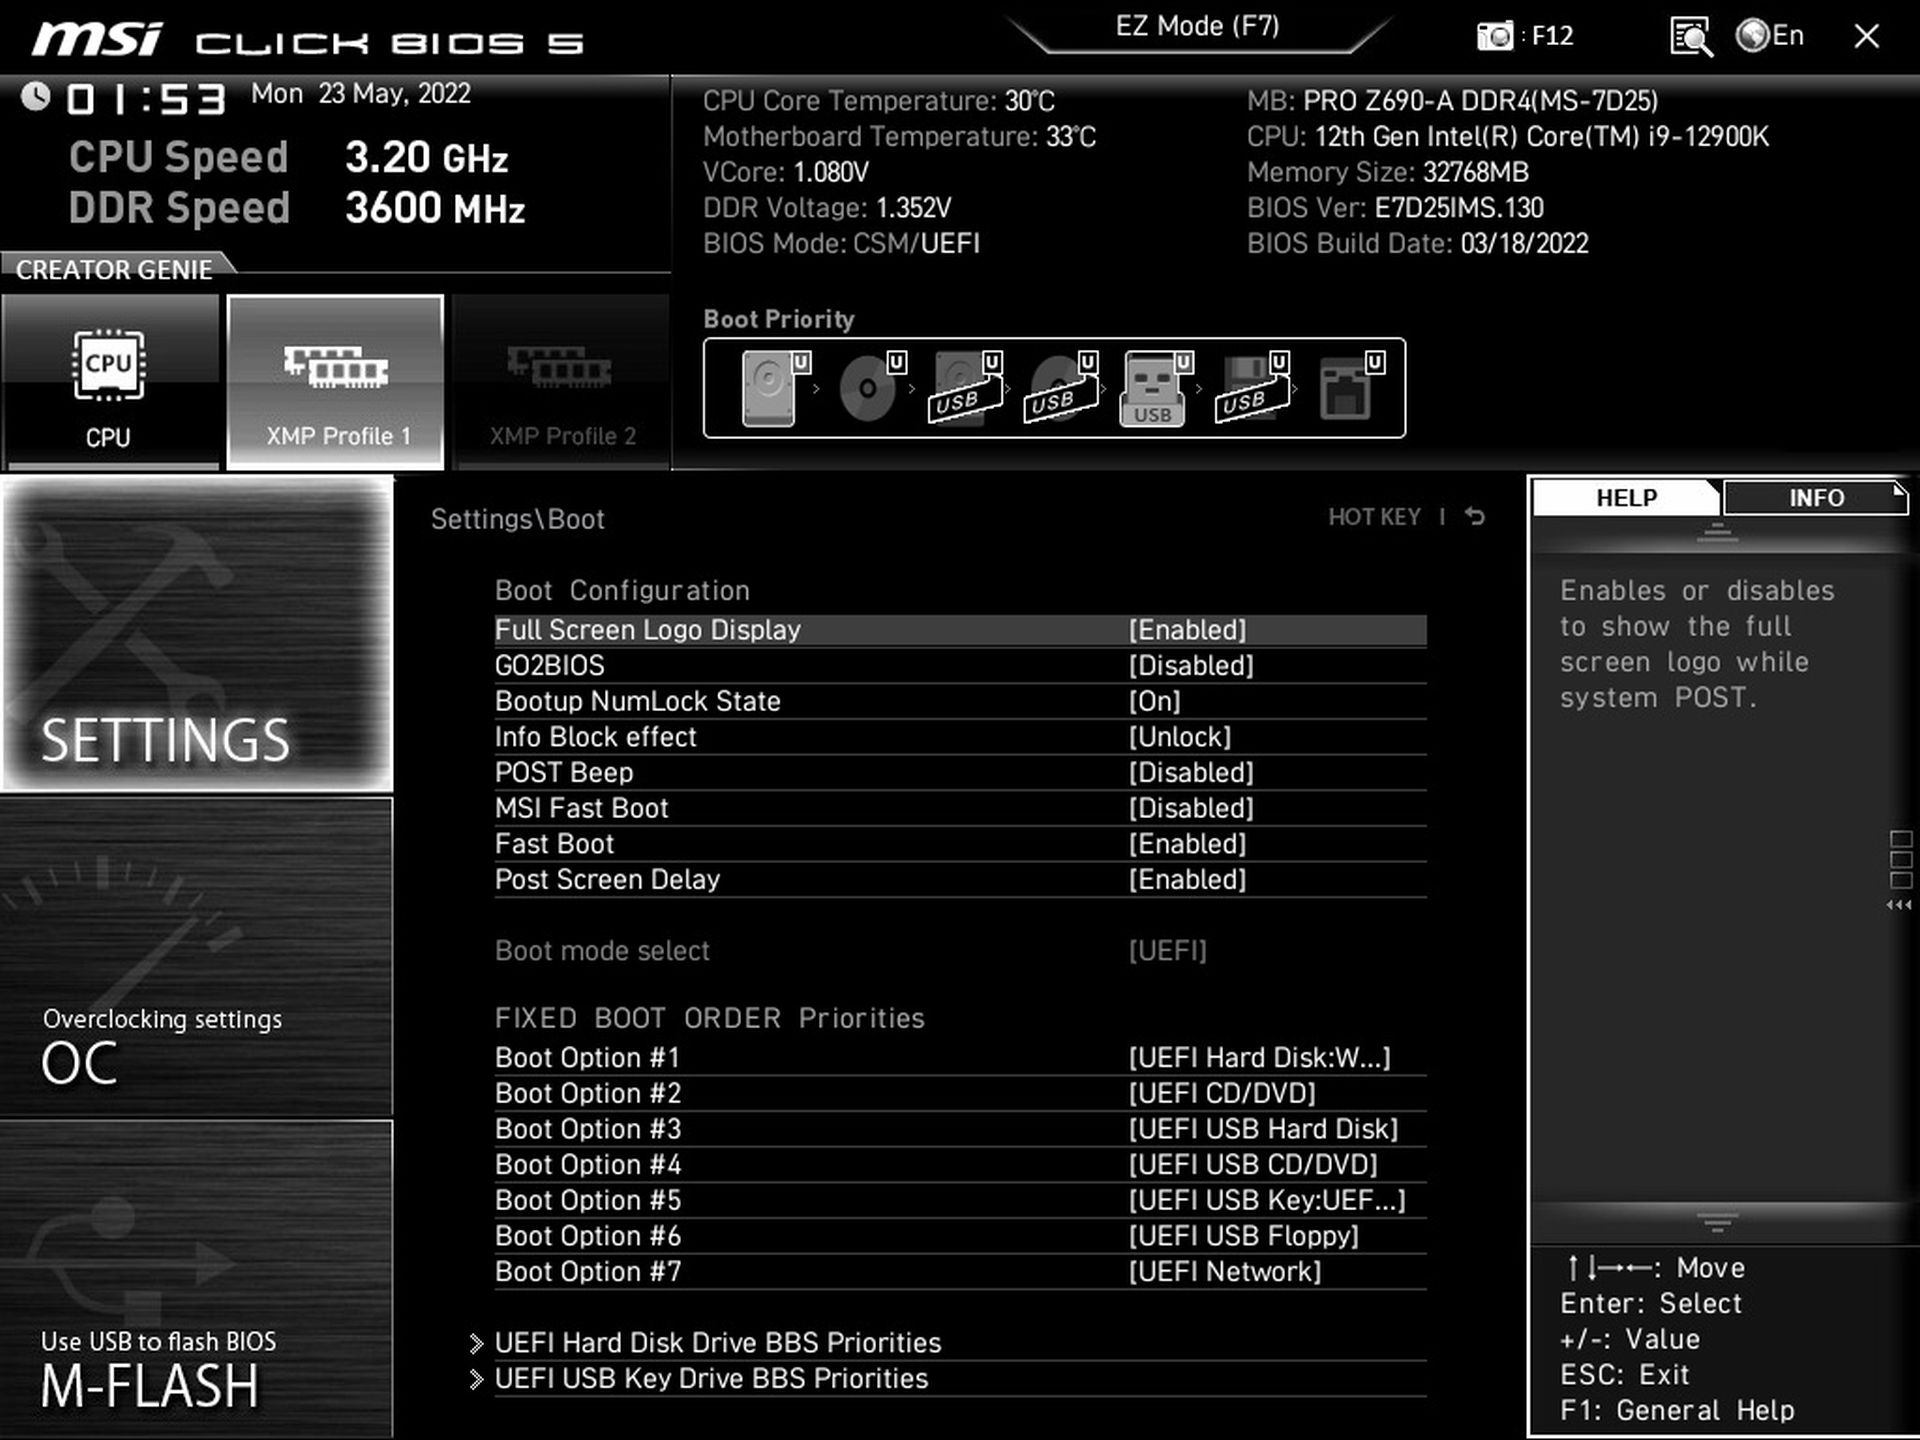
Configuration of ports (USB) or slots (PCIe/M.2) is done in the “Settings” tab, where you can also adjust how the board will behave during POST (should/ should not display the MSI logo, should/ should not beep the speaker) or after it – should/ should not the numeric keypad be turned on after OS boot? It’s nothing special, but these basic settings are not missing on this board.
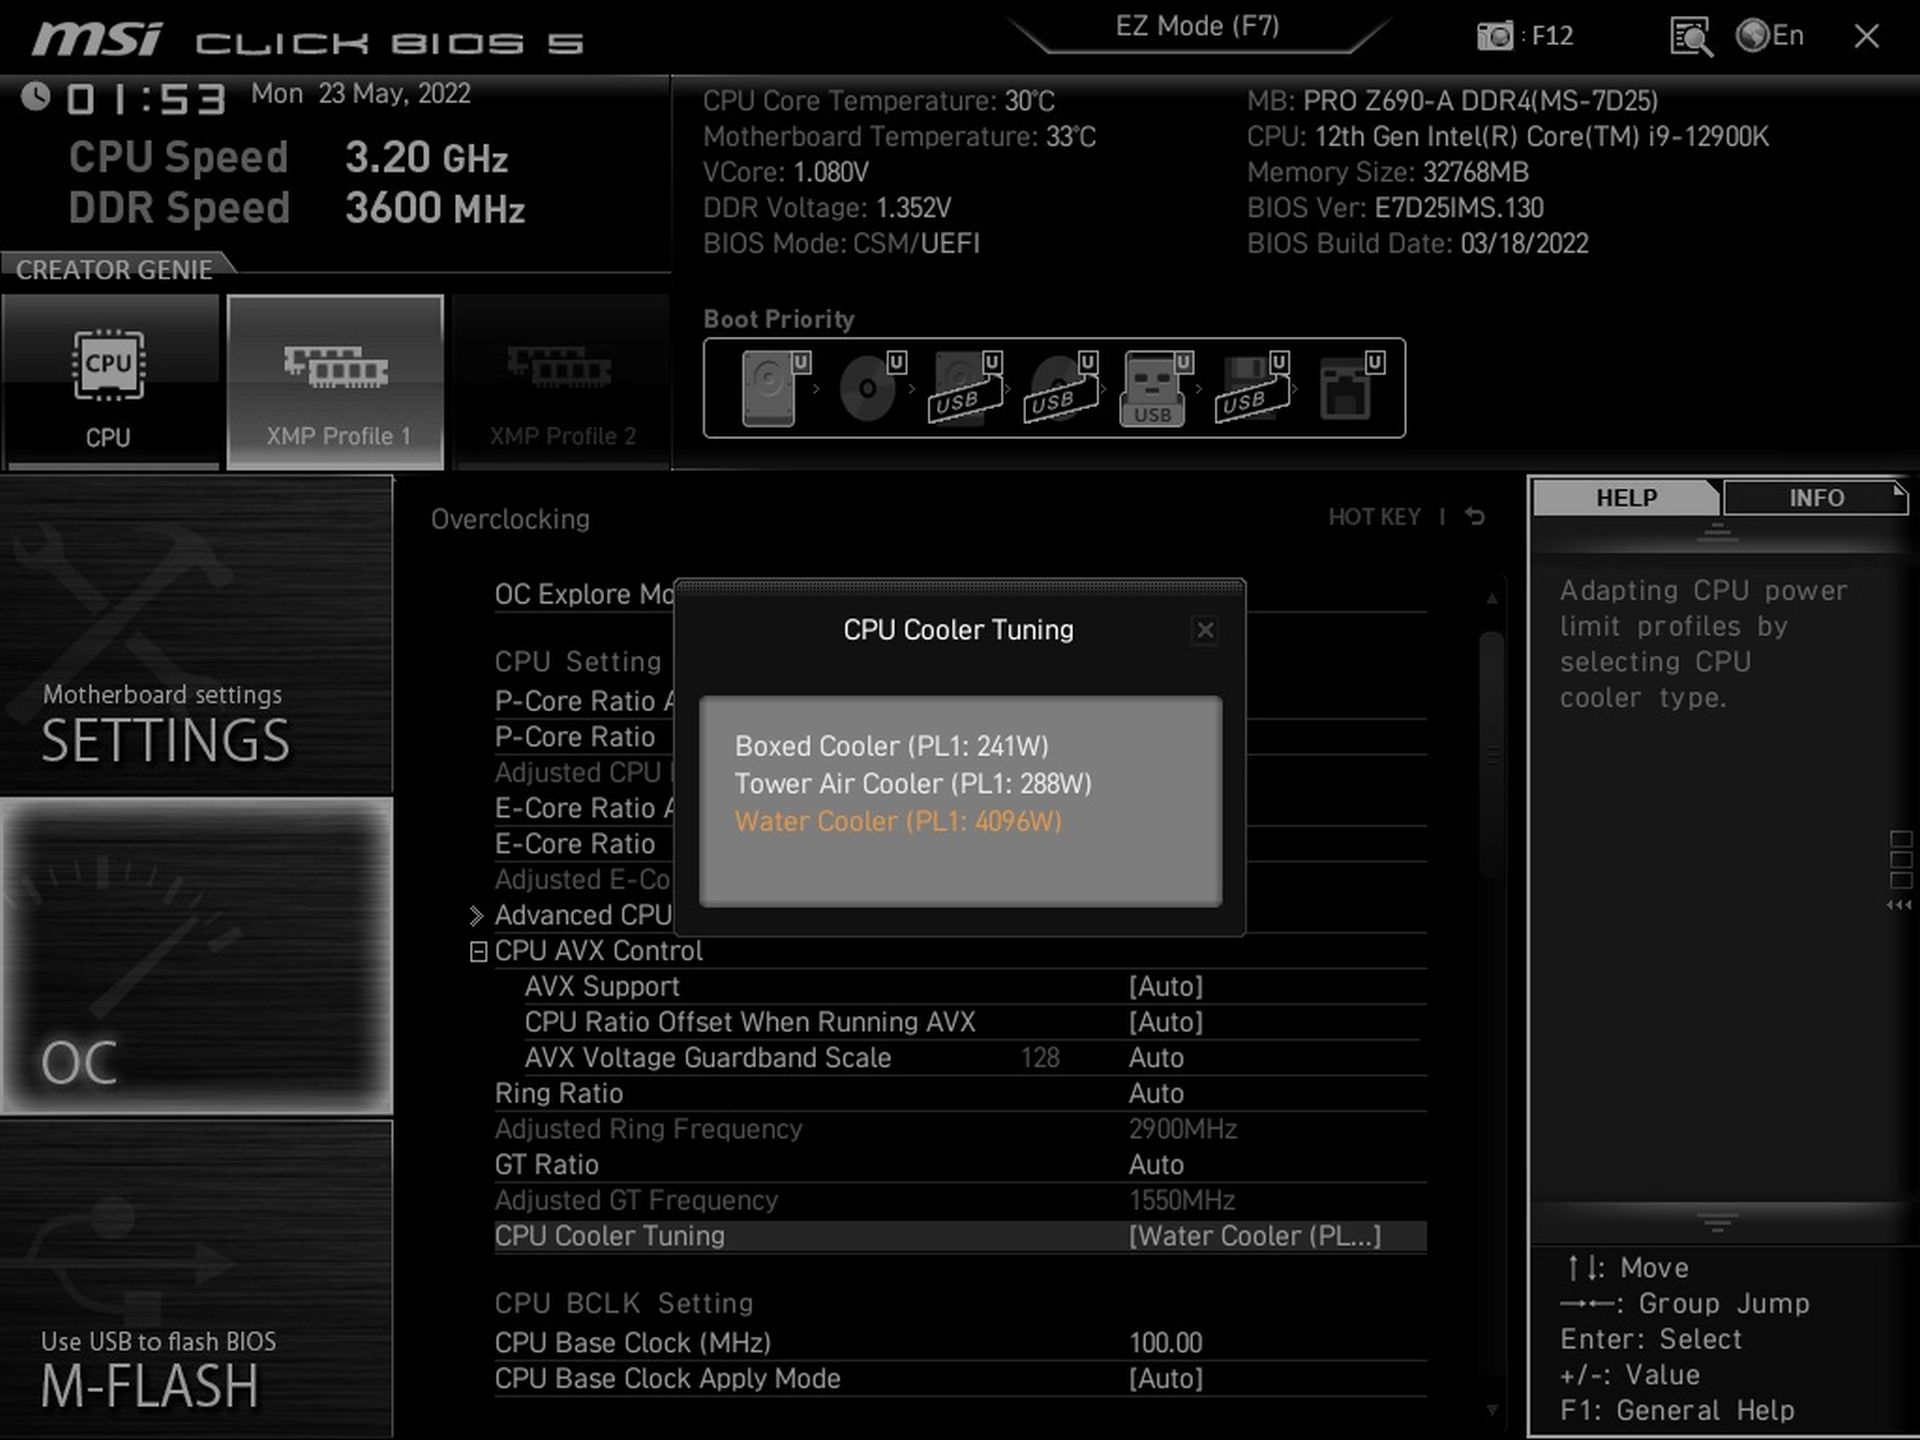
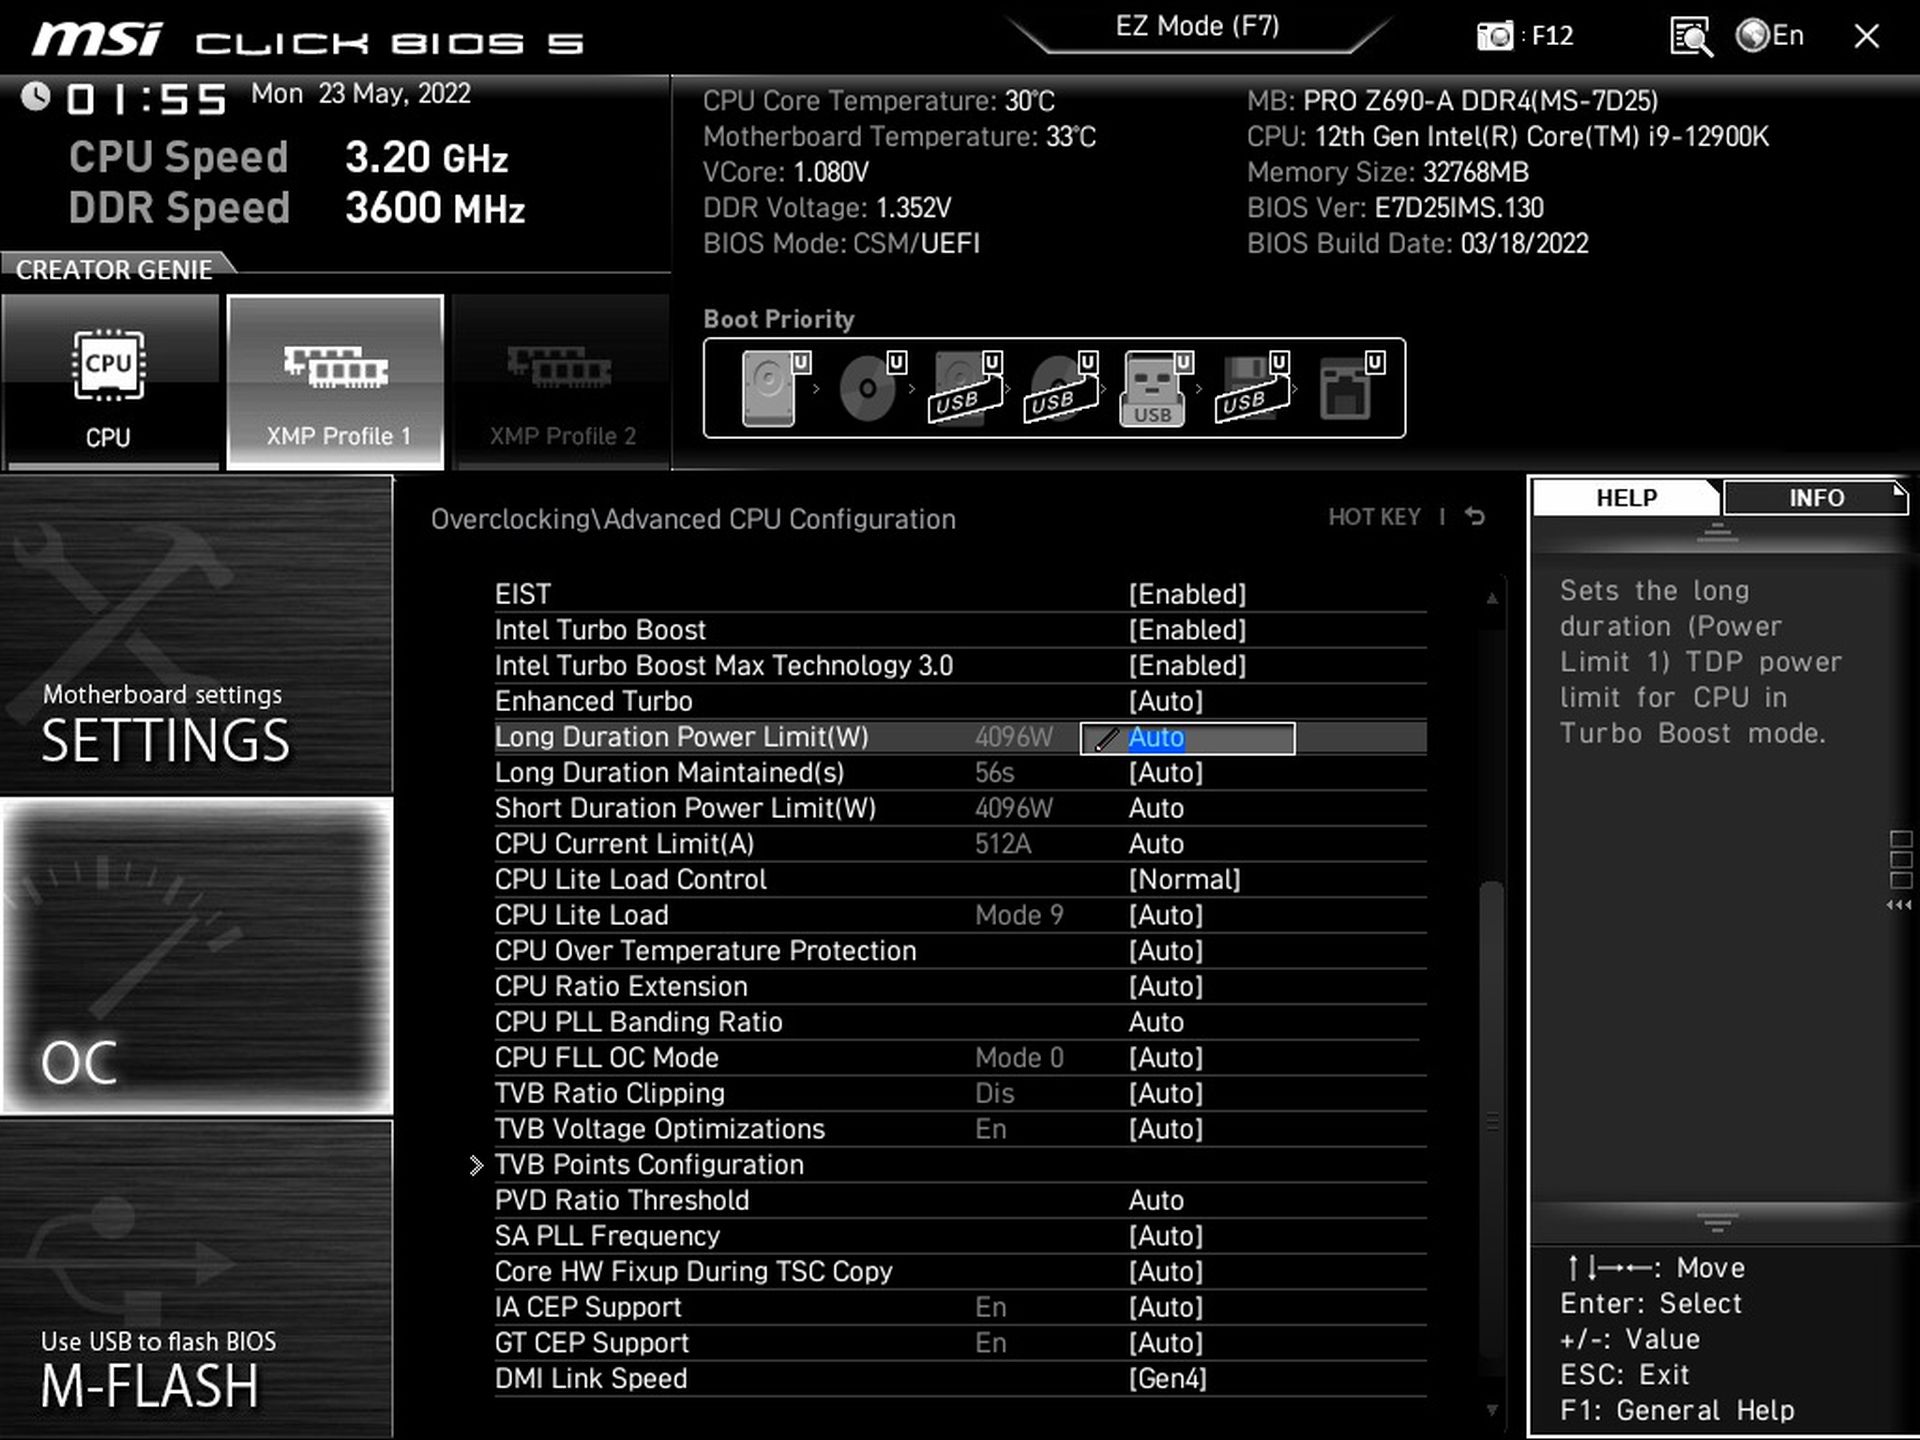
More interesting are naturally the options on the “OC” tab. You can move the multiplier for both P and E cores as you want. The default profiles for automatic CPU clock speed management depend on which model you fit into the board. Primarily though, in most cases, these will be open multiplier processors and once detected, the board has a default profile with no power limits. This means that both PL1 and PL2 values are set to the maximum “4096 W”.
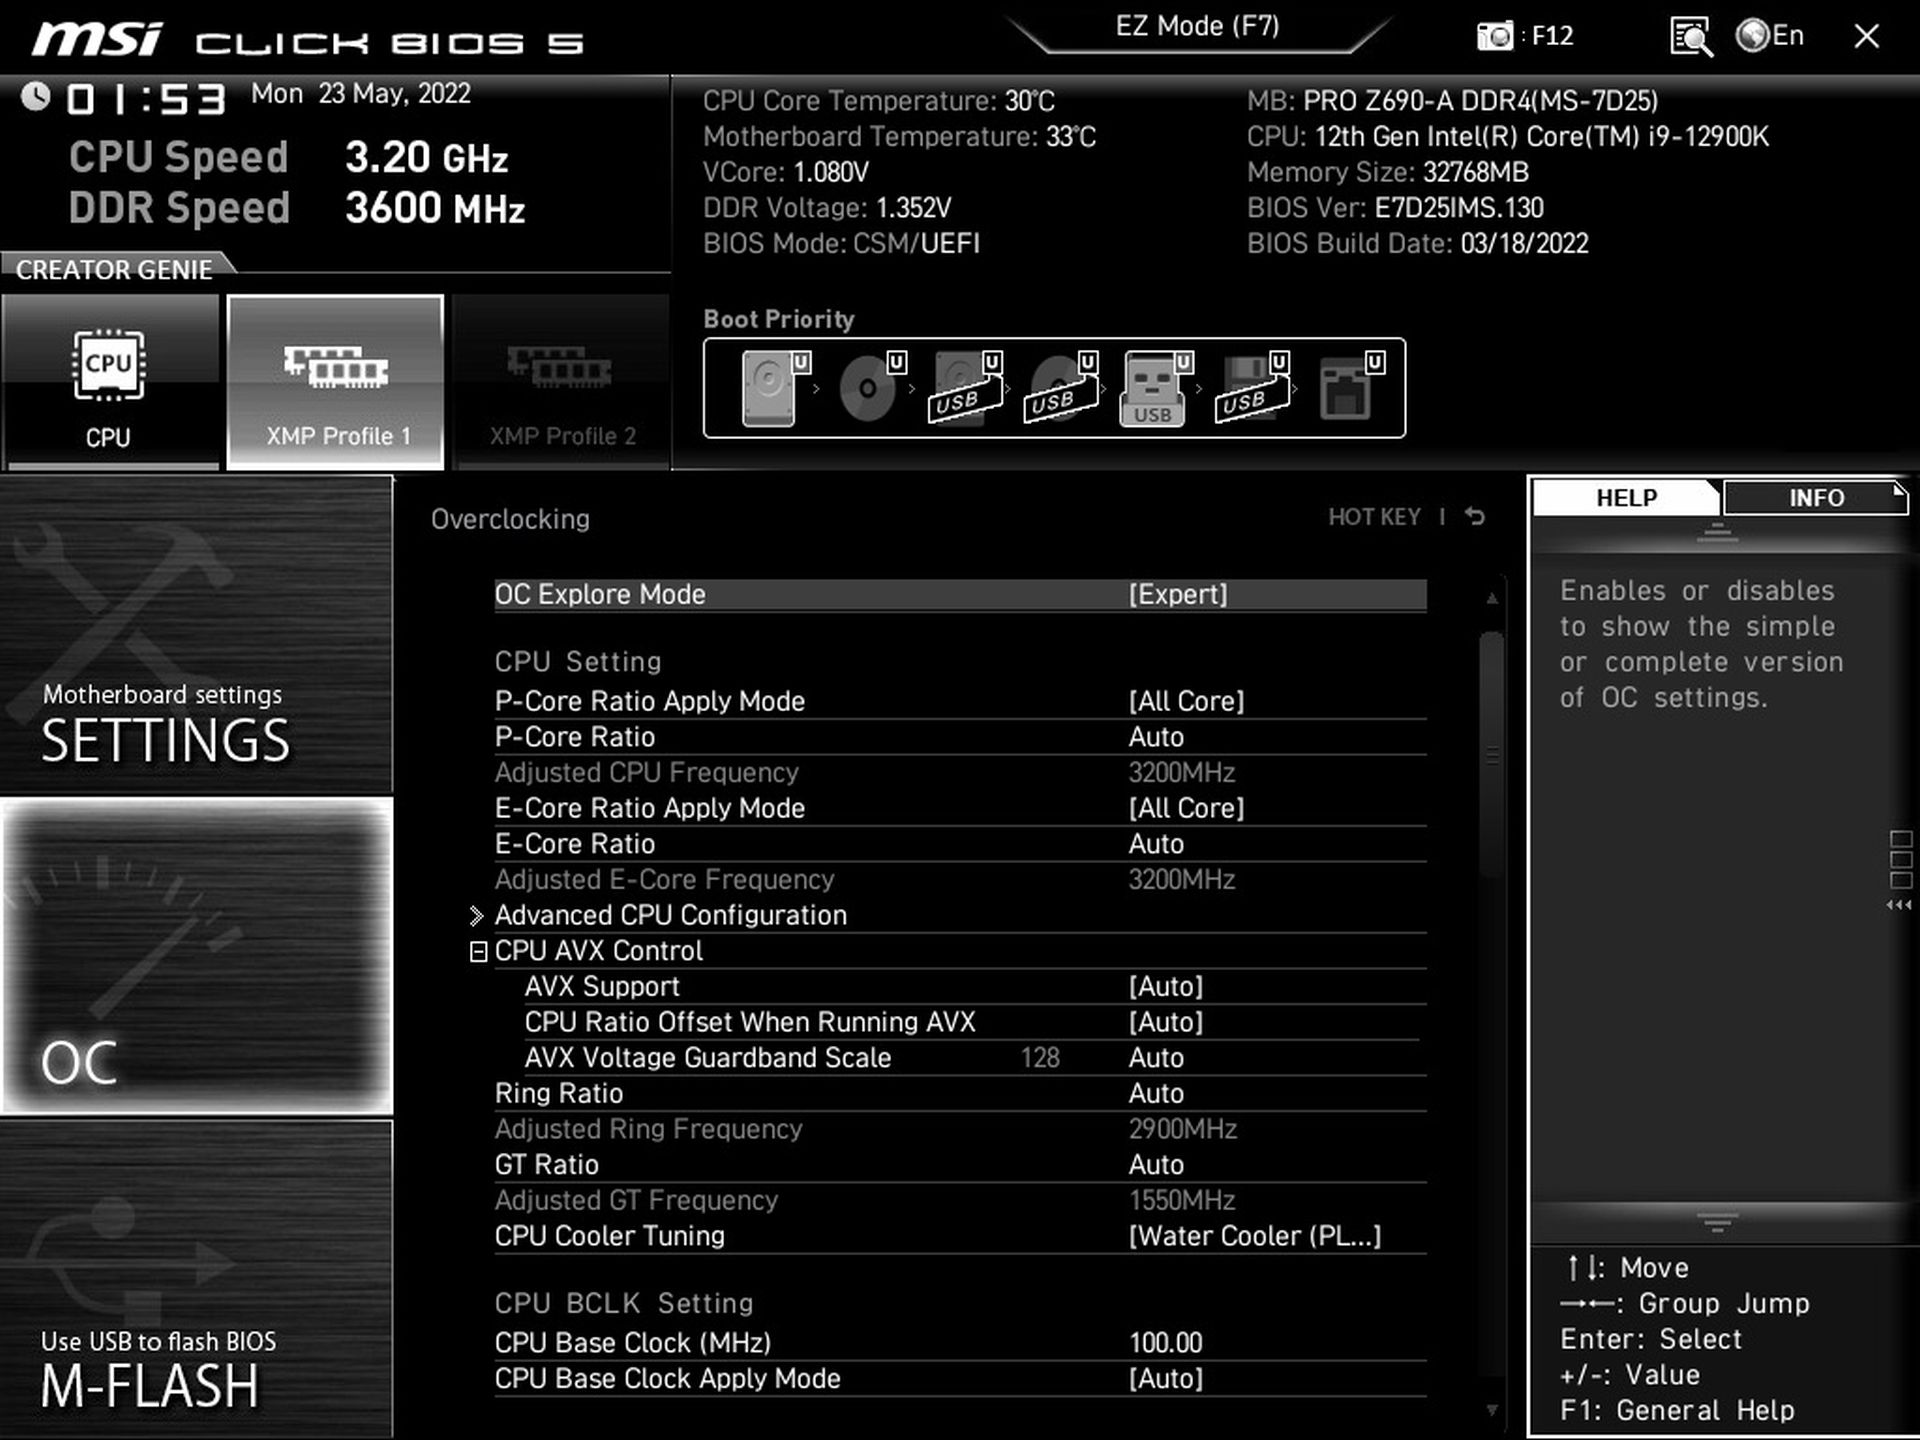
Regardless of the duration of the load, the clock speeds will be constant and the performance will not change. However, you can manually adjust everything, both PL1 for long term loads and PL2 for the first xy seconds.
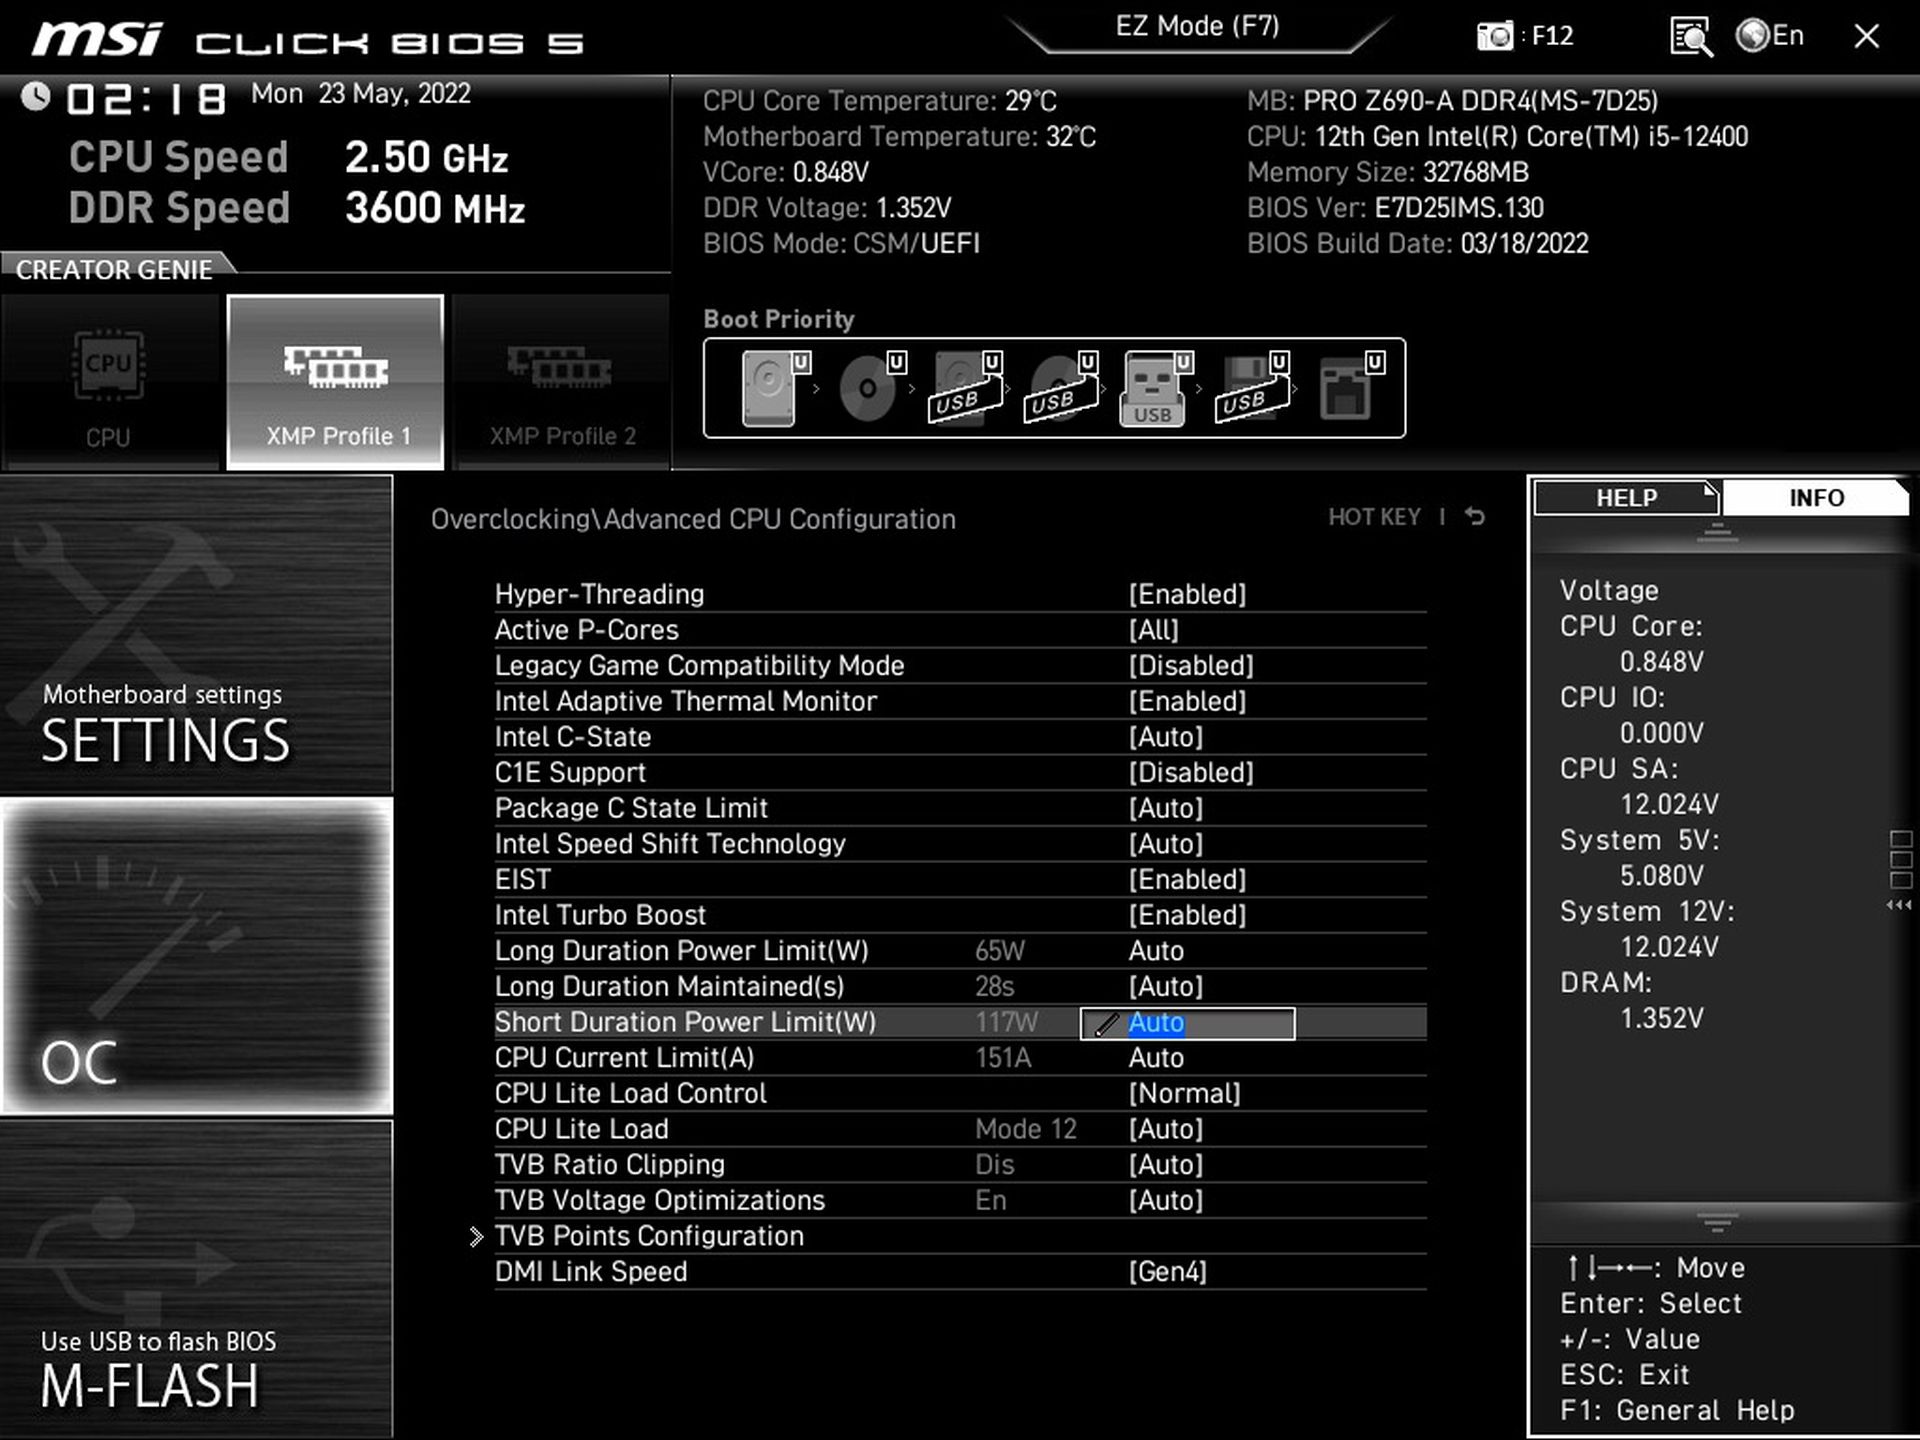
The situation is a bit different with the Core i5-12400, as far as the default profile is concerned. And apparently generally with processors with TDP 65 W and lower. PL1 is already at 65 W and PL2 for short term load is at 117 W.
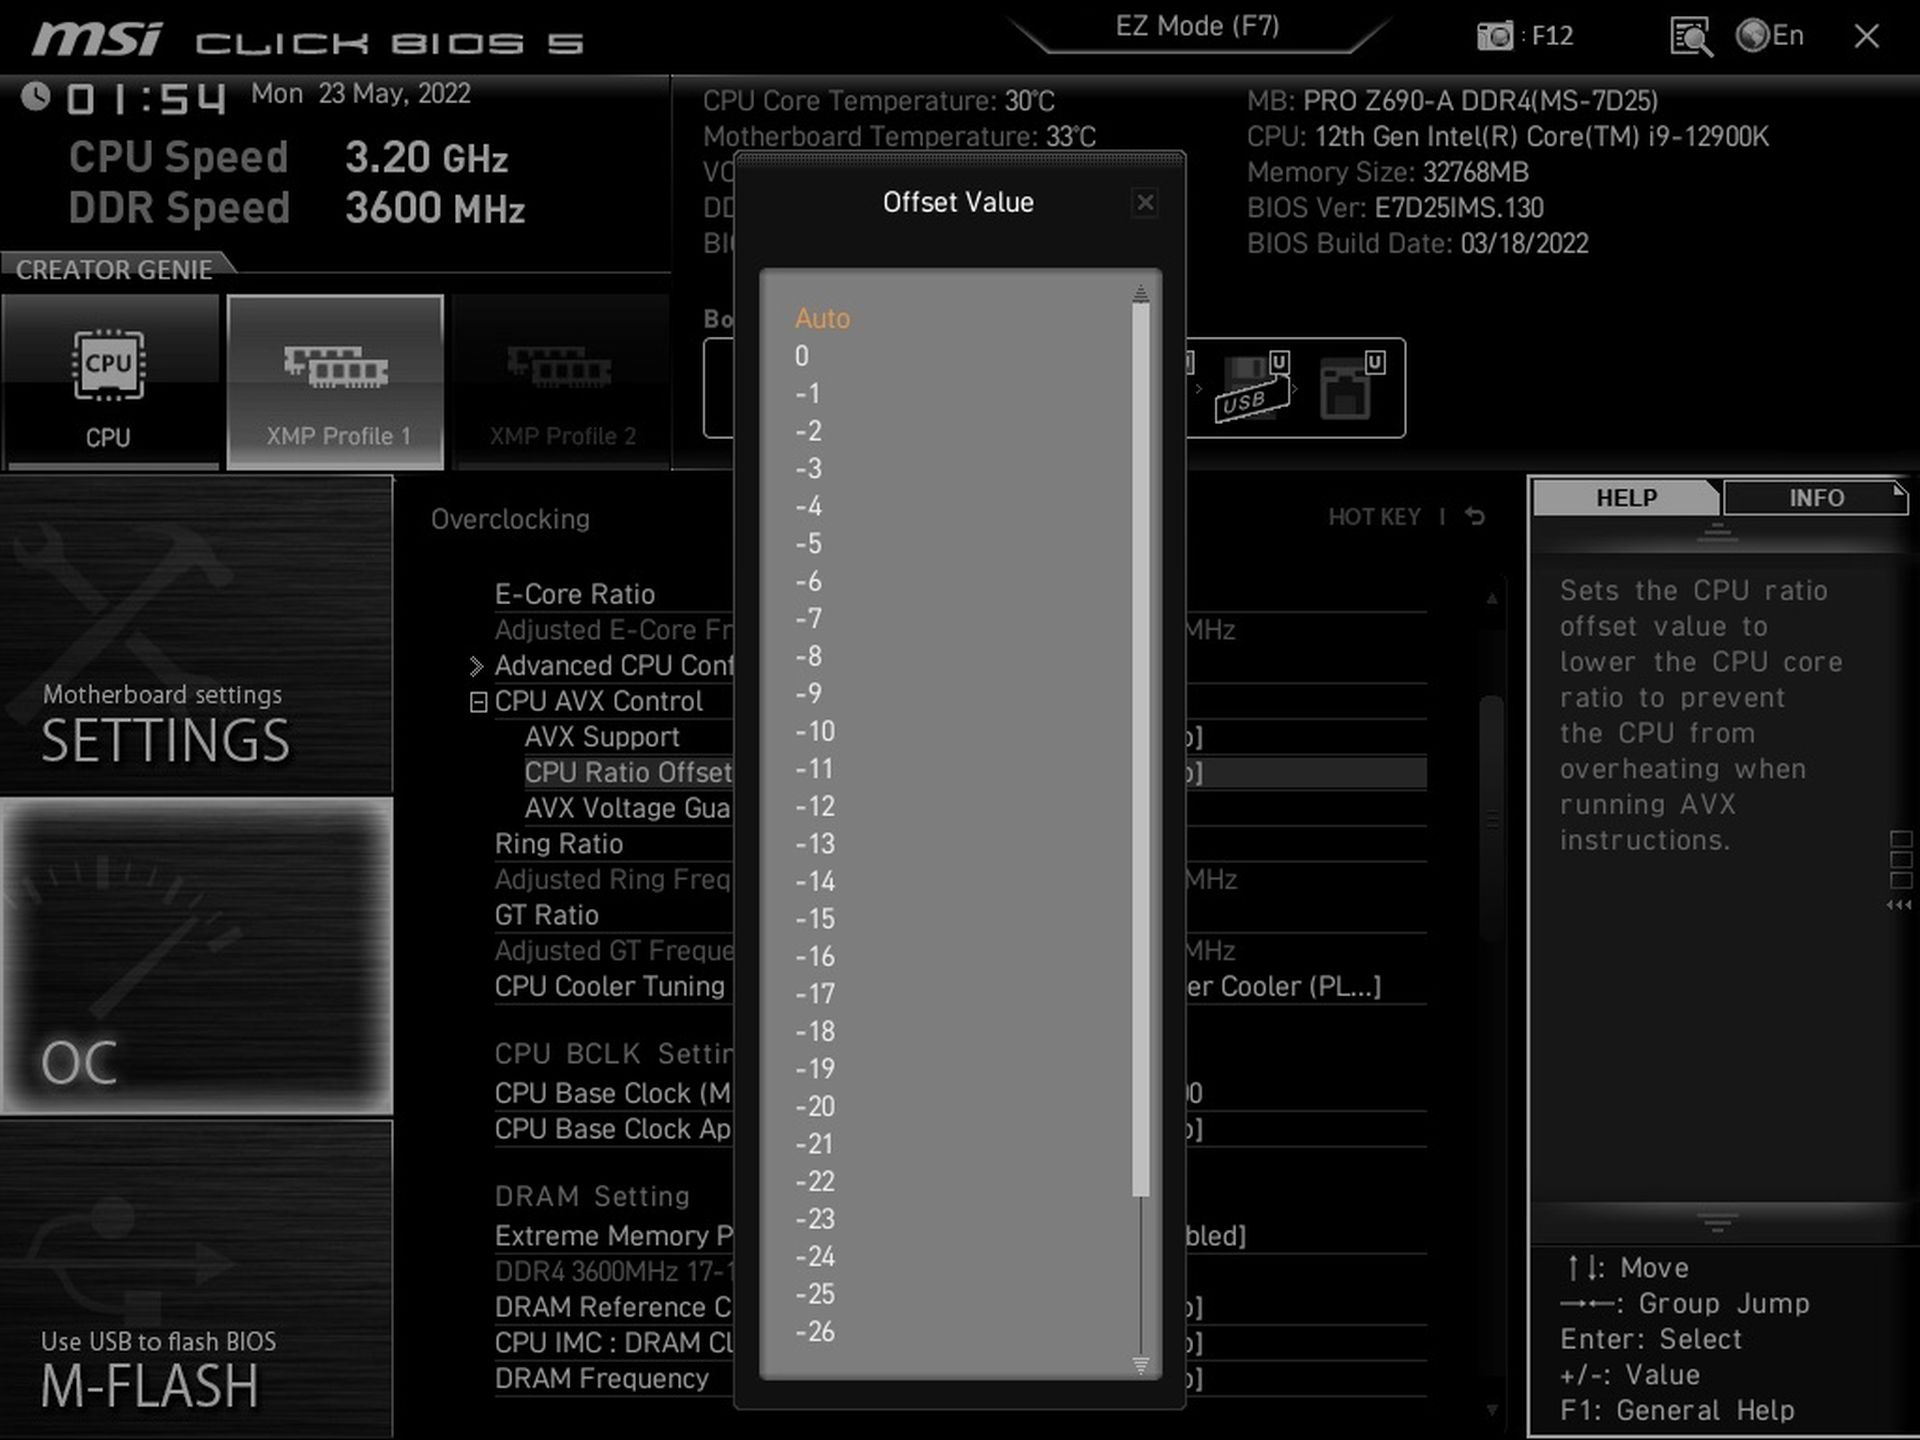
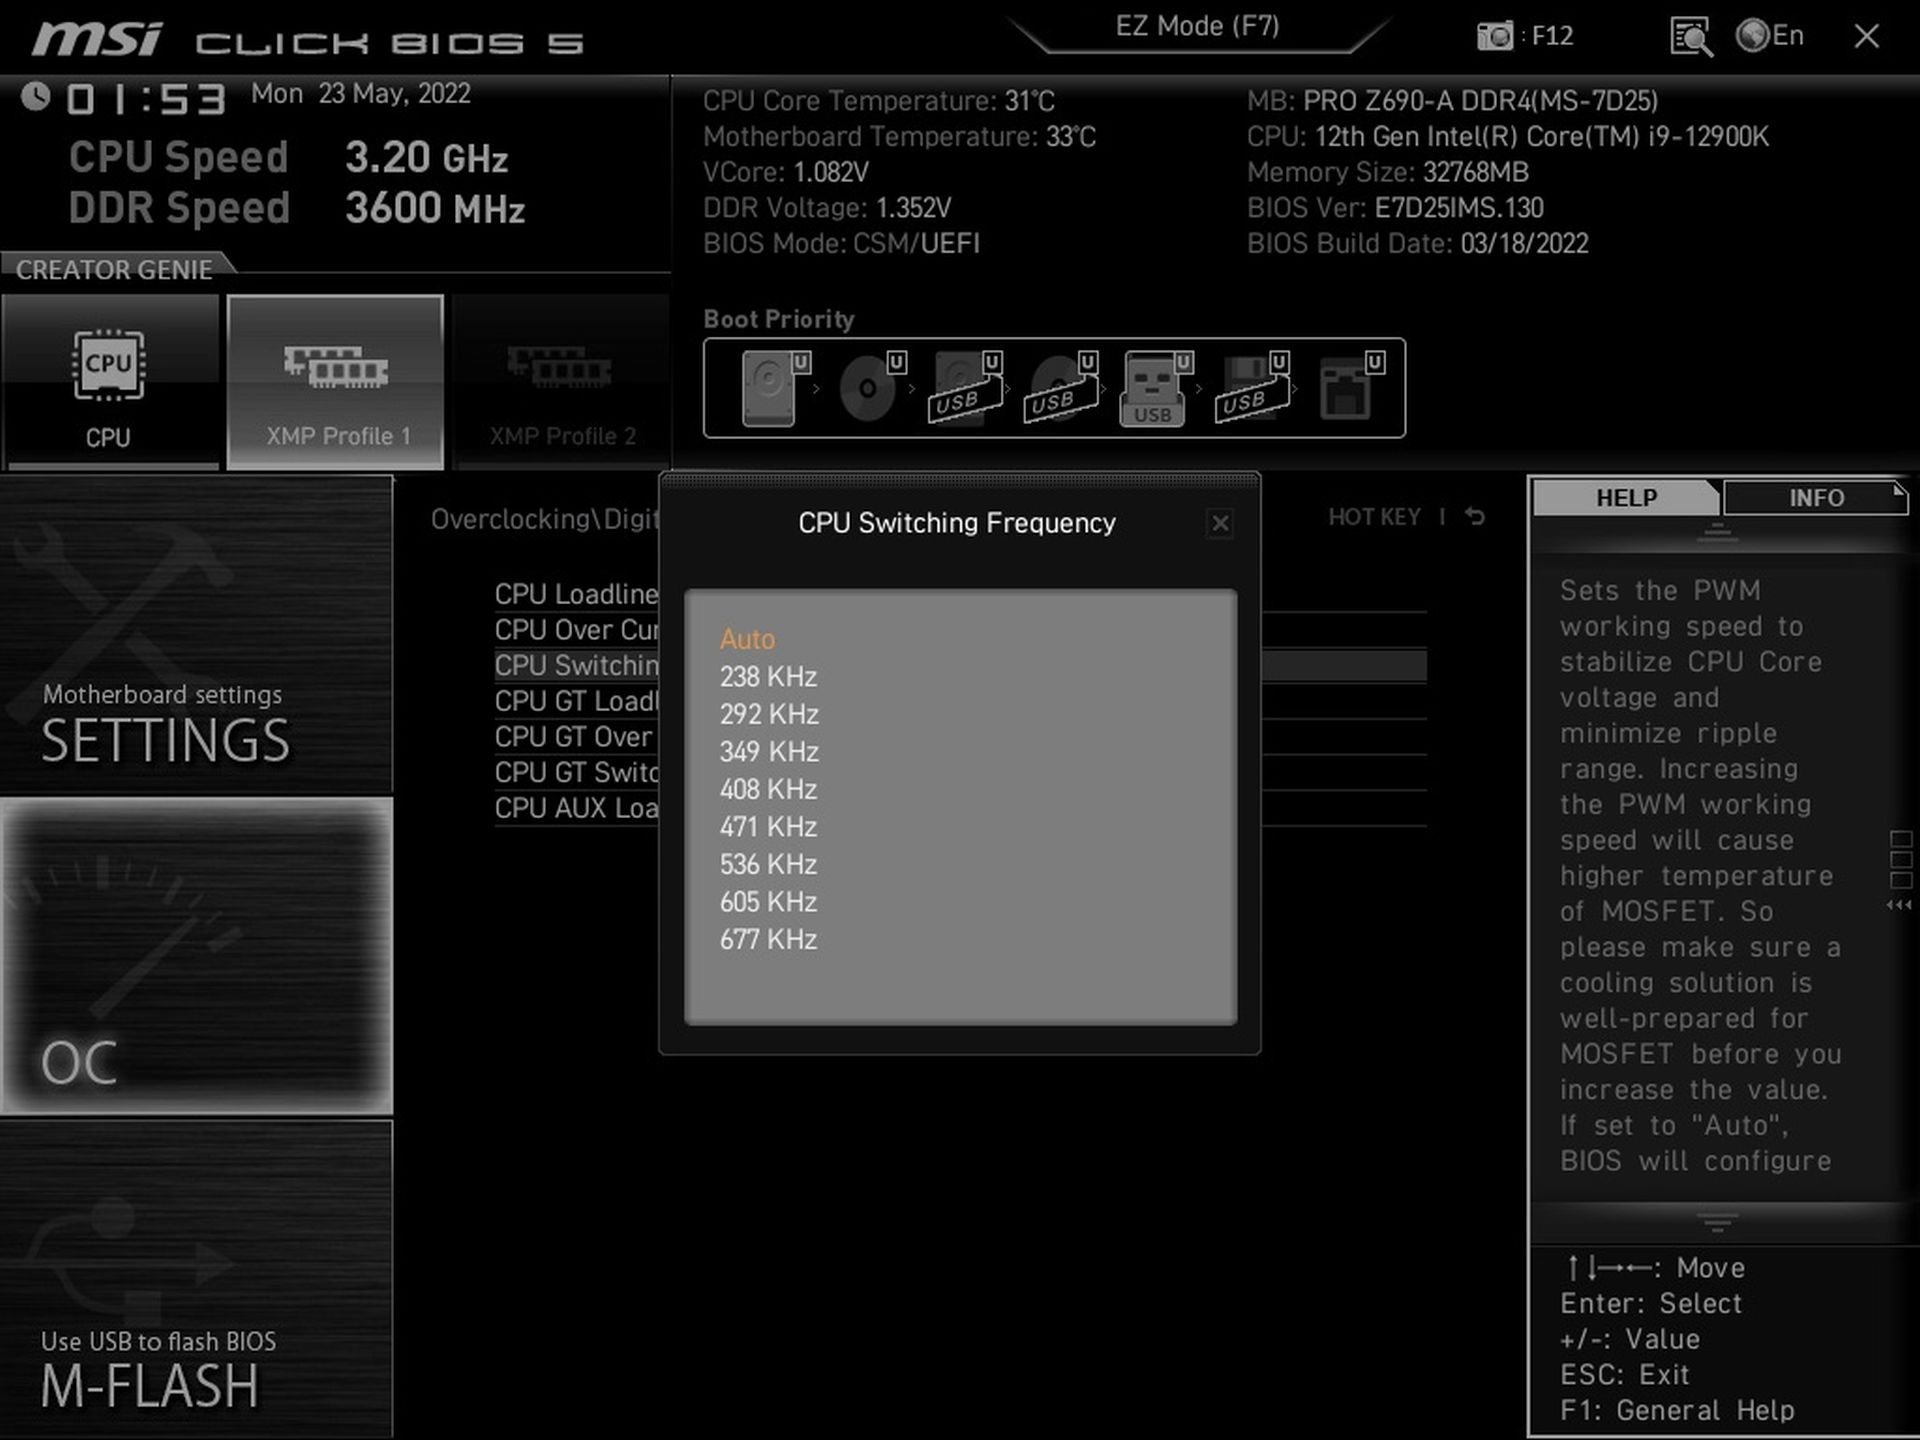
Among the more advanced settings, it is also possible to modify the negative offset for applications using AVX instructions. With these, power draw is typically higher, and to achieve higher efficiency, the multiplier of more powerful processors with a TDP of 125 W is reduced by 1, with more low-power models it is set to 0. For advanced tuners, even options such as the VRM switching frequency for the CPU are retained.
The “Creator Genie” button is still worth stopping by. It’s similar to the “Game Boost” on gaming boards, it works exactly the same, only in the context of a board promoted for work use, a different, more thematic name is used. Creator Genie, unless you manually overclock it, will force a 100 MHz higher clock speed for all CPU cores through a higher multiplier. While it’s always at the expense of efficiency, and the increase in power draw will be more significant than the increase in performance, if it’s worth the price and you want to wring the CPU more intensely, you can try as far as it will let you go. And not just the CPU itself, but its cooler as well.

For memory with XMP up to 3600 MHz, the board automatically sets Gear 1, with which full memory controller bandwidth is achieved. With faster modules, you can already count on Gear 2 and the fact that at half the IMC frequency, lower performance may be achieved in some applications even if you have paid extra for faster memory.
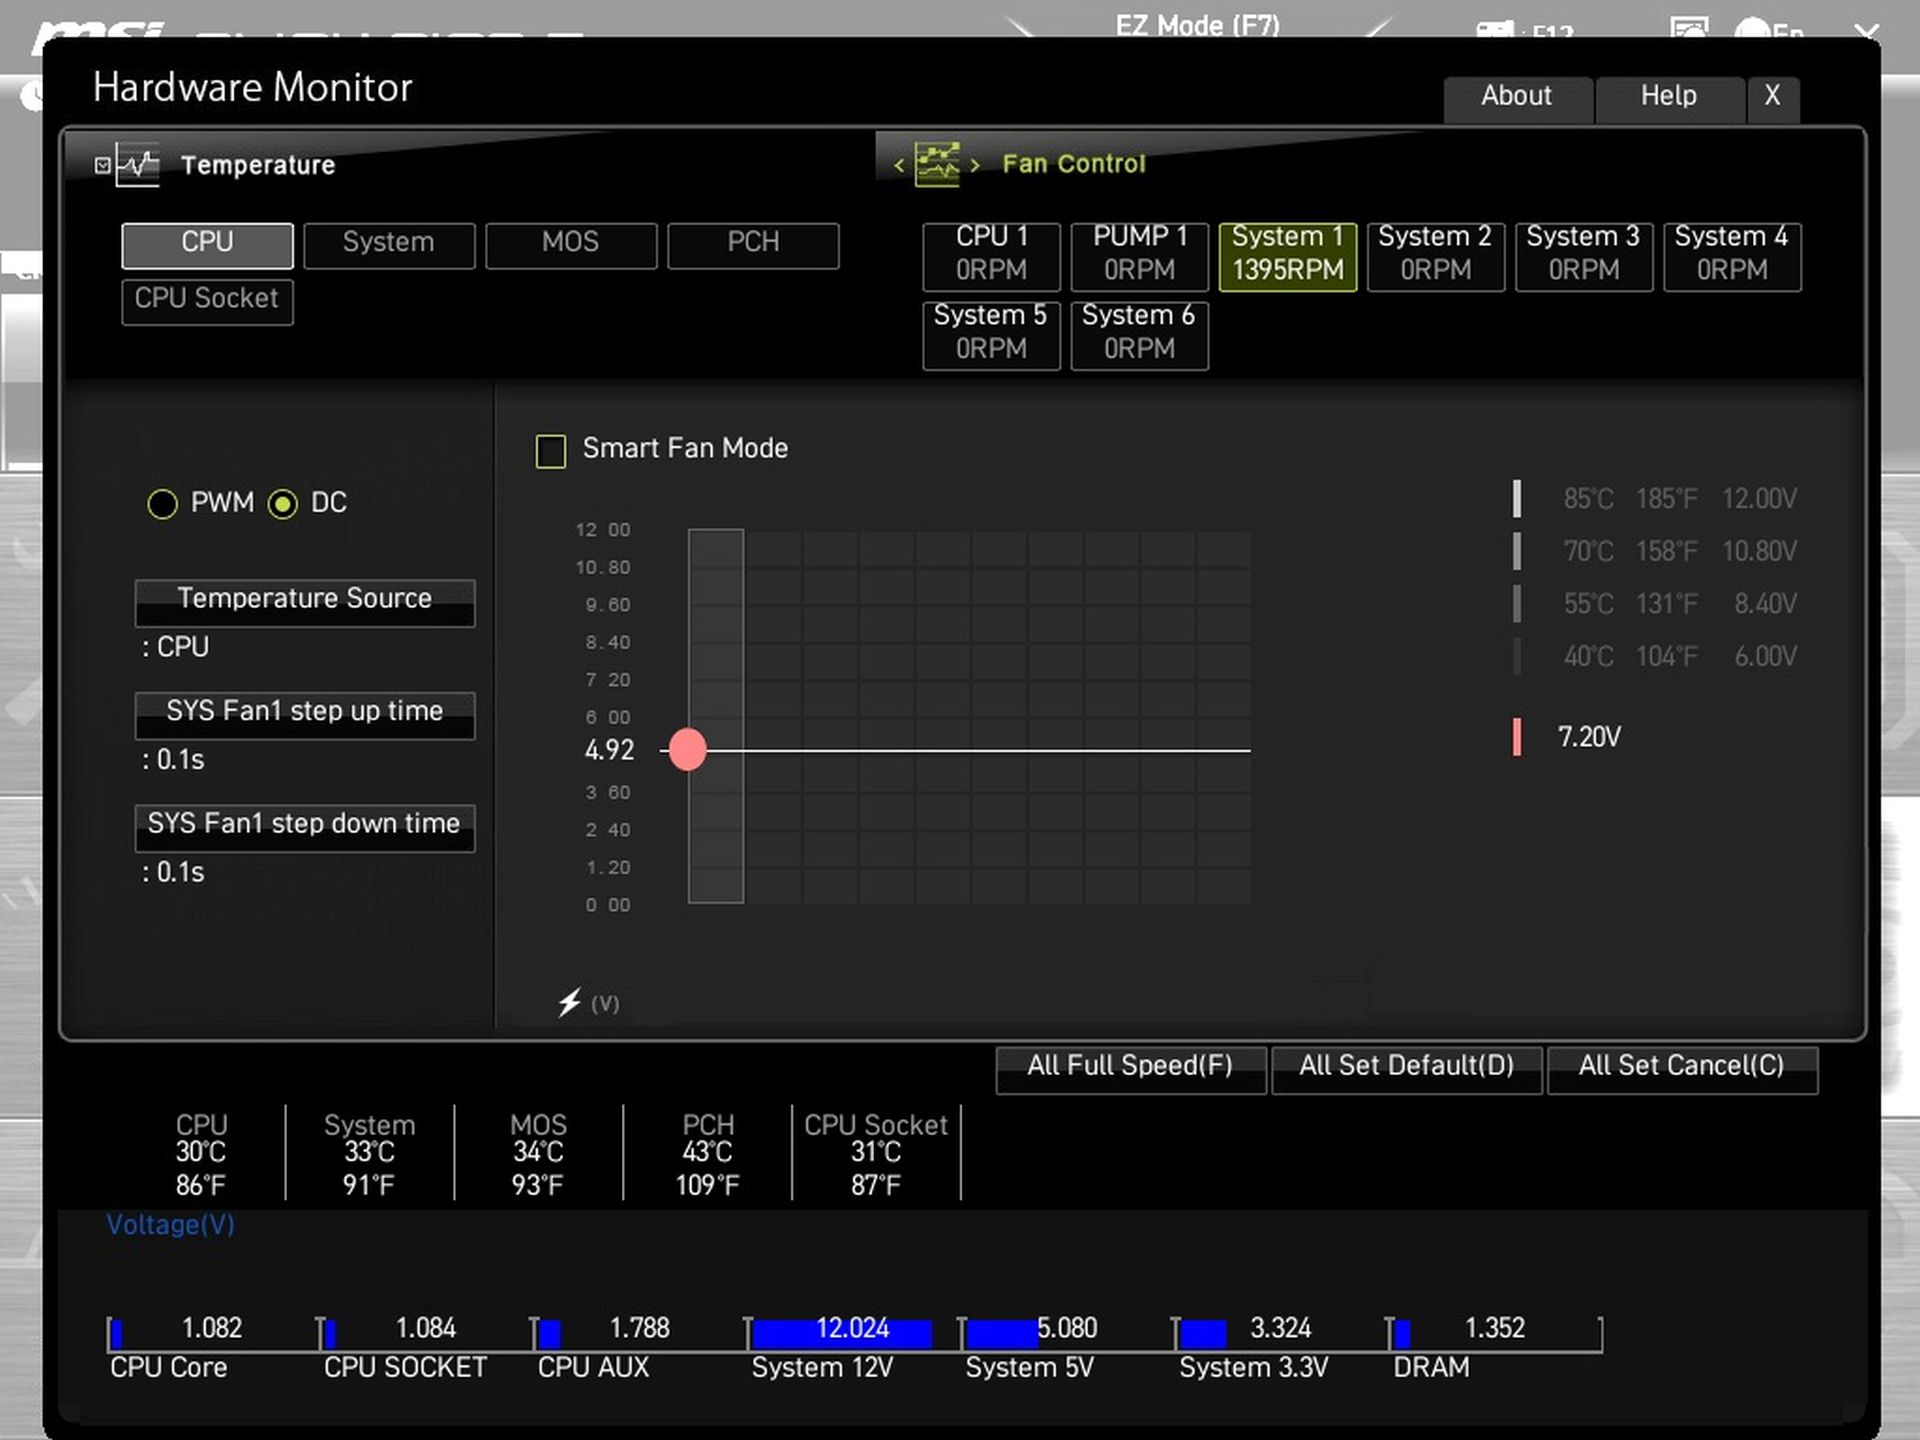
The fan management interface (Hardware Monitor) allows both PWM and DC control, i.e. older fans with 3-pin connectors. You can adjust the supply voltage in small increments manually to a fixed value or create a progress curve that responds to temperatures from different sources. All of this, of course, applies to PWM as well.

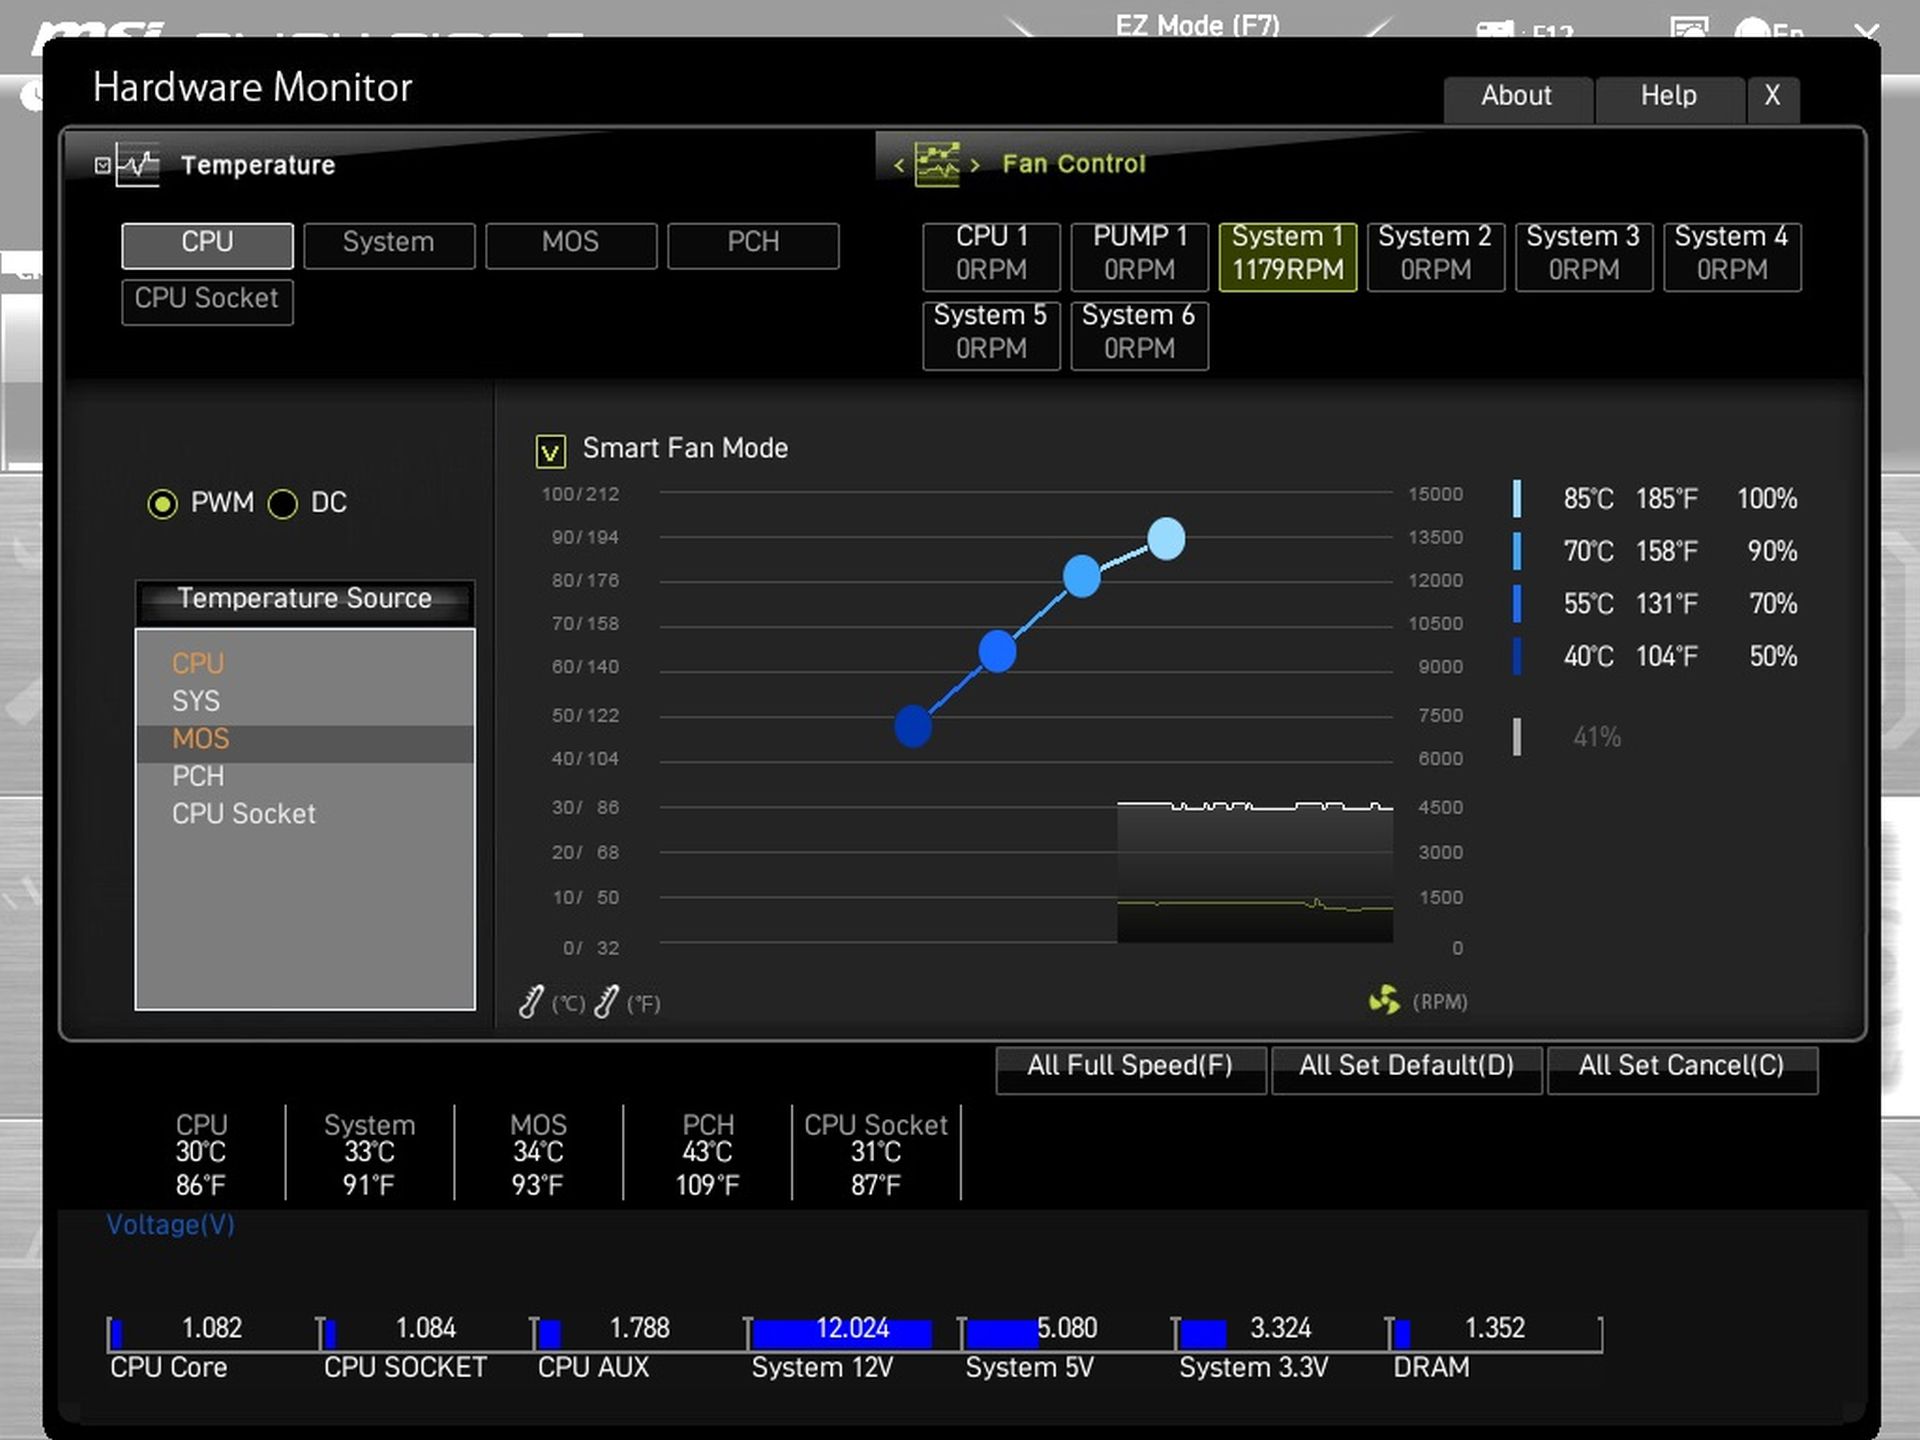
There are five heat sources, including a “MOS” sensor that will be located somewhere within the VRM. Compared to some boards (typically Gigabyte), it lacks a PCIE sensor or a spot for a custom thermocouple. But these are details for which we will not criticize a board in this price range.
- Contents
- MSI Pro Z690-A DDR4 in detail
- What it looks like in the BIOS
- Methodology: Performance tests
- Methodology: How we measure power draw
- Methodology: Temperature and frequency measurements
- Test setup
- 3DMark
- Borderlands 3
- F1 2020
- Metro Exodus
- Shadow of the Tomb Raider
- Total War Saga: Troy
- PCMark and Geekbench
- Web performance
- 3D rendering: Cinebench, Blender, ...
- Video 1/2: Adobe Premiere Pro
- Video 2/2: DaVinci Resolve Studio
- Graphics effects: Adobe After Effects
- Video encoding
- Audio encoding
- Photos: Adobe Photoshop, Affinity Photo, ...
- (De)compression
- (De)cryption
- Numerical computing
- Simulations
- Memory and cache tests
- M.2 (SSD) slots speed
- USB ports speed
- Ethernet speed
- Power draw curve (EPS + ATX connector) w/o power limits
- Power draw curve (EPS + ATX connector) with Intel’s power limits
- Total power draw (EPS + ATX connector)
- Achieved CPU clock speed
- CPU temperatures
- VRM temperatures – thermovision of Vcore and SOC
- SSD temperatures
- Chipset temperatures (south bridge)
- Conclusion

Do you guys think this board would handle the 13900K? With power limits and decent air cooling (Noctua NH-D15, U14S, Dark Rock Pro 4, AK62, or Thermalright PA 120SE?
With a power limit of 253 W? The Pro Z690-A DDR4 is up to the task for such a load, although you have to expect lower power efficiency. But that’s only natural in this class.
Hey guys, I have a Gigabyte 750h psu that i bought back in 2020, thing is.. it only has 1x 8pin CPU power connector, this motherboard required 2x 8pin CPU power connectors, i want to purchase this motherboard along with a i5 13600k (im not gonna do overclocking at least until i change the psu) am I gonna be ok with just 1x 8pin CPU power cable connected ?
Yes, a single 8-pin EPS connector (or a pair of two 4-pin connectors) will be sufficient with the Core i5-13600K, and by a wide margin. It’s capable of 336 W, and your processor’s power draw won’t be more than 180 W.
First of all, congratulations for the work done, I have never seen such complete tests for motherboards. There are so many information that I didn’t even think about, now I’m confused. Before, I didn’t think about the consumption or the achieved CPU clock speed.
MSI MAG B660M Mortar WiFi (128 USD) it consumes less energy and at the same time keeps the CPU at a higher frequency!
MSI Pro Z690-A DDR4 (170 USD): I thought it was a clear winner, I thought I’d put a 12600k on it and then in a few years upgrade to a 13900k or maybe even the 14 series. More lanes.
At the same time, there are chances that I will not upgrade to a CPU on the same platform. Hard to chose, or not?
I wouldn’t be put off by the difference in achieved clock speeds. This is just the sort of thing that can be well controlled by a simple manual adjustment of the settings. The Pro Z690-A DDR4 board obviously has a more aggressive minus offset setting for AVX instructions and therefore achieves lower CPU clock speeds in Cinebench. But in games and at lower load they are already the same as with the B660M Mortar. To a certain extent, until the limits of the VRM (in)efficiency are reached, the power draw can be tuned. It’s possible that what makes a bigger difference in the power draw than VRM efficiency (the components on the Pro Z690-A DDR4 don’t look that much worse on paper…) on the hardware side is that the Pro Z690-A DDR4 has a significantly more aggressive power supply, which can be adjusted. But that’s all a matter for detailed manual tweaking and fine-tuning.