

We’re kicking off a round of Z890 motherboard tests loaded with the most powerful CPU for the LGA 1851 platform – the Core Ultra 9 285K. We’re doing this with Gigabyte – the Z890 Aorus Elite WiFi7 from the mid-range, or the upper mid-range, if you like… There will be competing models in a similar category later on, but now to the motherboard, which has undergone many changes from the Z790 Aorus Elite AX of the previous generation.
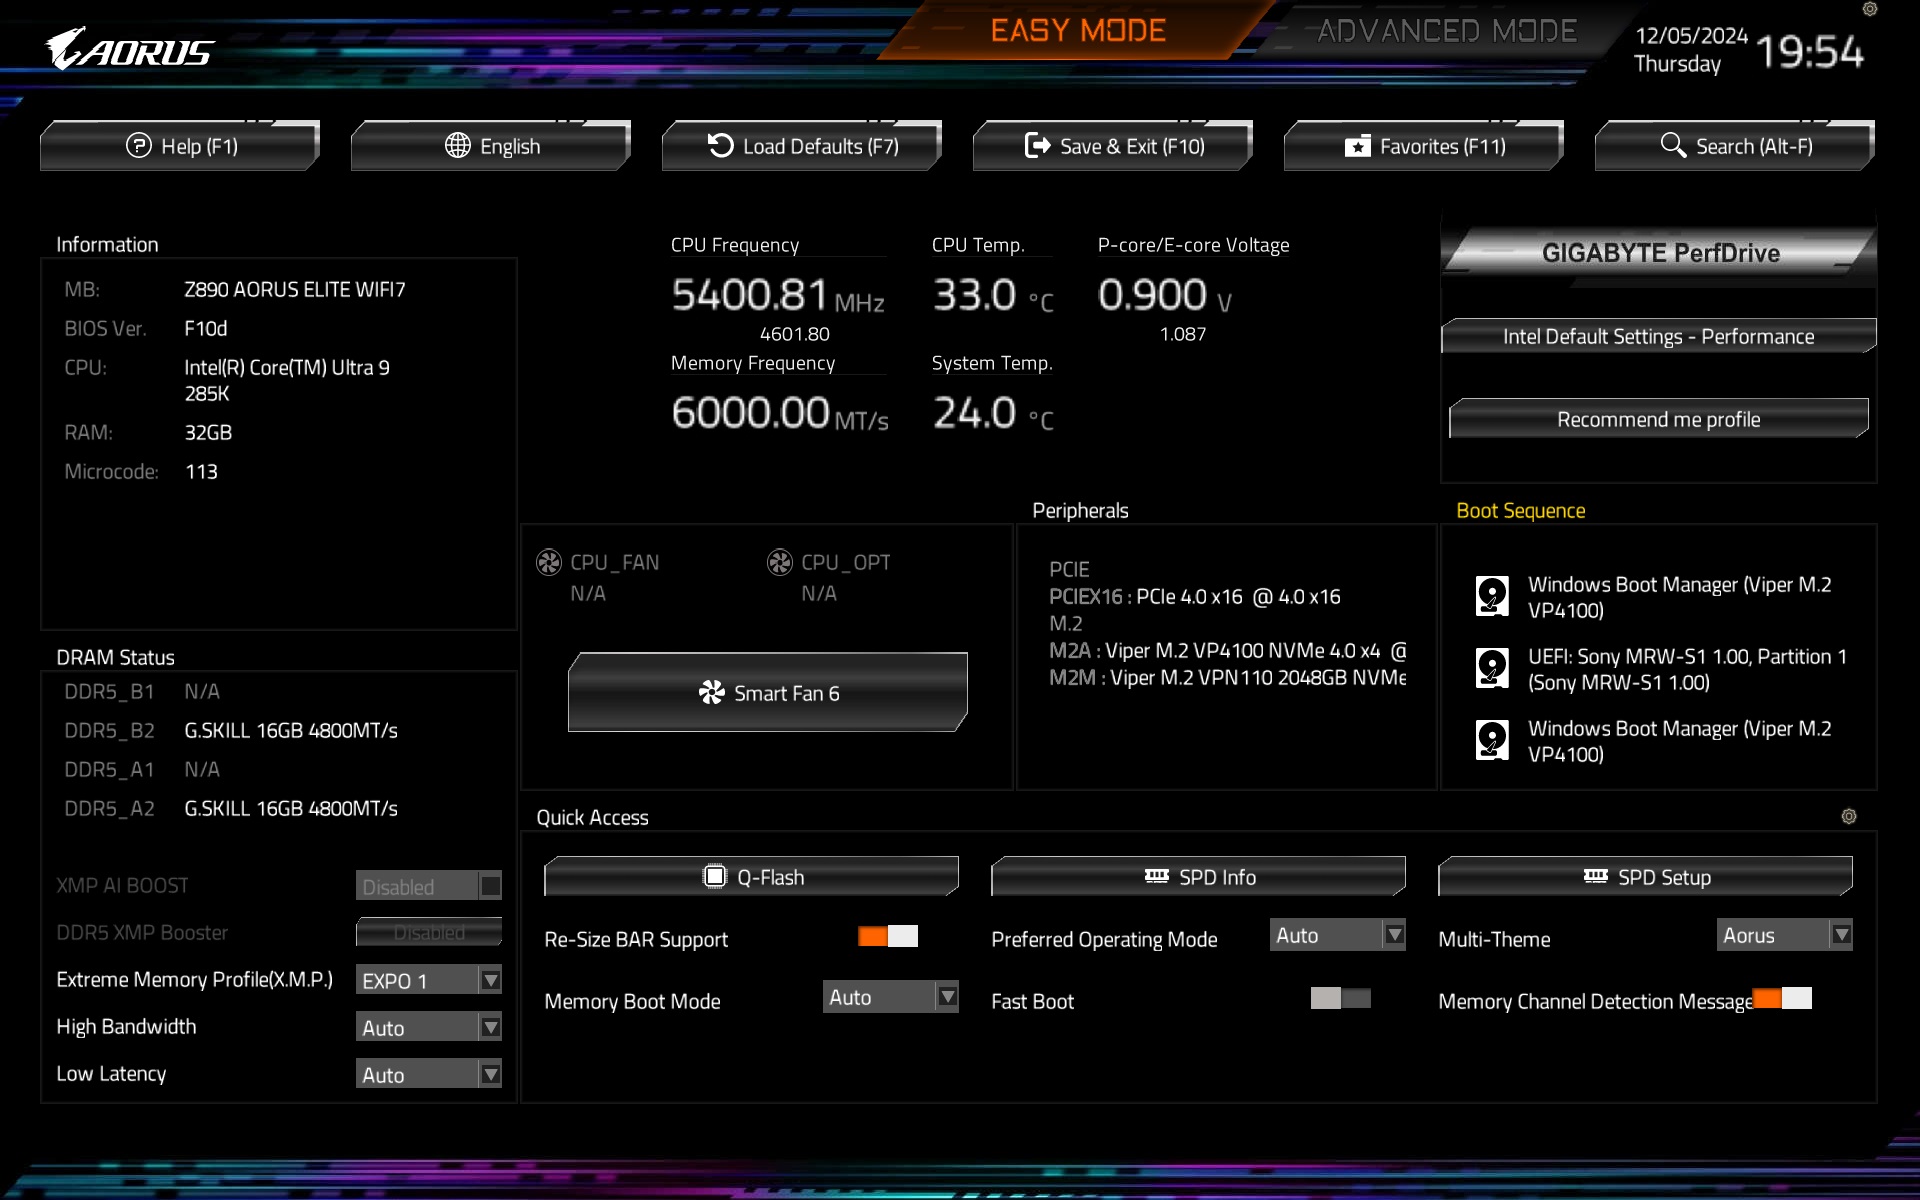
What it looks like in the BIOS
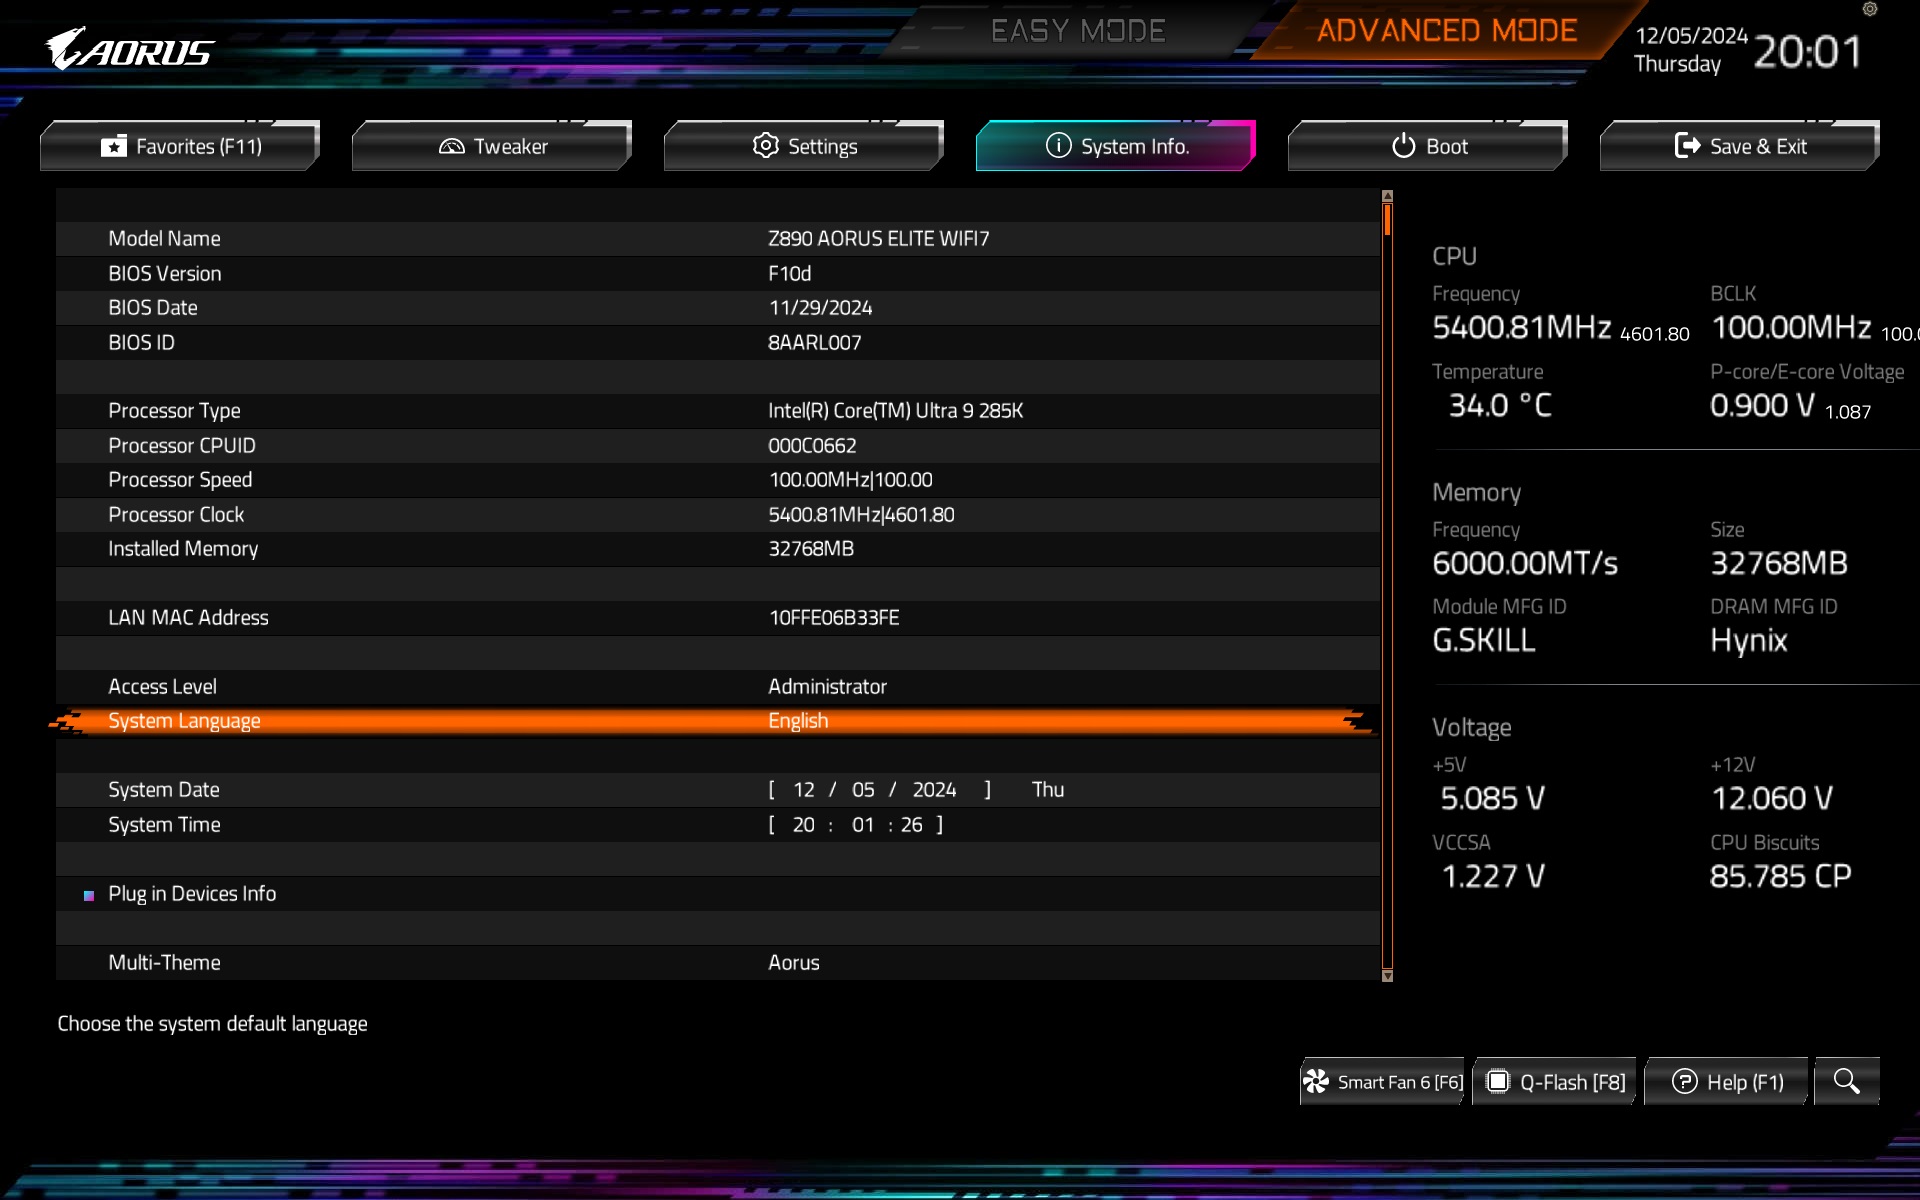
The splash screen, or “Easy Mode” user interface, is logically well divided into several blocks. In addition to basic CPU and RAM information, the information panel also tells you the BIOS version (in our case F10d, i.e. the latest build with microcode 0x113 at the time of testing). The diagnostics is dynamic and the monitoring also includes the current CPU or memory temperatures.
It is also possible to activate the memory profile (EXPO) from this environment and then to access BIOS update (Q-Flash button) or detailed fan management (Smart Fan 6) via quick options. The way to more advanced settings is via the F7 key.
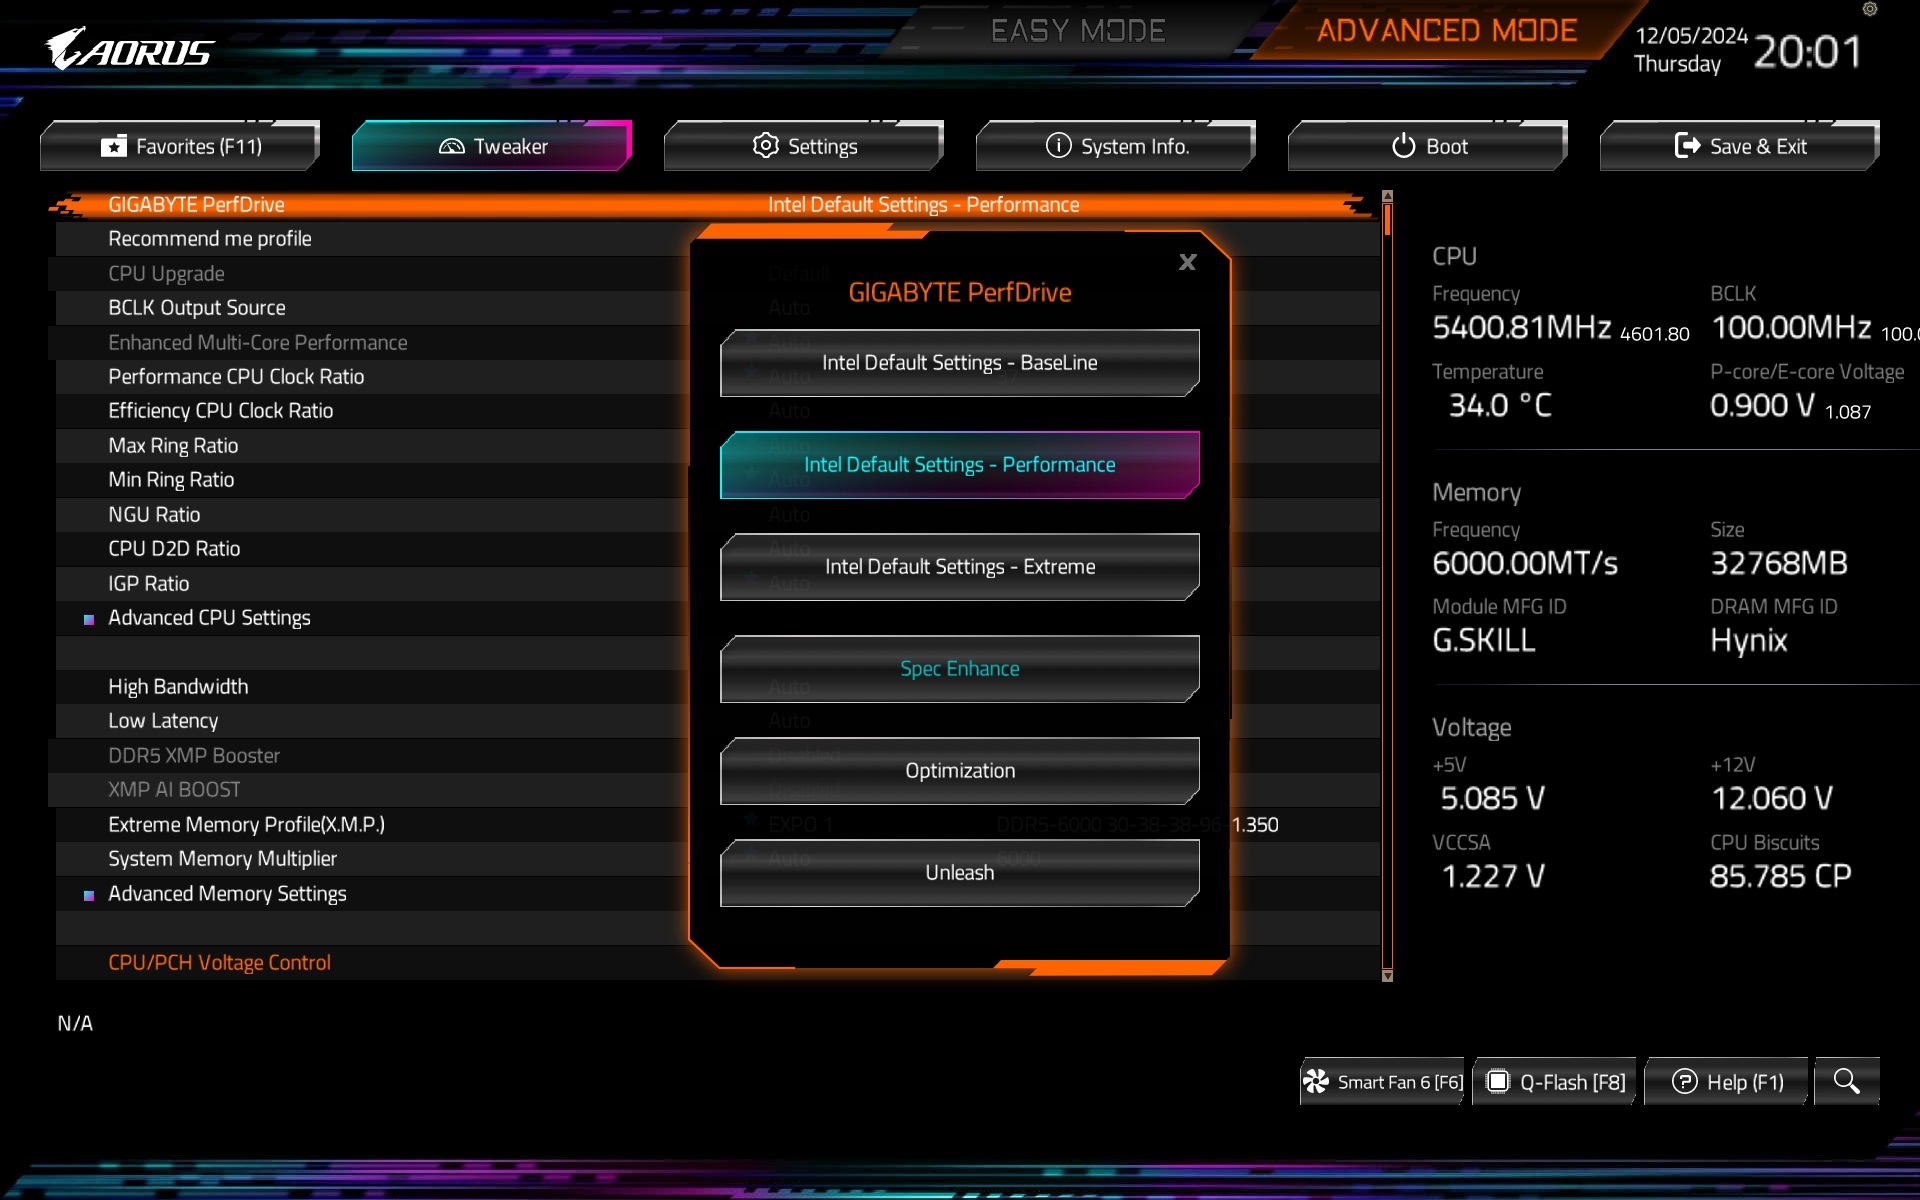
The Tweaker tab is key in terms of setting up the processor in advanced mode. The first choice right away is Gigabyte Perfdrive with preset profiles that you can change with respect to other global settings. Only Intel Default Setting has three levels within these profiles (BaseLine, Performance, and Extreme) with different power limits.
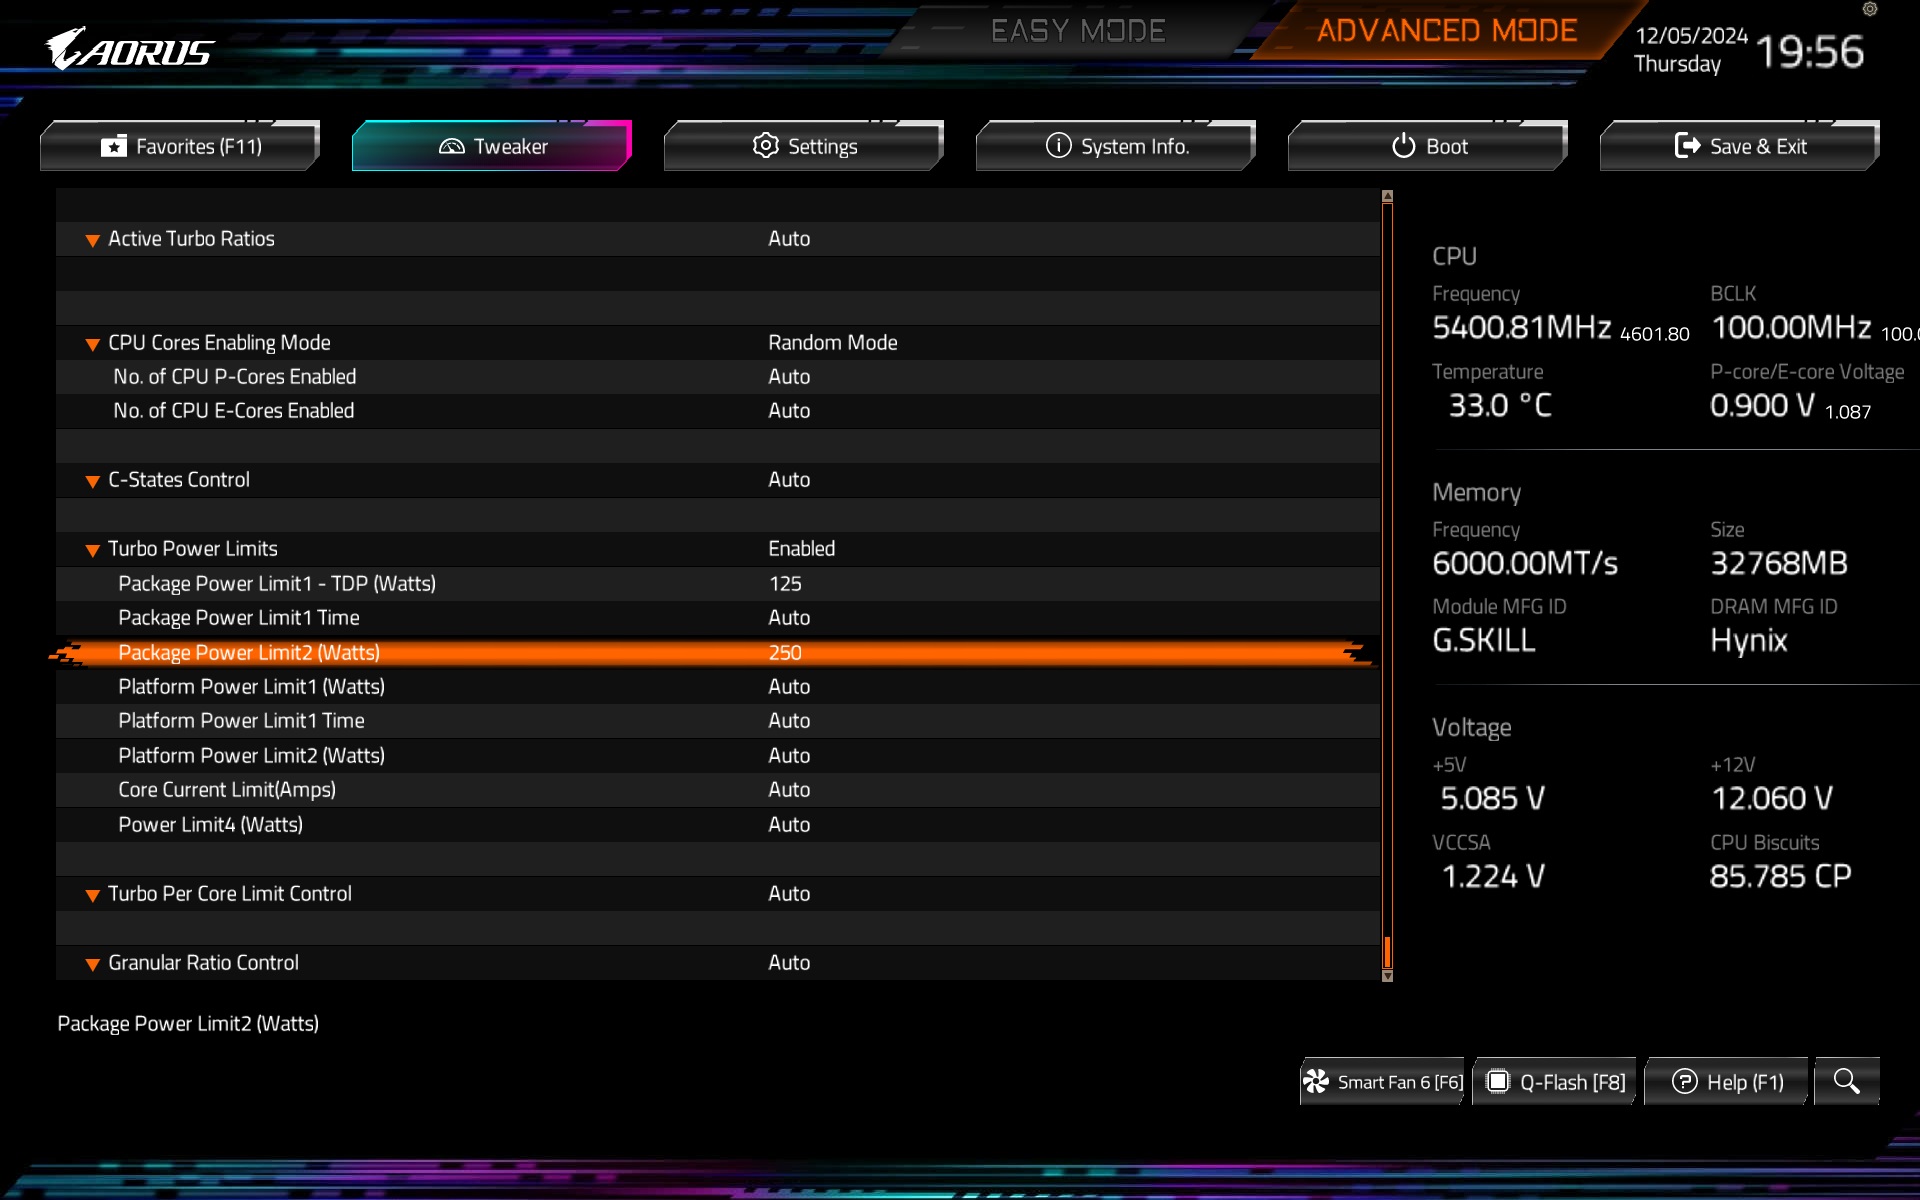
We set the power limits manually for testing purposes. Firstly, with respect to the unlimited possibilities (with PL1 and PL2 generously to “4096 W”), where especially the temperature limits interfere with the result. Only those, according to the available cooling power, mainly shape the multi-threaded performance, because of which powerful Intel processors achieve very high power consumption. For a lower-power setup, we set PL2 to 250 W according to the specifications for the Core Ultra 9 285K processor, with which we test. The PL1 is at TDP level (125 W) with the Tau timeout also applied. Its timing out can be seen well in the bar charts with the power consumption curve in Cinebench R23.
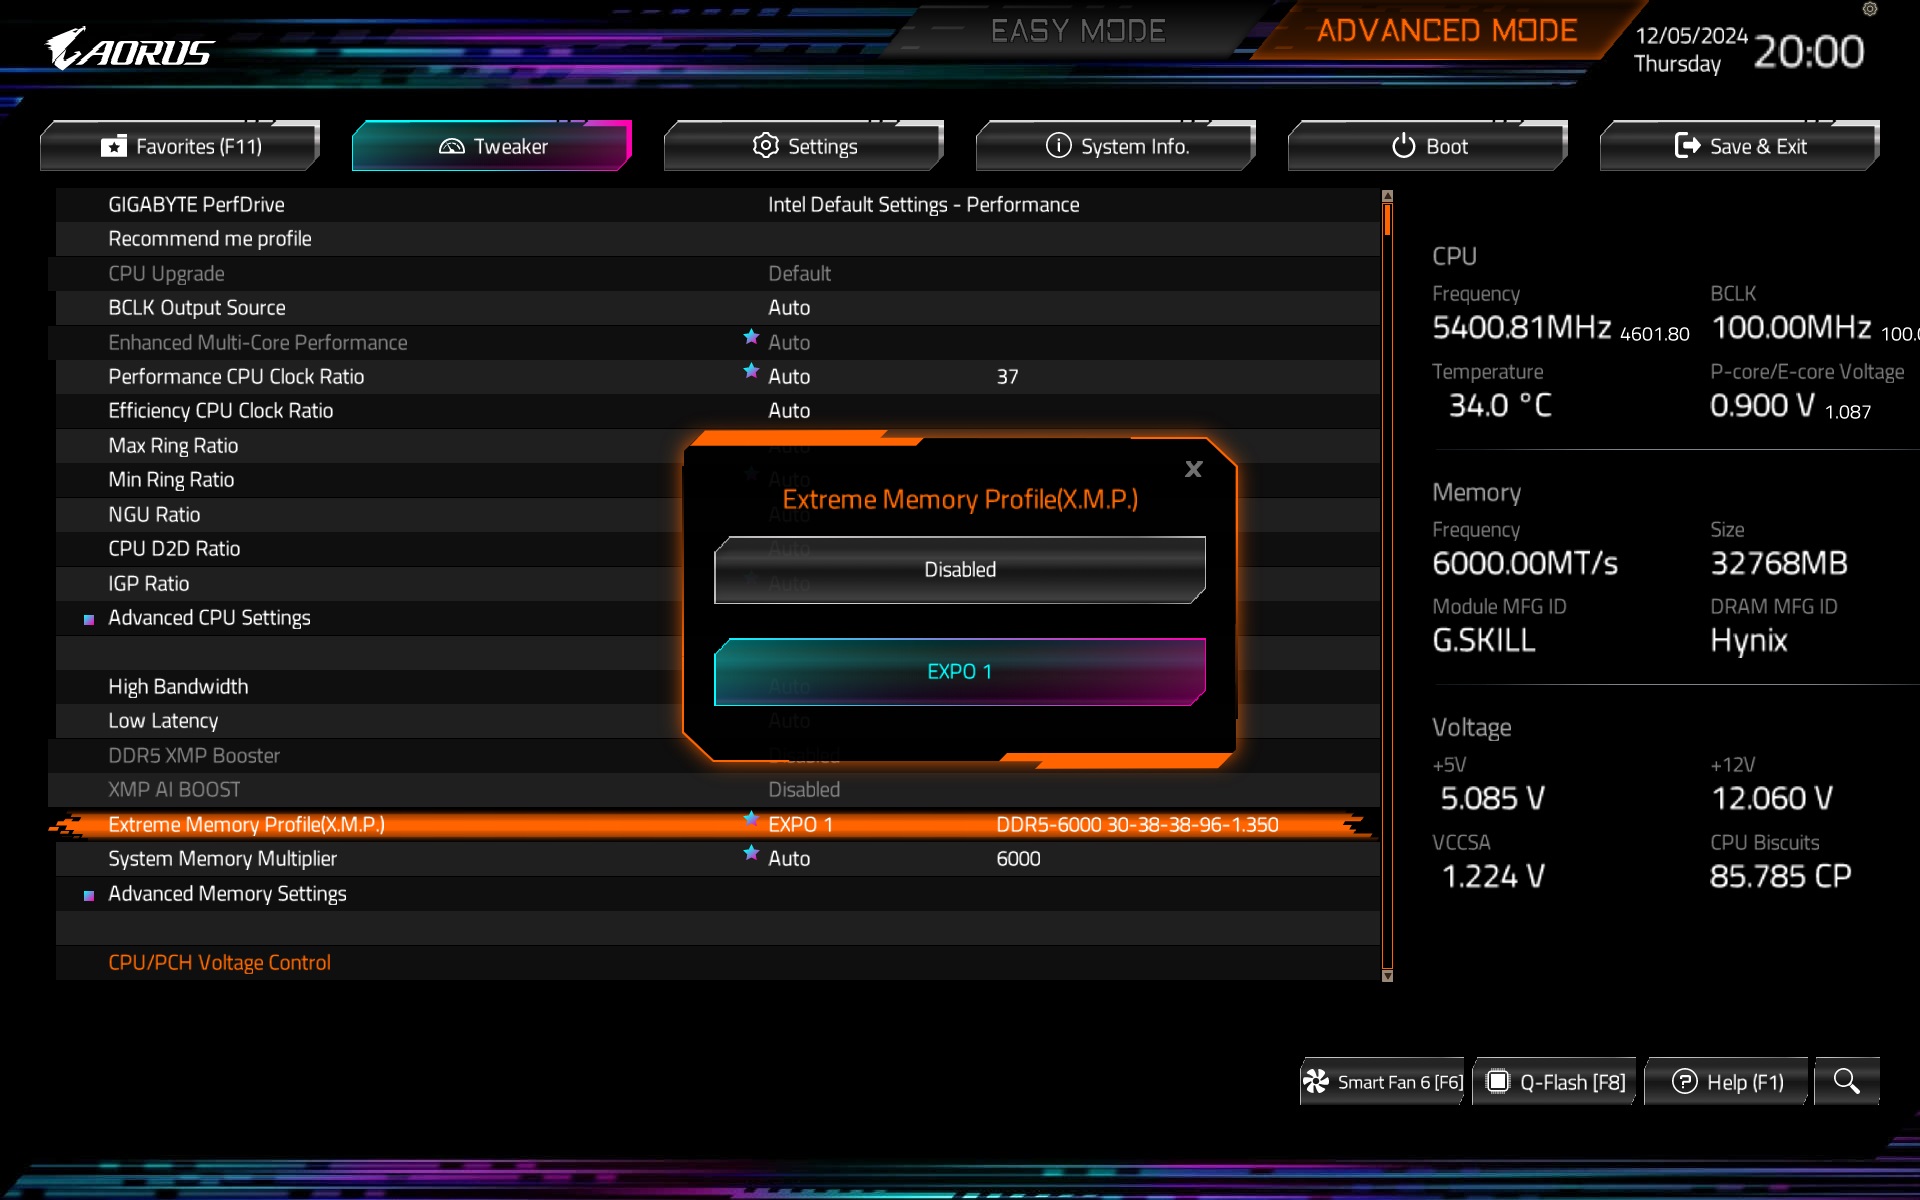
The memory profile can also be activated in the advanced settings, where, unlike EZ Mode, more detailed options are available. One of them is memory controller bandwidth management. With relatively faster test modules, the motherboard “automatically” presets the Gear 2.

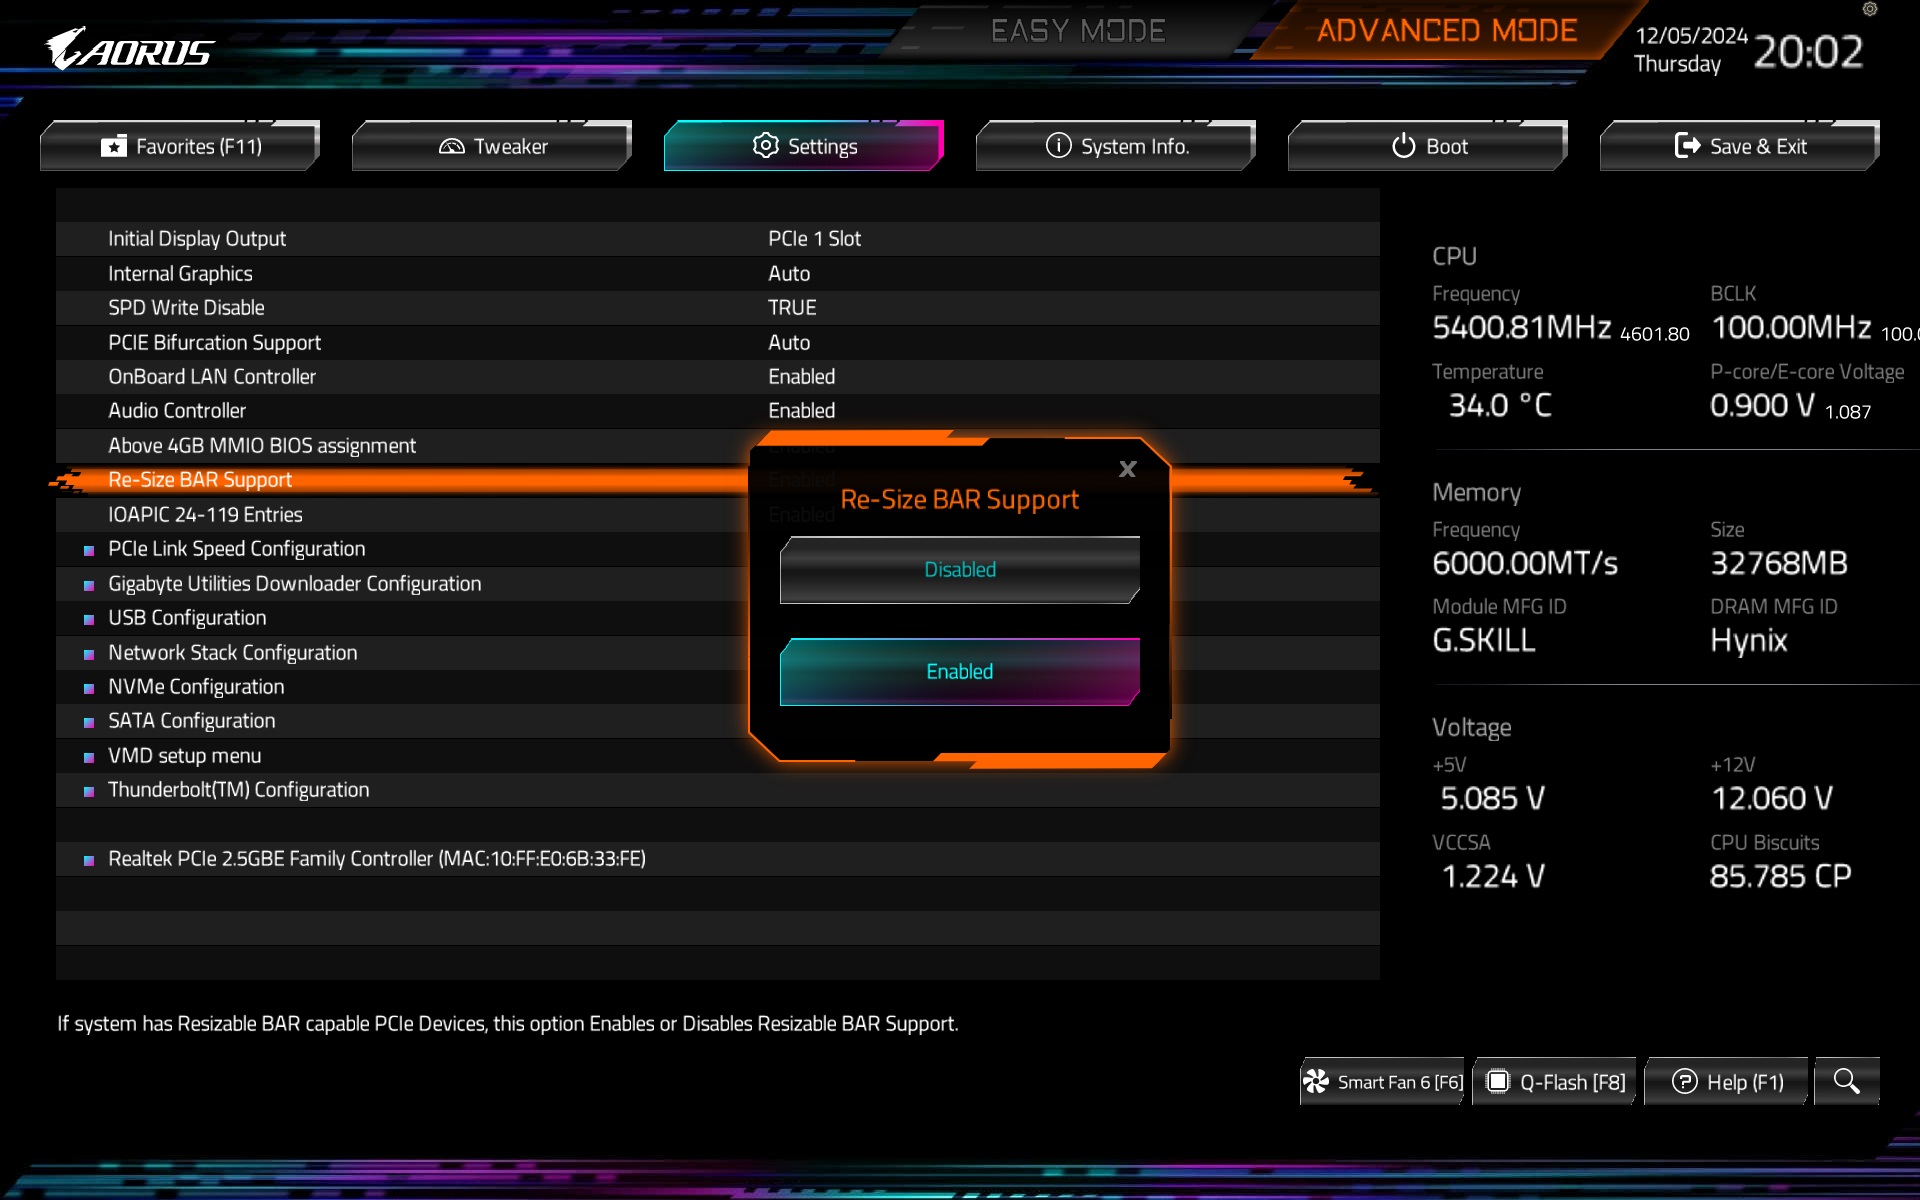
You can also change the ReSizable BAR activity in the Settings tab, where there’s the notable option of PCIe Bifurcation. These settings are useful when you need to split PCIe lanes from a PCI Express slot to support different devices. For example, when a graphics card also has an M.2 SSD slot that needs to be “decoupled”. We also addressed this in our tests of the Asus Dual RTX 4060 Ti SSD.

Smart Fan 6 is the pride of Gigabyte motherboards. The fan adjustment options are really detailed. Each of the six headers is customizable.
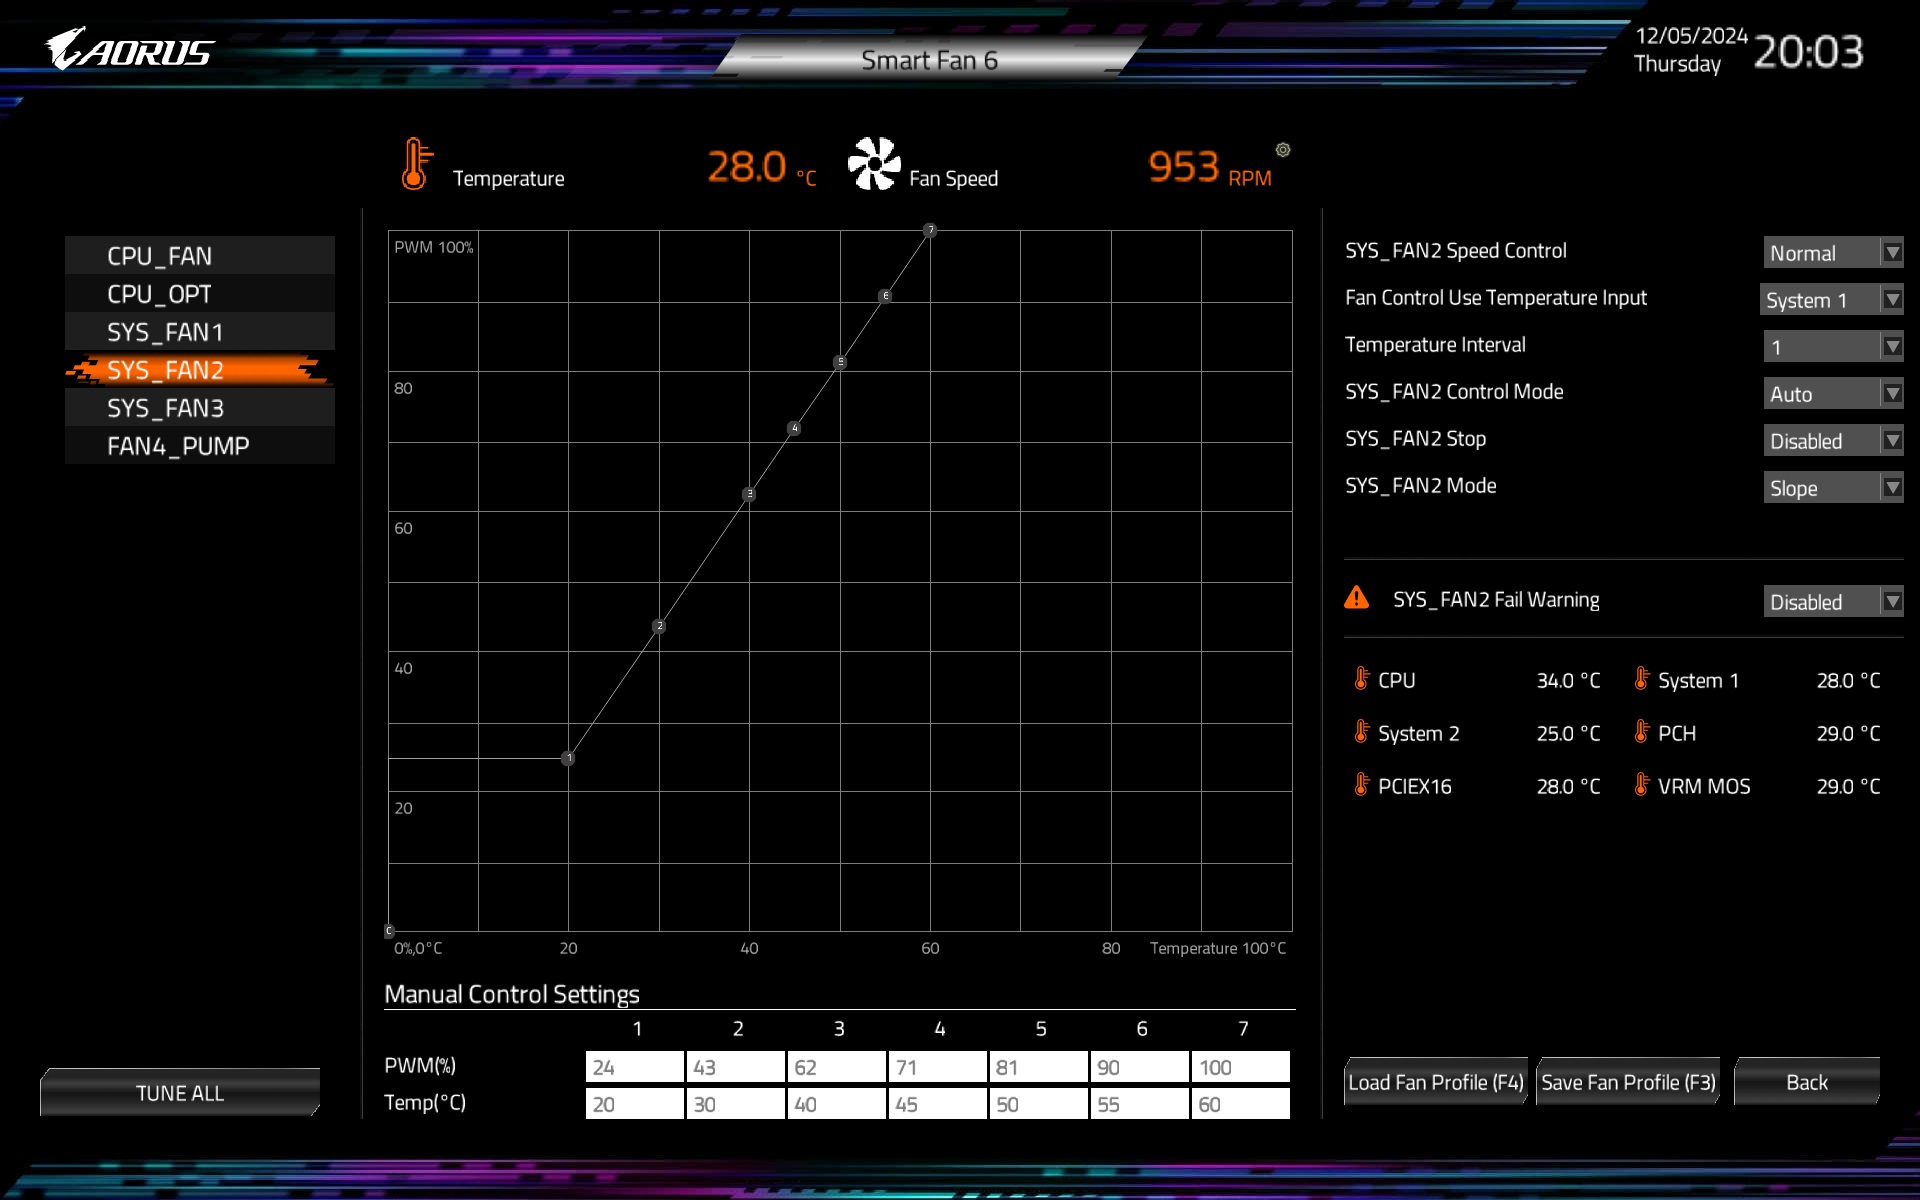
You can set the speed curves in different levels, where in Silent the PWM duty cycle will be the lowest and the operation the quietest, on the other hand the Full Speed mode is with 100% PWM duty cycle regardless of the temperature. In between these extremes is then Normal mode, or you can customize the curves yourself according to your own ideas of “how things should work”. You can do this by drag and drop technique using the points plotted on the 2D graph or alternatively by entering specific values (temperatures and PWM duty cycle) in the table below the graph. It’s an option that, for some users who don’t prefer a mouse (and chasing an overly sensitive cursor), may increase the comfort of the setup.


There are several temperature points in connection to the headers for the PWM duty cycle to depend on. For example, on the VRM temperature, or from the location that monitors the temperature at the PCIe ×16 slot (or is it directly in the slot?). There are a number of options to choose from… The traditional choice based on CPU temperature is only one of the options.