
What it looks like in the BIOS
At first glance, it’s the same board as the last tested Z690 Tomahawk WiFi DDR4 with one difference, that it supports the newer DDR5 memory standard. That’s how the Z690 Tomahawk WiFi is profiled, but looks are deceiving. A detailed analysis shows that there are some differences, including ones in design. Whether it’s for better or for worse is something you’ll learn exclusively from our measurements.
What it looks like in the BIOS
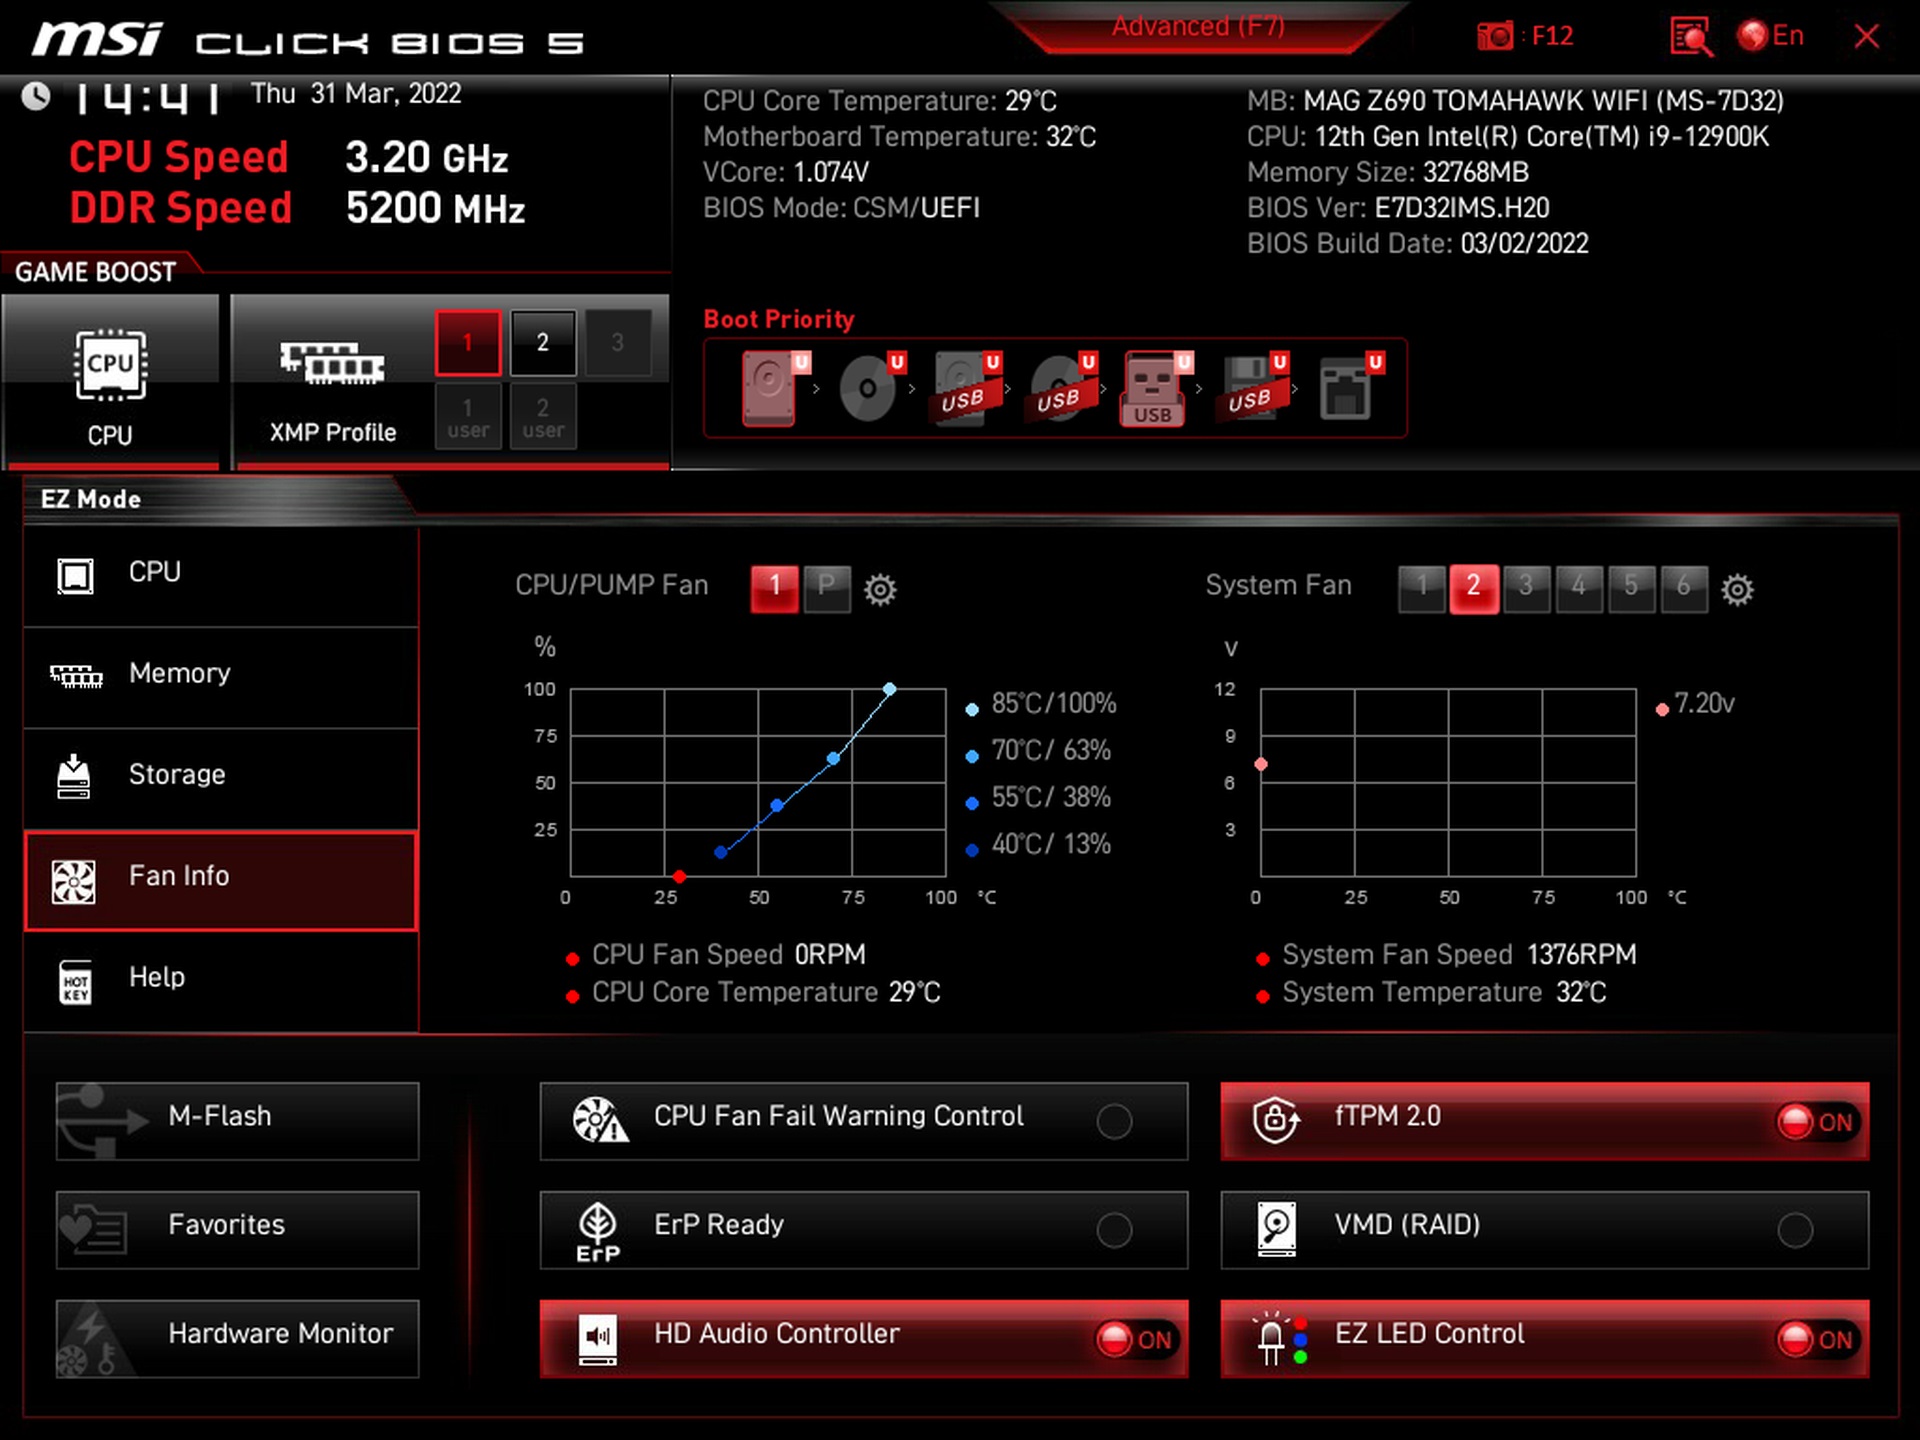
The layout of the simplified mode’s (EZ Mode) elements is clear. And it’s not at the expense of options. There really are quite a few of them, and nothing that the average user might be looking for is missing.
The graphical interface is nicely divided into sections according to content. The more information-rich items (CPU, Memory, Storage, Fan Info and Help) have tabs concentrated on the left side. From Fan Info, you can then also easily navigate to the more advanced mode settings (Hardware Monitor), which we’ll cover in more detail at the end of this chapter. Functions that are either on or off have their buttons (switches) concentrated at the bottom. Memory Profile or Game Boost, on the other hand, is set from the top.
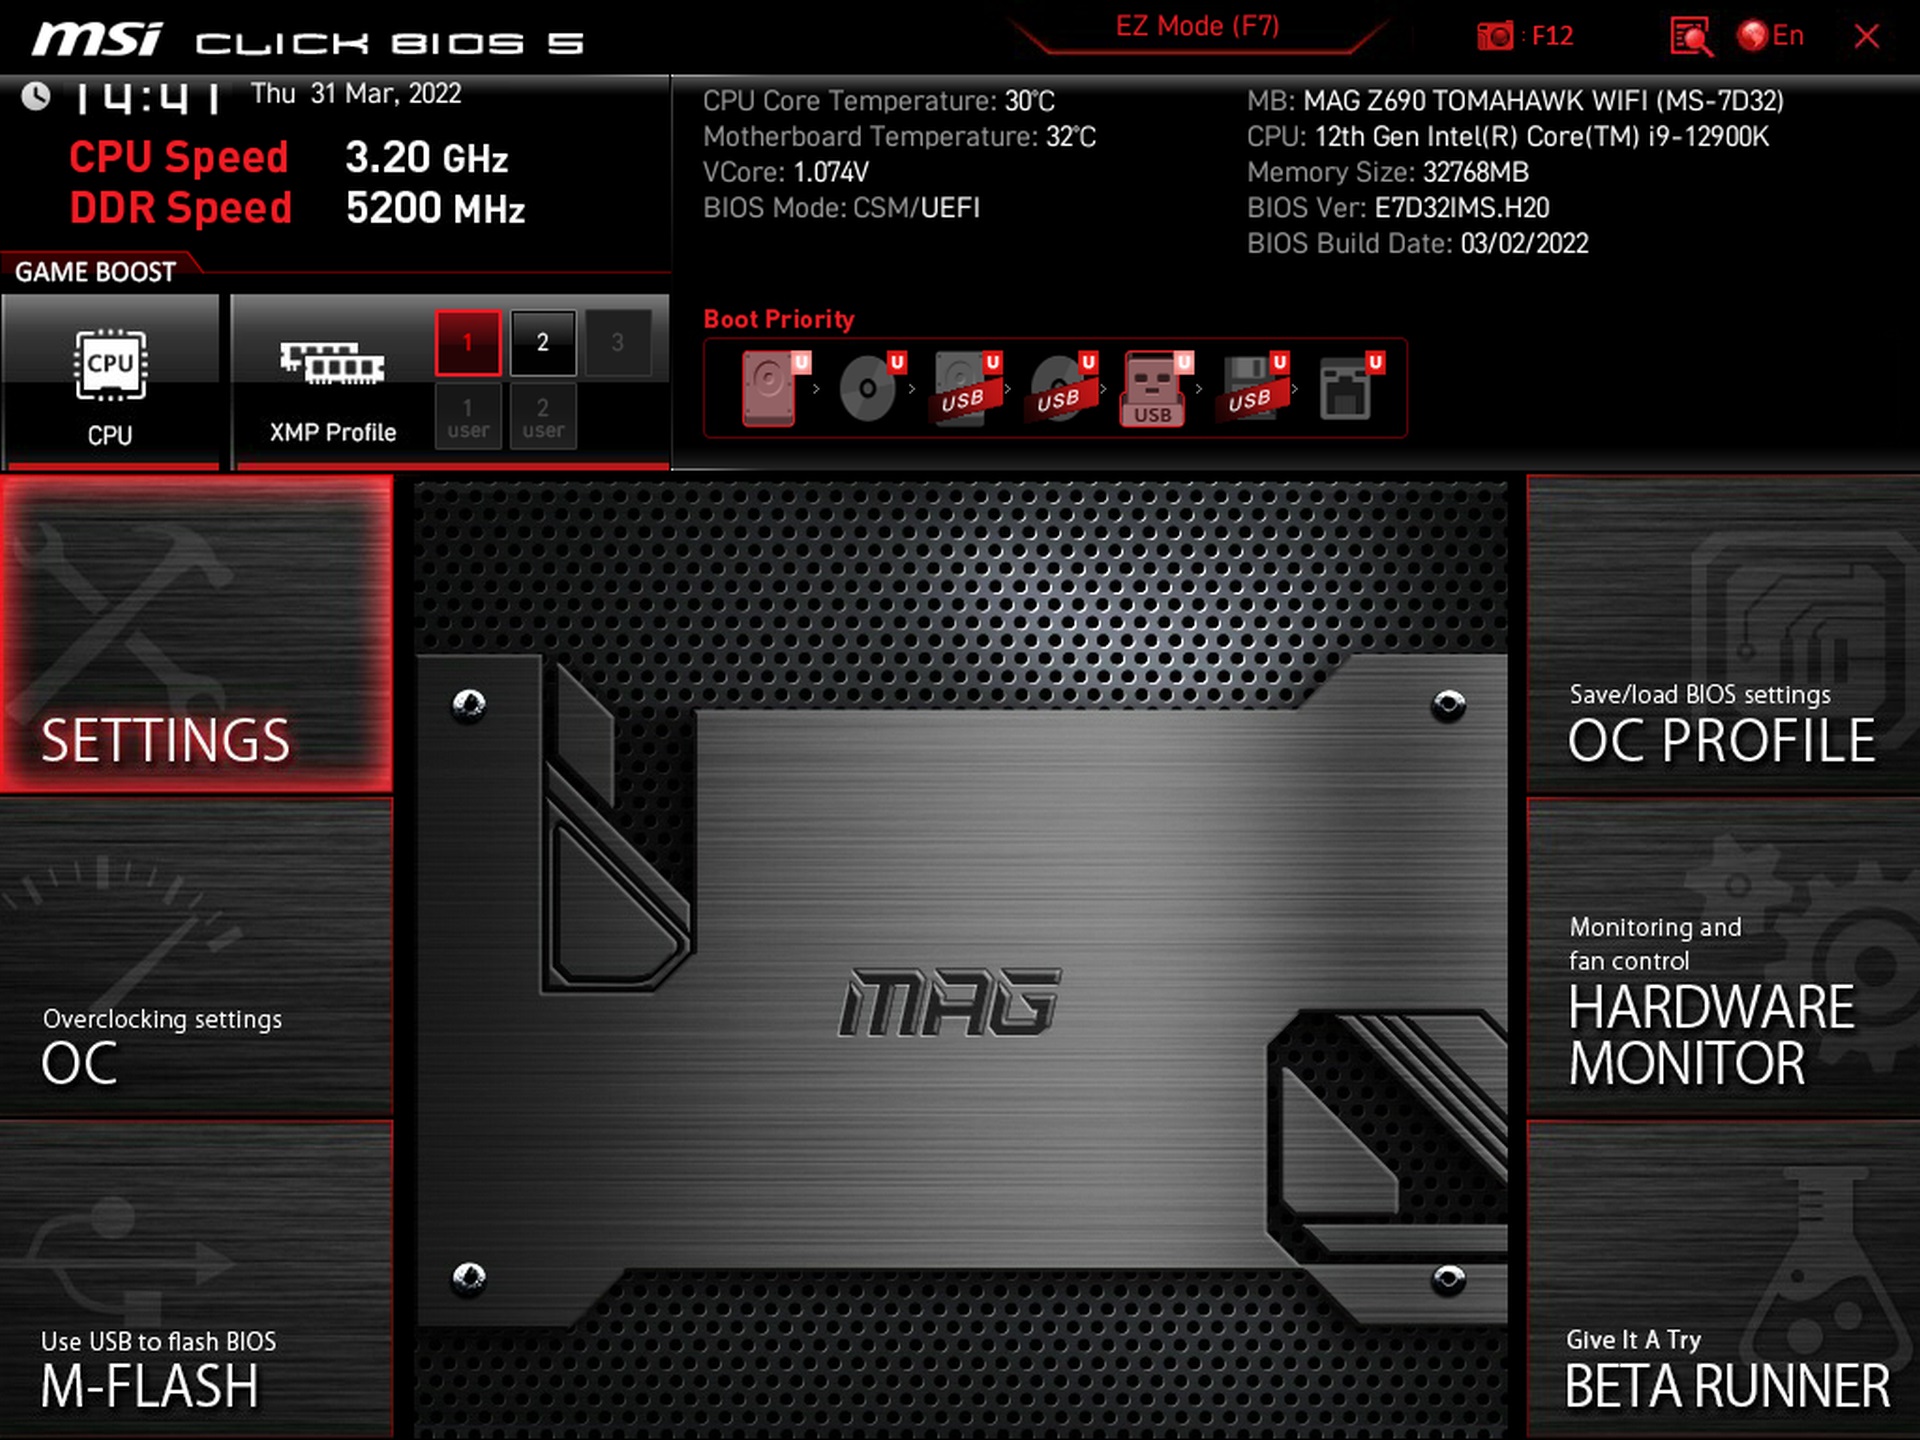
To enter advanced mode, press the F7 key. Its screen is divided into two rows of tiles. On the left are the tiles Settings, OC and M-Flash and on the right the OC profile, Hardware Monitor and Beta Runner.

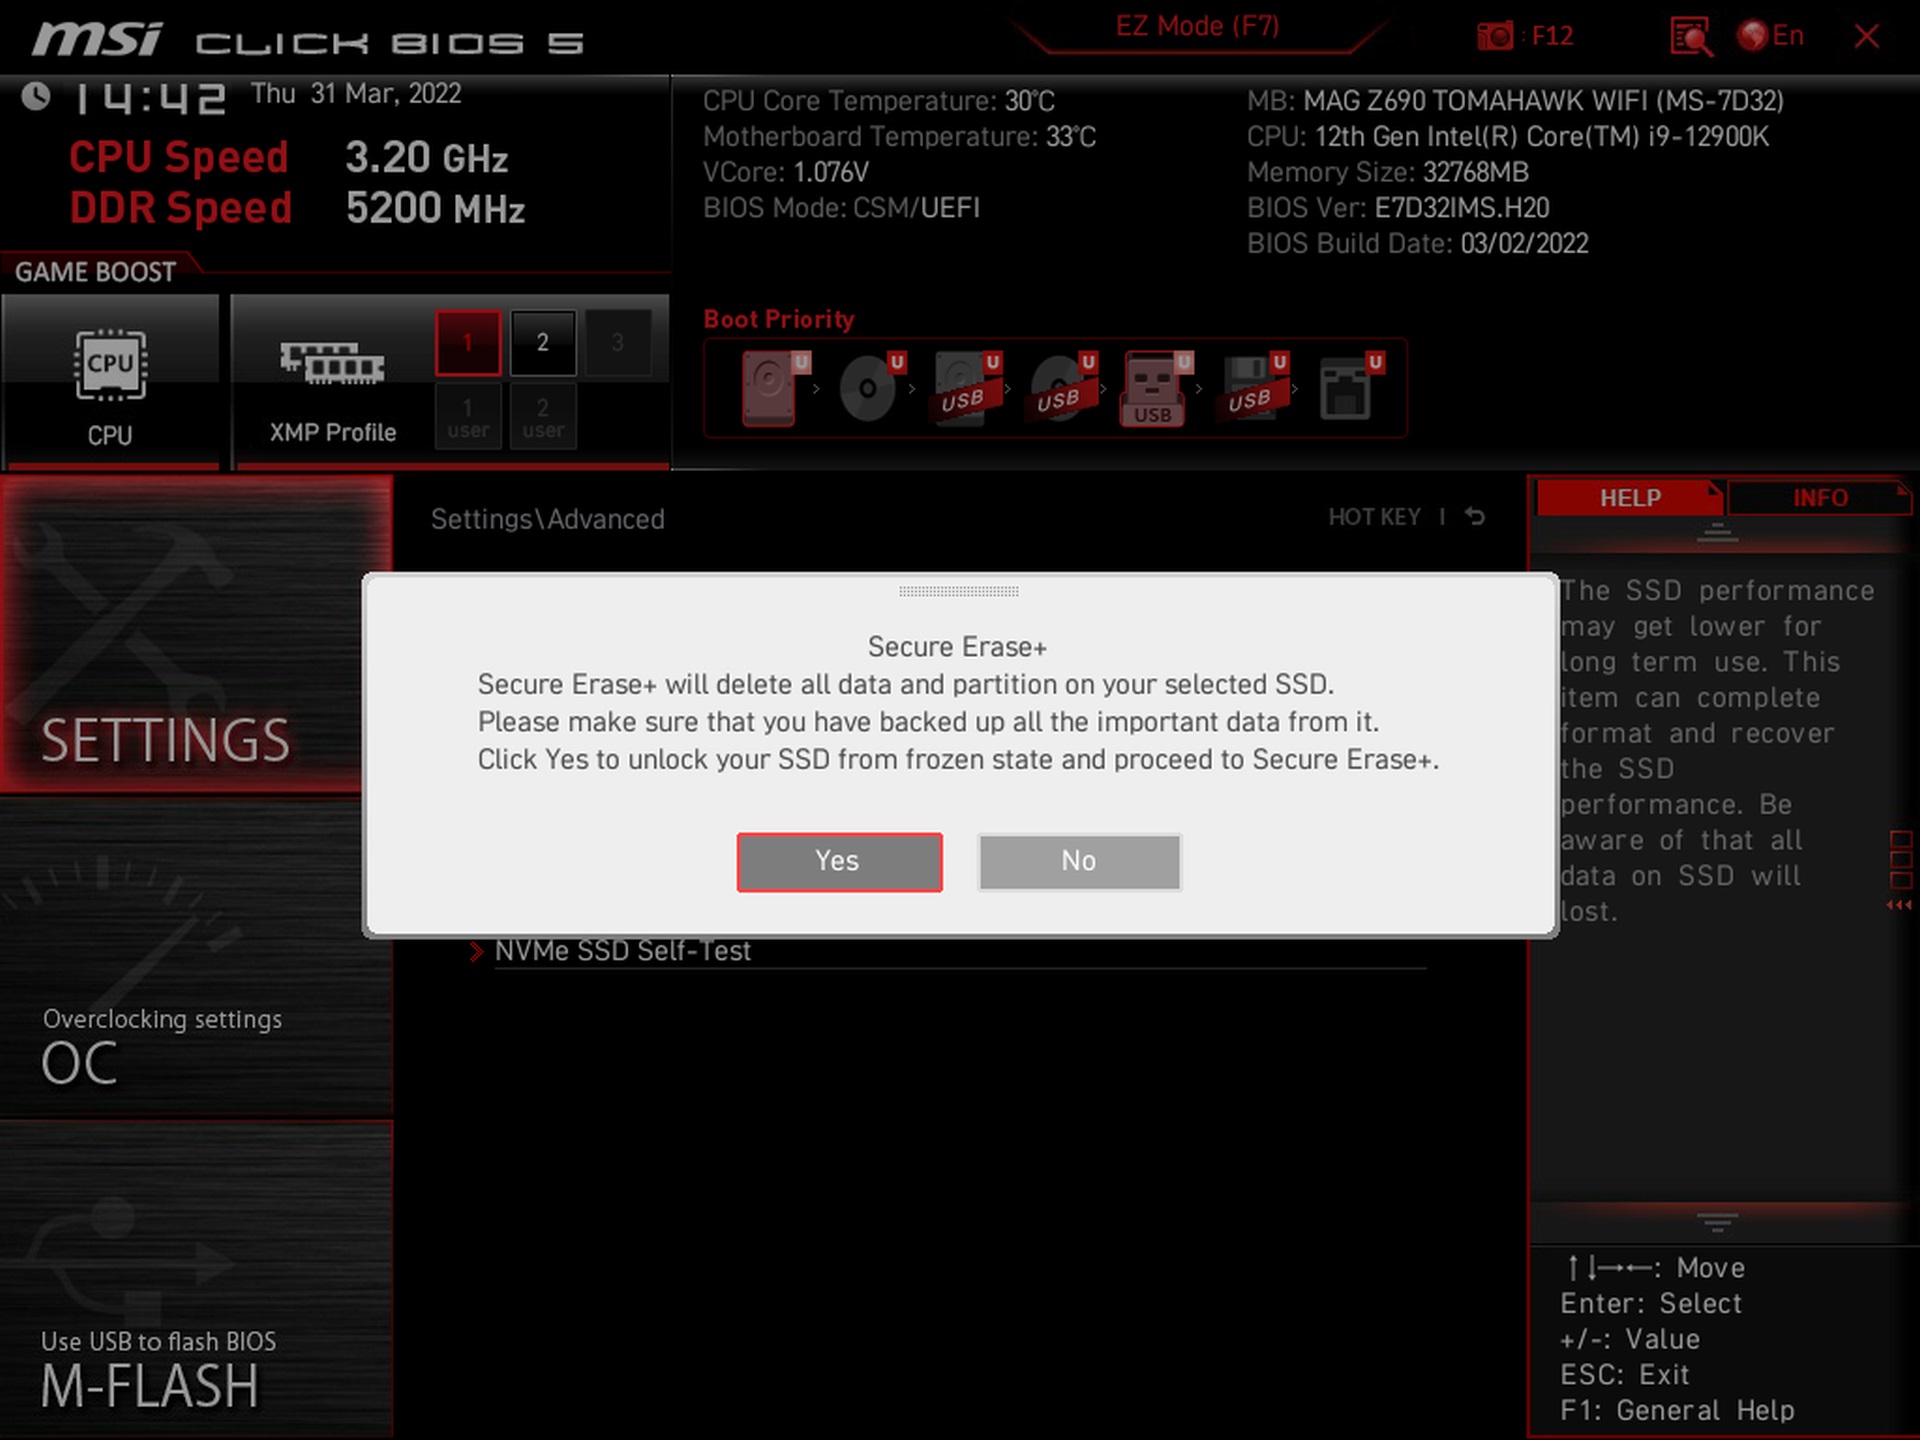
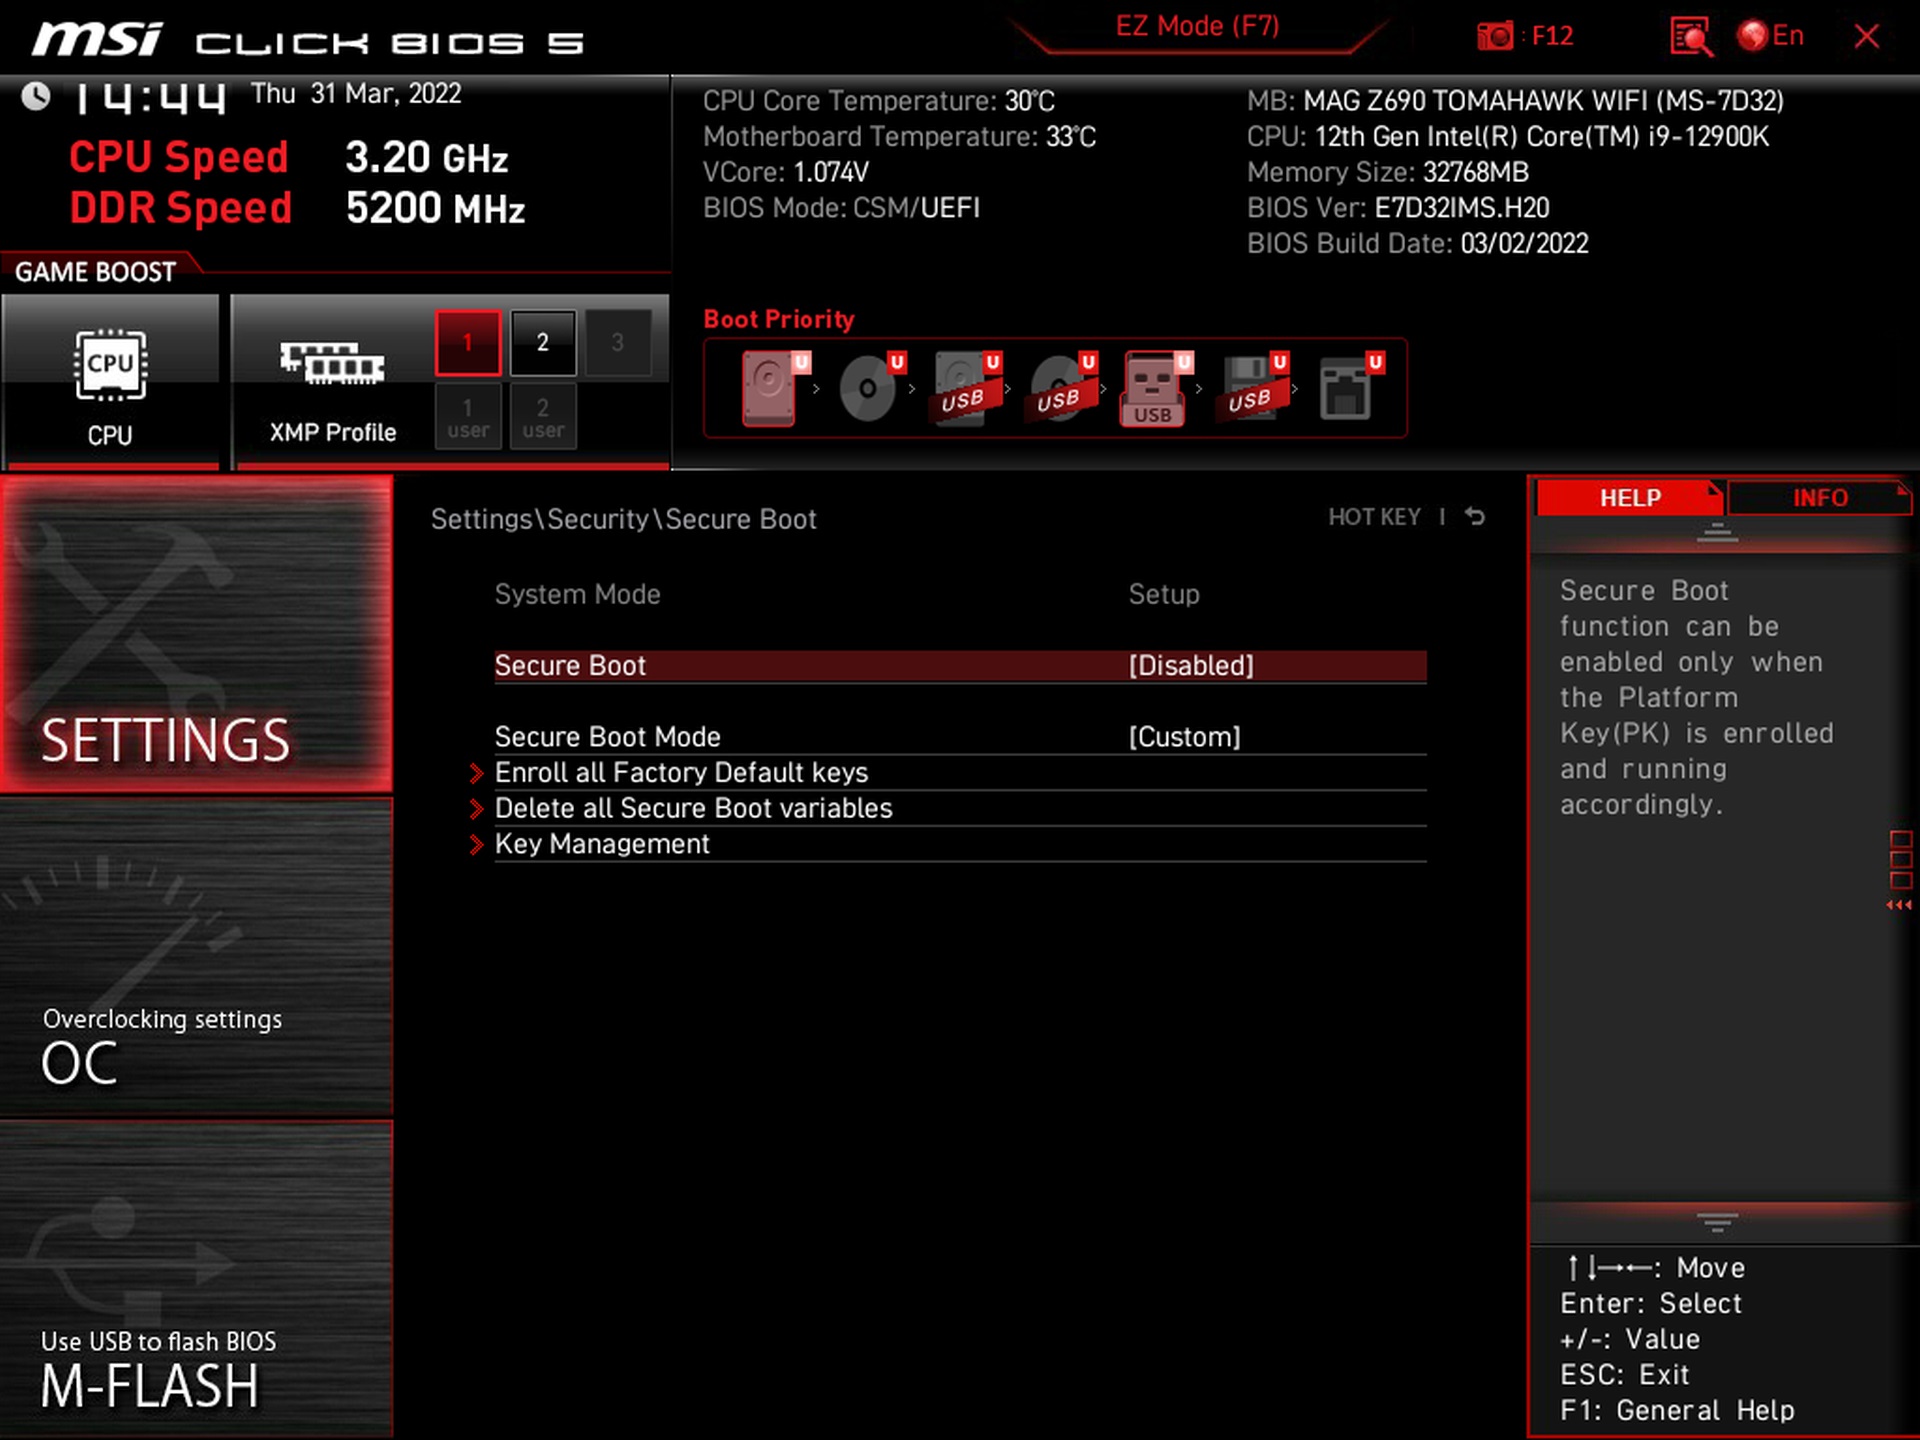
If you want to format some of the installed SSDs, there is a tool for this (Secure Erase+) in the settings tab. Among other things, you can also manage security settings, TPM or Secure Boot here.

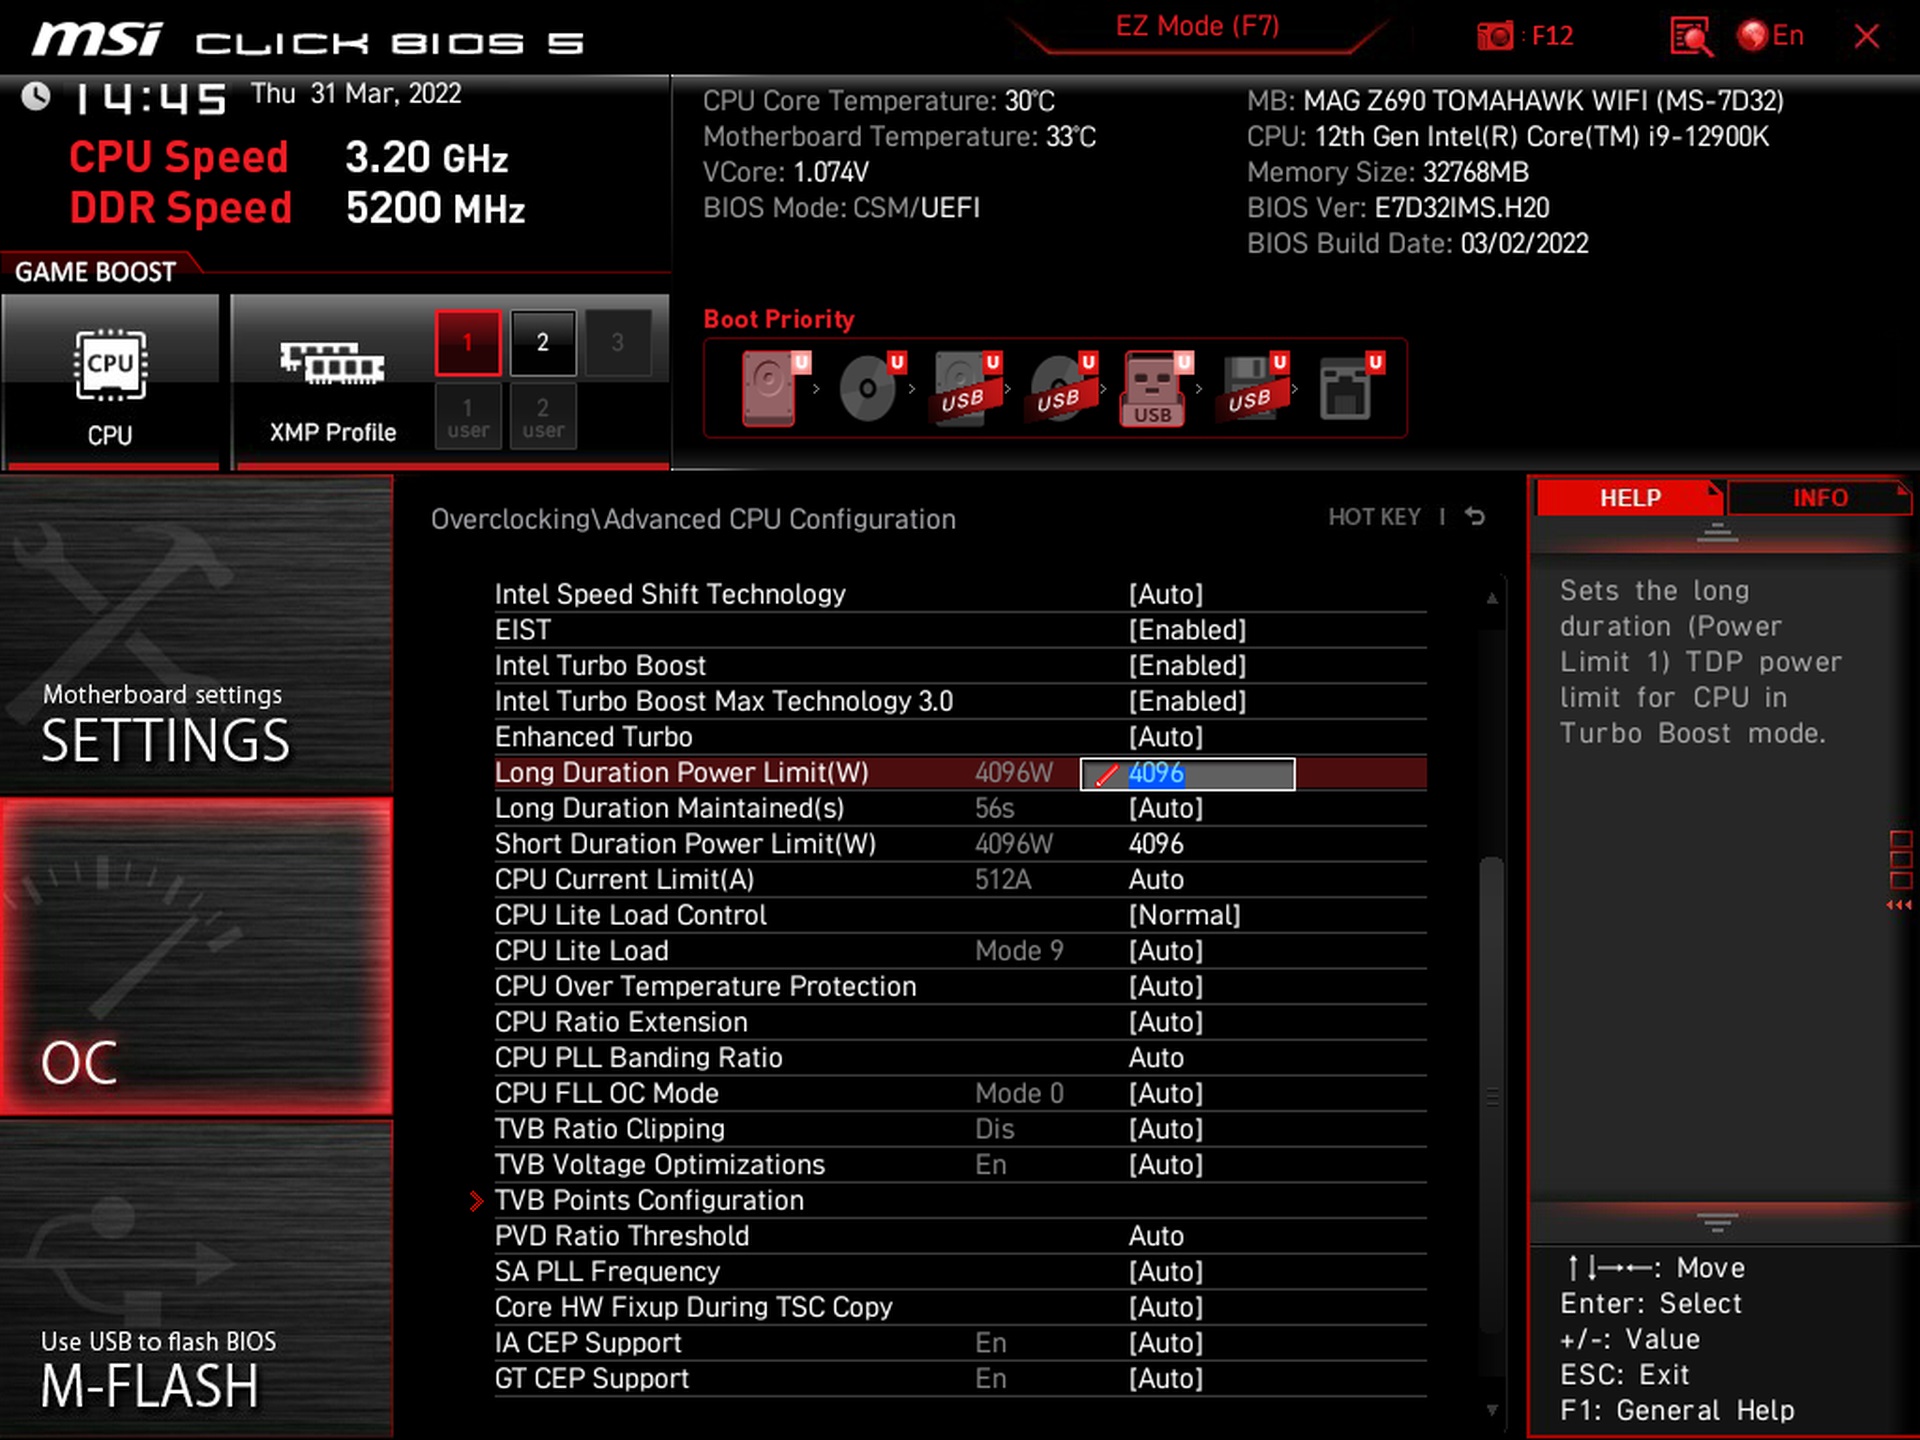
Managing the performance stuff around the processor is naturally under the “OC” tab. For quick power limit settings, MSI has three preset profiles. Their content varies with respect to the processor used.

With open multiplier processors, however, the “Water Cooler” profile has both PL1 and PL2 fully unlocked (symbolically set by the 4096 W number). But you won’t lose performance even after selecting the PL1 profile at 288 W, which doesn’t limit even the Core i9-12900K. The biggest differences depending on the installed processor are within the “Boxed Cooler” profile, which for Core i5 with locked multiplier respects Intel’s recommended PL1 value for long-term load – 65 W (TDP).

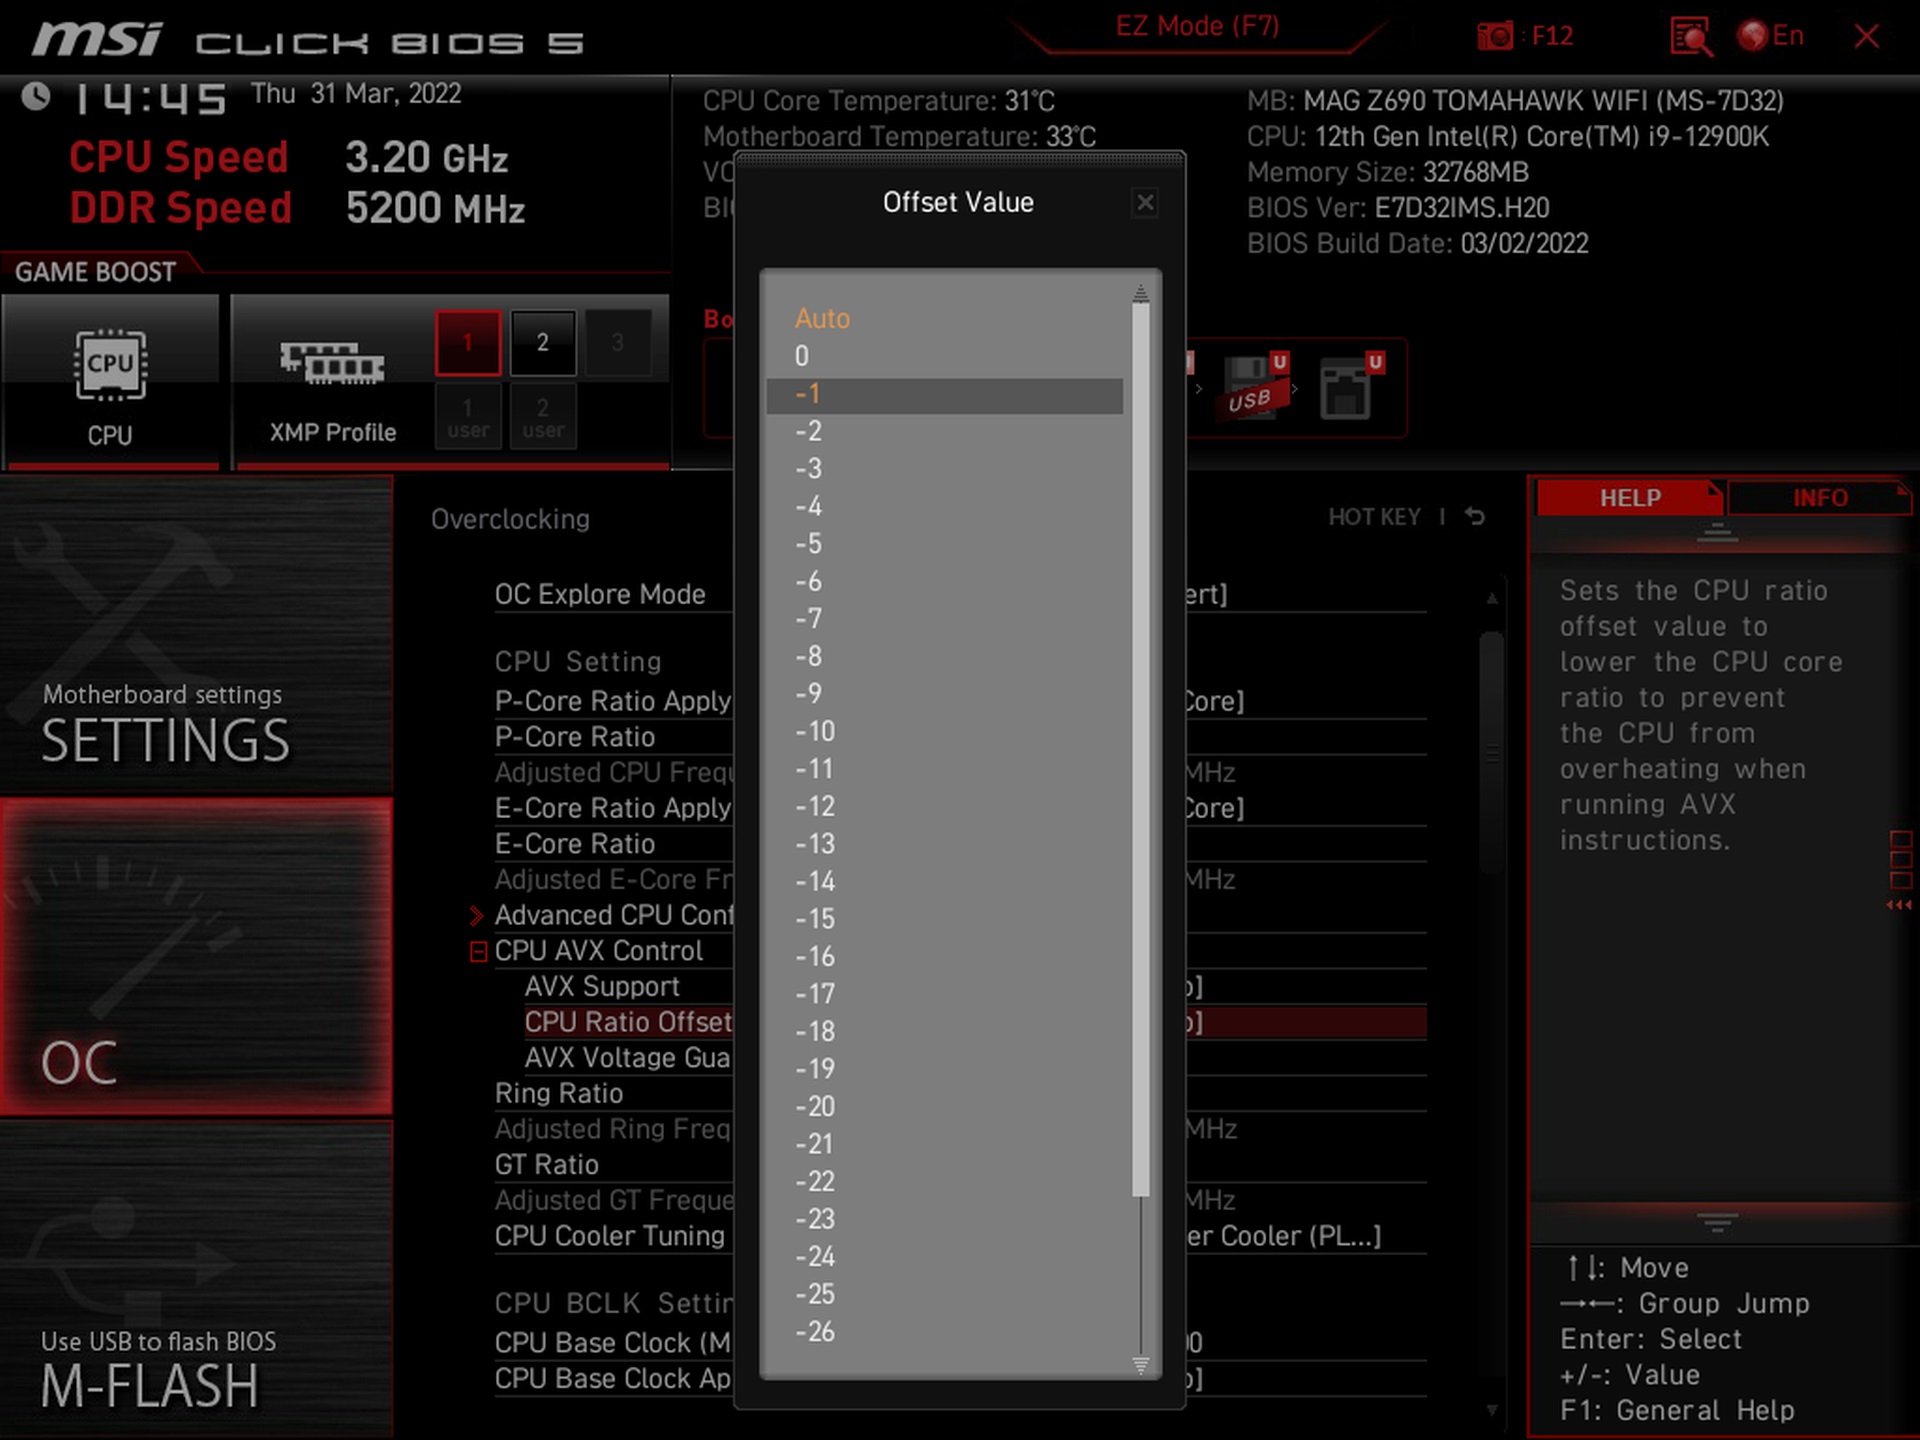
You can manually adjust the negative offset level in the section controlling the processor’s behavior under load with AVX instructions. While the all-core boost frequencies will be slightly lower than the CPU achieves in games, for example, the reward is supposed to be lower power draw and better efficiency. The impact on performance is typically quite small, because the AVX instruction is usually associated with a multi-threaded workload, in which it doesn’t matter so much whether the core frequencies are 100 MHz higher or lower. It doesn’t reflect too much on machine time.
On the other hand, to increase the multiplier above the standard all-core boost all P and E cores are possible with the “Game Boost” option. Performance in games can thus be increased, but this gain will always be disproportionate to the increase in power draw. Even in Full HD with the most powerful graphics cards, when the increase is highest, the frame rate will only be higher cosmetically even in the best cases. But power draw will increase quite significantly. The power draw of the Ci9-12900K test processor increased by roughly 24–26 % (approx. 30 W) under gaming load.
To keep the processor stable even at higher frequencies, the board sets a more aggressive power supply. In Game Boost mode, by the way, there is no tweaking of small things that could improve efficiency – everything is in the motherboard’s automatic control.

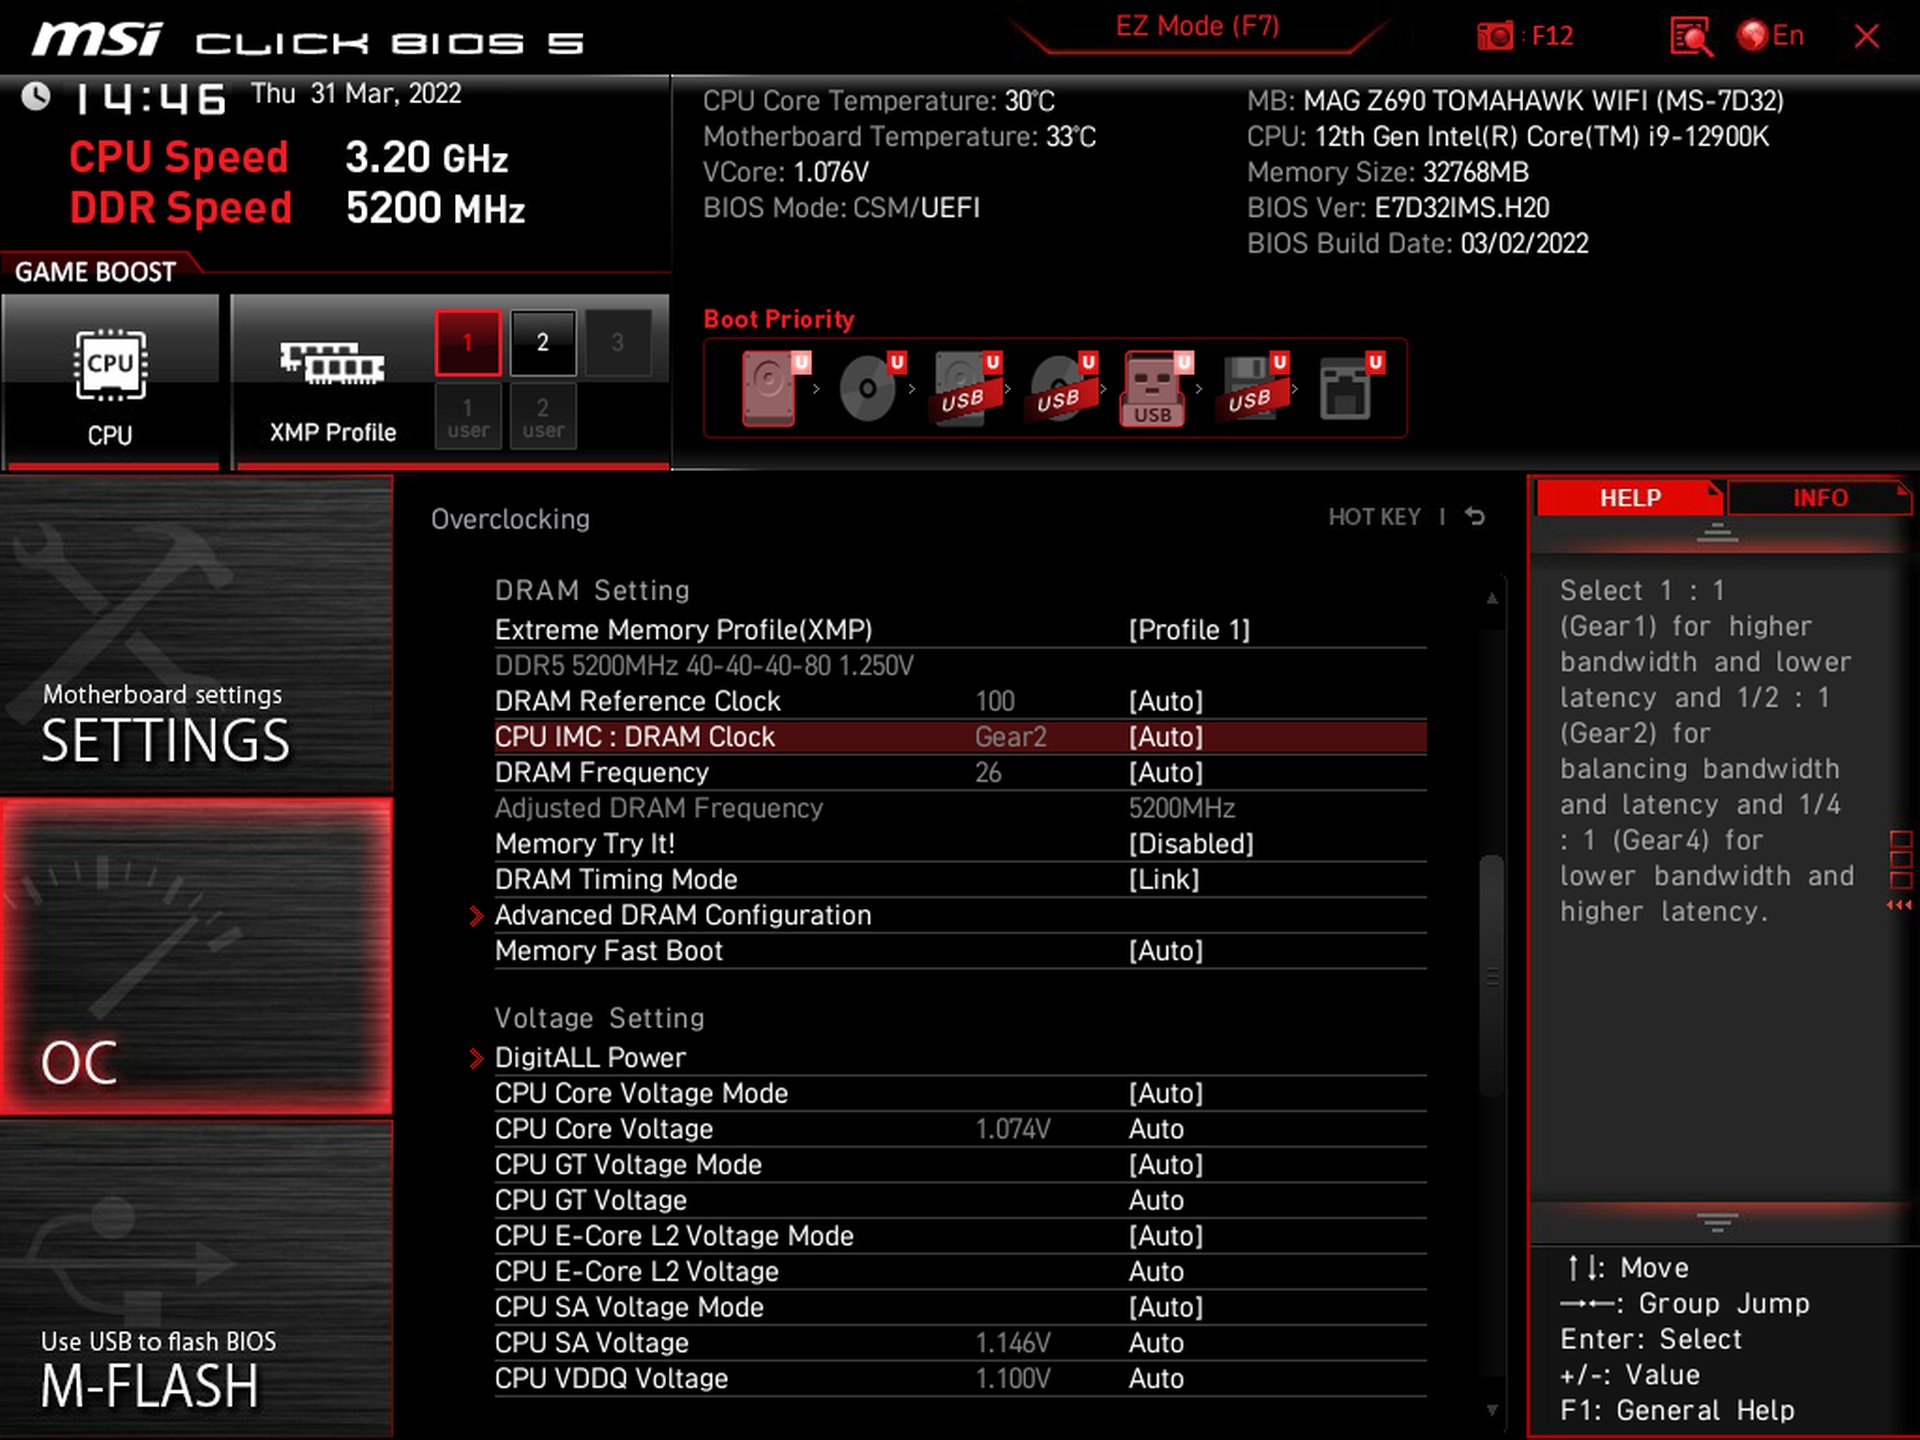
The CPU settings are one thing, and the memory settings are another. With XMP enabled, it doesn’t stop there for more demanding users and at the very least they will consider the memory controller frequency setting. We’re talking about options that are marketed as Gear 1 and Gear 2. With the Gear 2, the IMC frequency is halved, but that doesn’t mean performance always has to be worse. We’ll cover this issue in detail in a separate article and for now we’ll just note that the Z690 Tomahawk board prefers the Gear 2 and we’re not changing that.
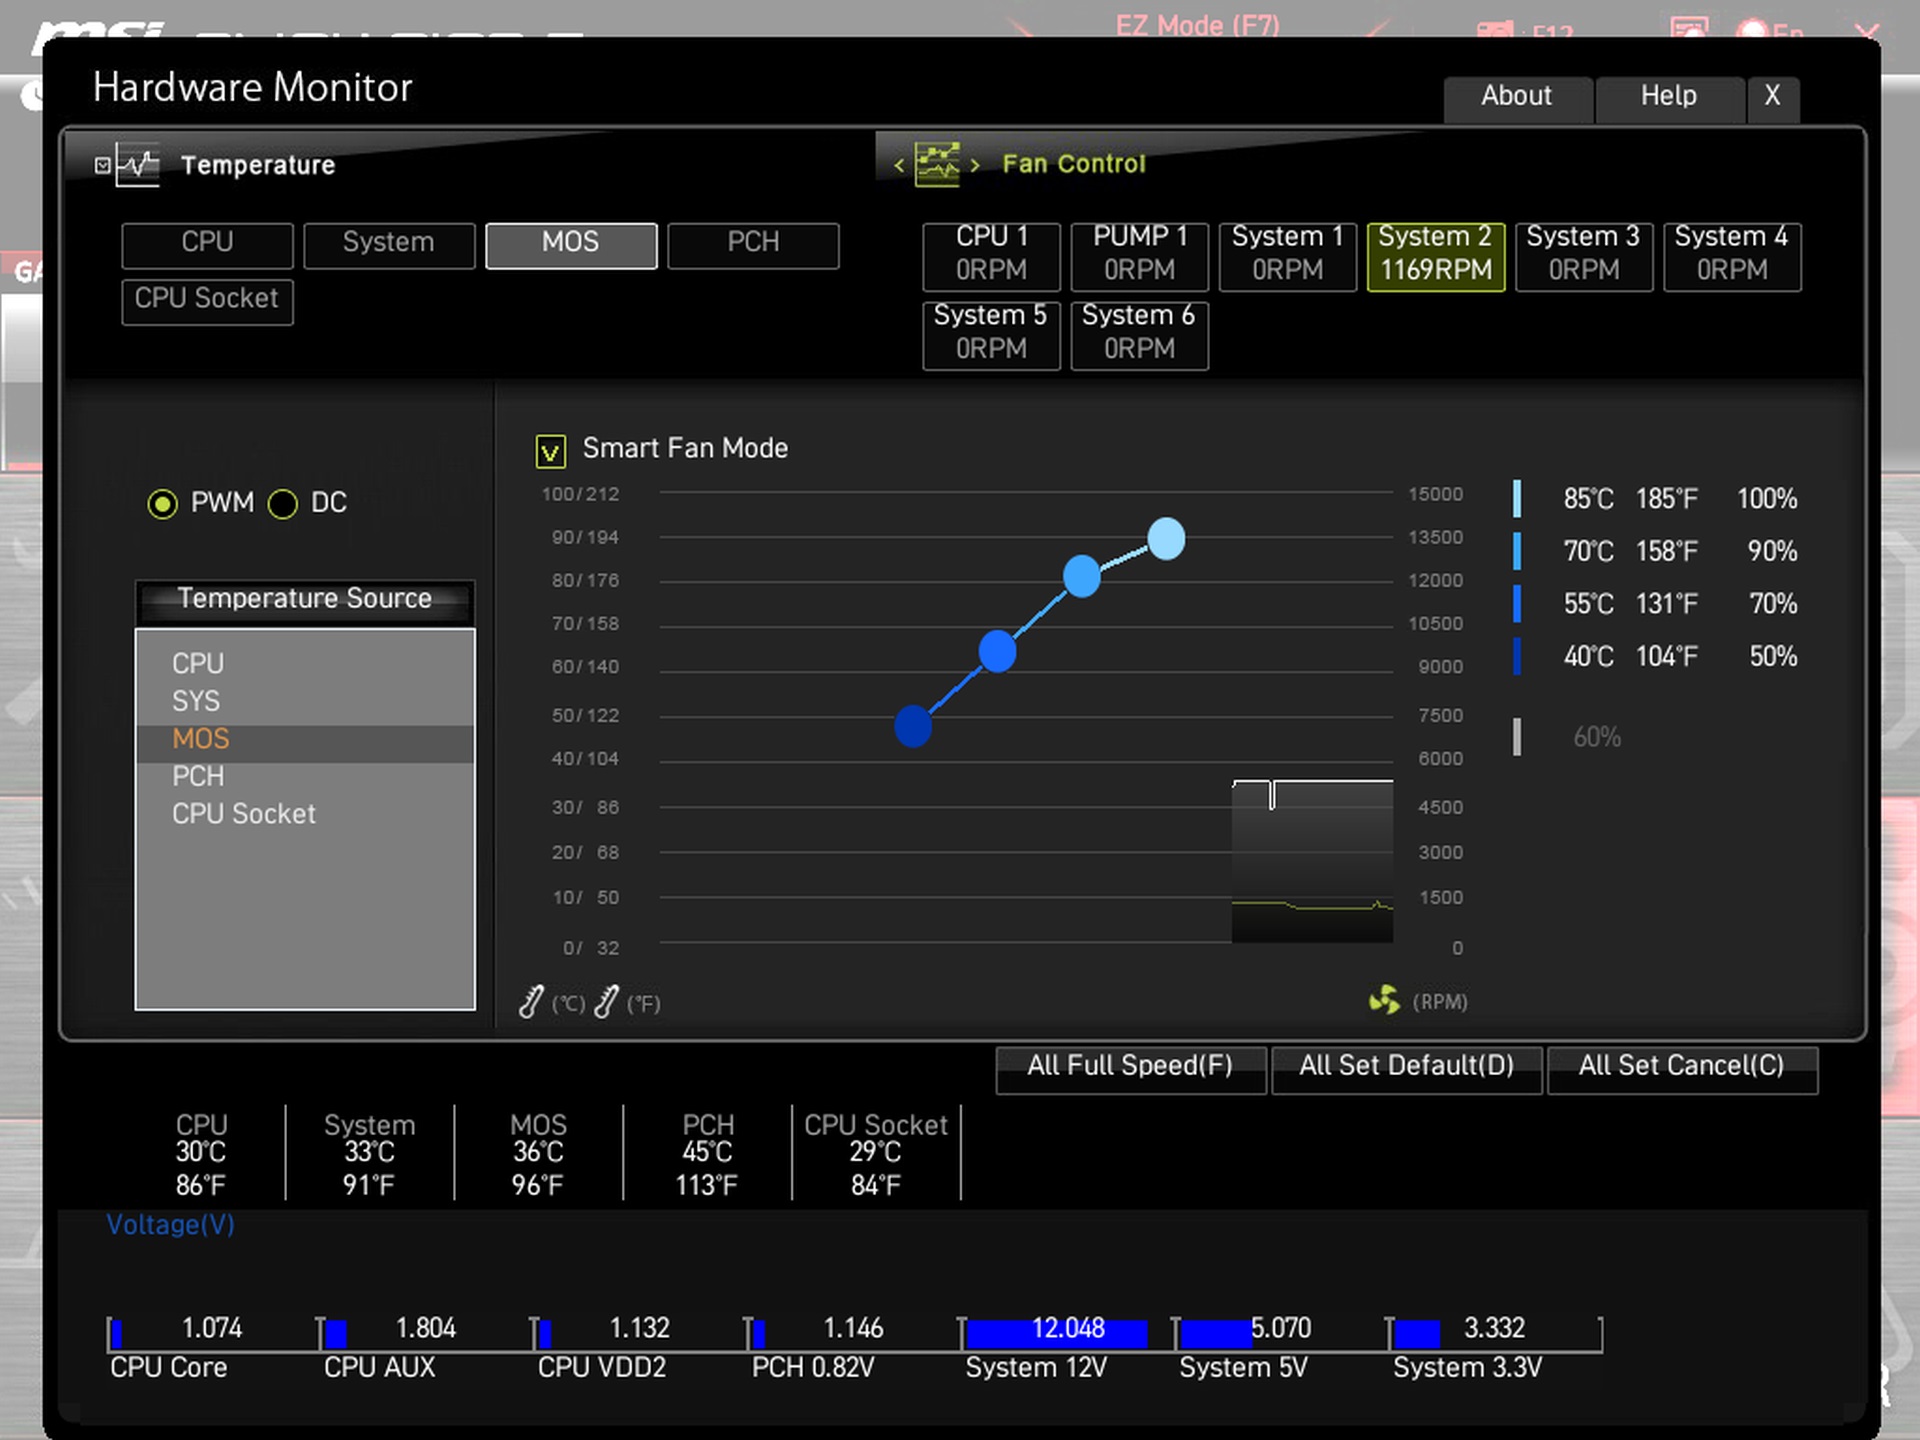
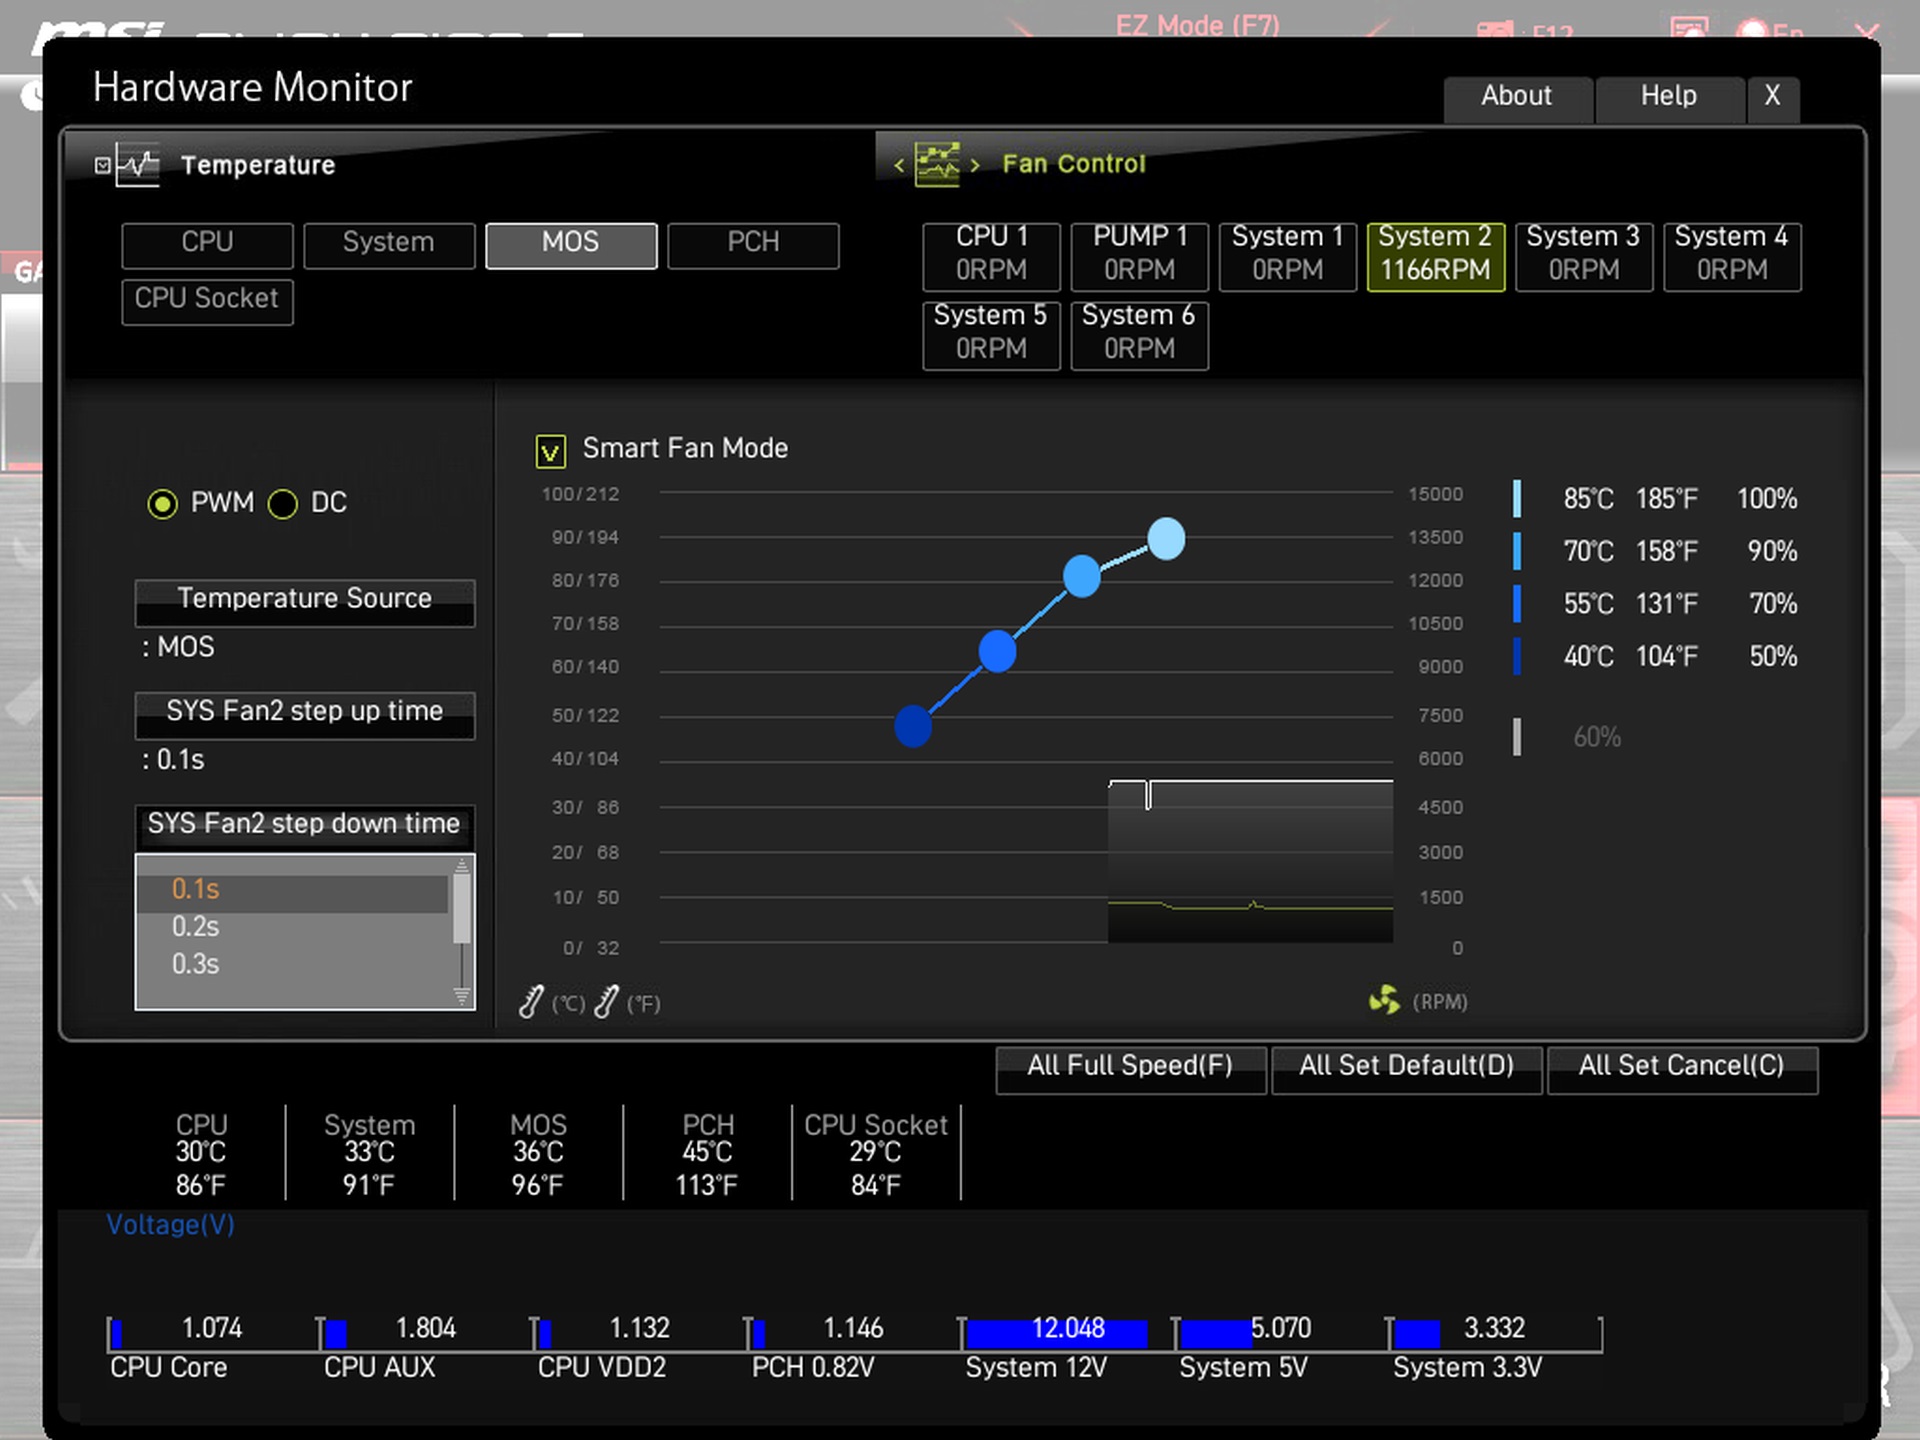
The fan management interface is excellent. A custom speed curve can be fully configured for each of the eight connectors, for both PWM and DC control. And why is it excellent? Because of the fact that the intensity of the regulation can be based on five different temperature sensors, which is not the case with all boards, and they differentiate only one heat source (the sensor in the processor).

- Contents
- MSI MAG Z690 Tomahawk WiFi in detail
- What it looks like in the BIOS
- Methodology: Performance tests
- Methodology: How we measure power draw
- Methodology: Temperature and frequency measurements
- Test setup
- 3DMark
- Borderlands 3
- F1 2020
- Metro Exodus
- Shadow of the Tomb Raider
- Total War Saga: Troy
- PCMark and Geekbench
- Web performance
- 3D rendering: Cinebench, Blender, ...
- Video 1/2: Adobe Premiere Pro
- Video 2/2: DaVinci Resolve Studio
- Graphics effects: Adobe After Effects
- Video encoding
- Audio encoding
- Photos: Adobe Photoshop, Affinity Photo, ...
- (De)compression
- (De)cryption
- Numerical computing
- Simulations
- Memory and cache tests
- M.2 (SSD) slots speed
- USB ports speed
- Ethernet speed
- Power draw curve (EPS + ATX connector) w/o power limits
- Power draw curve (EPS + ATX connector) with Intel’s power limits
- Total power draw (EPS + ATX connector)
- Achieved CPU clock speed
- CPU temperatures
- VRM temperatures – thermovision of Vcore and SOC
- SSD temperatures
- Chipset temperatures (south bridge)
- Conclusion