
Building water cooling loops for PC is fun and the results are almost always attractive. Today, however, I would like to focus on water loop maintenance and also on problems if you neglect maintenance. Maintenance is not a very popular topic though, so it is often not given enough attention. I was renovating a neglected water loop, where I would like to demonstrate the risks of insufficient maintenance. The following visuals may be drastic. 🙂
High temperature and noise
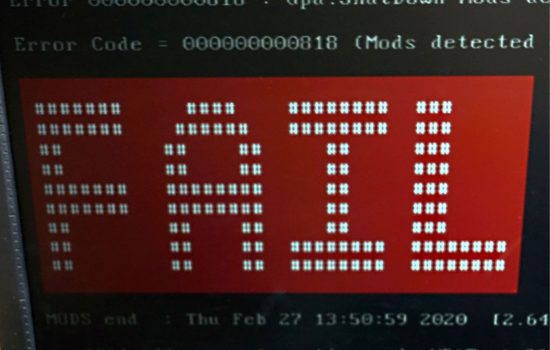
It’s been over two years since I built a complete PC, including a water loop for my friend. I strongly warned him from the beginning that the water loop needed regular maintenance. It is a good idea to check it visually from time to time, and the fluid in the loop needs to be changed at least once a year. However, he ignored my advice and recently wrote me a desperate e-mail that he was done. His PC is suddenly quite noisy and also lacks the performance it had before. From this information, it was clear to me that this was probably a cooling problem. A fault in the pump or fans was quickly ruled out remotely, but a detailed inspection of the cooling blocks still remained. It required to cover a distance of almost 300 km and also to cross one state border.
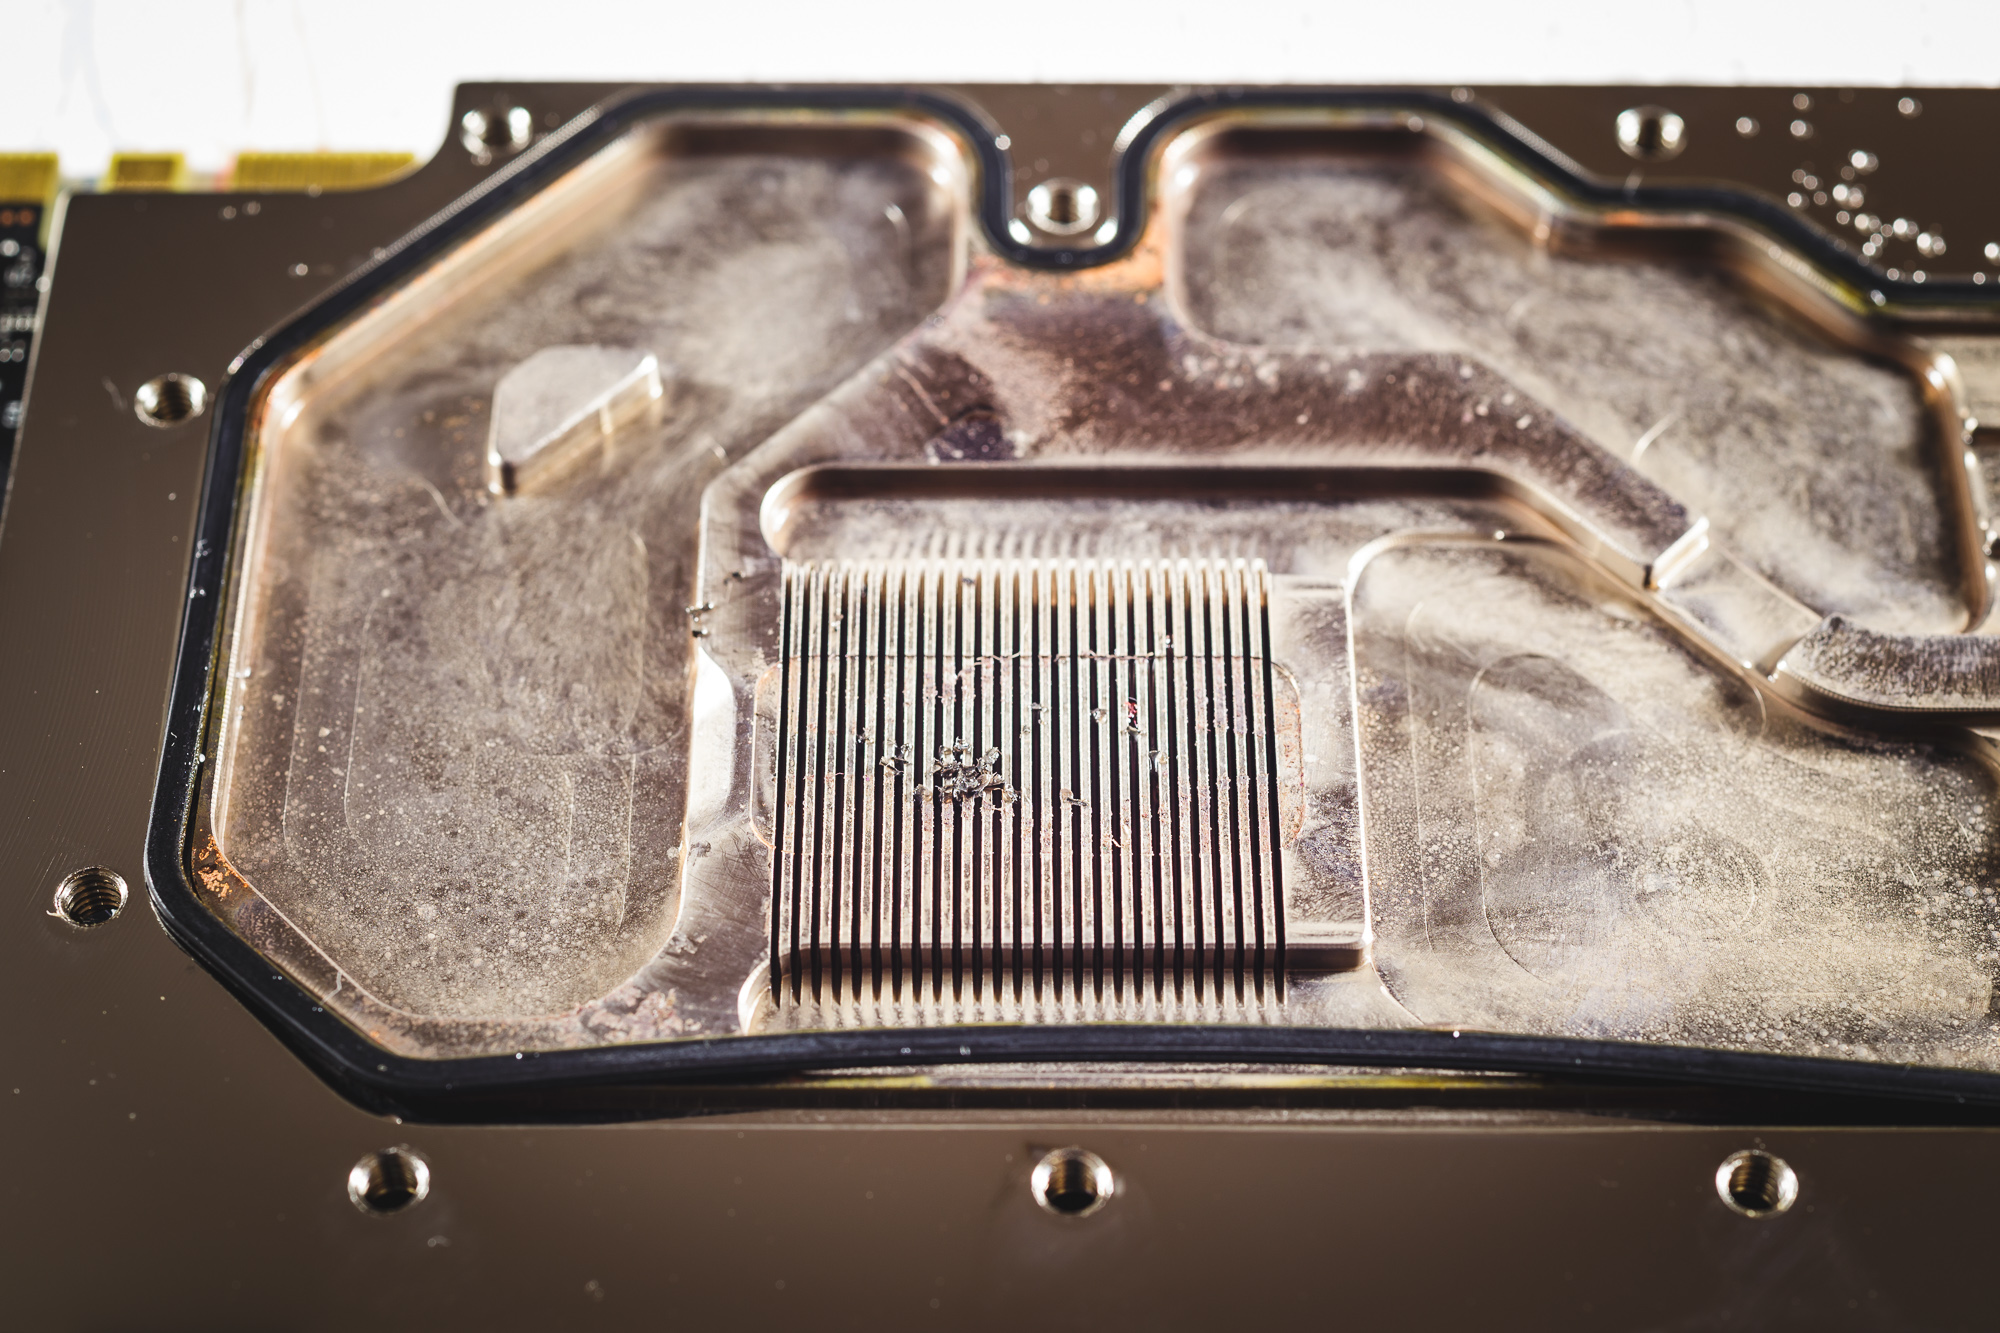
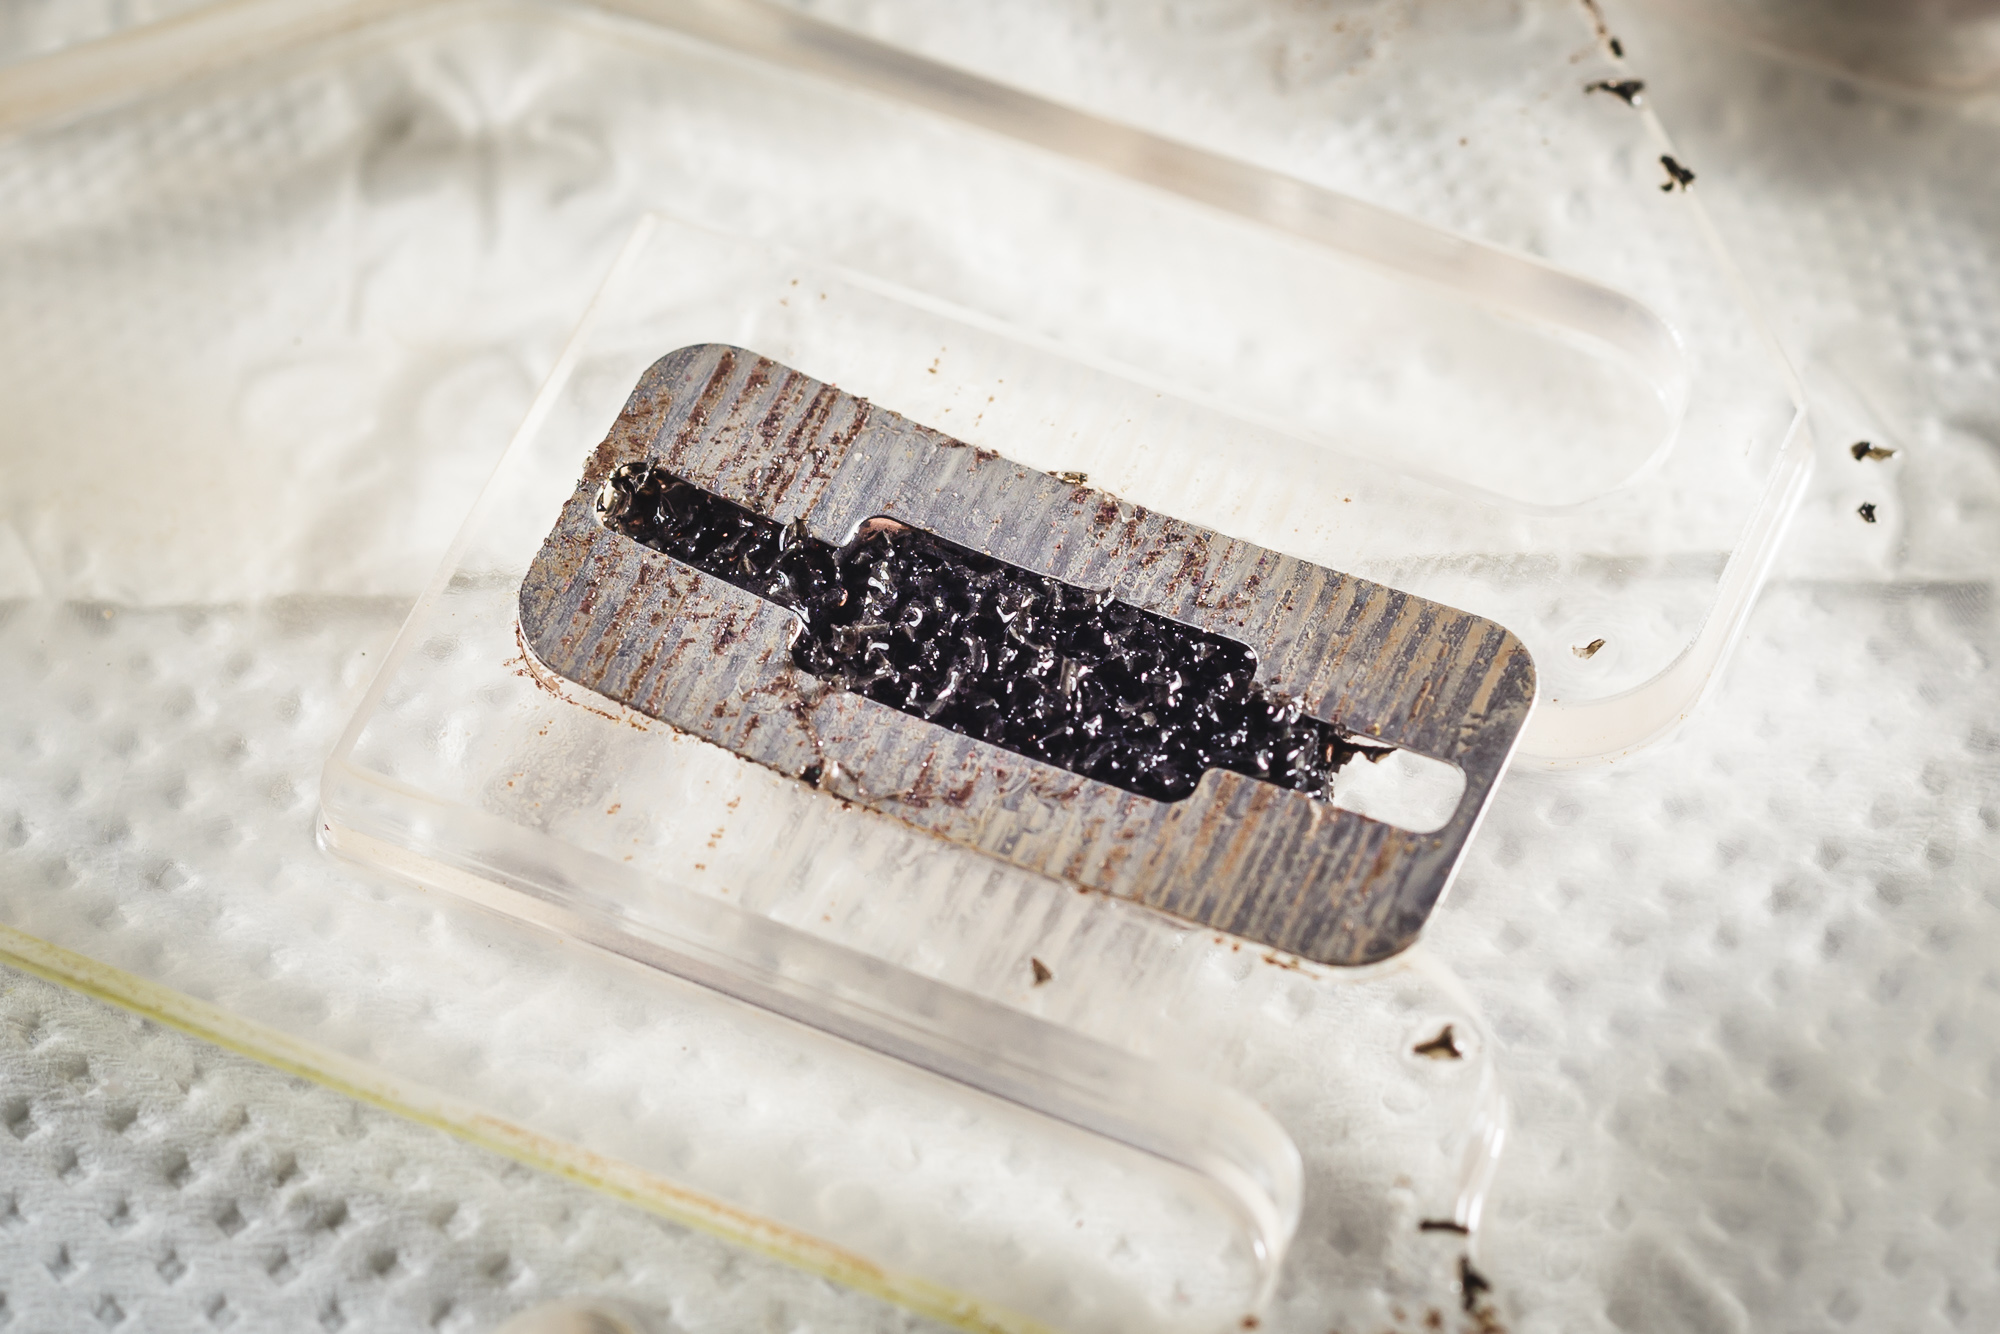
After a detailed inspection of the cooling loop, it was clear to me that the biggest problem is in the graphics card block. In the part of the block where there are cooling ducts for heat exchange between the GPU and the liquid, there was a strange black-gray material. This practically prevented the flow of liquid through the block, which logically made the whole loop ineffective.

There was nothing to do but disassemble the whole block and clean it thoroughly. But it was still not entirely clear to me where the material that clogged the cooling ducts in the block came from. It was too big for a sediment from the liquid and it didn’t look like remnants of the solder from the radiator. In addition, I flushed the radiator with several liters of distilled water through the loop during the installation. So I dismantled the cooling block from the graphics card and then I disassembled the whole block into individual parts. The metal parts of the block looked fine, except for minor color changes that are quite common after a while. This is not usually corrosion, but erosion of the nickel surface due to turbulent flow in the fluid. Aesthetically, it may not look nice, but it usually does not affect the cooling properties.
Small sedimentary deposits around the seal may also be quite common, but here it depends on the type of fluid you use in your loop. Clear colorless liquids are usually safe in this regard. However, different pastel colors or opalescent mixtures such as Mayhem Aurora or Primochill Vue are usually a recipe for problems if you do not change them regularly. However, all the metal parts of the block looked acceptable and it was not a problem to clean them. An old toothbrush, water with a little detergent, and a soft microfiber cloth simply dealt with minor dirt. It was just necessary to pay more attention to the seal, which can be easily damaged or torn due to use of excessive force.
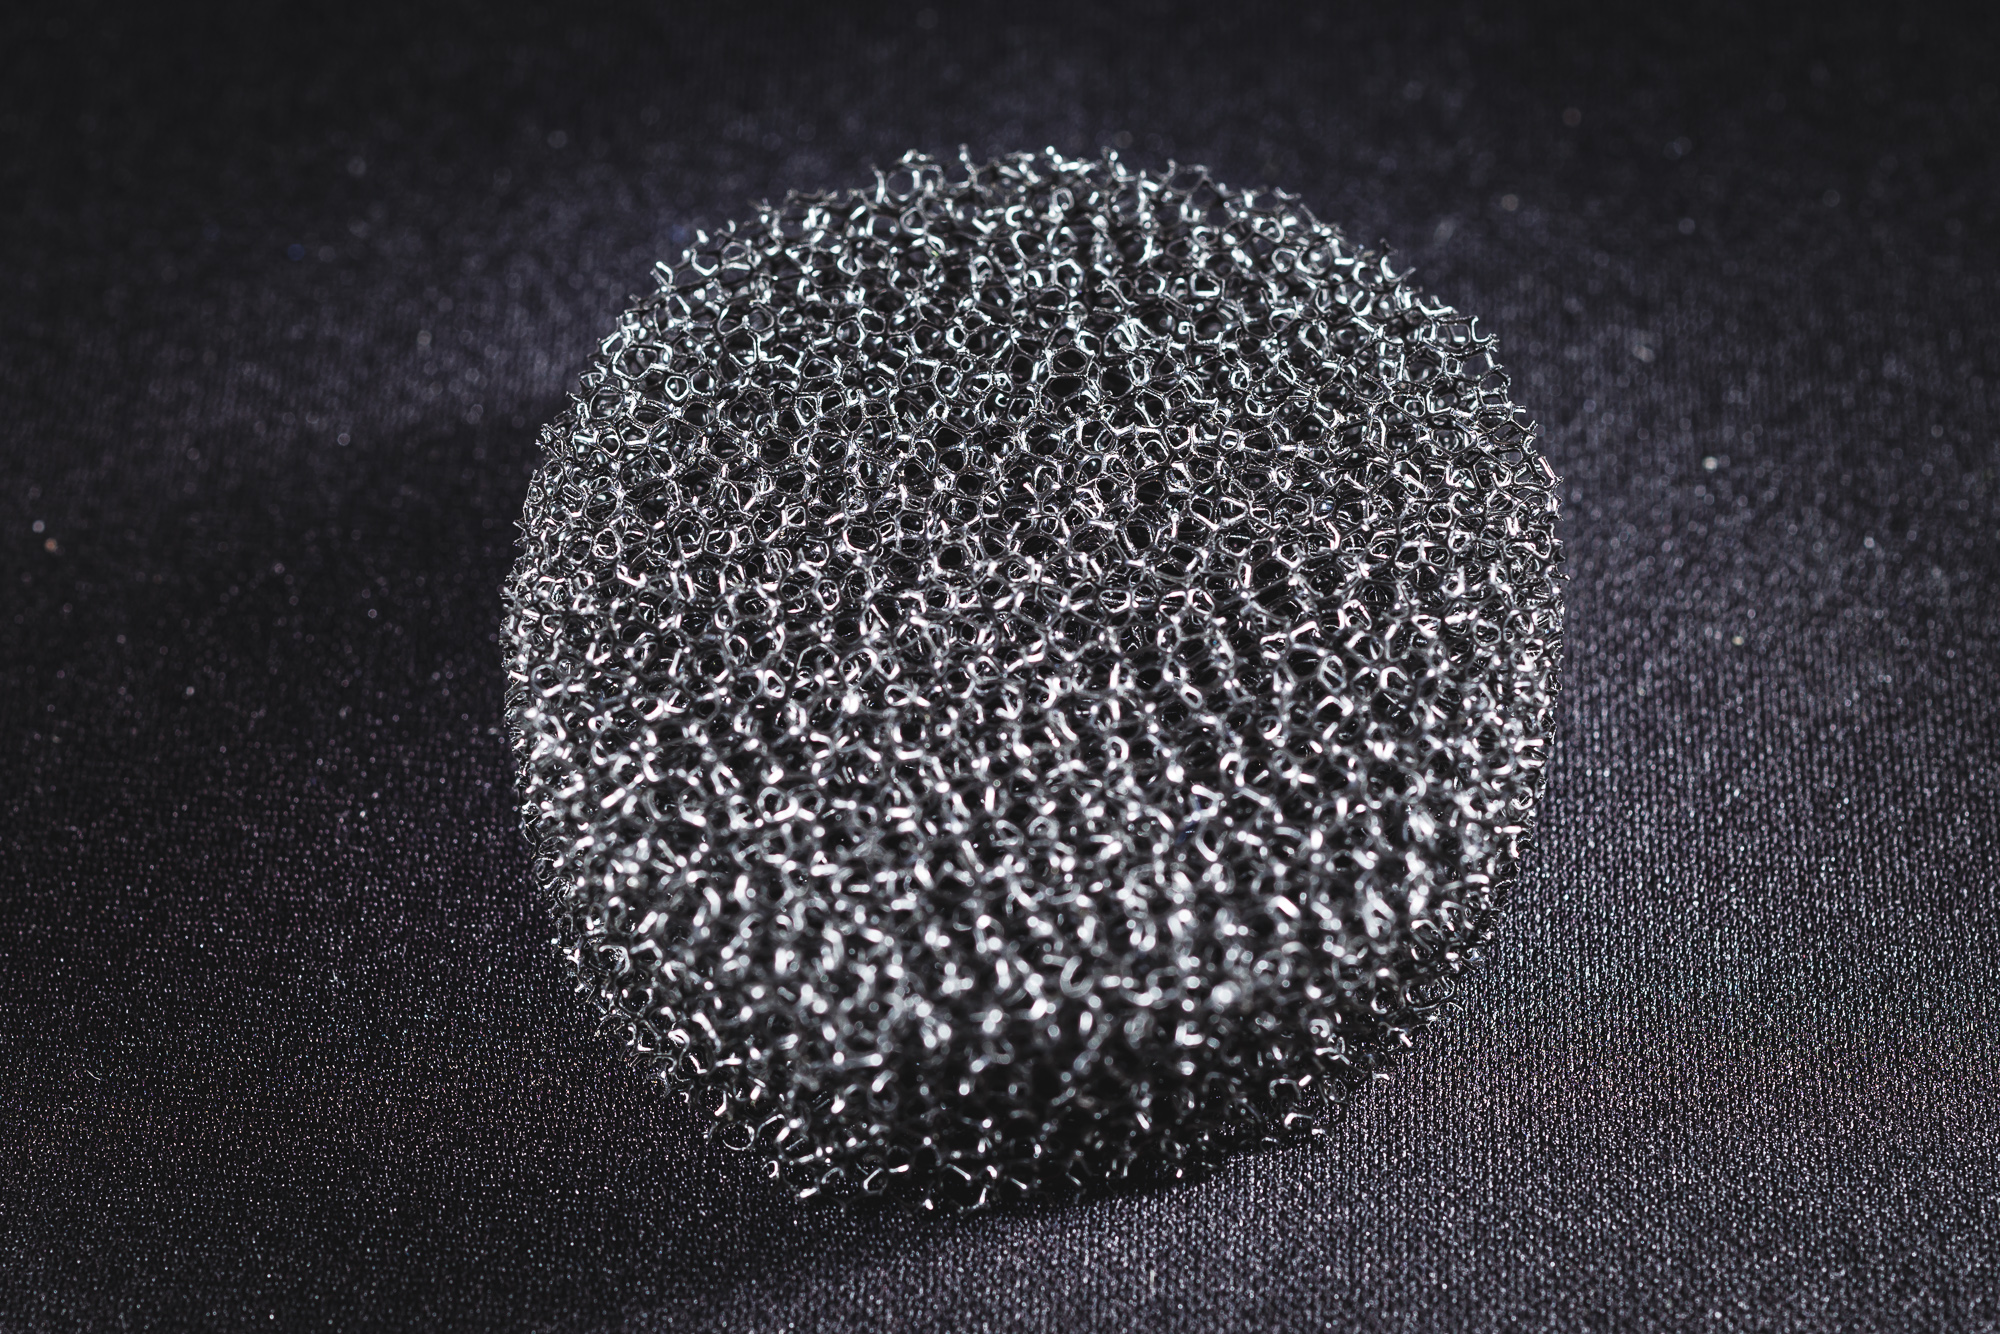
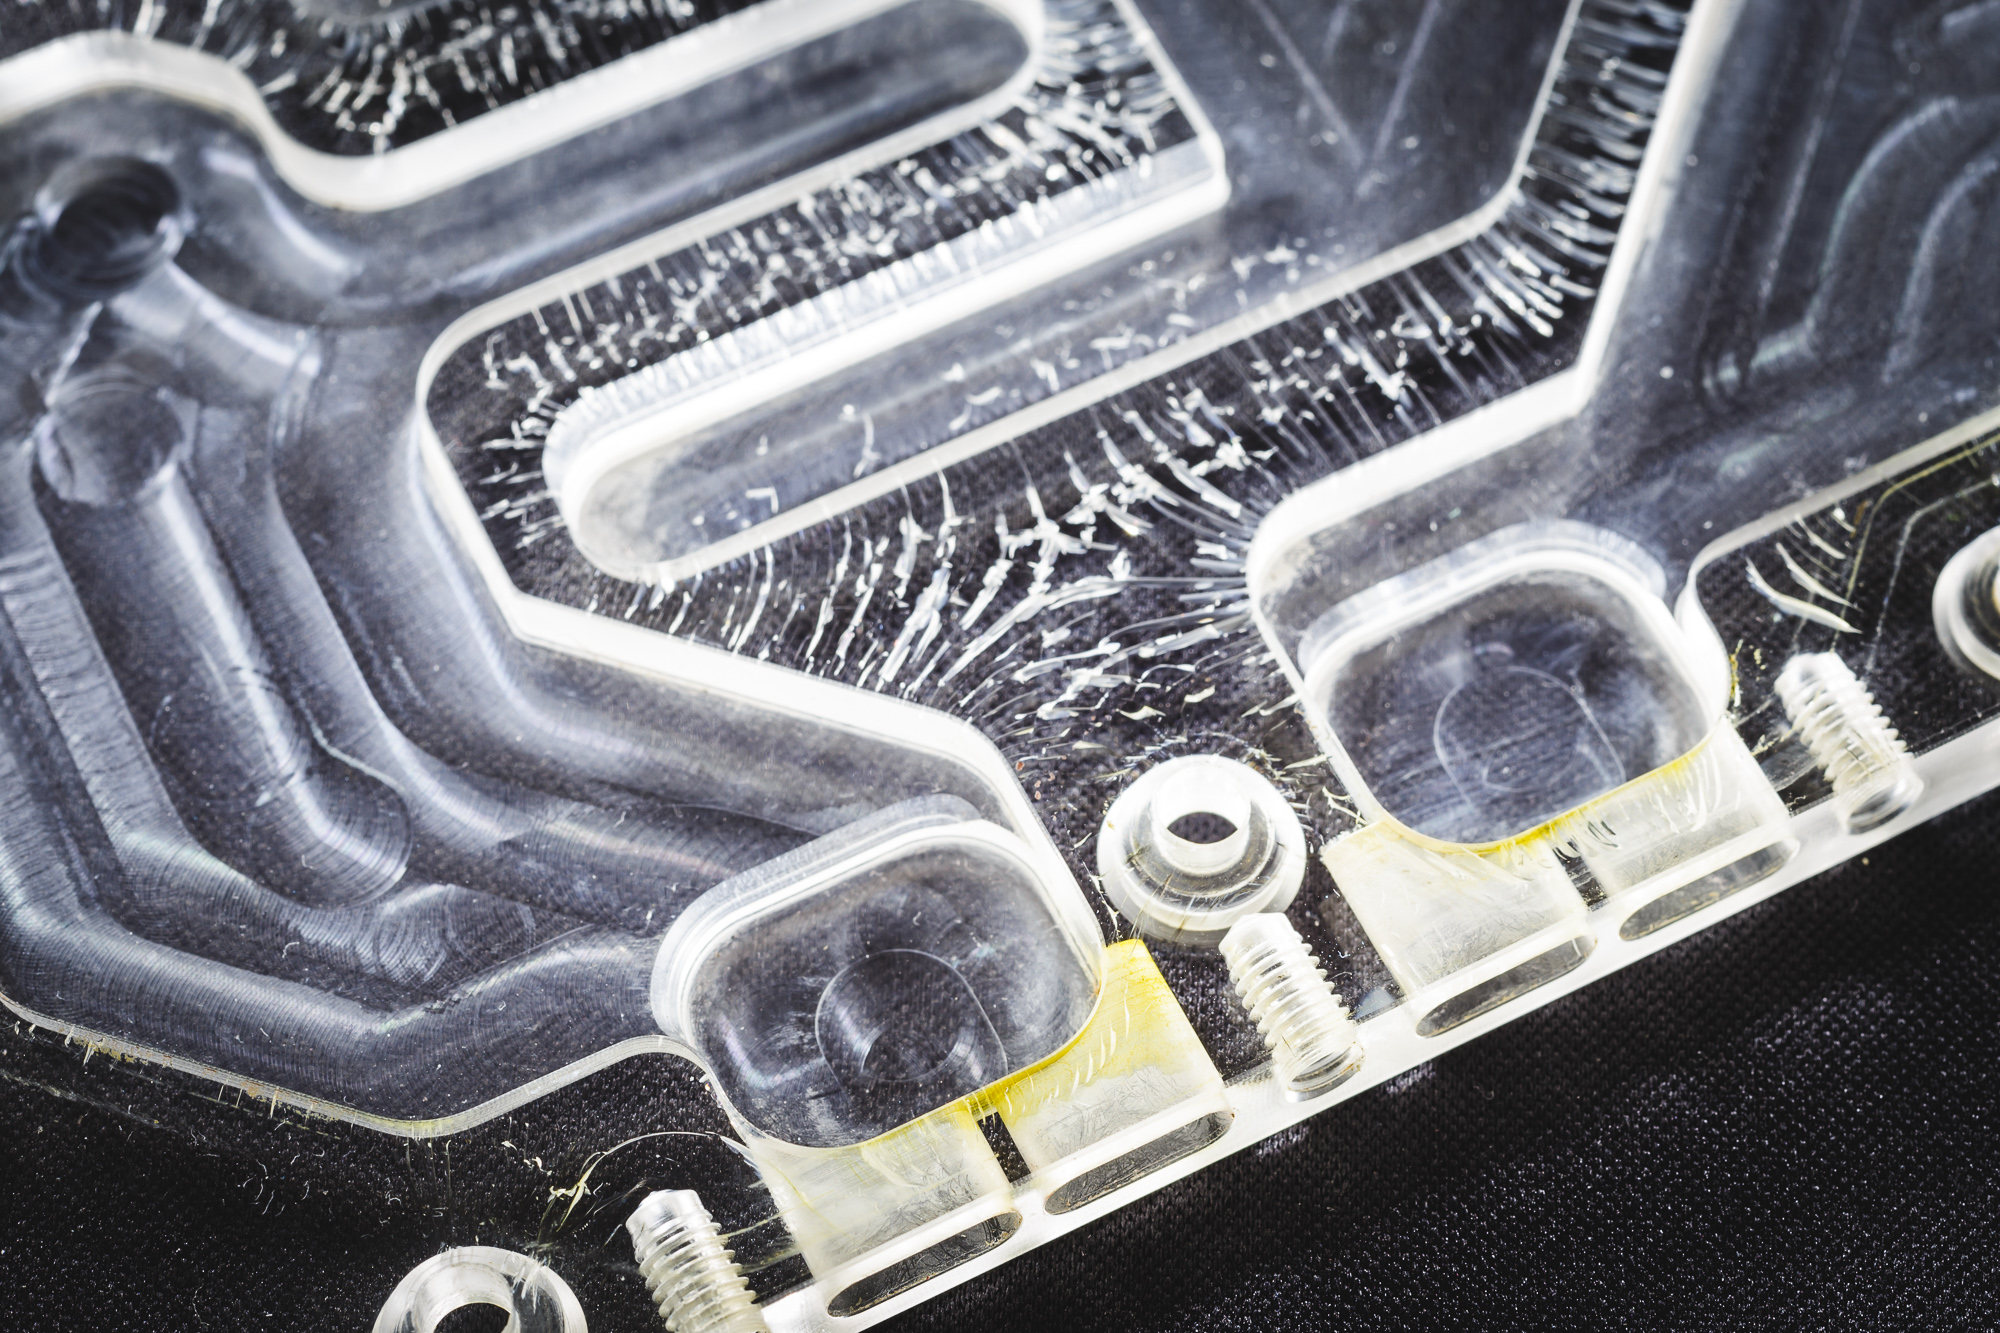
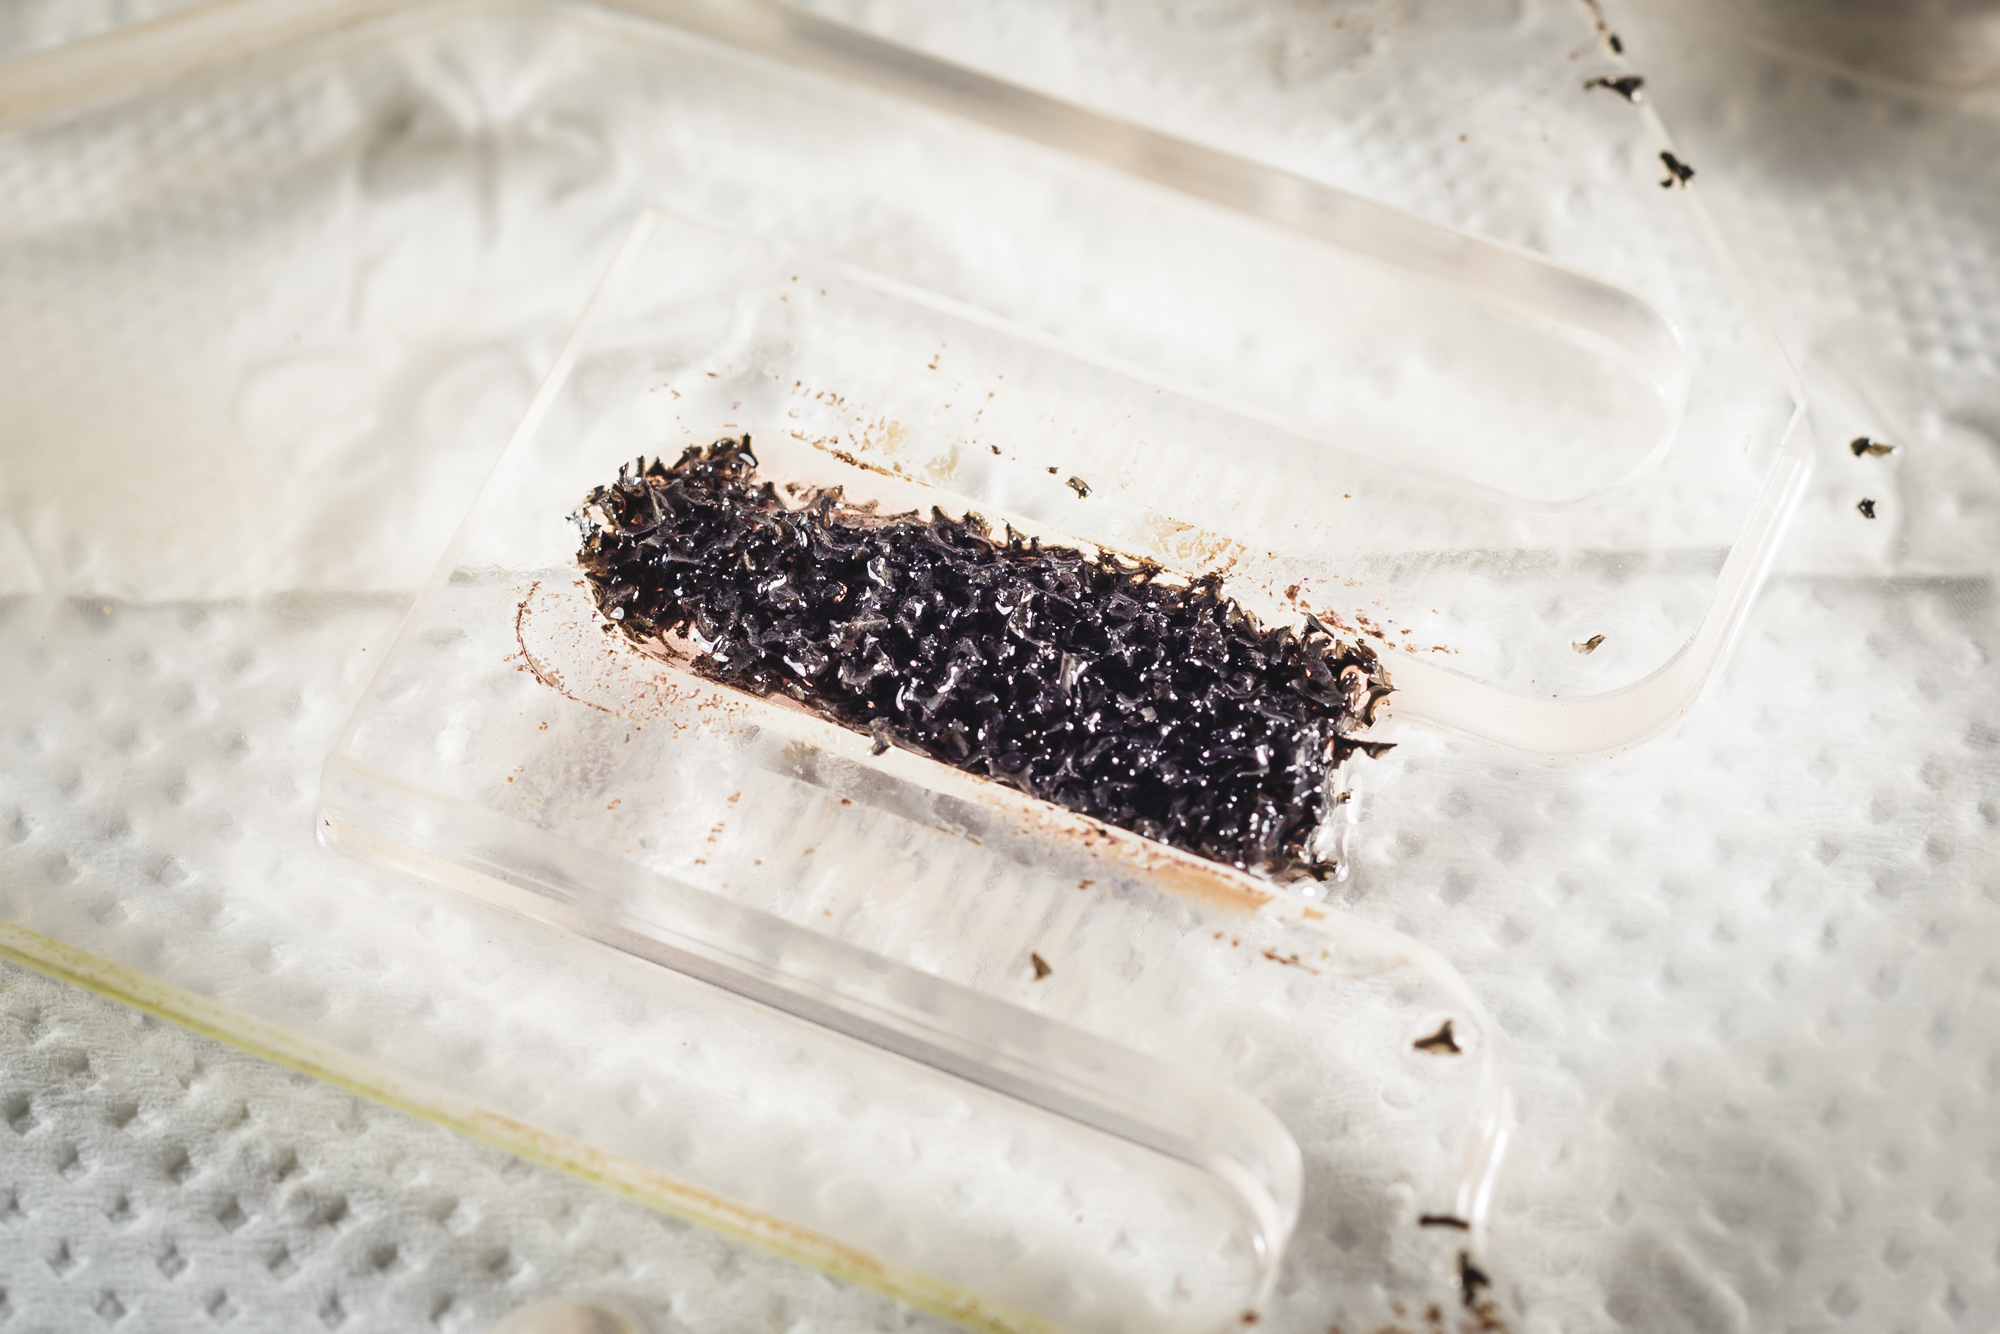
It’s time to inspect the acrylic plexiglass cover. After removing the metal nozzle, it can be seen that the material fills literally the entire chamber around the GPU part. Before disassembly, I also had a big problem with draining the liquid from the block. The flow resistance was really high. The black material crumbled, but it did not smear on fingers or give the impression of metal. It looked more like fragile plastic sawdust. Where the hell did this come from? It wasn’t until I cleaned the tank that I realized. Due to the shape and type of the tank, I had to use the supplied foam wheel (Anti-Vortex Foam) to prevent vortices in the tank. And this foam wheel has practically almost completely dissolved into small particles. These then flowed into the cooling block of the graphics card with a stream of liquid. There they got stuck in the first bottleneck, which were the cooling ducts for exchanging heat from the GPU.
I subsequently consulted this finding with the technical support of EK Water Blocks. I was told there that this phenomenon can actually happen from time to time. Insufficient maintenance of the loop is usually to blame. I was also told that this fact would be pointed out more in the description of the products where this foam is included. Personally, however, I cannot recommend its use at all. So if possible, use other methods of prevention against the formation of vortices in the tank.