We recently looked at different profiles in AMD Software, and today we’ll dive deeper into adjusting the fan control settings in more detail. First, we’ll test how fan performance affects the card’s behavior across the entire working range of fan speeds. Then we’ll focus on how fan control behavior differs between automatic and manual fan-speed settings, and on how to set the fan-control curve settings for the card.
Default settings vs. Fan Control, controlled by GPU temperature sensor
From the previous chapters, it’s clear that when the default curve loads in AMD Software, the control behavior changes dramatically compared to the automatic setting. It seems that in Manual mode, the fan curve designed for average GPU-temperature control is being used for hotspot-temperature control instead.

It was easy to check how the fan control would behave: I entered the same control points into a curve in Fan Control and set the fans to follow the overall GPU temperature (the “GPU Temperature” sensor) instead of the hotspot (the hottest point on the die), which reports lower values.
The first control point sits where the card runs in passive mode with AMD Software automatic fan control. The fans turn on at 50 °C at 36% speed, and I mirrored that in Fan Control. The remaining points match the curve from AMD Software—52% at 61 °C, 68% at 72 °C, and 100% at 80 °C.

With this setup, we ran both stress tests again. The results didn’t match the original fan-control behavior perfectly, but they were very close—much closer than with any of the settings from the previous chapters.
Cyberpunk 2077, BIOS Quiet, default settings vs. Fan Control (GPU Temperature sensor)
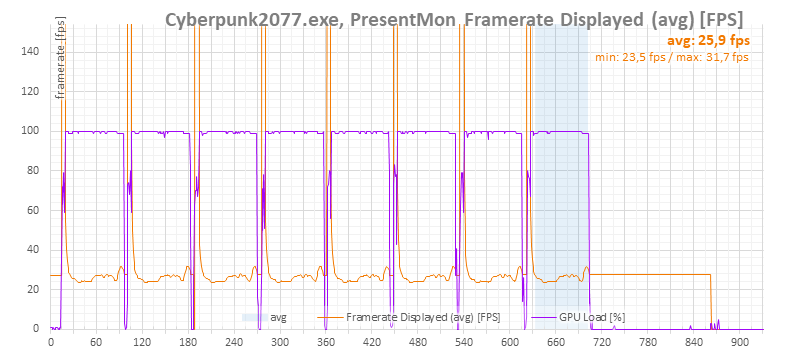
The first performance test was conducted using the Cyberpunk 2077 benchmark with RT Medium settings at the native resolution of 3840 × 2160. It consists of eight consecutive runs, with average values taken from the final run.
You should see the results in the interactive graphs, which switch when you hover over them. If they don’t work, the same graphs are available below as clickable thumbnails that open in a lightbox.
Performance differs from the default setting only within the margin of measurement error.

Default setings | Fan Control (GPU Temperature)
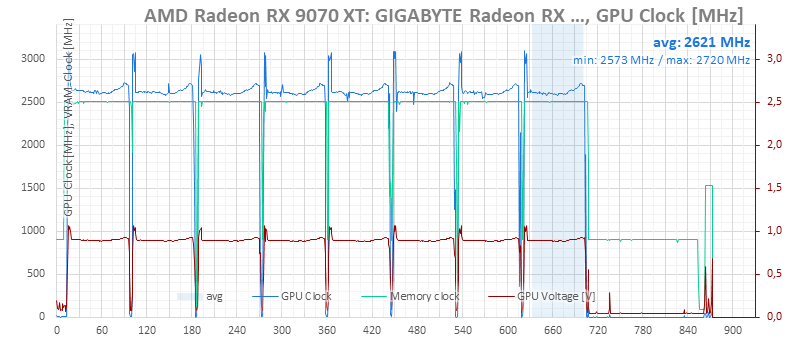
The GPU clock increase is negligible—practically unchanged.

Default setings | Fan Control (GPU Temperature)
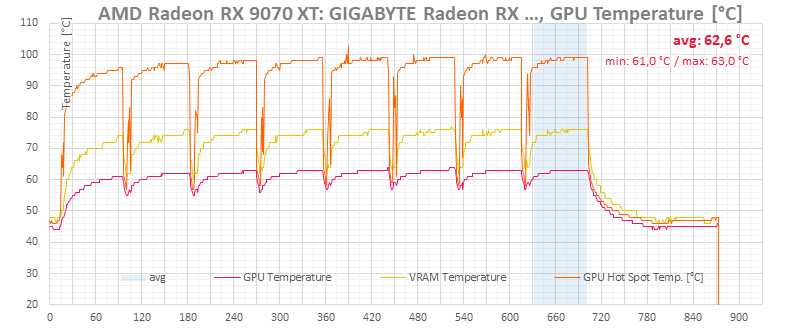
Temperatures are a little lower, likely thanks to the slightly higher fan speed.

Default setings | Fan Control (GPU Temperature)
The fans run a little faster, yet the curve is far closer to the original control than in the previous tests.


Default setings | Fan Control (GPU Temperature)

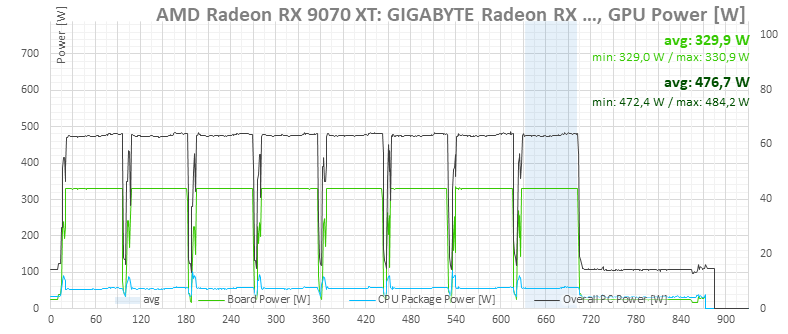
Default setings | Fan Control (GPU Temperature)
F1 24, BIOS Quiet, default settings vs. Fan Control (GPU Temperature sensor)
The next tests are from the F1 24 benchmark at 3840 × 2160 resolution with Ultra settings. This is a benchmark with five laps on the Singapore map in the wet. Unlike other benchmarks, this is a sustained load; there is no drop in load between test loops, and the card remains heated the entire time.
Even with sustained, longer load, the outcome resembles the automatic setting.

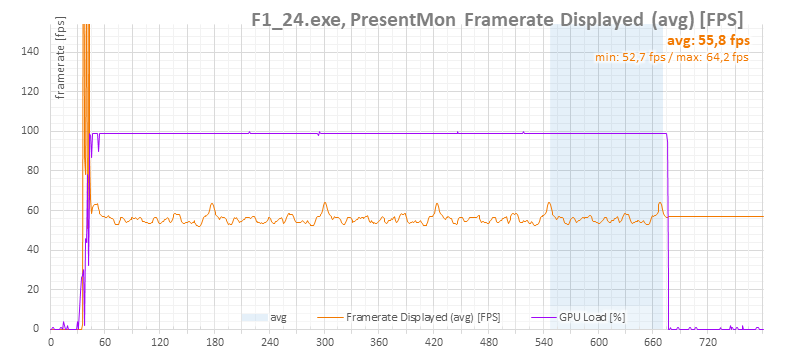
Default setings | Fan Control (GPU Temperature)

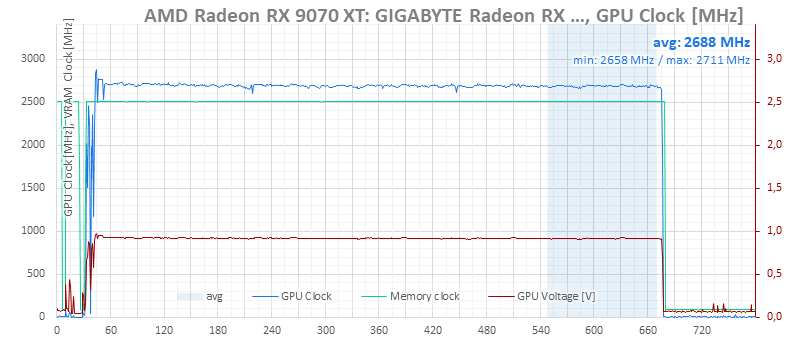
Default setings | Fan Control (GPU Temperature)

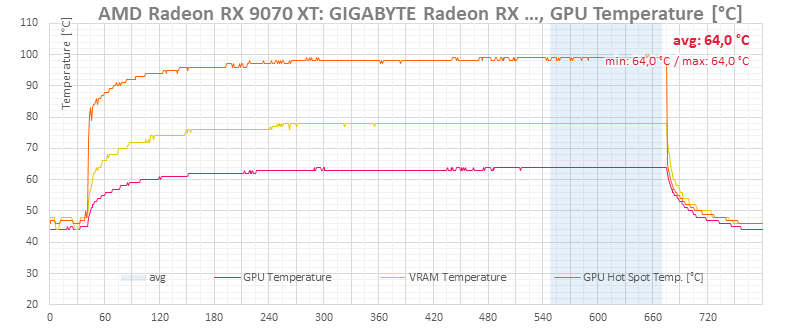
Default setings | Fan Control (GPU Temperature)

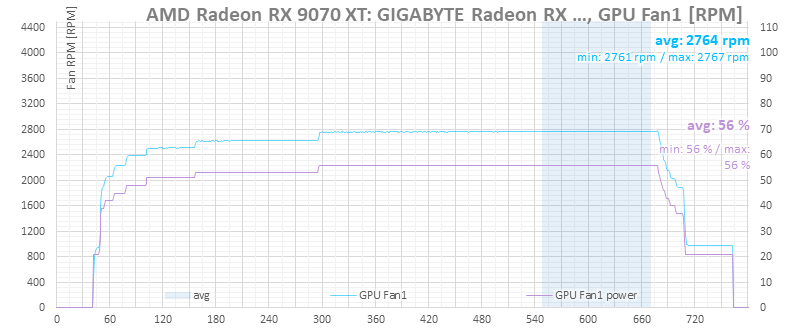
Default setings | Fan Control (GPU Temperature)

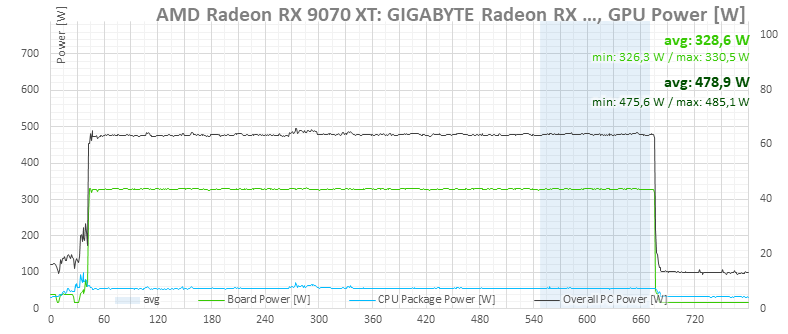
Default setings | Fan Control (GPU Temperature)
⠀